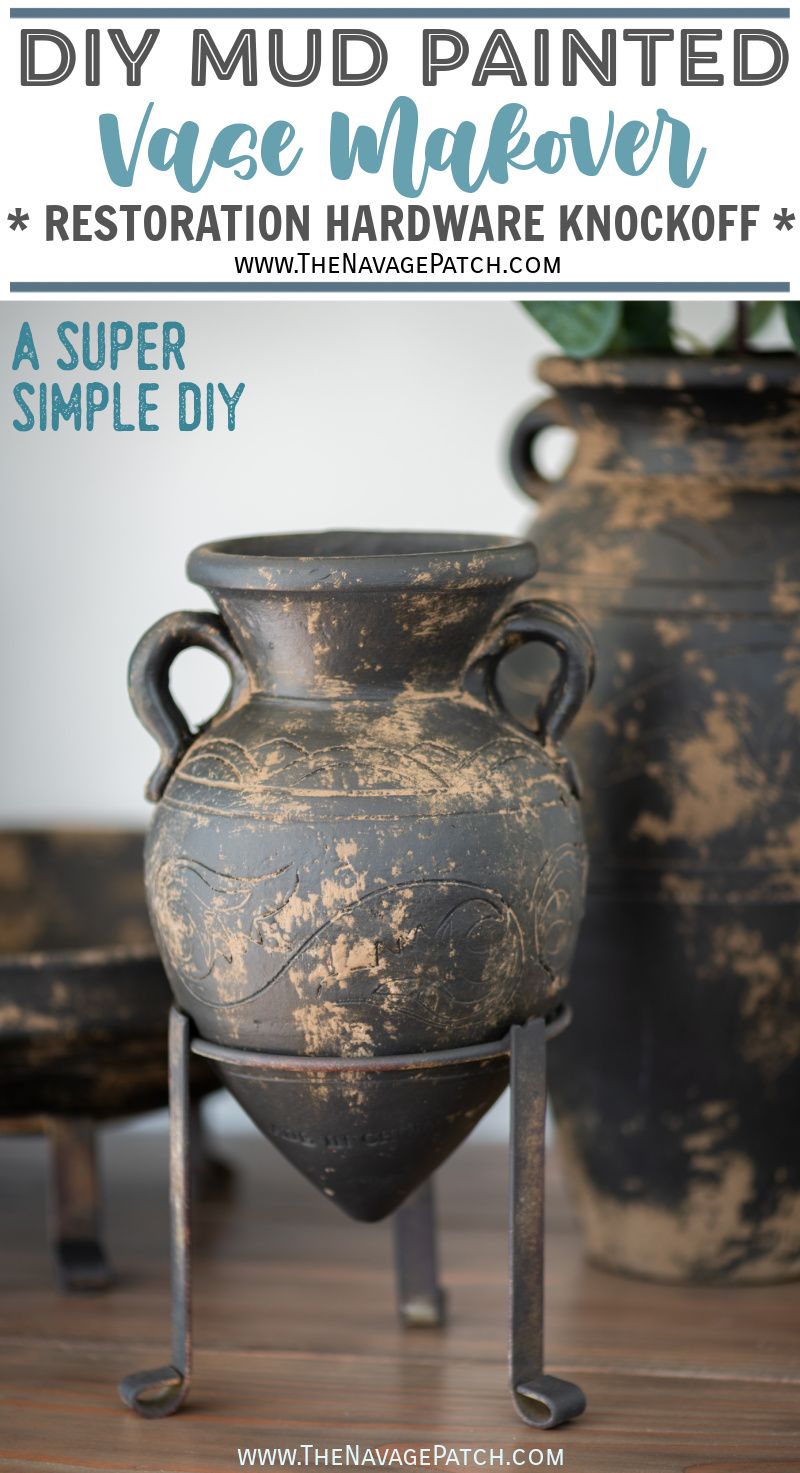
DIY Mud Painted Pottery
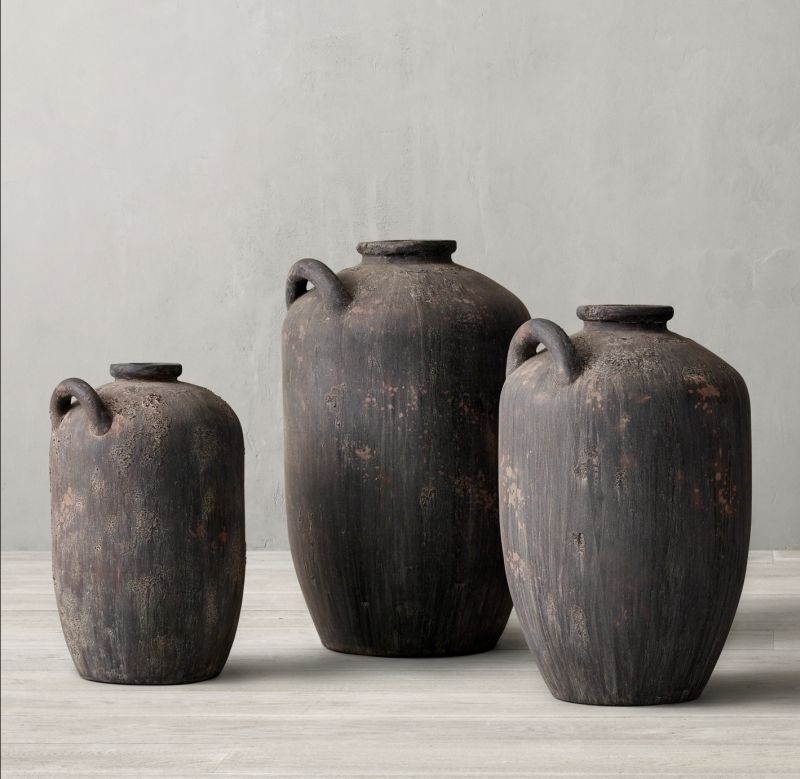
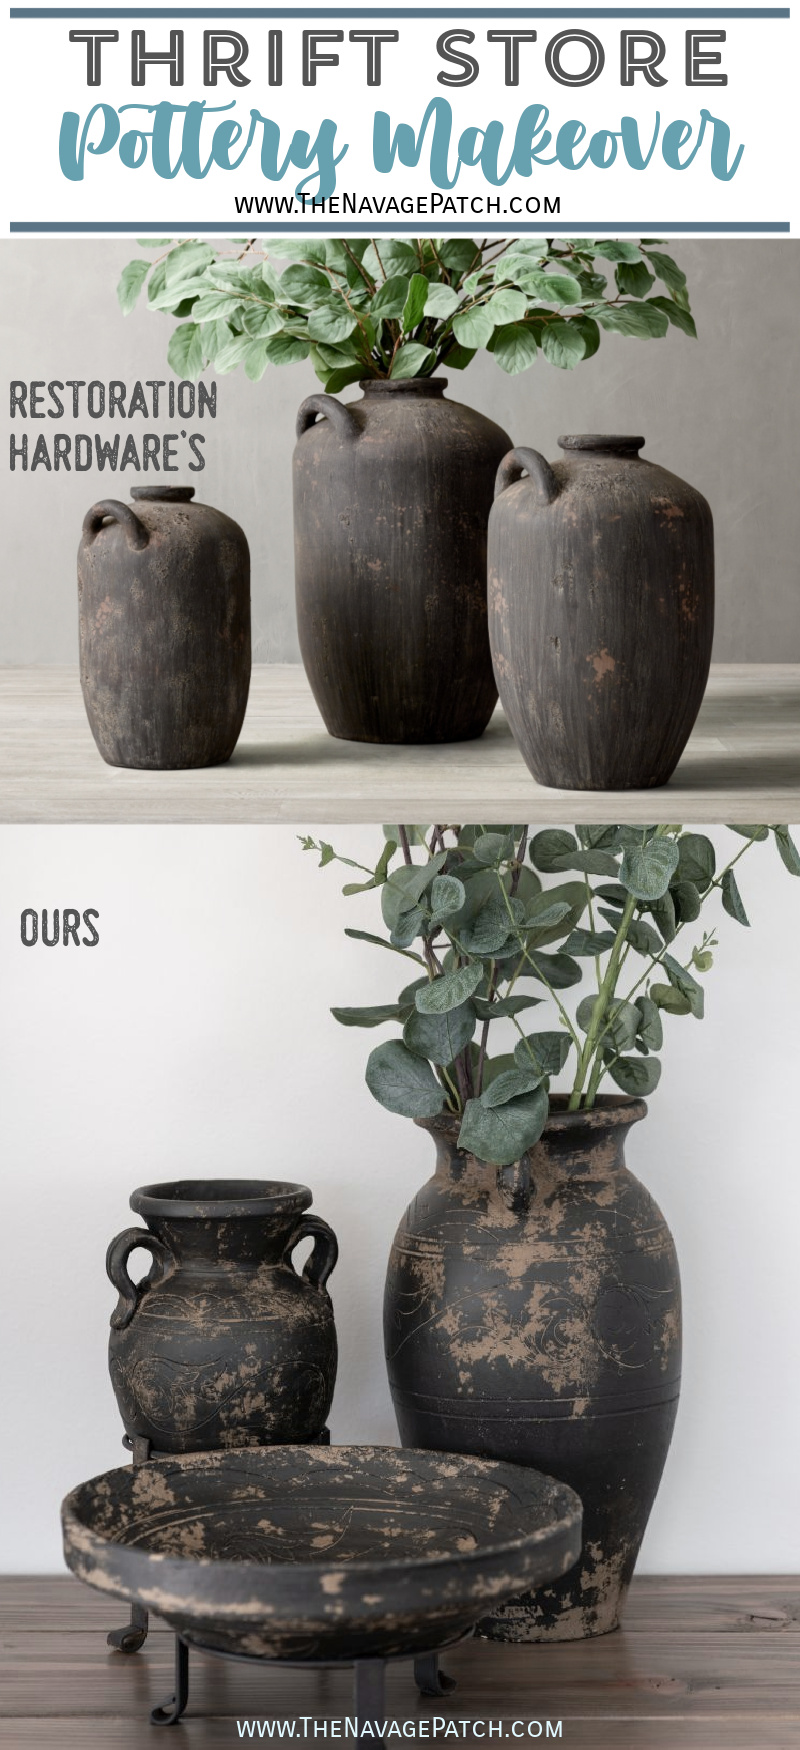
Our DIY Mud Painted Pottery tutorial will teach you how to make gorgeous and inexpensive faux-aged vases that rival those from Restoration Hardware!
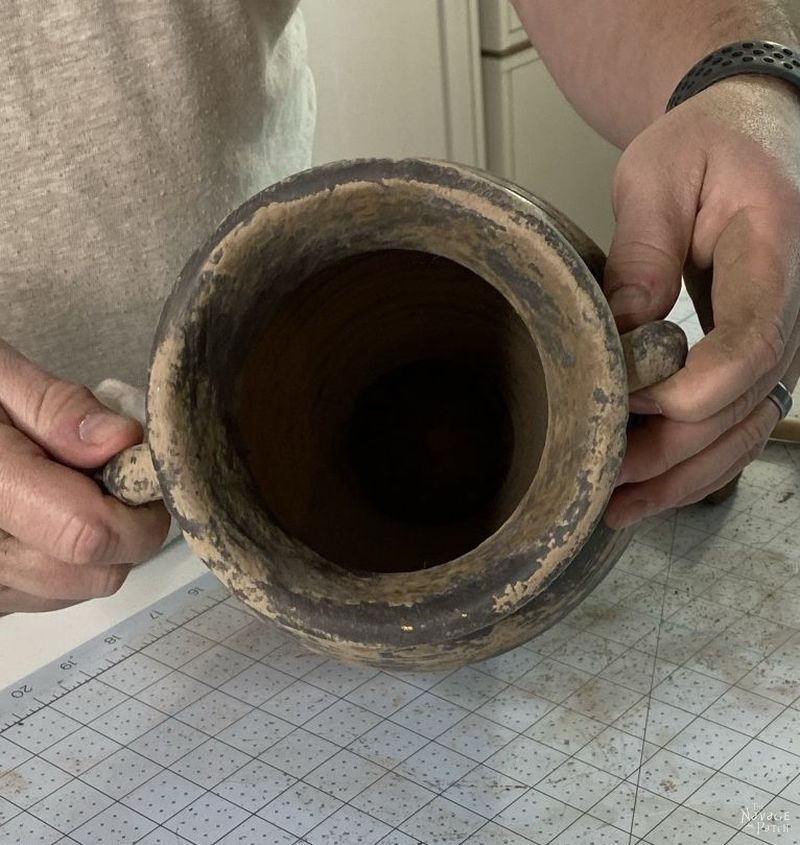
Sometimes my babes likes to play the long game when it comes to home décor. Case in point: at least five years ago, she bought a set of four Southwestern-looking (I think?) pieces of pottery for $20 from someone on Craigslist. I know it was at least five years ago, because I have this picture from January of 2016. I was enjoying a lovely Bordeaux blend red wine from Hawkes Bay, New Zealand, and I was also fiddling with my first DSLR camera and photography lights. Call it blog practice with tasty and inebriating benefits.
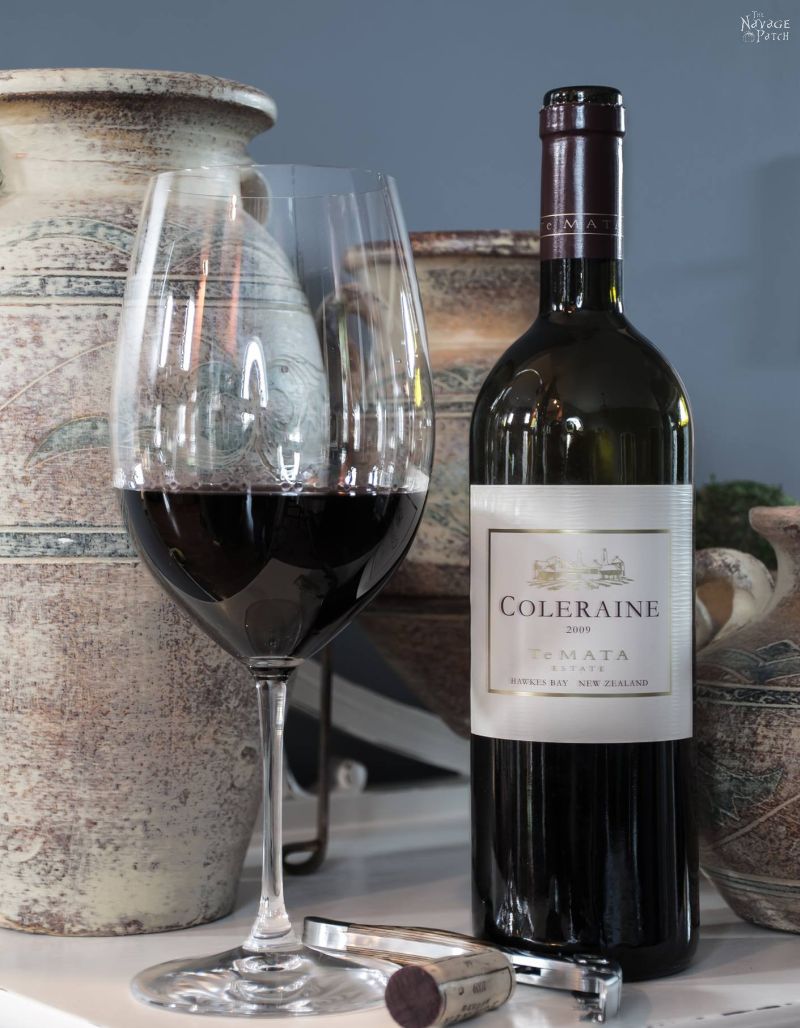
Five years ago! The Navage Patch was still a wailing baby back then, vomiting half-digested word-salad on an unsuspecting (and likely bewildered) Internet! For all I know, those weathered vases could be older, though I don’t think I have the photographic evidence to back that claim.
Not long after that delicious and inspiring wine photo shoot, I snapped this criminally inept photo of Handan’s Topiary Wall Art in February of 2016. At least I had the good sense not to include this photo in the post! Yeesh, my photography skills were more infantile than a Teletubbies convention. I especially cringe at the light switch protruding from the frame and the Honeywell thermostat playing hide-and-seek behind the largest vase.
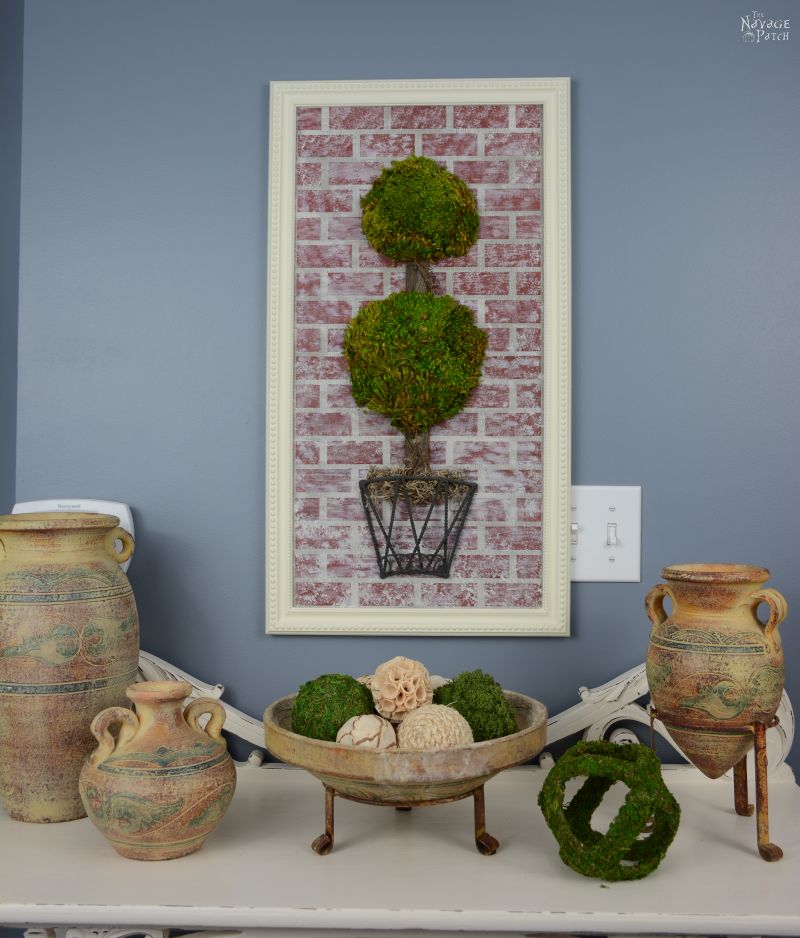
Anyway, Handan didn’t buy this pottery set for its paint job – she bought it for the shape of each piece. Someday, she’d figure out something to do with them. Until then, they sat on that old etagere and waited. In time, we offloaded the etagere on FB marketplace, and we deposited the pottery pieces in various corners of the house.
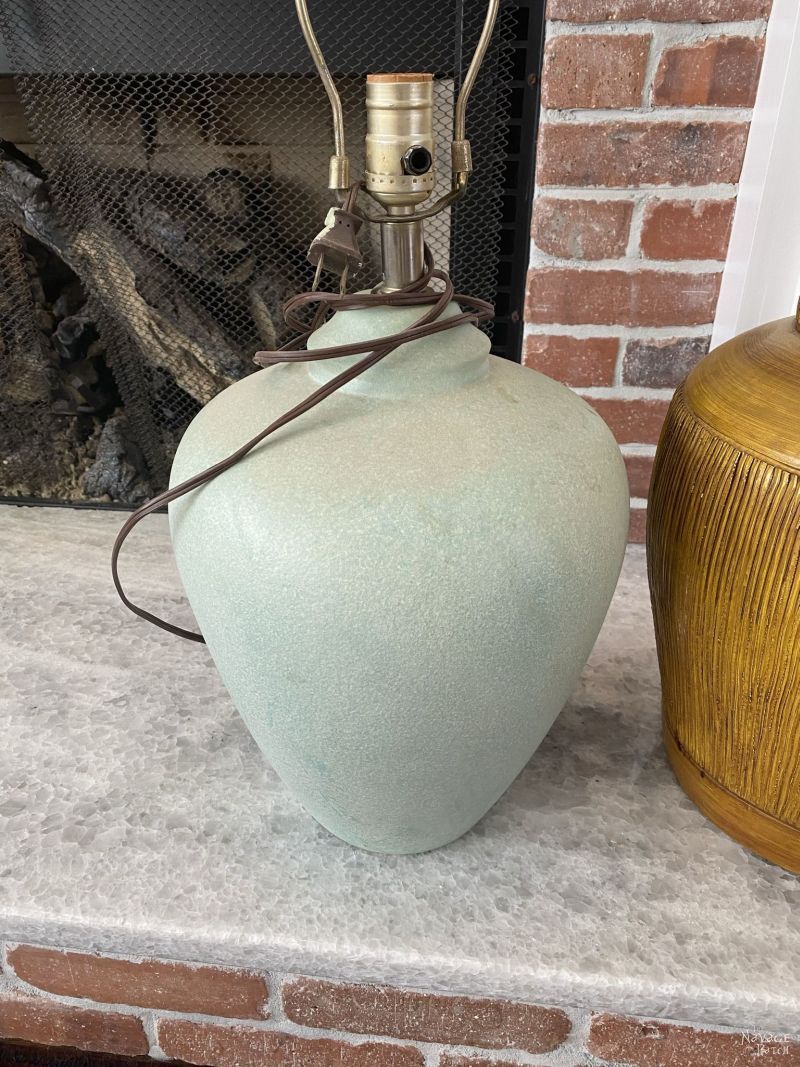
Just recently, Handan had the idea of (me) splattering mud on a thrift store lamp. This is just one of many old lamps I hauled 1000 miles from Connecticut to Georgia. Not bad compared to the golden-hued catastrophe next to it (the subject of a future post), but no prize-winner either. That mottled duck-egg teal likely had its heyday when Back to the Future was still the present.
Yeah, about the mud…I had the same reaction as many of you probably just had.
Wait, what? I’m gonna put mud on it??
My babes then explained that wiping mud all over your nice stuff is now a thing. She backed her ludicrous claim with Pinterest photos and YouTube videos.
Well, I’ll be damned…
She was right.
Mud. The final frontier for the terminally trendy.
I wondered when the tragically hip homesters of Instagram, no doubt egged on by laughing executives at Restoration Hardware and Pottery Barn, would start touting the benefits of wiping organic bat guano all over their furniture in an effort to re-connect with the Earth.
“Oh, I just adore this Guano Shine! I wipe it on literally everything! And I can feel good about using it because it’s sustainably sourced from a small cave of free-range vegetarian bats located deep in a fair-trade rainforest in Brazil!”
*sigh*
But as I’ve said countless times before, who am I to say no if my babes wants me to wipe mud all over our stuff? Besides, a long childhood spent playing with and in all manner of mud made me particularly well-suited to the task!
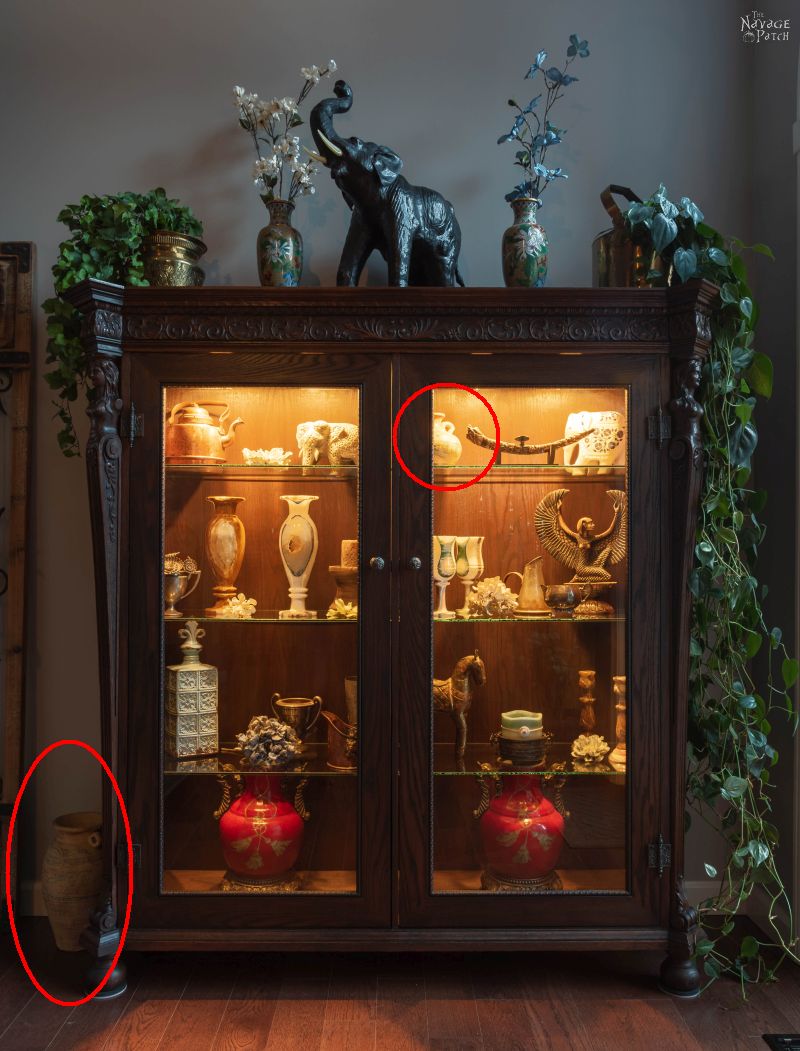
Not content for me to sling mud just at a crappy old lamp, my babes also wanted me to muck-up three of the four pieces of pottery shown above. Why three and not four? Well, one scored a membership to the ultra-exclusive Antique China Cabinet display club.
Now, I know what you’re thinking – why on earth would Handan want to muddy-up what look to be beautiful ancient artifacts!
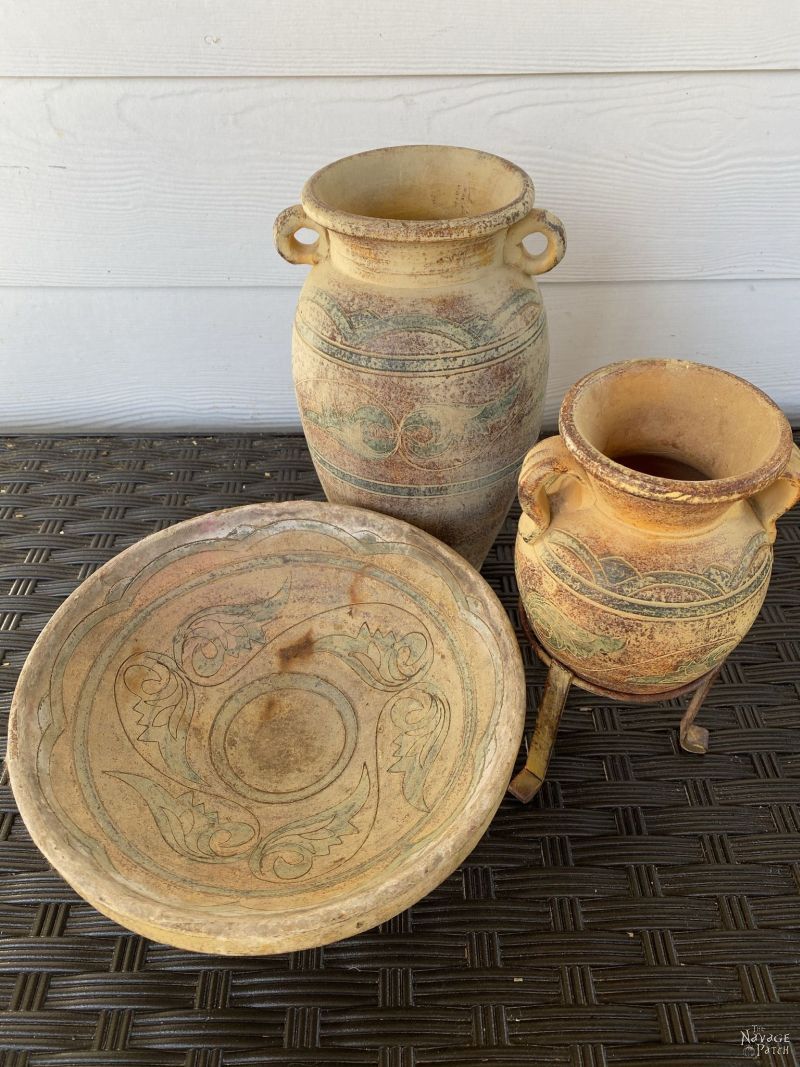
In a word, madam…
China.
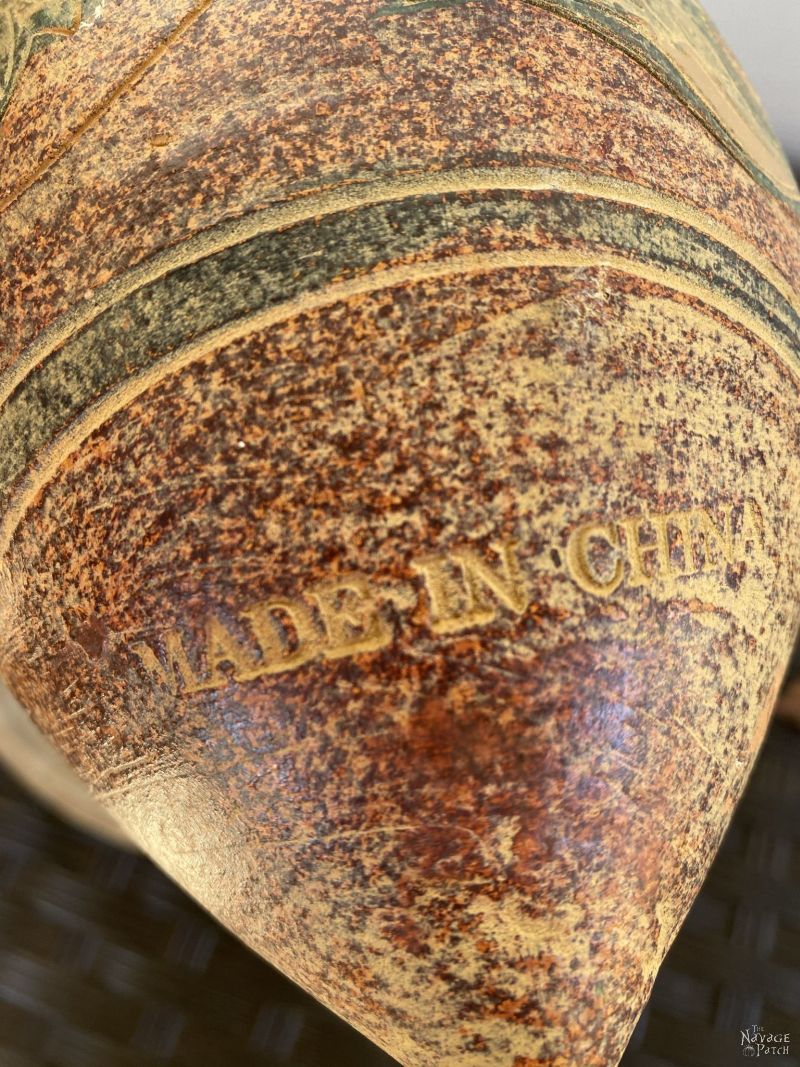
I doubt they were stamping MADE IN CHINA during the Ming Dynasty.
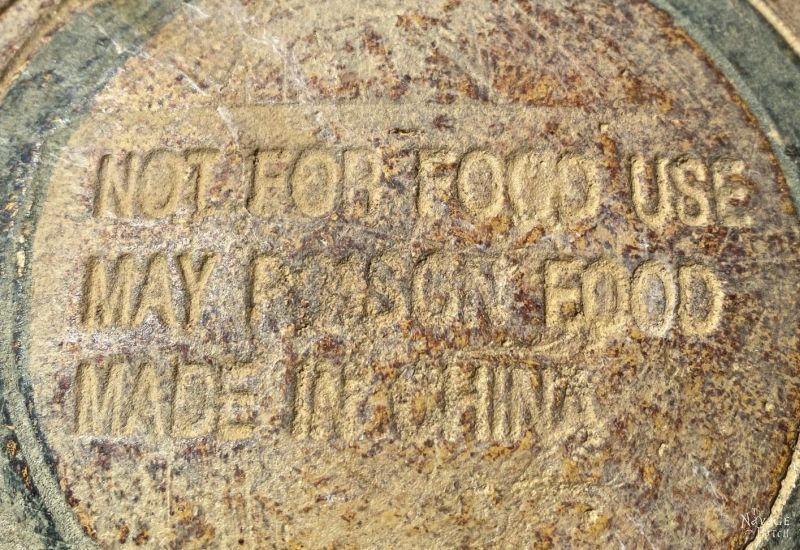
And just in case some American knucklehead wanted to serve his family a delicious pasta dinner from the wide bowl, China has thoughtfully included the following dire warning:
NOT FOR FOOD USE – Well, okay, if you say so, but I think a little spaghetti wouldn’t hurt anyone, amirite?
MAY POISON FOOD – Jeezum Crow! What’s this thing made of?
MADE IN CHINA – So you’re proud of your poison platter???
I had my pieces, now I just had to figure out just what the hell I was supposed to do. My babes broke it down for me, and I nodded. Seemed pretty easy: paint, smear and wipe.
Not wishing to delay another moment, I hoofed it down to the back yard to get cracking on my mud painted pottery.
DIY Mud Painted Pottery
SUPPLIES LIST
- Pottery, vase or old lamp
- Black chalk spray paint (Sorry, I forgot – spray chalk paint is too hip to be called “black.” The proper term is “charcoal.”)
- Dixie Mud (brown)
- Round stencil brush
- Baby wipes
- Matte clear protective top coat
So what’s the point?
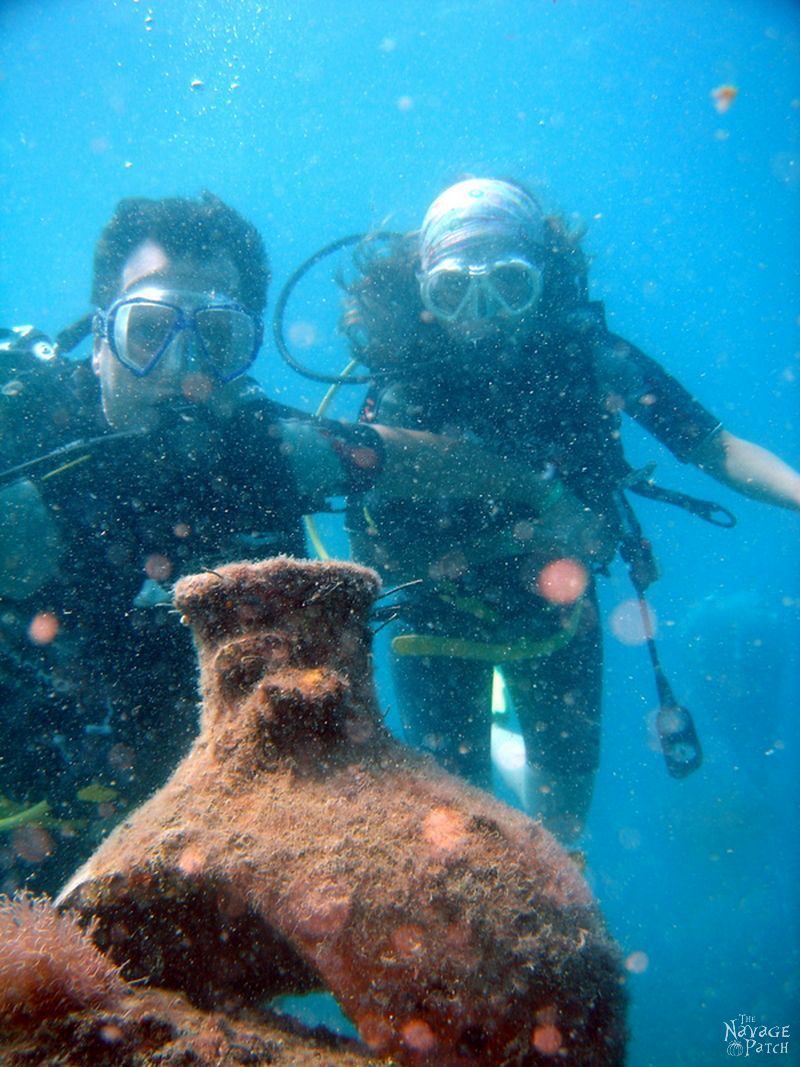
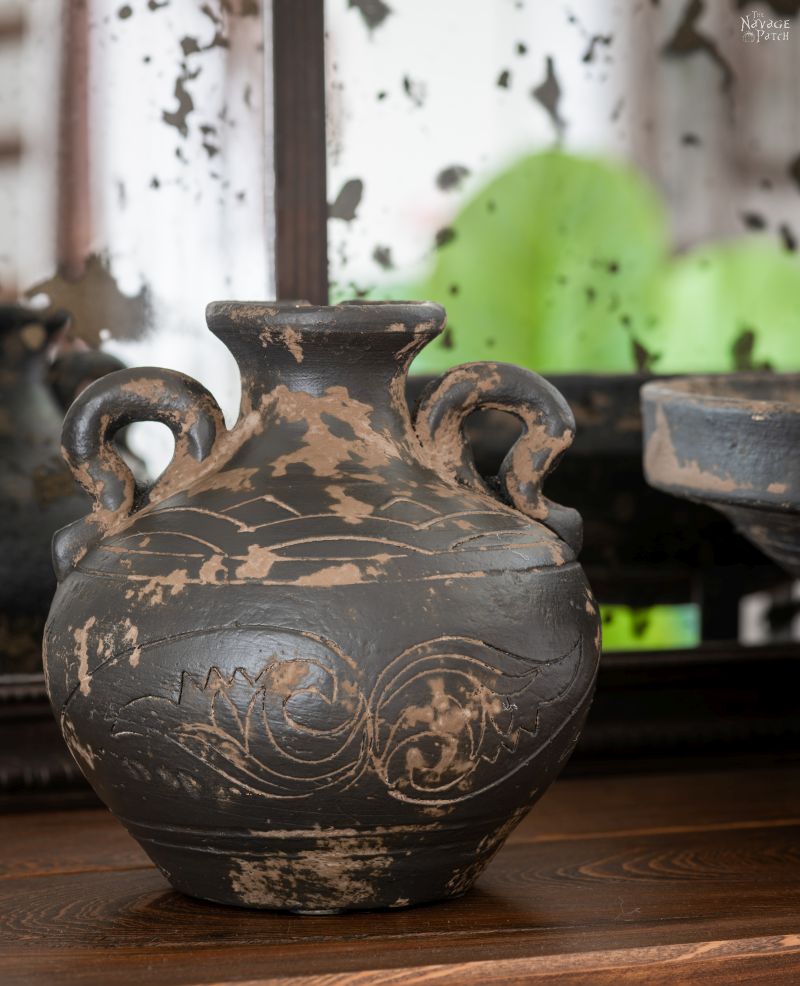
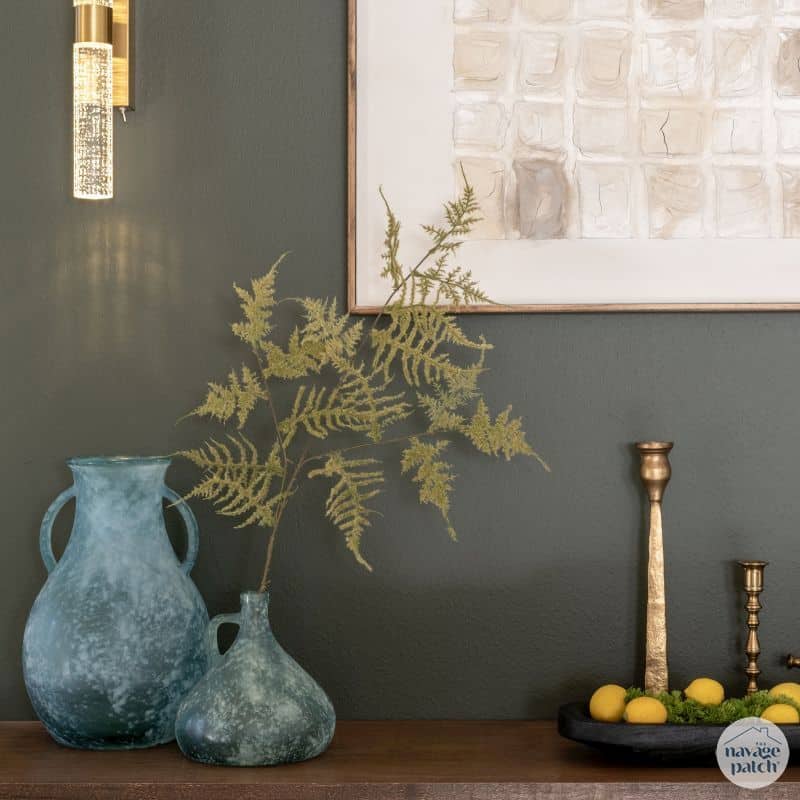
Oh, you mean besides grubbing for likes on Instagram? Well, I can’t speak for someone who’d pay $1200 for the RH vases pictured above, but for us (and my babes, in particular), this mud technique allows us to realize the plan Handan had in her head for the $20 pottery set. I told you she bought them for their shape, and that’s because they reminded her of the ancient pottery that has been found around Turkey and under the Aegean and Mediterranean Seas for centuries. These shapes are Handan’s culture. Just take a scuba dive off Turkey’s southern cost and see for yourself, as Handan and I did back in 2011.

She didn’t know it back when she bought the set in 2015, but what she was waiting for was Dixie Mud. As its name suggests, Dixie Mud is, well, mud. It bills itself as “straight from the swamps of Dixie.” If there’s any truth to that is anyone’s guess (and just where in the Sam Hill is “Dixie” anyway?). One whiff of the product suggests there’s some acetone or other organic solvent in the container along with the mud. But whether from swamps of Louisiana or a New Jersey laboratory, the stuff works, it works well, and it’ll transform ordinary pottery into something beautiful and ancient-looking.
But maybe you’re a purist? Perhaps the thought of Corporate Mud leaves you a little cold? Not to worry! You’re free to dig up your yard (or your neighbor’s) and harvest your own mud! This is mud we’re talking about here, people. It sure as hell ain’t rocket science!
How it’s done
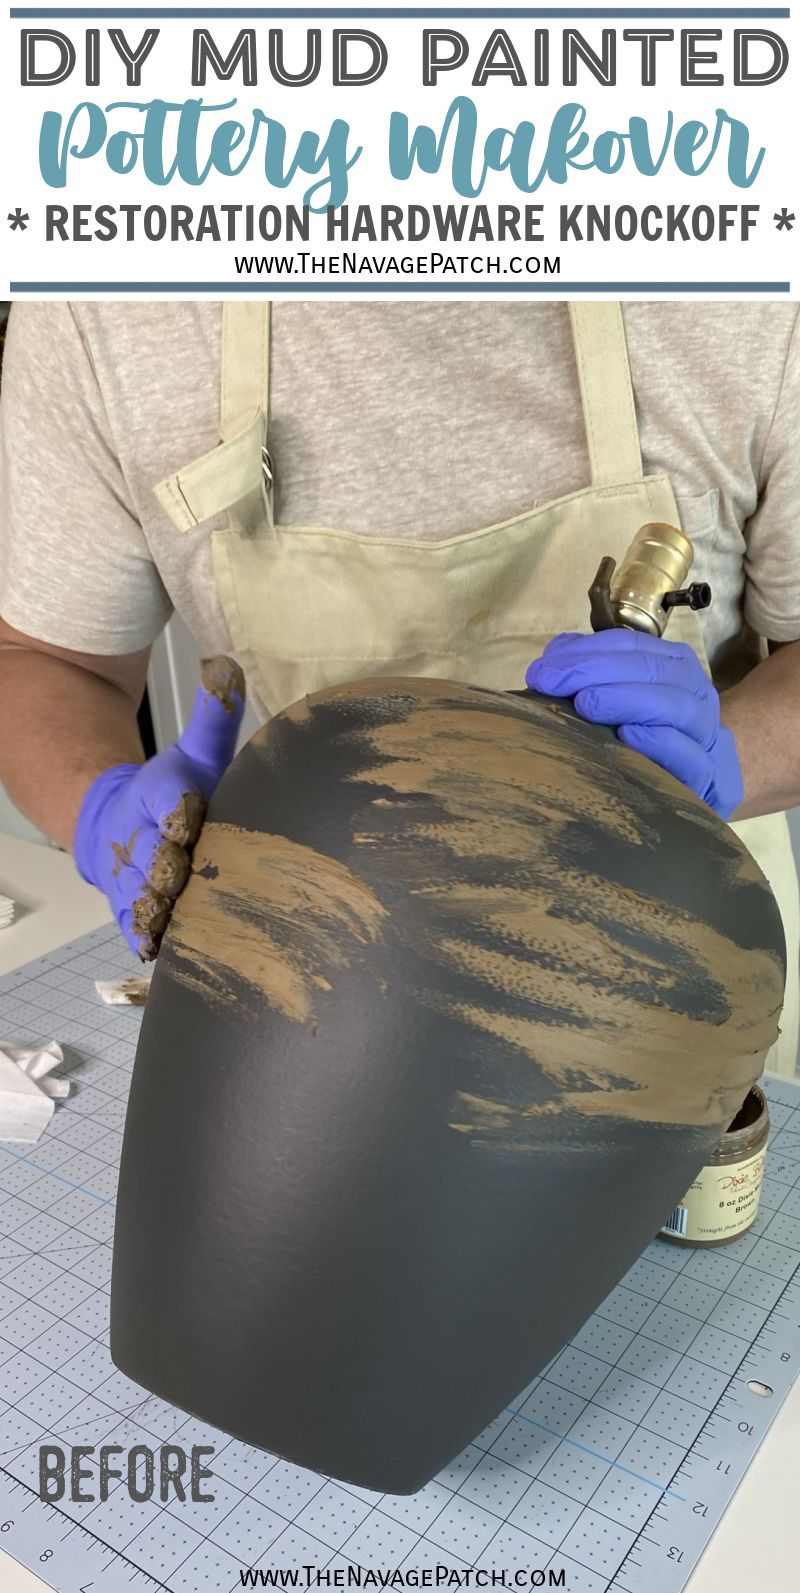
The first step was to spray the pieces with black chalk paint. The ultra matte chalk paint finish will allow the mud to stick better than it would on regular paint.

I love this spray chalk paint. It dries almost immediately when used outside on a breezy day. Perfect for applying 3 coats in a short amount of time!

Once the paint was dry, we carried the lamp and the pottery back inside. It was time to get muddy.

This was my first time using this product or anything remotely resembling this product (not including all the actual mud I played with as a child), so it was going to be a learn-by-doing kinda thing.
Since I grew up using my hands to play with mud, I thought it might be a fine technique to use on the lamp. I noticed the mud looked a lot like delicious chocolate mousse.
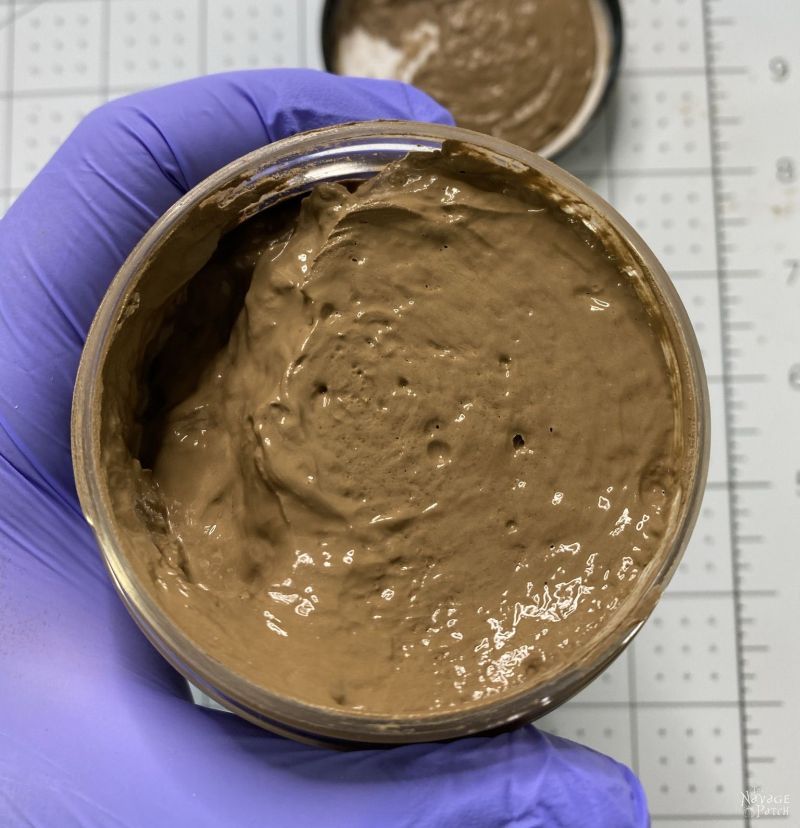
I cursed my keto diet and dug in with two fingers.
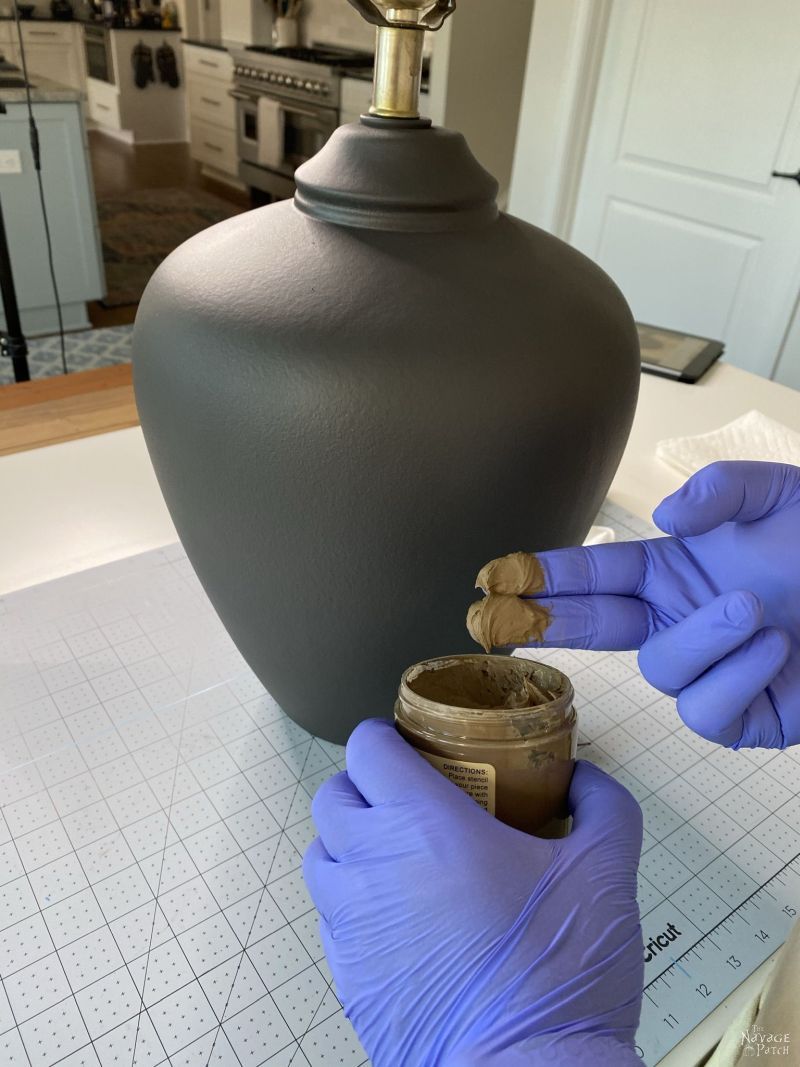
And….and what? I didn’t know what to do, so I just started wiping. I was trained on mudballs, not mud art!

I started on the back of the lamp so I could quickly wipe it off in case it looked hideous. And, yep, it looked as if I wiped mud on a lamp! So now what?

What the hell – in for a penny, in for a pound, right? I started slapping mud all over the damn thing.

There was no technique here, madam. Just slightly-panicked mud-slapping. Yes, slightly-panicked.
I had no idea what I was doing.
None.
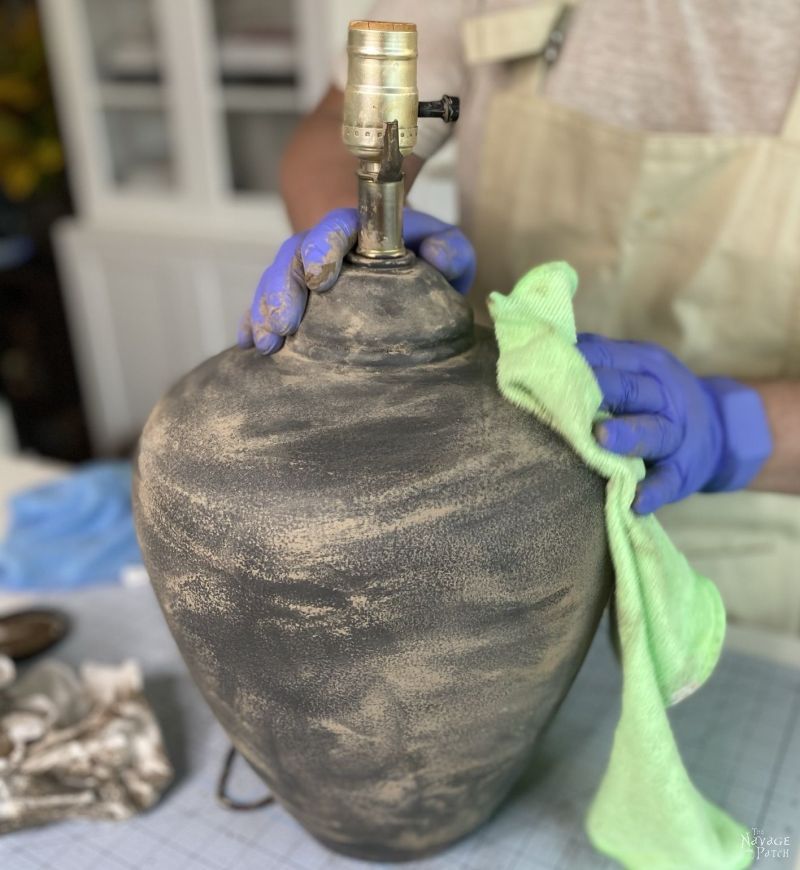
After fairly muddying the whole damn lamp, I started to wipe some of it off with baby wipes. Baby wipes are absolutely necessary for this project.

I wiped and wiped and wiped. This must be like the part of fatherhood I missed out on (thank god).

Wipedy, wipedy, wipedy. All the while, I’m thinking to myself, you’ve just ruined a perfectly good lamp, you goateed schmuck.

I switched to a dry rag…maybe it would help? It didn’t, at least not to my judgmental peepers.
Back to the baby wipes, and around this time I was mumbling and sweating and showing very visible signs of trauma and duress.
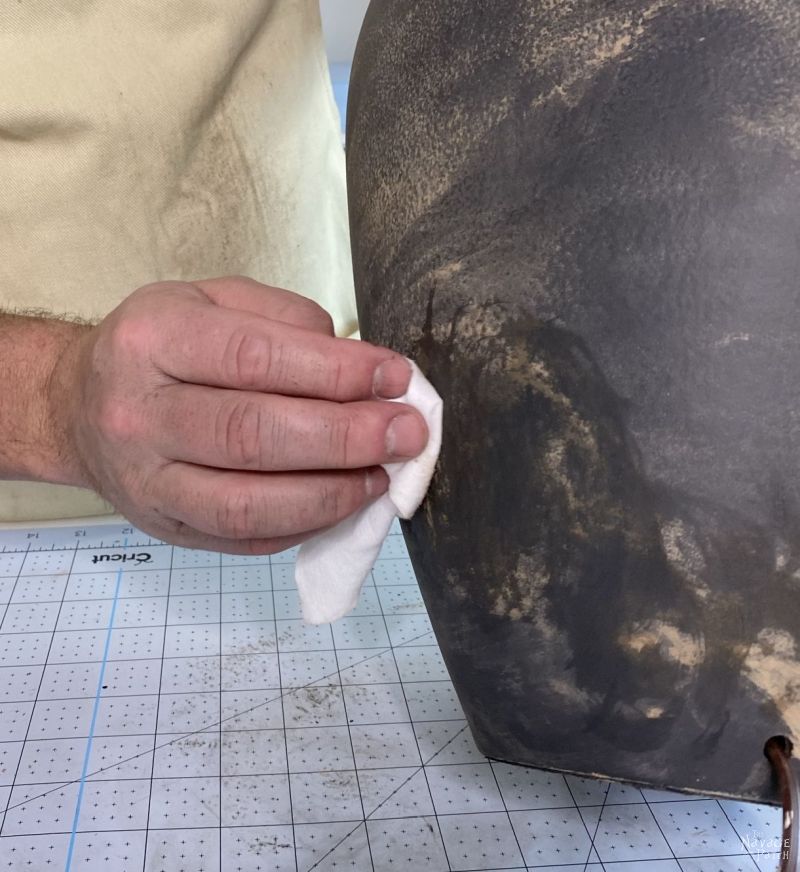
Handan kept telling me to relax. She kept telling me it this was supposed to be easy. God, I hate it when she does that! My panic shot through the roof. It’s one thing to fail at a complicated task, but to fail at something someone keeps telling you is easy is another thing altogether.

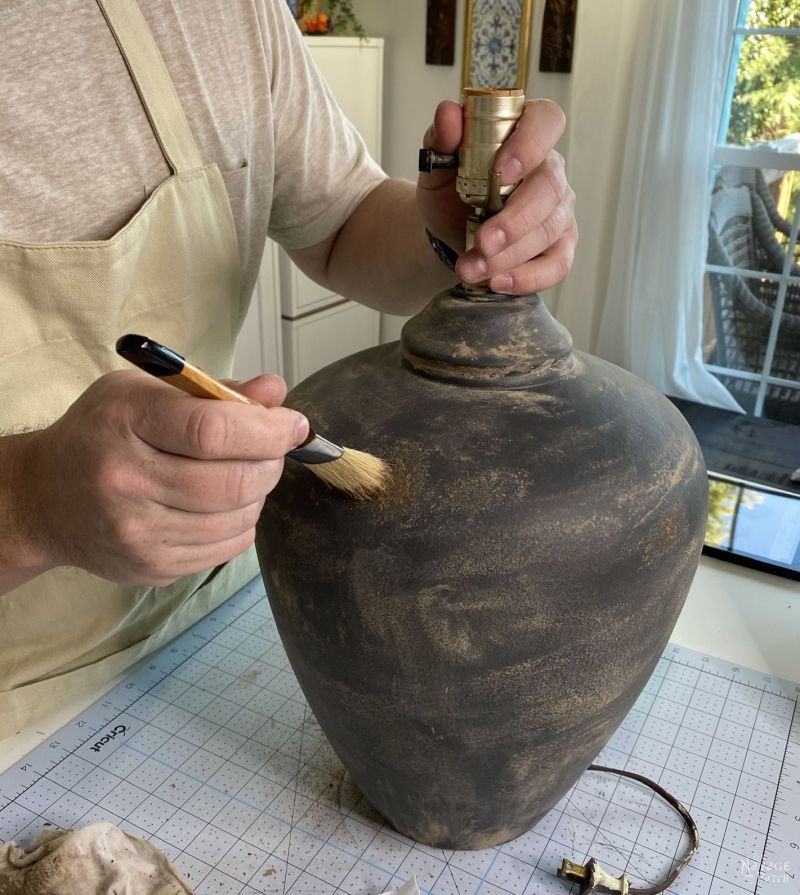
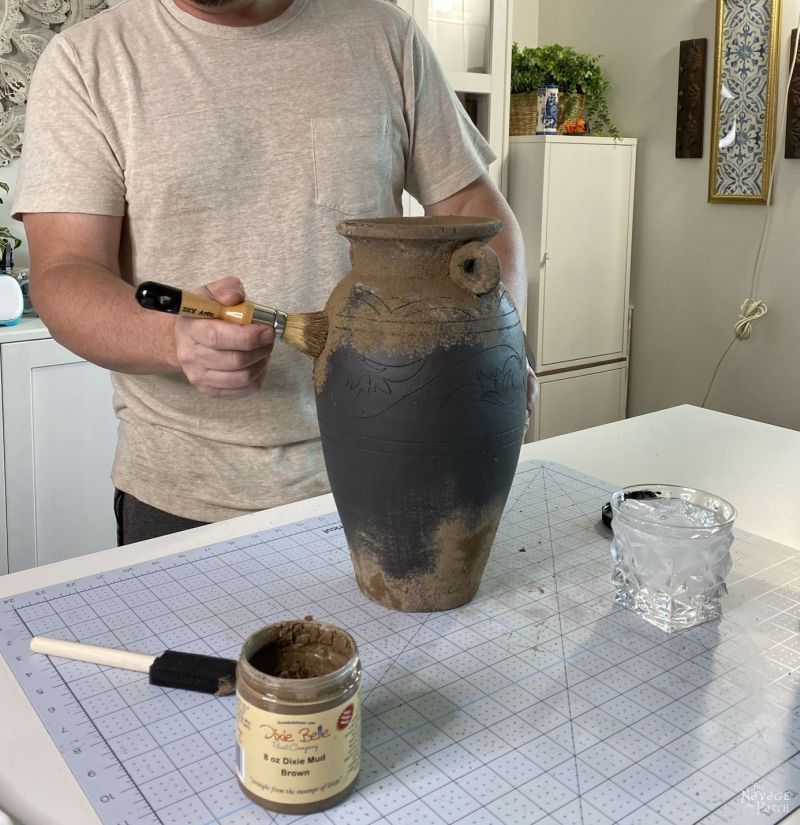
Finally picking up on my irrational fear and panic over this stupid mud-covered lamp, my babes suggested a new technique. Instead of wiping the mud on with my hands, she suggested I try dabbing it on with a stencil brush. Hey, at that point, I would have chewed the mud and spit it on the lamp – anything to break out of that downward spiral of defeat!
Turned out she was onto something. Her stencil brush technique was much better. My panic started to abate.
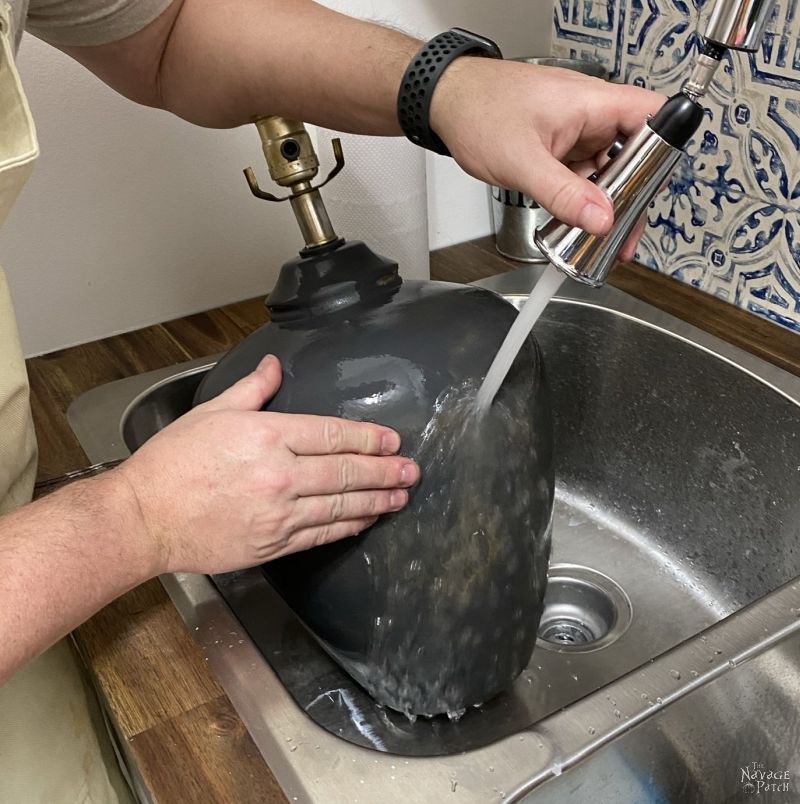
But there was no hope for the lamp. Fortunately, mud being what it is…namely, mud…it’s a simple thing to clean it off and start over.
This time, I used Handan’s brush technique, and it was a breeze. The project finally made sense!

I dabbed on the mud, here and there, trying to avoid overdoing it.


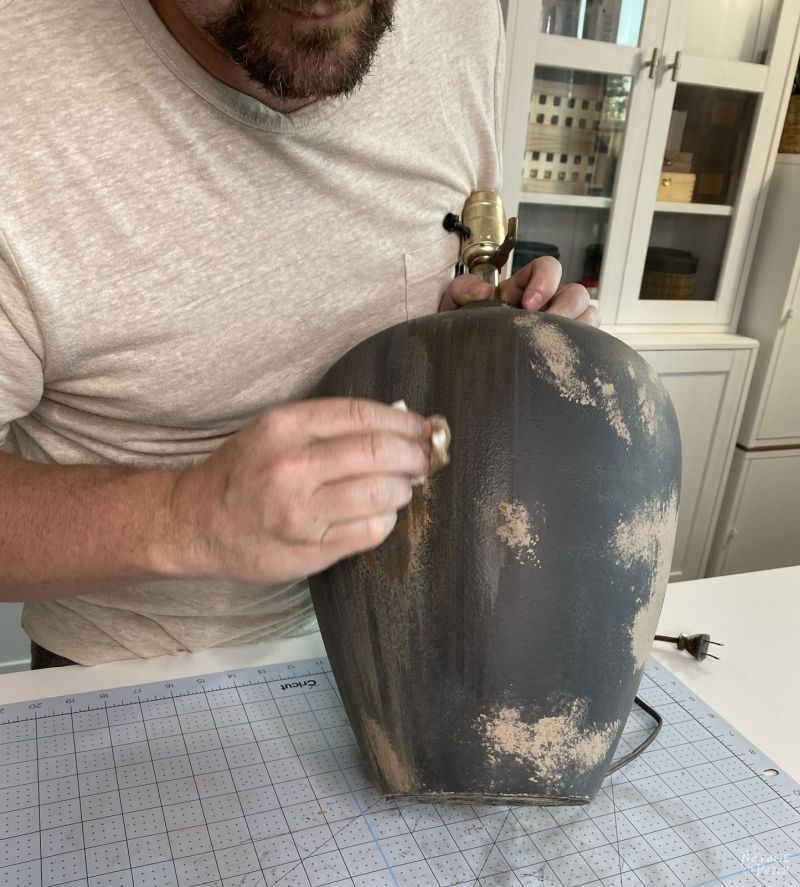
When the mud dried, I first “sanded” some of it off with my fingers.


Once I had smoothed out the mud, I wiped the lamp with baby wipes to lessen the mud in certain areas. This is where a little artistry comes in. You need to judge when enough wiping is enough.
For this lamp, I took a lot of the mud off, and the result was a conservatively-mudded lamp that Handan and I think looks very classy.

Before showing you the final lamp pics, let’s take a look at how this technique fared for the mud painted pottery.
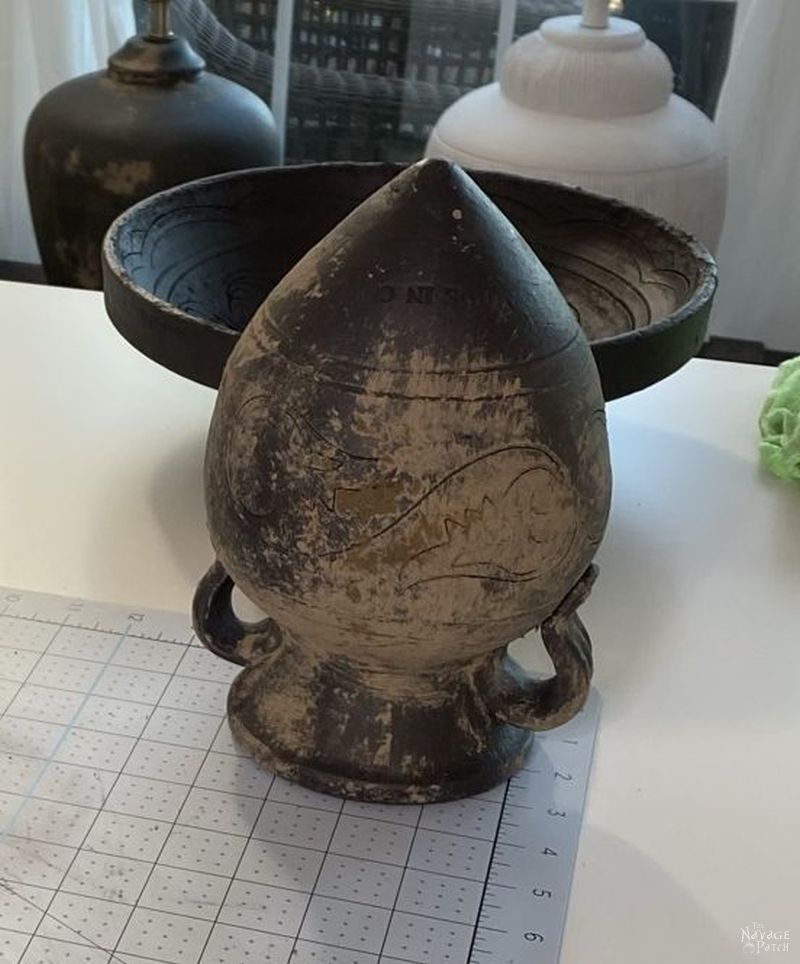
Handan snuck in and used her own brush technique on the small pointy-bottomed piece of pottery while I started cooking dinner. She finished and set it aside to dry before I had a chance to take any pictures of her.
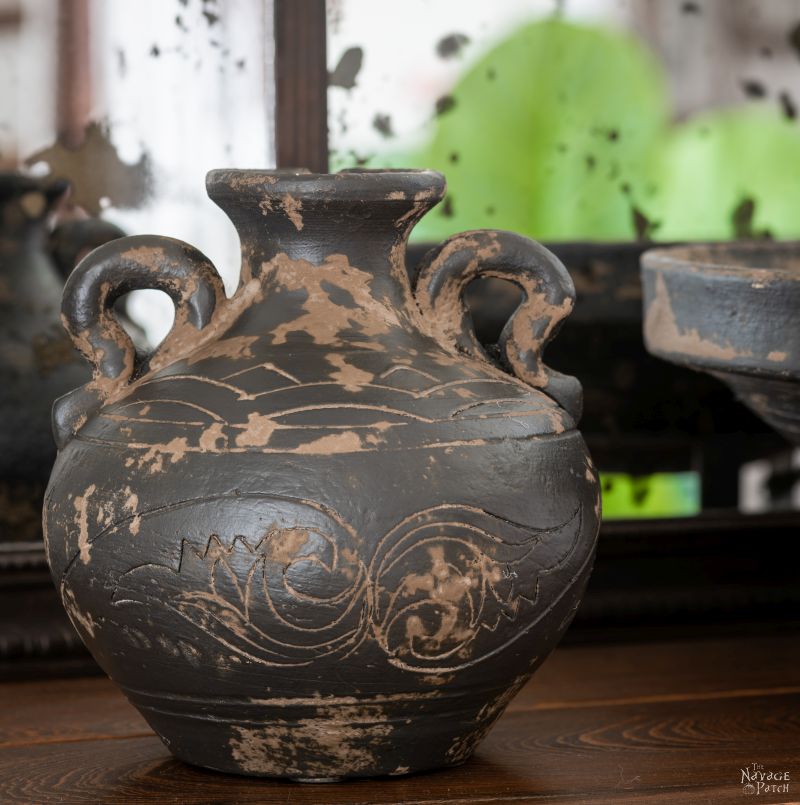
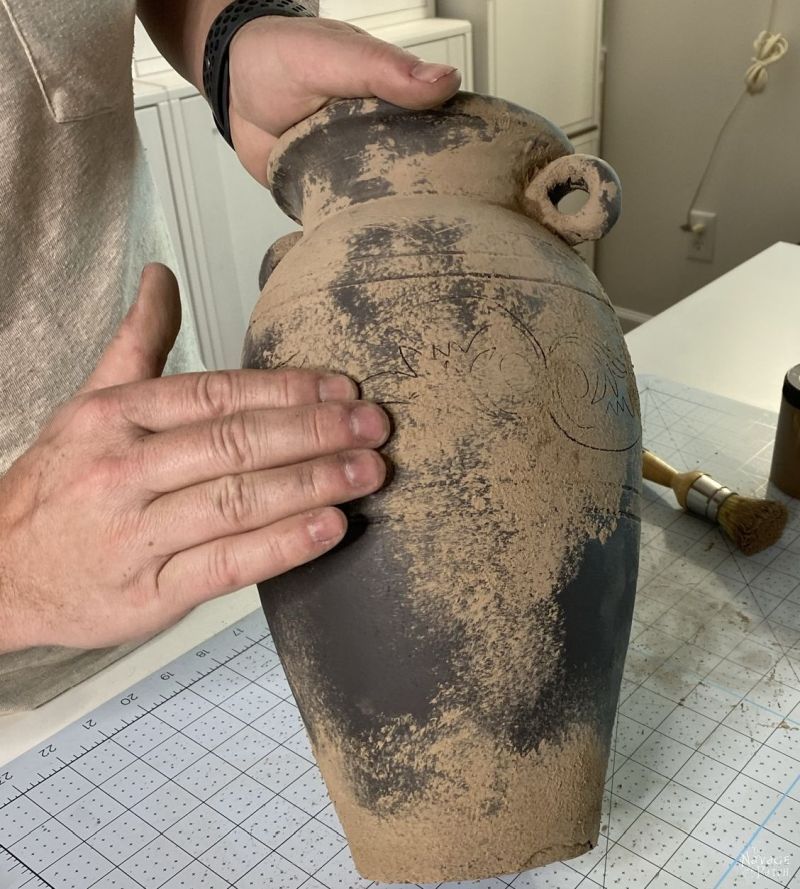
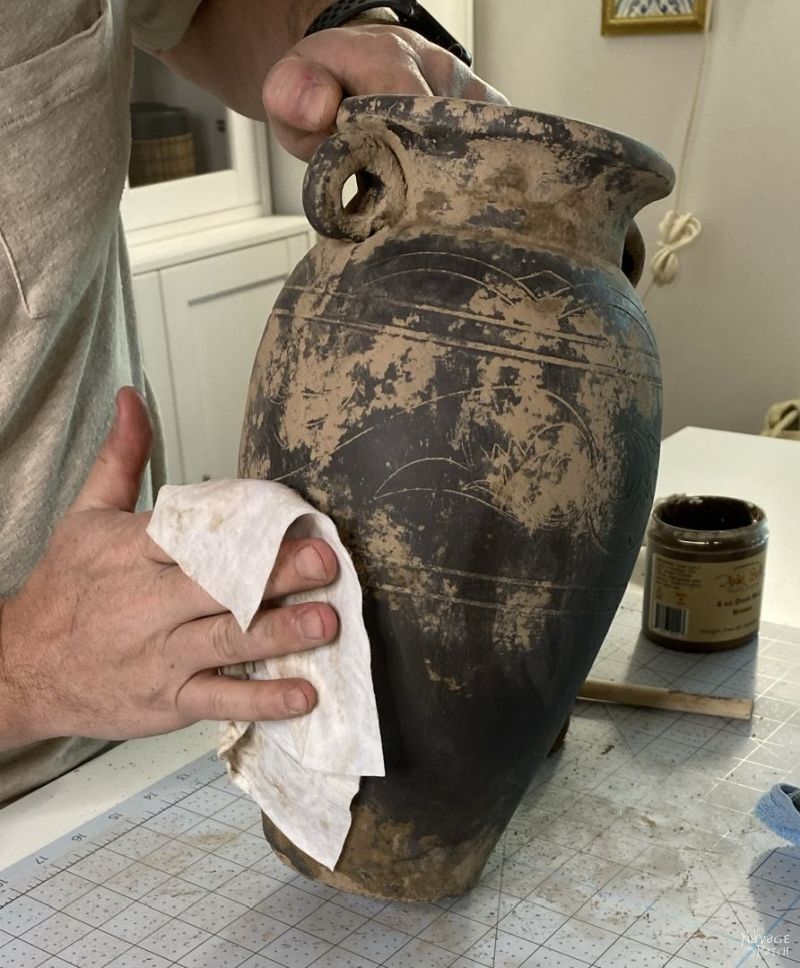
I took a break from cooking to carry on mud painting. This was Sunday night – one of our favorite times to craft together! For this tall one, I wanted to give it an ancient look, as if it had been pulled from the mud during an archaeological excavation. To accomplish this goal, I went heavy with the mud around the bottom of the vase.

And I went heavy around and inside the rim.

Sunday evening crafting is better with a martini. I sipped and contemplated my ancient treasure.

There’s no right or wrong with this, and I found it’s better to over-apply the mud, as you can always remove it with wet wipes later.
As usual, my babes managed to elongate my head. This was the best of about 10 photos. In all the others I look like a legit alien. I’m starting to wonder if I’m looking at the mirror correctly, because when I look at myself, I sorta think my head is a normal size and shape. But boy howdy, when I look at my pictures, I’m pretty sure I might possibly come from another planet. It would make sense. It would explain my ineptitude at crafting.

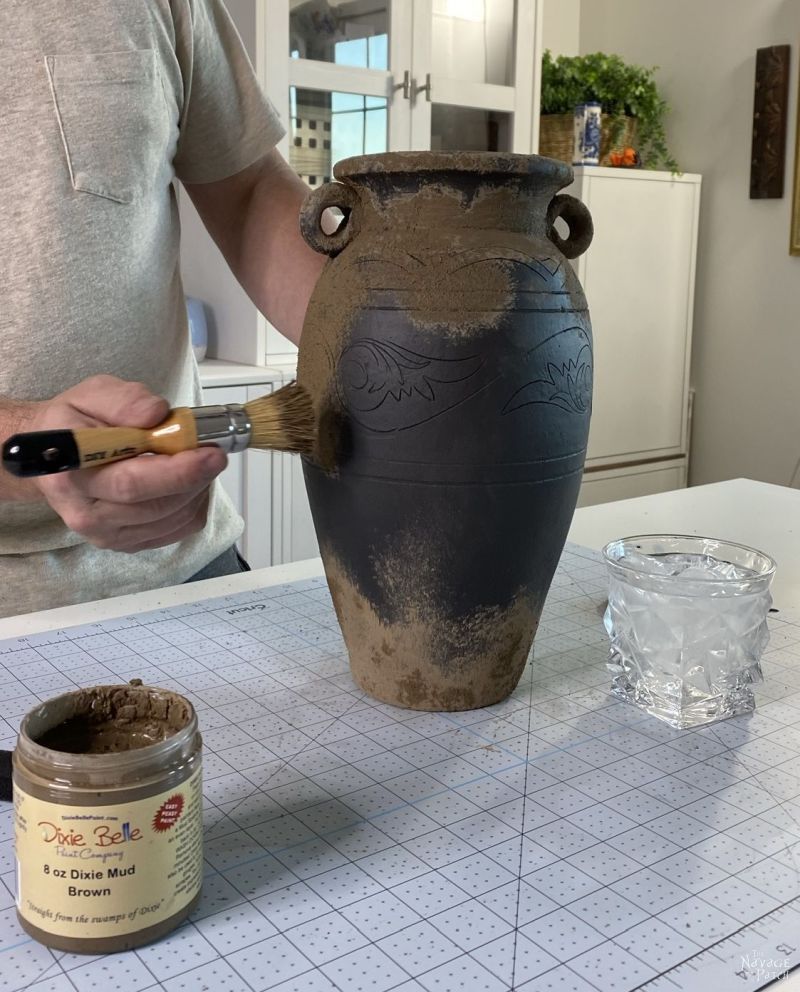
Here are a few shots around the vase that show how much mud I applied.

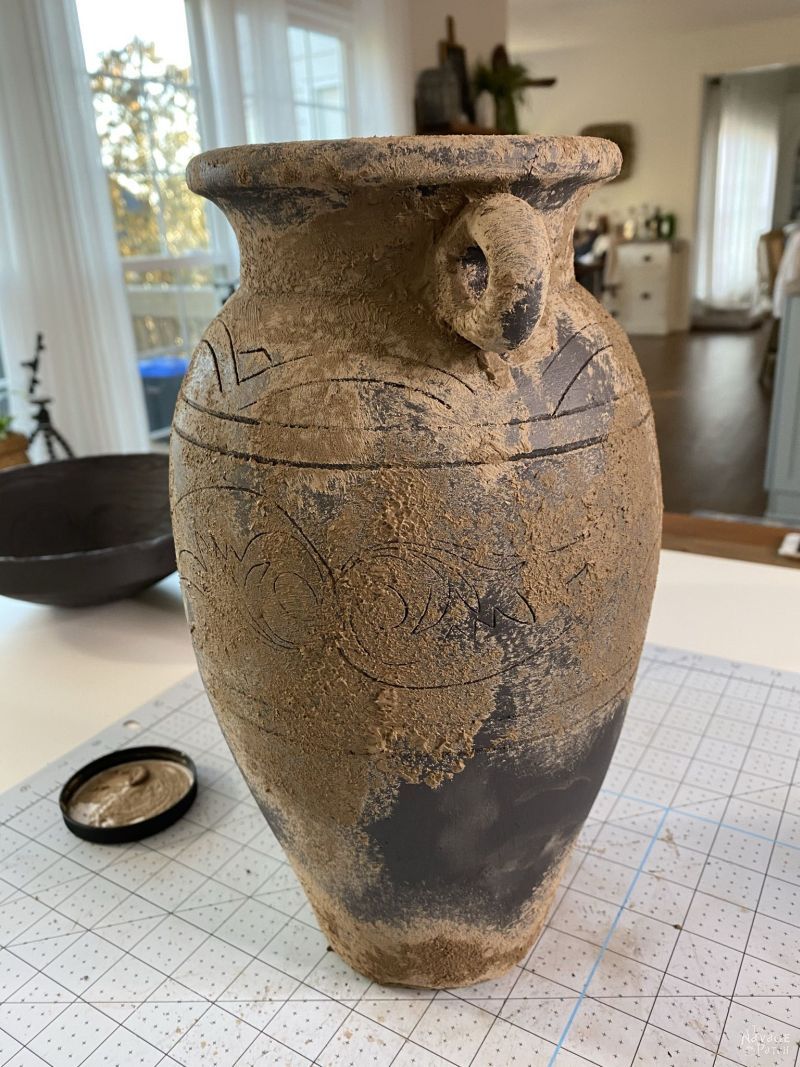
Once the mud dried, I again used my fingers to “sand” it smooth.
After smoothing the mud, it was time for the Pampers baby wipes.
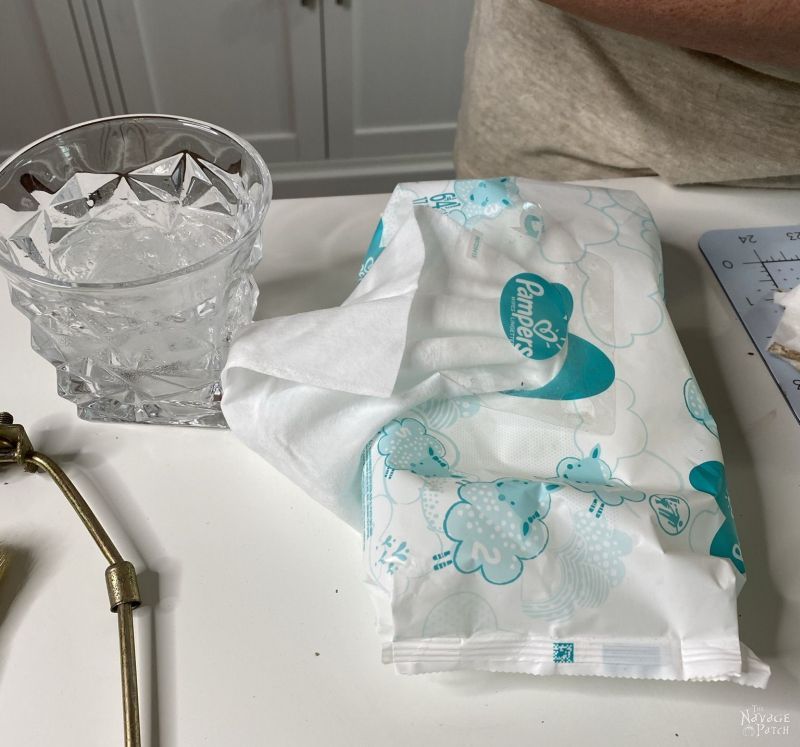
Using very gentle pressure I worked the wipes in a circular motion over the muddy areas, changing wipes when they became saturated with mud. I paused now and again to thank the gods of every religion that my only experience with baby wipes is wiping mud off pottery and not poop off tiny baby butts! Shout out to all the moms and dads out there who endured years of diaper duty. You’re better humans than I!
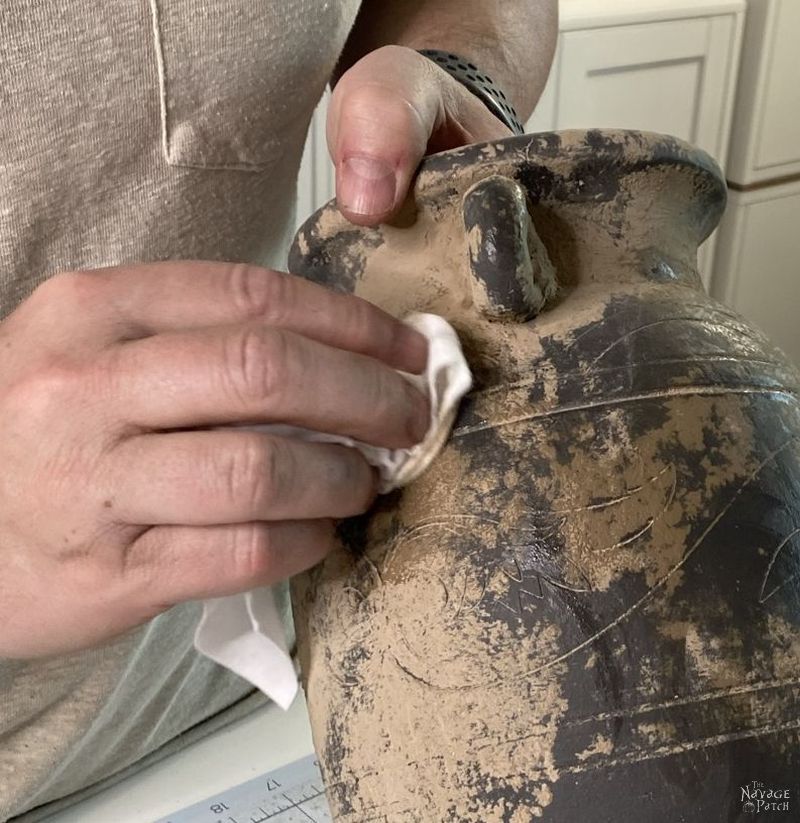
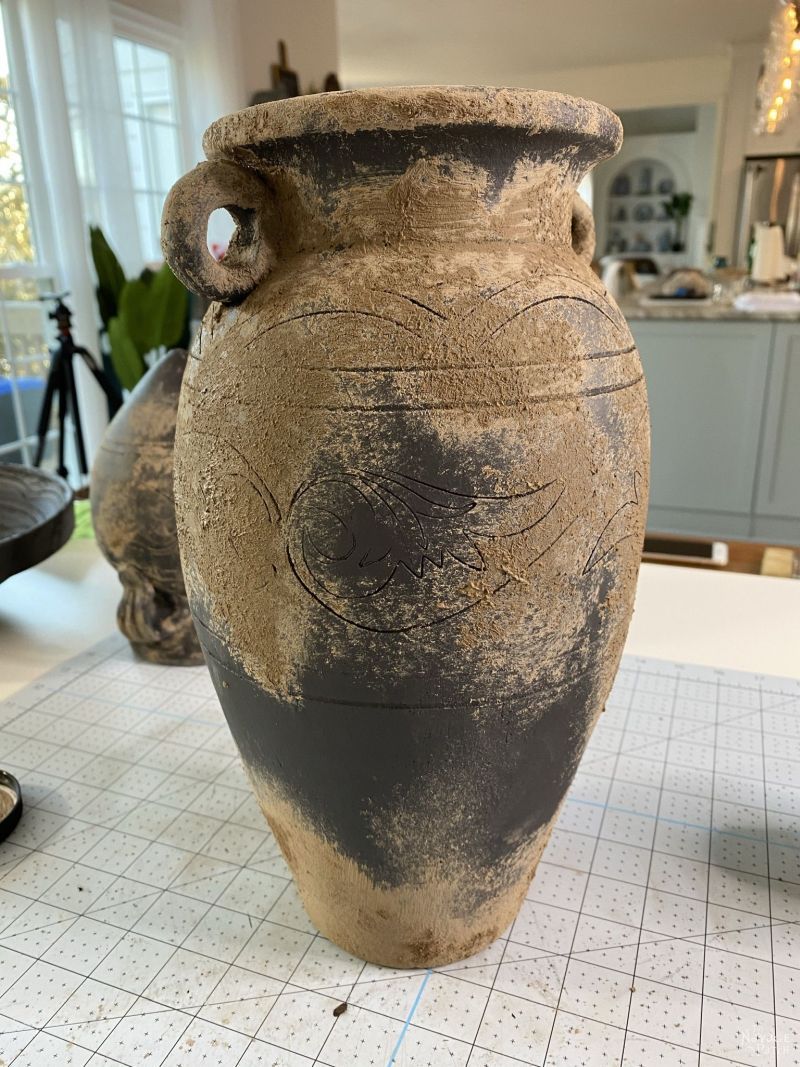
Again, this is where artistry and your own personal preference comes into play. Take off as much or as little as looks good to your eye.
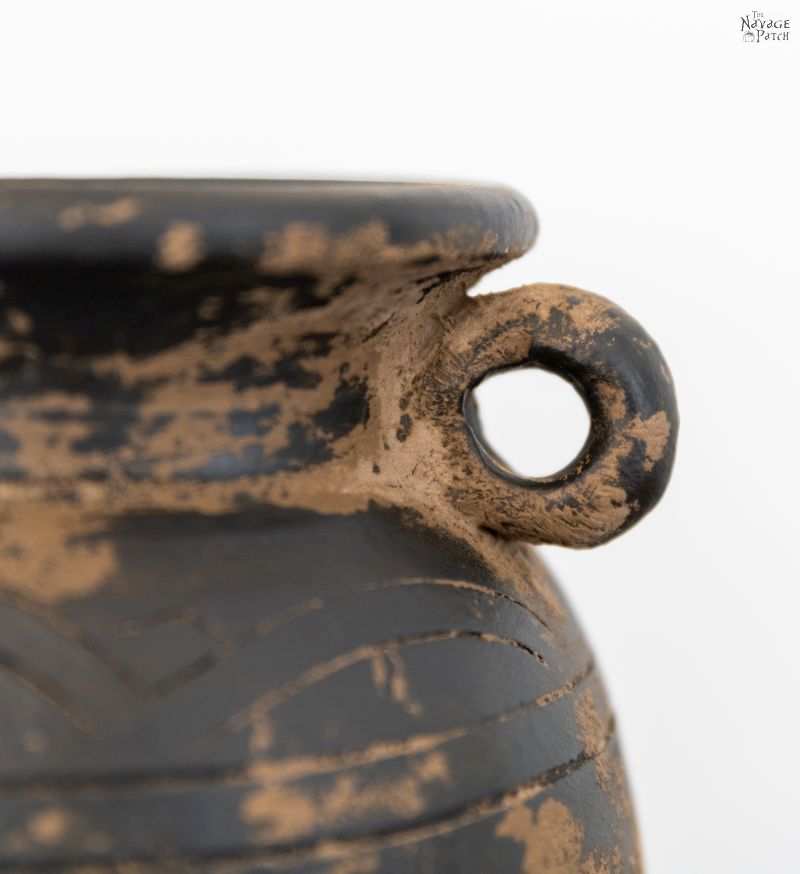
I love how the rim turned out when I removed some of the mud.

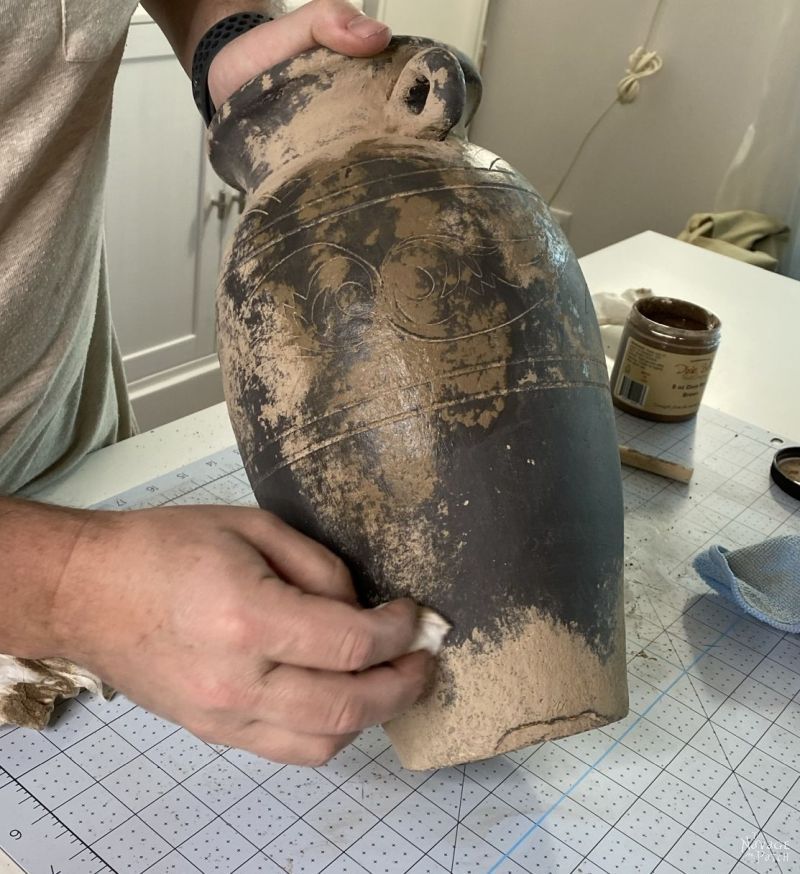
Once I was happy with how much mud I’d removed, I gently ran a flat baby wipe around the vase to erase the streaks caused by my circular wiping.
I set the vase aside and started in on the bowl. For this one, I developed a new technique for sanding down the excess mud. Instead of fingers, I used the wooden handle of a cheap foam paint brush.

I rubbed the handle over the mud to even out the rough spots.

Rubbing with fingers or paint brush isn’t strictly necessary – the baby wipes could accomplish the same thing – but it will allow you to use fewer baby wipes to get the job done.
This is how the bowl looked after I’d finished with it.

Now, at this point, you could display your mud painted pottery and call it a day. But the mud (being mud and all) can and will rub off if provoked, and don’t get me started on what could happen if you get it wet!
To prevent any future unpleasantness, I sealed the mud with a clear matte topcoat.

One coat was enough to lock the mud in place.

As a bonus (at least to my eyes and my taste), the topcoat darkened the mud a shade or two and made it look even better.

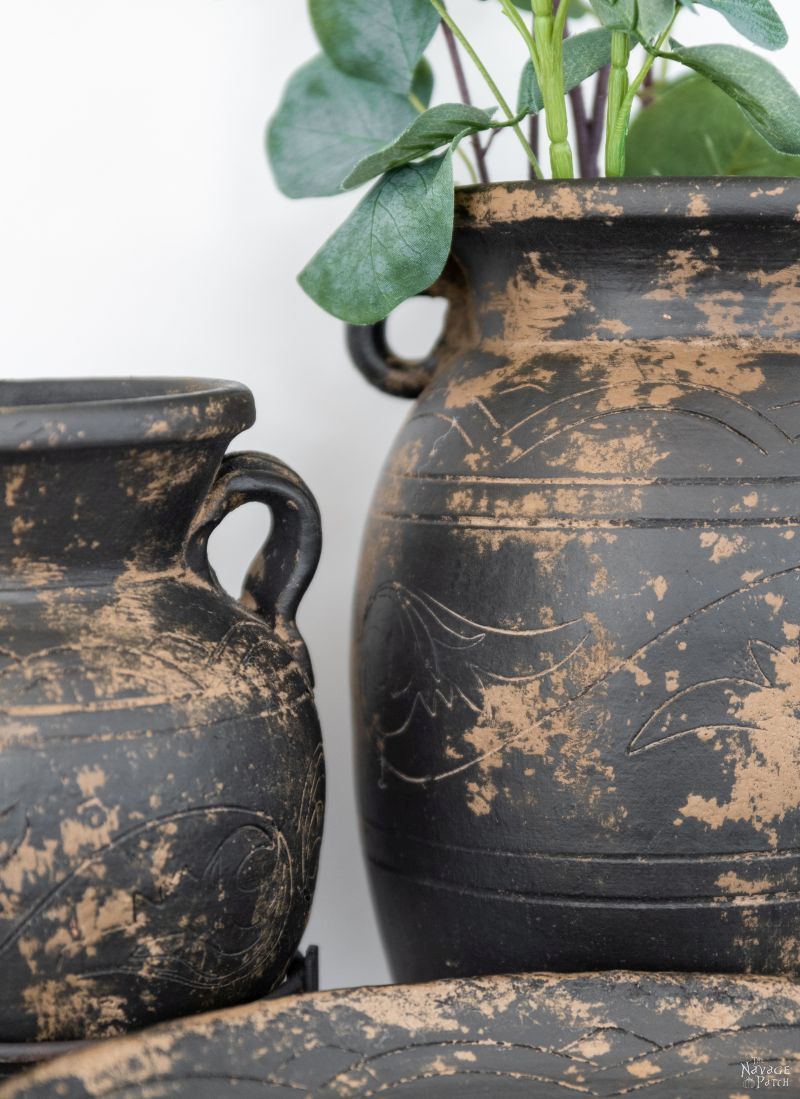
After about 15 minutes (that topcoat dries fast!), our mud painted pottery and lamp were ready for action!

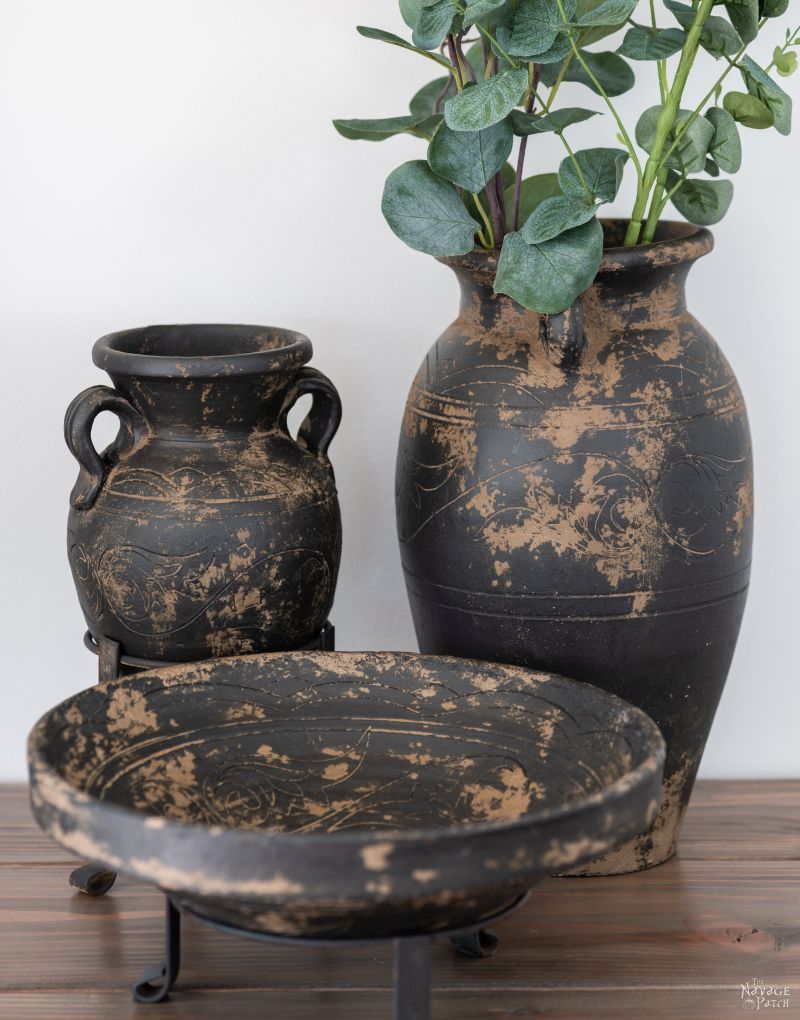

My babes loves it. Like bonkers loves it.

If only I knew…

I would have starting flinging mud around here years ago!

And guess what? My babes retrieved that fourth vase from the china cabinet and let me mud paint it! WooHoo! I think it looks awesome!
Let us know what you think about our mud painted pottery in the comments. Will you be trying this with some of your old lamps and vases?
We love it when you share our posts on Facebook and Pinterest!


You have your mud-slinging skills down to a fine art, Greg. If only Dixie Belle was available here in South Africa, I would definitely give it a go. They’re simply gorgeous. Looks like I’ll have to take walk to our vlei and dig up some of our organic mud to play around with. I just hope the squished bugs won’t affect the final look 😉
That’ll work, Michelle! The only reason I didn’t use the stuff from our yard is because it’s red! 🙂
I’ll have to take a walk around the garden too, and I think my kids would love to help me on a project like this. Greg, these turned out great. Michelle, maybe we should look into a mud “paint” brand. 😉
Hey, yeah, you and Michelle could be the Mud Queens of South Africa! 😀
That looked like a lot fun to do. Now to go hunting for some ugly looking pottery from China
Thanks
It is fun, Olga! 🙂
Fabulous. I have a pair of lamps that need a refurb. I might try making my own mud with Durhams water putty and brown acrylic paint.
As always —-looking forward to your next post. Have a great weekend!
Thanks, Karen and good luck with your lamps and DIY mud! 🙂
I liked yours better than pottery barn. And anyone that would pay that has more money than sense. I find it a little odd. Was not aware this was a thing…
Thank you, Carla! Yeah, $1200 for 3 vases is pretty insane!
I absolutely love the knock offs! Ancient and sleek!
Thank you so much, Patience, we love them too! 🙂
Luckily I was NOT sipping coffee this time when I read the “guano shine” statement or my computer screen would have been splattered. Your blog posts are hilarious and informative at the same time. I really like the shapes of these too, Handan. They remind me of my college days studying pot sherds in my archaeology classes. Yes, I am another liberal arts grad who doesn’t work in the field her degree is in due to life’s windy roads. Haven’t played with mudded paint finishes though these look cool. I was also thinking that since these have an engraved design, they would also look cool painted black with the engraved marked highlighted with white.
I hear ya on the liberal arts education, Laurie. Same here. Only I studied Economics and Computer Science…and now I blog. Well, it’s a lot more enjoyable than those years on Wall Street! 🙂
Love this Greg! I’m definitely going to give this a try. I don’t have any room in our home for any more treasures like this, but I think these would also look great on a patio or placed in a garden. Thanks for sharing this post!
Thank you, Lisa! They would be awesome outside – just be sure to give them several coats of sealant.
Not sure it would go with my current decor, but should look fantastic on flower pots and planters for outside. This technique would even work on cheap plastic planters and pots. Great post.l
Thank you, Jean! Oh yeah, this will work on almost anything! Have fun with it!
You now live in “Dixie”, Son! This project is a real keeper! I love the way the vases and lamp turned out. I’m going to give this a try. Thanks.
LOL, I’m aware that I’m vaguely in Dixie, but I was wondering if the term ever referred to one specific place? Like, is Florida part of Dixie? Even though it’s more south than the South, I rarely consider it to be “the South.” Is it? All these burning questions that are now more relevant because we live here! 😀
“Dixie” is anything south of the Mason-Dixon line. Georgia is in Dixie, for sure.
It’s good to be in Dixie, Sheri! 🙂
At first I didn’t think I’d like it (but laughed hysterically at your elongated head!)…. then, like magic, it did work.
Yours looks so much better, more authentic, than the store-bought examples. In one fell swoop you got the technique down!
Now I’m in search of vases to mud-wipe…. thank you 🙂
Oh yeah sure, laugh at poor Big Head Greg. Hardy Har Har. ??? Glad you liked the mud, though! 🙂
Your muddied pots are way more attractive than Restoration Hardware’s pots.
Plus, your witty chatter is soothing and leads me to read more! You actually sound like you’re having fun with the project and you’ve backed the pots up with wonderful how to pictures! I could use some of these shapes outside on the Lanai for my orchids and have a totally organic and classy look.
Well thank you, Stephanie, I’m flattered! After the initial panic, I did have a lot of fun with this project! Putting orchids in them would look amazing! Please email me some pics if you do it!
I love this technique and plan to try it when I can find the right shape vase or lamp. I remember one lamp from the 70s that would have been perfect! Thanks for sharing!! Handan has such great visions!
Thank you, Jane! She certainly does! 🙂
This looks absolutely awesome! I am definitely keeping this idea in my ideas file for later use.
Thank you, Gloria! It’s a really cool technique! 🙂
OMGosh! This is the first post I have seen (of all the many I follow) that sends me straight to the thrift stores and my storage unit to hunt old bowls, vases and lamps! Not to mention ordering “Dixie Mud” ~ if there’s any left! Love your projects, and your *clever words* … Now I’m off to craft!
Thanks for the fun!!!
I’m glad to hear it, Kathleen! Happy hunting and merry mudding! 🙂
Hey Greg, “Dixie” is anywhere below the Mason-Dixon line between the East Coast and the Mississippi River. In the upper states, like Tennessee, the dirt looks like dirt and it isn’t red!
So, welcome to Dixie.
As for the long face, you have the cutest elongated head I’ve seen in a long time.
Thank you for the welcome Connie, and I’m delighted to hear that someone appreciates my alien cabeza! 😀
What will they think of next?! I think your diving experience must have given you an edge on what the finished product should look like. Actually tempted to try it. I’m guessing the sales of Dixie Mud will increase greatly following your blog post, so if it hasn’t already been offered, you should rate a lifetime supply of the stuff.
You should try it, Teddee – it’s easy and forgiving, and as I mentioned in the post – if you mess up, you can just wash it off and start over!
I really like the mud look…..Your pottery is better looking than the R. Hardware ones. I’d love to makeover a planter for my snake plant.
BTW, your martini glass is beautiful!
Thanks, mom! You should try it!
THIS is why we love you guys! It’s posts like this that give us the “ah-ha” moment! We have a couple of outdoor urns that we have been trying to figure out how we want to spruce up. This technique will be perfect. We will go with charcoal and use their black mud paint – which will go with our color palette. Next weekend’s project – thanks! ?
Woo hoo! Take some before and after pics and send them to me, Mo!