DIY Copper Pipe Candle Holder
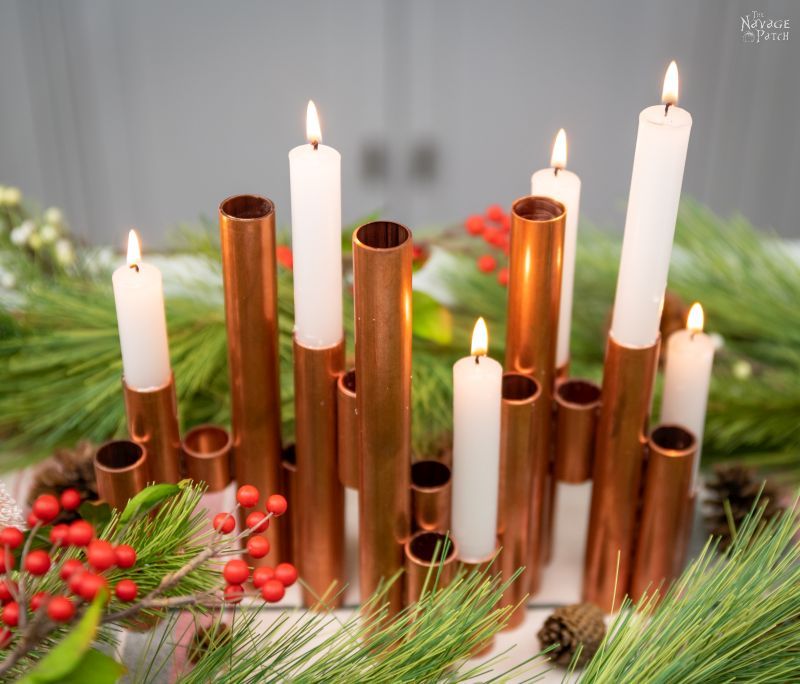
This copper pipe candle holder is an eye-catching DIY that’ll brighten up your dining table or anywhere you decide to showcase it!
There was a time not too long ago when I held great lengths of copper pipe in my hands with the express purpose of connecting them to other copper pipes in the gleaming copper circulatory system of our Georgia home.
It was glorious.
I was the Water Master, and I toiled away in the basement to keep the lifeblood flowing through those pipes.
But now I find myself in Florida, and not only do I not have a basement, but right now, I don’t have a house to call my own.
What am I going to fix?
Or to be more precise – what am I going to mistakenly break so I can fix it? Where are the pipes? I can’t find the guts of this apartment, and it’s making me feel kinda useless.

The other day, I had to call maintenance because our smoke detector kept chirping.
I know, I know…it’s just the battery. And of course, I’m man enough to swap that out!
But it kept chirping.
And every time it chirped (every minute or so), the dogs would go all bukbukbukbukbuk chicken and try to crawl under whatever bed or desk or sofa was closest.
Now see here, madam! I knew what the problem was, and I would have solved it in a hot flash if I’d owned the place! A quick trip to Home Depot for a new detector and Bob’s your uncle!
But I don’t own this place, so I’m not allowed to replace such things. I have to fill out a form online and then wait my turn until the maintenance guys come and do this embarrassingly simple job for me while I stand by and watch like a wide-eyed four-year-old.
It’s so humiliating.
It’s so emasculating.
I just hope when the next light bulb blows, I can muster the courage to change it myself.
Anyway, Handan was yapping next to me on the sofa the other day about this craft and that craft and heylookasquirrel!, and I heard these words come tumbling from her flapping lips: copper pipe.
I snapped my head to look at the woman I married all those years ago.
“Stop!” I bellowed for no good reason. “Rewind.”
Realizing she was my wife and not a remote control, I blinked twice and tried again.
“What did you say about copper pipe, my babes?” I said.
“I said that I want you to make a copper pipe candle holder, my babes,” she said.
A silence stretched between us as my mind weighed her words. I sniffed once and ran a finger along my nose.

“Copper pipe, you say?” I pulled at my scraggly beard in abstract thought then slammed my eyeballs back over to hers. “You want a candle holder made from real copper pipe? The kind they use for plumbing?”
“Yes, my babes,” she said.
Copper pipe! The stuff houses are made of!
“You shall have it, my babes!” I said and ran out the door to Home Depot.
DIY Copper Pipe Candle Holder
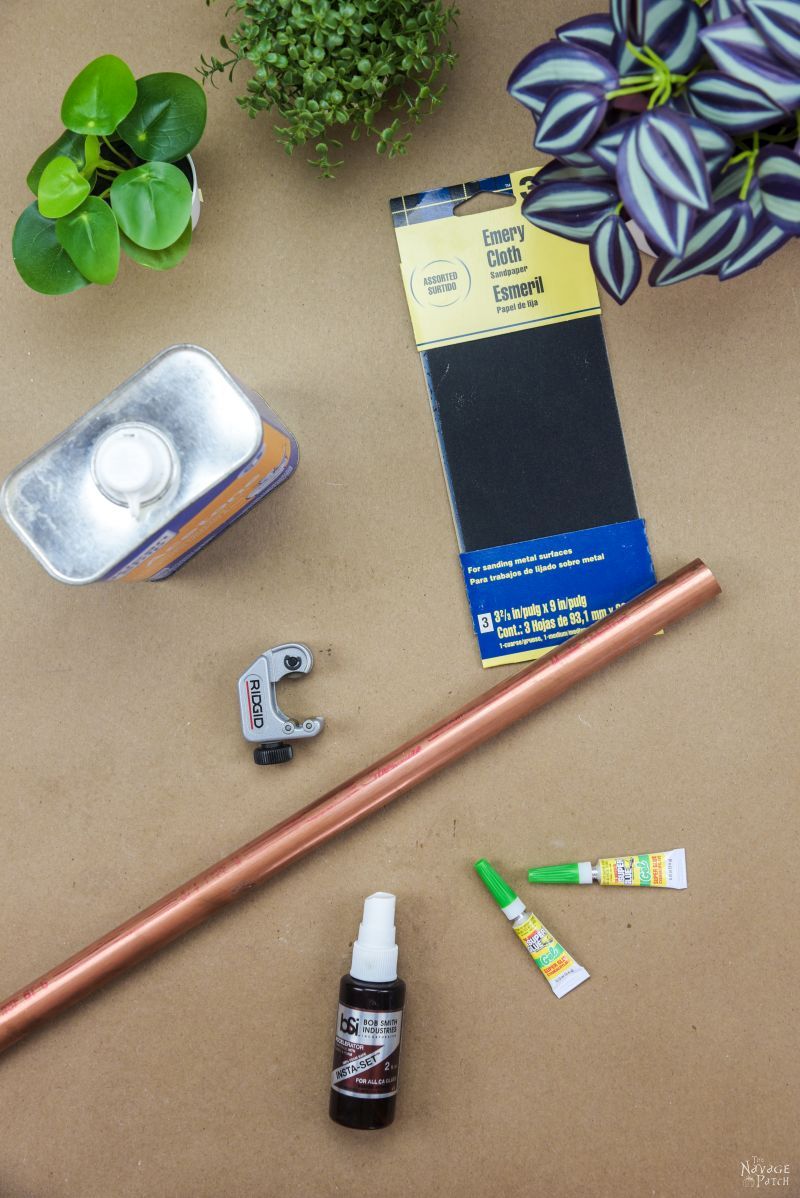
SUPPLIES LIST
Affiliate links are provided below. Full disclosure here.
- 3/4 inch copper pipe (Home Depot sells 5-foot or 10-foot lengths)
- Tubing cutter
- Emery cloth sandpaper (optional – to smooth sharp edges, if any)
- Acetone or nail polish remover
- Super glue gel (Dollar Tree has the cheapest around)
- Super glue accelerator
- Bright copper spray paint (optional)

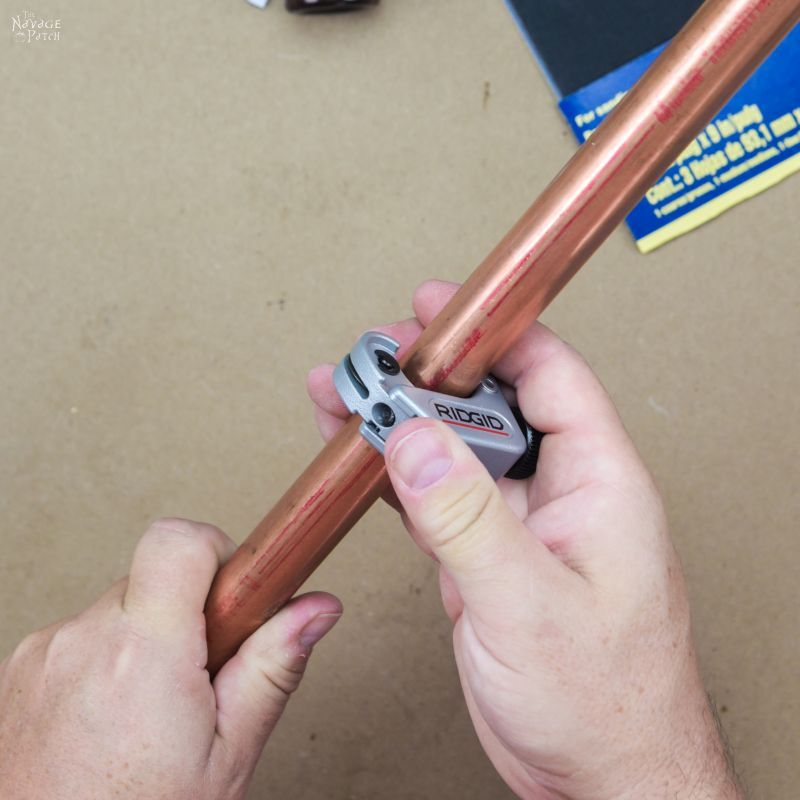
The best part about copper pipe is how easy it is to cut. Hacksaw? No way! Power tools with special metal blades? Pfffft! All you need to slice through copper pipe like salami is the little gizmo I’m holding in the picture below.
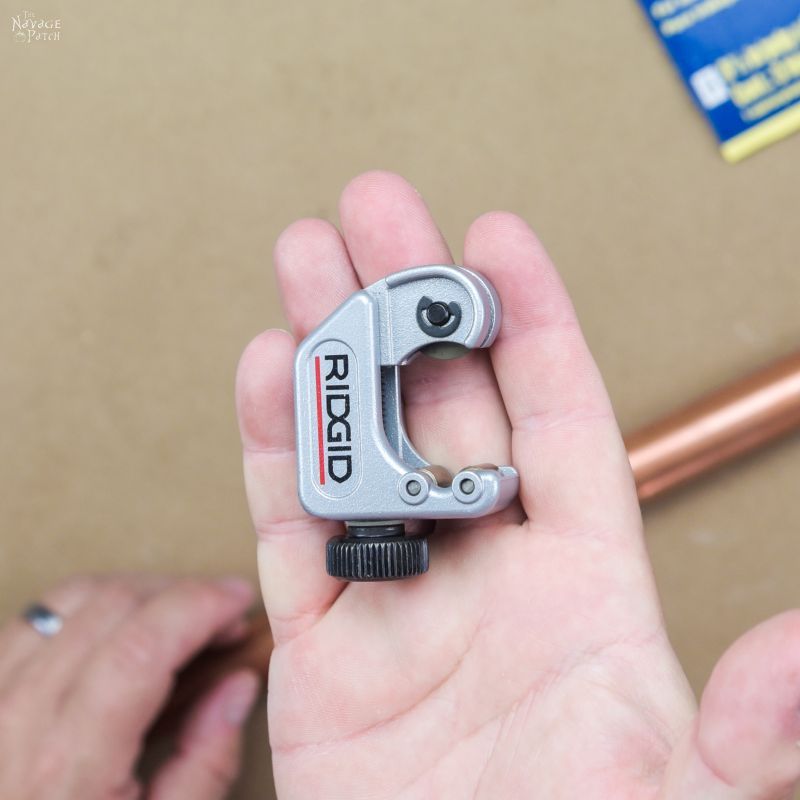
It’s a tubing cutting, and it has a cutting wheel on one side and rollers on the other. You simply unscrew it until it fits over the pipe, then tighten the clamp and spin it around the pipe a few times.
Tighten the screw a quarter turn (or however far it will turn) and spin. You can see in the picture below that the wheel has already cut into the pipe.
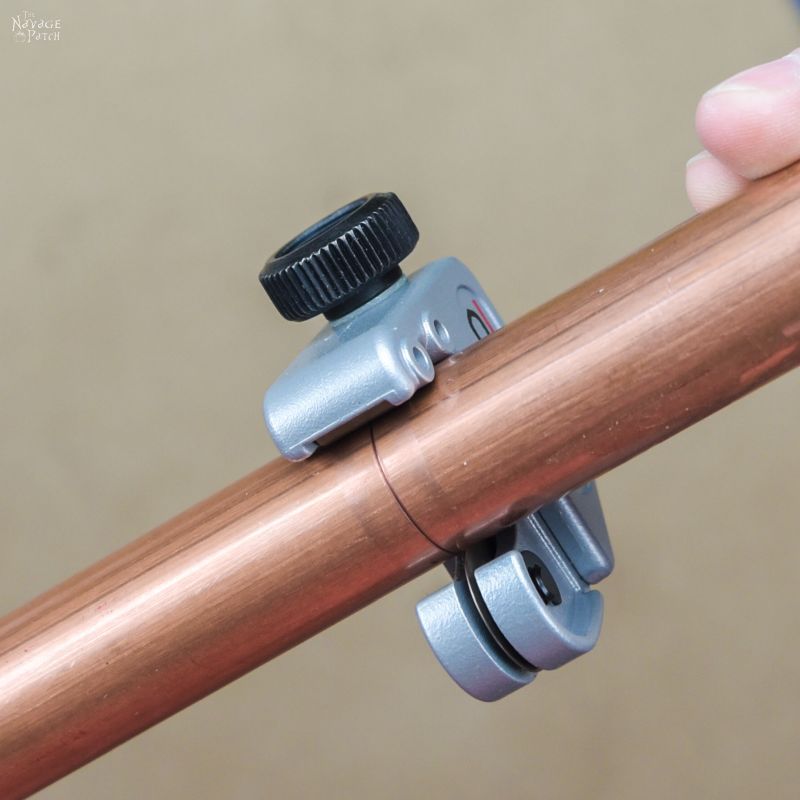
Repeat 2-3 times until the pipe cuts cleanly in two.

For this project I cut pieces of all different lengths – some in pairs and some alone. While you could certainly make a beautiful copper pipe candle holder from one 5-foot length of pipe for 20 dollars, I bought a 10-foot length for 25 dollars. So for an extra 5 dollars, I have a bigger and longer one.
o_0
Candle holder madam, I’m talking about my big long candle holder!
Yeesh, I worry about you sometimes, madam, do you know that?
Okay, so you’ll notice your pipe has some red writing on it. Probably not the best look for a decor piece, but don’t worry, it’s easy to clean! Oh, and do make sure your pipe has red writing. If you get the kind with blue writing, you’ve picked yourself a fancier grade of pipe, and you’re going to pay too much.

Acetone will take that ink right off of the pipe. If you have nail polish remover, you can use that – it’s just high-priced acetone. Acetone is cheapest at Home Depot, but if you don’t have one near you, you can find it on Amazon for a little bit more.

Now we’re ready to make a copper pipe candle holder!

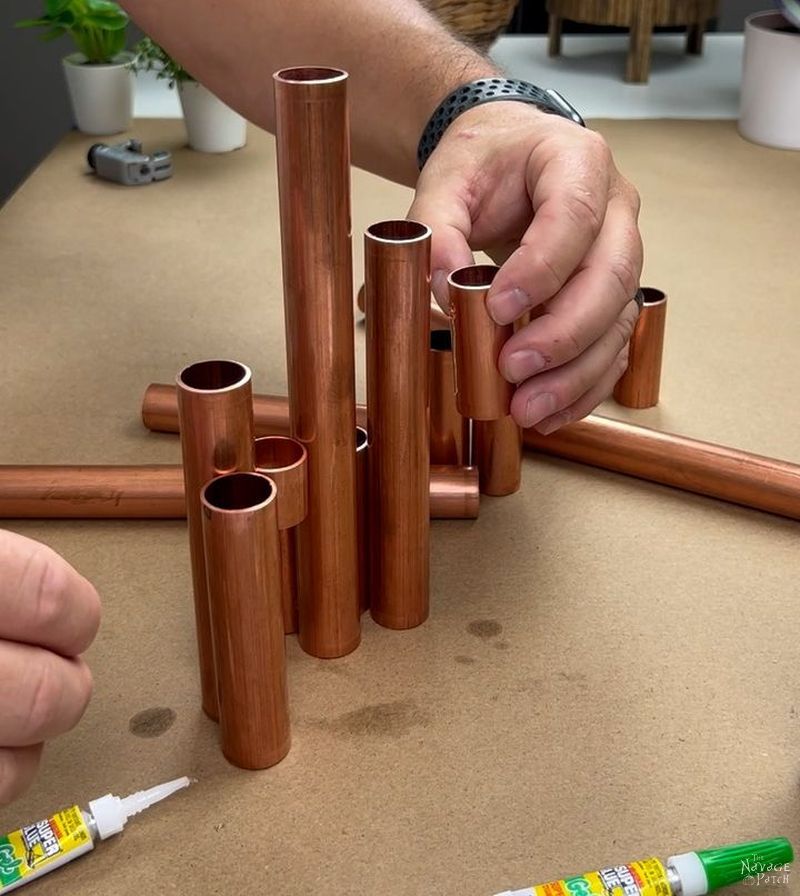
Okay, so there isn’t a right or wrong way to do this part – and the design possibilities are pretty much infinite. How you want to glue the pieces together is entirely up to you. I first made a rough mockup by standing all of the pieces how I thought I might like them. I planned to raise some of the smaller pieces so they wouldn’t be touching the table.

The easiest way for you to assemble your candle holder would be to keep them in your mockup formation. But since I was filming this for other social channels, I had to lay some of the pipes down so the whole thing would look a little better on video. I still had the rough idea in mind, and those taller pipes lying on their sides in the pic below are sort of in the places I want them. It was time to start gluing. I readied my tubes of super glue gel.

I ran a thin line of glue down one of the pipes. Now here’s the thing about super glue and accelerator. If you were to let super glue cure naturally, it will remain clear. But by speeding up the curing process with accelerator, the glue will turn white. This is usually not a problem, but with theses pipes, you’re bound to have a little squeeze out when you stick two pieces together. If you’re not in a hurry, I suggest you skip the accelerator and hold the pieces. For some reason, super glue sets faster on metal than on other materials, so you won’t have to wait an eternity. But I need to get projects done quickly, especially if I’m filming, so I used accelerator knowing it would turn white. That was okay though because I have a solution for the white hardened glue. More on that later.

You don’t need much super glue.

I joined the pieces and then sprayed with accelerator.

I carried on like this, gluing, connecting and spraying.


I suspended some of the smaller pieces between some of the taller pieces.


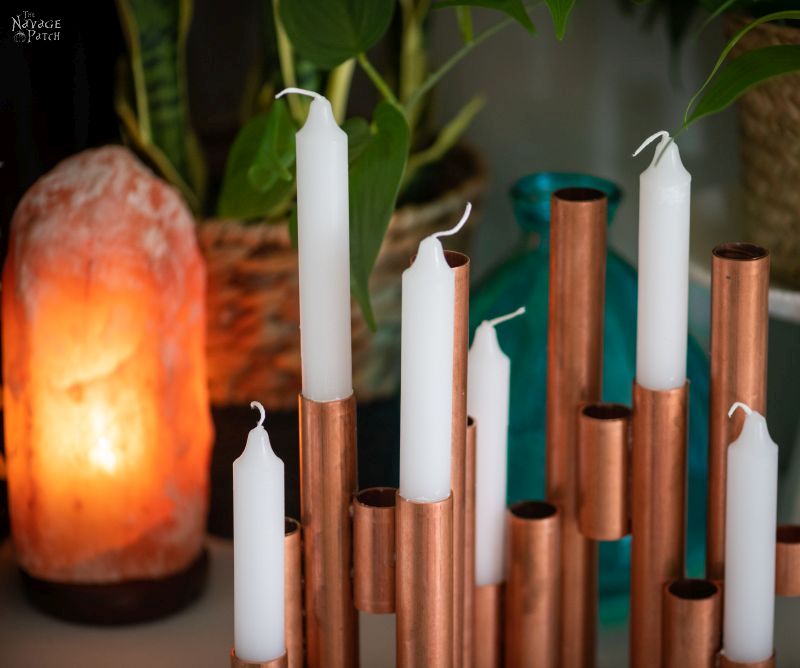
Eventually, I worked through all my pieces, and this was the final product – a beautiful DIY copper candle holder.


The view from above…

If you’re not using dripless candles, you’ll want to put something underneath your copper pipe candle holder so you don’t ruin your nice holiday tablecloth or worse yet, your table!


Check out the picture below. You can see some of the joints have excess super glue, but it kinda looks like solder thanks to Rustoleum Bright Copper spray paint. This stuff is exactly the same color as the copper pipe. I sprayed a little bit into a small disposable Dollar Tree plastic dish and then I used a small craft brush to paint over the hardened glue. Seriously, this paint’s color is amazingly accurate. I tested it first on a spare piece of copper pipe, and I couldn’t see where I had brushed it on – it’s that accurate!


We love it when you share our posts on Facebook and Pinterest!


This, kind sir, is “GENIUS!” DO you know how much these would sell for??!! I (my babes) have this piece of walnut block…a “hole saw”…insert copper piece…run down center of Thanksgiving table…eeekkk…YOU’AL HAVE “DONE IT AGAIN!!” YEP! franki
Thanks, Franki! 😀
Beautiful!!!
Any of your TERRIFIC suggestions on what to put underneath as i don’t feel comfortable putting this on my dining room table unprotected.
Secondly, where did u use the emery cloth–i couldn’t find in the blog.
Thx, Gail
Thanks, Gail! IF you’re worried about the copper scratching the wood, you could put felt pads underneath the pipes. If you’re worried about wax damage, then I would maybe use a piece of burlap or canvas underneath – basically any sort of decent-looking fabric/cloth/placemat etc that you don’t mind getting a few wax drips on. The emery cloth was to sand down any excessively sharp edges you may end up with. I didn’t get any, so I never used it. It’s a “just in case” supply.
This is one of my all time favorites. I love warm metals, and this is so affordable. And forgiving. There really isn’t a wrong.way to assemble, but thank you for the small suspended sections idea. Genius. I see this as a gift for some of my friends with large fireplaces and rustic mantels. Not that this isn’t perfectly elegant for more formal settings. I cannot wait for Home Drpot to open!
Awesome! I’m happy to hear that this one’s a favorite! Just remember to get the copper pipe with the red writing or you’ll be paying too much! Good luck, and please post a pic on Instagram and tag us when you’re done!
I meant to ask this question. Is this the kind of copper that will oxidize if left untreated?
These pipes would need to see water and air over time to oxidize, so it’s not really a concern as long as they’re not getting wet. That said, if you want pristine copper color, you could polish the pipes first and then seal the finished project with a clearcoat sealant afterwards. Personally, I like the somewhat imperfect look of natural copper, so I left the pipes as they are.
Love this!! So elegant!!
Thank you, Anne! 🙂
WOW! That’s cool!
Thank you! 🙂
hahahaha!!
by the way, love the candleholder!!!
Thank you so much! 😀
Very cool. And super creative.
I have to admit, though, that it is the super glue accelerator mentioned in your last two posts that caught my eye. I did not know super glue accelerator was a thing. How did I not know about this? Super glue and I have a very iffy, not very super relationship and I feel like I should have known. I took your last post to my three sons and asked whether they had ever heard of it. They had not. I just now showed this post to my husband and oldest son over lunch. My son laughed, “You are really excited about that accelerator mom, aren’t you?” I side eyed him and responded, “Why, yes. Yes, I am, child of mine who goes to Home Depot almost daily.”
I have made clear to everyone that it is a new life goal that I obtain obtain accelerator. I expect to have some in my hands soon.
This would be a perfect project on which to try it out. lol
Yes, yes, yes! It’s better than sliced bread with a zipper on top! They won’t find it at Home Depot, but you can order it from the link in the post. It’ll change your life! 🙂
Wow, this is inspired. I am forwarding this to my handy husband as a strongly worded hint about what I would like under the Christmas tree this year!! 🙂
LOL! If I know anything about being a husband, I think you’ll get your wish! 😀
Really love your copper candle holder. It looks so awesome and would like to make one. What approximate lengths did you cut the copper pipe? I have never cut pipe before and don’t want mine looking like I tried to build the Eiffel Tower when finished. . If you could provide direction on the lengths it would be greatly appreciated. Great job!!
Thanks, Linda! My tallest pieces are 8 3/4 inches and the shortest is just under an inch. If you constrain yourself between 1 and 9 inches, you should be fine! 🙂
I love everything about this candle holder made of copper pipe. Woohoo to you and the “babes”.
Thank you so much, Cecilia! 🙂
Greg, I absolutely love, love, love this copper candle holder!!!!! You are amazing! Copper is my favorite metal. I WILL have one of these whether I make it or someone else does. That is what I also want for Christmas. Thank you for all of these wonderful ideas.
I’m so happy you like it, Marian, and I do hope you get one for Christmas! 🙂
I found 2′ lengths of copper pipe at Menards. With the coat of copper hoovering around a 10 year high, that might be a less expensive route. It turned out great!
Oh cool! How much are they selling those for?
This is one of your absolutely best projects yet. It is a timeless beauty. I am going to show it to the hubs and have him make three for Christmas gifts for our daughters. Thank you for sharing your talent and creativity with us.
Wow, thank you so much, Gail – I’m so happy you like it! I’m sure your daughters will enjoy having them! 🙂
What an awesome idea. Ii is gorgeous ❣️ Thank you so much for sharing this wonderful DIY 💋
Thank you, Nette, and you’re welcome! 🙂
This is really cool. Making it for my wife for our anniversary. Could you send a link to the candles you used?
Hi Scott, I think those are Dollar Tree emergency candles. 6-pk is $1.25