DIY Dollar Store Christmas Trees
These DIY Dollar Store Christmas Trees are a simple craft that look great on a tiered tray, and there are endless ways to make them!

Okay, Halloween is over, so that means it’s totally fair game to start posting Christmas crafts. Yeah, yeah, I know, some bloggers started posting Christmas stuff in October, and some probably even started in September and August. But if we start posting Christmas crafts too early, we risk getting an earful (or an eyeful, to be more precise) from all the Denouncing Debbies and How-Dare-You Hollies policing the internet for seasonal craft infractions.
I can hear it now (or picture it, to be more precise):
“Why are you posting this Christmas craft in August?? I’m about to go on a beach vacation with my family, and you just ruined it!!”
But now that it’s November, we can unfurl our Christmas flag and wave it proudly.

Anyway, jeez, if I thought Halloween was a little odd in a steamy place like Florida, Christmas is going to be downright bizarre! And look, it’s not the first hot place we celebrated Christmas, but Christmas in Vietnam wasn’t truly Christmas since it’s not a part of the Vietnamese culture. But in another way, it was the best Christmas ever…
Here in Florida, Christmas is very much part of the culture, and I must admit it’s a little strange buying Christmas lights, ornaments and and all sorts of red, white and green decor while wearing flip flops and a shirt with sweaty armpits. On the plus side, I look forward to grilling a slab of meat outside in bare feet and shorts on Christmas day while the Northern Folk all huddle around their fireplaces for warmth.
And of course, it wouldn’t be Christmas at The Navage Patch if my babes didn’t have a few (dozen) Dollar Tree crafts up her sleeve. She spends all year hoarding DT supplies like a squirrel hoards acorns. And just as the squirrel nibbles them throughout the winter from the warmth and comfort of his oak tree nest, my babes plucks from her stash so I can make the Christmas crafts that she desires.
Today’s dollar store Christmas trees are built upon some house-shaped shadow boxes that Handan has been trying to find for two years! Well, thanks to an all new set of Dollar Trees here in Jax, she finally found what she’s been searching for!
Now, there are literally infinite ways you can make Christmas trees inside these shadow boxes, but I’m just going to show you two ways, and I’ll let your imagination take you the rest of the way.

The first way uses adhesive vinyl – yes from Dollar Tree! – and bottle brush trees. Did you know DT carries adhesive vinyl now? That’s a pretty big game changer for those who use smart cutting machines. It’s no secret that the material costs can quickly eclipse the machine cost, so having a source for $1 vinyl is pretty damn awesome! And yes, it’s the same size roll – 12 inches by 48 inches, so it’s a screaming good deal!
The second Christmas tree builds upon a creative gift-wrapping idea Handan shared a few years back. Let’s check ’em out.

DIY Dollar Store Christmas Trees
SUPPLIES LIST
Affiliate links are provided below. Full disclosure here.
- Dollar store shadow boxes
- X-Acto knife
- Buffalo check adhesive vinyl (we got ours at Dollar Tree)
- Bottle brush trees
- Hot glue gun
- Scissors
- Super glue gel
- Cinnamon stick or twig
- Small cotton balls (we got them at Dollar Tree)
- Flat white spray paint
- Double-sided tape
- Double-sided thin ribbon
DIY Dollar Store Bottle Brush Christmas Tree
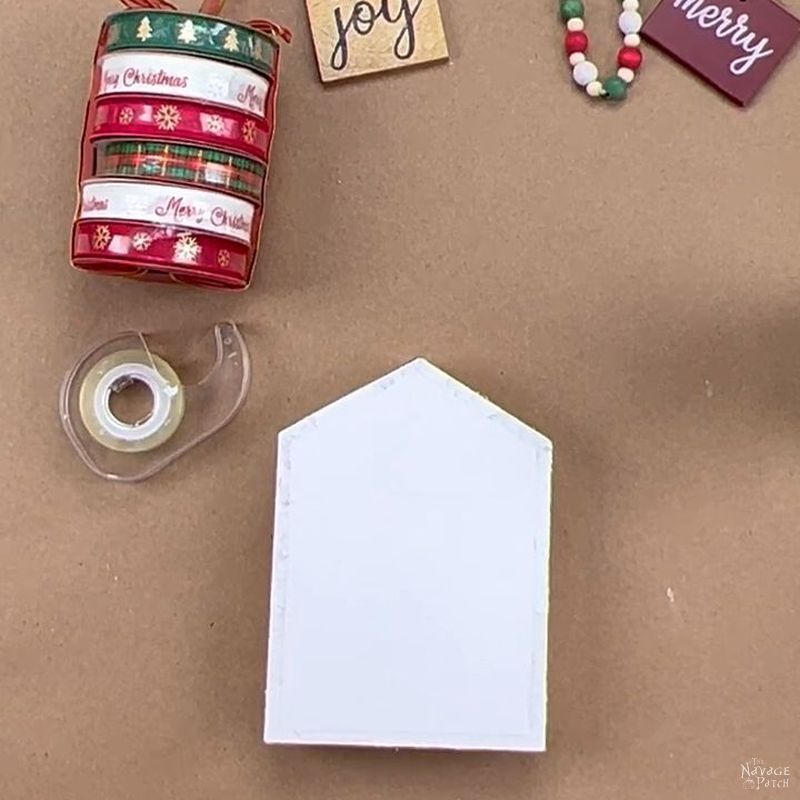
The beauty of a cheaply-made imported Dollar Tree item as that it is often easy to disassemble, muck around with and then re-assemble.

In the case of these Dollar Tree shadow box houses, all it takes to separate the back from the frame is a firm push with the thumbs. But first, I ran an X-Acto knife around the edges. This prevents any paper getting left behind on the frame. It’s not necessary, but it’s helpful.

Then a quick push with my thumbs to break the seal.

Easy as pie.

Once you have the backing removed, make sure it is smooth and free of debris. The Dollar Tree vinyl is pretty thin and will show any imperfections underneath.
Did I mention Dollar Tree carries adhesive vinyl now?

I know I did, but it bears repeating. Dollar Tree has $1 freaking adhesive vinyl! Now if they would just stock a $1 smart cutting machine, we’d be all set!
I placed the backing on the vinyl.

Then I traced around the backing with an X-Acto knife.

Peeeeeeeel….

And stick!


A brayer helps if you have one, but it’s by no means necessary. I didn’t do a very good job at cleaning the backing before putting on the vinyl. And that’s precisely why I knew to tell you about it!

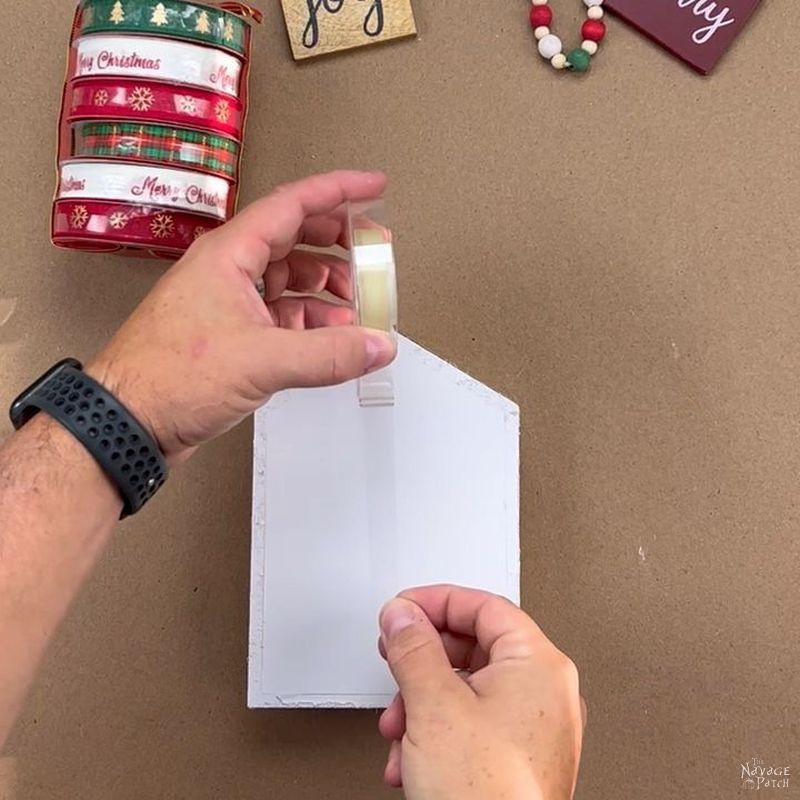
I ran a thin line of super glue around the frame.

Then I reattached the frame to the backing.

A white tree would be great against that black and red background. And as fortune favors the frugal, you can also find this very same bottle brush tree at Dollar Tree. But if you don’t have a DT near you, Amazon has a wide selection.


Next, I ran a line of hot glue down the buffalo plaid backing.
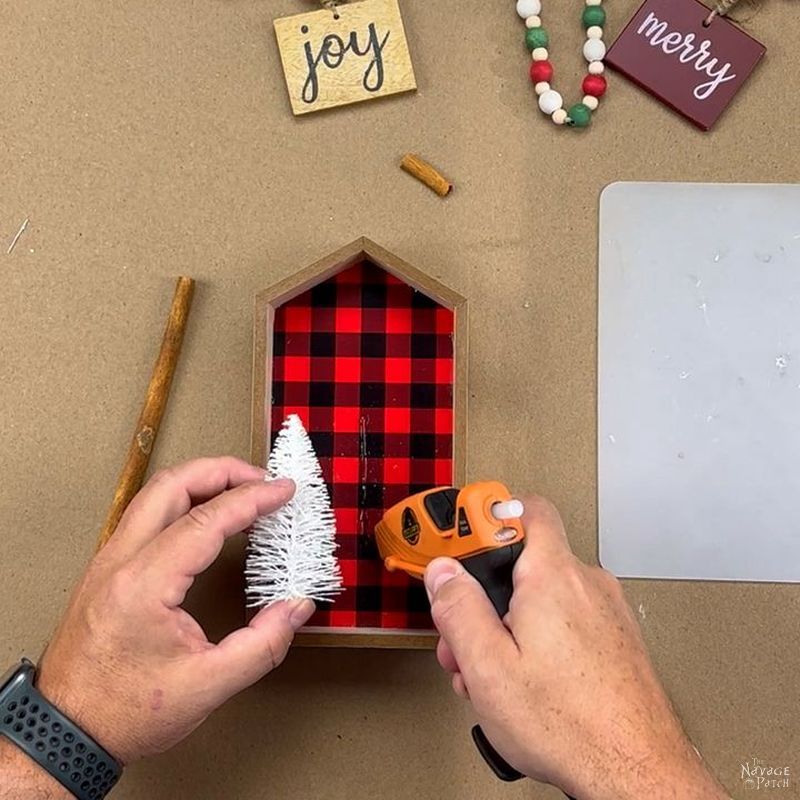
Then I pressed the tree against the glue and held it until it hardened.

Since I don’t own any trees in Florida (though that doesn’t mean I can’t scrounge up sticks from Home Depot parking lots), I opted to use cinnamon sticks for the tree trunks – they’re cheap, they look like wood, and most of us have them in our pantry. I put a dab of hot glue on a piece I’d cut to fit.

And then I stuck it into its place.

I looked at the tree and found it lacking. It needed snow. Fortunately, my babes had recently bought a few packs of mini cotton balls from Dollar Tree. They’d make fine snow!

I put a little hot glue on each one and stuck them along the bottom of the frame.


And that was it for the first DIY dollar store Christmas tree!


At first I kept trying to get rid of the excess glitter from the tree, but it kept falling off the tree, so I just declared it to be falling snow and left it alone.


What do you think? Yes, I know, I know, it’s awesome. Did you know that I’m kind of a big deal amongst the kindergarten set? They all worship me and my mad crafting skills. I’m thinking of taking my show on the road and teaching a crafting Master Class at elementary schools all across the country! Now wouldn’t that be exciting!

Let’s move on.
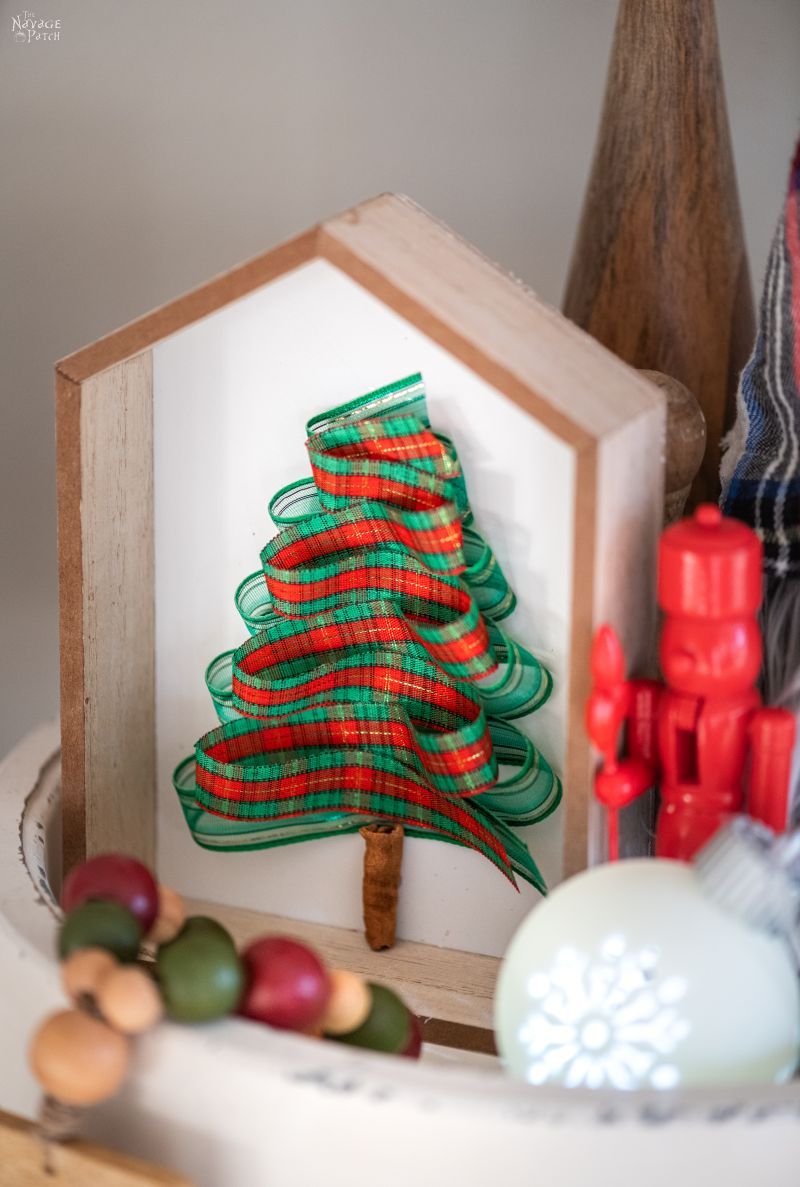
DIY Dollar Store Ribbon Christmas Tree
For my next masterpiece, I skipped the adhesive vinyl in favor of spray paint. I disassembled it in the same manner as I did the first shadow box.

Then I sprayed the backing with several light coats of Behr spray chalk paint in a color called Tin White. Of all the sad things I’ve seen in connection with this global supply chain crunch, perhaps the saddest of them all is the perpetually-depleted shelves of Home Depot’s spray paint department. It breaks my heart to see all those empty slots. I just hope those missing cans are safe and sound in the bowels of one of the 80 or so container ships waiting patiently in the waters off Long Beach for their turn to dock and unload.
I tore off a piece of double-sided tape and laid it down the middle of the backing.

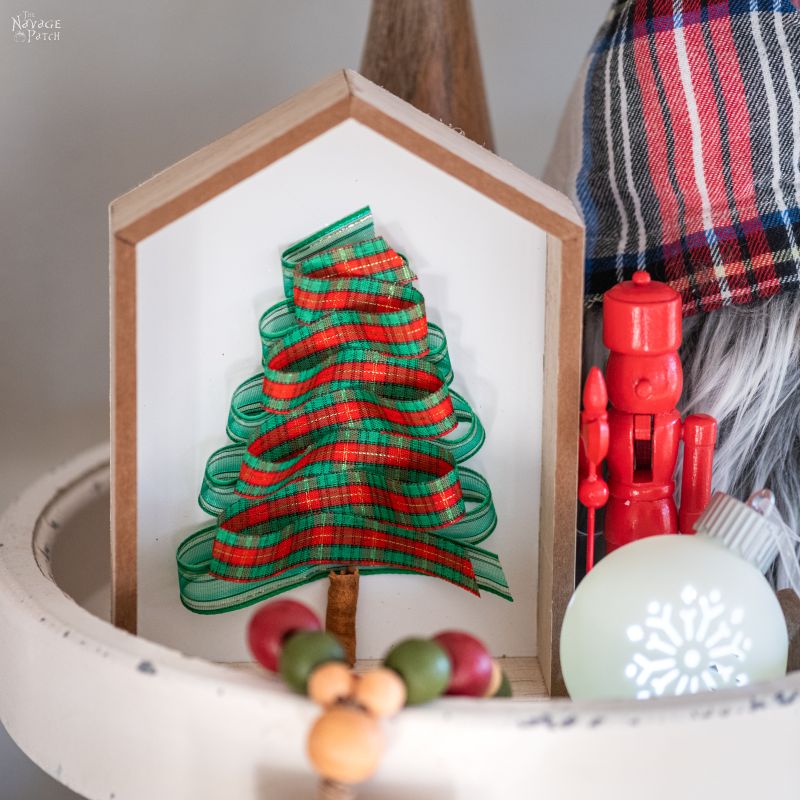
Thinking green would look good with the white, I used some gossamer green ribbon for the tree.

What I did next was to try to replicate what my babes did so well a few years back. First I’ll show you mine, and then I’ll show you hers.

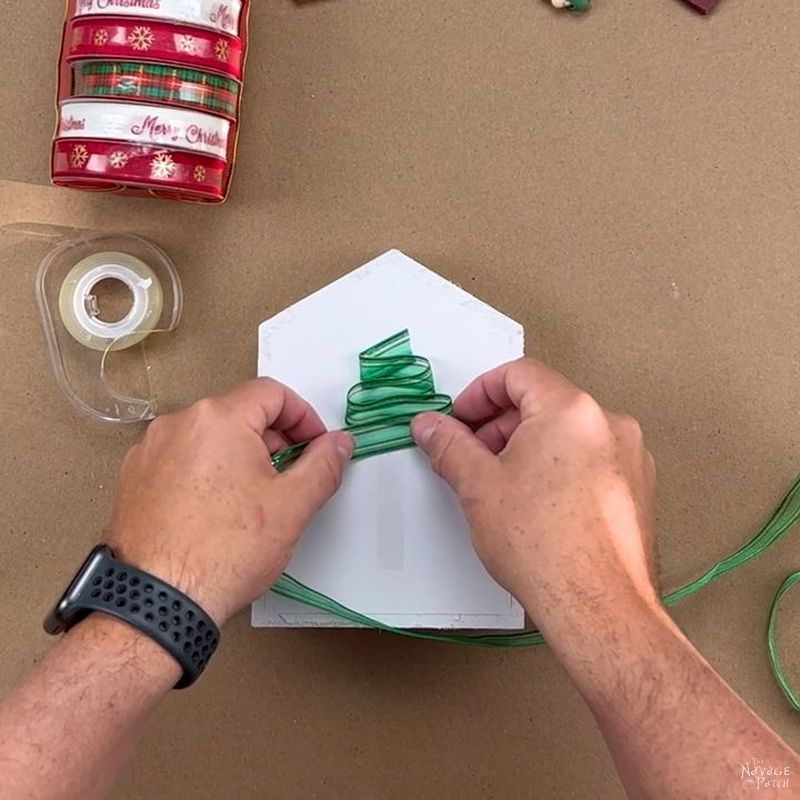


Then I placed the frame back on (though I didn’t glue it yet), measure and cut a cinnamon stick and hot glued it in place.

I put super glue on the frame.

And stuck the frame back onto the backing.

So how’d I do? Here’s the gift Handan wrapped that I used as my guide.
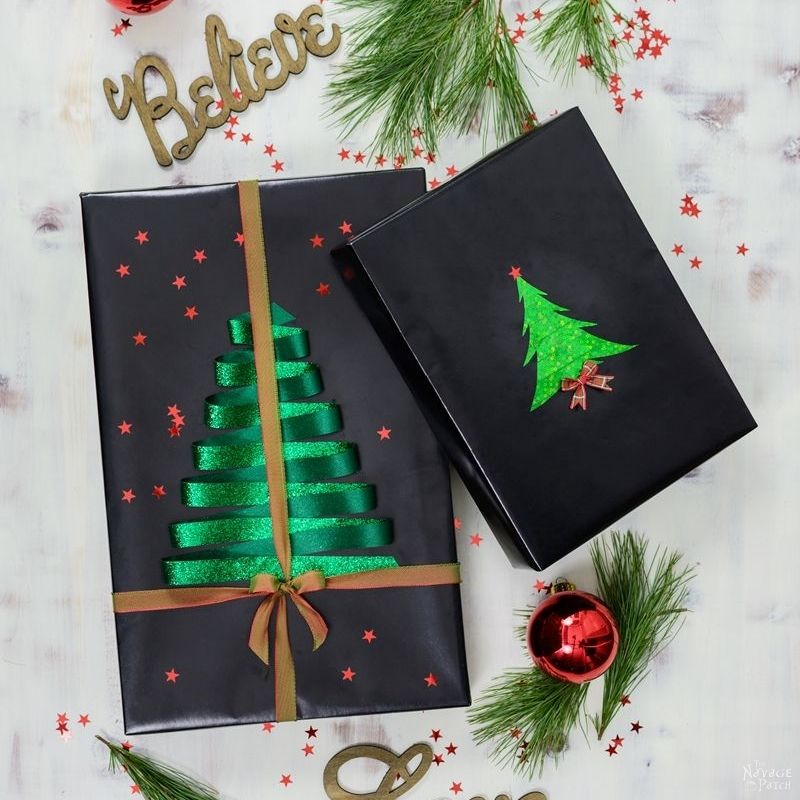
Yeah, yeah, I know. Hers is better. But I liked mine! I thought it had restrained class. But when you looked at it from above, it did have just a bit of white space showing.
I displayed my masterpiece to my babes when she got home from work.
She looked at it.
She looked at me.
She looked at it again.
“Hmmmmm,” she said. “It needs something.”
I pointed to my biceps and flexed. “A little more of this, perhaps?”
She just rolled her eyes. “A little more color, I think. Let’s try it again with a different color ribbon.”
We laid a piece of double-sided tape on the table and quickly made another tree with red and green ribbon and then peeled the tape off the table with the ribbon tree still attached. Before removing the original green ribbon tree, we laid the new one on top of the old one to see how it would look. As it turns out, we both liked the look of the new one and the old one together, and that’s how we kept it.


Here are some of our other Christmas DIYs that were also shown in the pictures above.
DIY Dollar Tree Christmas Signs (& Free SVGs)
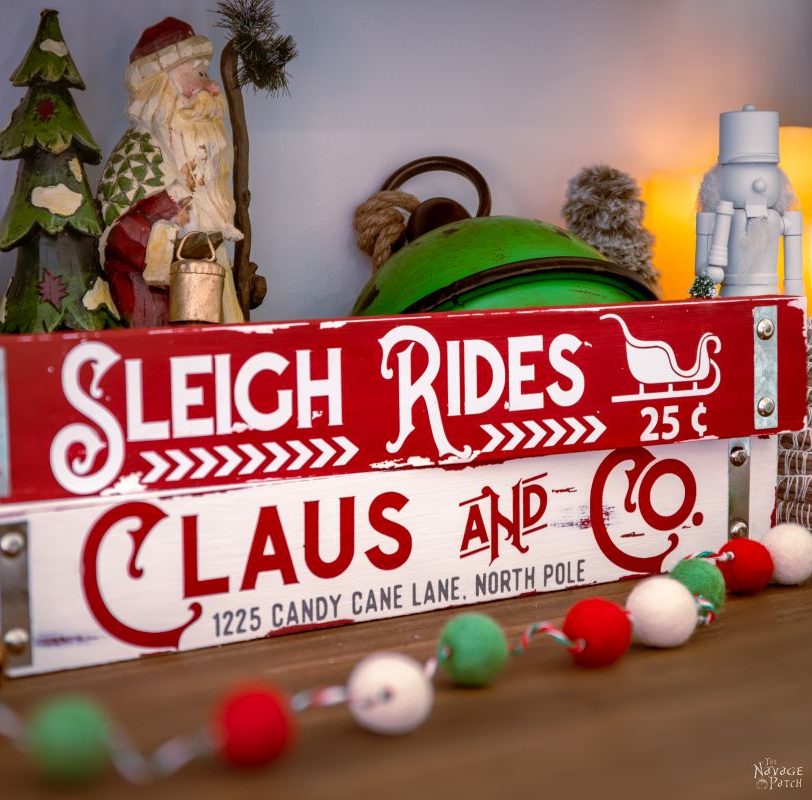
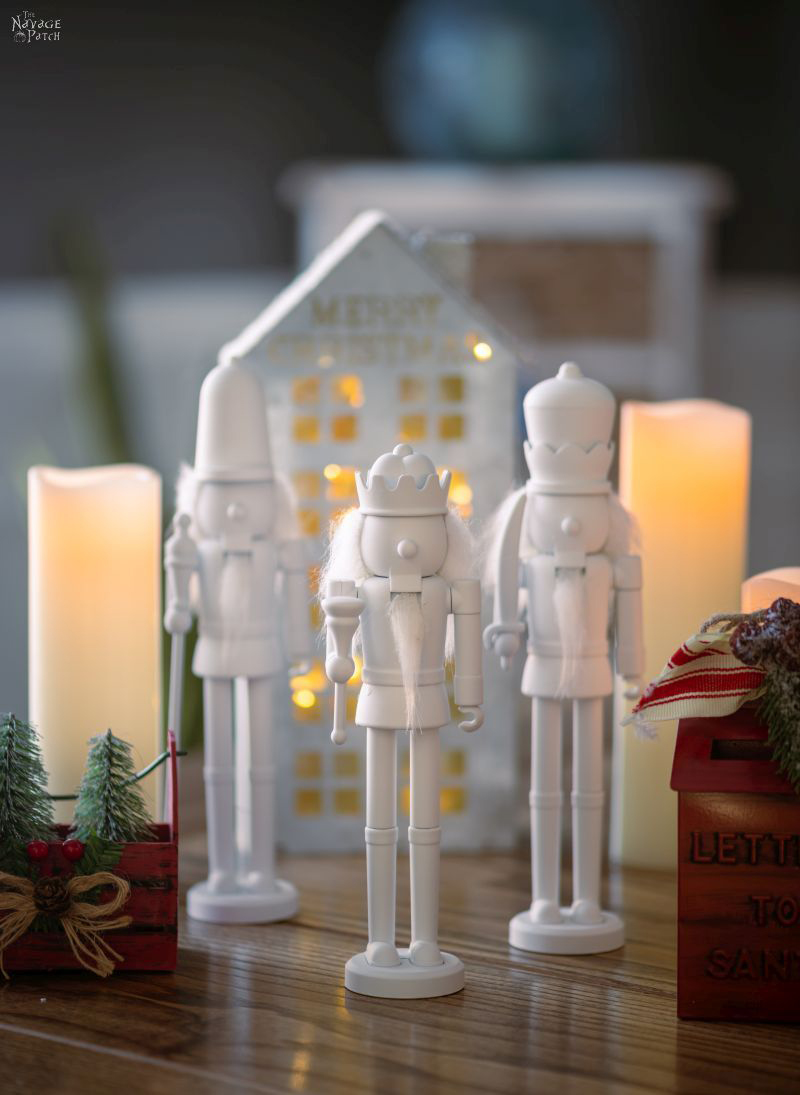
DIY Dollar Tree Snow-White Nutcrackers
DIY Dollar Tree Signs & Free Printables

We love it when you share our posts on Facebook and Pinterest!


You guys are absolutely amazing! I love all the trees you made! I hope I have time to craft some just like them and that my local Dollar Tree stores have the box frames and other items you used. I haven’t found any vinyl at my local Dollar Tree stores.
Thank you, Carol! The vinyl is new, and we’ve only seen it at most two DTs around here. Keep looking, you’ll find some eventually!
I just absorb love the way you narrate your post, you make me lol so much! Thank you and your wife for all you teach me!
Thank you so much, Missi! That really means a lot to me to read this…writing these posts is even more fun than making the crafts! 😀
Love how both your brains came together on the last look! Turned out great.
Thank you, Sara! Yeah, I’d be a shuffling zombie without Handan! 🙂
Greg & Handan!
That’s such a clever idea with the ribbon trees. I love it! I’ll have to check out my local Dollar Tree. If you ever have a traveling Master crafter class, I would definitely check it out.😉
Thank you, Michele! Well, I think you’re a bit older than my target demographic, but I’m sure I could make an exception! 😀
More cool Christmas crafts to try! I was painting nutcrackers white last night as a matter of fact (found some smaller unpainted ones at Michaels. I love the ribbon trees. Handan is a wrapping wizard! I also have got to make some gnomes because who doesn’t love the fuzzy cuteness of gnomes. Though finding some supplies is not fun this year, my local craft stores are really not stocked for the holidays yet. Hardly a Christmas spray or pick to be found and the ribbon selection isn’t what it normally is so it will be a challenge this year. Usually these shelves are overflowing by the end of August. Now they are empty awaiting the arrival of those container ships.
Ugh, tell me about it, Laurie. It’s so depressing. I guess the only consolation is knowing the supplies exist…they’re just bobbing around in the Pacific 3000 miles away.
Christmas in Florida: You have to travel south to find more Christmas trees than you have ever seen in one place! There are millions of them, grouped together in neat rows and all displaying either orange, yellow or green ornaments. Their leaves are not spiked, but wide in the middle and pointed at the ends. The ornaments were preceded by the most fragrant flowers, and after Christmas, those ornaments are edible! It’s the ultimate recycling of Christmas immediately past! The Keys are famous for their tiny ornaments which are often featured in pies. We consider our Christmas trees to be a joy to the world which continue to give their blessings year after year. You will be able to buy the ornaments in your neighborhood Publix sometime after the new year if you can’t take a trip south to see them in their natural habitat. We used to have many in central Florida, but there are only a few left because it got too cold for them. Around Orlando and south you can find them now, but they won’t be quite ready for Christmas just yet.
LOL, I love those ornaments! So many delicious uses!
Oh no! The link to the Christmas gnomes is broken! It goes nowhere except to a message saying that the URL can’t be shown. Can it be repaired? Glue gun ready?
All fixed, Barbara – thanks for the heads-up!
Ooh, what a fun use of scrap ribbon from my stash of supplies (because the black hole that is my craft closet is not having delivery issues), but really, the wood shim trees with the epoxy are what caught my eye. Those are something I may have to make this weekend. I’m pretty sure there are some shims or scrap lath pieces somewhere in my house, just waiting to be of use. Thanks for the great ideas!
Thanks, Deb! I hope you try those shim trees – they were so much fun to make! 🙂
Hi Greg,
You make me smile!!!!! I love all of the things you make. I am on my way to the Dollar Tree. Love and best hot cocoa wishes to you and Handan.
Thank you, Marian! I hope you find everything you’re looking for! 🙂
Such a fun project. Thanks as always for sharing. I had to scroll through 3 times to get back to the 2nd half of your post because I kept laughing so hard at the “artist rendering “ and my iPad kept resetting to the beginning of the post. So worth it though!
LOLOL! Thanks, Toni! 😀
Love the ribbon trees! It would be cute to add drops of glitter glue to look like ornaments.
Good job team!
That’s a great idea, Margie! 🙂
LOVE LOVE LOVE those sweet little trees ..they are just so dang cute …And I know that is going to be on my list to make ….an it just so happens that I have a vinyl cutting machine …not a Cricut but a big SureCuts machine ….and I have and colors of vinyl…You and Handan are two of the Best Crafters around ….Thank you both for sharing your Idea’s… Have a very BLESSED DAY !!! And keep up the CRAFTING !!!!
Thank you so much, Maude! You have a blessed day as well! 🙂