DIY Garage Cabinets
Our garage and workshop makeover is in full swing, and with these DIY garage cabinets, we now have tons of useful storage space!
At first, I thought she was nuts.
It wasn’t the first time I’d thought my babes was nuttier than a squirrel convention, and it almost certainly won’t have been the last.
She has a long history of batty notions, hare-brained schemes and loony ideas that I was always sure would be followed by men in white coats with butterfly nets.
Alas, no men in coats, no butterfly nets, and the most galling thing of all, my babes’ ideas almost always worked or at least made sense in the end.
So you can imagine my perplexion (that bordered on apoplexy) when my babes informed San (our fabulous Georgia cabinet guru) that she wanted to keep more than half of the kitchen cabinets we were paying him to remove from the kitchen walls and (presumably) from the house.
Half.
And she wanted me to carry them to the basement.
The basement.
The Georgia basement was already fast approaching “blivet” status, or as my father once explained it to me in the 80s:
Dad: Do you know what a blivet is?
Me: no.
Dad: Ten pounds of shit in a five pound bag! [laughs]
So back to Georgia and the kitchen cabinets. The Loon (aka, my wife), wanted Yours Sufferingly to haul 12 cabinets of various sizes down the stairs and somehow fit them into the general mayhem of the basement.
My protestations fell on deaf ears. She just kept reminding me that cabinets were expensive – even used ones – and that (don’t worry), we’d be using them.
Well, to her credit, I did use them. Seven remained in the basement and held paints, stains and other odds and ends.
Then, the summer we moved out, I employed a few more in our Georgia garage mudroom. I used the last two cabinets in the garage locker makeover.
Though I suppose I should have expected it, I was nevertheless surprised and dismayed when my babes informed me we’d be taking those greasy old carcasses with us as we headed south to Florida.
It seemed there was no escaping them.
But (as you all know by now), my babes was right.
Again. (god, it’s so annoying!)
For here we are at the precipice of yet another garage makeover, and (wouldn’t you know it), all those cabinets have come back into play.
But not just those Georgia cabinets! Oh no! They aren’t nearly enough! We had to beef up their numbers with some freebies we found on Facebook Marketplace, and we had to buy some cheap Project Source unfinished cabinets from Lowe’s.
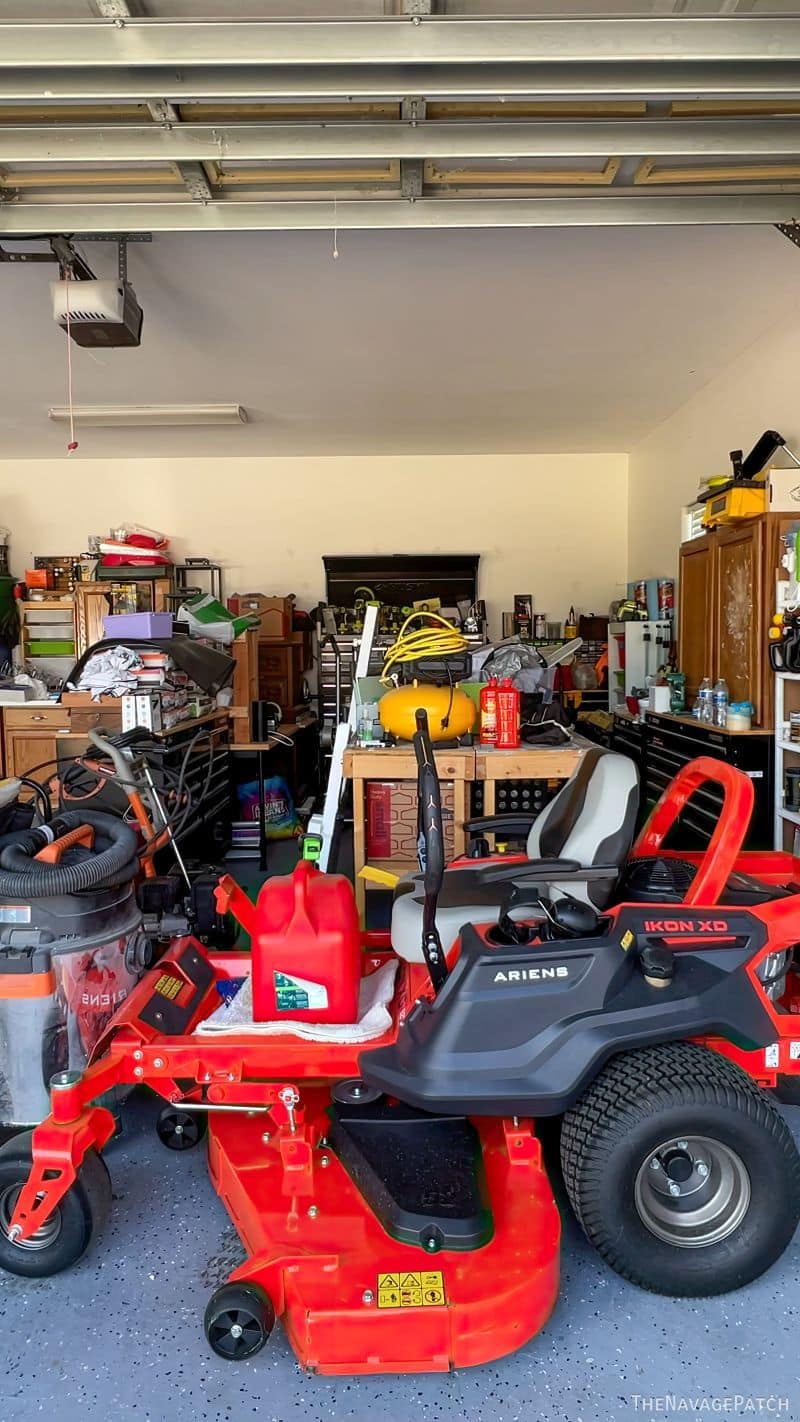
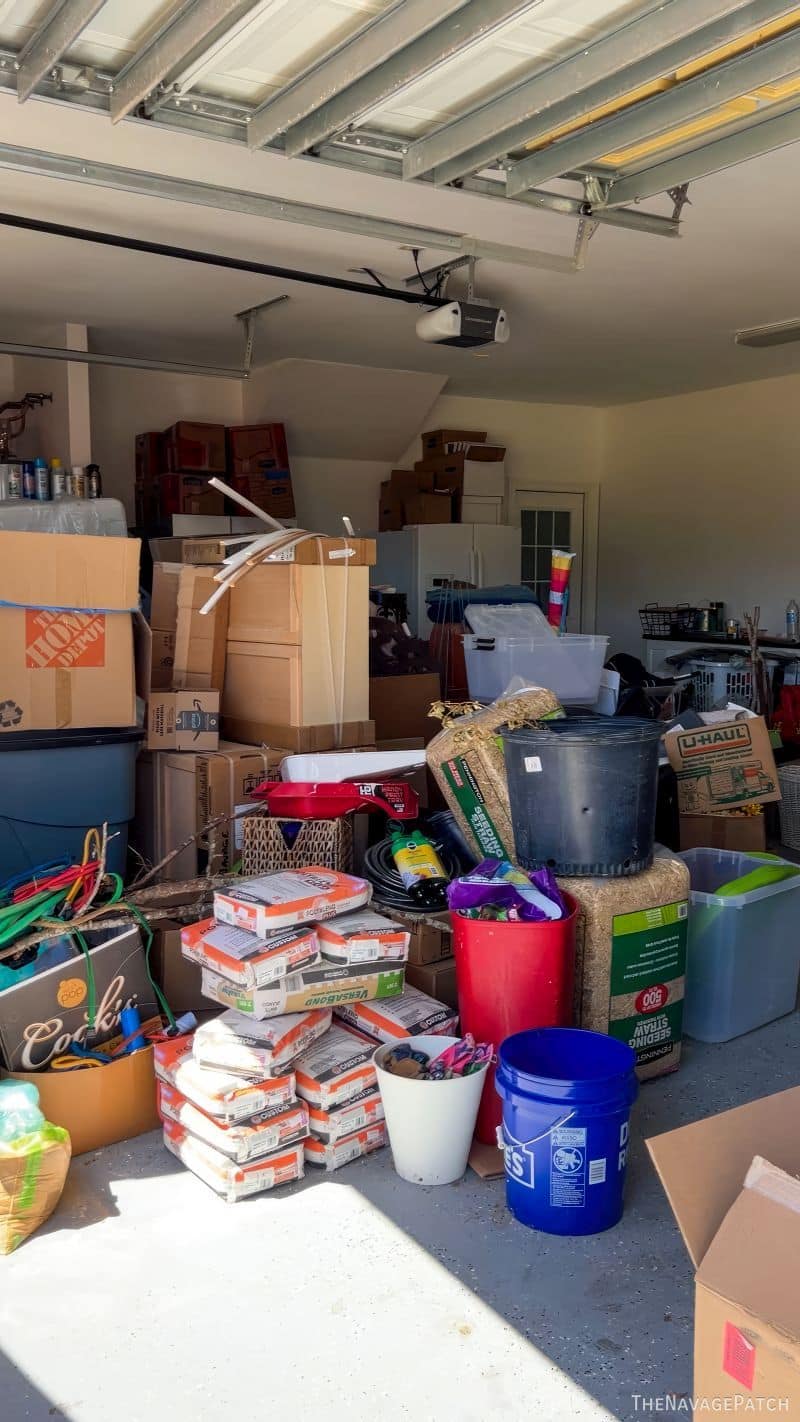
Now, before we open up this cabinet of curiosities, let’s rewind a bit and look at the first steps of our garage and workshop makeover.
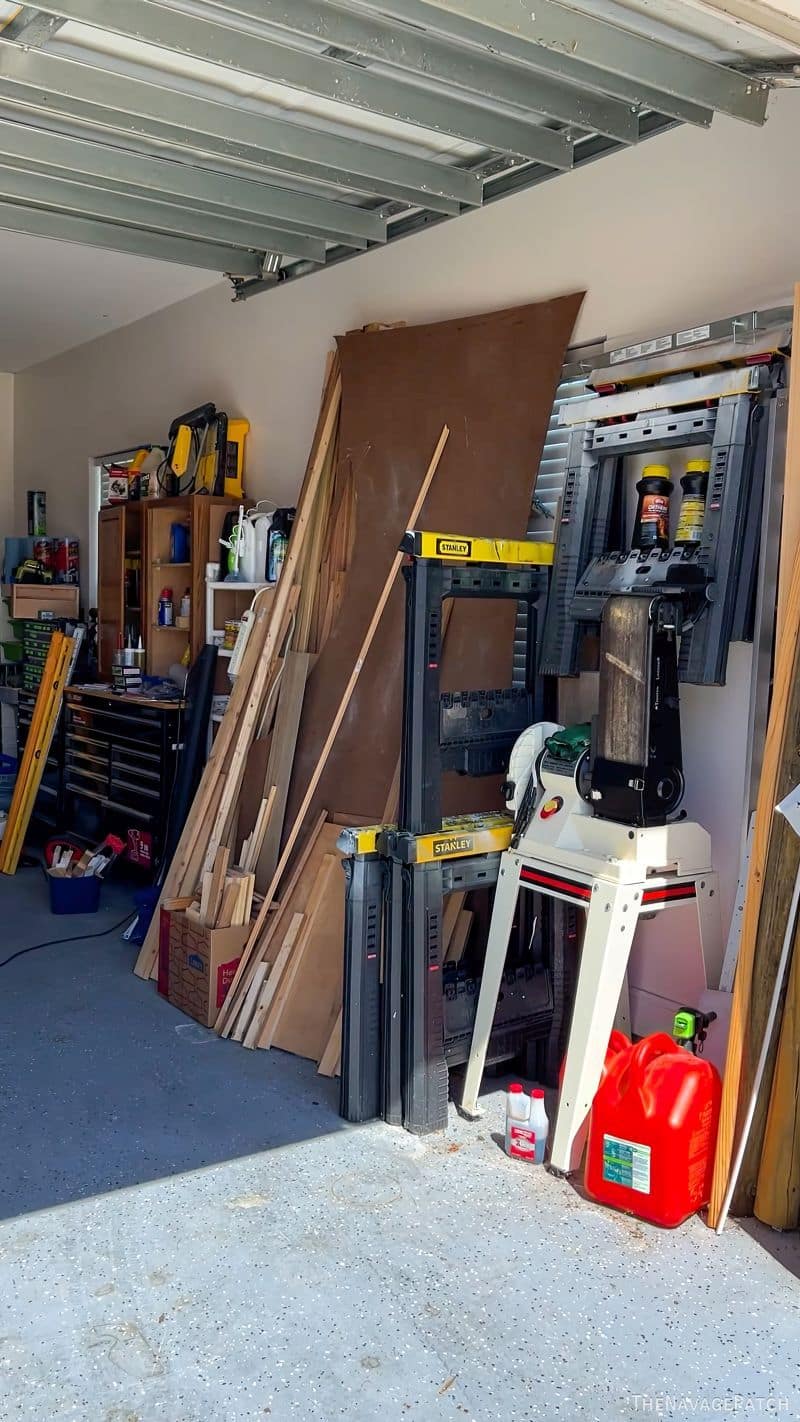
The biggest space-gobbler and eye sore was the scrap wood, plywood and foam that took up almost half of one wall and intruded out into the garage itself. Since there was no other obvious place for storage that wouldn’t be encroaching on proposed cabinet real estate, the only place left for wood storage was…up.
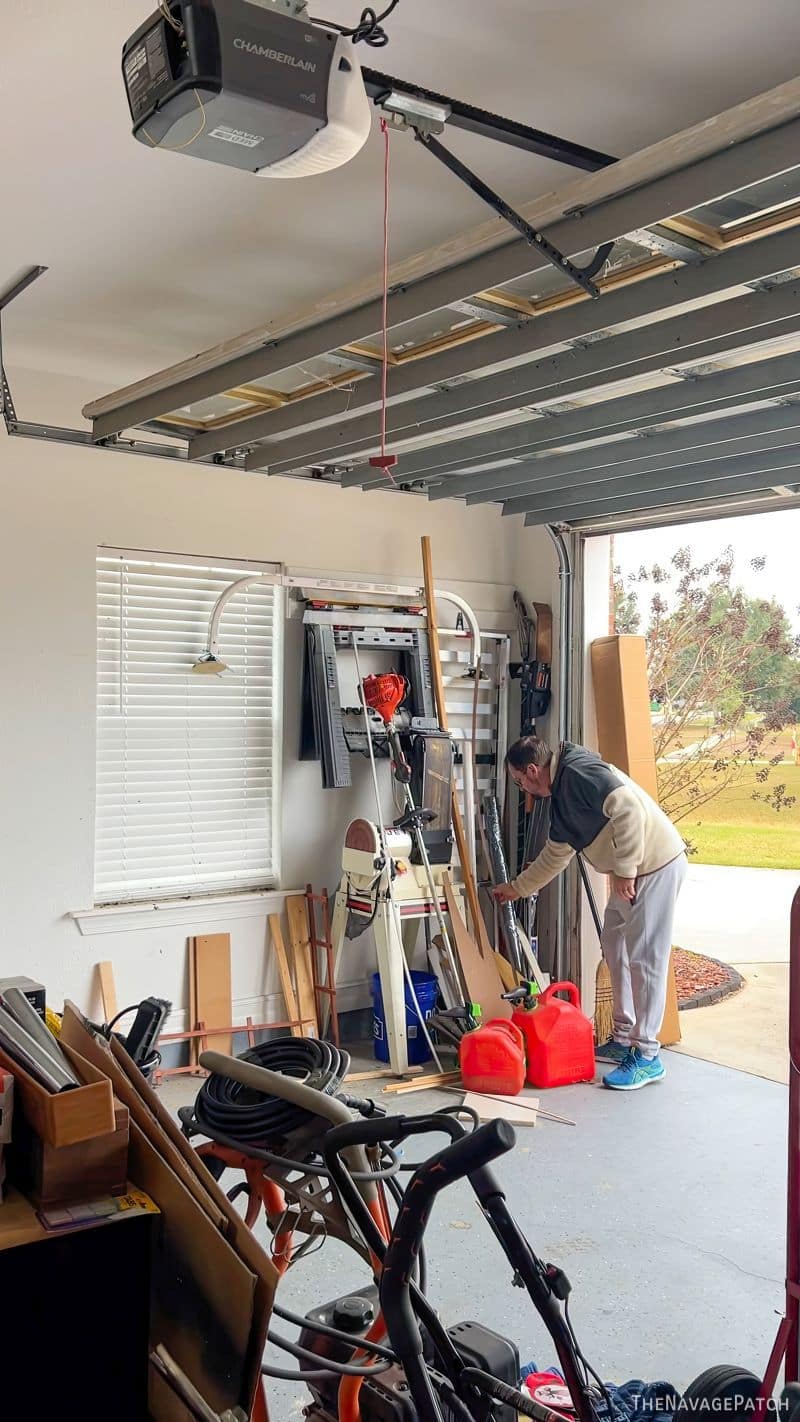
Step one was to clear out all that wood and temporarily clog up the back wall with it.
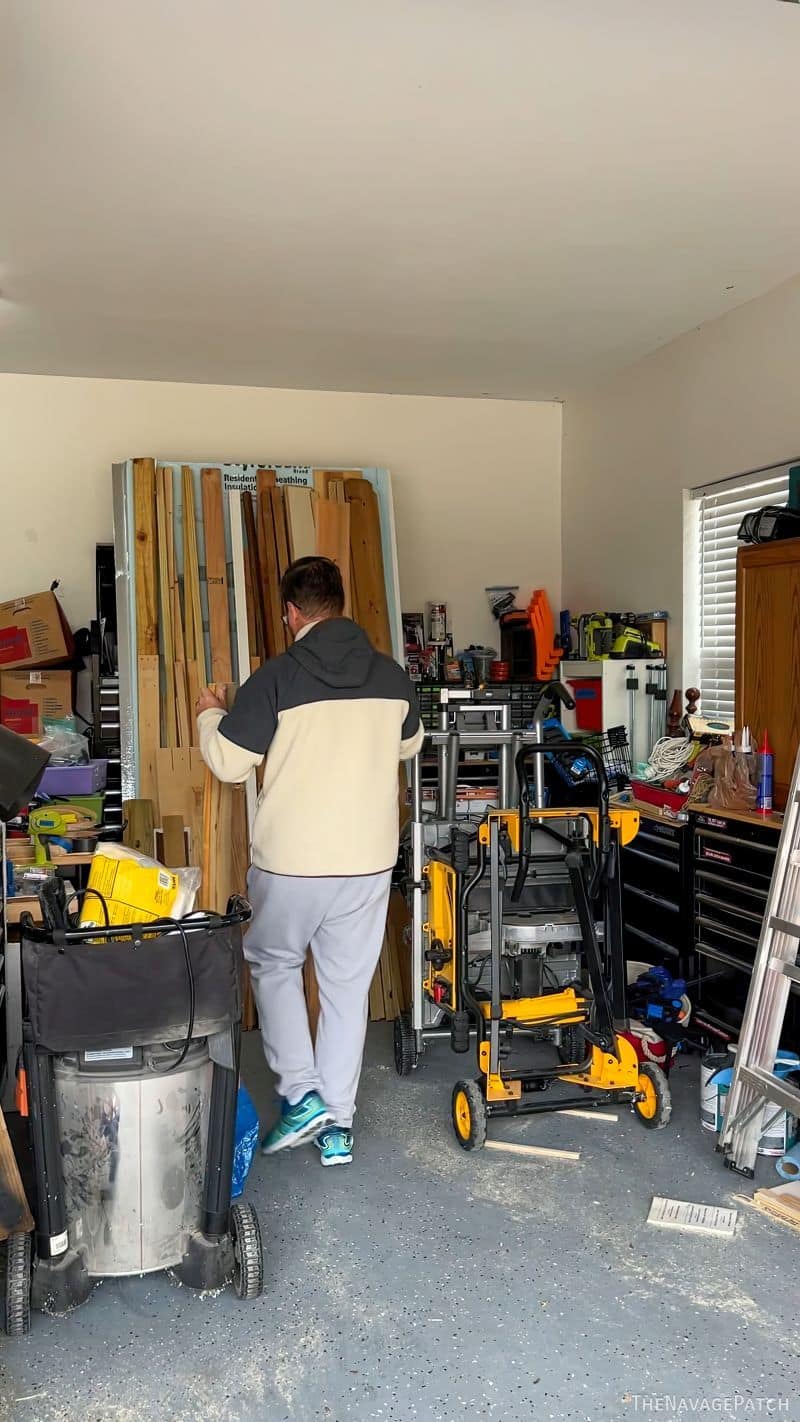
The garage looked better already just by moving all the crap away from the window and door!
When I’d excavated enough to expose a reasonably large patch of wall, I slapped on two coats of paint. All the painting will need to happen piece-by-piece.
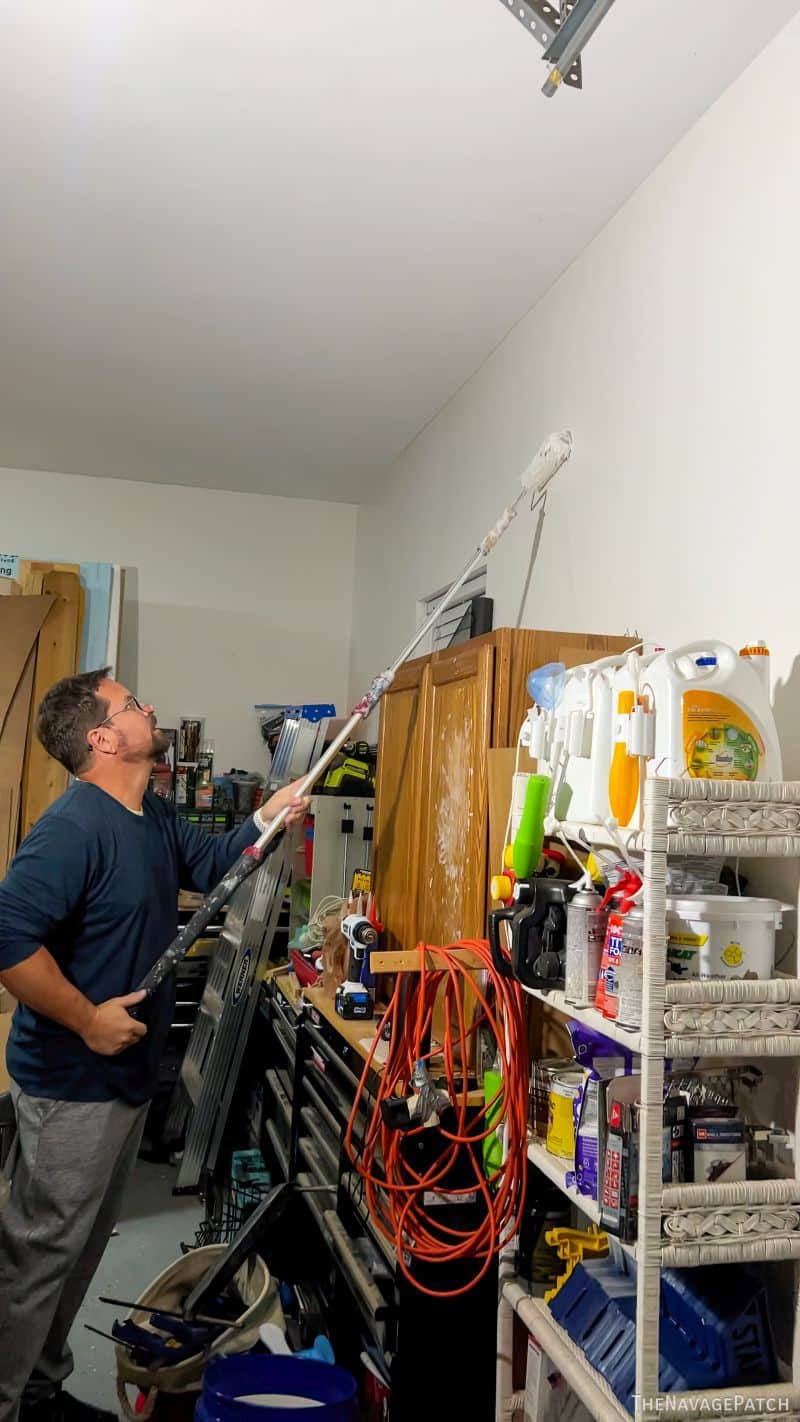
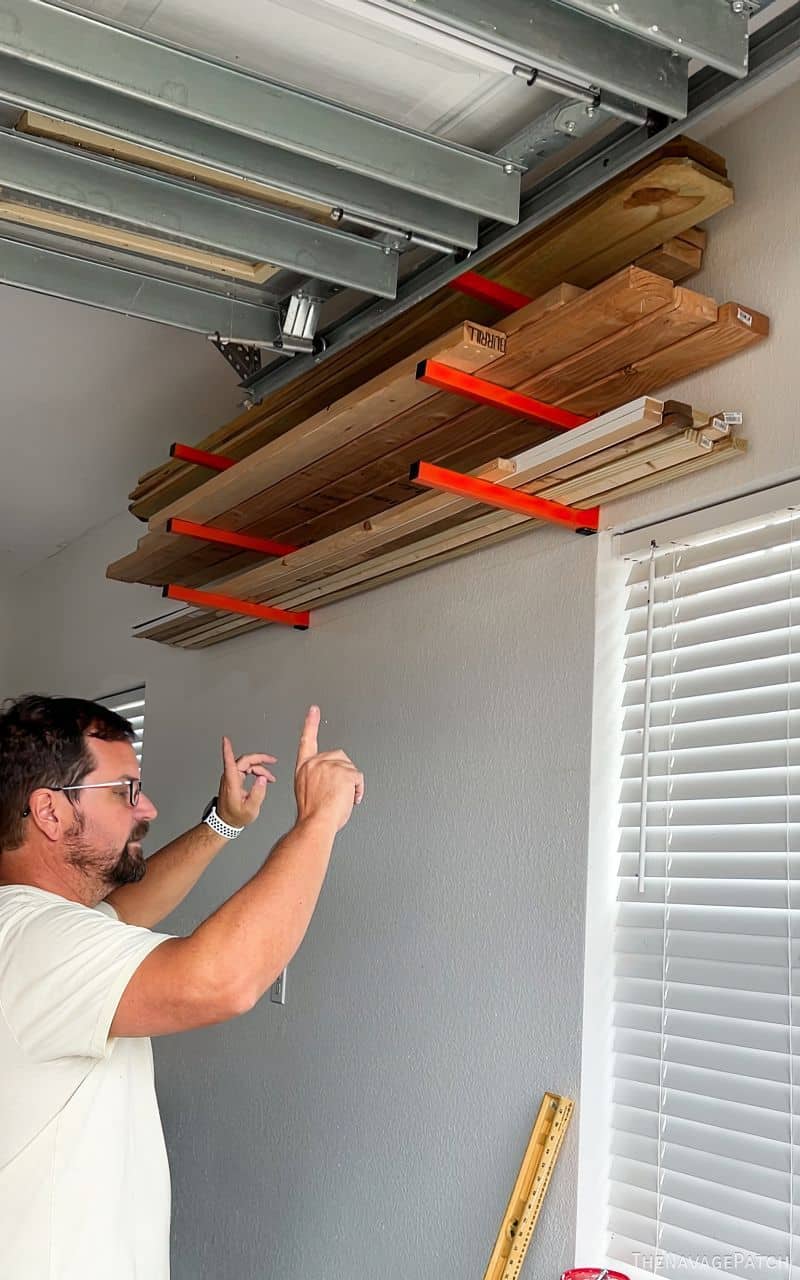
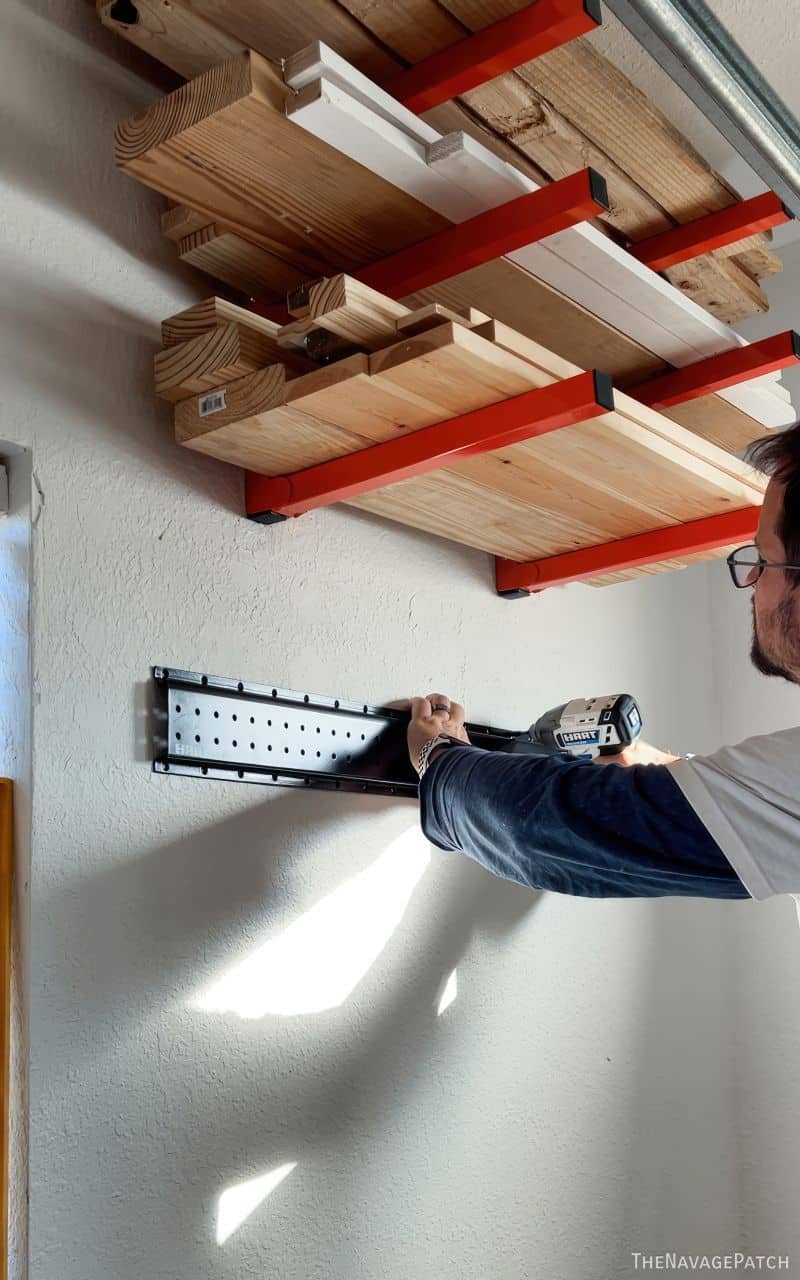
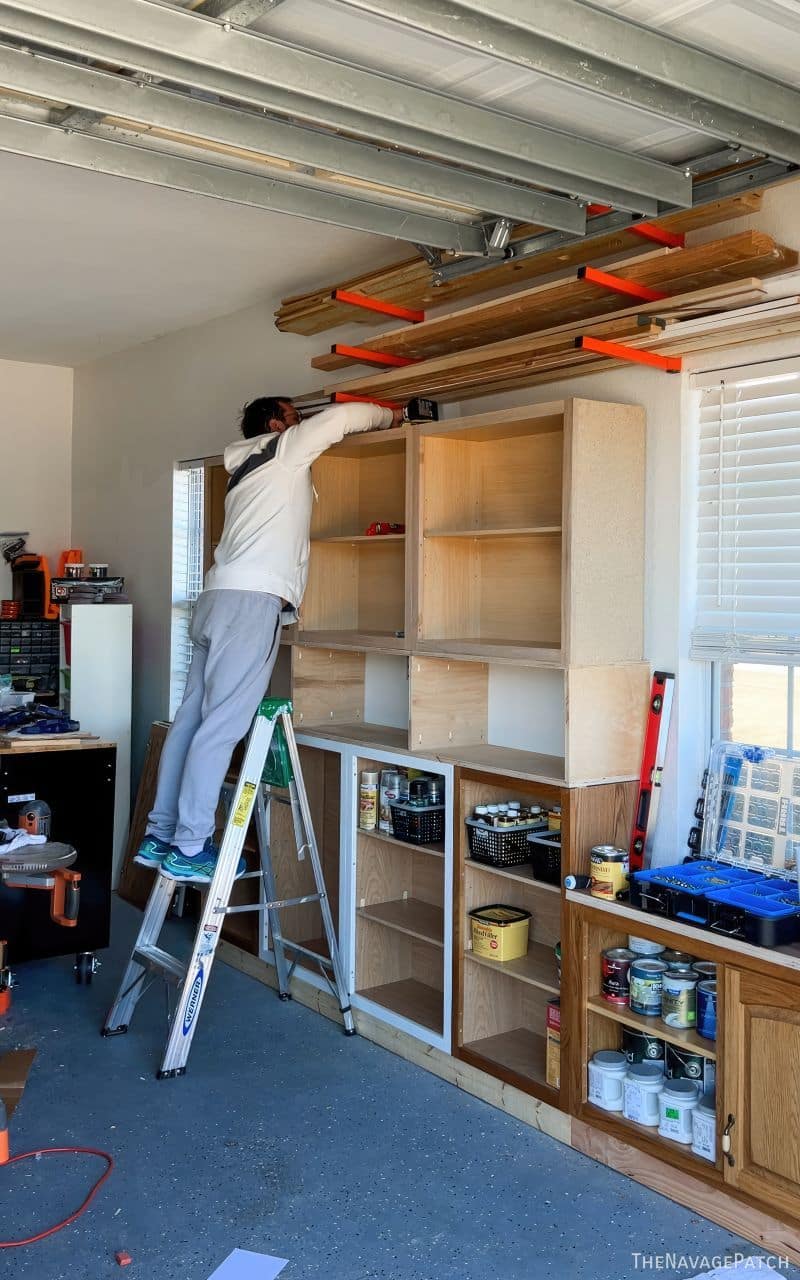
When the paint had dried, I installed a few wood storage racks as high up and out of the way as I could.
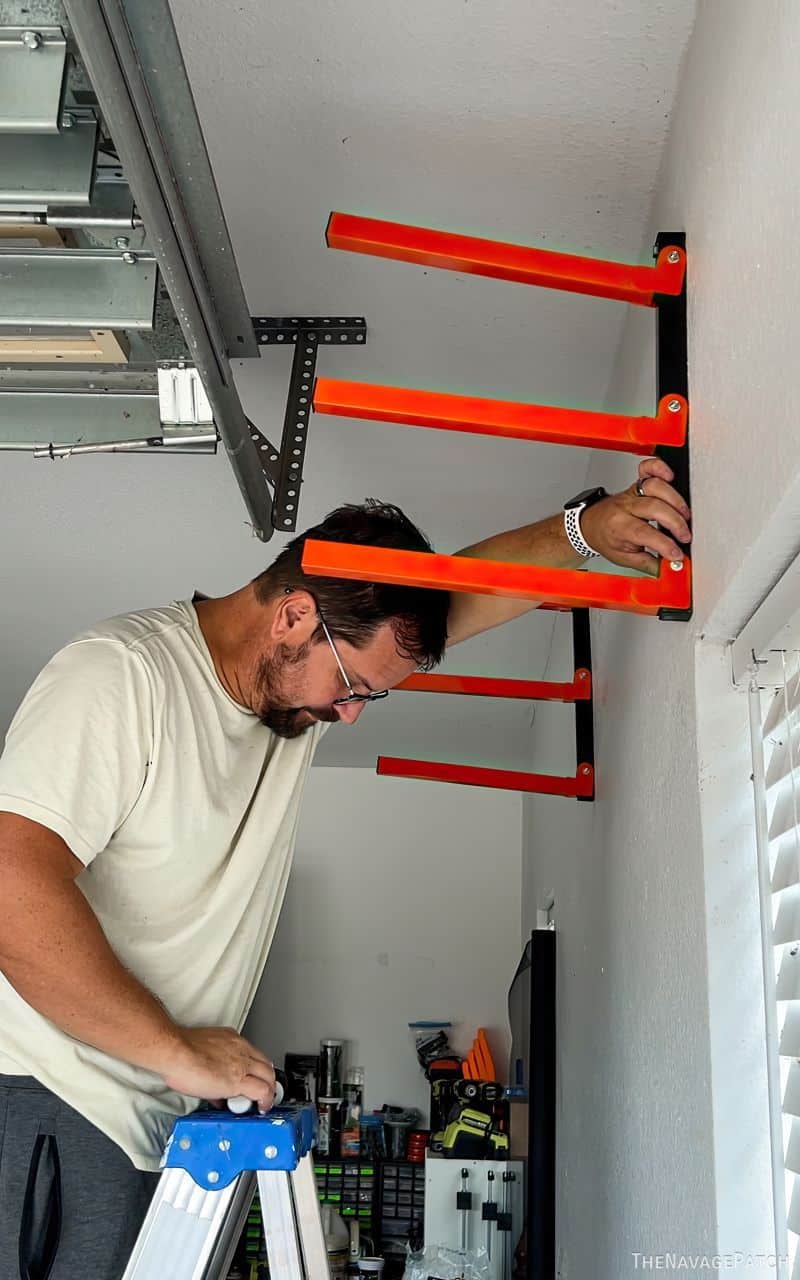
These racks are perfect for clearing the useful scrap off the floor and keeping them out of the way.
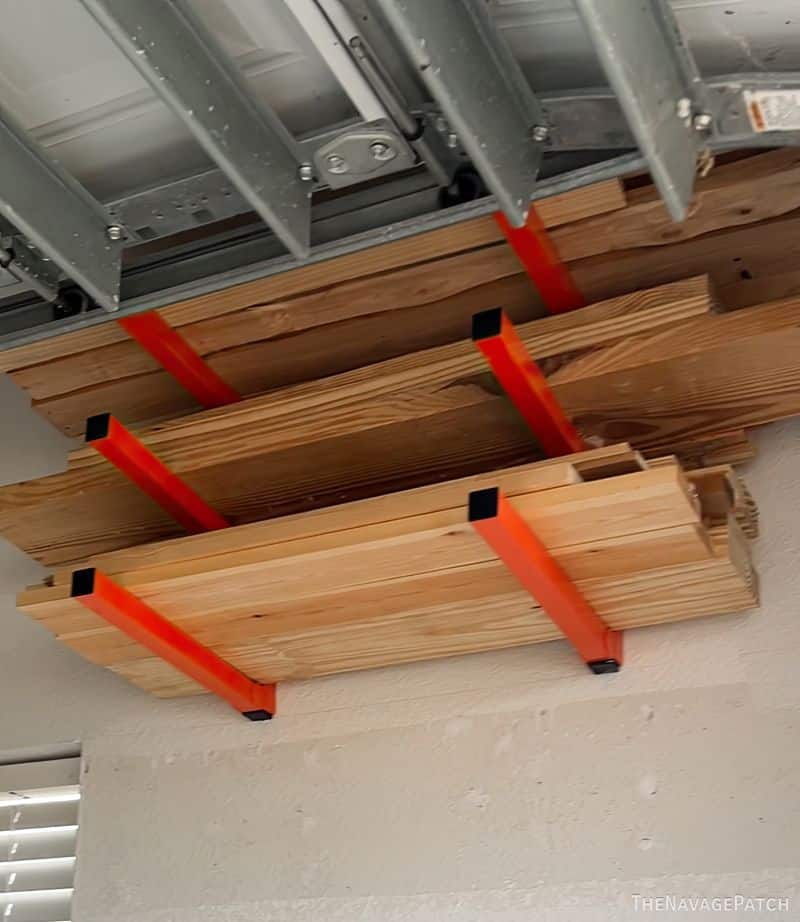
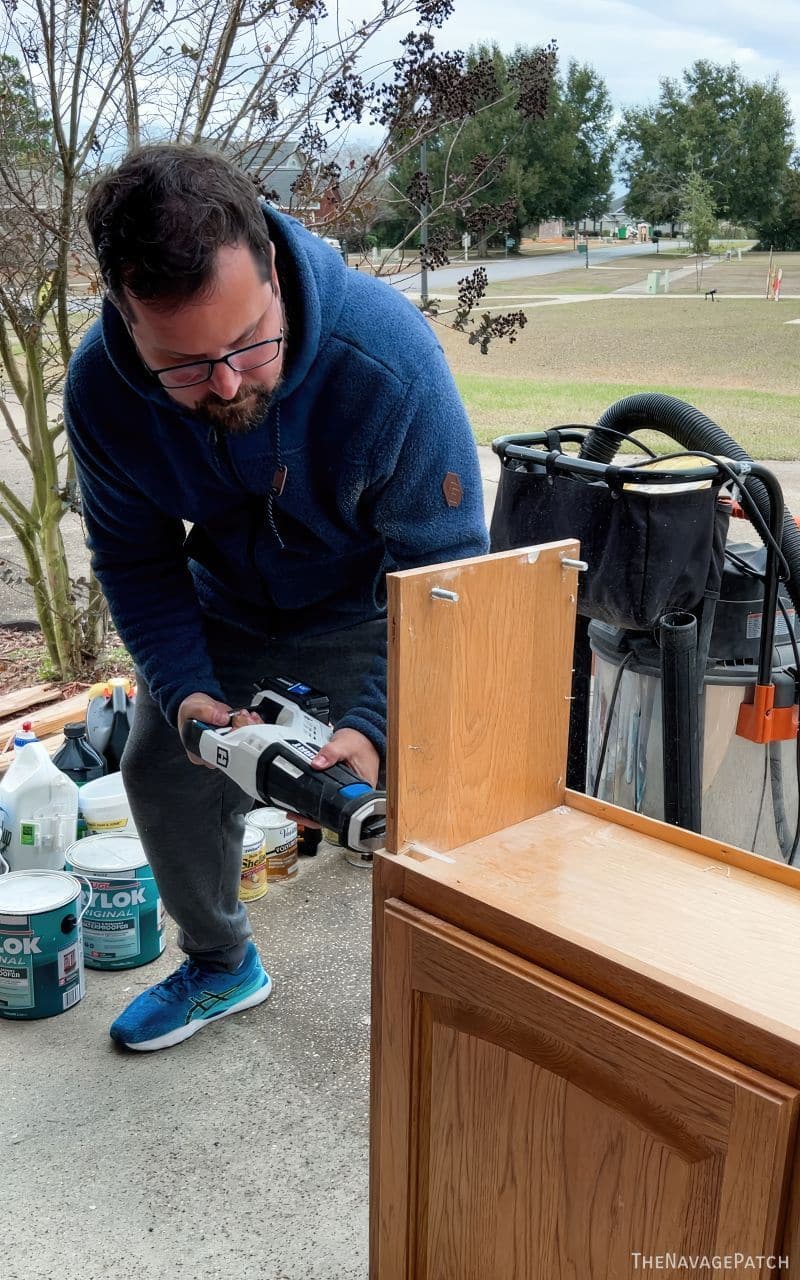
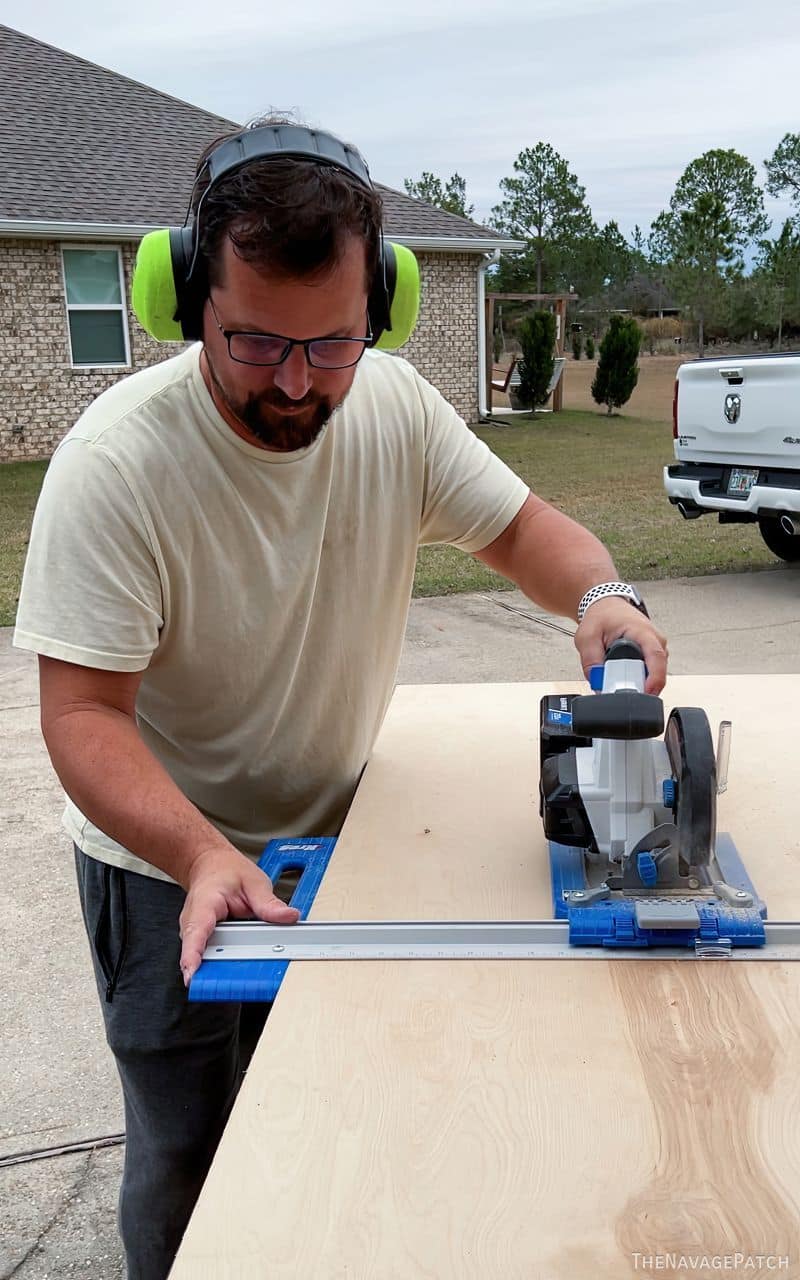
For my first cabinetry trick, I’d be installing these kitchen cabinets we scored for free from a woman in Shalimar who was demoing her kitchen. They may look dated, but these buggers are heavy as heck because they’re made from real hardwood, not MDF and composite.
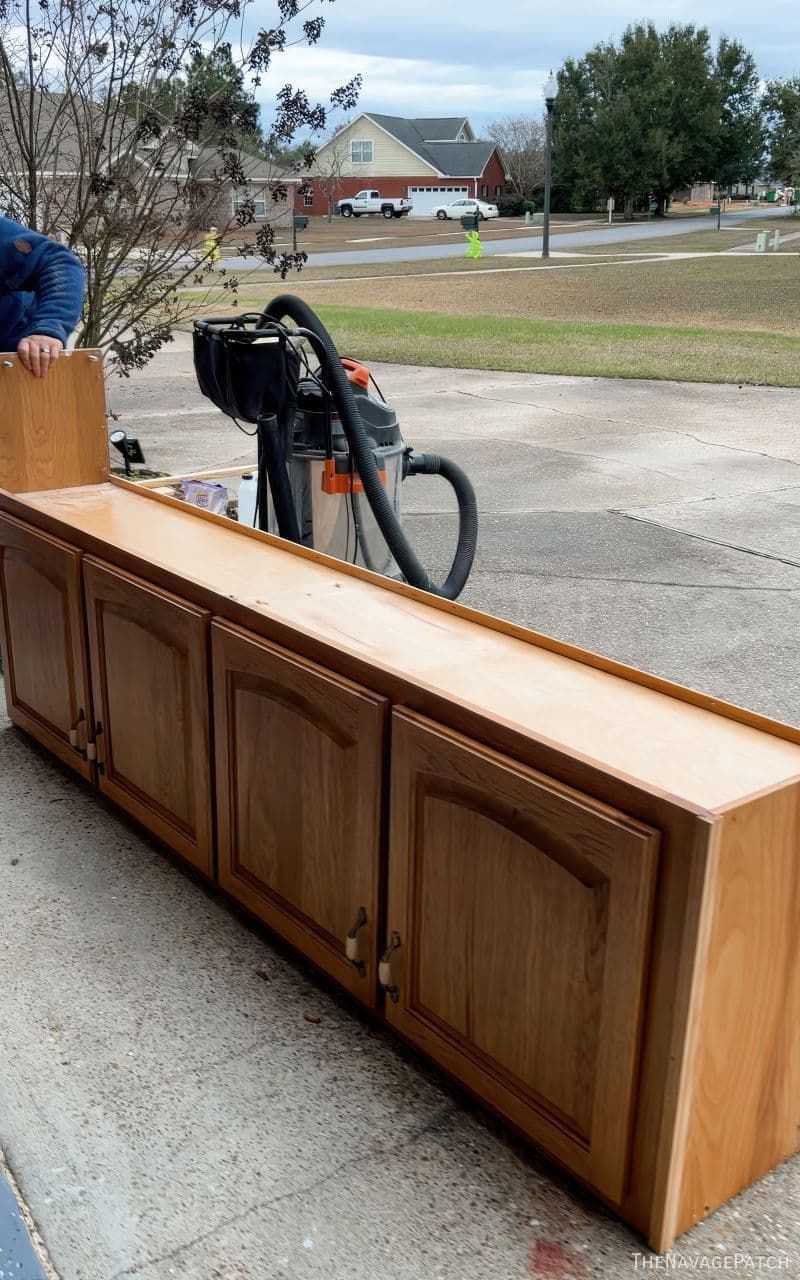
They only needed a little modification, and then they were ready to press into service.
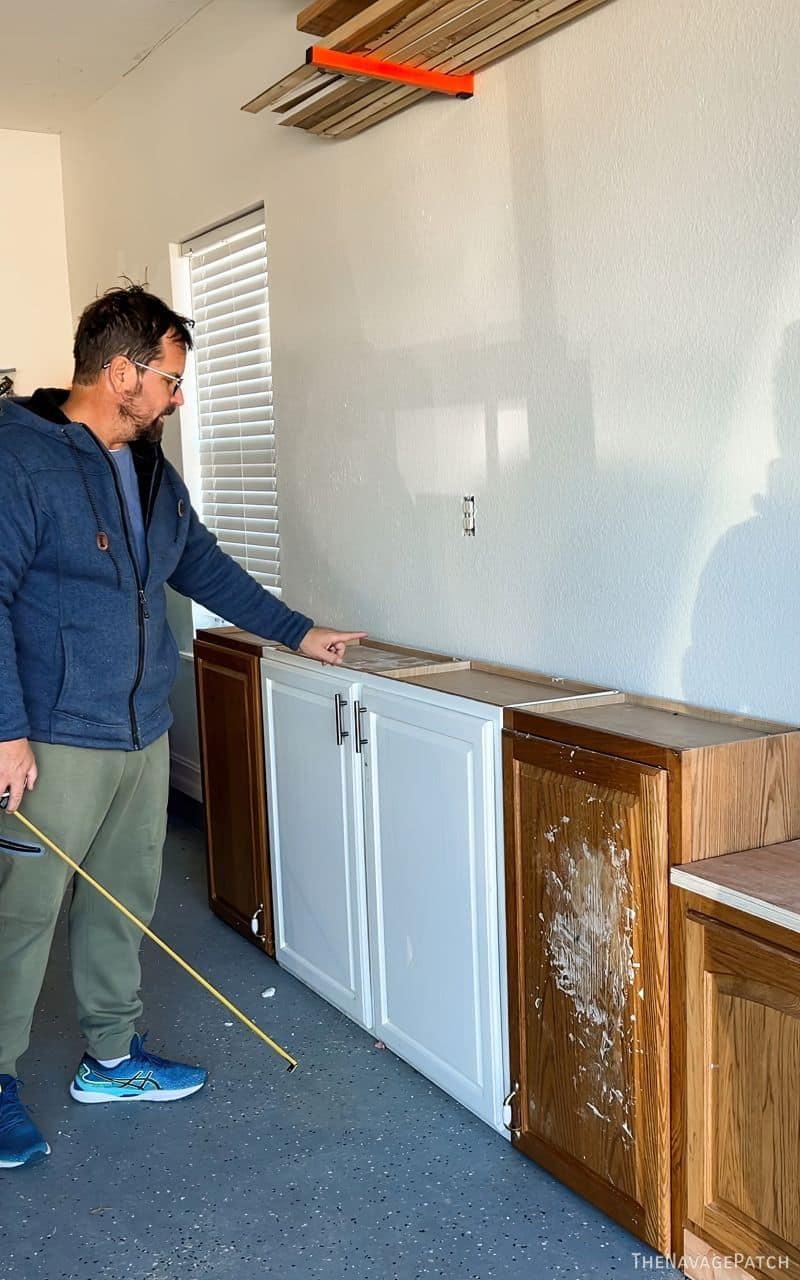
Though they were upper cabinets in their previous home, they’d be shallow base cabinets in their new garage home. I made a countertop from plywood.
I placed the cabinets where I’d be installing them to see how tall a base I’d need to build to bring the countertop level with the window sill.
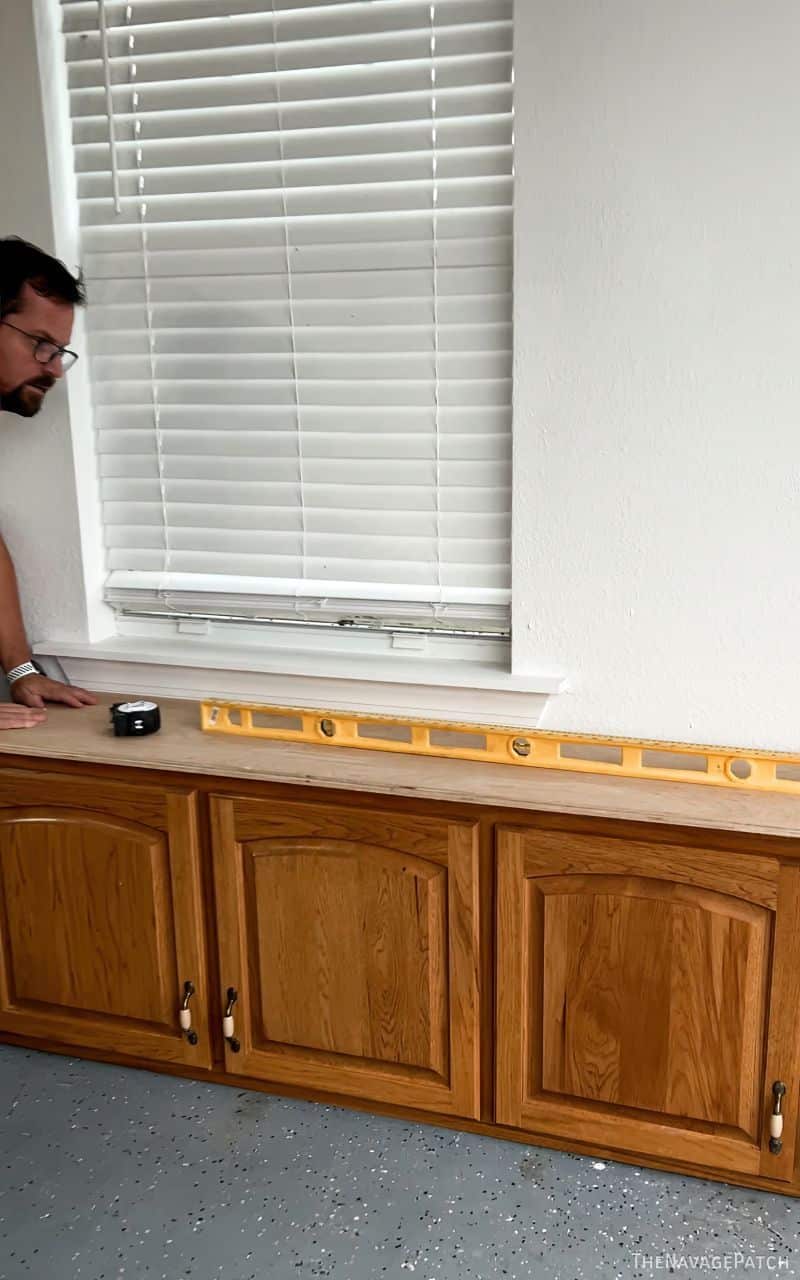
I removed the trim from underneath the window to gain more space for the cabinets.

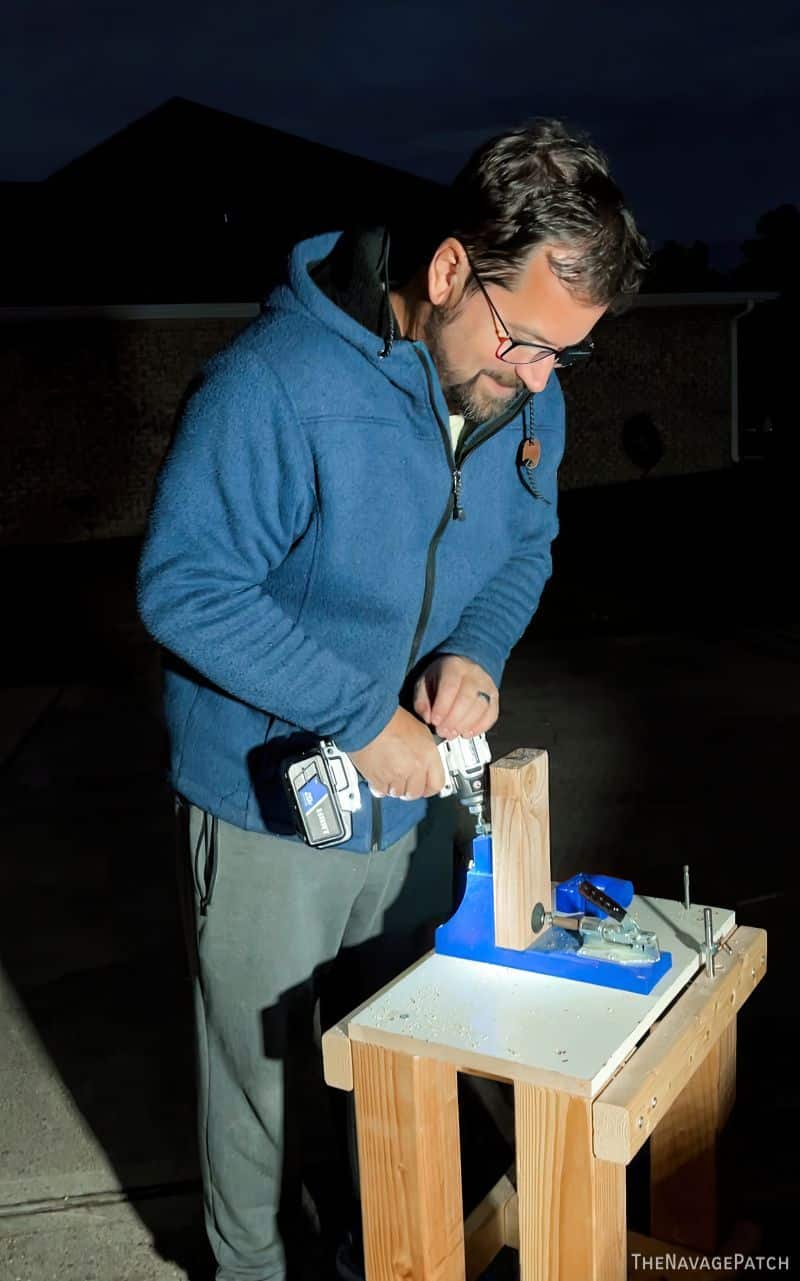
Darkness was no match for my base-building skills, as Handan and I worked into the night to get the garage makeover rolling.
Once the cabinets and countertop were installed under the window, I started in on the next area.
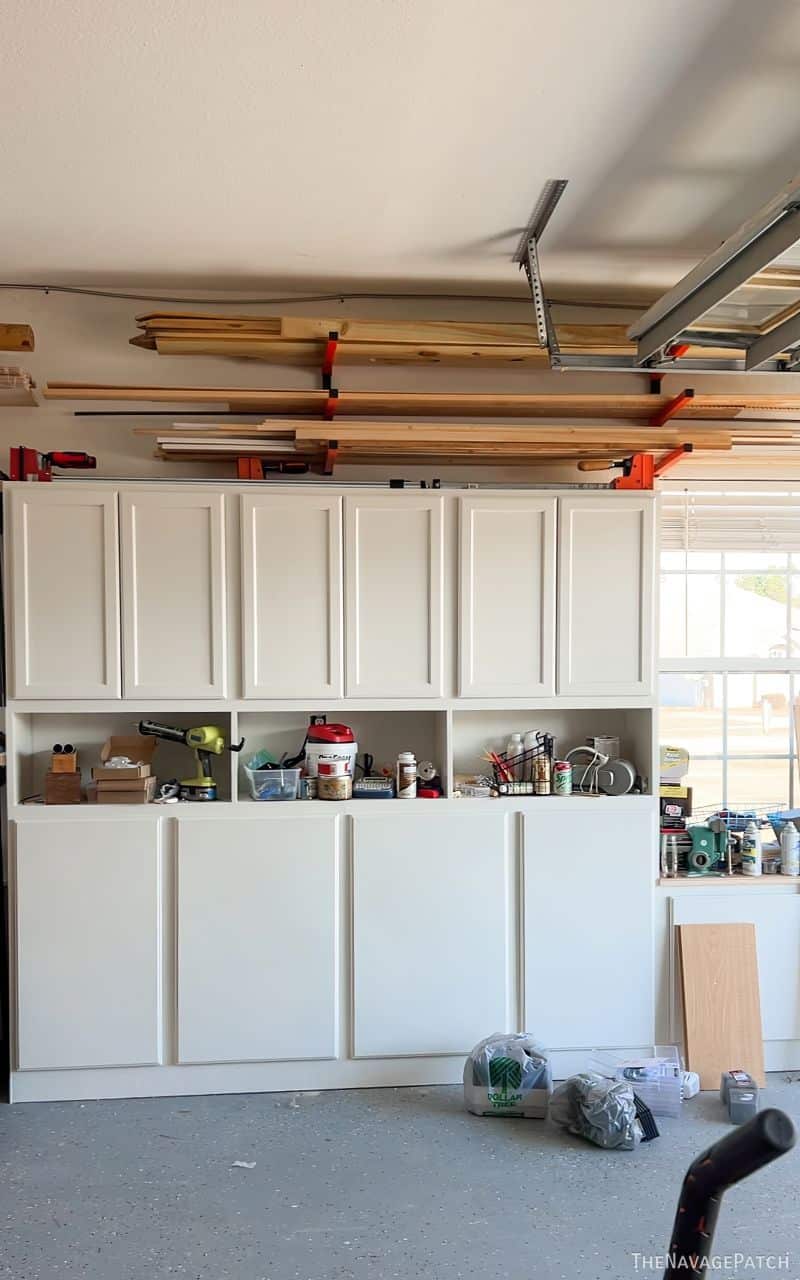
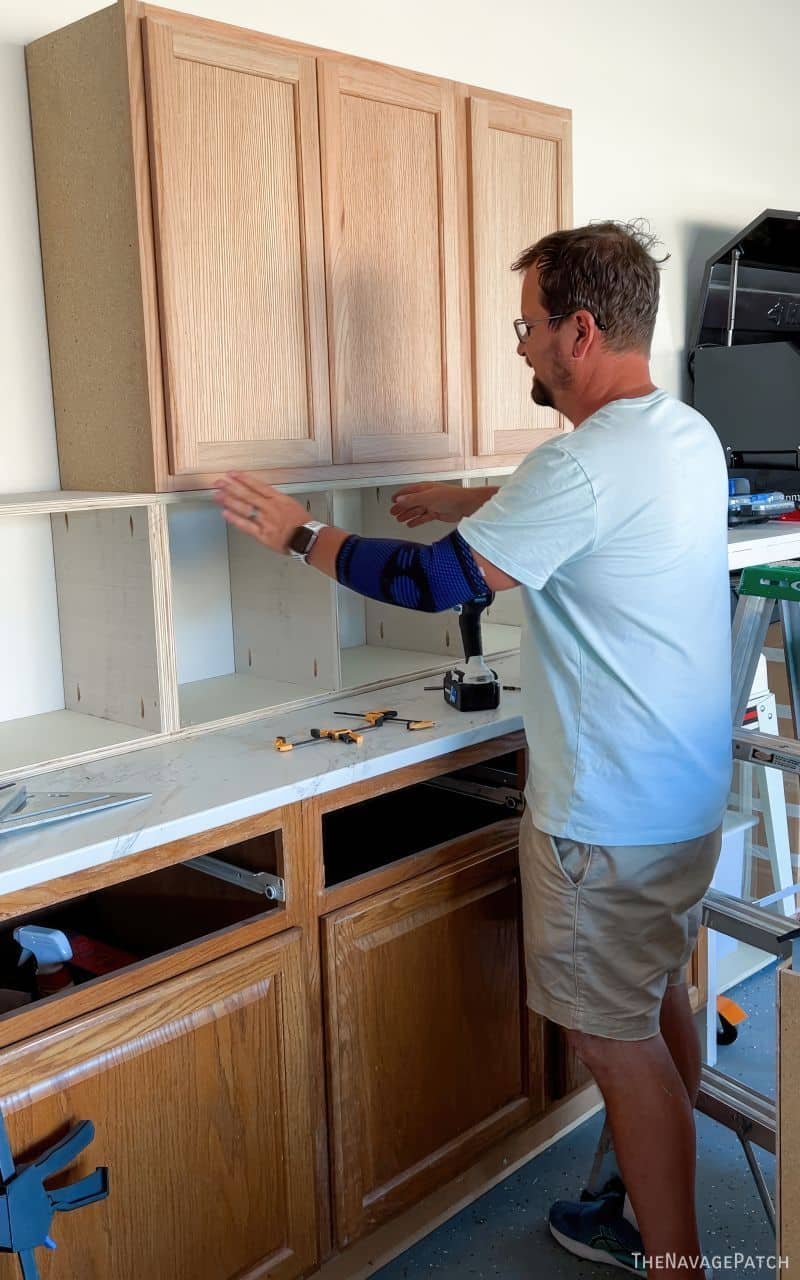
The space between the two windows would get three levels of cabinets – the first level would be four old upper cabinets from Georgia, the middle cubby-cabinets I’d build from plywood, and the upper cabinets would be Project Source unfinished cabinets from Lowe’s.
But first, my babes and I installed a garage storage system made by HART Tools above the cabinets I’d just installed. We’d earmarked this little area by the garage bay door to keep some of my most-used items, so I’d always have them at hand.
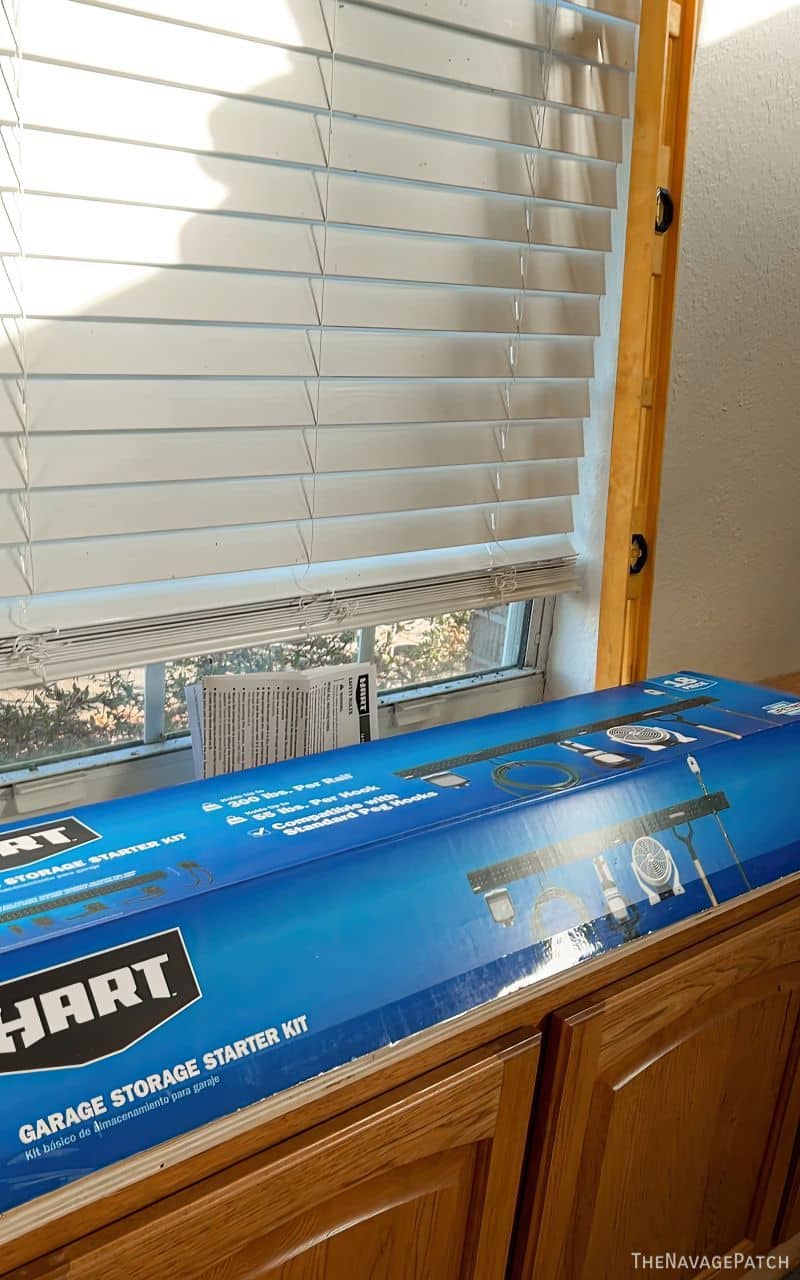
HART’s garage storage system is perfect for any-size garage, though for us it was just one part of a much bigger solution. For some – especially those just starting out in DIY – it may be enough on its own. But for those of us who’ve been DIYing for years and years and years, a wall-mounted storage system would never be able to handle the tsunami of accumulated crap that comes with the territory.
The storage rails install easily into studs, and the included accessories make hanging your most useful tools a breeze.
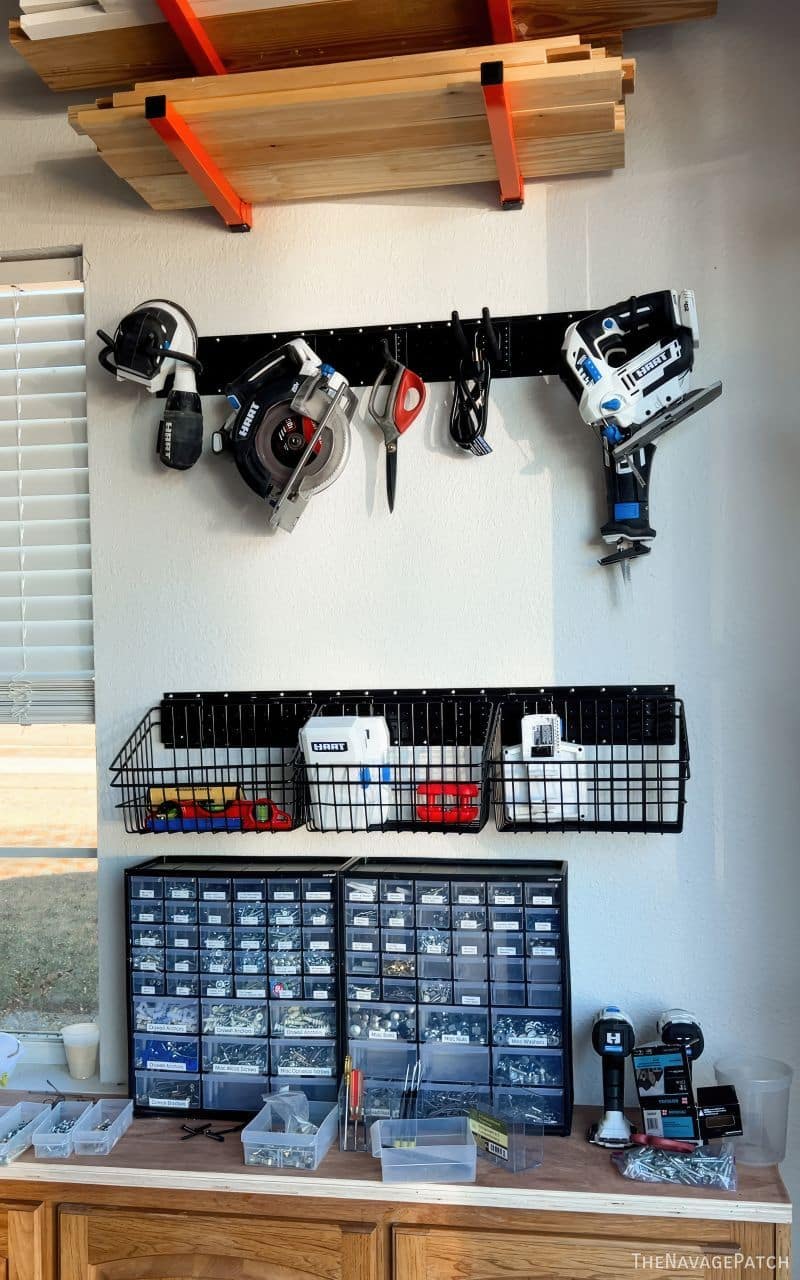
This was the first of a few different storage configurations we tried since installing the storage system.
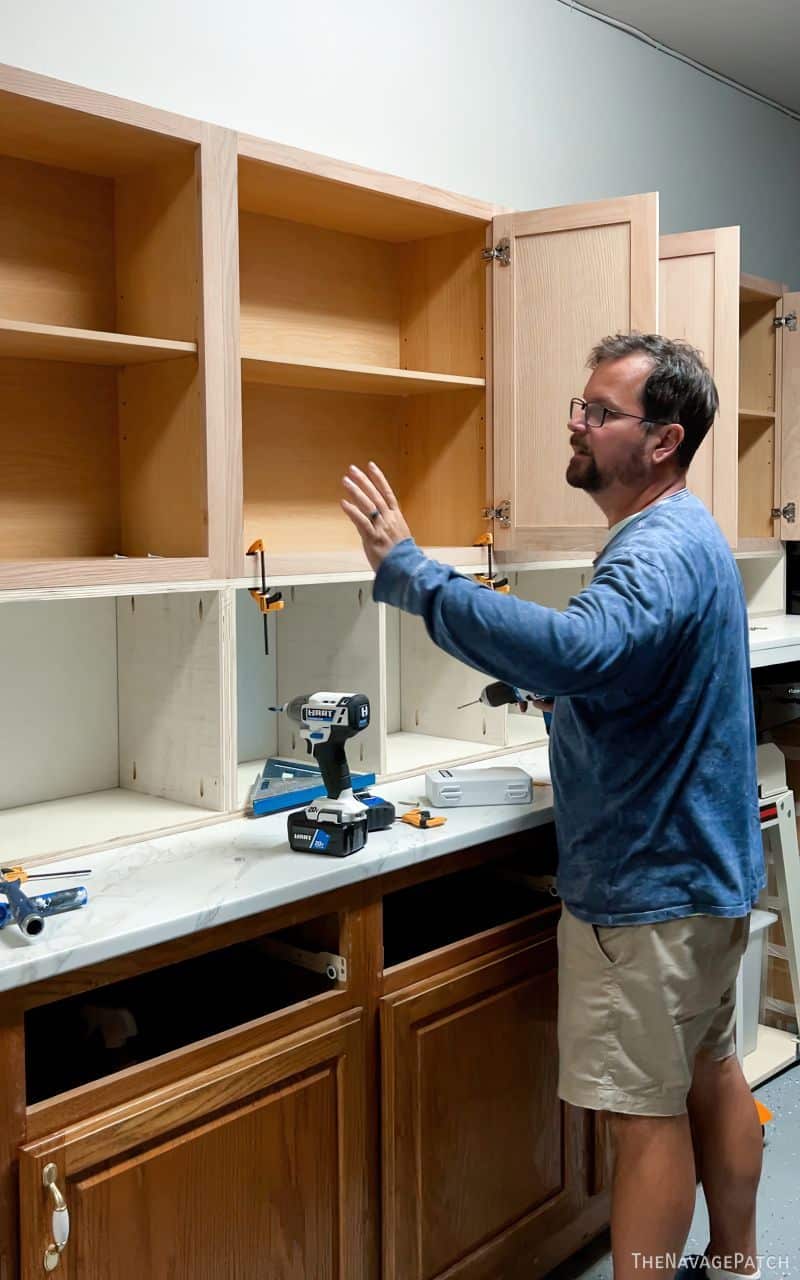
I carried on with the cabinet install between the windows. Before placing upper cabinets, we wanted an open cubby area. This would give more storage raise the upper cabinets to just below the wood storage rack.
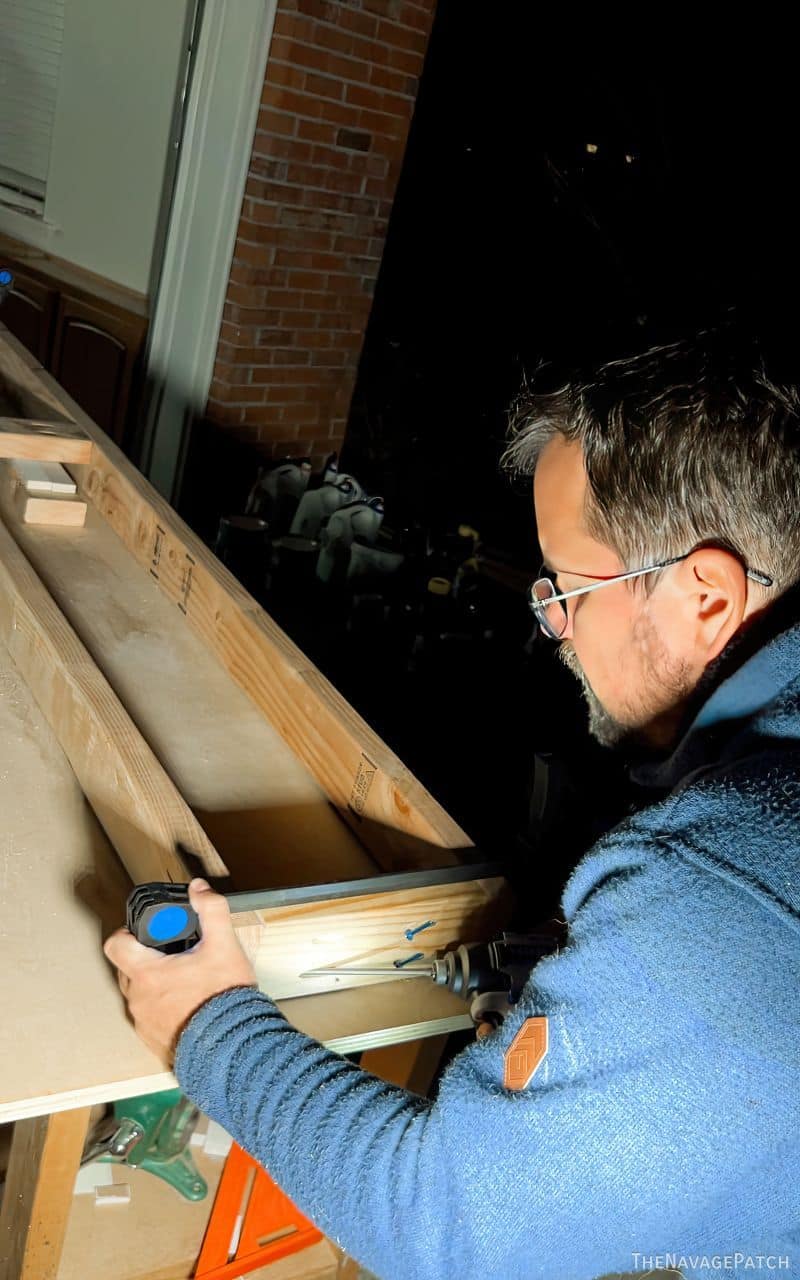
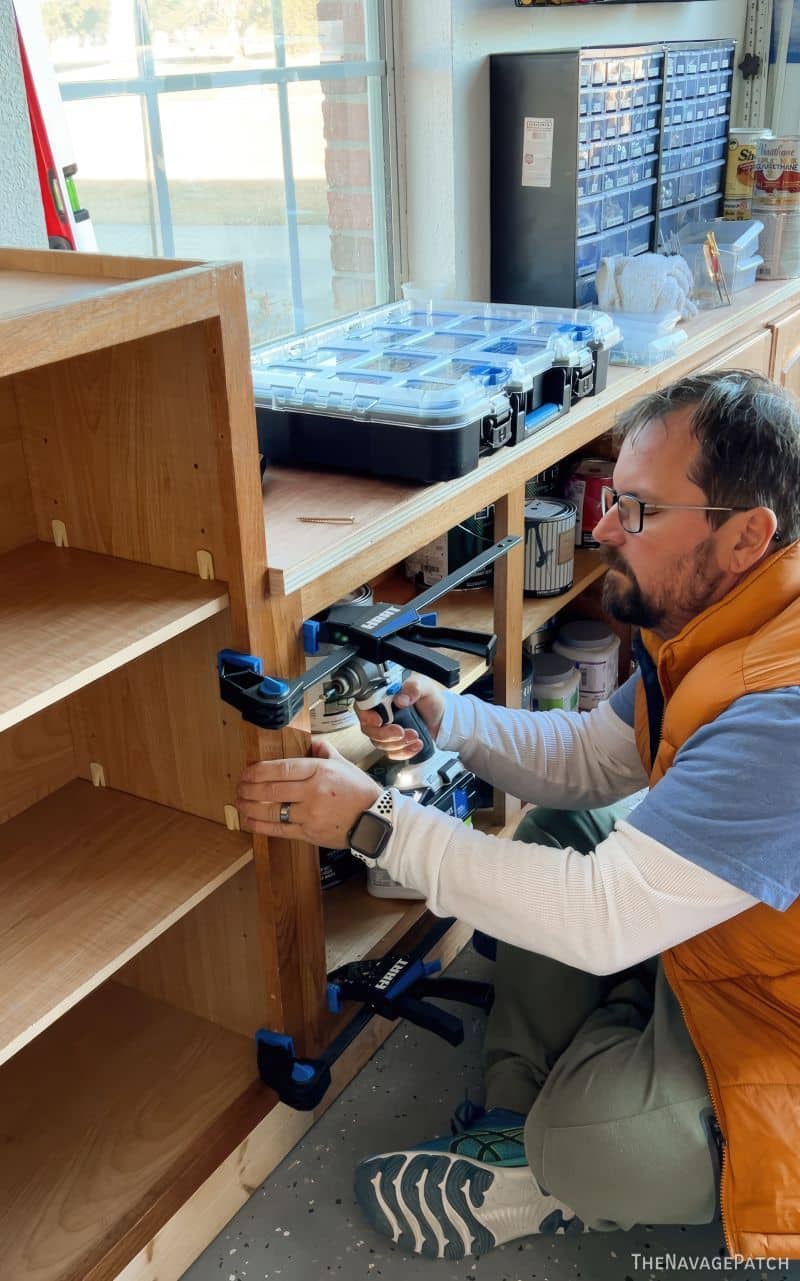
Before installing the cubby, I built a base for the 4 new cabinets, leveled them and then screwed everything together. Penny and Pepper seemed interested but stopped short of offering any useful assistance.
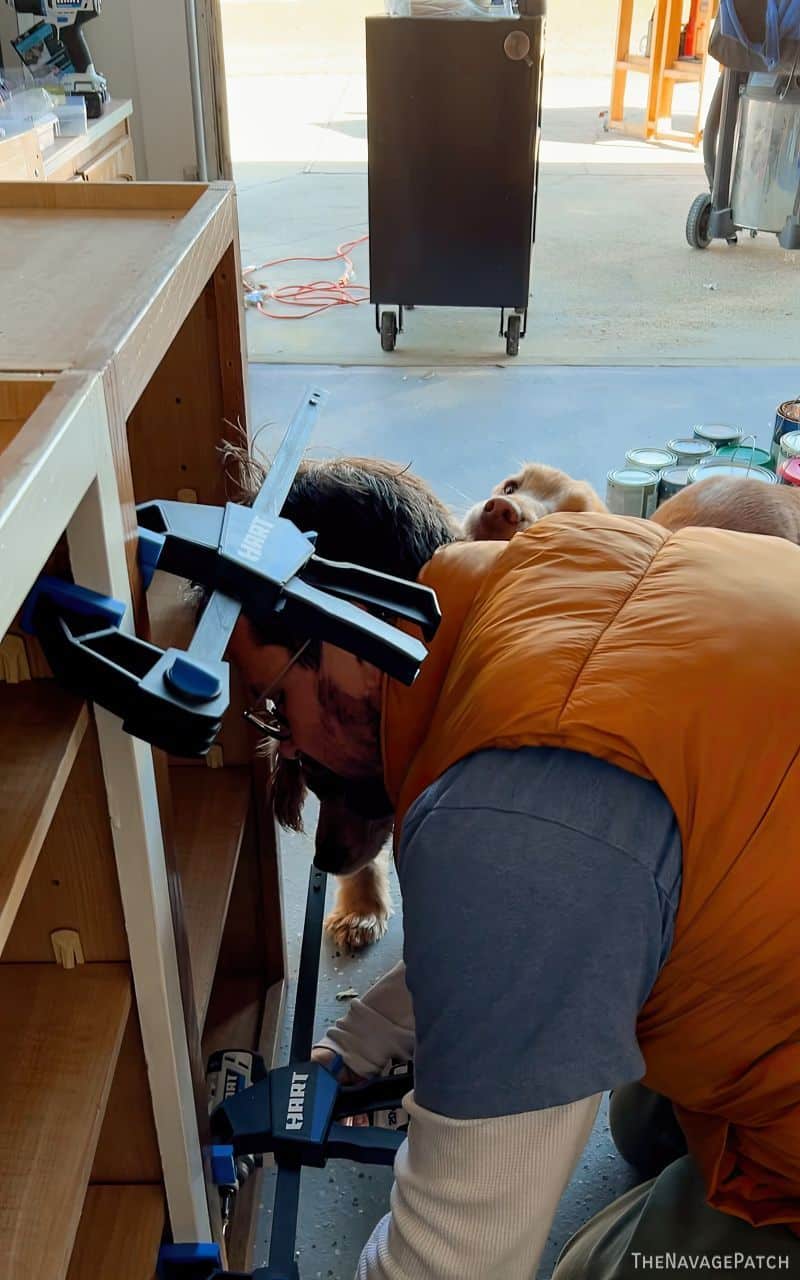
When screwing cabinets together, I clamp them first to make sure they don’t shift at the last minute.
I built the cabinets while my camerababes was elsewhere, but they’re simply two long pieces of 3/4 inch plywood with 4 pieces between them all held together by Kreg pocket screws.
I then placed three Project Source unfinished cabinets on top.
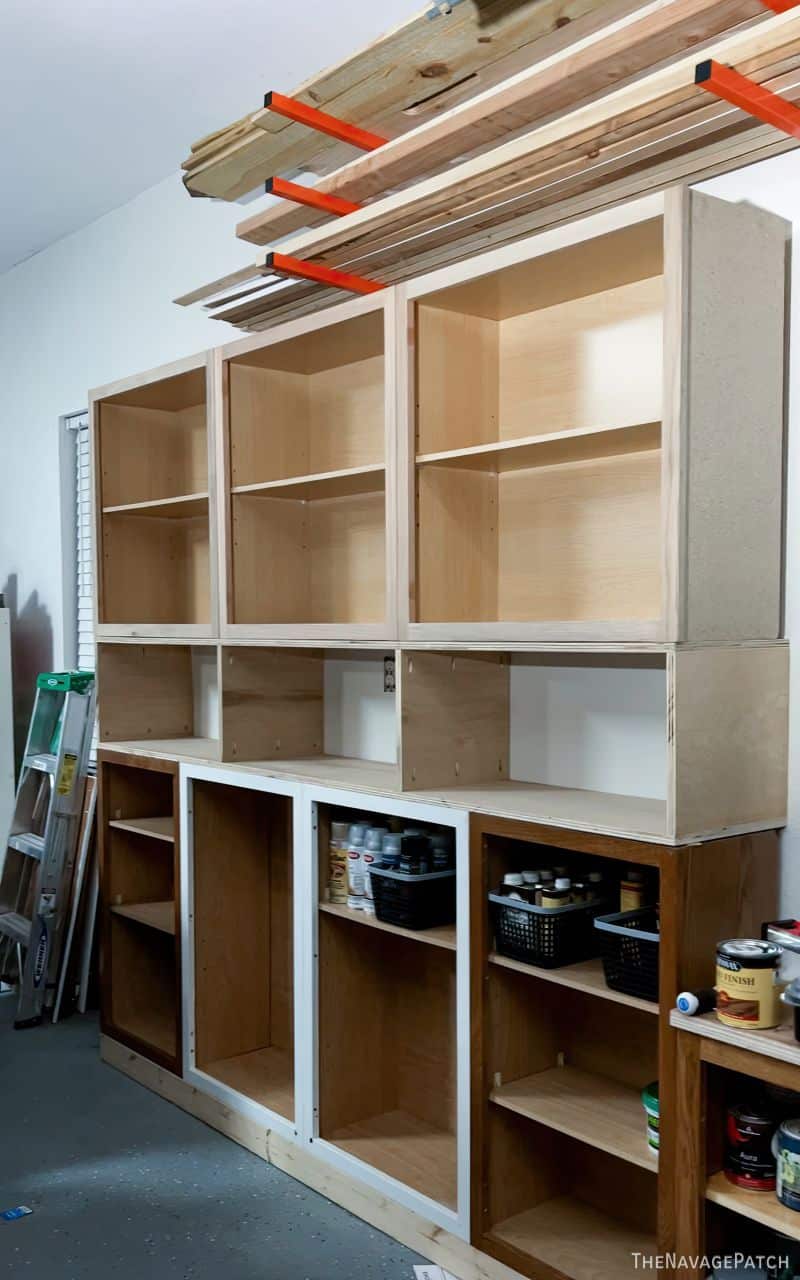
This is Frankenstorage at its finest, and I think it really captures the essence of what it is to be a DIYer.
In addition to screwing all the cabinets together, I also secured the upper cabinets to the wall. These cabinets ain’t going anywhere!
Though this is Frankenstorage, it doesn’t have to look like Frankenstein’s monster. I used wood filler on all the gaps before painting. Hey, you can’t have a true garage mahal if your cabinets have more gaps than my memory.
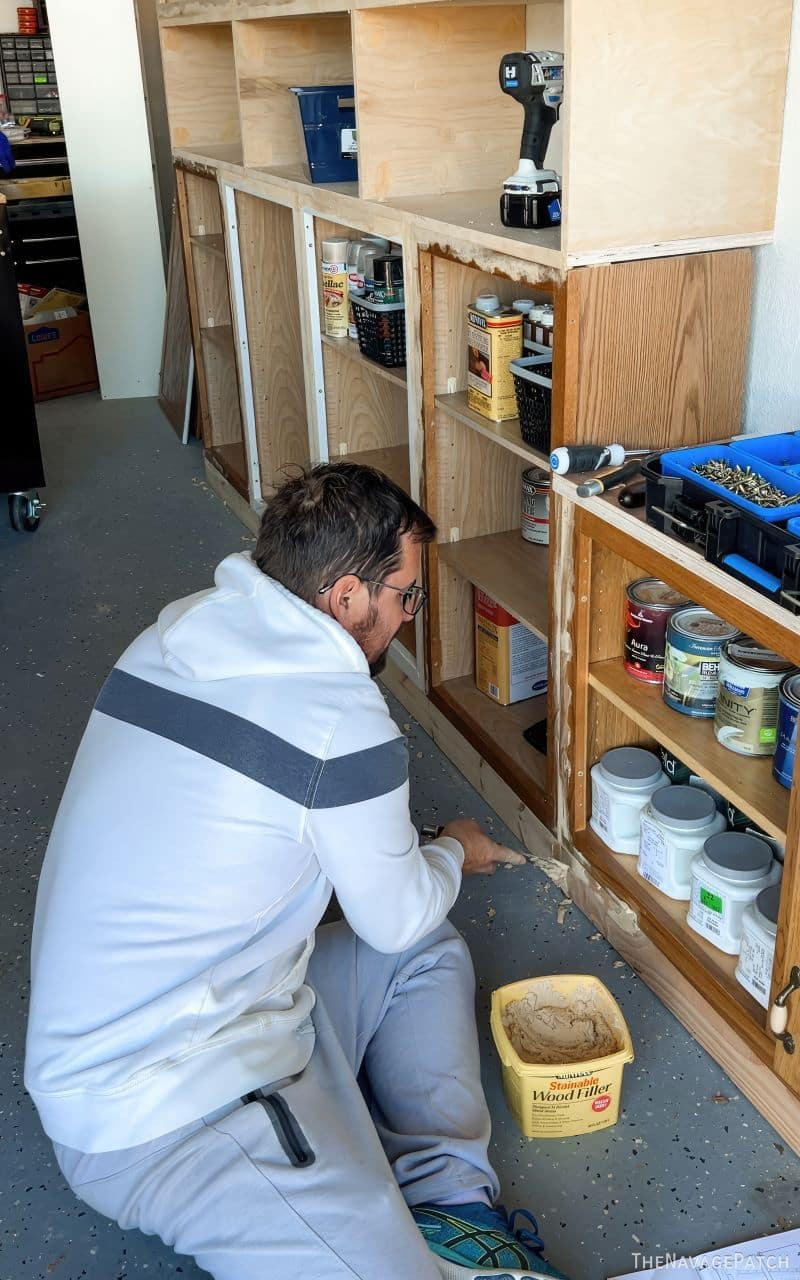
Sanding the wood filler…

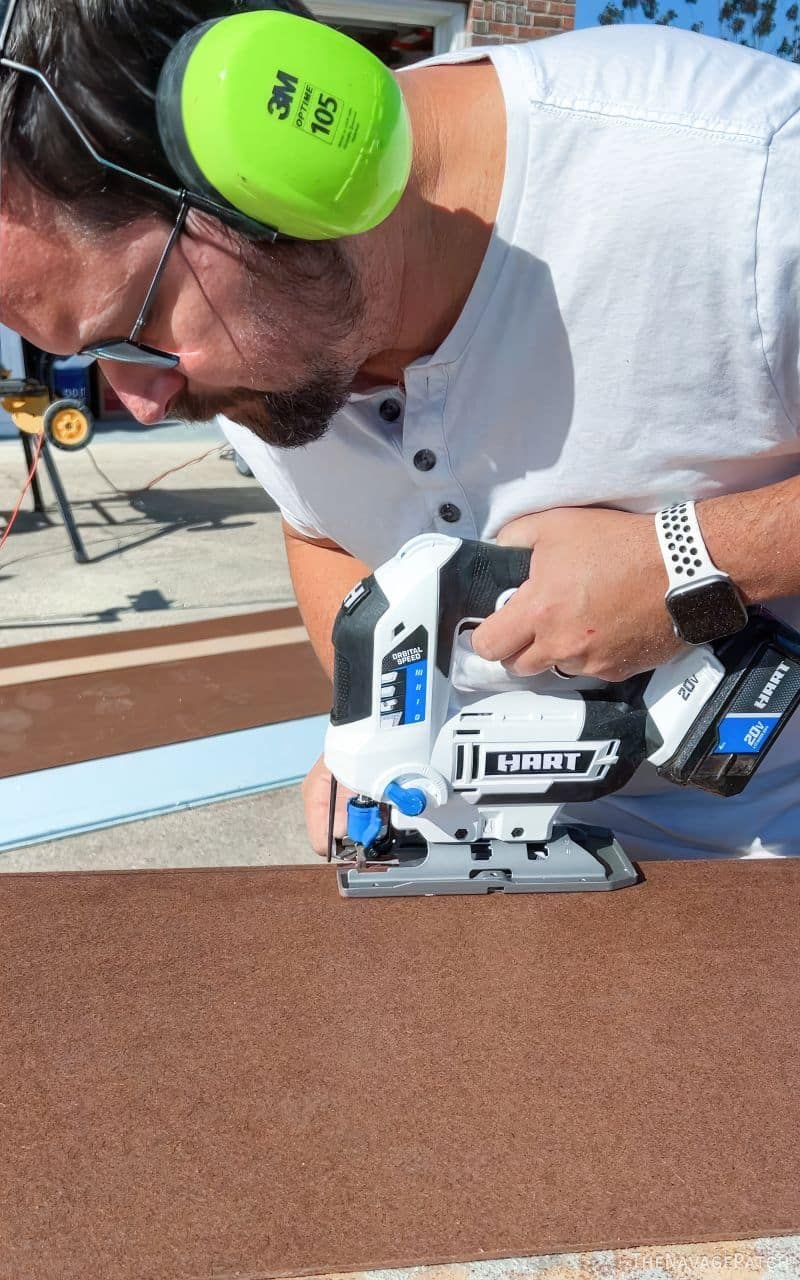
I cut some side panels from hardboard. You may have noticed HART Tools in a lot of these shots. I’m switching over to them, as I’m very impressed with their price/performance ratio. This is a brand I’m proud to promote. As with all the other tools I’ve used, their jigsaw cuts like butter.
I slathered construction adhesive on the cabinet sides and then installed the hardboard side panels.
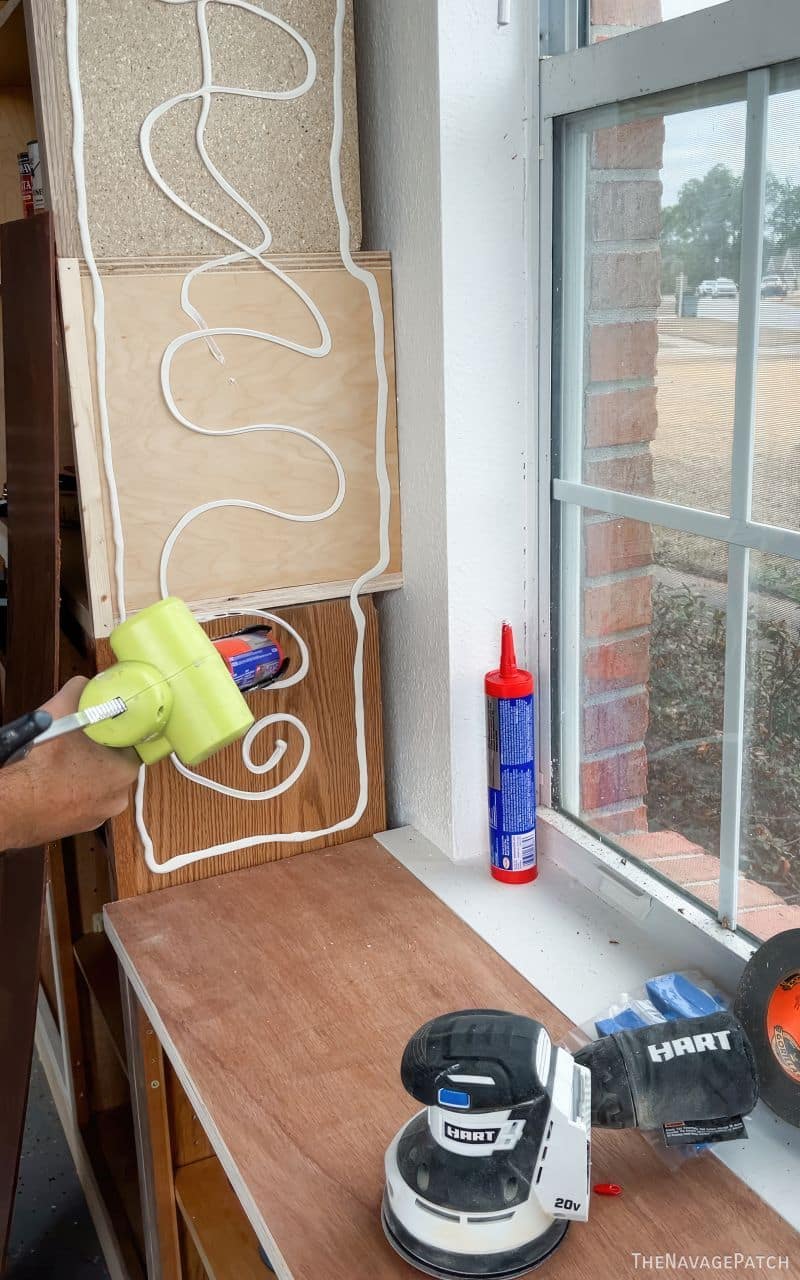

Handan couldn’t abide the three different door styles from the three different cabinets we used. To help ease her OCD, we decided to cover the Georgia cabinet doors and the free cabinet doors with hardboard and leave the Project Source doors alone.

I squeezed on some construction adhesive and spread it around.

Then I pressed on a piece of hardboard I’d cut to size.
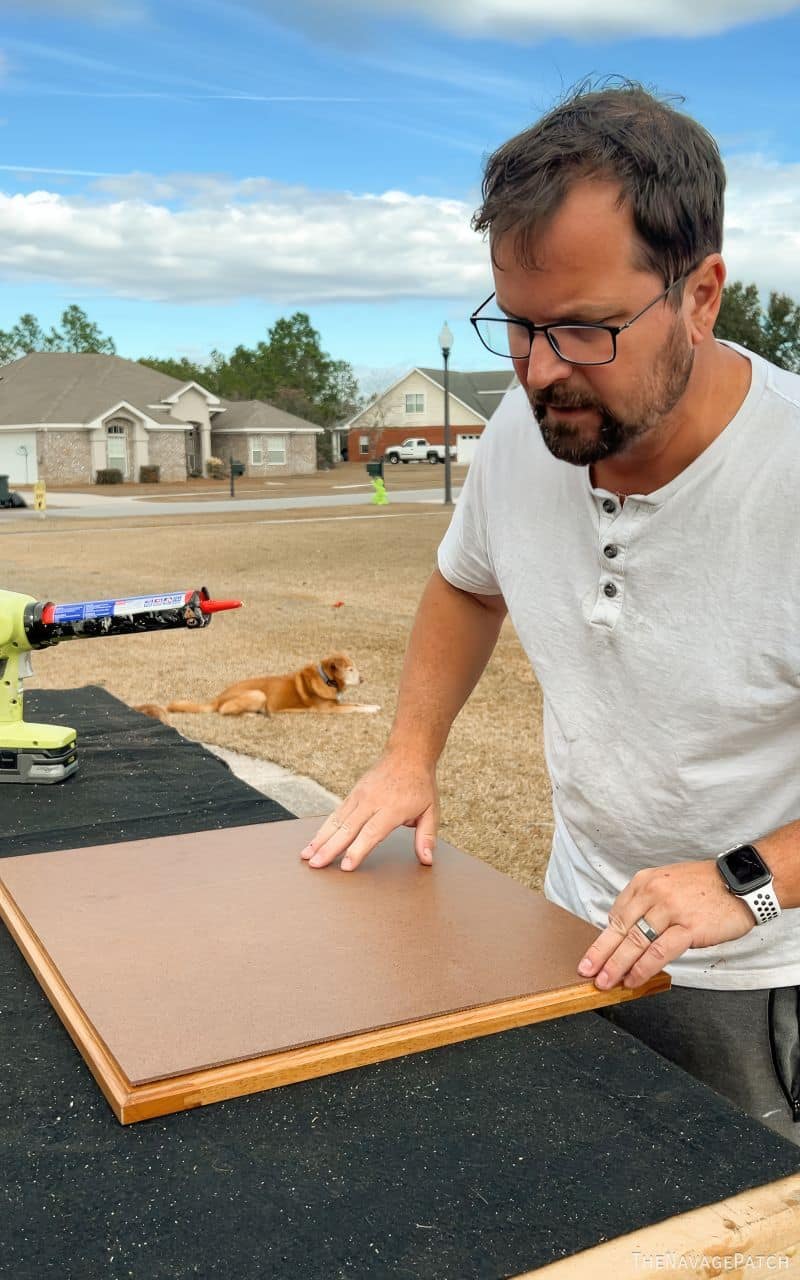
A clean and simple solution to mismatched doors!
Next, I primed the cabinets and doors with oil-based primer (a must due to the pre-existing finish on some of the cabinets and the oily, stainy wood of the Project Source cabinets), and then I painted everything with a few coats of Sherwin-Williams Swiss Coffee.
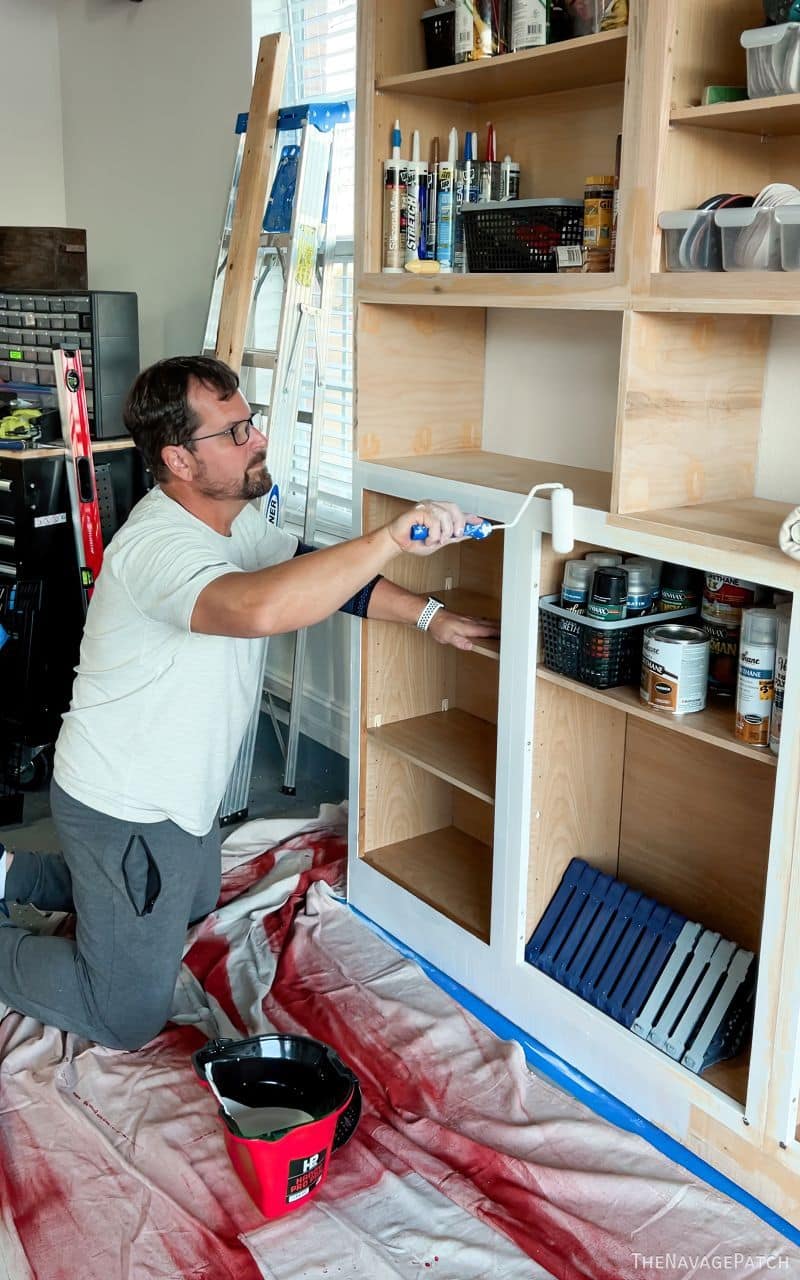
I reinstalled the cabinet doors and this part of the garage makeover was almost finished.

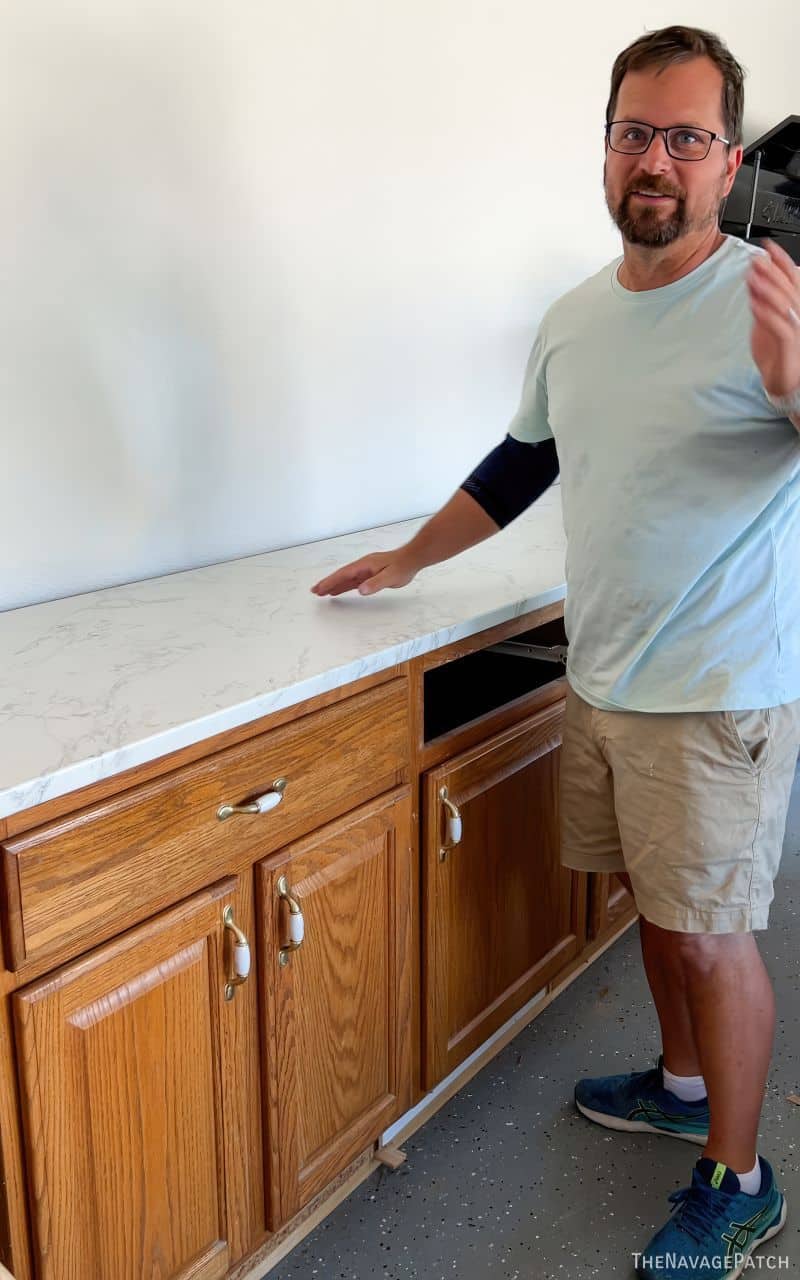
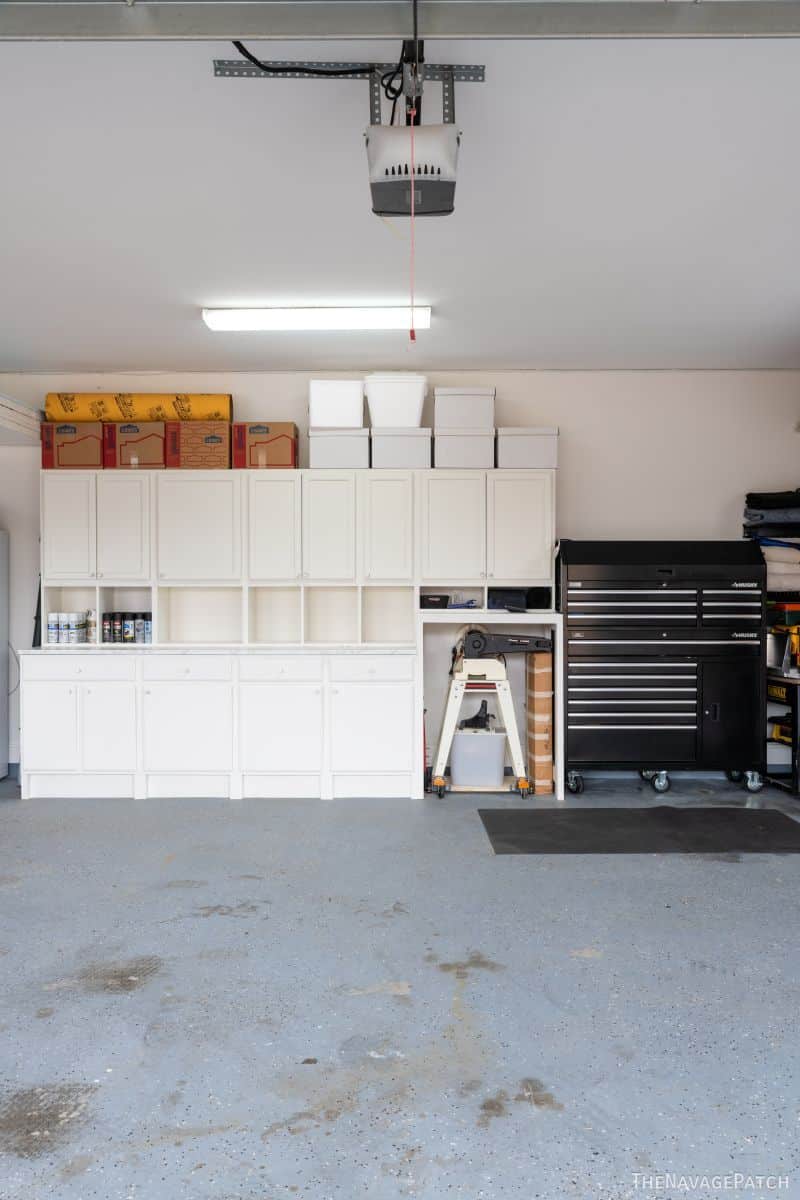
Like I did on the side wall, I first built a 2×4 base for the back wall cabinets. These are actual base cabinets, so they’re 24 inches deep, not 12 like the side wall cabinets. Since these cabinets stretched 99 inches, I couldn’t use a single piece of plywood for a countertop, so instead, we chose the cheapest composite counter we could find…in faux marble.
Hey, you can’t have a garage mahal without marble, right?
As before, I build a series of 12-inch-deep cubbies to go on top. This job was made so much easier by my Christmas gift from my babes – a Kreg Foreman pocket hole system. All I can say is WOW, this thing is a gem!

I screwed the cubbies together and then placed Project Source cabinets on top.
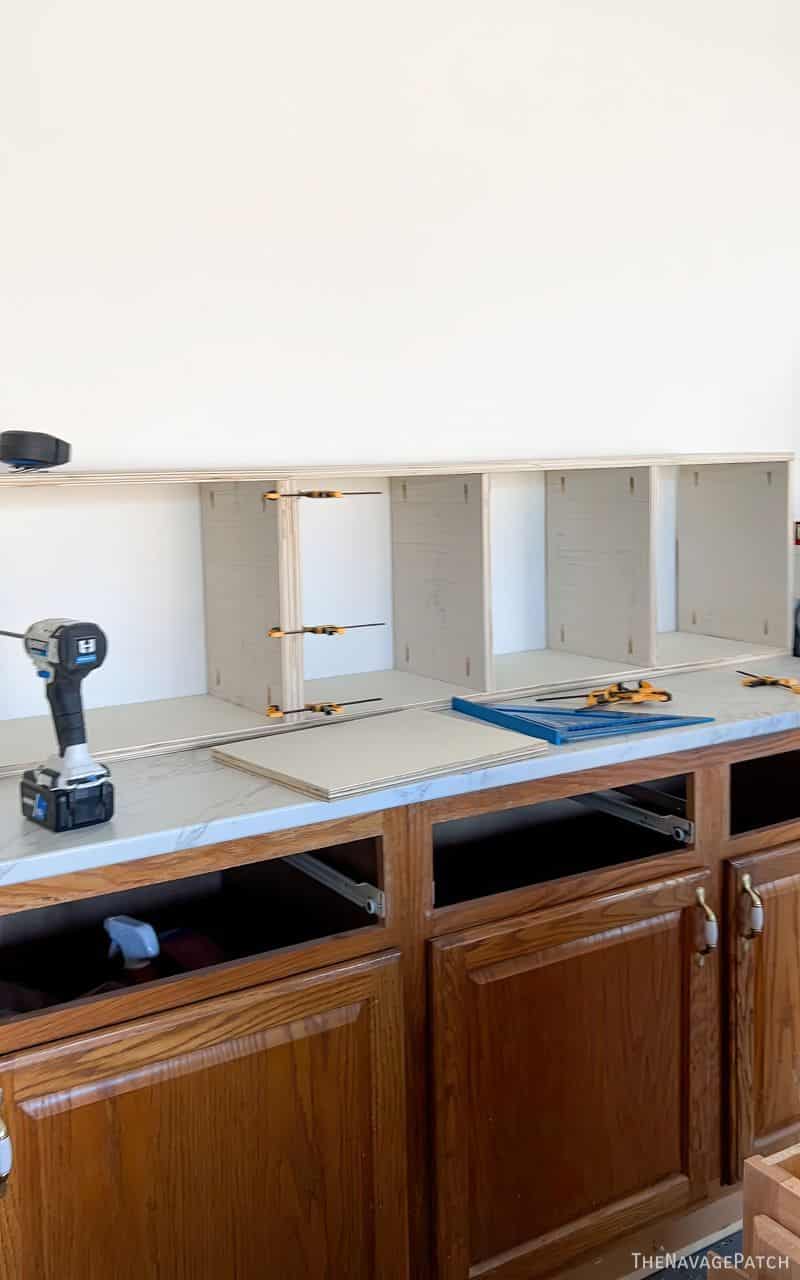
I screwed all the cabinets together to form one cohesive unit.

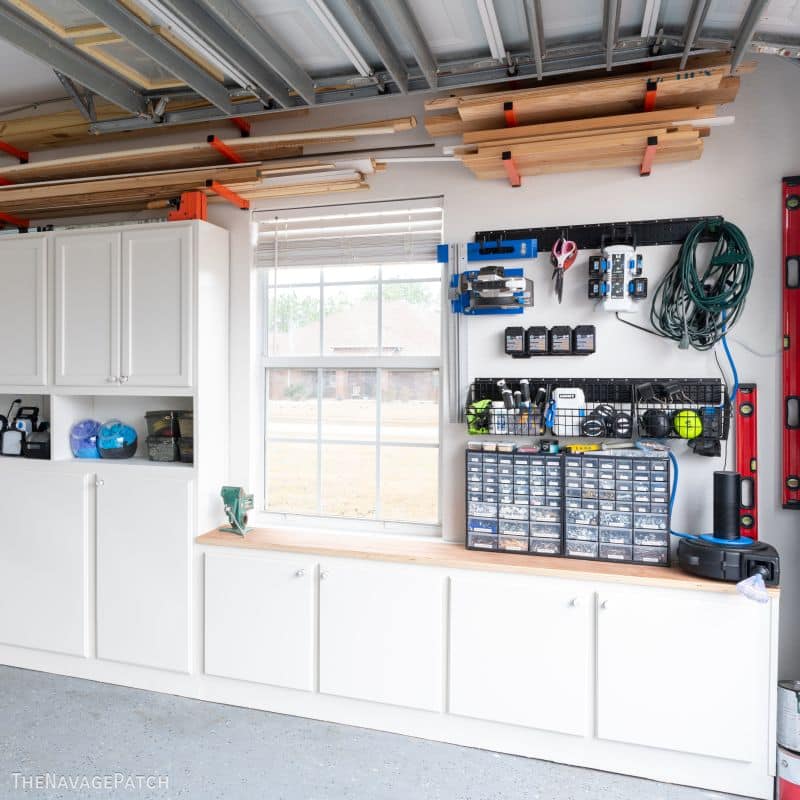
Ahh, the joys of abundant storage!

And here’s is where we stand with the garage cabinets and wood storage.
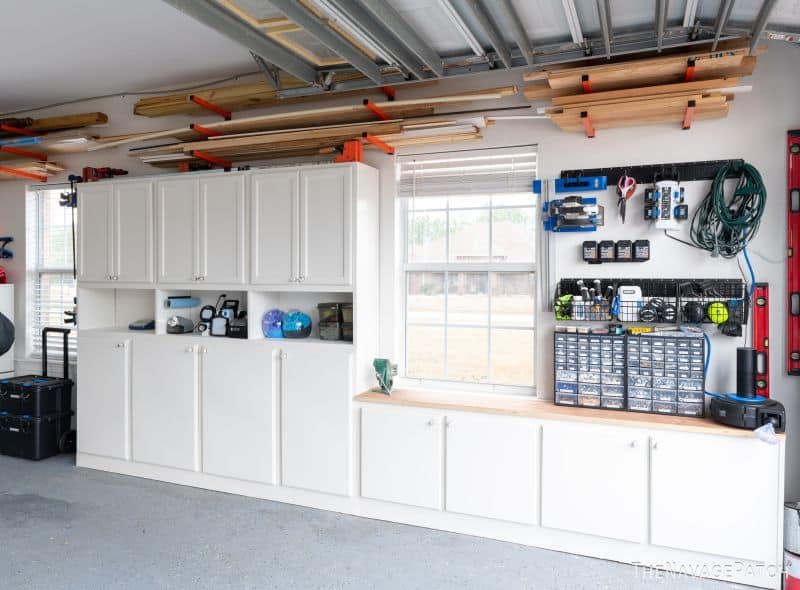
I love this little area by the bay door. It has almost everything I need!
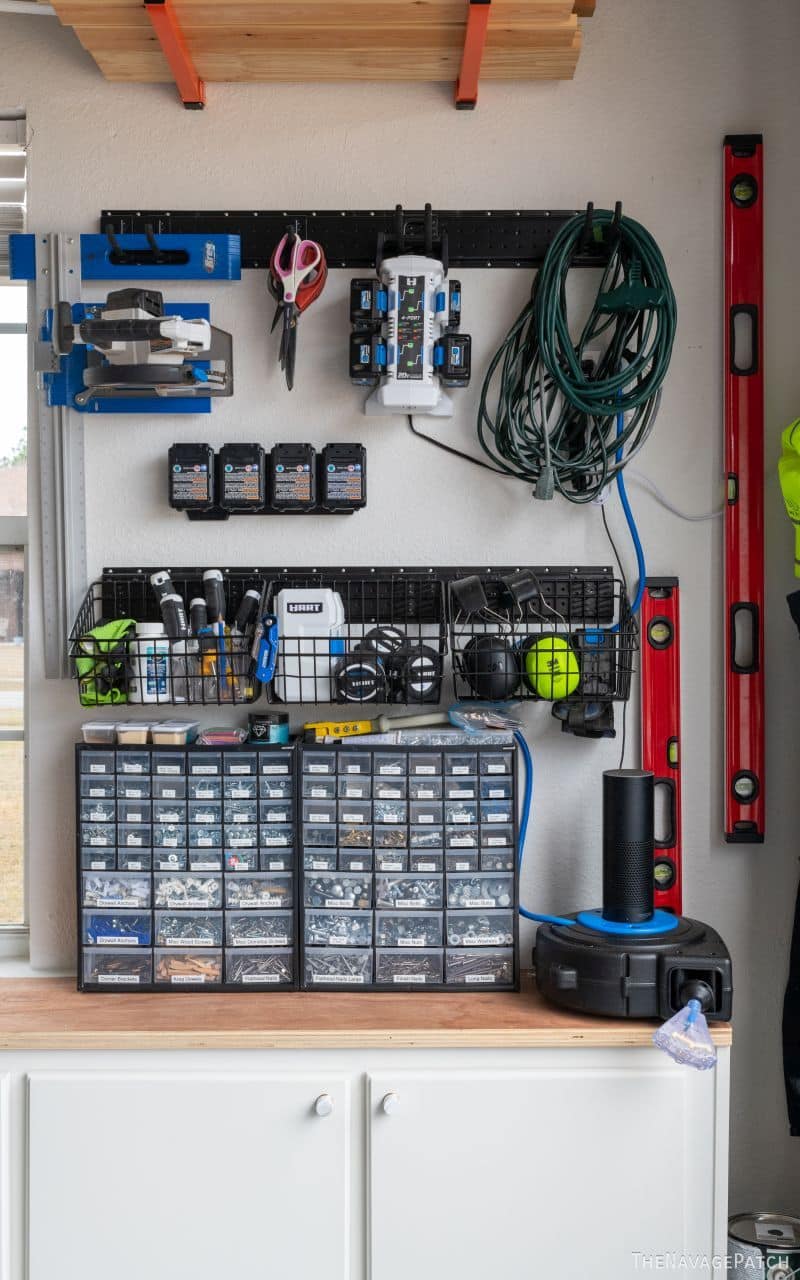
The HART charging station and battery storage is a life-saver with all the cordless tools I use these days!

And I’ve never…

In my life…

Been this organized!

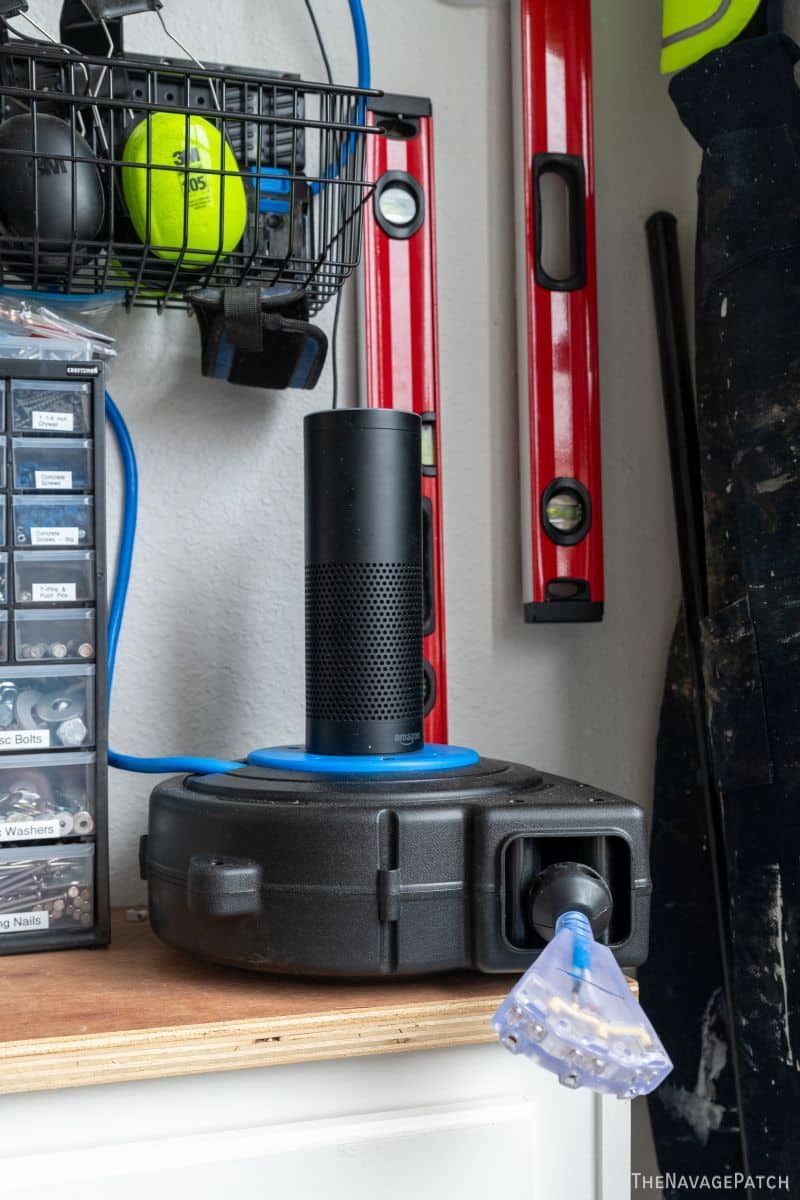
This retractable extension cord makes life much easier when I’m working outside!
And my babes has been organizing up a storm. Just look at all these adhesives and caulk!
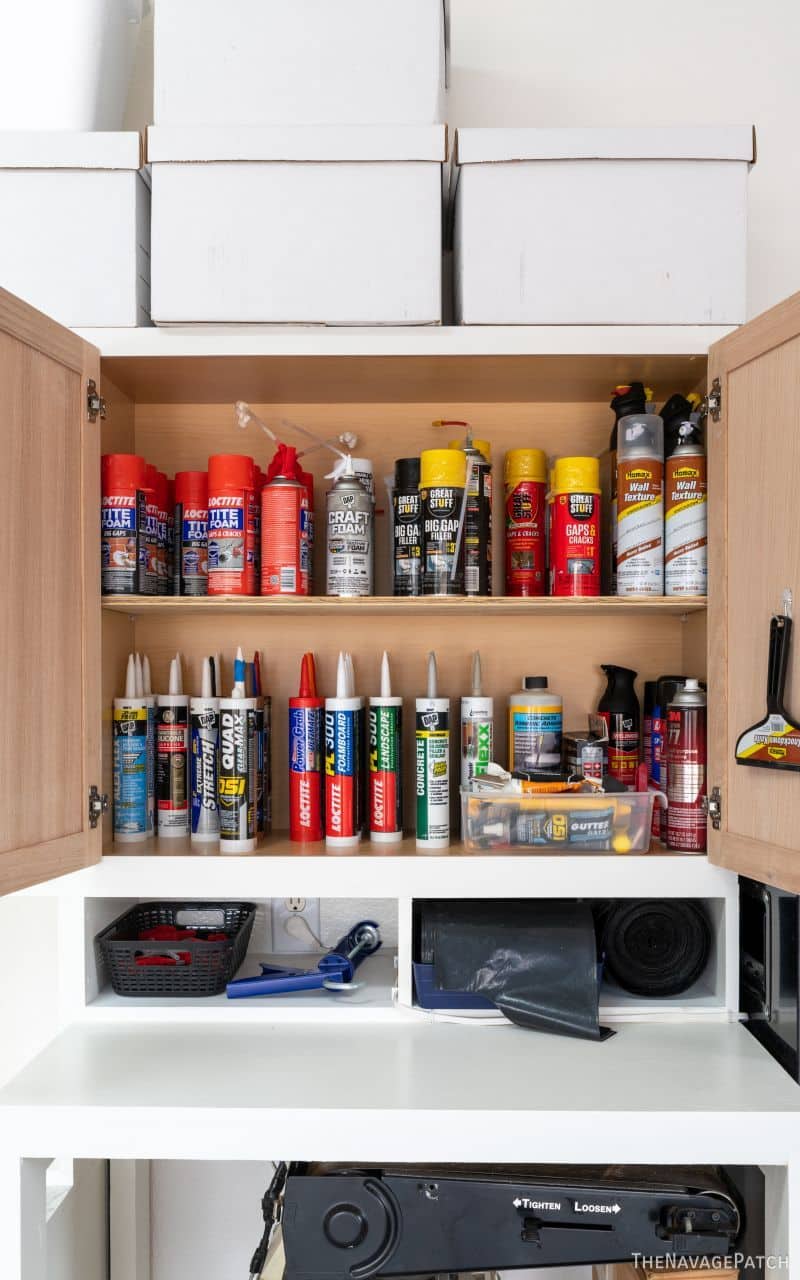
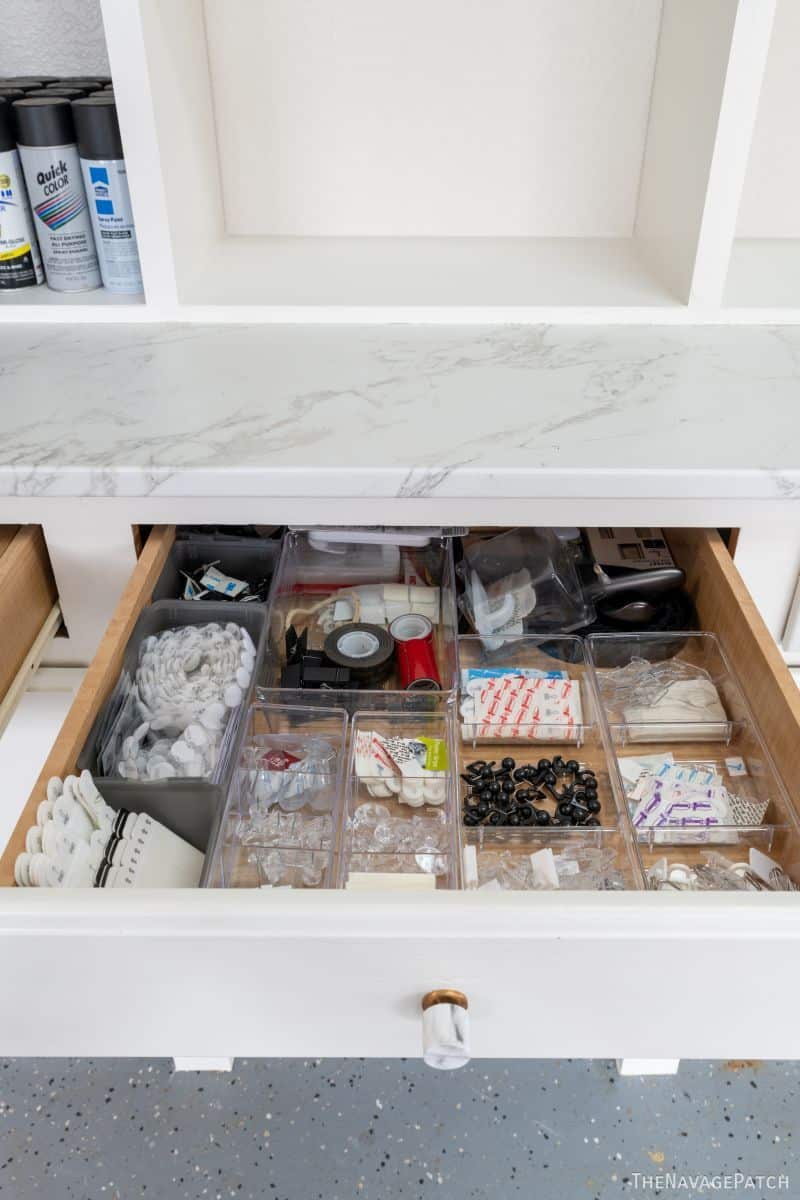
The longest part of this makeover is creating a space for every little thing. Fortunately, Handan is the Zen master of organization!
Aren’t’ those knobs sweet? They add a touch of class, and they’re only $2.90 each – that’s about a buck more than “regular” knobs. Well worth it, in my opinion!
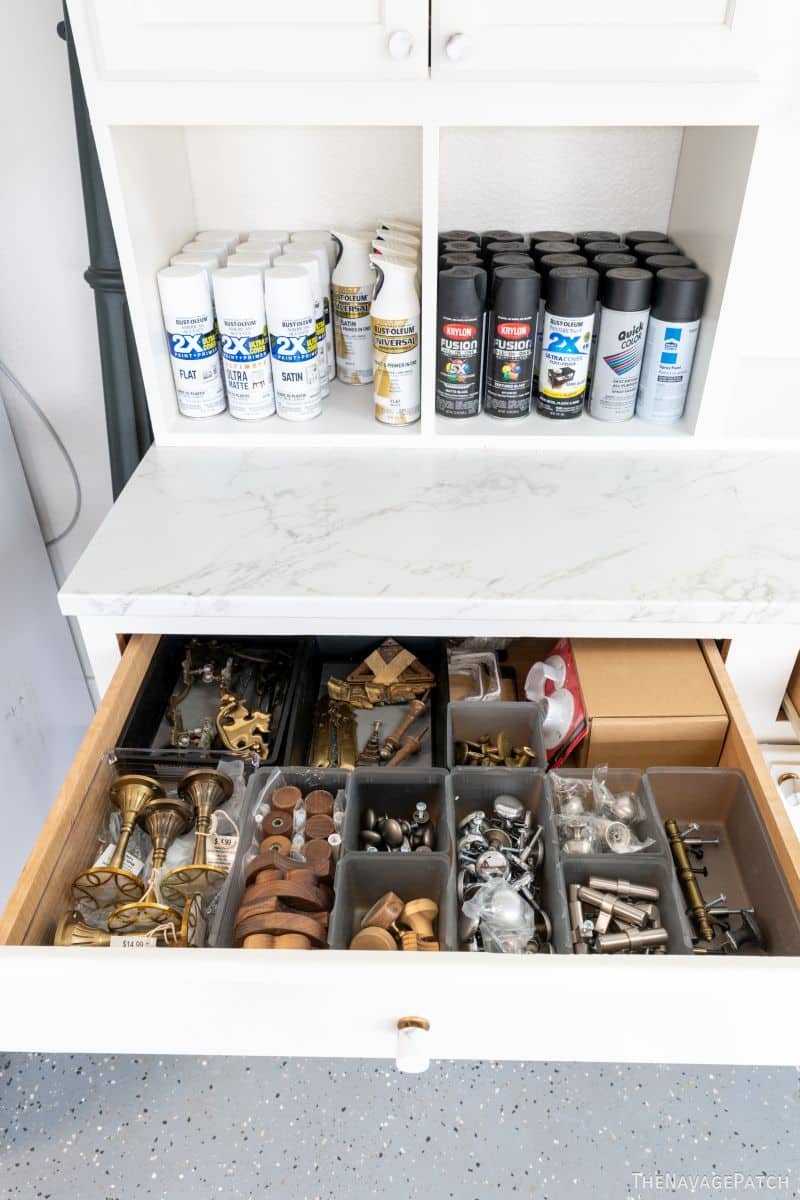
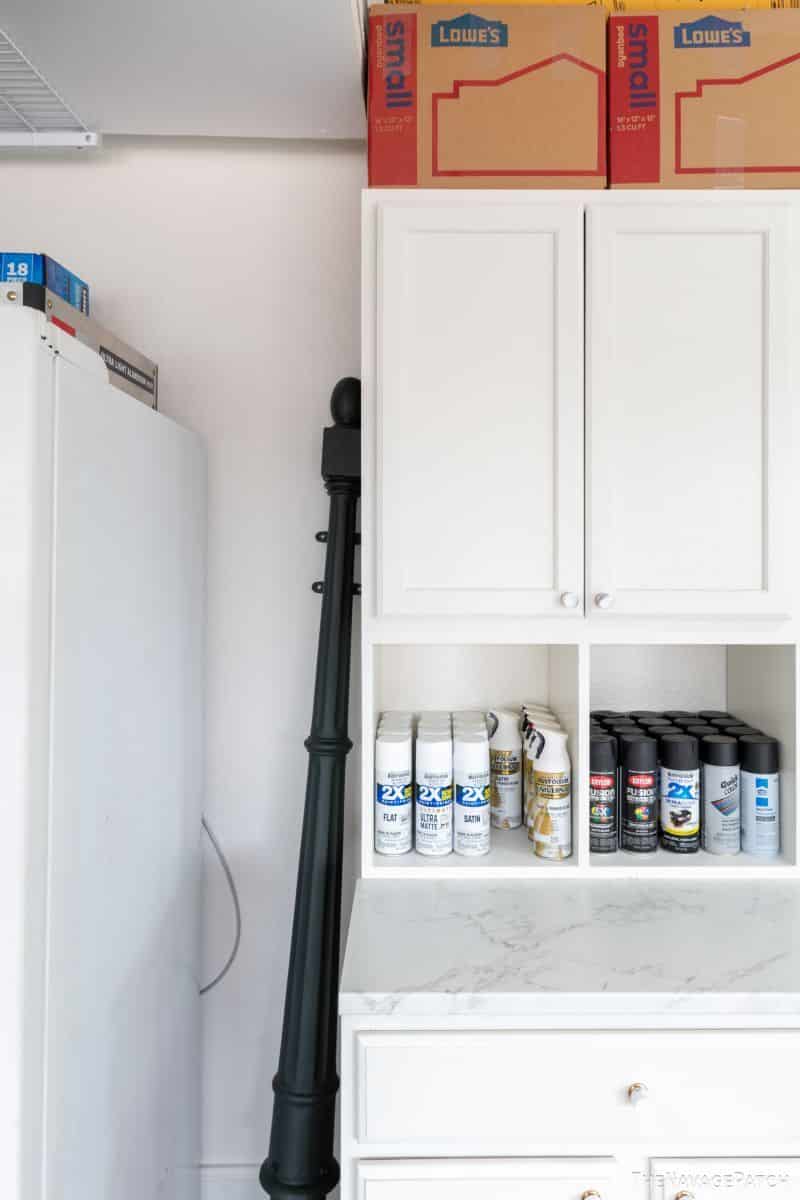
Soon I’ll be building a roll-out spray paint cabinet in that space next to the fridge.

Yes, that’s a mailbox post. So what? Don’t you have a spare one lying around in your garage??
That’s it for now! In my next update I’ll show you what I’ve done with all the big power equipment – miter saw, table saw, router table, etc.
This garage makeover is coming along beautifully! We can’t wait to finish it and show you our very own Garage Mahal!
Fantastic!
Thanks, Dianne!
Fantastic job. Although I did smile when you said, “These cabinets ain’t going anywhere!” At least not until you move again, and your wonderful wife wants to take them with you, again! LOL
Oh hell no, Linda! If we have to move again, I’m concreting those damn things into the foundation, lol! 😂
Wow!!! What a difference! It looks so nice!
Thanks, Nanci – it’s really quite a change!
Only one word comes to mind… WOW!
Thank you, Linda! 🙂
Coveting is a sin and you’re making me do it so shame on you two!! LOL. I thought I was happy because everything in our garage was at least contained to the boundaries and allowed two cars to park AND has a tool bench. But now I’m seeing that there’s a garage makeover in our future.
Yes! You can do it! 👊👊👊
Well I can see why it’s been awhile since you posted. It is looking great!
Thank you, Carla! Yes, this project turned out to be much bigger than we anticipated. But thank god we’re doing it. Once this mess is totally cleared, it opens the way for a lot of interior clearing too!
Greg, what a PERFECT JOB you have done so far. And Handan, your organizational skills are second-to-none! Of course I love the color you chose, really makes is light and bright in there. Really jaw-dropping. How long did all of this part take? I’m anxious to see the rest 😉, as I’m sure you both are as well. You are a master carpenter, etc. and I always love to see your projects.
Thank you so much, Jaime! This has been one heck of a project that we’ve worked in weather ranging from 18F to 88F – and we’re in Florida! All told, we’ve been at it about a month, though there were times we couldn’t work on it. Just wait until you see what I’ve done with my big power tools!!!
As usual, your project is amazing. Your photographer does a great job. I’m sure there are many verbal exchanges going on while she is taking pictures. The end result is wonderful.
Thank you, Cynthia! Oh, she’s always filming video, so there is tons of banter, lol!
Awesome job as always, I do hope you don’t have to move in a month LOL
Bite your tongue, Bunny! Fingers crossed there won’t be any more moves (unless it’s into a lake house or seaside villa, lol!)
Just AWESOME!!! Even the cute little knobs on the cabinets:) Seriously great job!!
Thank you so much, Barbara! Those knobs were only a buck more each than standard ones, so why not, right? 🙂
LOVE your garage makeover! Pretty sure this is going to inspire us to get ours painted and spruced up this spring. My husband is always asking me why I need all this spray paint. I feel better now seeing your stash. 😉
Thanks, Dee! As I write this we’re designing a pull-out spray paint cabinet. Look for it soon on the blog!
WOW! My husband is going to hate you. 😂
I’m going to show him this and get him started on the garage. Absolutely love it.
LOLOL, he can join the line! 😂😂😂
Oh what I wouldn’t give to have a garage like yours. I live in a rental until my new house is done. When all I’ll have is a she shed. I can just clear out some trees and build a bigger one. Sometimes I scare myself when I actually put my brain to good use.
A she shed is perfect, Ellen. You won’t have some schmuck messing it up all the time! 😂😂
I’m going to guess that all those little drawers with the labels for the fasteners were sorted and labeled by the lovely Miss Civil Engineer of Northern Florida that you live with. Fastest label maker in the southeast!
I realize it took you longer than a weekend to put this all together, but you make it look easy. That’s some good planning and a lot of talent. Thanks for sharing!
NO! I made all those labels, Deb! But, yes, Handan stuck them onto the drawers…and we both worked on filling them. This has been a team project since the get-go. We’re about a month into it now – it’s much bigger than we initially thought, lol!
Looks awesome as always. Man, I wish we had a tiny fraction of your superb DIY skills and Handan’s amazing ability to envision these projects. It would be great being able to do the many need-to-fix jobs around our house which we don’t cos 1) we are feeble DIYers and 2) handyworkers, in our SC zone anyway, are ridiculously expensive and shockingly unskilled. Yes, we’ve had our share of horror workers (listed in local referral platforms) from gardeners, to painters, to handyworkers for installation of shelves, or cement ‘experts’ for a concrete patio. What kind of worker comes to your house to start a job and asks you for paintbrushes and sheets to cover your furniture or, before they even arrive text you asking if you have a stepladder? Seriously, is it just us? We’ve given up. And so, we look in awe and admiration at your stunning projects. Live long and prosper. 🖖
Hi Meena, oh wow, your comment reminded me of the “movers” I hired to get our stuff out of our Jacksonville apartment and moved into our garage – literally 200 yards away across a parking lot. They showed up with no truck, no hand truck (we were on the third floor) and no clue what they were doing. But I guess that’s what you get when you hire “movers” and not a moving company.😂
Your home and garage is amazing. I tried to organize my garage but it didn’t stay that way for long. I’ve already decided on a nice day I’m going to work on it again.
It’s never a fun project, Theresa, but it feels good when it’s done! 🙂
I am EXHAUSTED!!! You are “Super Construct!!” Impressive, verrry Impressive!! franki
Thank you, Franki! I’m at least half as exhausted as you are. Maybe three quarters. 😂
This makes me jealous lol
Hi Kristen – good to see you here so soon! Thank you! 🙂
Oh, wow! I’m exhausted just reading this. You deserve a medal. This looks absolutely amazing and will make all of your projects so much easier.
Thanks, Teddee! It’s goign to be an amazing space when it’s fully finished!
Does Handan realize how lucky she is to have you??? This kind of project could cause a divorce among many couples! And you seem so cheerful doing it all. You are a heck of a husband.
I’m the lucky one, Barb! And a project like this is never all smiles, lol!
Just beautiful!
Thank you, Jean!
OMG….amazing and awesome! So glad that you were able to go from fleece and jogger flannel pants to shorts!
There’s been a lot of different weather during this makeover, lol!
Well that’s just an amazing space and I’m planning to copy it… but I just don’t have a garage …😐 😲 … I do have a 150’ long driveway…
That’s enough driveway to build a stellar garage, Marie! 😀
Amazing work wonderful the way it looks…….
Thank you so much, Vicki!
OK, I love your garage redo. I’m currently working on my garage too, but not as detailed as yours. The one thing I didn’t see is where you purchased the little cabinet with all the drawers for screws, etc. Please tell us where you bought it. I NEED something like that.
Thanks.
Hi Vicki, I got those particular two units at Lowes – I think they’re Craftsman – but you can find similar units at Home Depot.
I’m so envious of your beautifully organised garage! We only have a small shed but we did manage to gut the whole thing a couple years back and set up some proper shelves and cabinets and the difference it made was incredible. I love how cohesive everything looks even though you were working with mismatched pieces. I’m glad you went to the extra effort to cover the door panels and paint everything the same color. It really does look mint. Great job!
Thanks, Jay! It’s amazing what a few shelves can do, isn’t it? We seem never to have enough storage around here, so we’re always looking for easy and inexpensive ways to increase it. With enough wood filler, caulk and paint, you can make a Yugo look like a Lamborghini!
I love the pulls/handles on the cabinets. It doesn’t look like those were the originals. Where did you find those and what are they made of? Were they easy to install? They look like marble. Oh and can you pop up to Nashville and do this in my garage??
Thanks, Marilee! I linked to them near the end of the post. They are very inexpensive and just as easy to install as any other knob!
There’s nothing I like better than a neat, organized garage with built-in storage. Which is something my garage does not have. It’s a cement bunker that the hubby stashes stuff we don’t need in. Wanna visit MA and redo mine? Just kidding. It looks so much nicer now.
I’ll be right up once you guys thaw out a bit! 😂
Wow! That is an incredible change in a short time! The garage is really looking terrific and even more important is that there seems to be a spot for everything. The cabinets look wonderful.
Thank you so much, Claudine! It’s been an ambitious project, that’s for sure, but we love how it’s turning out!
YOU ARE AMAZING!!!
Thank you, Wendy! 🙂
Tell me the truth, your garage is heated right? How else are you able to keep paints and adhesives from going bad, or getting rusty nails? Looks great. I’m jealous, my husband is basically useless at DIY. He also shows no signs of wanting to learn. Sadly, I usually find myself doing it all by myself, or with friends. Question: in a previous post you mentioned the name of a white paint that goes with everything by Vaspar. What was the name of the paint color?
Hi Jennifer, it’s not heated or cooled, and things don’t seem to go bad or get rusty. I guess we’re lucky! The color you want is called Swiss Coffee – Sherwin Williams has the color code for it!
I absolutely love these DIY garage cabinets! The step-by-step instructions are clear and easy to follow. I can’t wait to tackle this project and finally get my garage organized. Thank you for the inspiration!
Thank you!