DIY Outdoor Christmas Gifts (Inspired by Grandin Road)
Christmas. For some, it’s a time of family gatherings and joyous celebration, while rosy-cheeked children laugh and cavort before a roaring fire. For others, it’s a time to see those jerk-faced in-laws, while their rotten brats scream and shriek for more damn presents under the rickety old fake tree that Uncle Fred fixed with duct tape last year.
For me, Christmas means catalogs. And catalogs. And more catalogs. An endless stream of glossy capitalism from every Ronnie Retailer and Sally Superstore that starts before Halloween and doesn’t end until the new year puckers up people’s wallets and slams the populace with a vicious hangover of buyer’s remorse.
But it’s not so much the tsunami of fake smiles and overpriced Chinese junk that gets me. No, that’s what fireplaces are for. Catalog season is when Handan takes a keen interest in the arrival of the daily post. Because catalog season is knockoff season: that time of year when Handan gets it in her head that we should be DIYing the entire stock and inventory of stores like Pottery Barn and Grandin Road. You can be sure that catalog season means that yours truly will never see the last southbound goose or the first snowfall, as I’ll be chained to my basement lair, working like an elf on overtime.
With the arrival of Grandin Road’s first Christmas catalog (they feed them into the mail system throughout the holiday season like an intravenous drip to the economy), Handan’s eyeballs pounced on the following “Artisan Packages with Bows.”

Each box is lovingly crafted from the finest scrap wood by starving artisans in the remotest regions of the Guangdong Province on the outskirts of Hong Kong. The price for this artistry: $90 for the small one, $130 for the medium one and $180 for the big one. $180! For a bunch of scrap wood! Jeezum H Crow on a Popsicle Stick! Who buys this stuff?
Handan wanted them. She wanted them NOW. And she wanted them FREE!
Well, if there’s one thing I have in spades, it’s scrap wood. I think I could make one hundred of them without spending a dime. She would make the bows from metal scraps she had leftover from previous projects. It was time to build.
I started by gathering some pallet scraps. Among them, I had some scraps with old red paint. Perfect.

Months ago, I had glued some of the red ones together to make some rustic thing or other. I can’t remember, because I never finished whatever the heck it was I had started. I ran those boards through the table saw to separate the pieces. I did this because I needed to cut all those boards in half by halving the thickness. This isn’t a necessary step with boards of this thickness, but I did it for two reasons:
- The resulting box would be half the weight.
- I didn’t have enough red boards to make one box, so I needed to double the wood by slicing them in half.
I ran the boards through my band saw to create new boards of equal length and width, but with half the thickness.


Once I had all my lumber resawed (the term for cutting them in half through the thickness), I cut them to 15 inches. This would be the height of the small box. I played around with the pieces and settled on a width of about 11 1/2 inches.

I arranged the pieces so I would have four equal sides, then glued them together using parallel clamps. Since the pieces were so thin, they wanted to buckle when I applied pressure with the clamps. To fix this, I employed my Gigantic Iron Pulley Hook. I bought this at a weird warehouse sale. Why? Who the hell knows! But from the same warehouse sale, I also bought an old green doorish thing from which I would make the big box. More on that later. Anyway, my Gigantic Iron Pulley Hook comes in handy when I need to apply pressure, but a clamp won’t fit. This thing must weigh about 60 or 70 pounds. After gluing these first pieces, I actually did figure out a way to use a clamp to accomplish the job. Clamps are way easier to deal with than the Gigantic Iron Pulley Hook.

I had enough red wood to make four sides, as long as I judiciously mixed in some regular old pallet wood. But I think that the mixed colors make it even more Authentic and Rustic. You can never be too Authentic and Rustic. I’d have to make the top from plain pallet wood, but that’s okay, since it would be mostly covered by the bow and ribbon, anyway.
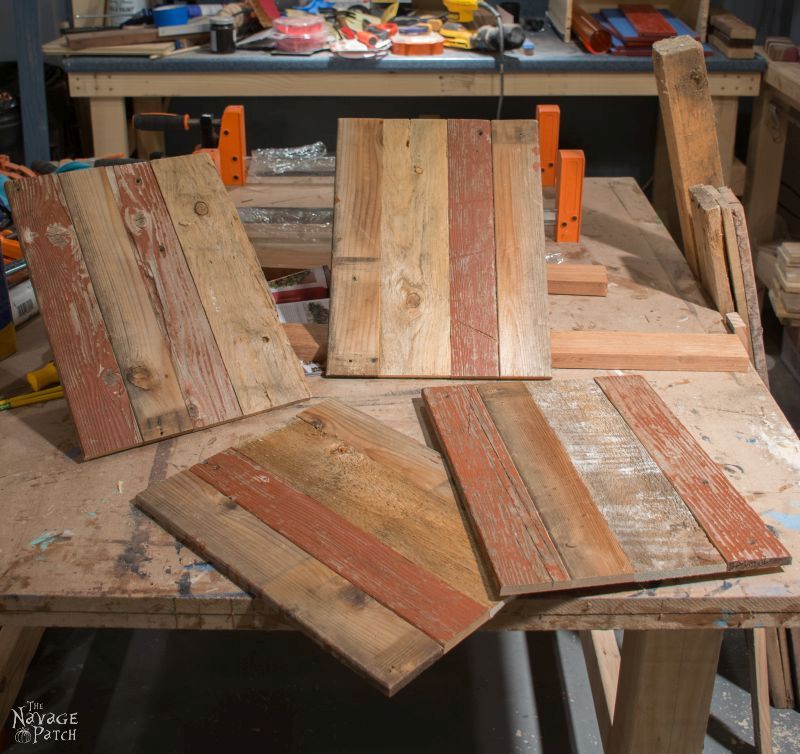
I played around with the panels until I found a sequence I liked. To make the box, I would glue and brad-nail the edges together. Each face would have one overlapping side.


Good lord, that face! Why didn’t anyone tell me I looked like a Wookie with that facial hair? (Not that I would have cared.)

I used a speed square to keep things, uhh, square.

More glue and brad nails.


For the last face, I put a bead of glue on the edge of one side of the frame and a bead of glue on the edge of the fourth panel.


And then I brad-nailed the piece in place.

The box had a shape. Now it needed a top.
I had glued together some other scraps for the top, since I didn’t have any more of the red ones. After measuring the length and width of the top of the box, I trimmed the top piece to fit.

I applied a bead of glue around the top rim of the box. Wait a minute!

That beard again! Gah!

Anyway, I seated the top and secured it with brad nails.


I never met a corner I didn’t want to round.

And that was it for box number one. For the second, larger box, I found the old green doorish thing I mentioned earlier. I had bought it thinking that we could make a cool vintage sign out of it (this was back in the days before The Navage Patch). But one day I got the notion in my walnut brain that I would bust out some chalk paint and a brush and freehand a “vintage” laundry sign for our laundry room. Handan was less than overwhelmed by my artistry, and the sign spent the next two years collecting even more dust. Here was the photo I sent to her on Skype after I completed my misbegotten masterpiece.

The indifference was deafening.
But it would live again! I sanded off as much of the lettering as I could without also sanding through the green. Then I dismantled the boards and cut them into strips thin enough to resaw. Once I had run them all through the band saw, I had enough wood for a large box, including the top. I didn’t take any pictures of building the big box, but it was identical to the process of making the small one. Once both boxes were completed, it was time to turn the project over to Handan, so she could dry brush the small one and make metal bows and ribbons for both.
To dry brush, she first dipped her brush into some of her chalk paint then wiped off as much as she could.

She then dry-brushed the small box, leaving the red boards untouched.

To make the ribbons and bow for the small box, Handan used the same metal strapping that she used for her Outdoor Metal Pumpkins. She measured and cut strips for the pieces that would wrap around the sides of the box and for the pieces that would make up the bow. She drilled holes with the step drill bit large enough to accommodate a bolt in the pieces (more on that in a bit) then spray painted them glossy red.

Here are the wrap-around ribbons and the bow-ends in their place. You can see that the holes all meet in the center of the box.
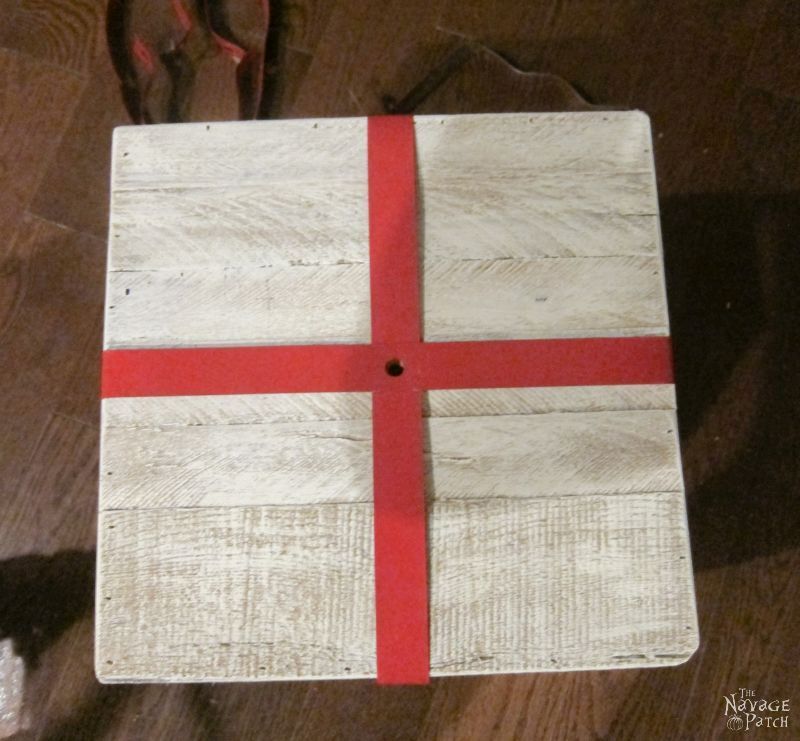

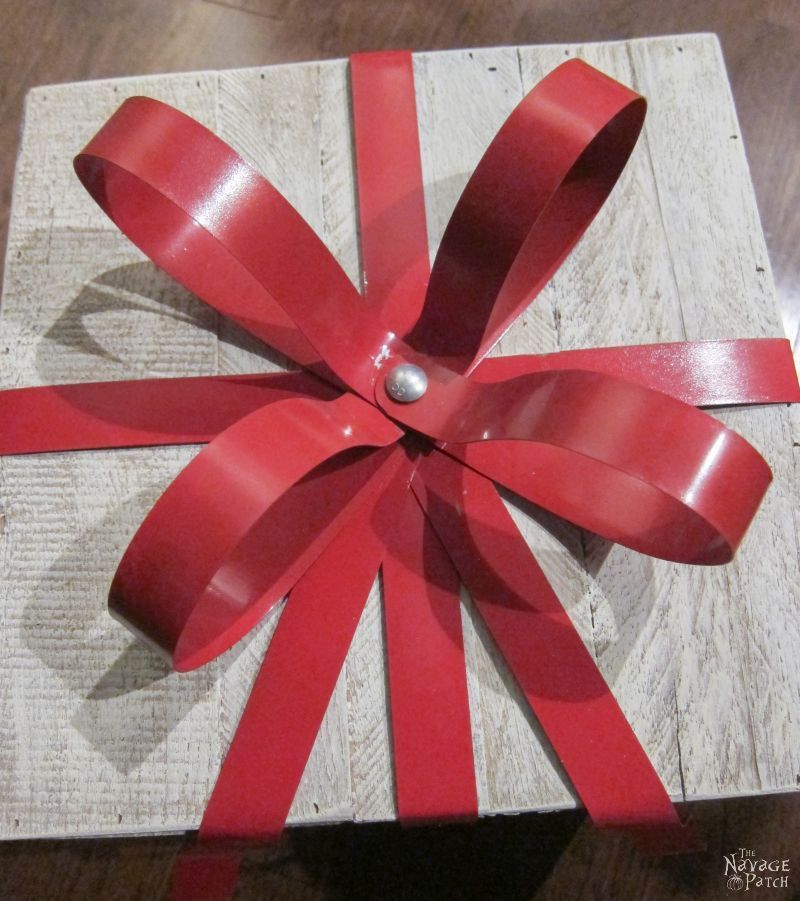
For the bow, she cut four pieces of strapping and drilled them on each end. She wrapped them over on themselves so their holes were lined up, then placed them on the box. She inserted the bolt through all of the holes and secured it with a nut on the underside of the box top.
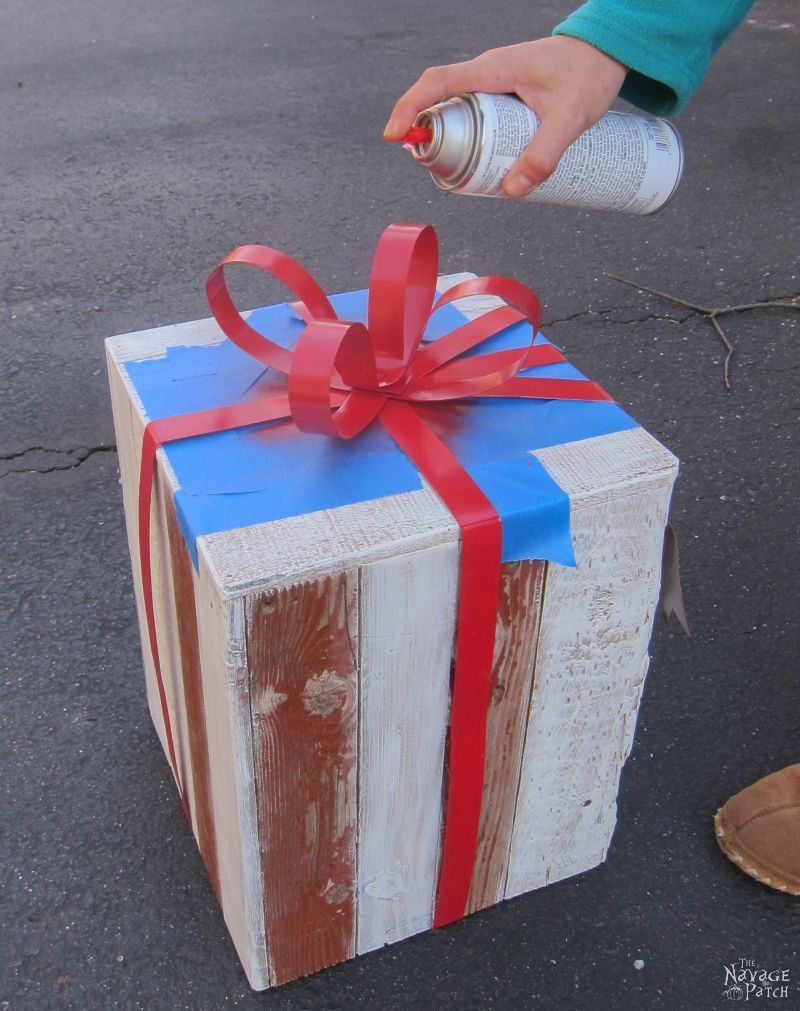
She taped the area underneath the bow, so she could spray-paint the bolt.
The small box was finished, and it was time for her to make ribbons and bows for the large box. The strapping she used for the small box would have been too thin for the large box, so she used some aluminum lawn edging that she got at a tag sale instead. This stuff is vintage – they don’t make it anymore! She got two rolls for $1.


What a bargain, because now they make it out of plastic, and it sells for $15 per roll. What a colossal rip off! But Handan also found 4 inch roof flashing which would work just like the metal strapping.
Starting from the bottom of one side, she wrapped the edging around and back underneath the opposite side. She did this for both opposing sides.

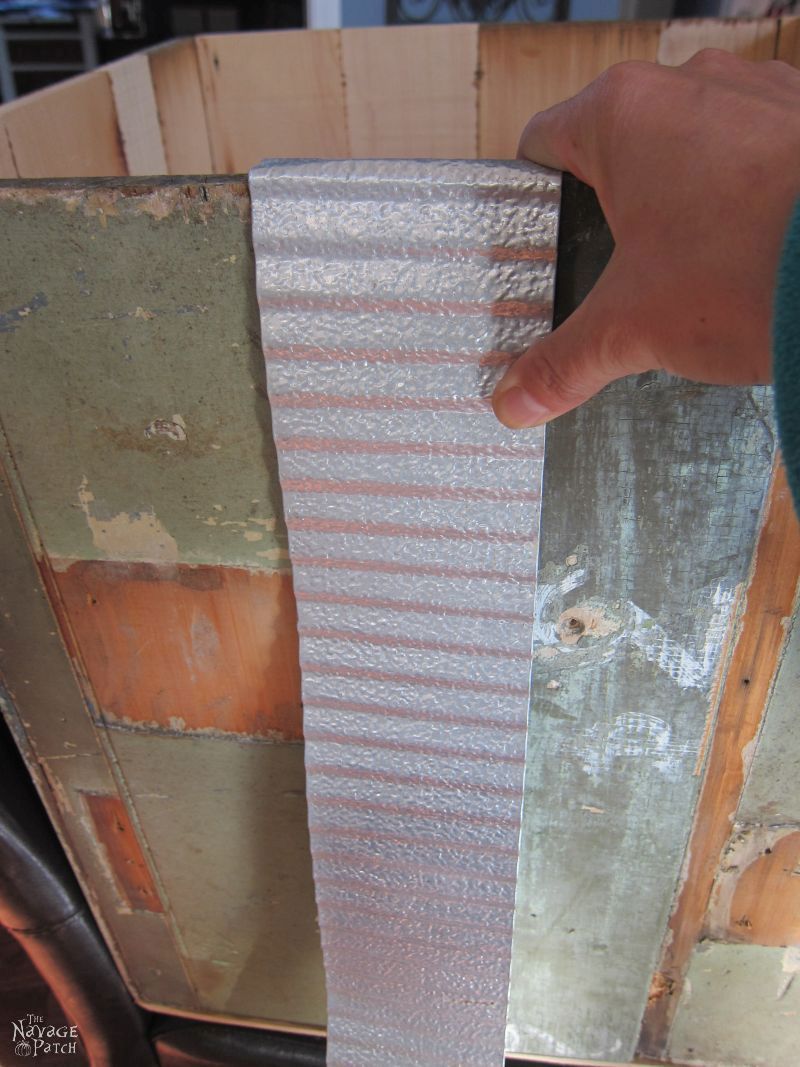

She put the two pieces aside to be painted.
She forked the bow-ends with a pair of scissors.
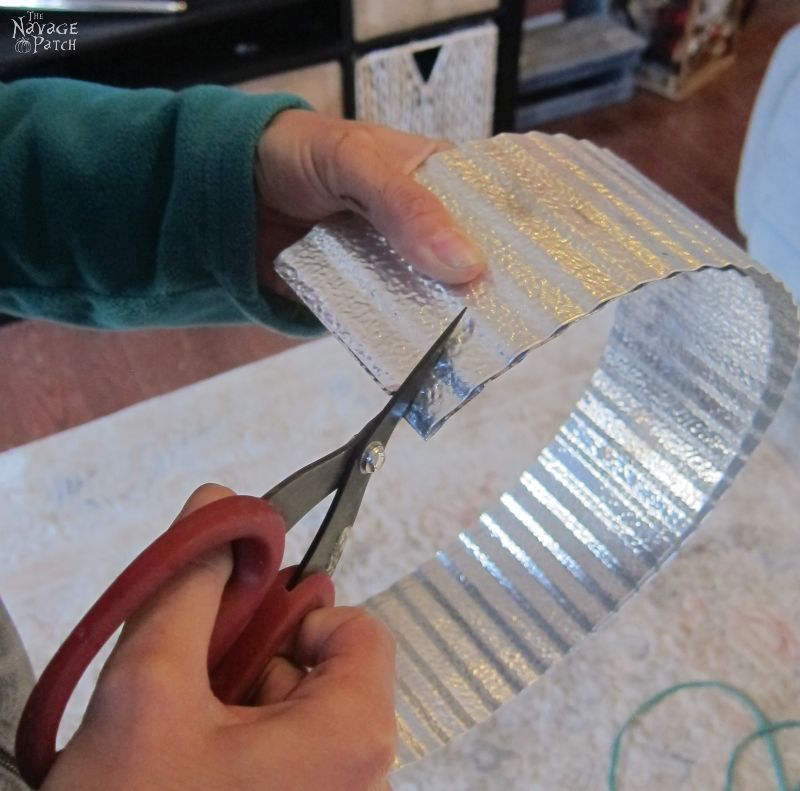

Then she cut pieces for the bow and took everything outside to be spray-painted. When the paint was dry, she attached the pieces of ribbon and bow with small nails. She held the nails in place with needle-nose pliers while she hammered.


With my help, she hammered the bow pieces through the middle and then bent them into their final shape.

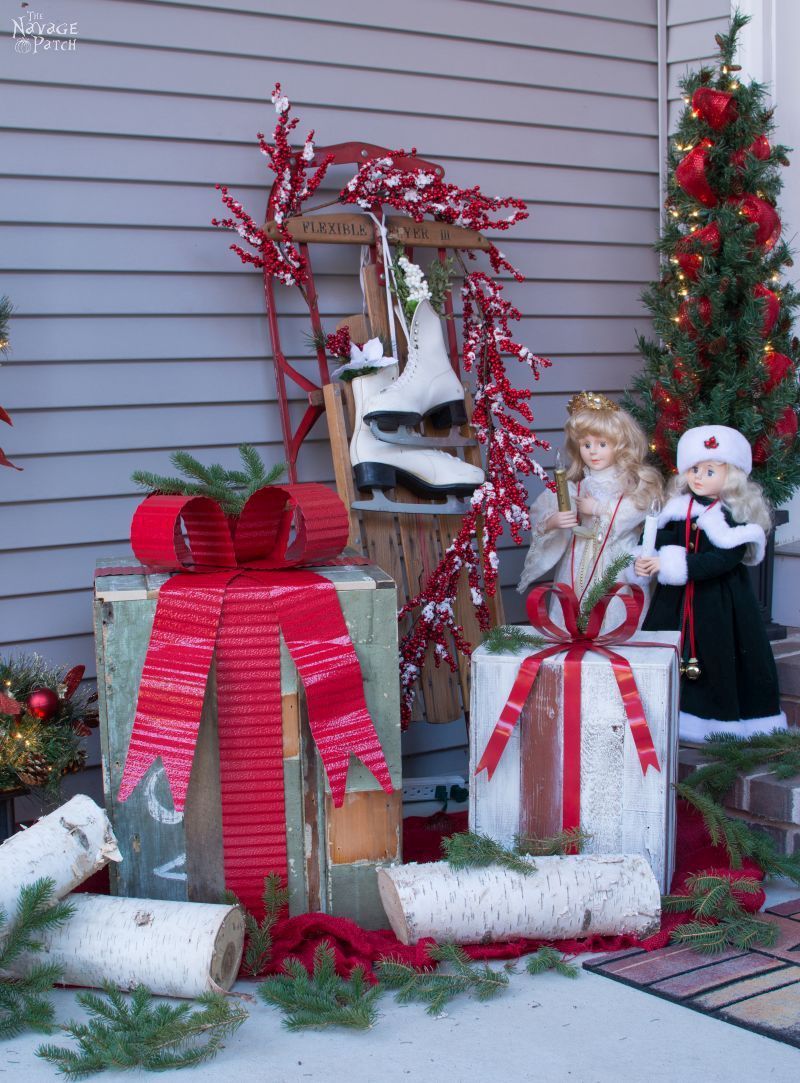
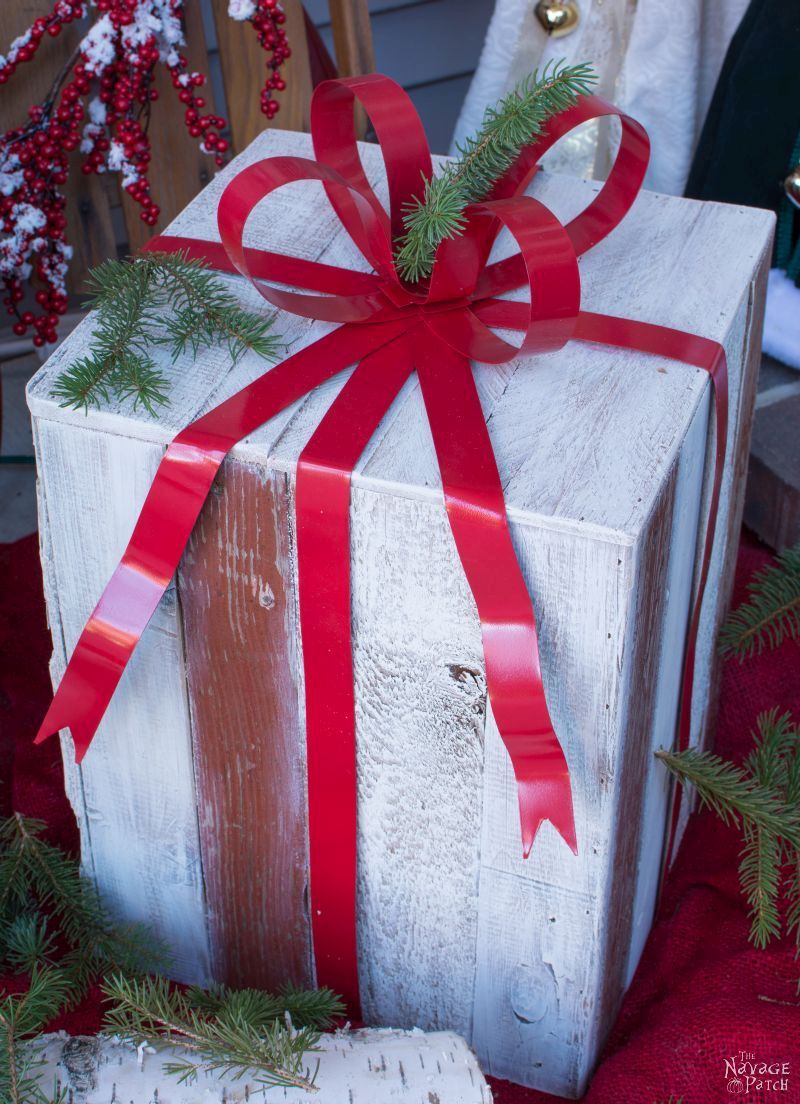
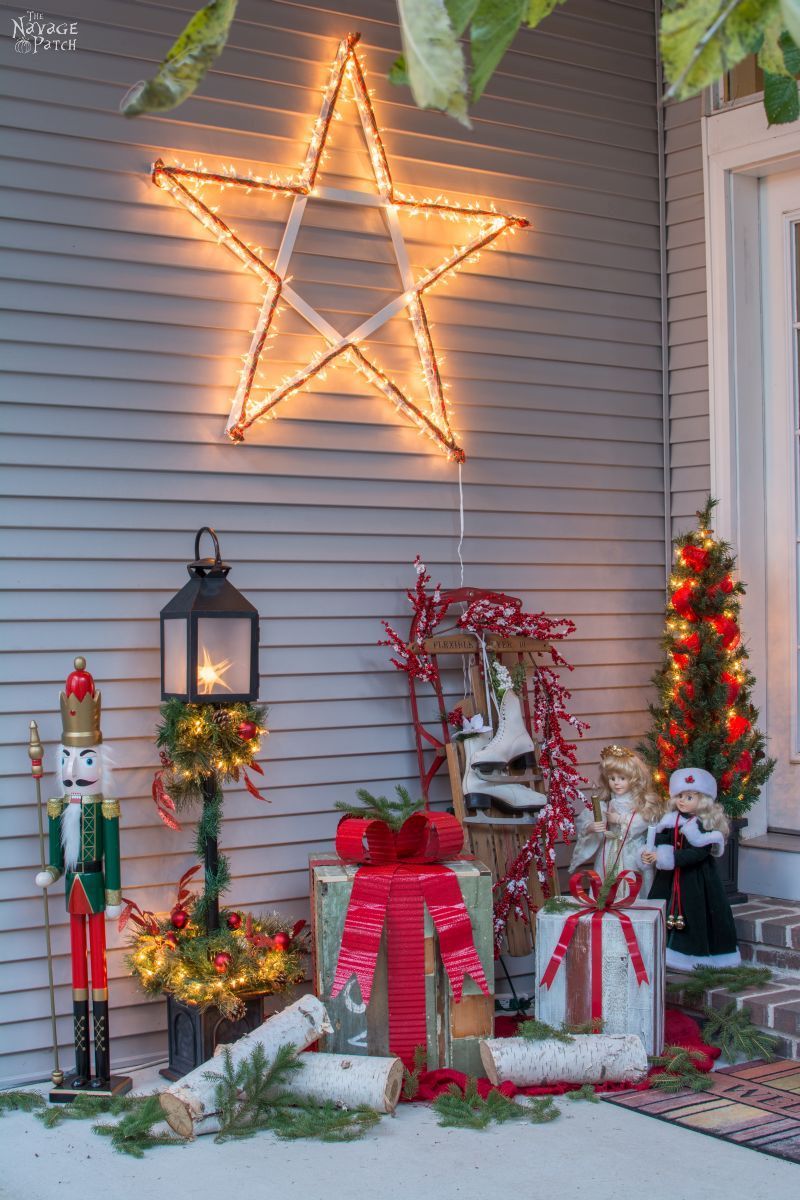
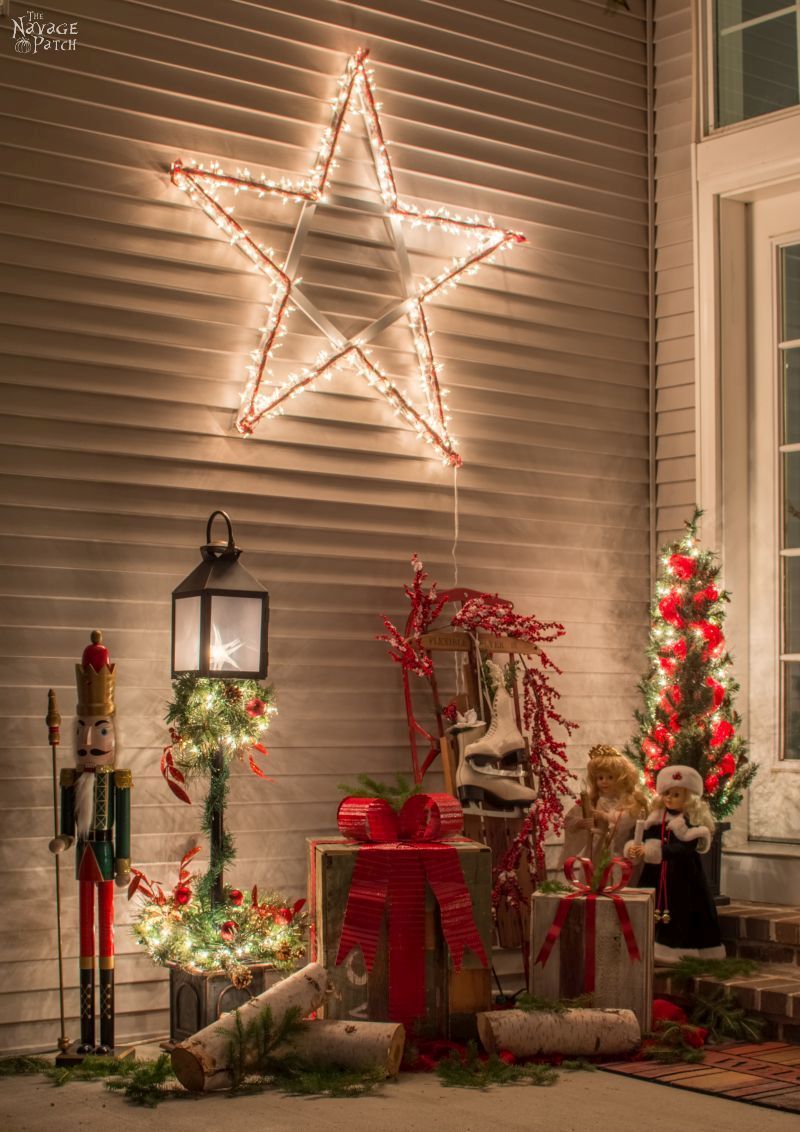
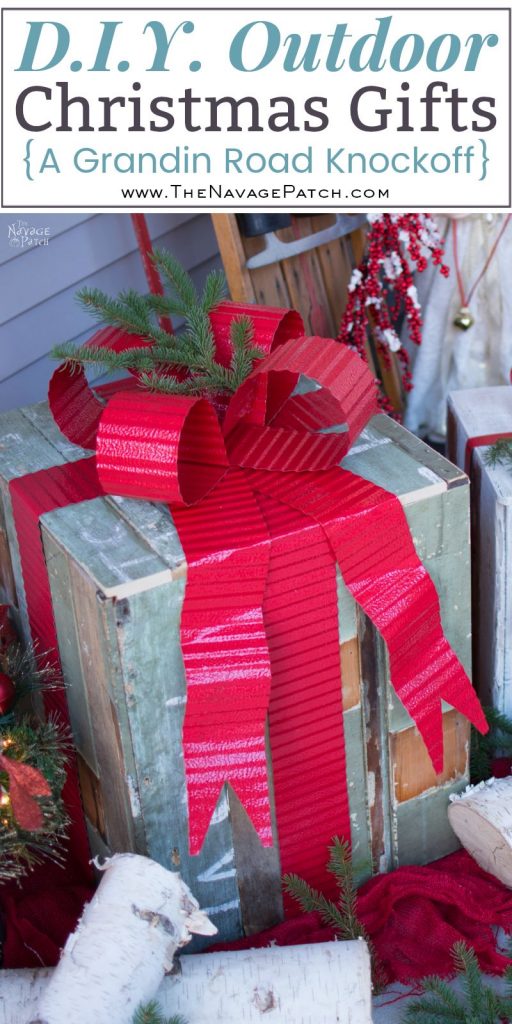
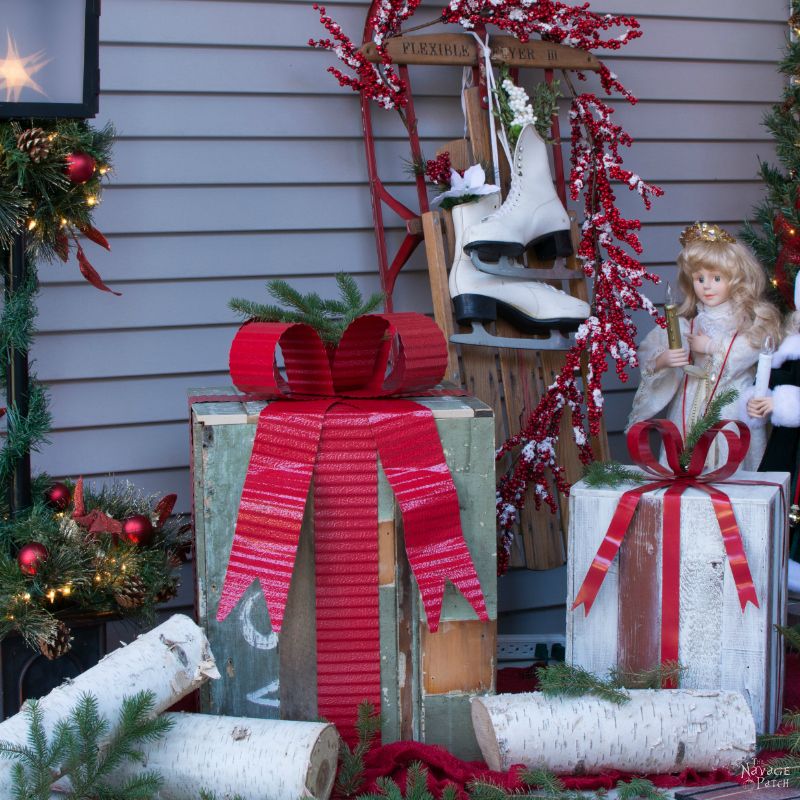
She did a quick touch up on the nail heads, and our DiY Outdoor Christmas Gifts were ready for the limelight!

Not a bad result for almost no expenditure. Here are the rest of the pictures presented without comment.


We love it when you share our posts on Facebook and Pinterest!


Love the boxes. I have the Grandinroad catalog at my elbow, with that page folded down, thinking there ought to be a cheaper way to make them. Have you got ESP or what? Awesome job!
Thank you, Kay! The price of those things is ridiculous, right?
OMG, LOVE them!! I may have to get my hubby to do this… the bows are amazing. Your vignette outside is so cute. You 2 are amazing!!
Thank you, Sandra! I’m just the dumb muscle. Handan is the brains of the operation 🙂
Love this! I want your whole front porch… no I want a big shed so I can store everything so I can make everything myself. Hate No Storage!
Thank you, Kat! Yes, build a shed! We’re going to need to build an addition to our shed soon – it’s already full. We may need another basement, too… 🙂
How clever you are. What a lovely Christmas scene. I only discovered the Navage Patch recently and i’m addicted already. Had great fun constructing a Halloween Apothecary inspired by Handan s beautiful display, It was a big hit with the village trick or treaters when they came round. Thank you both for your inspiration.
Hi Catherine, and welcome! Handan and I are happy you found us. Please enjoy your time here with us! 🙂
You hit another holiday decoration outta da park!! As much as I love these big impact Christmas decorations, I think I’m happier to know that Handan joins me in the joy of the holiday by finding all kinds of craft inspiration (translation – items to totally copy) in those numerous catalogs. And as for the beard – it fits the image of a man who lovingly crafts by hand outdoor Christmas gifts for his wife. (that’s a compliment)
Thank you, Susan!! Don’t give Handan any ideas, or I may never see the light of day again! 😀
I LOVE your gifts! I wish I had a workspace to try and build things! It’s probably safer that I don’t, for myself and family! If you ever need a new career I am sure you could sell all the amazing things Handan and you create!
Hi Giselle, it’s great to see you here again! Handan and I have dabbled in selling the things we build, but it takes up every bit of time we have. Better to make them once, take some pics and write about them 🙂
Love those…They looked like alot of work though….
Thank you! They were a bit of work..not too bad!
Oh my gosh, I adore them!
Thank you, Carolann!
Greg, the boxes are incredible. I hope you’ve learned your lesson about the beard! You and Handon are an awesome team.
Thank you, Gigi! 🙂
Wow! Great job! I love these.
Thank you, Tonya!
the constant stream of traffic in front of your house from Halloween until Christmas, must be nerve racking, they are all trying to get a glimpse of that awesome beard lmao xx love the boxes xx
It’s unbearable! 🙂
I just found your site this week and am enjoying it so much! you both make a wonderful team with beautiful results. Thanks so much for sharing with us. Happy holidays!
Handan and I are so happy you found us, Adrienne! We look forward to hearing from you again!
LOL, that’s so funny Greg. Do you think the Volkswagen porcupine spawn have cousins in South Africa, coz I swear my hubby had that same awesome beard. The rustic gift boxes turned out great by the way, love how Handan made the bows.
It is entirely possible. My beard has always wanted to see South Africa!
Y’all do a great job! I’m still waiting to see how y’all made the whimsical trees shown on the hohoho photos ! Thanks for posting!
Hello Tricia, last night I posted the tutorial for trees. Here is the link for it: https://www.thenavagepatch.com/whimsical-tabletop-christmas-trees/
Have a great weekend! 🙂
Thank you, Tricia! See Handan’s latest post for the Whimsical Tree Tutorial!
I love this! I’ve always been a try to DIY before you buy sort of gal. My husband, not so much, so I’ve gotten away from it a bit, but I’d love to do this for our front porch one year. Thanks for the tutorial!
Thanks, Iris!
Oh my goodness, those are FANTASTIC!! Love. Now I need to get my husband in the basement to make a few for me! Thanks for linking up to Funtastic Friday!
These are seriously the BEST!! I love it…Christmas is a time of catalogs and creating a version that looks even better than the original – GREAT job, both of you!! I’ve chosen your Christmas boxes as my feature this week over at the Friday Favorites Linky Party, swing by and check out your beautiful boxes in all their glory again! Thanks for linking up!
Hi Dawn, I’m sorry for the late reply. Thank you so much!
This is awesome. Love the Christmas decorations and your beautiful house. You are so funny.
Thank you, Maria! 😀
Hi Handan, I wanted to let you know that your wood decorations are being featured on Oh my Heartsie Girls Friday Features this week. Your post has also been pinned.
Hope you have a great day! Merry Christmas!
Thank you so much, Karren! That’s awesome news. Have a great weekend and Merry Christmas to you!
Wow! Thank you so much, Karren! 🙂 Merry Christmas to you and to your family too!!
These are FABULOUS! Just letting you know I will be featuring you gift boxes tonight at Best of the Weekend!
Thank you so much, Amy!
Greg, as usual, they look amazing! And, as usual, you made it look so easy, that I’ve pinned it, thinking I can do it, too!!! (And, as usual, I’m kidding myself, there’s no way I can make those!) LOL! Great job! (as usual!)
LOL, thank you, Terra! 🙂