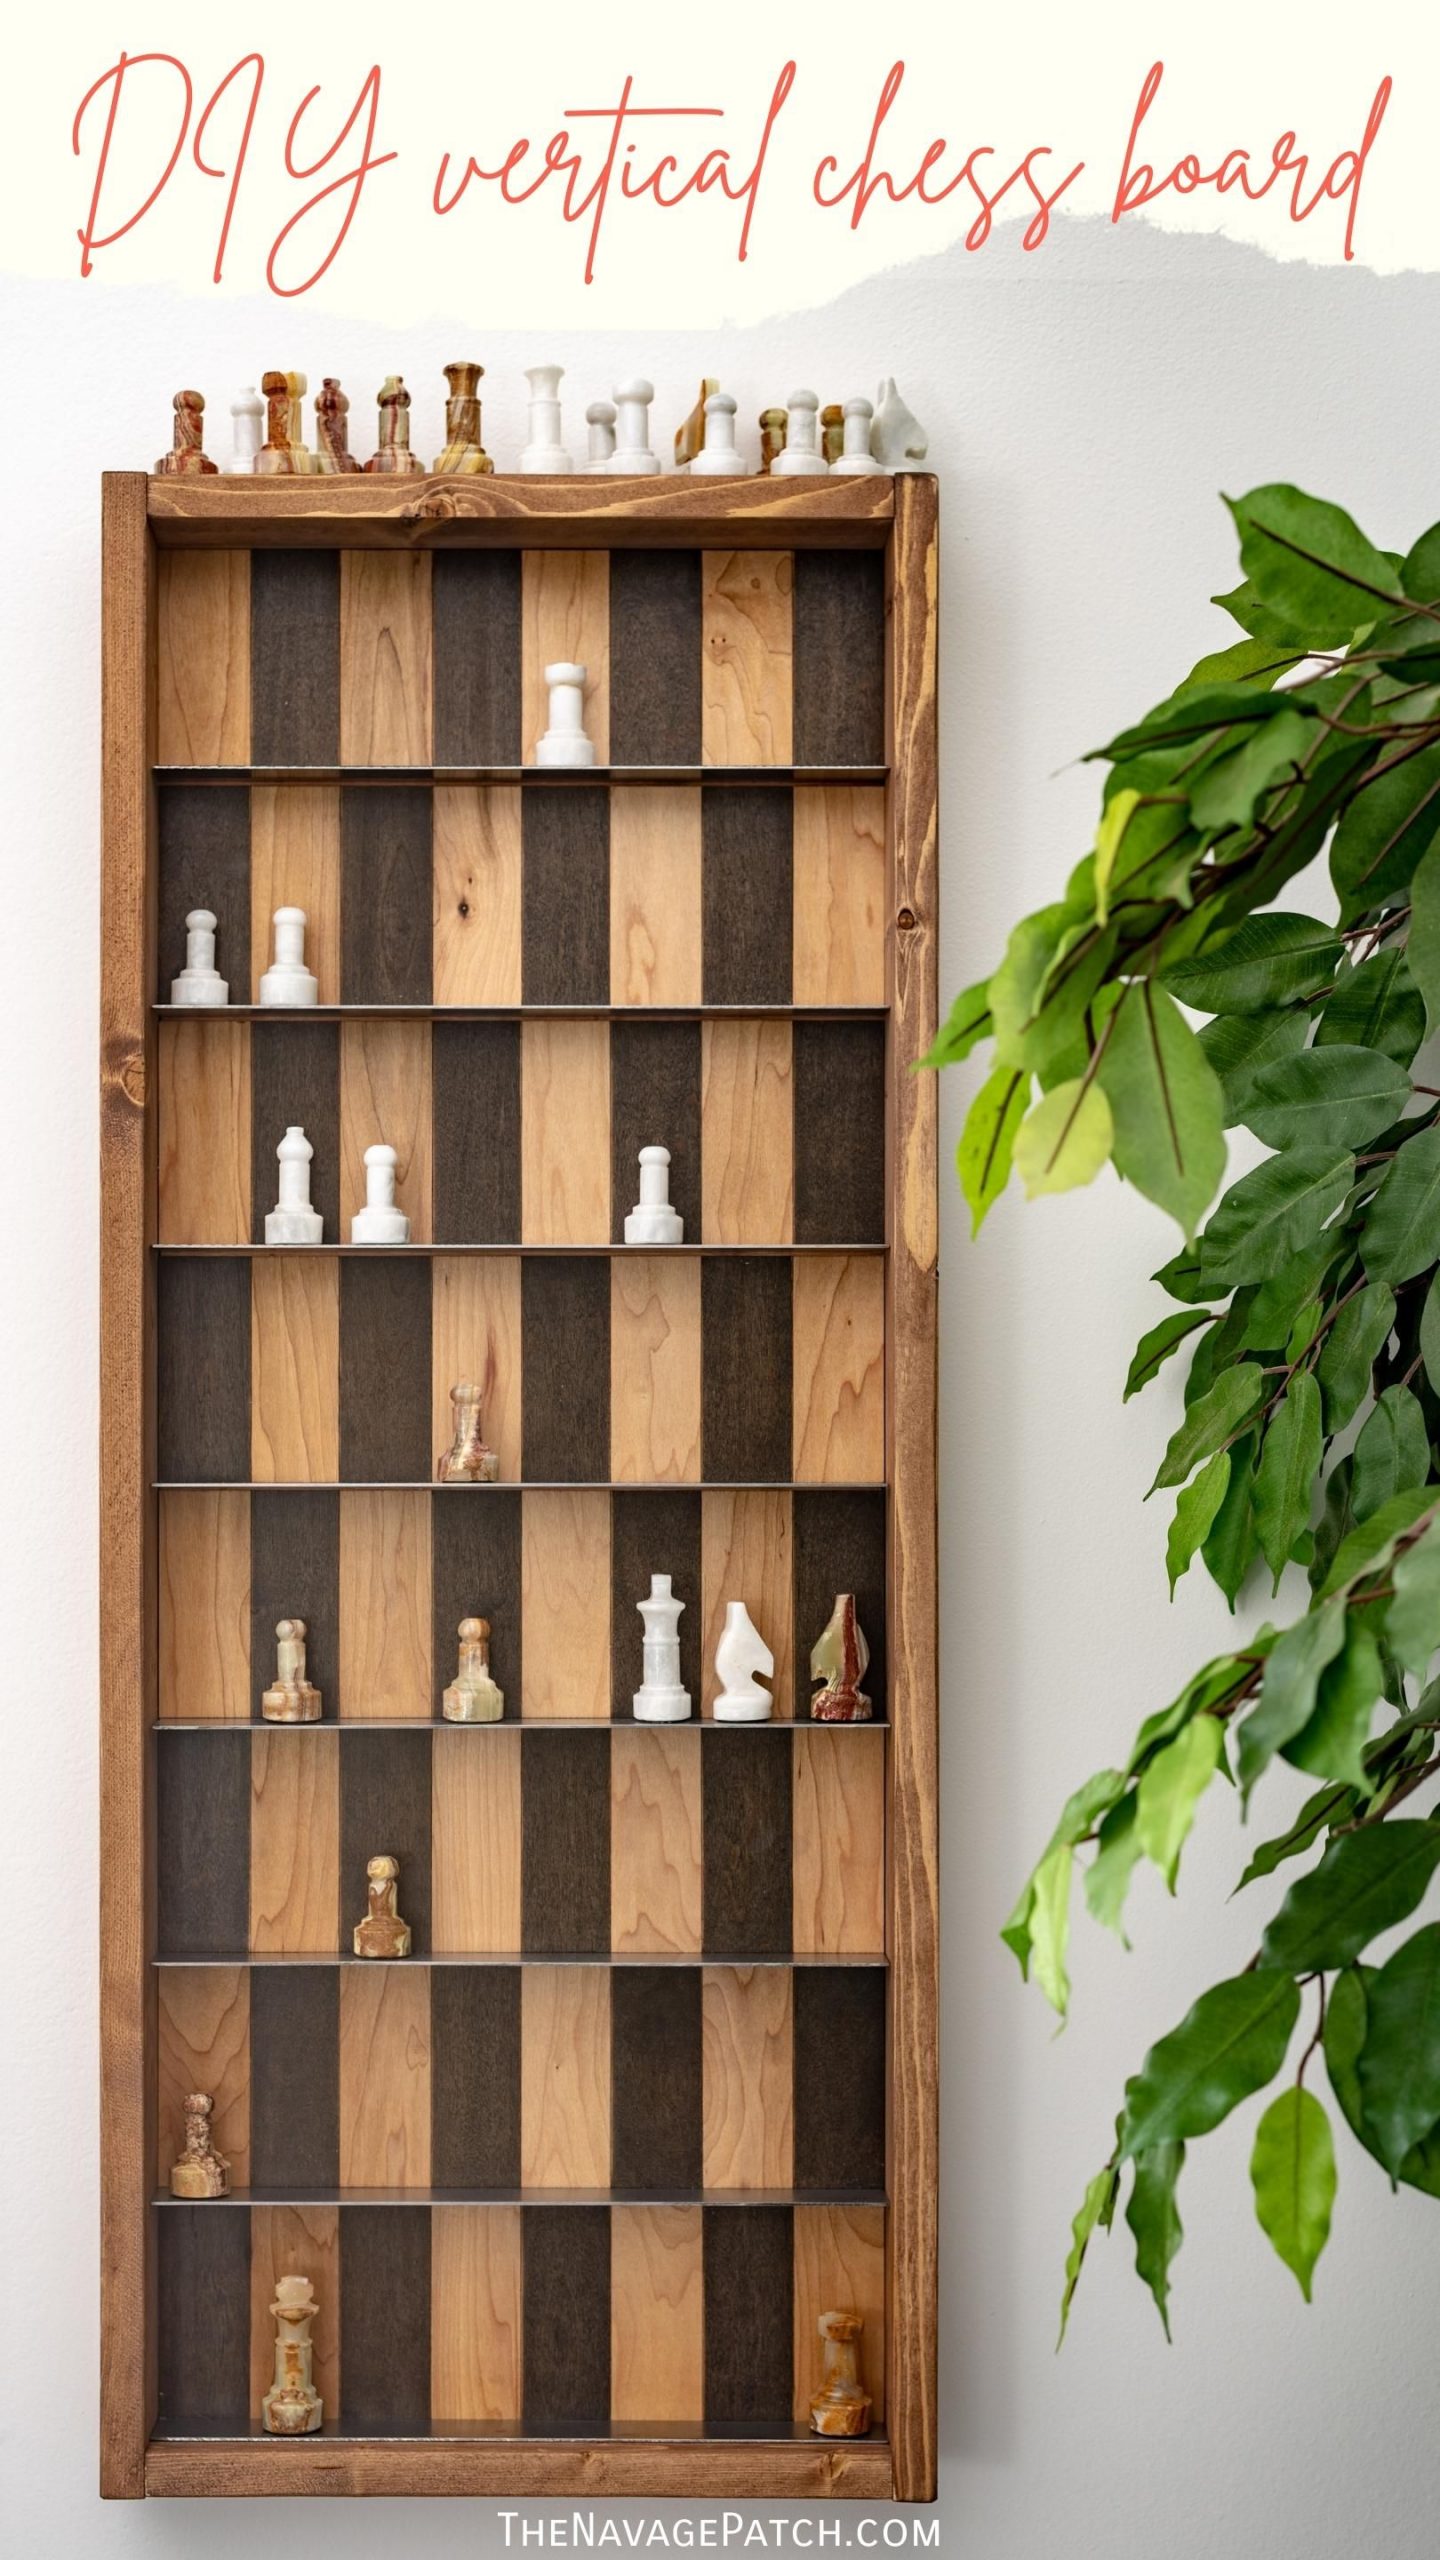
DIY Vertical Chess Board
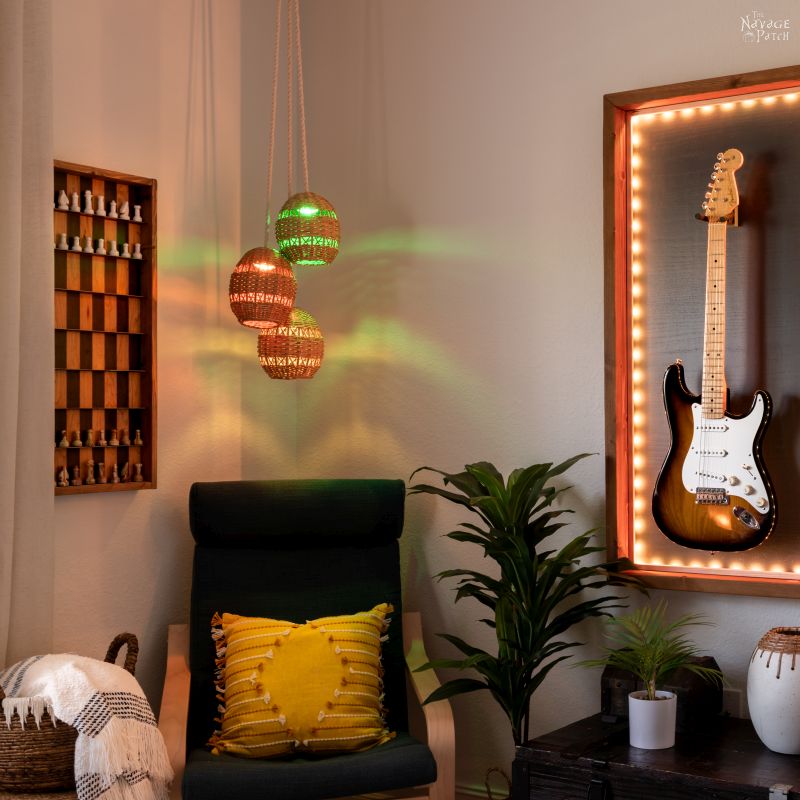
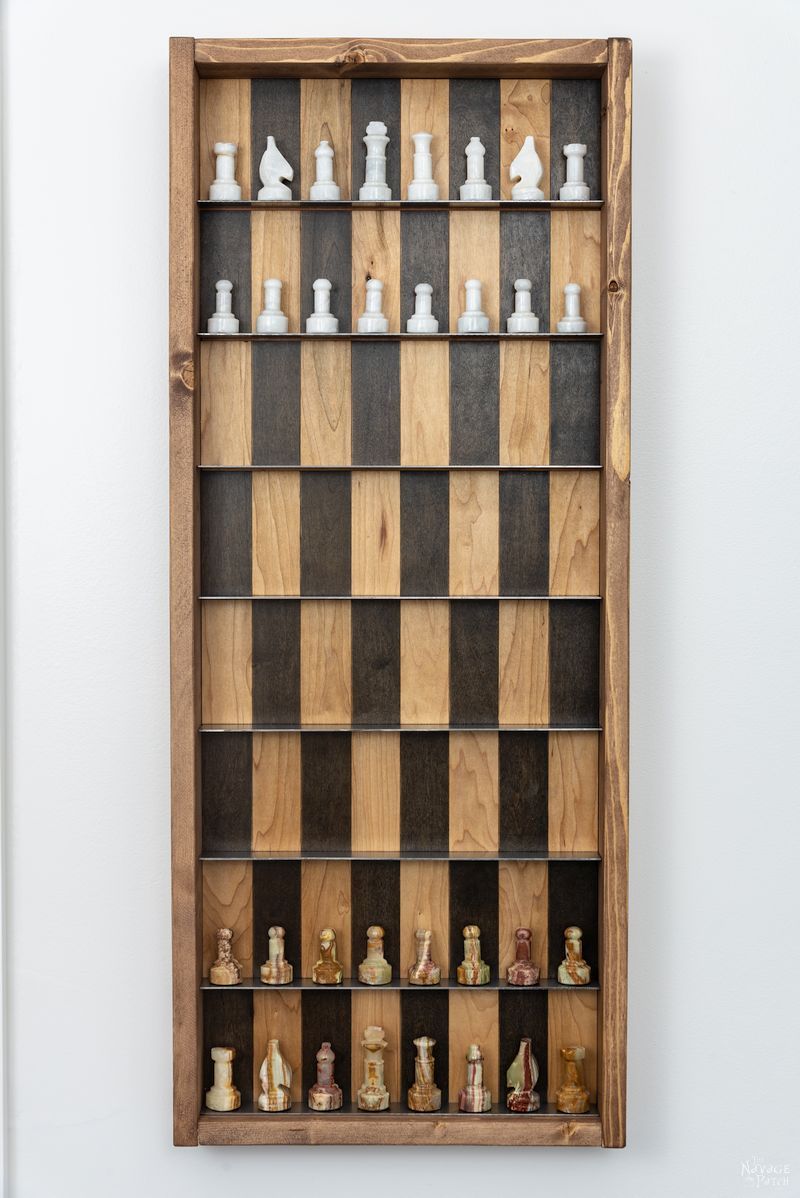
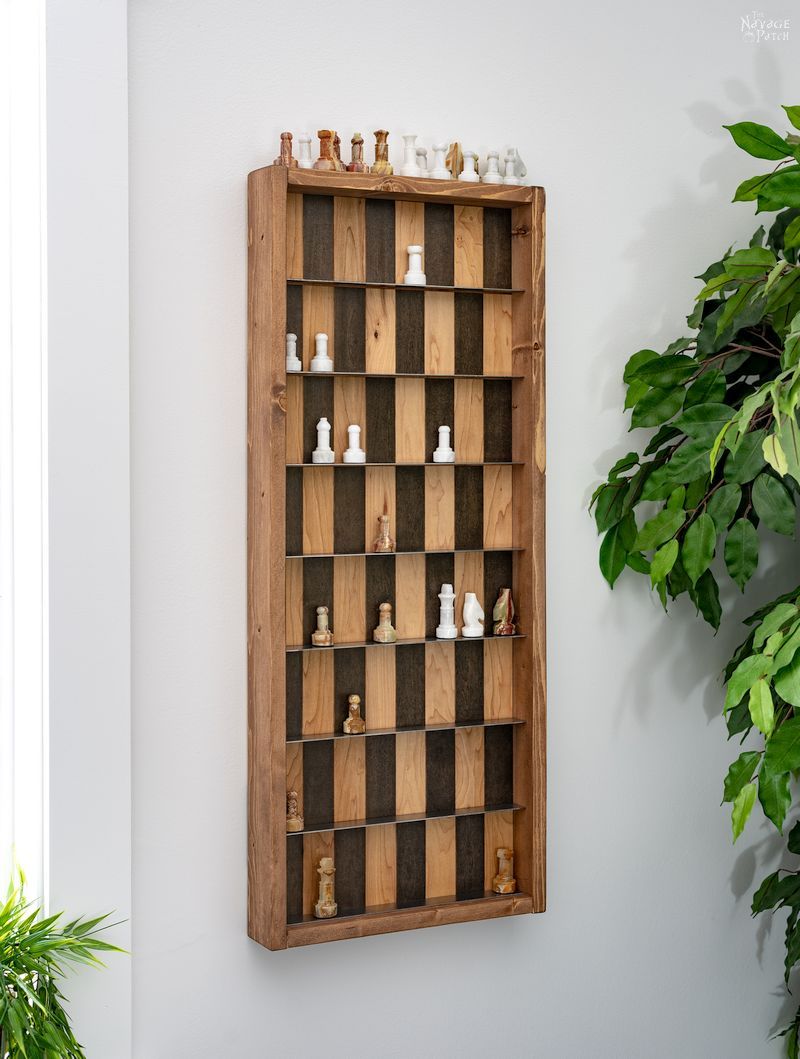
Our DIY Vertical Chess Board hangs on the wall, so there’s no rush to finish a game. It’s a playable piece of art that everyone will love!
I’m in awe of chess players. The ability to think and plan several moves ahead and build ever-changing strategies and contingencies has always seemed like magic to my sputtering and backfiring little brain stem.
When I see people playing chess, I imagine this is going on in their heads:
I see it when I watch Baris and Handan play. There’s an intensity I really admire.
Every so often, I’ll throw my hat in the ring and offer myself up for slaughter.
After asking again (as I always do) which pieces do what, I sit and contemplate the game board. While Baris’s or Handan’s brain has probably already anticipated how many moves it will take to destroy me, I just stare at the board with a little drool pooling at the corners of my mouth, while my brain does its thing:
Okay, so I’ll never be Bobby Fischer, but at least I have a couple of chess players in the family to make me proud.

One of the things that Handan wanted for Baris’s bedroom wall was some sort of permanent chess installation. Since horizontal real estate would be at a premium, she suggested I build a vertical chess board. She started yammering on about metal and magnets and frames and stain, and then before I knew it:
She wanted me to stain a checkerboard pattern on a piece of plywood for the chess board. This required me to come up with a way to create clean lines with stain. Once I had that part figured out, the rest was relatively easy.
The DIY vertical chess board I built for Baris’s room has metal platforms for the pieces. This allowed me to add magnets to the pieces to keep them from getting bumped or jostled off the board. Working with metal adds a bit of complexity to this project (I had to buy a metal-cutting blade for my table saw), but this vertical chess board can also be made with wood or Plexiglas platforms.
DIY Vertical Chess Board SUPPLIES LIST
Affiliate links are provided below. Full disclosure here.
- 3/4 inch plywood
- 1 x 3 pine for the frame
- Table saw
- 12 x 24 16-gauge steel sheet
- Metal-cutting table saw blade
- 150 grit sandpaper (for the sheet metal)
- 220 grit sandpaper (for the chess board)
- random orbital sander and 400 grit discs (for the sheet metal)
- Magnetic sticker sheet
- Utility knife
- Drywall square
- Painter’s tape
- Stain
- Wood glue
- Brad nailer

The onyx chess pieces I built the vertical chess board around were part of a set that Handan and I bought during our time in Afghanistan. We bought so many beautiful hand-crafted treasures there that we display all over our house. If you’re new to The Navage Patch and haven’t read the stories of our time overseas, may I invite you to start here and enjoy the journey with us?

They are beautiful pieces, and we’ve been wanting to display them for years. This DIY vertical chess board was the prefect opportunity to show them off!

DIY Vertical Chess Board
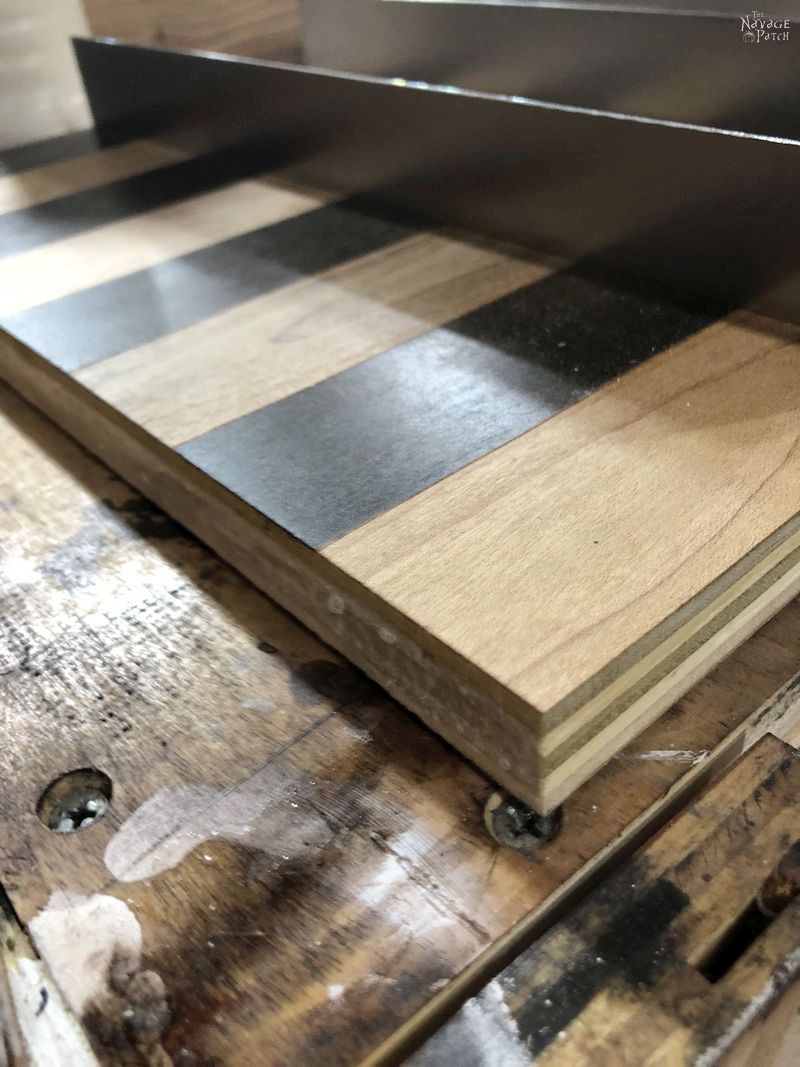
For my chess board, I chose a piece of 3/4 inch birch plywood with a nice grain pattern. I had a few panels left over from the cabinets I built for our Connecticut house laundry room renovation, so I didn’t have to spend any additional money on the board.
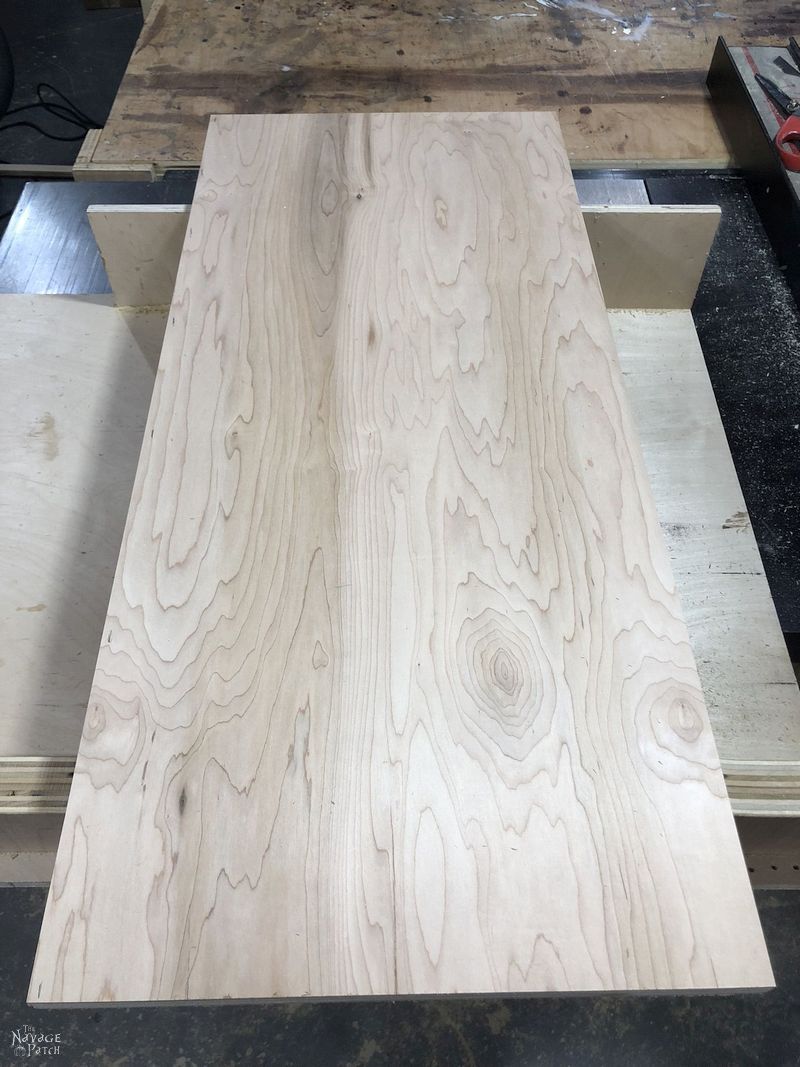
Note: you’ll see some process pics with a different piece of plywood. I originally made a chess board with a plain-looking piece of plywood that I also had as scrap, but I wasn’t happy with how it turned out, so I made another with the piece pictured above. I happened to take many more process pics of the one I didn’t use, so you’ll see a mixture of the two. The process was the same for both.
I based the size of my board around the size of my chess pieces. Since the metal I’d be using for the platforms was 12 inches wide, I was limited to that for the width, but it turned out to be the perfect size. Each space would be 1 1/2 inches wide.
For the height, I wanted to leave more than enough room for the pieces so the board wouldn’t look crowded. 31 inches seemed about right. Dividing that by the 8 spaces on a chess board gives 3 7/8 inches.
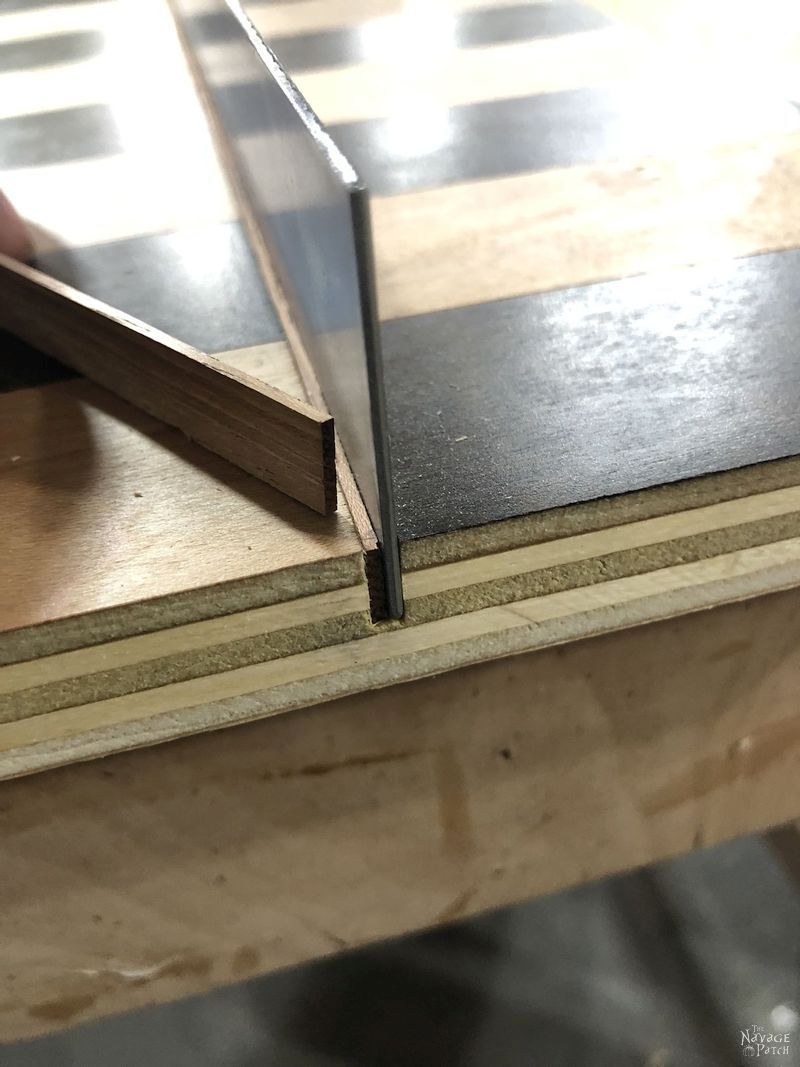
I marked the board every 3 7/8 inches for the cuts I would be making for the metal platforms. Since the saw blade has a thickness of 1/8 inch, I market the edge of the board at 3 13/16 and 3 15/16 just to make it easier to line up each cut.

I then adjusted the height of the blade so it would cut through about half the thickness of the plywood or about 3/8 inch.
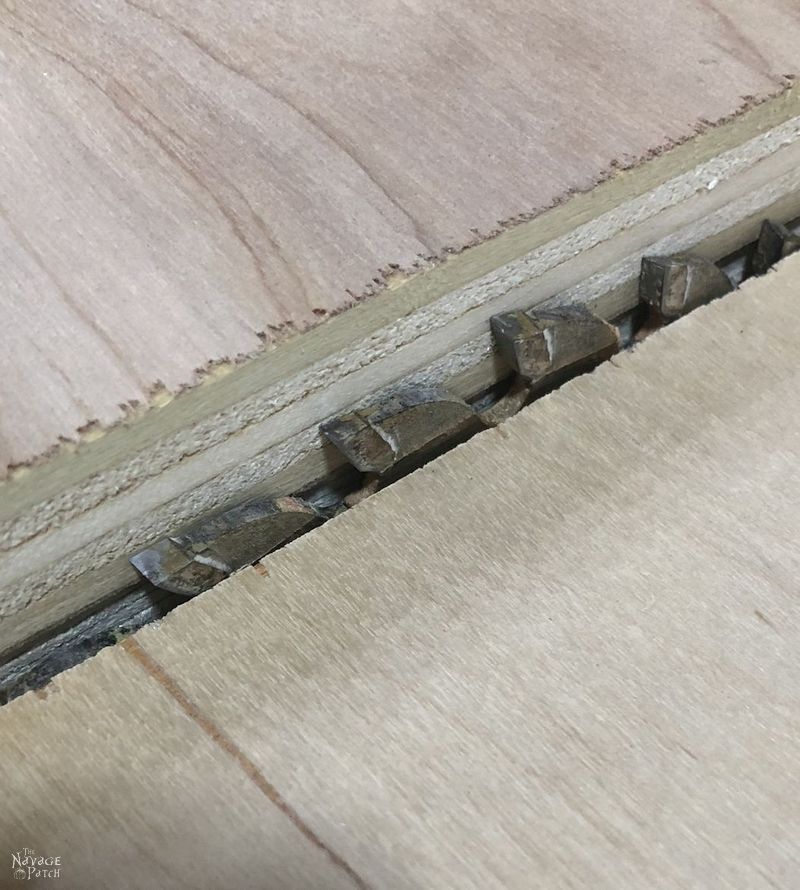
Then I ran the board over the blade at all my marks.
Here’s the board with all the grooves cut for the platforms.

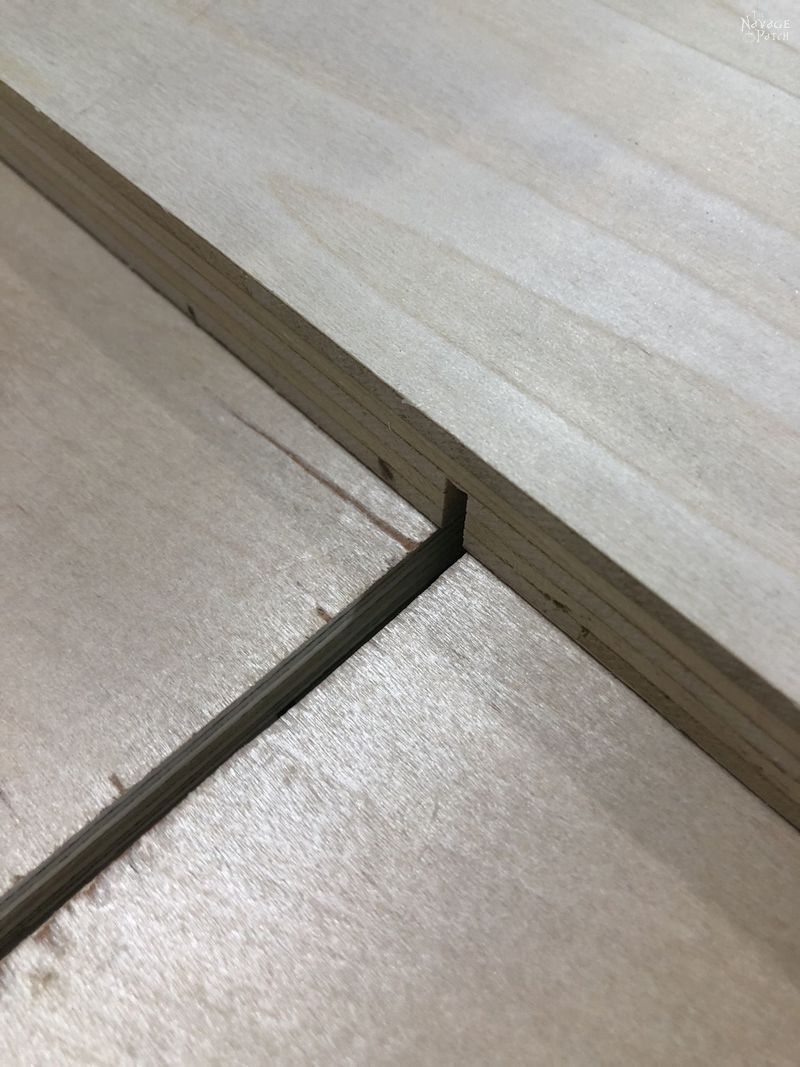
Next I used a utility knife to cut vertical grooves every 1 1/2 inches in order to get clean lines when staining the board.
A drywall square was perfect to run the knife against.

After one pass along the drywall square, I ran the knife freehand over all the grooves again. When I finished the lines, I lightly sanded the board with 220 grit sandpaper.

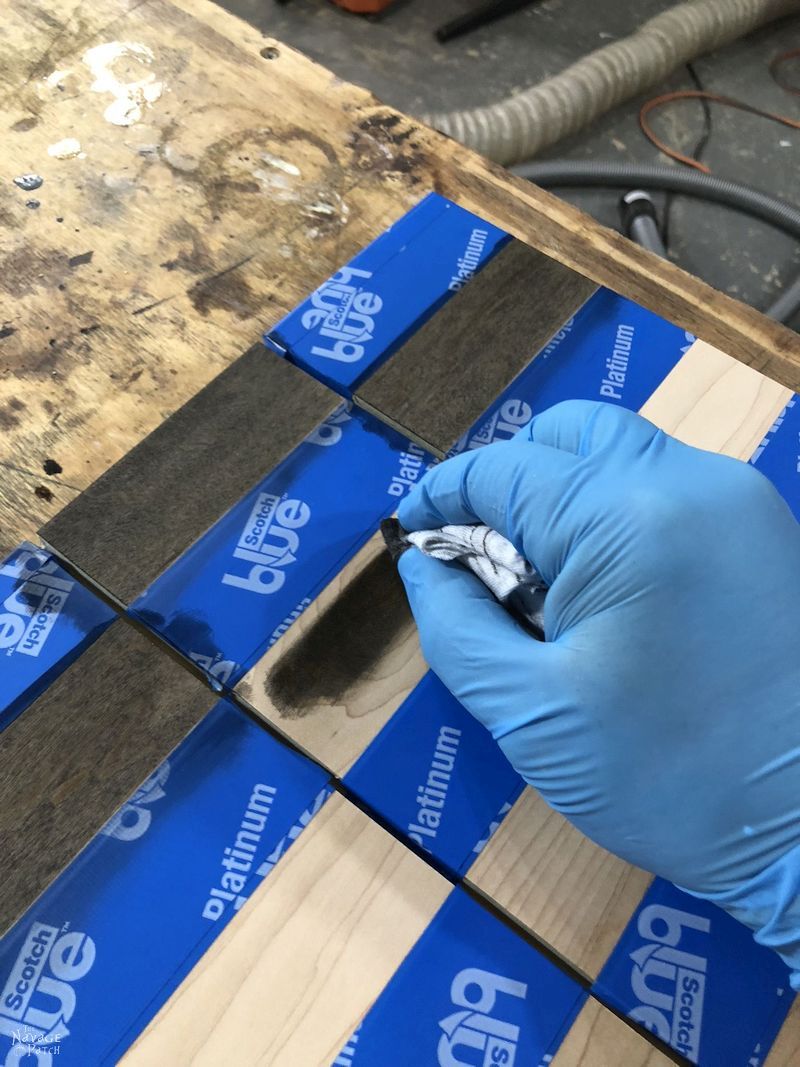
I used 3Ms Platinum tape to mask off the squares. I could have used regular blue tape for this step (the grooves contain the stain, not the tape), but since the Platinum tape tears perfectly straight, it was easier to use for this particular application. You can read more about this in my How to Make Clean Lines with Stain post.

I was careful to cover the grooves with the tape, as explained in my How to Make Clean Lines with Stain post.

Cutting grooves and masking are essential to making clean lines with stain, but the third key to success is not to flood the piece with stain.
Ebony stain would be the perfect color for this vertical chess board.

I applied just enough stain to get color on the piece with no pooling of residual stain.
The moment of truth! I peeled off the tape and was thrilled to see a perfect checkerboard emerge!

Success!

DIY Vertical Chess Board Platforms
Since we wanted the chess pieces to stay in place with magnets, I needed to use steel sheet metal to make the platforms. I chose 16 gauge sheet metal, which is about 1/16 inch thick. As my platform grooves were 1/8 inch wide, I’d need to shim the metal. More on that later.
The quickest way to cut sheet metal is with a carbide-tipped, metal-cutting table saw blade. I ordered one from Amazon for about $35. It made quick work of the sheet metal! I cut eight 1 1/2 inch pieces.

I’m holding up a piece of scrap as a deflector in the picture above. Without it, I would have been peppered with little molten shards of metal.
After a while, I got tired of holding the deflector shield, so I geared up to take the onslaught full force!
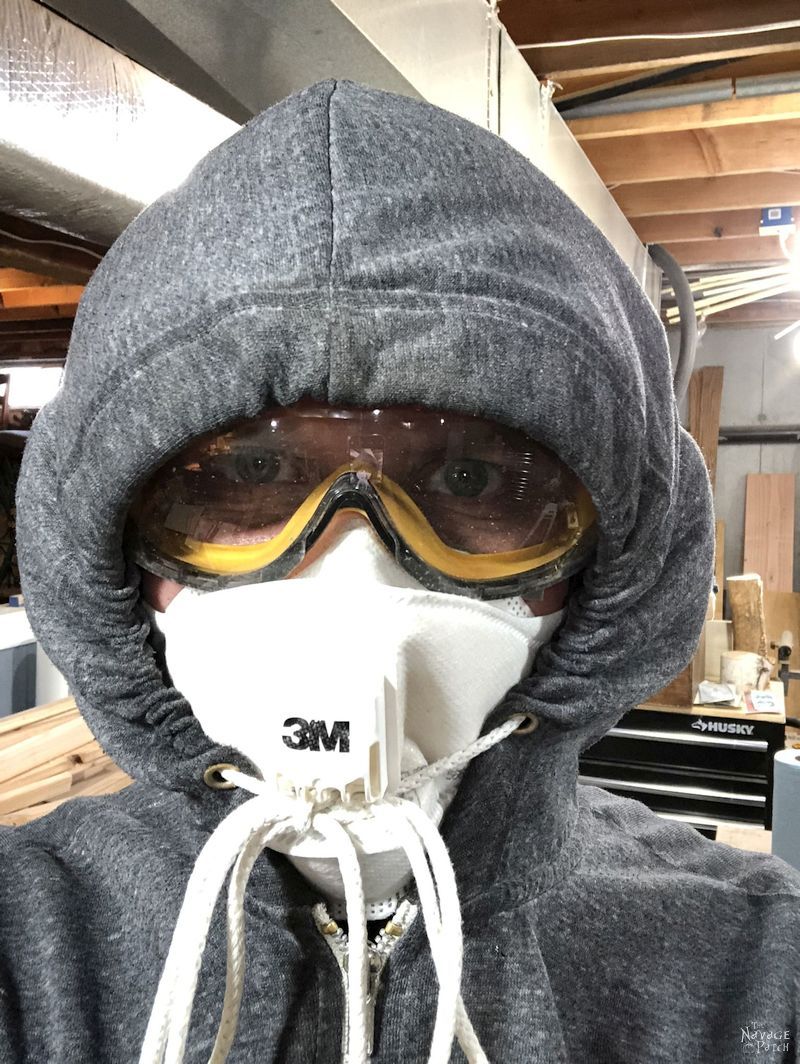
See those two little exposed patches of cheek in the photo above? Yep, I think that’s where 90% of the molten shards landed, lol!
The platform pieces were a little jagged, so I smoothed the edges with 150 grit sandpaper. This was quicker and easier than using a metal file.

To make the platform pieces look better, I buffed them with a random orbital sander and 400 grit sandpaper.

All buffed and ready to go!

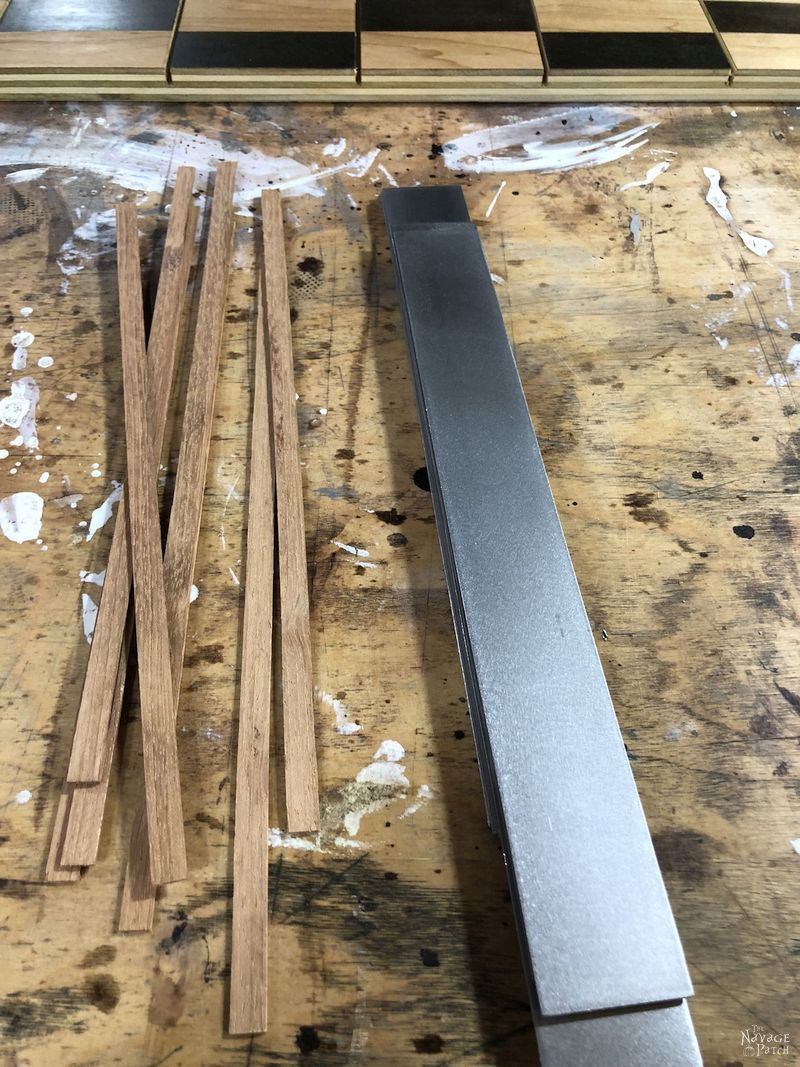
As I mentioned earlier, the metal platforms are only 1/16 inch thick, and the groove is 1/8 inch wide. I made 1/16-inch-thick shims from some scrap hardwood and cut them to about 3/8 inch wide, so they would fit perfectly in the groove.
Installing the platforms…
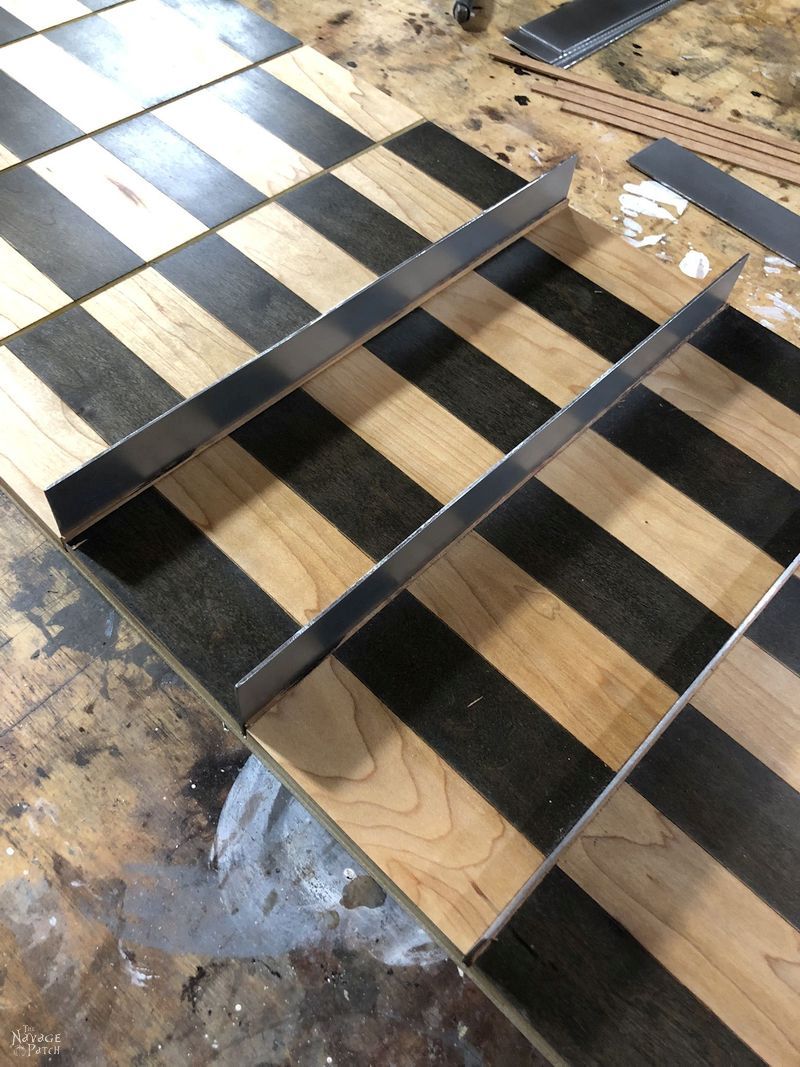
I used a spare shim to help hammer the other shims in place. It was a tight fit, which is what I wanted.
DIY Vertical Chess Board Frame
After installing the platforms, I cut pieces for the frame. I wanted to keep the frame simple and build it onto the chess board. I used 1 x 3 pine lumber, cut them to size, sanded them and then stained them.
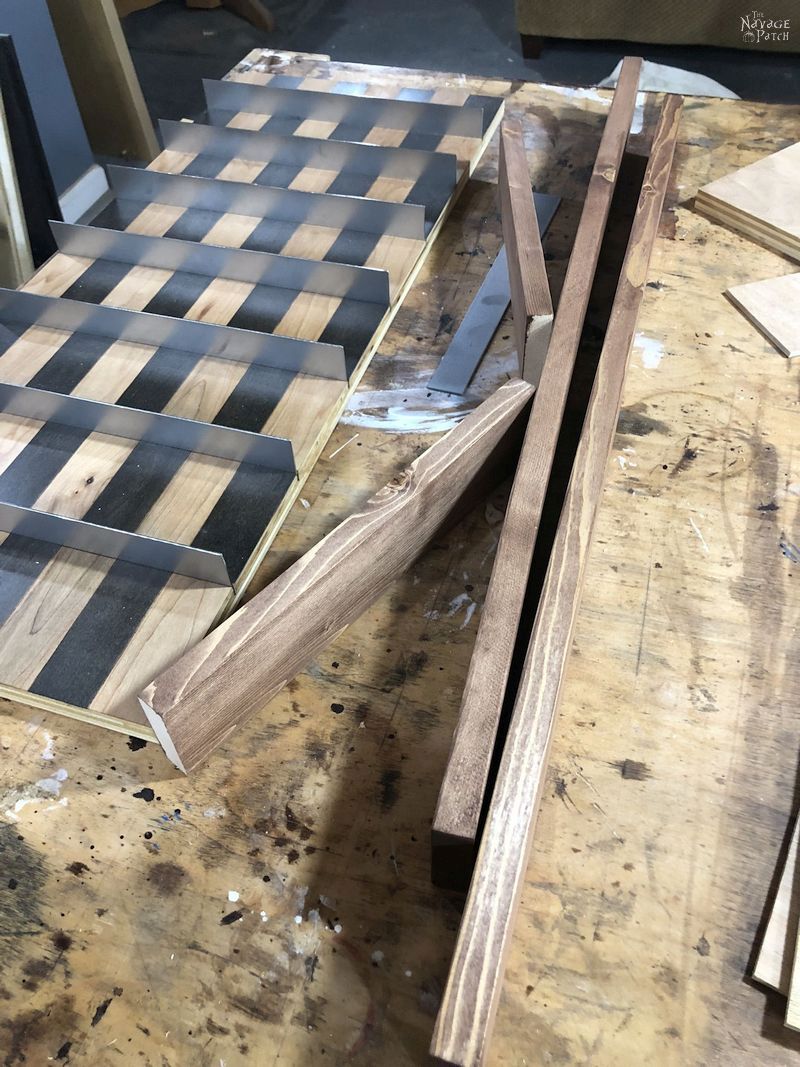
To install the frame pieces, I applied some wood glue along the edge of the chess board and then brad nailed the frame piece in place.

I did this with the remaining frame pieces.
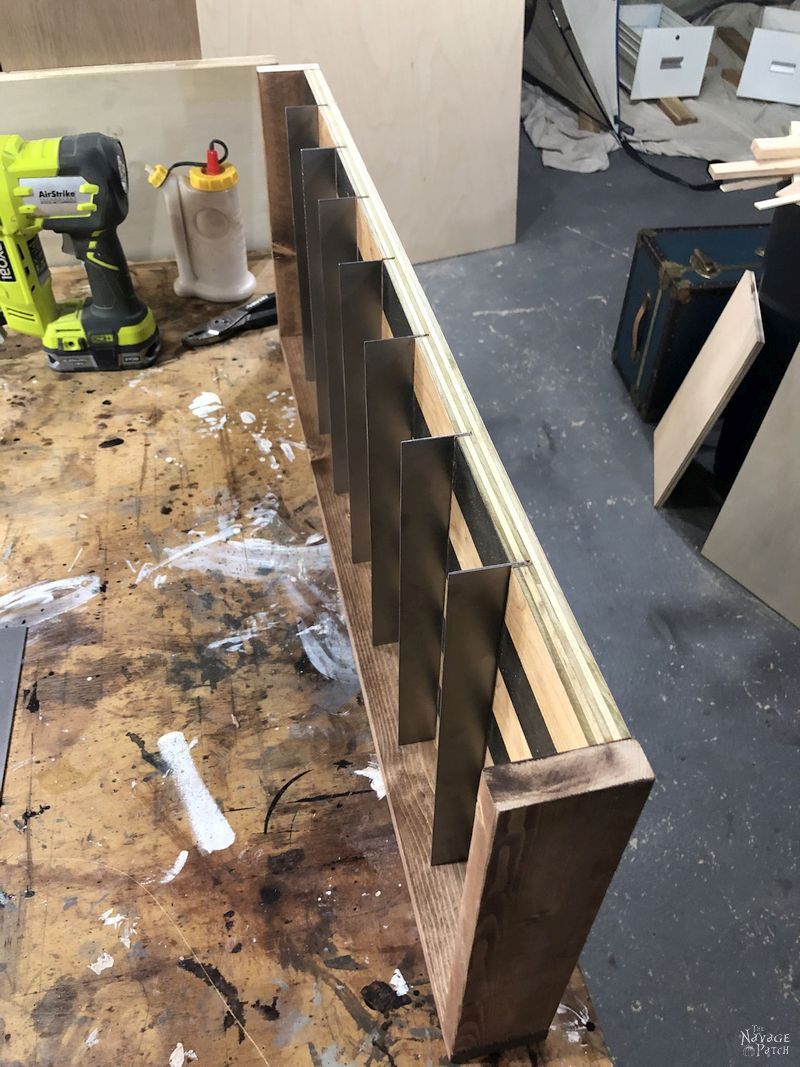
As a last step, I glued the final metal platform piece onto the bottom frame piece, and my DIY vertical chess board was finished!
Handan then cut out little pieces of the magnetic sticker sheet and stuck them to the bottoms of each piece.

To hang the chess board, I installed two D-rings to the back and ran sturdy picture frame wire between them.

Baris’s DIY Vertical Chess Board looks awesome on his wall, and it is always ready for a mother-son championship match!

We love to see our DIY projects out in the wild! If you try this DIY project and take a picture and post it on Instagram, be sure to tag us – thenavagepatch


Share it on Pinterest & Facebook!

That is Pretty Darn Awesome! Well Done!
Thanks, Shaun!
So cool…and absolutely beautiful! By the way you completely nailed the very same experiences I have when I attempt to play chess with my kids, seriously! ?
Thank you, Erin! It’s a frustrating game, lol!
Wow you two are so clever and have amazing imagination!! That is fabulous a game and beautiful display/storage in one. I’m afraid when it comes to games Snakes and ladders and snap are about my limit.
Thank you, Catherine! I love snakes and ladders! Though here in the US, we have “Chutes and Ladders,” as I guess snakes are too scary for kids, lol! 🙂
What a cool idea! I wish I played chess better but I play it so little, I never seem to learn to plan ahead with my strategy. I am too busy trying to remember how each piece is allowed to move!
Same here, Laurie! 😀
Wow! You both are so clever & talented. I’m always entertained reading about the projects. Another successful, unusual, amazing, useful endeavor!
Thank you so much, Ellen! 🙂
Thanks again for the great idea. You have the best blogs in my opinion. You do an amazing job on very unique items.
Thank you, Marcia – that is an awesome compliment! 🙂
This is a beautiful piece! I LOVE following your creative process! Your thinking is so clear and confident, even when you realize a mistake and rethink how to accomplish the goal!
Thank you, Constance! Clear and confident after the fact – muddy and uncertain while making the project, LOL! 😀
that baby is nice really nice and i can’t play chess worth a flip either backgammon was as hard a game that i ever played xx
I hear you, Chris! I could never get the hang of backgammon. Handan and Barish love it though!
You two never cease to amaze me with how your minds work! This is gorgeous! I don’t know how to play chess but I’d love to have one in my house! Hint., hint! (I may end up using it as a checkers set but don’t let that dissuade you from sending me one!?)
Thank you, Giselle! Hey, vertical checkers! That’s an awesome idea, and a game I can get behind! 😀
When I was younger my cousin used to love whipping me at chess. I think our final tally was about 73 to 5. My only strategy was to foray blindly but with great enthusiasm into No Mans Land and hope for the best. My cousin, who had an actual strategy, did away with me from there. She also used to like destroying me at Monopoly, and Poker, and any other game she could lure me into playing.
But I still displayed my chess board proudly, as if I had any idea of what I was doing, because heck, it looked good! It did take up valuable coffee table real estate though but I would have never thought of placing it on the vertical. Inspired! What a great way to include such a beautiful set into interactive art.
The way the grain of the wood matches the stone is beautiful. I don’t think you could have picked a more perfect piece to use as the board. And those LINES. Why are perfect lines so satisfying? I think I’d just walk past this board occasionally and sigh happily at the perfection of those lines. Gorgeous work.
I think our brains work in the same way, Jay. Mine is no good for strategy games. I always felt like a guppy at a shark convention when I’d get myself ensnared in anything that didn’t depend on the dumb luck of a die toss, lol!
Pretty darn amazing. I love your build and I love your writing composition, great illustrations. I feel the same way about those who play chess.
beautiful workmanship. I would love to build a vertical chess board for my son but its above my skill and tool capacity.
Thanks for posting.
Okay, so two years isn’t too long to answer a comment, right? I’m so sorry, Becki – this one slipped through the cracks. Thank you so much for your kind words! 🙂
That is a really cool idea! And I think I’ll make one… but since I sew… I’ll be making a vertical chessboard with Velcro!😁
See? This is what we love about you guys! We give ideas, and you all adapt them to your skills, tools and materials! Velcro is a GREAT idea, Marie!
Oh, sure…you HAD to buy a new metal blade for your table saw. Oh, the sacrifices we make for our creative endeavors. But now you have an excuse to try some other metal projects, just to be able to use that new blade again! This turned out really neat. It would be great for a game room, too!
Cutting metal is great and all, but ooooh-eeee! Does it hurt when those molten flecks hit the skin, lol!
You are hilarious! Thank you so much for your inspiration and your humor. I know that it is too late in my life to undertake these types of projects, and I never would be able to match your talent! It makes me pretty darn happy to read your posts and admiring your projects!
Thank you, Kathy! I know some of our projects (especially the older ones) are not necessarily doable by everyone, so that’s why I like to at least make them fun to read! Thaks for the kind words!
That is genius and looks very high-end….. next level execution on that one.
Really beautiful piece of functional art.
Your blog is fun and interesting! ❤️
Thank you so much, Shelley! It was a lot of work, but I think it was worth it. It’s something Baris can take with him into adulthood and hopefully not lose along the way, lol!
I really wanted to see mitred corners tho 😏
Well, Handen and Baris may have the brains to play chess but look at the amazing achievements your brain has created!!!
A follower of yours in awe!
Susan
Thank you, Susan! Handan is the idea woman. As I’ve said before, I’m just the monkey with a hammer! 😀
That is the most fabulous project! Great to play long term when the players can’t be there at the same time.
Thank you so much, Lois!
Wow, this DIY vertical chess board is amazing! The idea of playing chess on a playable art piece is so clever and unique. I love how the Navage Patch’s design allows for a fun and modern twist on a classic game. Can’t wait to try it out!
What a fantastic project! I love the idea of combining art with a functional game like chess. The vertical design is both unique and space-saving. Can’t wait to try this out with my family—thanks for the inspiration!
What a fantastic project! I love the idea of a vertical chess board – it’s both functional and artistic. The step-by-step instructions are super helpful, and I can’t wait to try this out at home. Thanks for sharing such a creative and unique DIY!
I absolutely love this idea! The vertical chess board adds such a unique touch to the game. It’s not just functional but also a stunning piece of art for home decor. Can’t wait to try making one for my living room! Thanks for sharing this creative project!