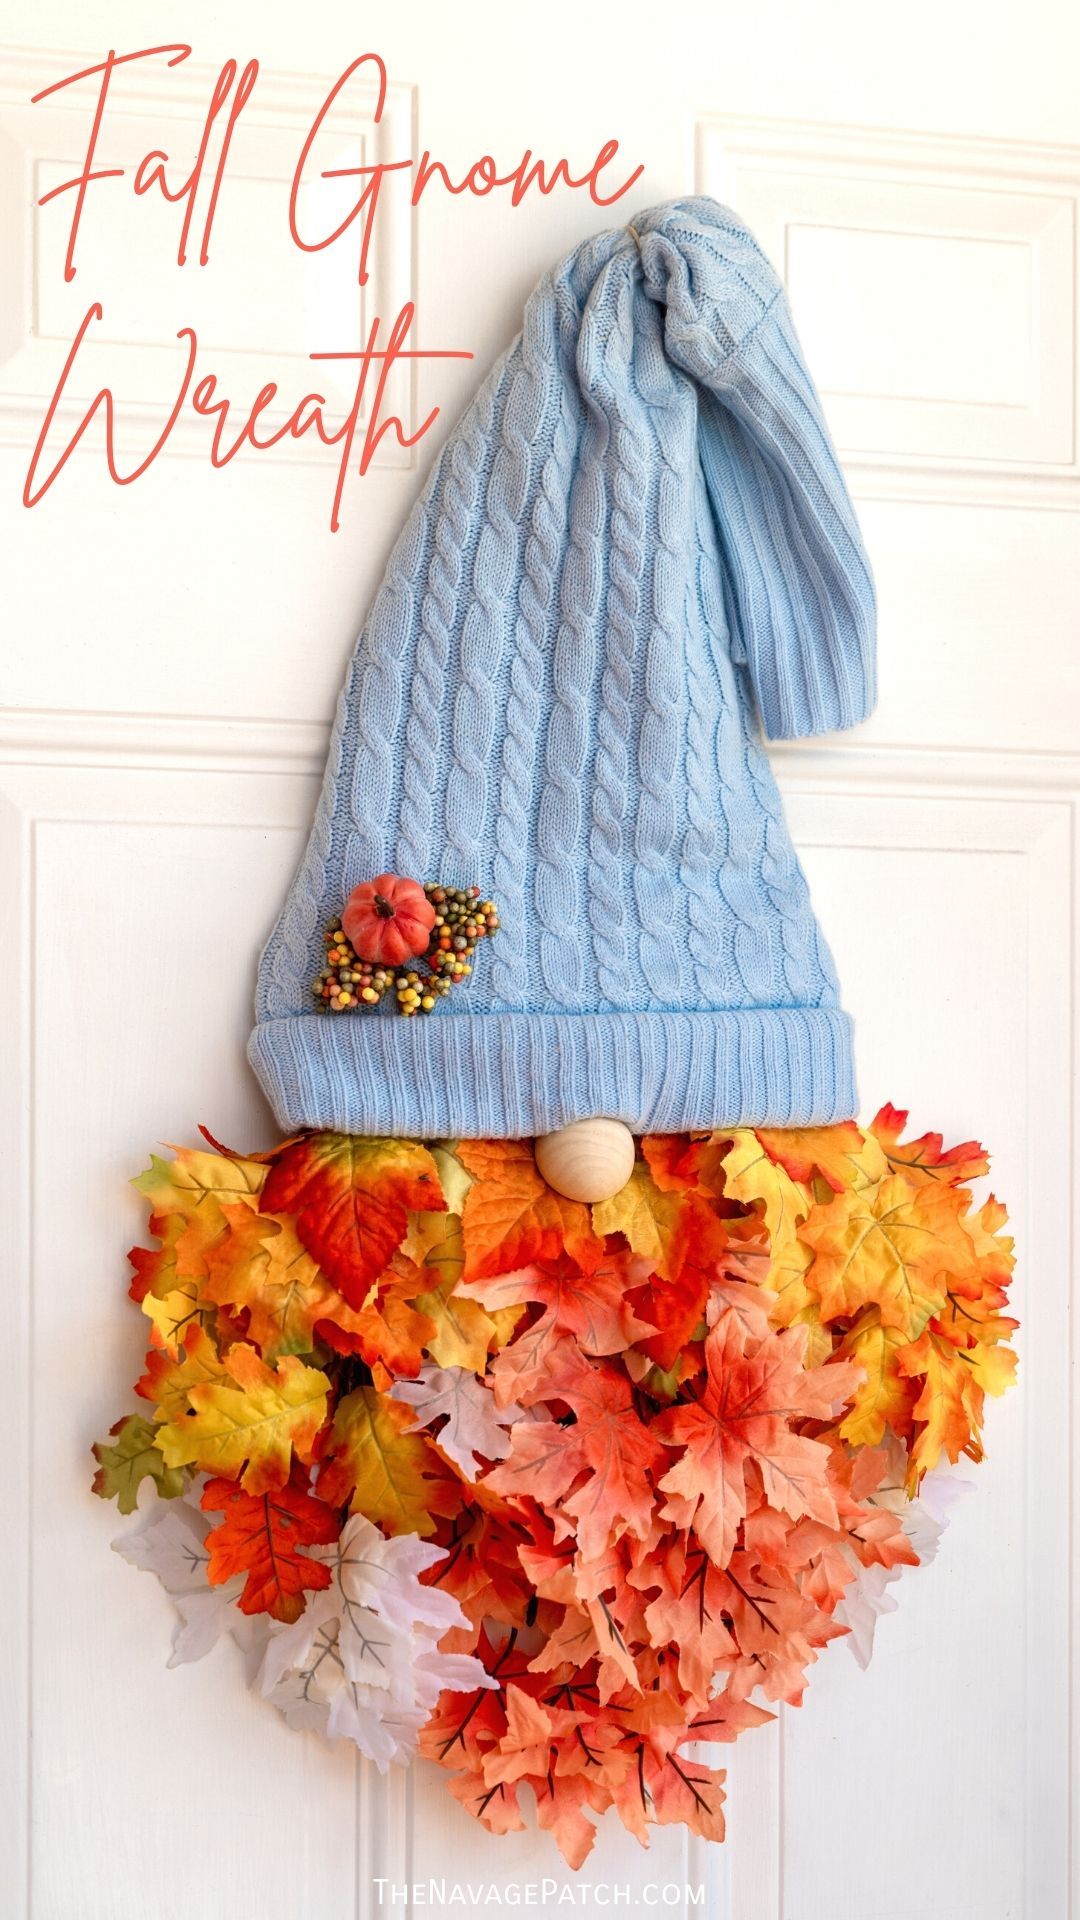
Easy DIY Dollar Tree Fall Gnome Wreath
This Fall Gnome Wreath is not only the cutest thing ever, but it’s also a super easy DIY that only costs about $12 to make!
If you asked me back at the tail end of 2019, I would have told you that one was definitely enough.
In December of that year, we made our first gnomes.
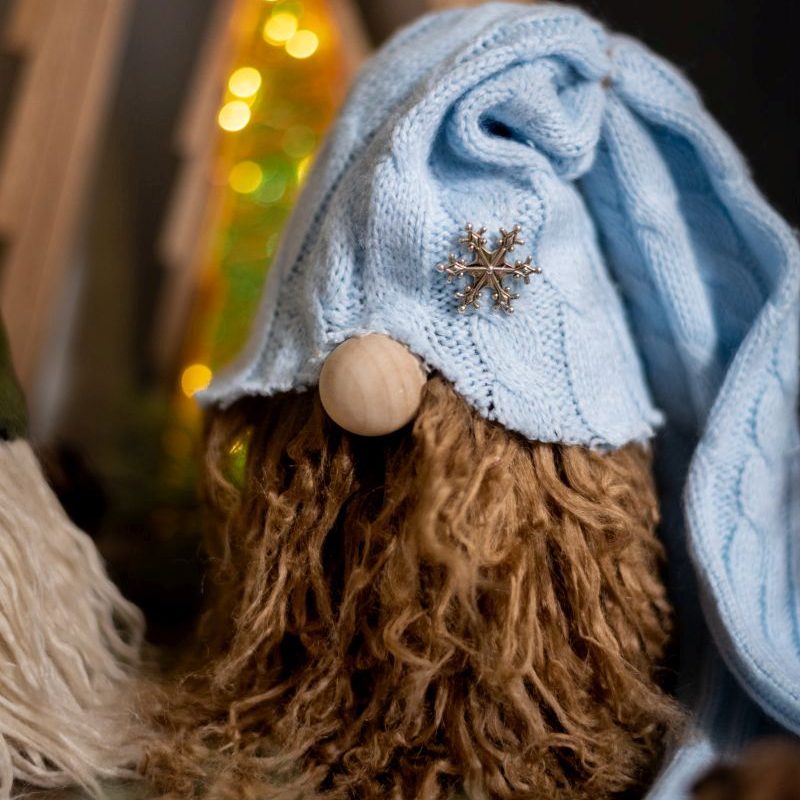
And had you asked, I would have told you that was the end of it.
One and done, baby. Made ’em once and gno’more.
Of course, I also would have told you that we would continue living in Connecticut and that life would carry on much as it had for the past several thousand years.
Thus we answer yet again the age-old question: what do I know?
If you answered, nuthin‘ – congratulations! You win a golden peanut!
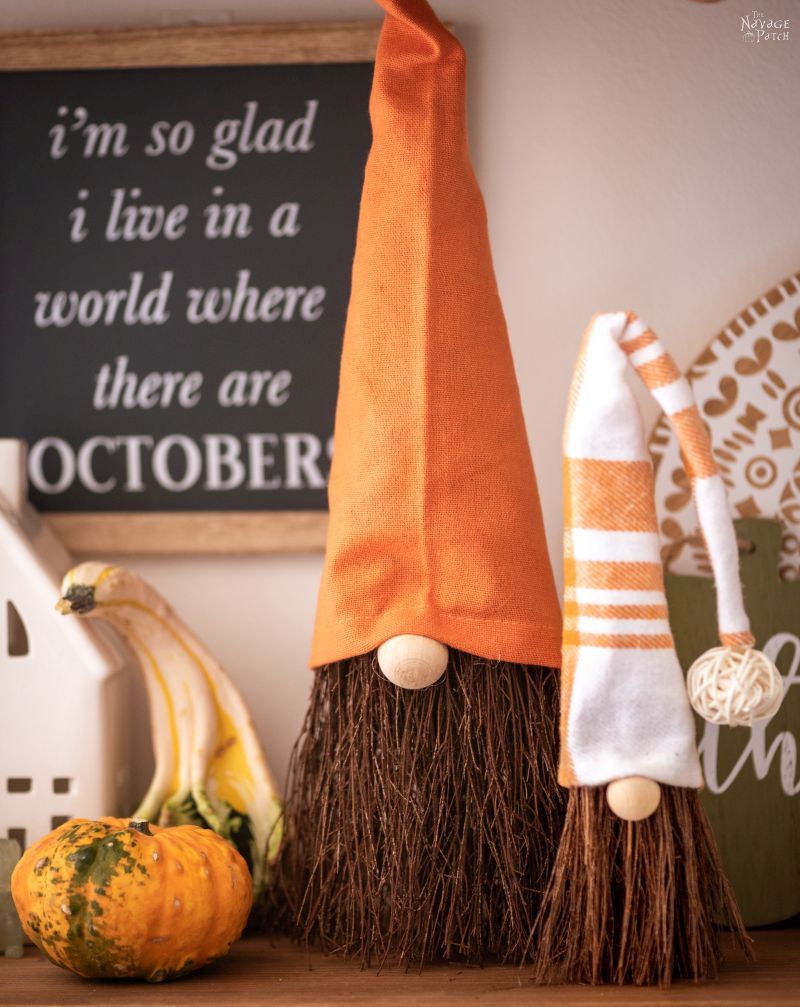
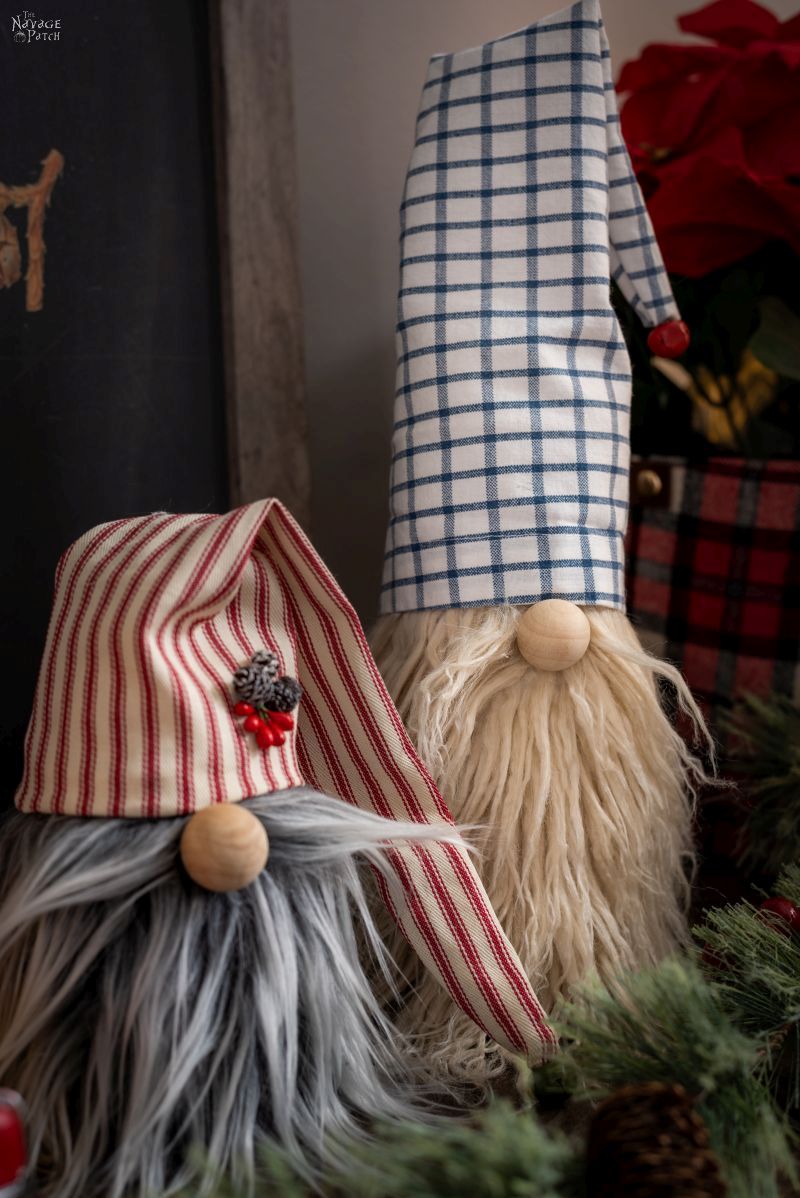
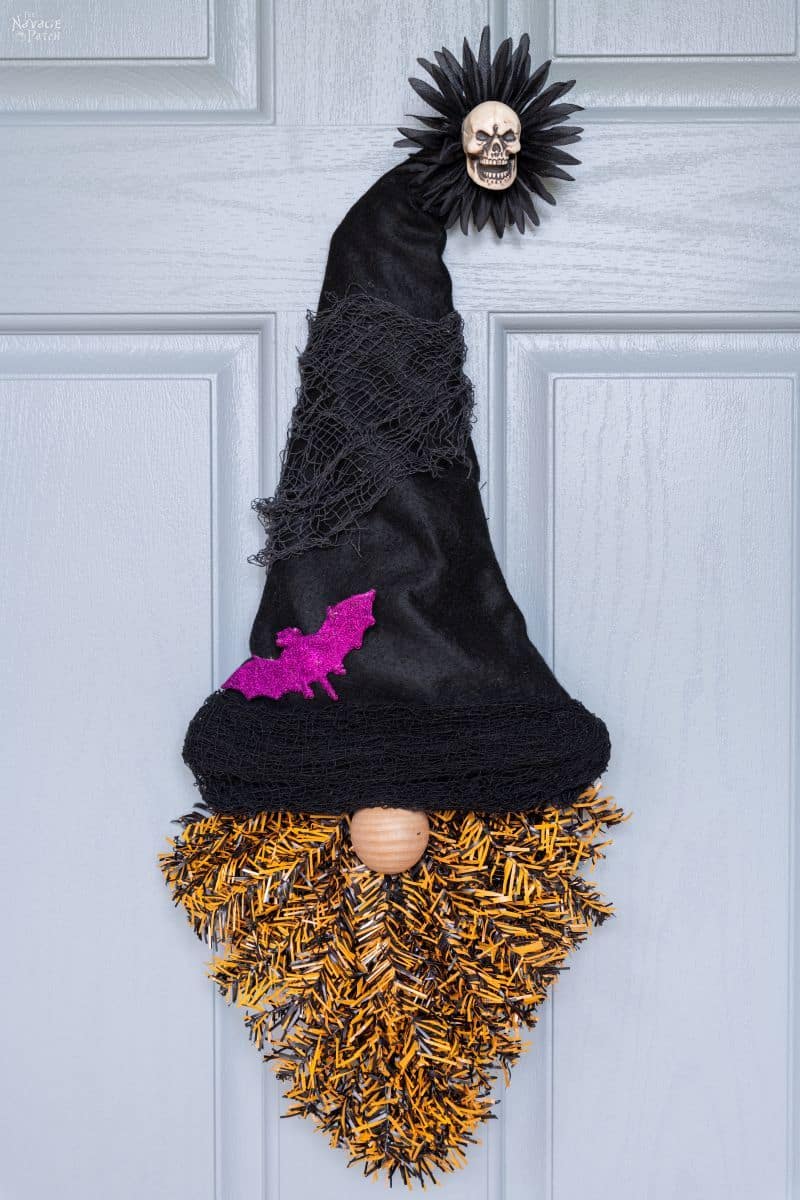
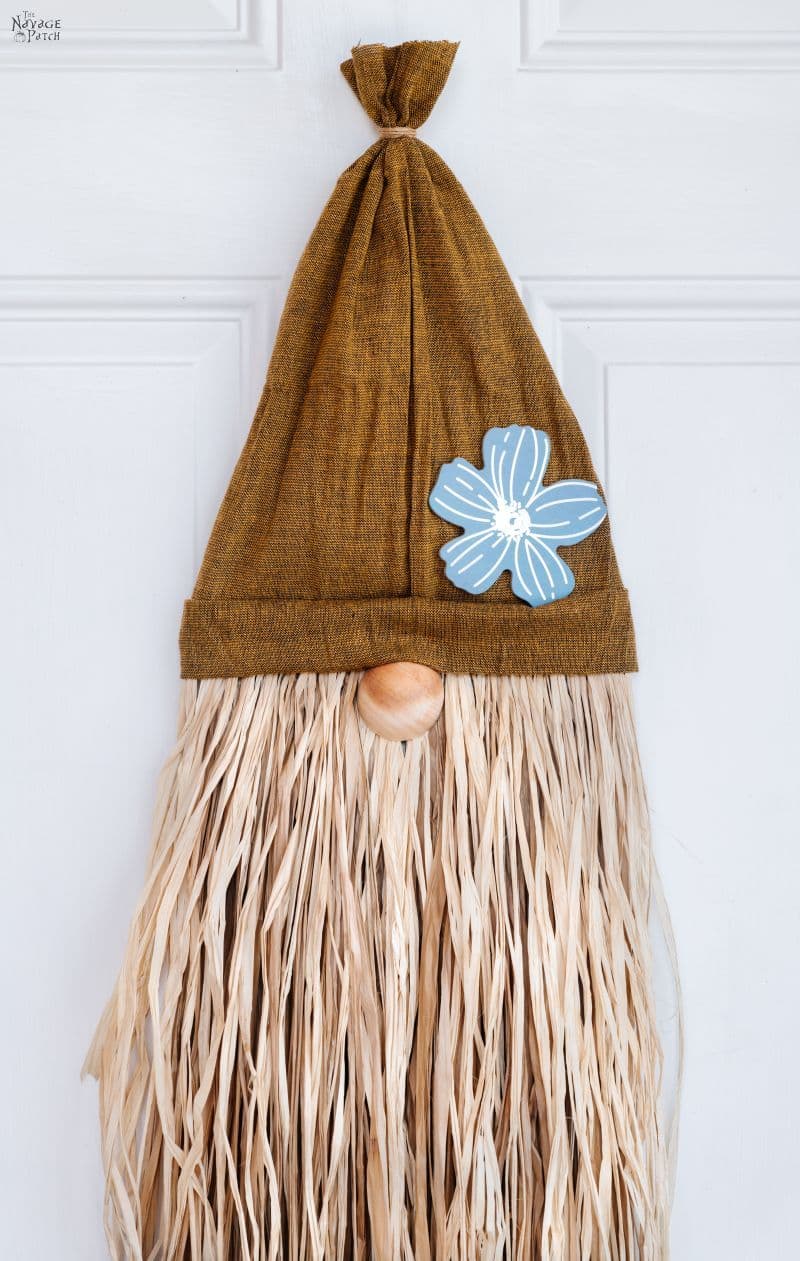
Fast forward through Georgia to Florida and four more gnome projects, and there’s gnome end in sight. Just as we became known early on for our Halloween projects, we’re now getting known (or would it be gnown?) for our gnomes.
The best part is our gnomes are ICE ICE, baby – Inexpensive, Cute and Easy. What more could you possibly want from a gnome? Breakfast in bed and whispered sweet nothings? Well, we’re working on that, but for now, would you settle for one that hangs on your door and looks like late afternoon sunlight?
Good, let’s get gnoming!

DIY Fall Gnome Wreath SUPPLIES LIST
Affiliate links are provided below. Full disclosure here.
- 8 fall foliage picks from Dollar Tree
- Christmas Santa or Halloween witch tinsel hat (Dollar Tree)
- Small zip ties (Dollar Tree)
- Old fabric, burlap or sweater for the gnome hat
- Wood hemisphere, 1/2 ping pong ball or similar for nose
- Hot glue gun
- Small rubber band

DIY Fall Gnome Wreath VIDEO TUTORIAL
You may want to watch our short video below for an overview of this easy fall gnome wreath before you read the detailed step-by-step tutorial.
On Tiktok
We love to see our craft projects out in the wild! If you try this seasonal craft project, take a picture and post it on Instagram, be sure to tag us – thenavagepatch
How to Make a Fall Gnome Wreath, Part 1: Beard
Step 1 – Unravel the tinsel hat
Honestly, if you want to be Lazy Bananas about this step, feel free to skip it. The tinsel will be completely covered by your gnome hat in the end. I removed the tinsel because it was easier to thread the zip ties through a clean hat frame. Feel free to leave it though!

Oh, and if you’re wondering why the Christmas tinsel hat and not something more autumn-esque like a witch hat, well, it was supposed to be made from a witch hat, but I couldn’t find the ones we bought last year. Thank god my babes found this one in a tub of Christmas stuff, otherwise Yours Truly would have been in the dog house!
Step 2 – Pick your picks
Okay so what are these? Picks? Stems? Sprays? Sprigs? Bouquets? Bunches? Shopping for this stuff is like talking to an Eskimos about snow – there are semantic subtleties I just don’t get!

Anyway, pick about 8 – that’s the number we used, and I think it’s a mighty fine number. Note that Dollar Tree carries these in oak leaves, maple leaves, grape leaves and unidentified leaves, so have fun shopping!
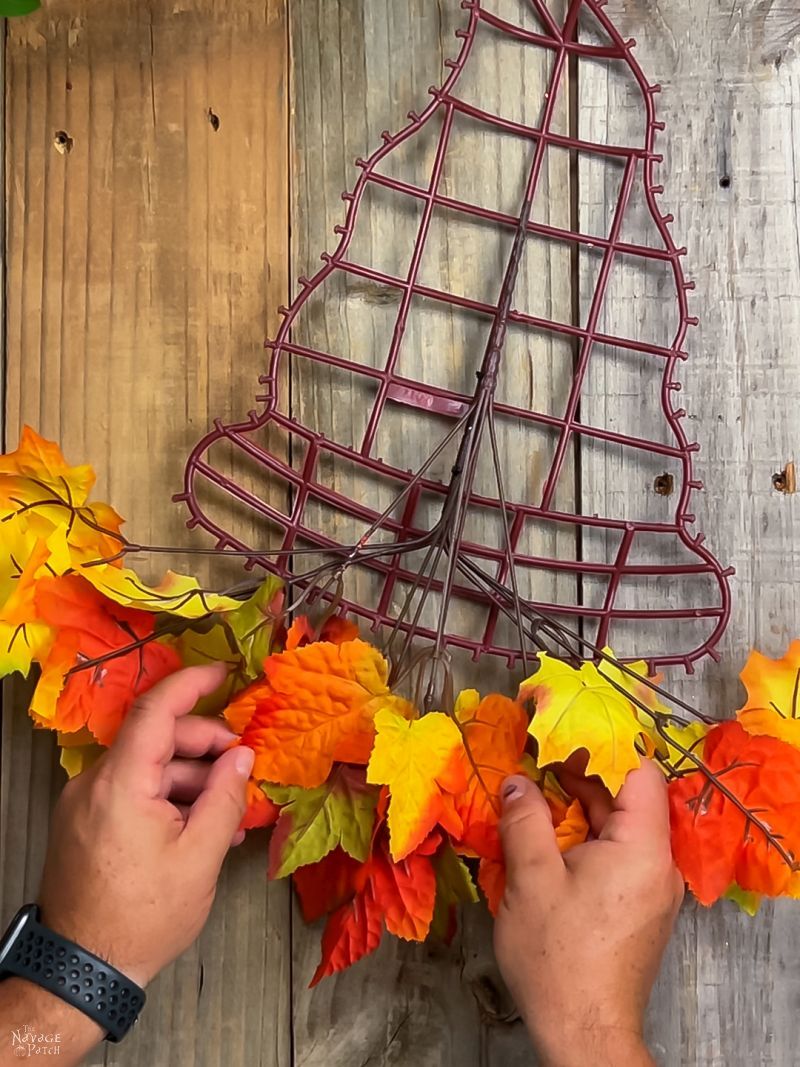
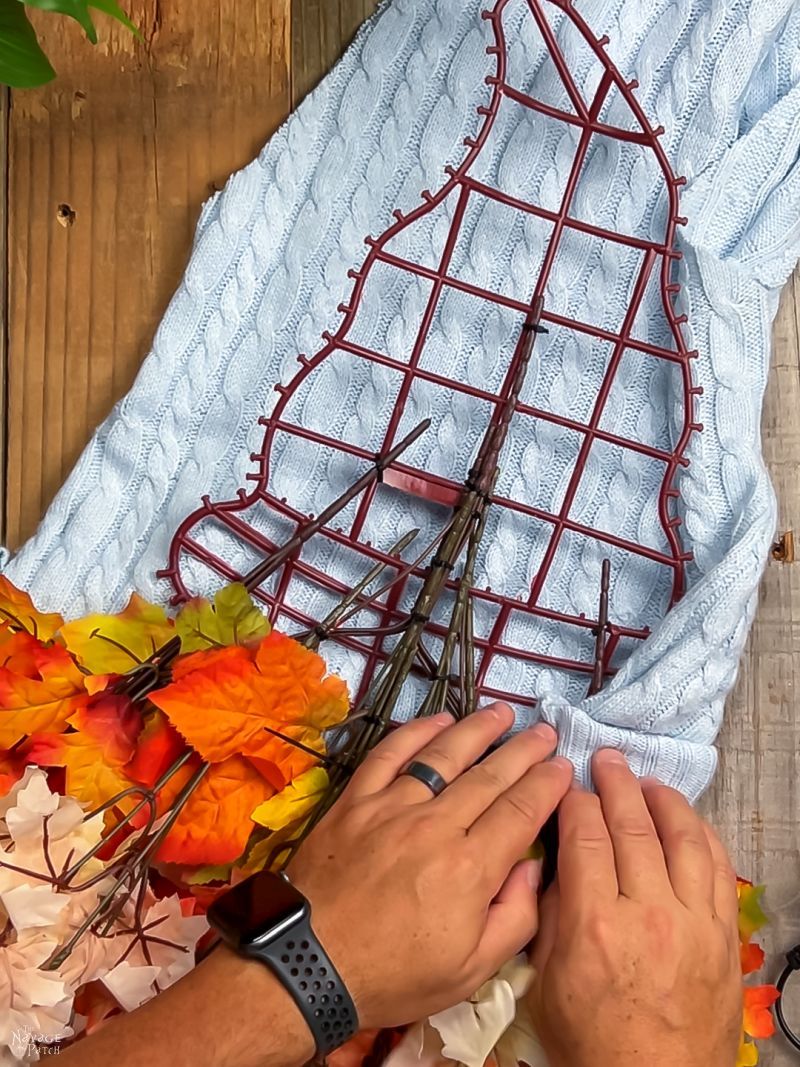
Step 3 – Get a rough idea of the arrangement
I arranged the leaf beard without securing any of the florals to the hat frame. When I was happy with the beard, I carefully picked up the arrangement and moved it aside, making sure I kept the shape. Turning back to my work area, I flipped the hat form over so the back of it was facing up.

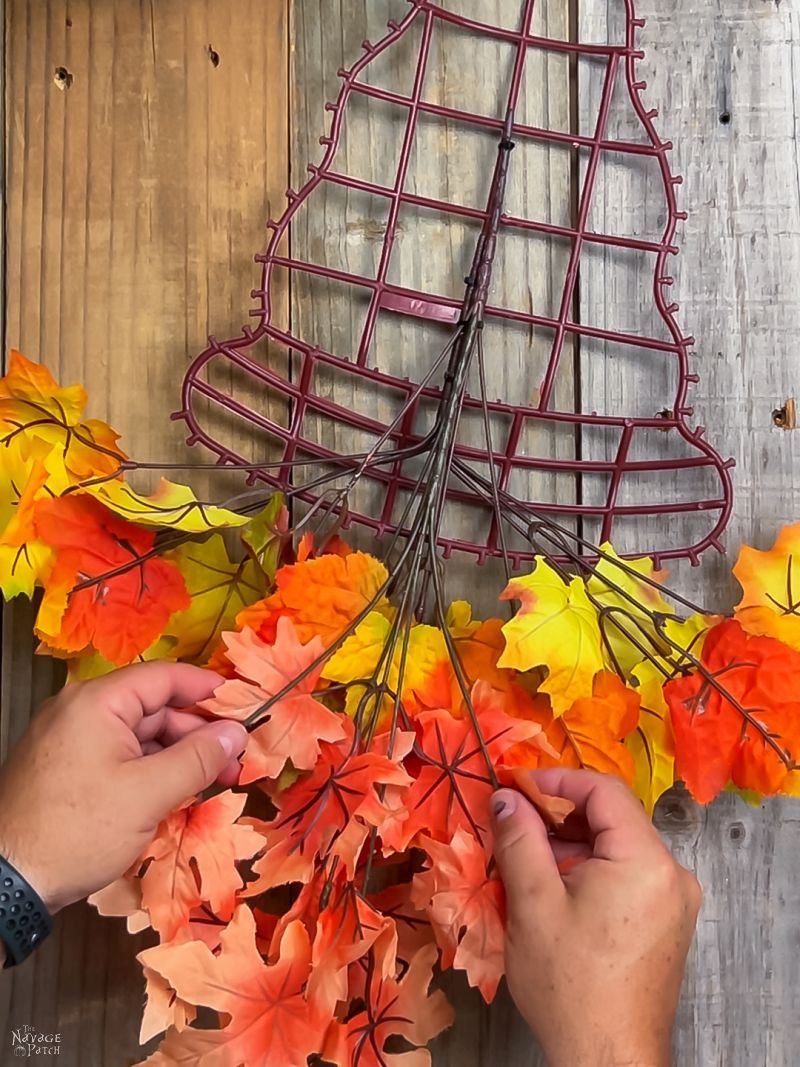
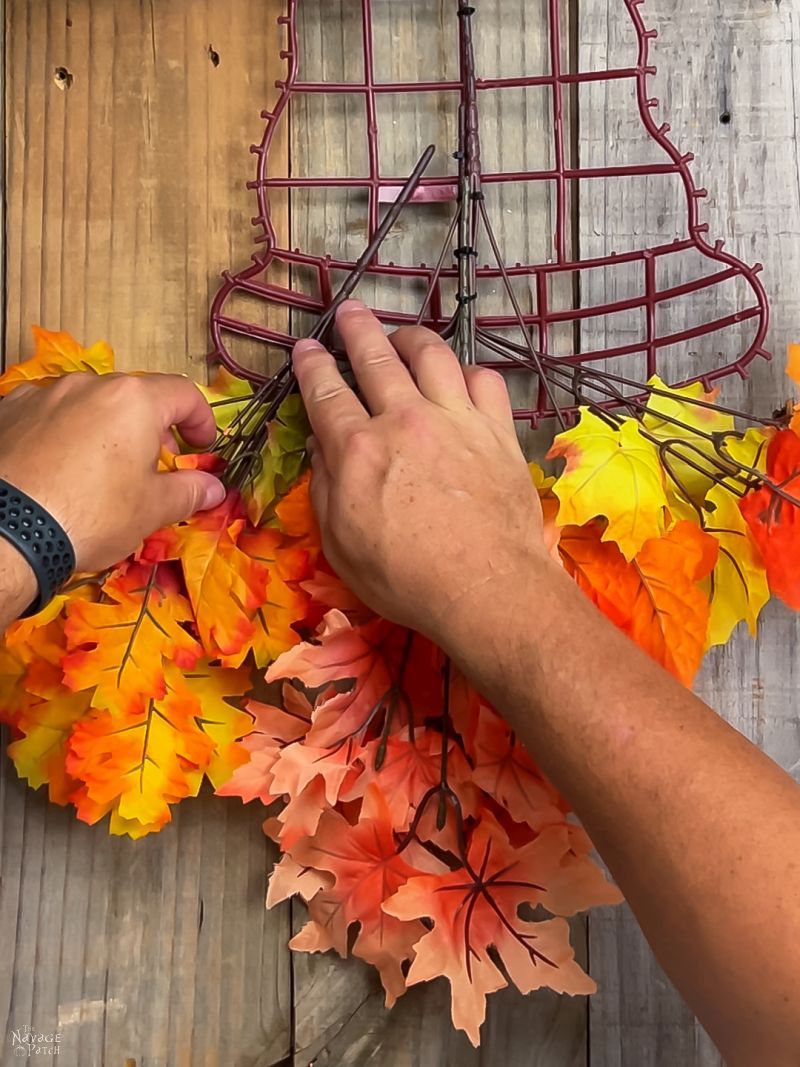
Step 4 – Arrange and zip-tie the florals to the hat form
Starting with the top-most florals in my beard arrangement, I picked one at a time, flipped it over (remember, the hat form is now flipped), and put it in its place. For this particular floral, I had bent the leaves out as shown in the picture below. It helped fill out the upper part of our gnome wreath beard.

I used small zip ties to secure the florals to the hat form – 2 for each pick.


I then trimmed the zip ties with scissors.

This is the last time I’ll show the zip-tie and trim pics. From here on out, the pics will show the placement of the florals, and since I know we have the best and smartest readers out there (ugh, so much better than the weirdos who read that other blog), I can rest easy knowing (gnowing?) you’re still with me and filling in the blanks.
I put the next pick in the middle, filling out the uppermost part of the beard/mustache.
Another pick in the middle – this one a slightly different shade to give some color variation.
Then a red/orange on the left…
…and one mirrored on the right.
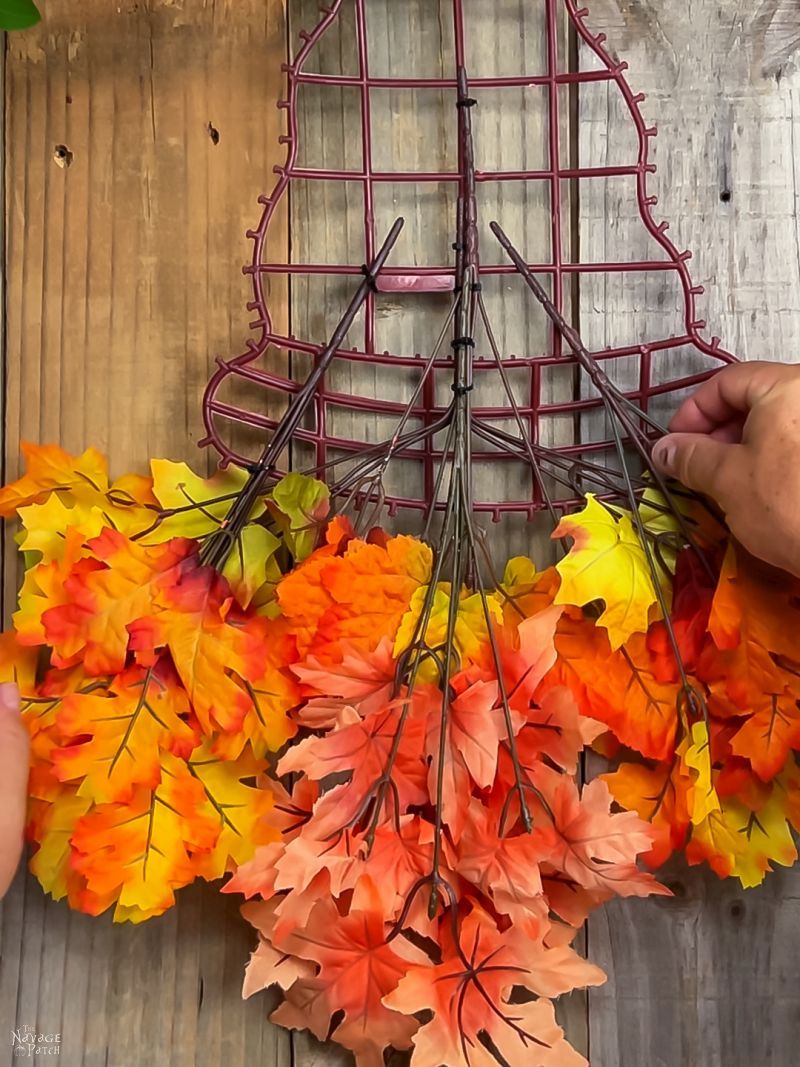
I added two sprigs of white to give my little gnomish fellow a distinguished and erudite look.


I put the final floral pick in the middle, lower than the others. This helped to round out the classic gnome-shape for the beard.

My fall gnome wreath beard was finished. Now it was time to make my fine little fellow a fitting hat.
How to Make a Fall Gnome Wreath, Part 2: Hat
Step 1 – Flip
Flip the gnome wreath back over so he’s facing up. Take this opportunity to fluff the beard and adjust the leaves to fill in any bald spots. To be on the safe side, you can buy an extra floral pick and use individual leaves or leaf pairs to fill in any glaring gaps, should you find any. The leaves come in pairs, joined at the stem, and I used two pairs from an extra pick to fill in two spots near the top. Not necessary, but it can be done, if you’re a perfectionist.

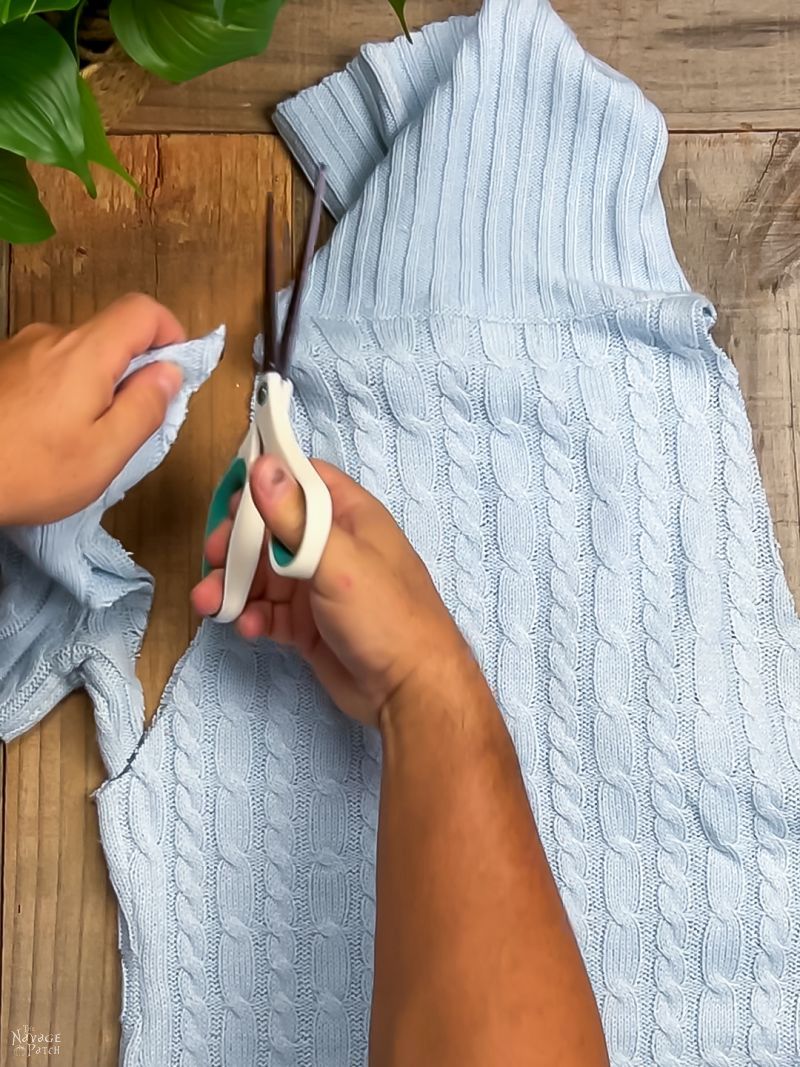
Step 2 – Cut the hat material
You can use any material you like for the hat, but we like the look of an old sweater. As we were looking through our gnome-making tub…yes, we have a tub full of gnome-making supplies, don’t you?? Anyway, as we were pawing through that tub, my babes found the same sweater (minus the right arm) that I used for my favorite of the Christmas gnomes that I made back in 2019 – the one pictured at the beginning of this post.

We agreed that the soft blue would be the perfect complement to the fiery oranges and dusty reds in the beard.
I cut off the left arm, starting about halfway down the torso and carrying up to the neck (yeesh, this is starting to sound like a horror movie!).


Next, I cut the remains of the right arm in the same manner.
Step 3 – Make the brim
To make the brim of the gnome wreath hat, I folded up the bottom of the sweater once…

…then I folded it over again.

I then ran hot glue under the fold and pressed the brim into place.


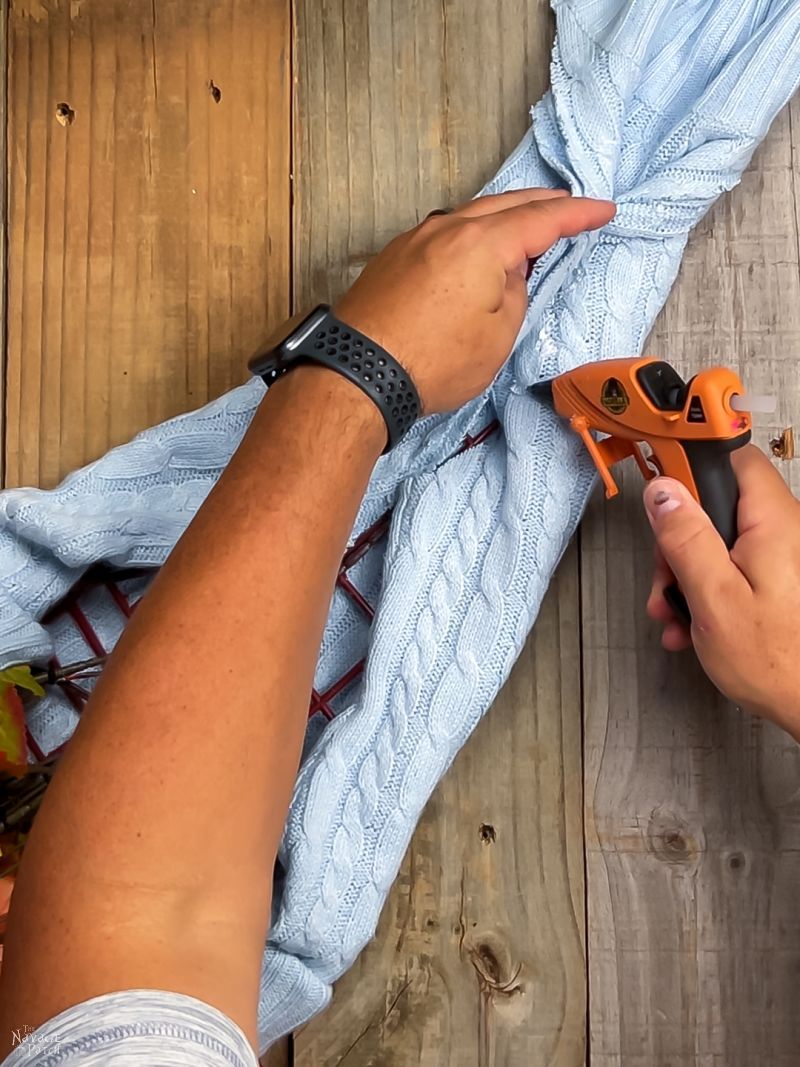
Step 4 – Attach the hat to the beard
I positioned the hat where I wanted it to be.
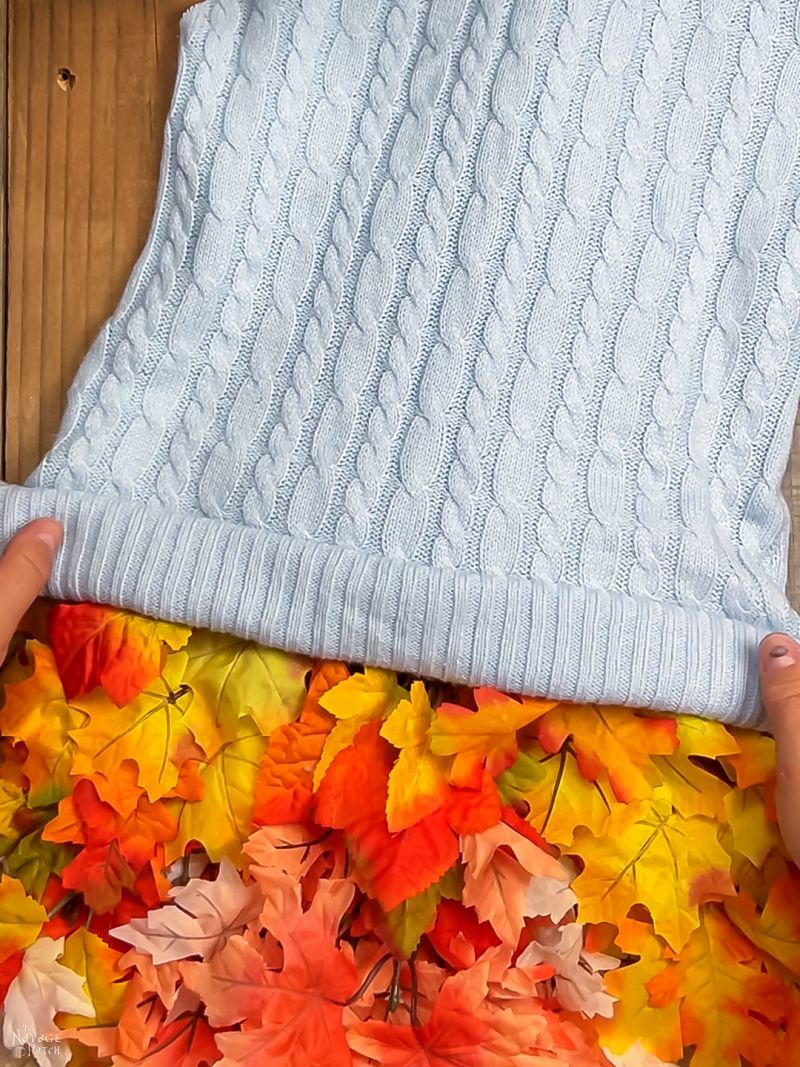
Then I folded it back, exposing the frame underneath. I ran hot glue all over the frame.

And then I pressed the sweater back into place.

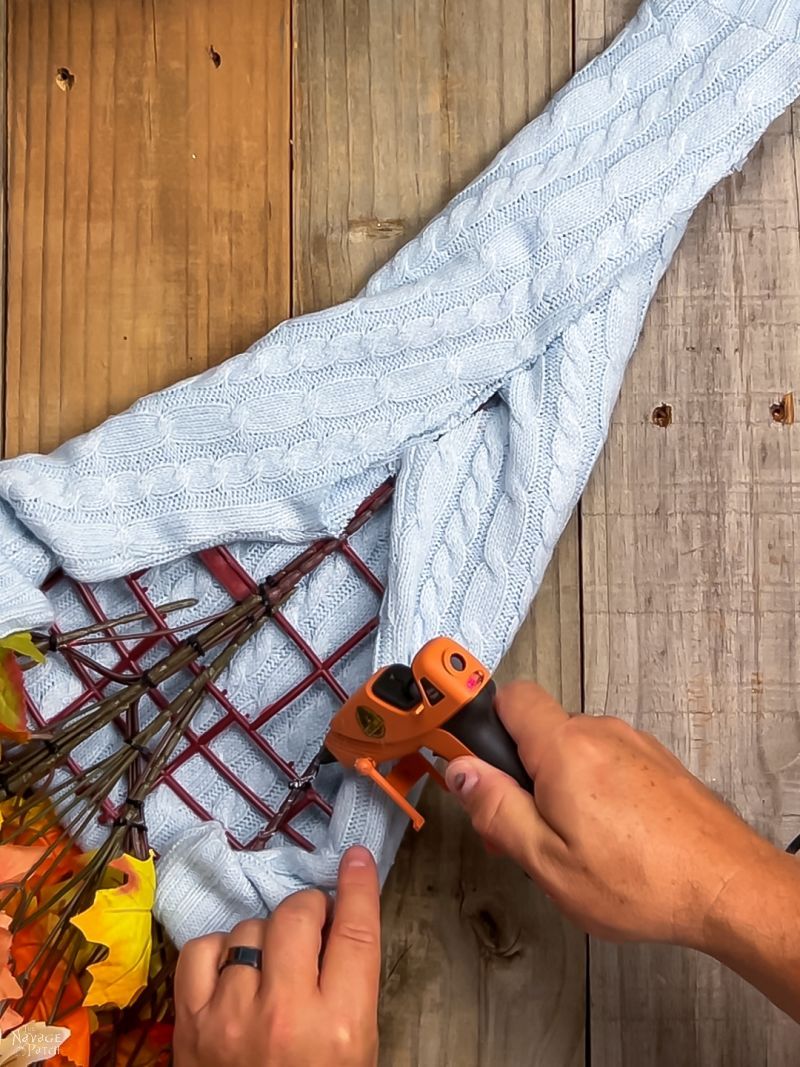
After letting the hot glue cool for a few seconds, I carefully flipped the gnome wreath over so I could secure the back of the hat.
Starting with the corners, I put some hot glue on the frame and folded the excess sweater material over on it. At no point of gluing the sweater to the frame did i pull the material tight. Loosey-goosey is the name of the game.

I repeated this on the other side.
Next, I ran hot glue up the entire side of the hat frame and folded the material over.


Ditto the other side, then I put some glue up top and folded the flaps over.

Then I went back and reinforced any areas where the sweater was not glued down.
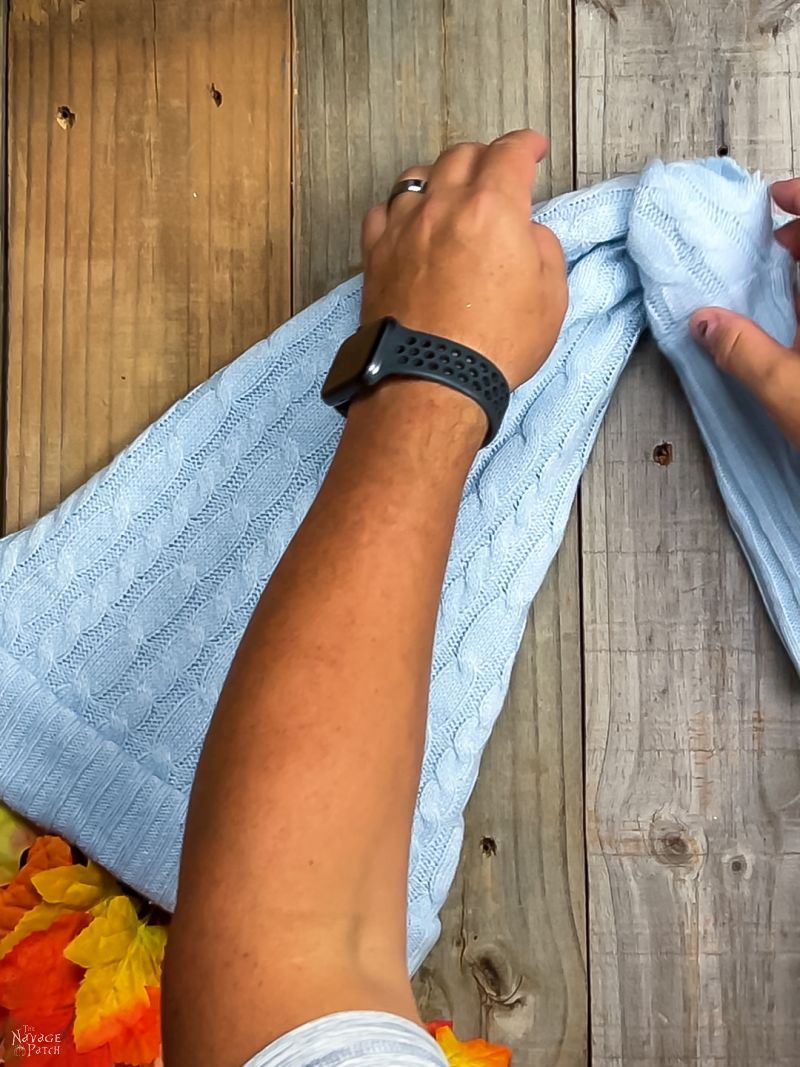
Step 5 – Tie off the hat
I used a small rubber band to tie off the hat, but you can use string or even a zip tie.

Step 6 – Add a nose
We’re big fans of using wood hemispheres for gnome noses, but you could use anything spherical or hemispherical: a 1/2 ping pong ball, a 1/2 foam ball or even a foam pumpkin. Totally up to you and what you think looks good!
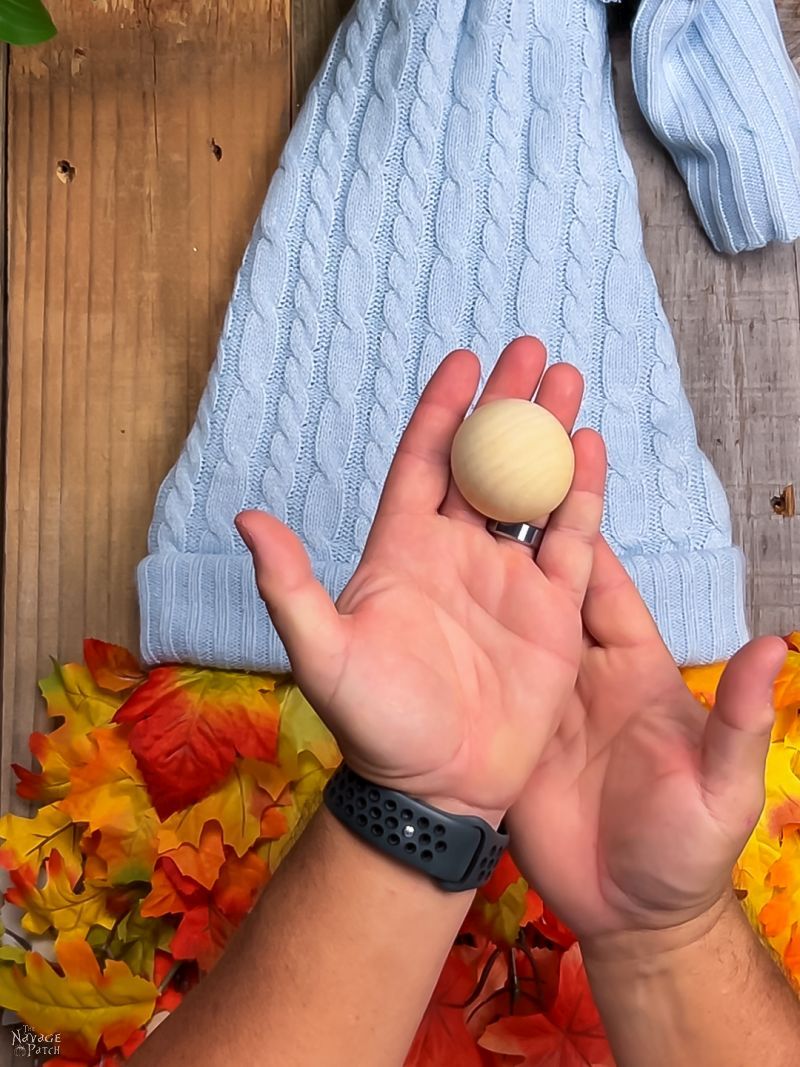
To attach the nose, I just glopped on a bunch of hot glue…

…and then stuck that sucker in place.
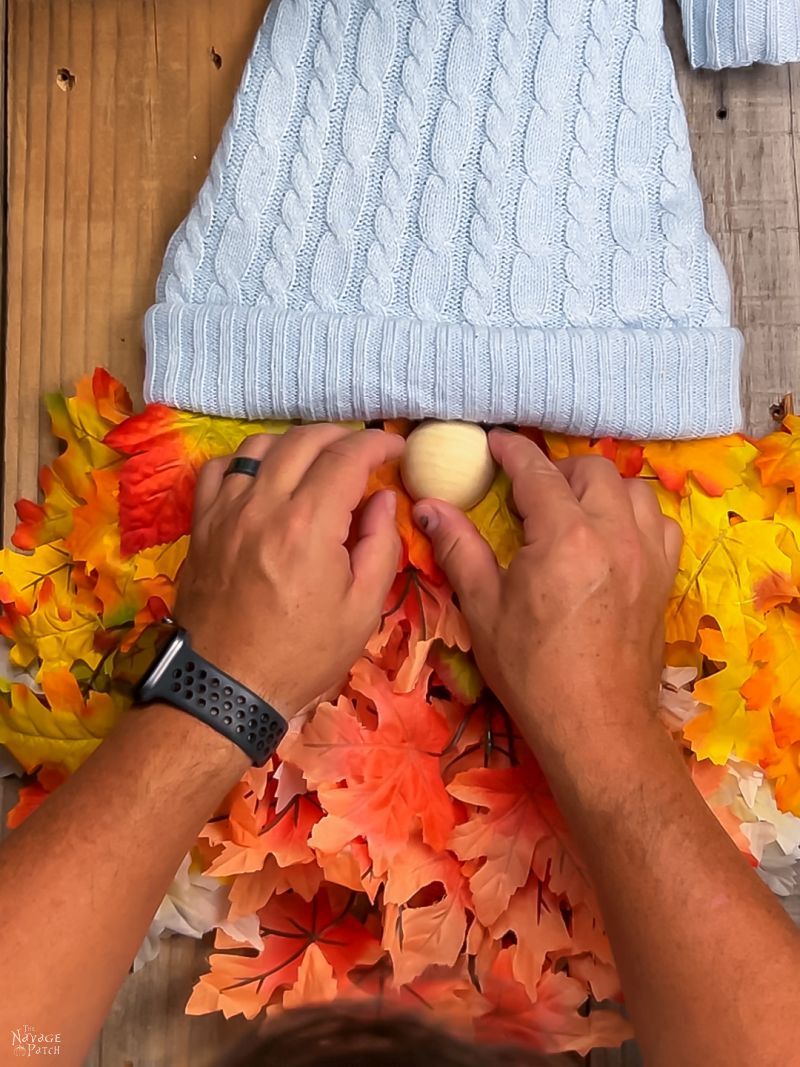
To prevent the hat from riding up from the nose, I added a dab of glue to keep it in place.


Step 7 – Embellish
I used the berries and pumpkin from some other Dollar Tree flower picks we had on hand to embellish the hat. You can use anything you think looks good.


And with that, my fall gnome wreath was finished and ready to hang. Before we get to the beauty shots, don’t forget to check out our other gnome tutorials!
If you love gnomes as much as we do, be sure to check out our other gnome tutorials!


- DIY Dollar Store Lighted Mop Gnomes
- DIY Gift Box Gnomes
- Easy DIY Dollar Tree Fall Gnome Wreath
- DIY Scented Broom Gnomes
- Easy No-Sew Christmas Gnomes
- Dollar Tree Halloween Gnome Wreath
- DIY Christmas Gnome Wreath
- Cheap & Easy DIY Dollar Store Halloween Gnomes
- DIY Dollar Tree Christmas Gnome Wreath
- DIY Dollar Tree Scarecrow Gnome Wreath
Okay, now let’s have a look at our fall gnome wreath!

He looks fantastic in our newly-refreshed side entrance!

What do you think of our gnomish lad? Let us know in the comments!


Greg did you ever think about using tied fabric strips on the frame. It’s a lot more time consuming but a pretty soft look and a good way to use old clothes or fabric pieces.
Thank you for all the great ideas…….
I did not think of that, but it’s a great idea, Vicki! 🙂
Very cute! I like the reuse of the Santa hat frame…
Thanks, Audra! 🙂
I love the gnome wreath! Plan on making one for my door. Thanks for the idea!
Thank you, Mary. Have fun making yours!
Cute, cute. I’m making as soon as I can find a witches hat.
Thanks, Vicki! Shouldn’t be long!
Greg, I love the Knome Autumn door wreath. However, I can not find the hat frame. Will you direct me please. I would love to make the wreath and also the Santo and witch. Thank you for these ideas.
Hi Wendy, Greg bought the hat frame from the Dollar Tree. Very soon Dollar Tree should start bringing in the tinsel witch hat frame and soon after that they’ll have the tinsel Santa hat frame. If you can’t find it this week in Dollar Tree, give it another week and they’ll start bring all of it to every store.
So stinking cute! My mind is thinking of ways to make one for every season lol. Thanks!
It can certainly be done, Barb! 🙂
I’ve learned several things about you Yanks over the years…
…and one is how much y’all LOVE a wreath. Christmas, fall, Easter, summer, 4th of July, ALL wreathable. And I’ve learned so much about wreaths, like, how they don’t have to be wreath-shaped! That was the biggest shocker to me. You still call these wreaths? Imagine!
in America, Jay, if you can hang it on a door, you can call it a wreath!
Loved your gnome; the white beard streaks made me smile as it reminded me of my SO’s beard streaks although his is totally a light salt and pepper color! Wanna check for local Dollar Tree and look for witch hats to keep it simple!
Thanks, Kathy! Yes, the white flowers make him very distinguished, lol!
Do you happen to know what size that sweater was? Like toddler size or something maybe?
I LOVE gnomes!! I collect Tom Clark gnomes and have 150+ of them! I’ve made your fall gnome wreath because I also love Fall. I have just one question. Where did you get the hat-shaped form??? I ended up using a form for a standing wreath at a gravesight, with a few adjustments made by my husband, but it isn’t quite right! I also had to buy a knit hat to use because I couldn’t find a turtleneck sweater like the one you used. My daughters are 39 and 34 and they were no help!
Thank you!
nina
Hi Nina, that hat is from Dollar Tree – they should have some Christmas stuff by now, so you may be able to find it!
I love, love, love your fall gnome wreath!! I’m going to make me one! Eeeeee I’m so excited, I never thought it would look so do-able. Thank you for the picture tutorial.
Where do you get your wooden noses?
Thanks,
Lisa
Thank you, Lisa! I’ve linked to those noses in the supplies list of this post! 🙂
I can’t find a hat shape at Dollar Tree. Can you help me, where is it available?
You can cut a similar shape from Dollar Tree foam board! 🙂
I love the fall gnome. I am going to try and make one.
Have fun!