How to Make Clean Lines with Stain
Learn how to make clean lines with stain! It’s possible to get a clean line with no bleeding between two colors of stain (or just one). We’ll show you how!
Handan and I were putzing around Home Depot recently while The Boy was busy karate-chopping his way through another Saturday morning kung fu class. As always happens, our putzing and poking led us into the paint area where we found ourselves standing before The Wall of Tape.
Home Depot’s Wall of Tape is an impressive assortment of blues, tans, greens and yellows, with a few other colors thrown in for good measure. The Wall is a necessary stop before each painting project, as we use a boatload of blue painter’s tape to help keep us within the lines.
But this time, it was the green that caught my eye.
“FrogTape,” it called itself.
Pffffft, I thought. What a stupid psychological gimmick. People are suckers for anything with an animal in the name or on the label. Just look at the wine market for examples.
I mean, really, who falls for this crap??
“Hey babes,” I said to Handan, “I want to try this FrogTape.”
Apparently, I do. I love frogs.
But it wasn’t just the little green frog and his promise of a cleaner edge that grabbed me. I was thinking of one of the projects Handan wanted me to do for Barish’s teen bedroom makeover. It would require me to stain a clean line with no bleeding. Normally for the type of project she was asking, I would make the thing from two different, contrasting types of wood. But since we wanted the project to be a little quicker and easier, she asked that I do it with stain.
What she didn’t realize is that stain is a snotty bitch when it comes to clean lines.
Stain doesn’t play nice.
Stain doesn’t stay “within the lines.”
But I told her I’d do it, so do it I would.
I just needed to figure out how.
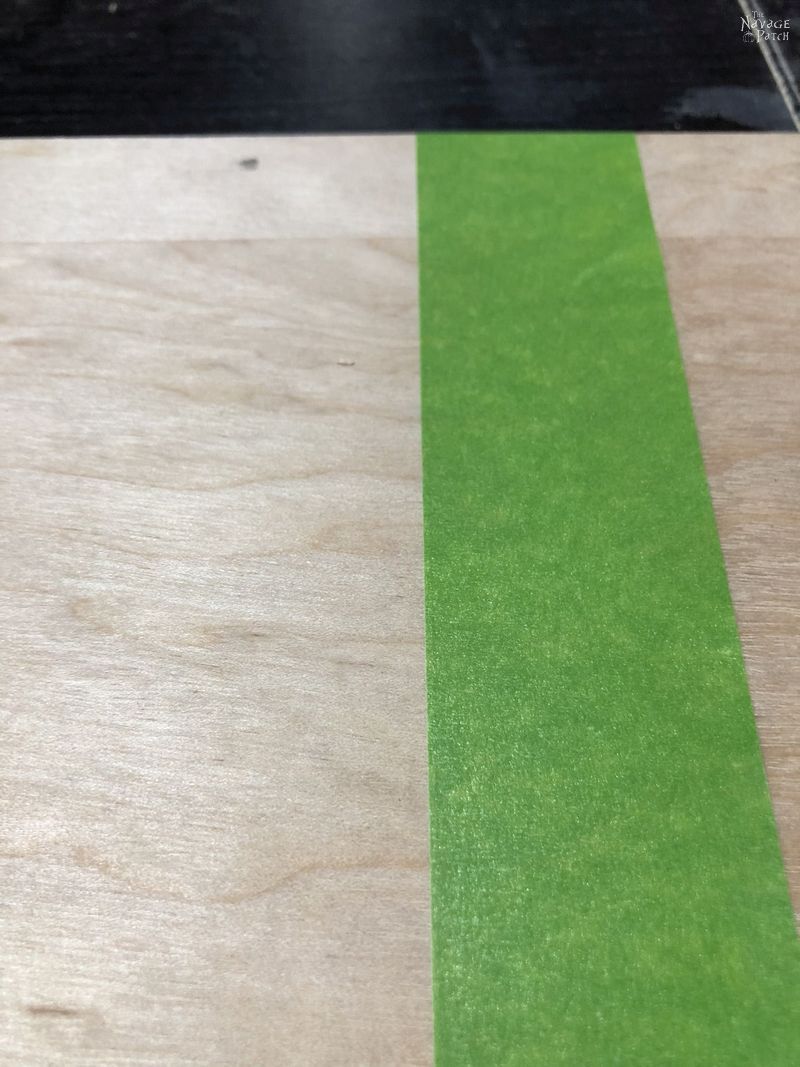
So I thought I’d give the FrogTape a try. Maybe it could Contain the Stain.
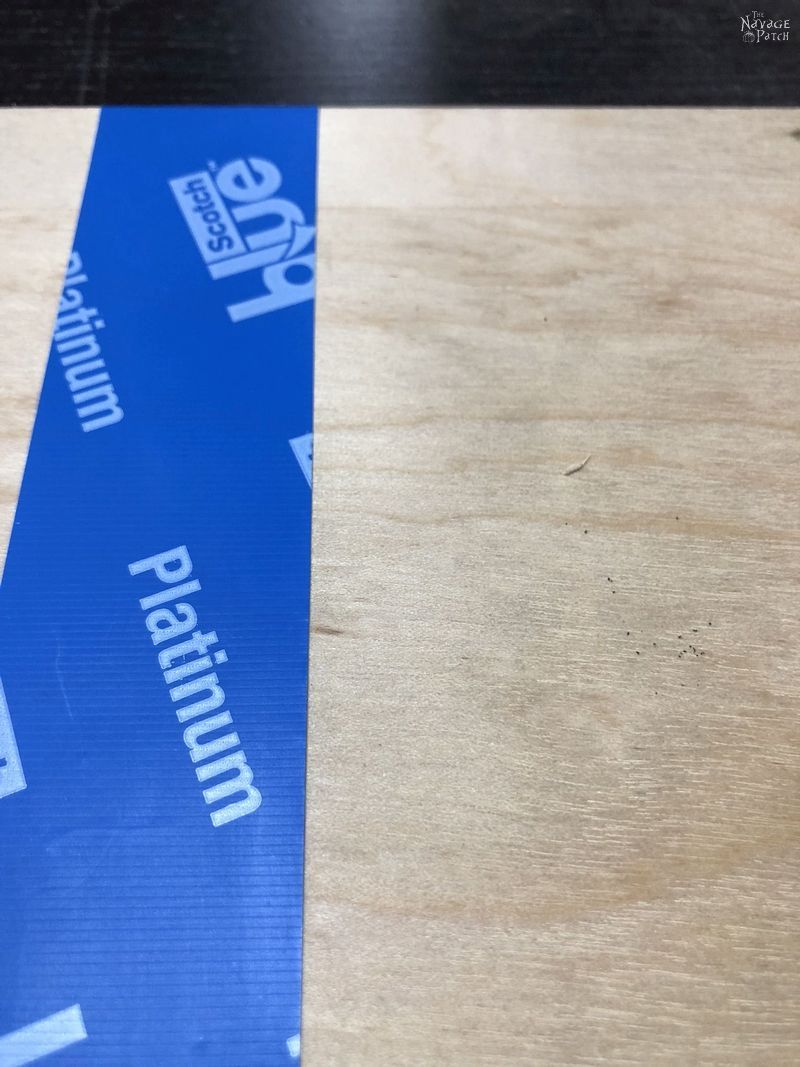
While I admired Le Frog, a new entry in the blue tape lineup caught my eye: 3M’s Platinum Painter’s Tape.
Oh, it promised so much! But the one promise that made me forget about Le Frog for a moment was that it tears at a 90 degree angle for perfect corners!
I swooned.
And as much as I’m a sucker for frogs and reptiles, I’ll also fall into the Platinum Trap every time.
Salesman: “And over here we have a rather used and worn toilet. It’s seen better days, but it still has a few flushes left.”
Me: “I’ll pass.”
Salesman: “Did I mention it’s the Platinum Model?”
Me: “Shut up and take my money!”
I grabbed a roll of that Platinum Blue Beauty, and then Handan and I made for the checkout line. I intended to put these two tapes through the paces with stain.
Frog vs Platinum. This was going to be good!
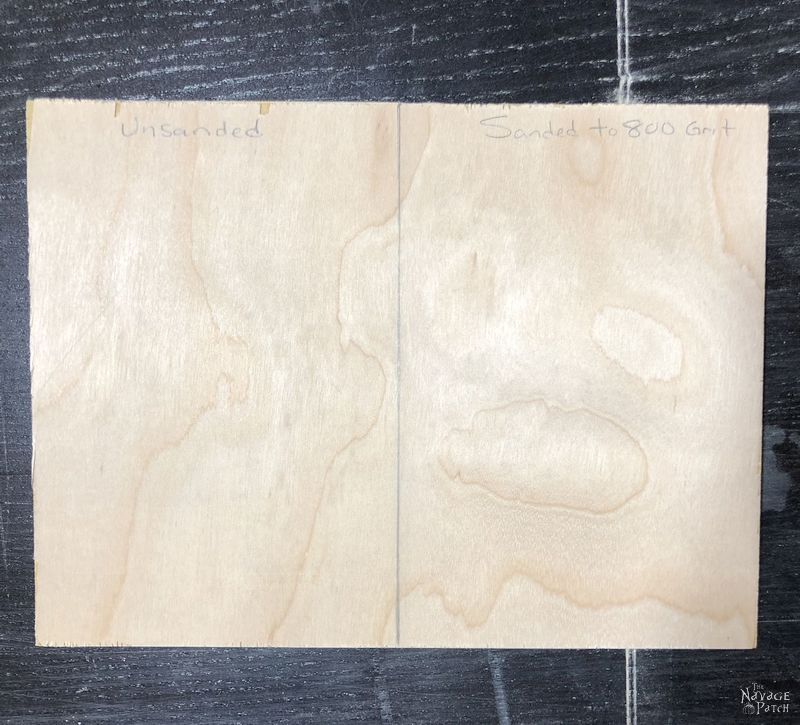
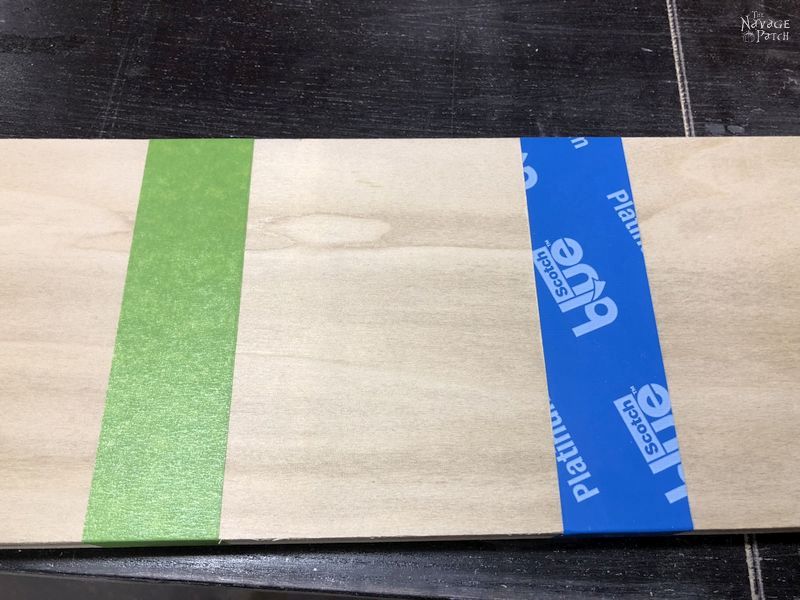
Since I would be making my project from plywood, I used plywood for my tests.
I know, I know, you’re sitting there like, “Well, tell us what the project is! You keep hinting, but you ain’t sayin’ nuthin’!”
Sorry, madam, you’ll have to wait. Okay, I’ll tell you what – I’ll give a little teaser photo at the end of the post, okay? And then tomorrow, I’ll publish the full post on the little project!
So anyway, back to my Contain the Stain trials.
How to Make Clean Lines with Stain
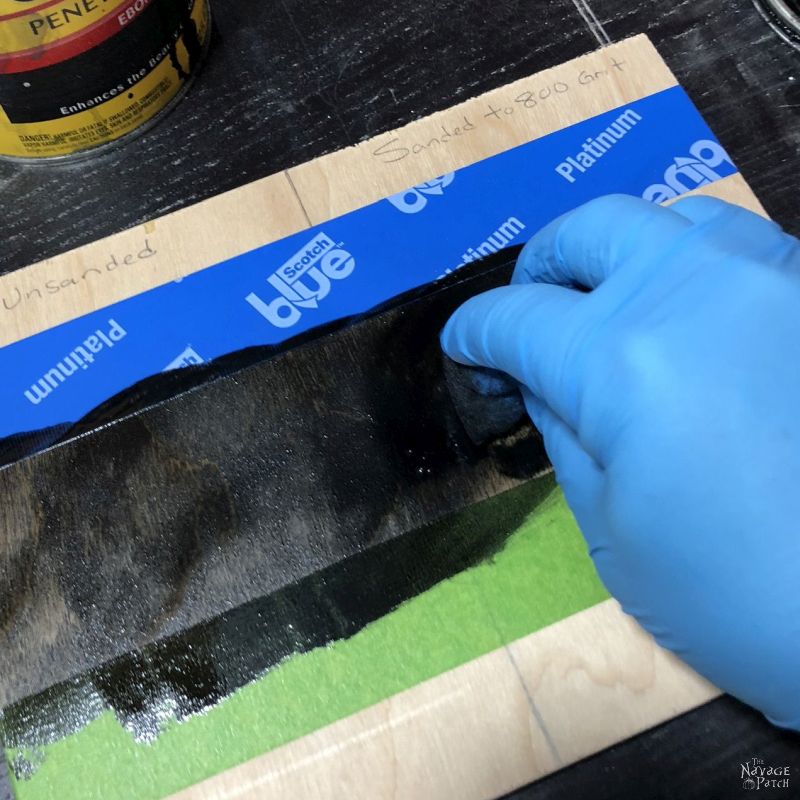
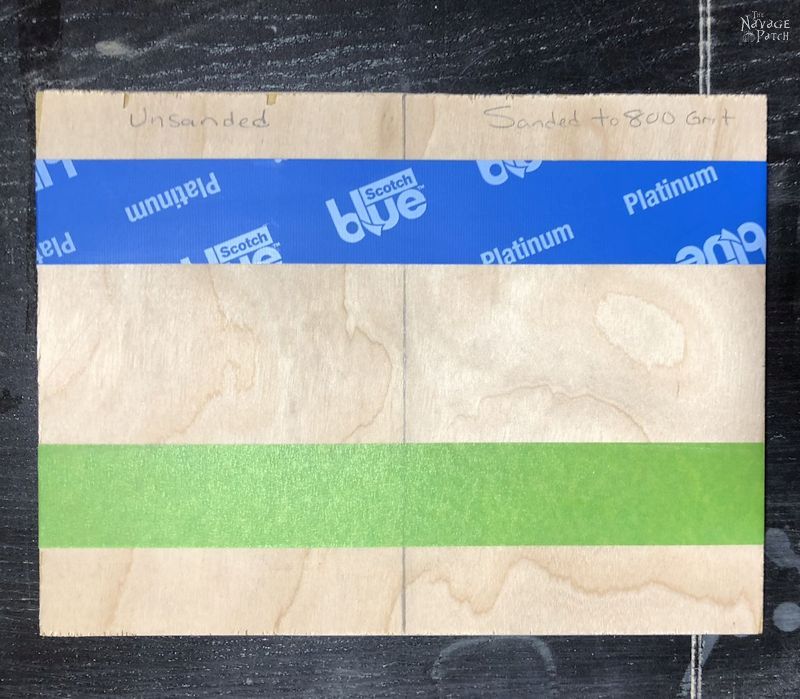
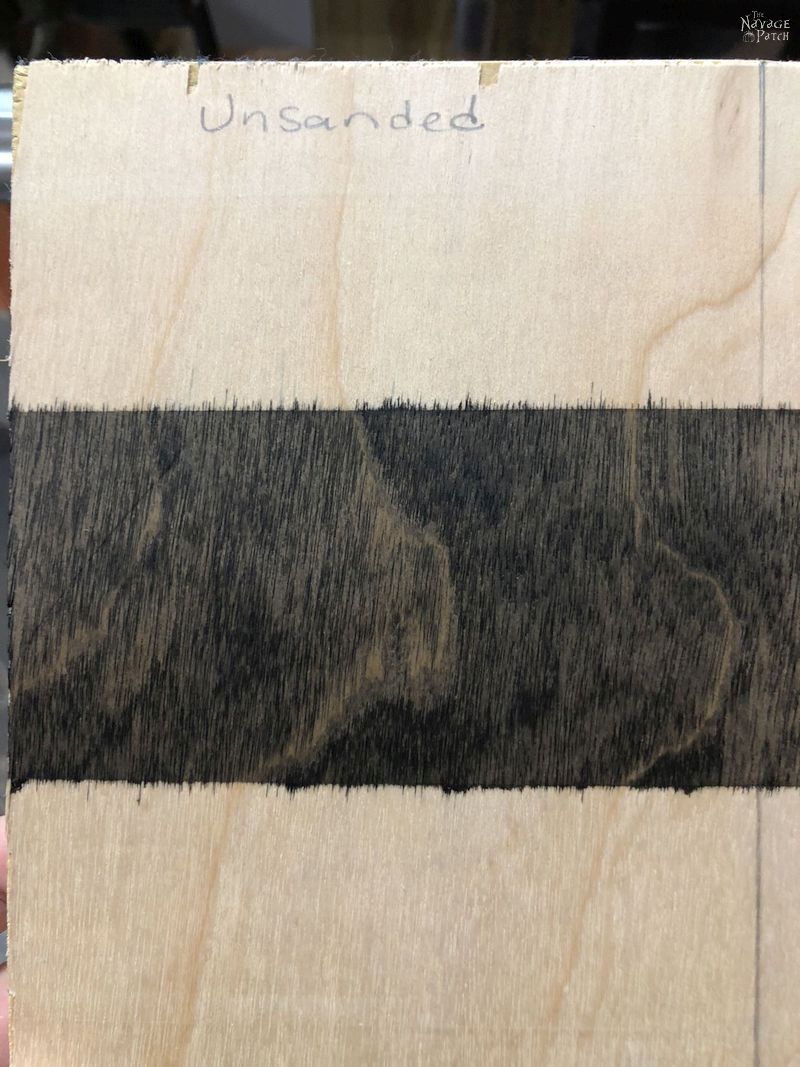
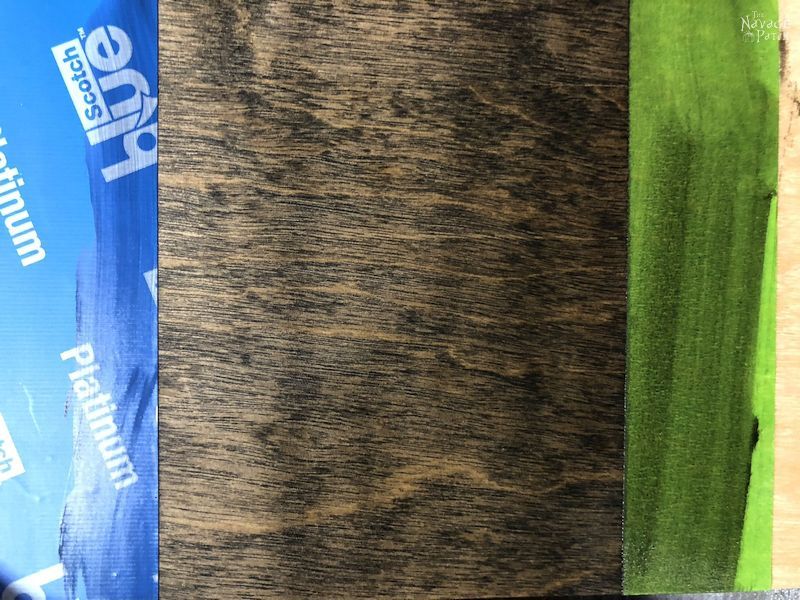
With the first board, I sanded one side to 800 grit, and I left the other half unsanded. I hypothesized that the 800 grit side would achieve a better edge since the surface was smoother, and the tape would get a better lock.
I applied a strip of Frog and a strip of Platinum. Can you feel the excitement, madam?
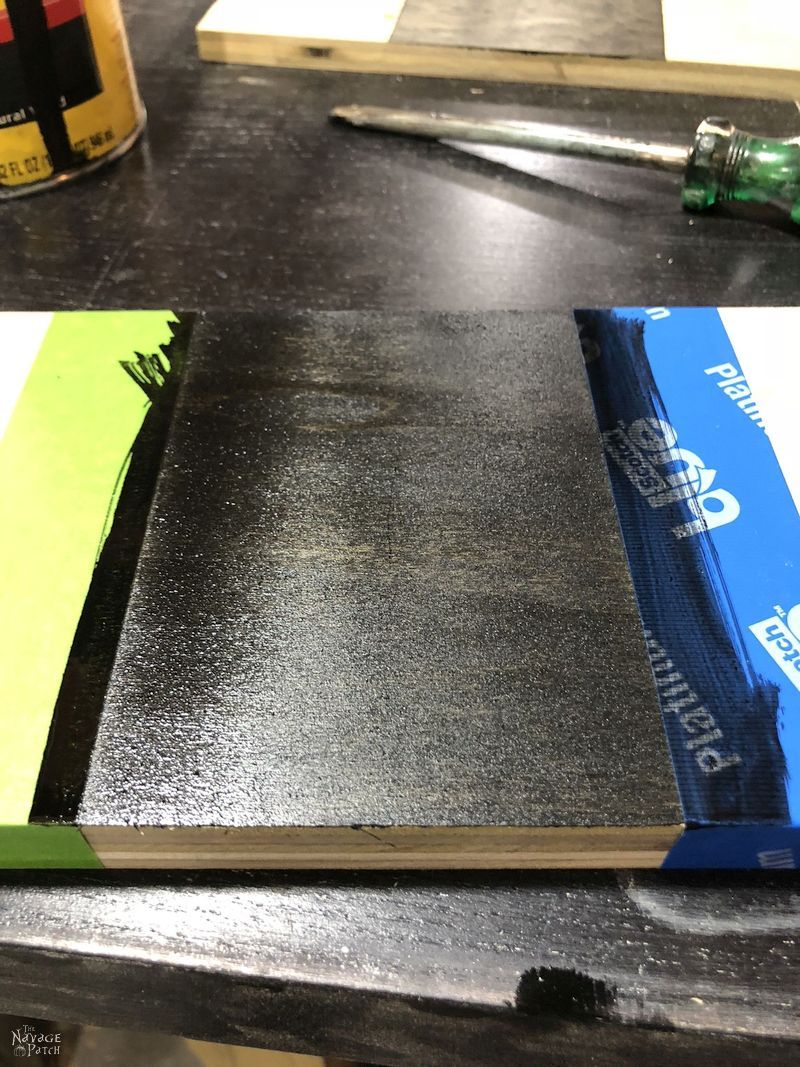
There was only one stain that would do for this test: ebony. I grabbed the can and did my Shake ‘n’ Jiggle Dance. You know the one – when you shake the stain can so hard that your fat jiggles all over the place, and you look like some spastic weirdo on the dance floor for the very first time. Yeah, that dance.
Anyway, I wiped on a good coat of ebony.
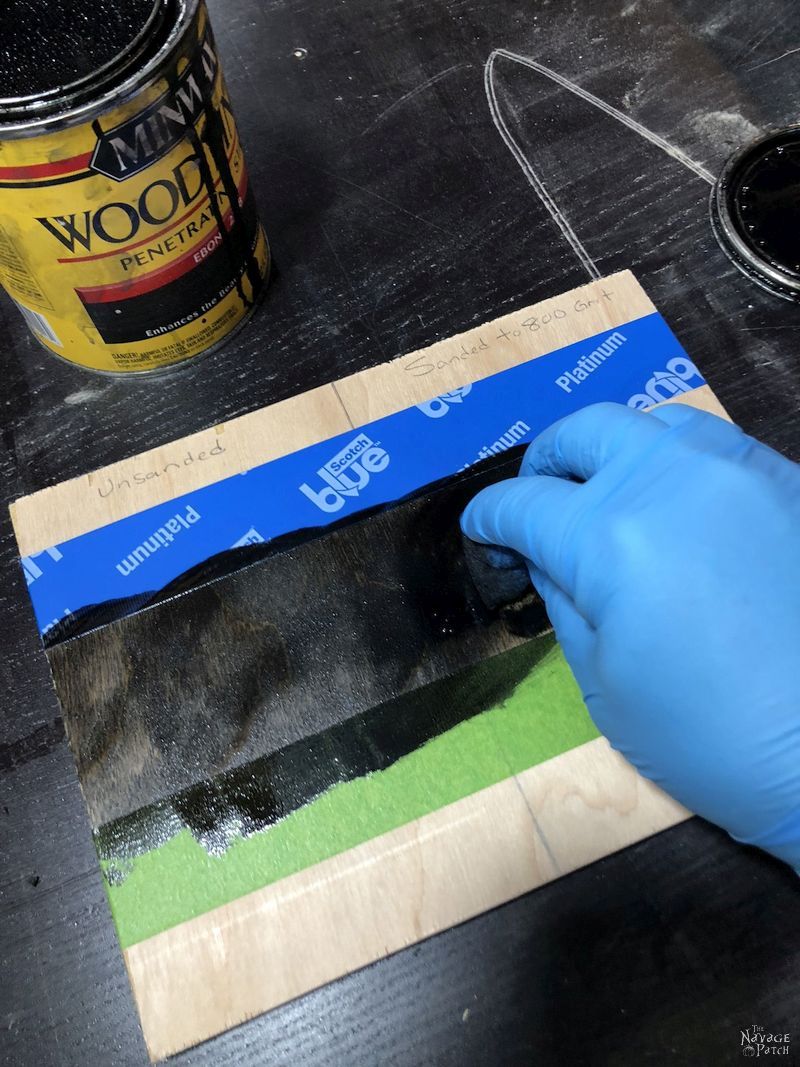
After about 30 seconds, I wiped it off.
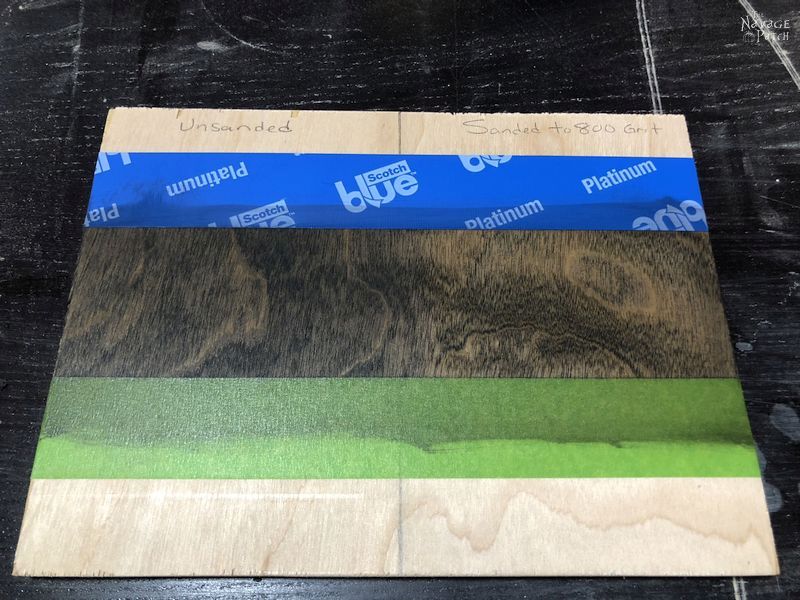
This was the moment of truth! Who would win? Frog or Platinum?
I looked at the unsanded side. Hmmm…I wouldn’t call either a “winner,” but I’d have to give a slight edge to Platinum.
How about the sanded side?
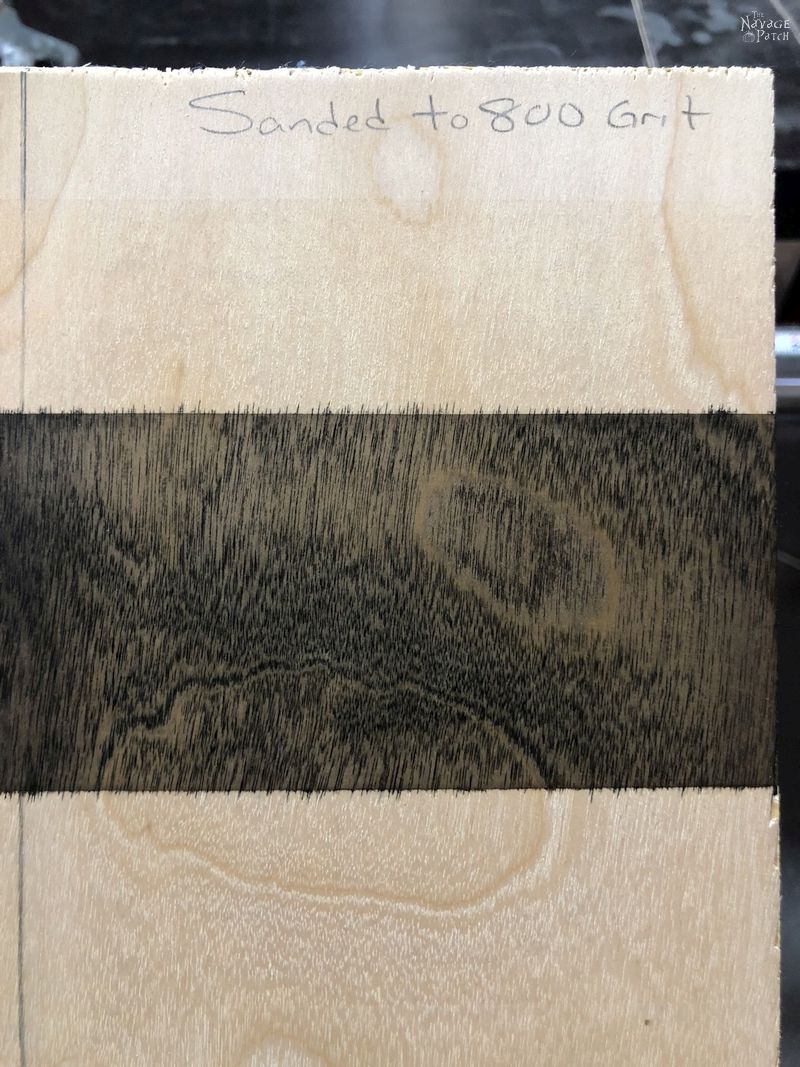
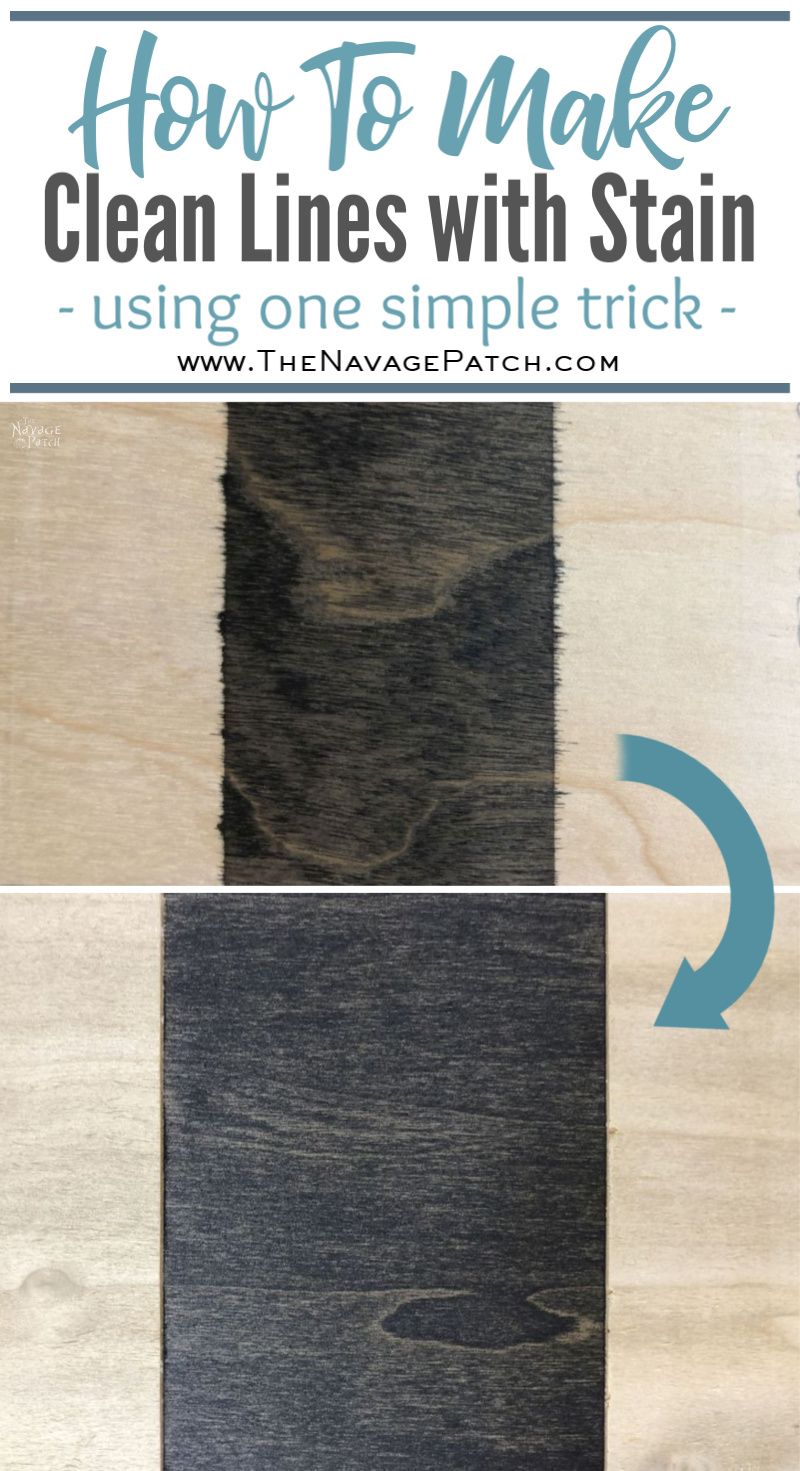
Both performed better, but still an overall failure. The lines were not clean. The stain bled under the tape.
Or did it?
What was really happening here? Was the tape not locking well enough, allowing the stain to seep under?
To understand what’s happening, we need to understand wood. The fibers that run along a piece of wood (they make up the pattern we call “grain”) are like microscopic drinking straws. It’s how the tree survives. Water enters the roots underground and through a process known as “capillary action,” the water travels up the trunk and out into the branches through these millions of long and narrow straws.
The wood fibers soak up stain in the same way they used to take in water. I realized that I could have the most perfect tape seal in the history of tape seals, but the moment that stain penetrated the tiniest bit below the surface of the wood, capillary action would draw some of it under the tape through wood fibers just under the surface.
Okay, so straight tape was out. I’d never get a clean line that way.
What if I cut through the fibers, thus severing the pipeline? Have you ever tried to drink soda through a broken straw? Doesn’t work so well, does it?
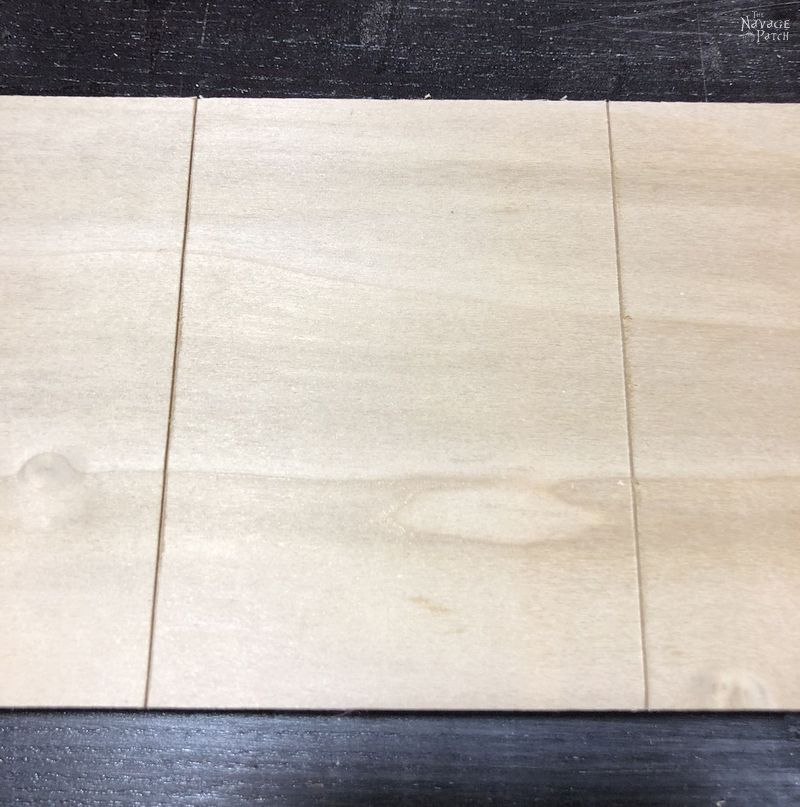
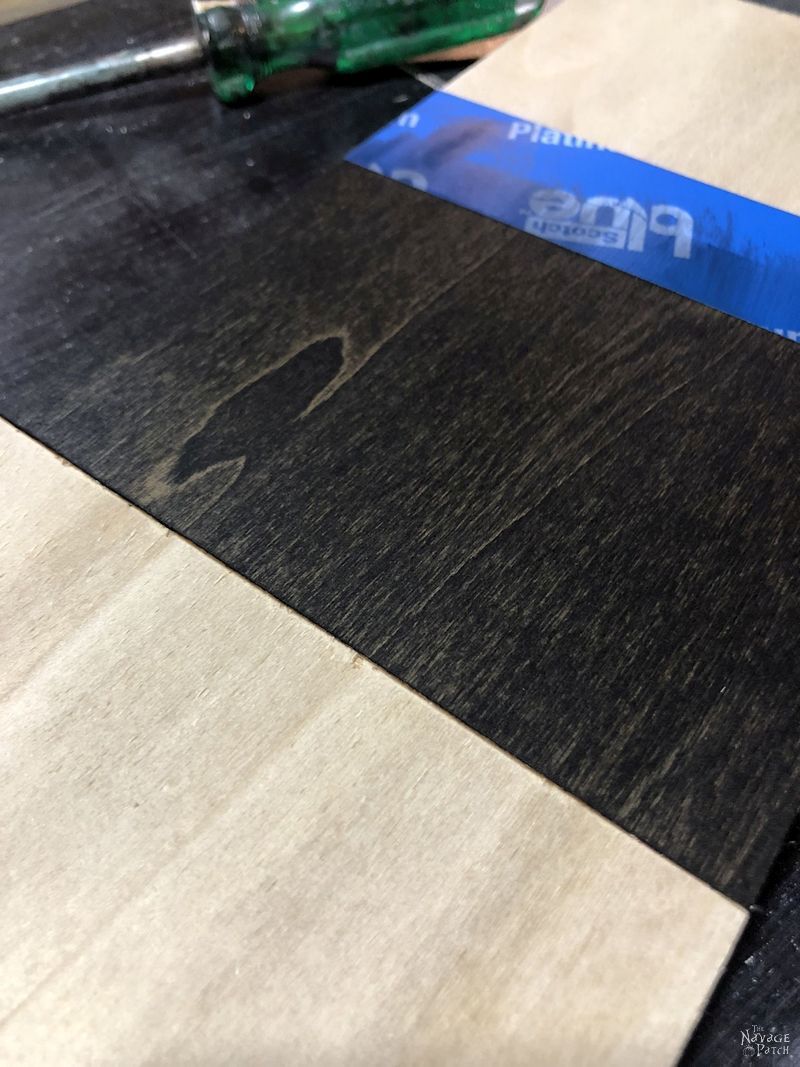
I grabbed a razor blade and made light cuts in the plywood along the edge of a metal ruler.
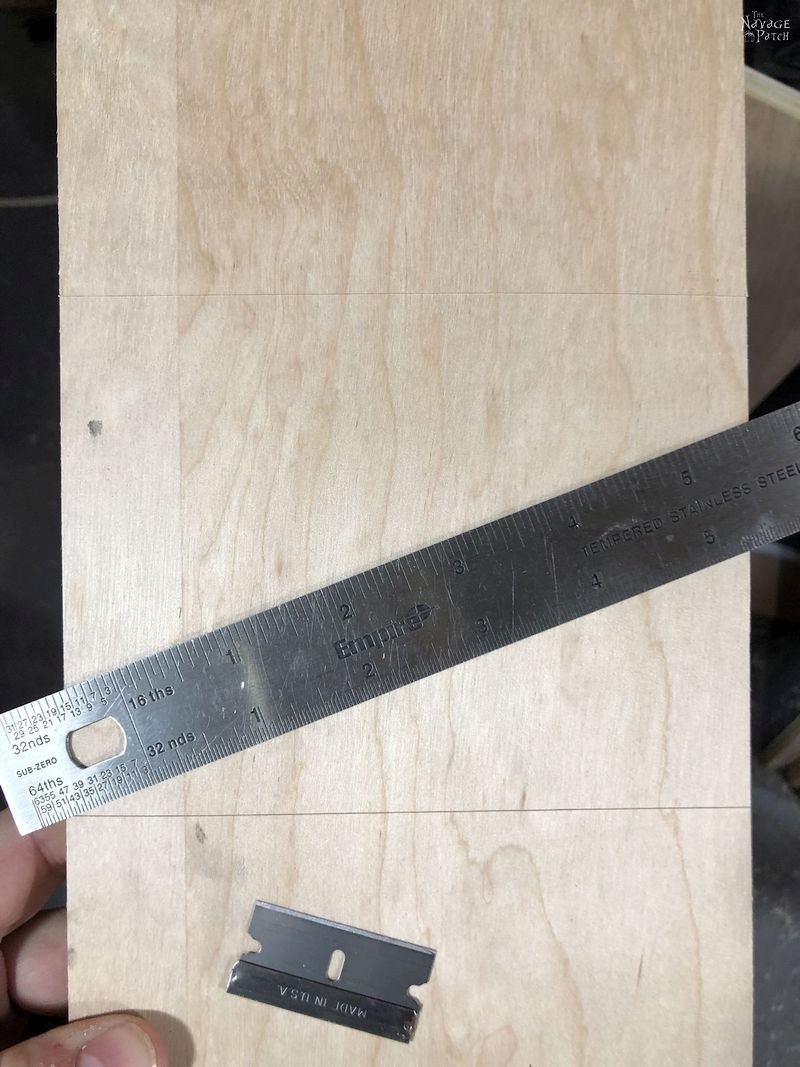
I again applied Frog and Platinum.

But I applied them in a very specific way. Even though the razor line was very thin, it still had some width to it, so I was careful to completely cover the width of the line with the tape. See the pictures below. You won’t be able see the groove I cut with the razor.
My intent with this was to keep the stain away from the groove. If it got into the groove, it would be able to bleed into the wall of the cut.
I again stained and wiped.
I knew I’d nailed it this time. Just had to peel the tape and take my victory lap!
What the what?!?
My science was sound! What the heck had gone wrong?
I chalked the failure up to my groove not being deep enough and me maybe putting on too much stain?
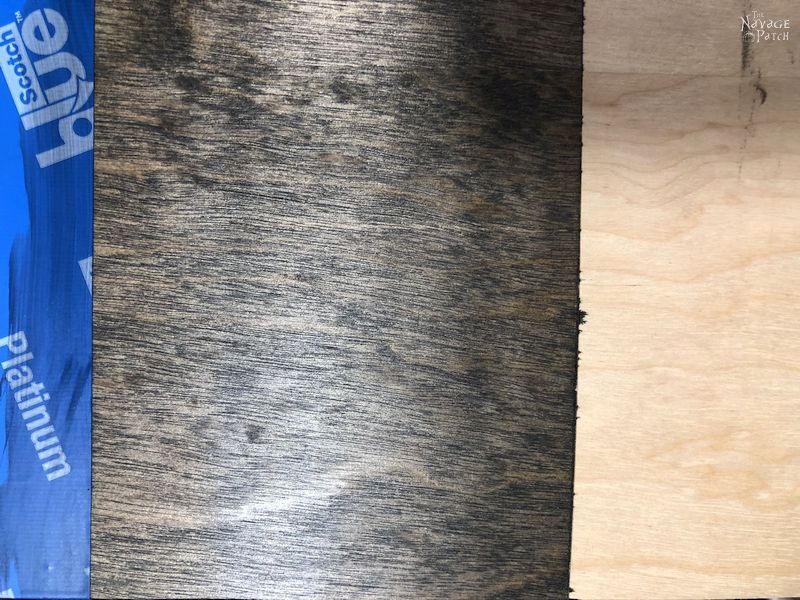
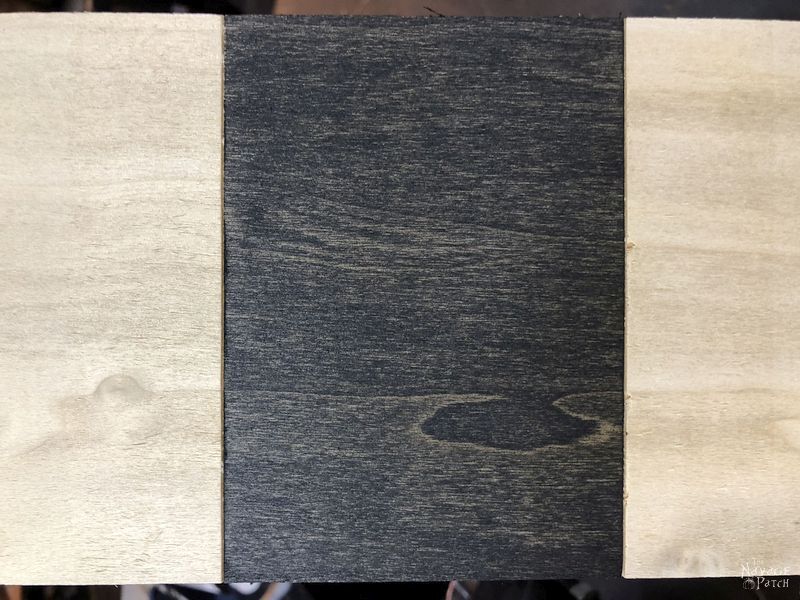
Unfazed, I grabbed my utility knife. This next round was going to require more pressure than a dinky little razor blade could handle!
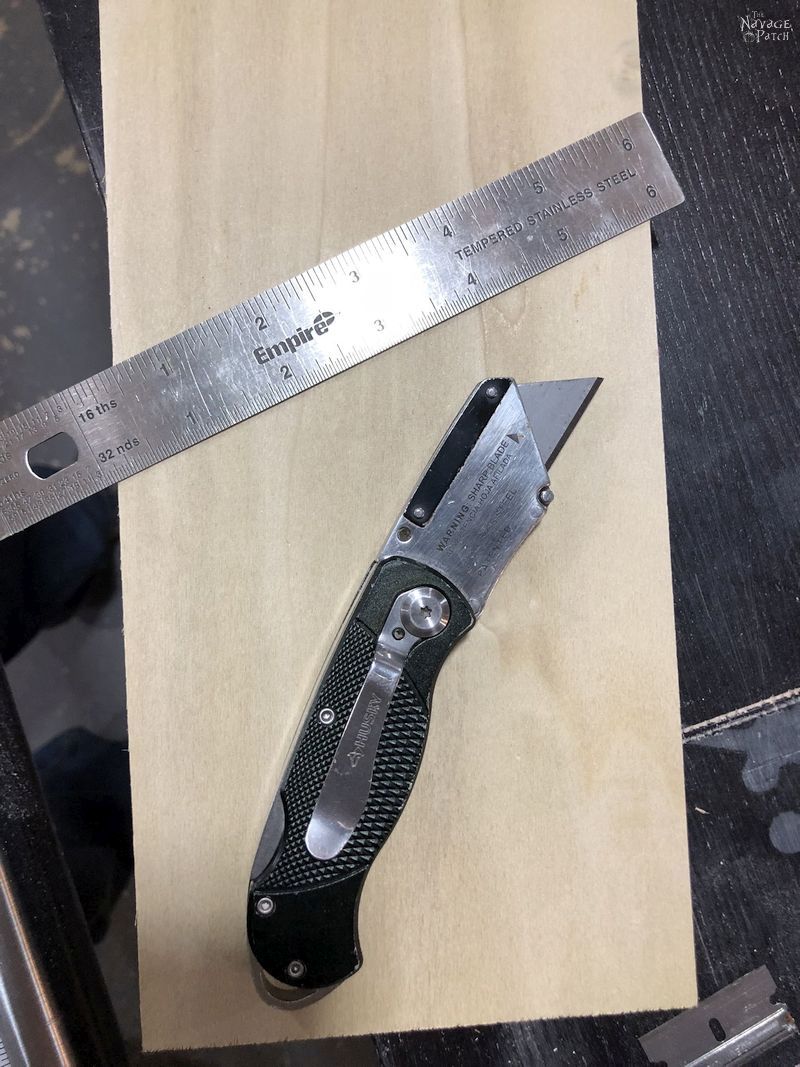
I cut two deeper grooves. I went a little overboard I think – I probably only needed to cut through the very thin top veneer. But hey, if this didn’t work, I’d hang up my tool belt and start crocheting! [hahaha… as if crocheting is easy! Instead, you should carry on with your embroidery LOL – Handan]
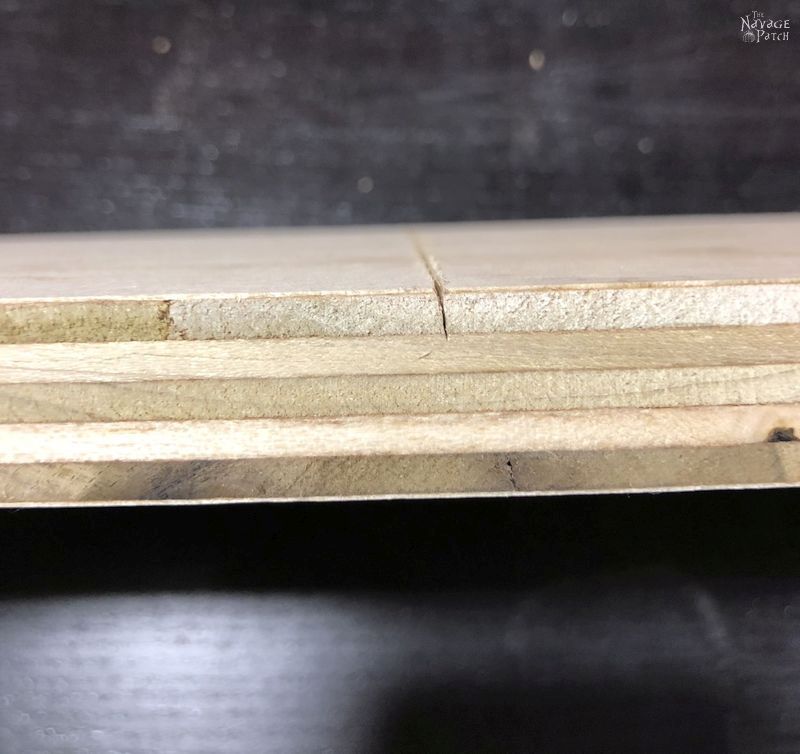
The lines were much deeper and more pronounced.
And again with the ebony stain…
My confidence was shaken at this point, but I was cautiously optimistic.
I peeled back Le Frog…
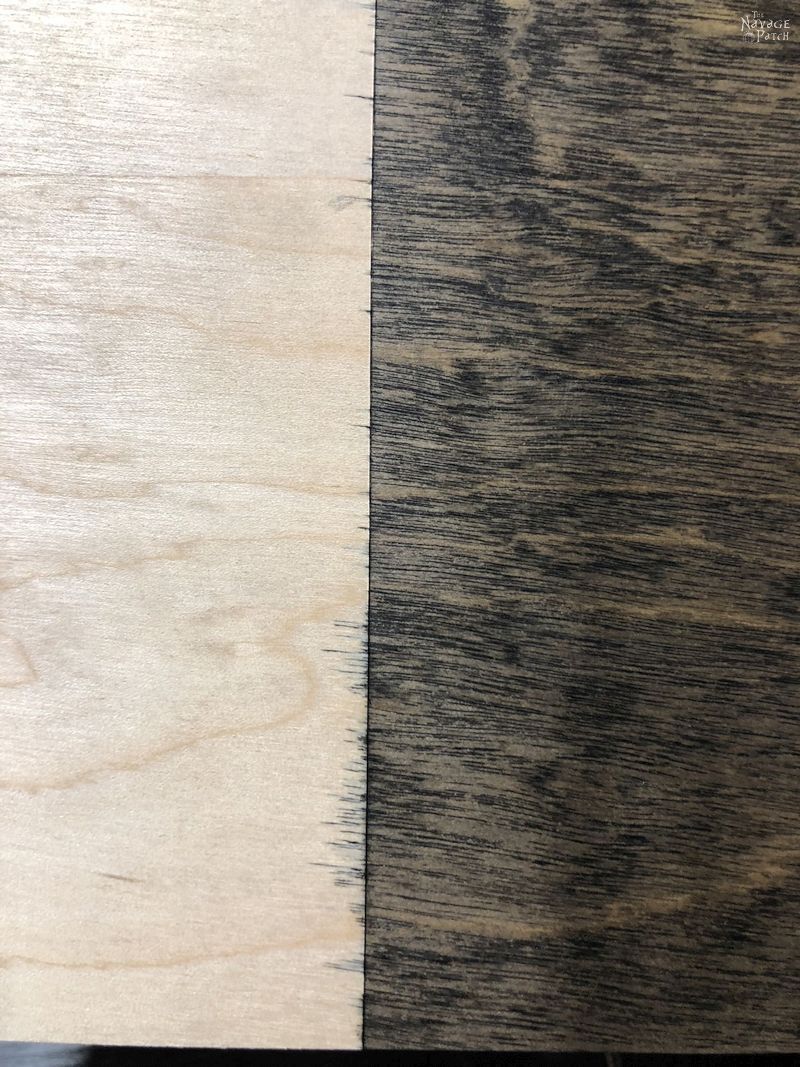
Success!
Then I peeled the Platinum…
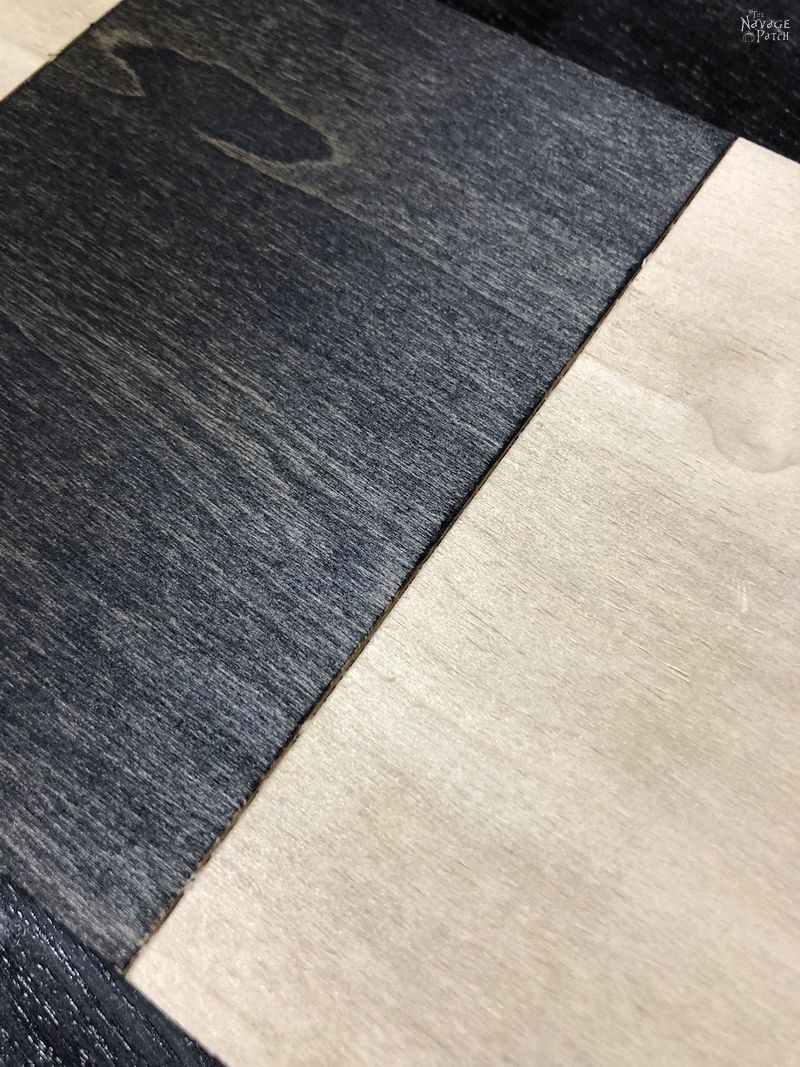
Victory is mine!
I did another jiggle dance to celebrate my win. I had discovered how to make clean lines with stain!
With the utility knife method, it doesn’t matter what tape you use. Since the Platinum is far pricier than the Frog, you’re fine using the Frog or regular blue tape to make clean lines with stain.
Okay, yes, you need to take a knife to your project to get clean lines with stain that don’t bleed, but that wouldn’t be an issue for what I made for Barish’s room.
I promised you a sneak peak. You ready?
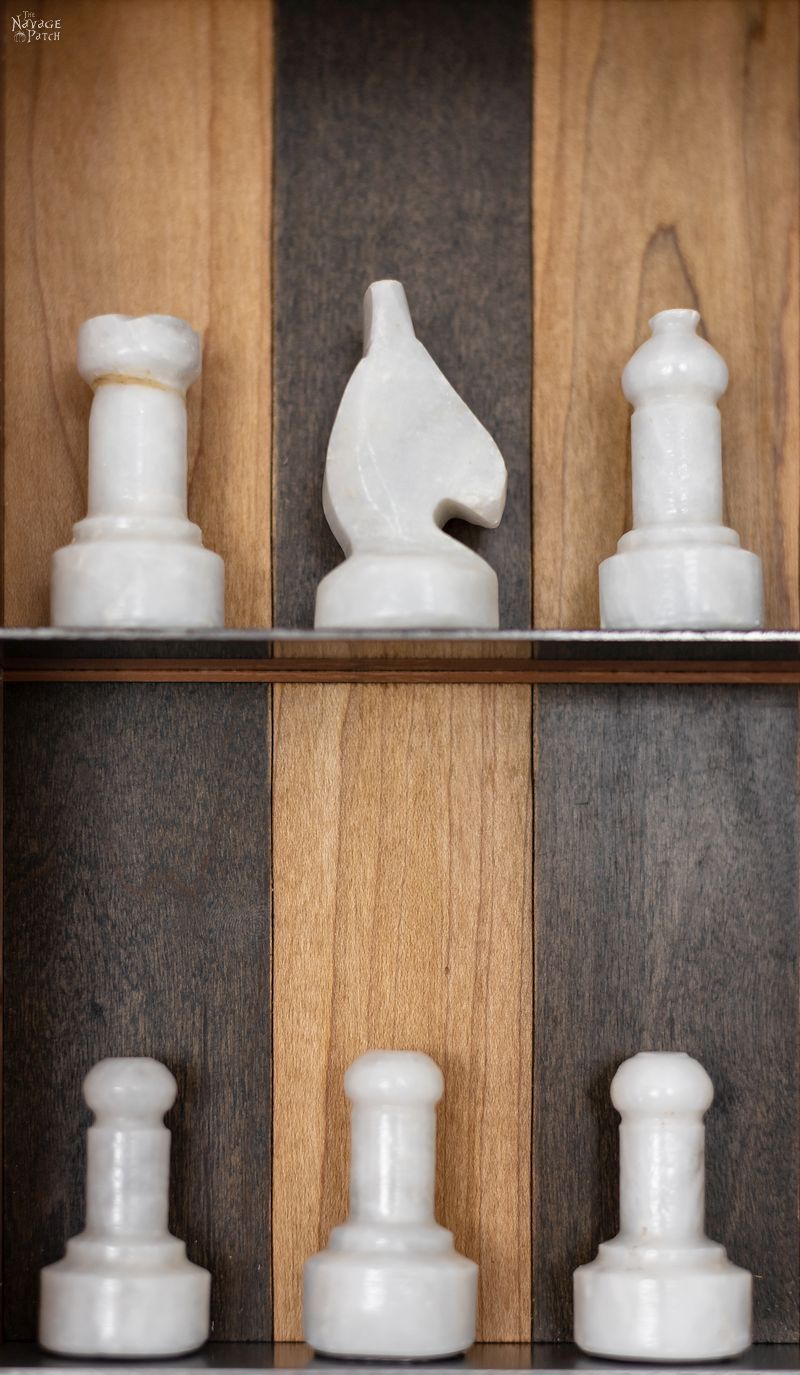
Ready for more? Then check out our DIY Vertical Chess Board!
We love it when you share our posts on Facebook and Pinterest!


Have you thought of trying to use mod podge? You could tape the section and paint some mod podge along the taped edge and then try the stain. I use it a lot when painting signs, but haven’t tried it to contain stain so not sure if it would work! But it might be an option if you’d rather not have the knife marks!
Hi Lynn, the problem there would be that the stain wouldn’t work over the Mod Podge. Unlike paint, which sits on the surface, stain needs to penetrate into the wood, and the Mod Padge would prevent that. It’s a great idea for paint though! That would give perfect lines!
You’re right! Hadn’t quite thought that thru! ?
Wood burning does a similar thing. My husband will burn a pattern that I then stain different colors and it stays within the lines
Oh, that’s a great idea, Darlene! 🙂
I’ve seen a number of projects on Hometalk where a picture was stained onto furniture. One was a horse on a dresser and a few other were flowers on table tops. Perhaps if you look them up they will have their method explaining how they got such perfect lines. . I never really read their instructions too closely because I can barely draw a stick person but the outcomes were stunning! Good luck!
Thanks, Giselle, I will check it out!
Gel stains applied in light coats seem to work well.
Absolutely. Gel stains don’t penetrate like regular stain, so you’d definitely have less bleed-under.
Thanks so much for this!! You just saved me from messing up my wood board! My sister wants a stained brown boarder with a white inside. I wasn’t entirely sure how to do that but if I just cut the square inside where I want white, it should work out perfect! Thanks.
Oh my gosh. I hate reading through a whole story when I just need a quick answer…until this post. I was dying laughing the whole time and got my answer! Wonderful delivery of information (clapping hands) Thank you!
LOL, well then you’ve come to absolute wrong/right blog! That’s how I roll here, Jessica, and I’m happy to hear that you enjoyed your first visit! 🙂
Thanks…This made my day. Was wondering,, Since it is a bit difficult to align the tape to the cut line, would placeing the tape over the drawn line , then cutting thru the tape with the knife, releasing the the excess tape, also achieve the same results??
Thanks in advance, -dan-
You, sir, are a genius! I wish I had thought of that. I absolutely think it will work, but as with everything – test it out first. Good thinking!