How to Age Brass Cabinet Pulls
Learn how to age brass cabinet pulls and give a quick makeover to any room! We’ll also show how to remove the knobs’ polyurethane coating.
So, you got knobs.
Knobs and knobs and knobs. You knobs probably have knobs.
From the bathroom to the kitchen to the living room, you got knobs coming out the wazoo.
And I bet most of them are bright golden brass, aren’t they?
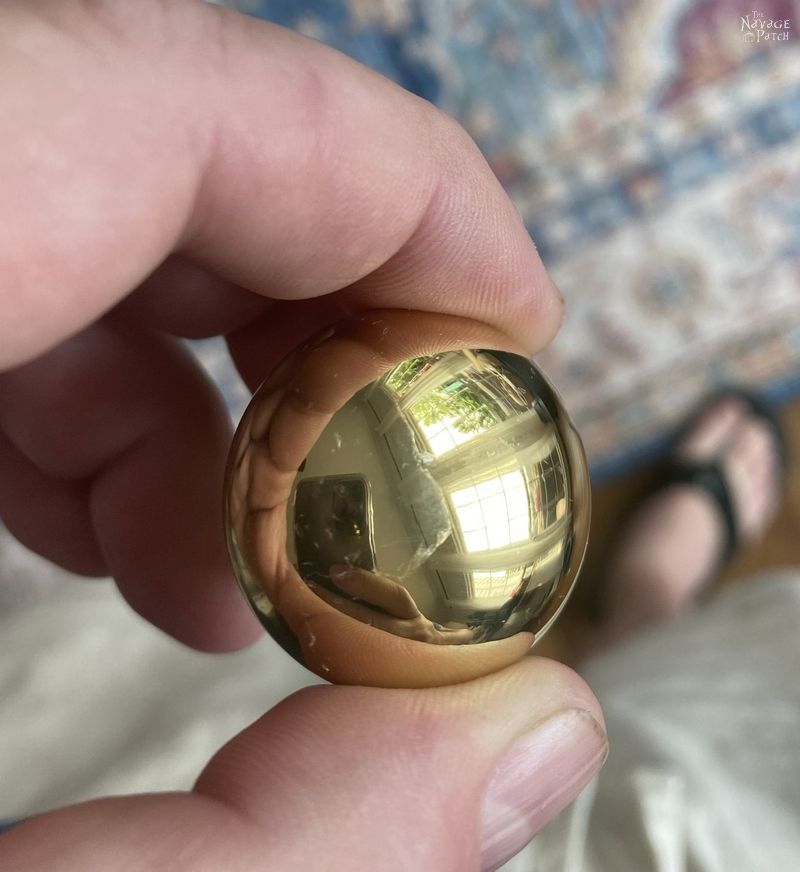
For years they’ve been staring at you…or more to the point, your distorted and rounded reflection has been staring back at you from their perfect, round and shiny surfaces, hasn’t it?
You’ve thought about changing them, but who wants all that expense for all those knobs?
You’ve considered painting them, but…brass is supposed to be fancy…it’s supposed to be shown off to the world, right?
But wouldn’t it be nice to have brass knobs that didn’t look so damn perfect and golden?
Wouldn’t it be nice to have cabinet pulls that looked a little aged?
What if I showed you how to age brass cabinet pulls to make them look like, well…almost anything you want?

Like shiny knobs? Great! You can make them golden tan or mirror gray or dark rainbow iridescent.
Like satin cabinet hardware? Fabulous! You can have that, too!
How to Age Brass Cabinet Pulls
SUPPLIES LIST
Affiliate links are provided below. Full disclosure here.
- Poly-coated brass cabinet pulls
- Paint stripper
- Mineral spirits
- Chemical-resistant jars or bowl
- Microfiber towels
- Nitrile gloves
- Eye protection
- Brass ager
In my last post, I showed you how to remove polyurethane from door knobs and door handles. I encourage you to read that post before this one, as this is kinda like part 2.

I was so hopeful that technique would work as well on brass cabinet pulls, but because the polyurethane layer is so much thinner on the knobs, I couldn’t get a good peel going. Only once after soaking in denatured alcohol did I get a nice wrinkly surface like I had with the handles.
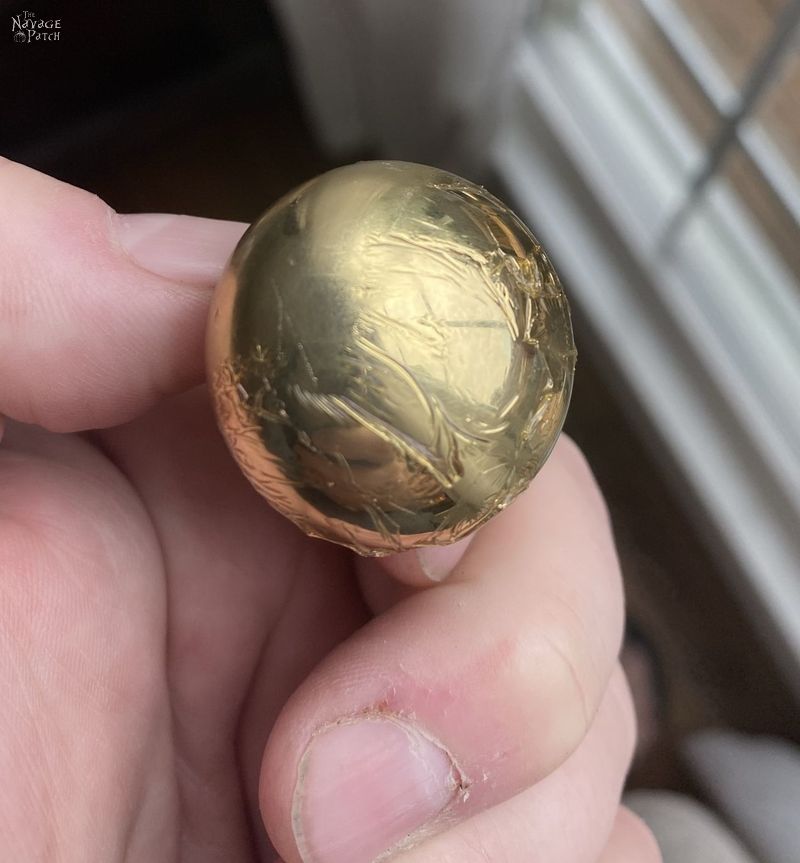
When the poly is wrinkled like that, it slides right off. Unfortunately, it only slides off the top part. The narrow part that I’m holding onto still has the poly on it.
So how to get it all off? And how to get it all off even when the top isn’t nicely wrinkled from a long soak in denatured alcohol?
Well, there is a way to do it with denatured alcohol and #0000 steel wool. I explain the process in the video below.
We love to see our DIY projects out in the wild! If you try this DIY project and take a picture and post it on Instagram, be sure to tag us – thenavagepatch
How to remove polyurethane from cabinet pulls with denatured alcohol
But there’s an easier way to remove all of the polyurethane or lacquer or whatever is sealing your knobs. Simple paint stripper will do the trick. For this, I prefer non-gel strippers. They’re still a little thick, but not as thick as, say, CitriStrip.
To strip a big bunch of knobs, I put them all (or as many as will fit) into a chemical-resistant bowl or jar, cover them with stripper and then wait about 10 minutes. I then transfer the knobs to a mineral spirits bath to wash off the stripper followed by rubbing them clean and dry with a microfiber rag. To strip smaller batches or a few at a time, I used mason jars.
When working with strippers, nitrile gloves are a must, and it’s a very good idea to wear eye protection in case of a splash. The stuff is pretty nasty, but you can’t argue with the job it does!
How to remove polyurethane with stripper and how to age brass cabinet pulls
The following video has been stitched together from the many attempts I made while figuring out how to age brass cabinet pulls. The first several videos (and a colossal waste of time) were made while I still believed that denatured alcohol alone would dissolve the polyurethane coating. In those videos, a hopeful and younger me puts a knob in a jar of denatured alcohol, sets a big digital timer for an hour and then walks away. An hour later, younger hopeful me comes back on screen, fishes the knob out of the denatured alcohol, wipes it off triumphantly and shows it to the camera as if he’s just invented a better wheel. Dumb young me then dips his prize into a cup of brass ager and waits – on camera – for the ensuing miracle of brass aging before his eyes and the eyes of the world. Stupid silly me then removes the knob from the ager, and….!
Nothing.
The damn things looks just as it had before. Younger dumber me gives the knob a funny look and wonders where he went wrong in life.
After several failed attempts, young dopey Greg wises up a tiny bit and realizes that denatured alcohol will not dissolve the polyurethane no matter how long he soaks the knobs. He shrugs and remembers the old adage: better living through chemistry. He reaches for the hard stuff…
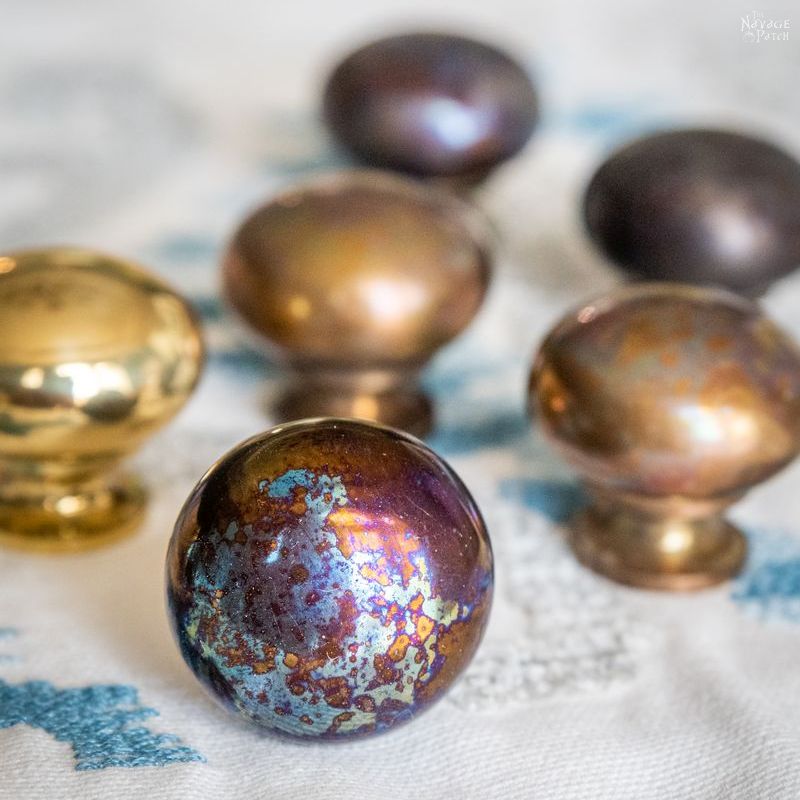
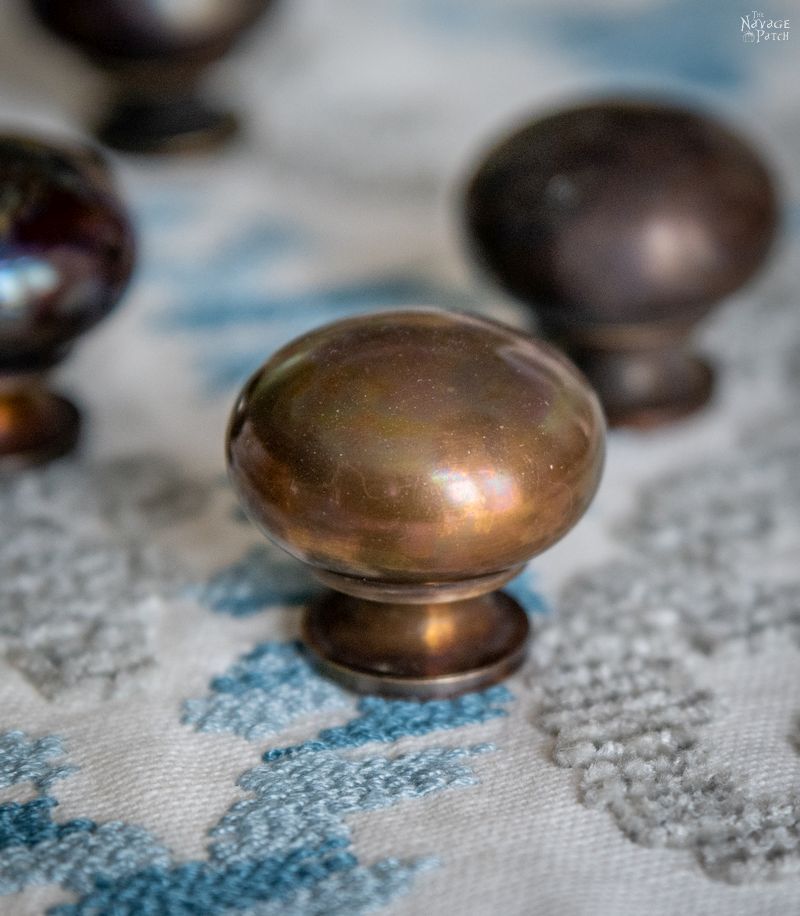
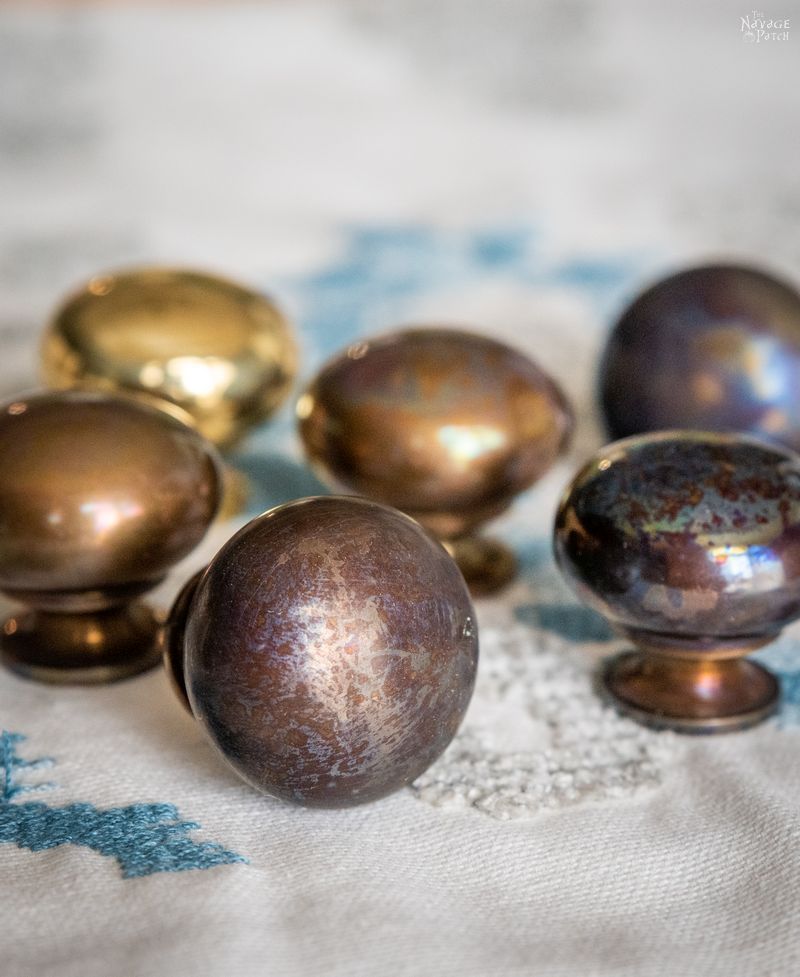
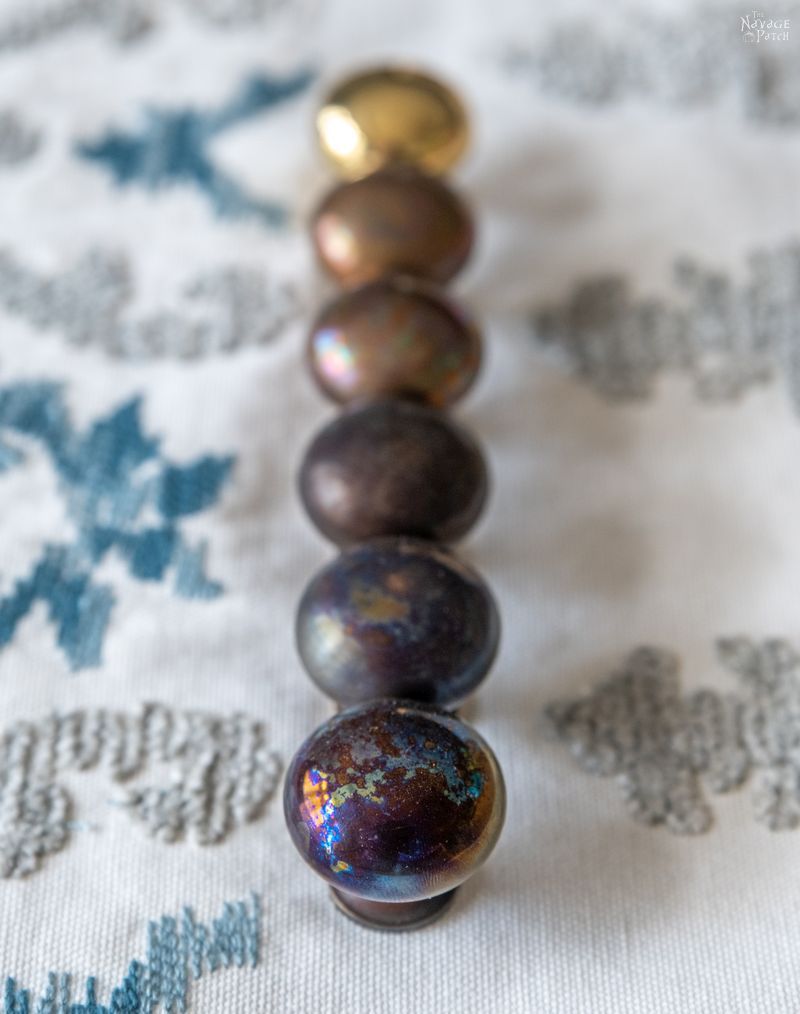
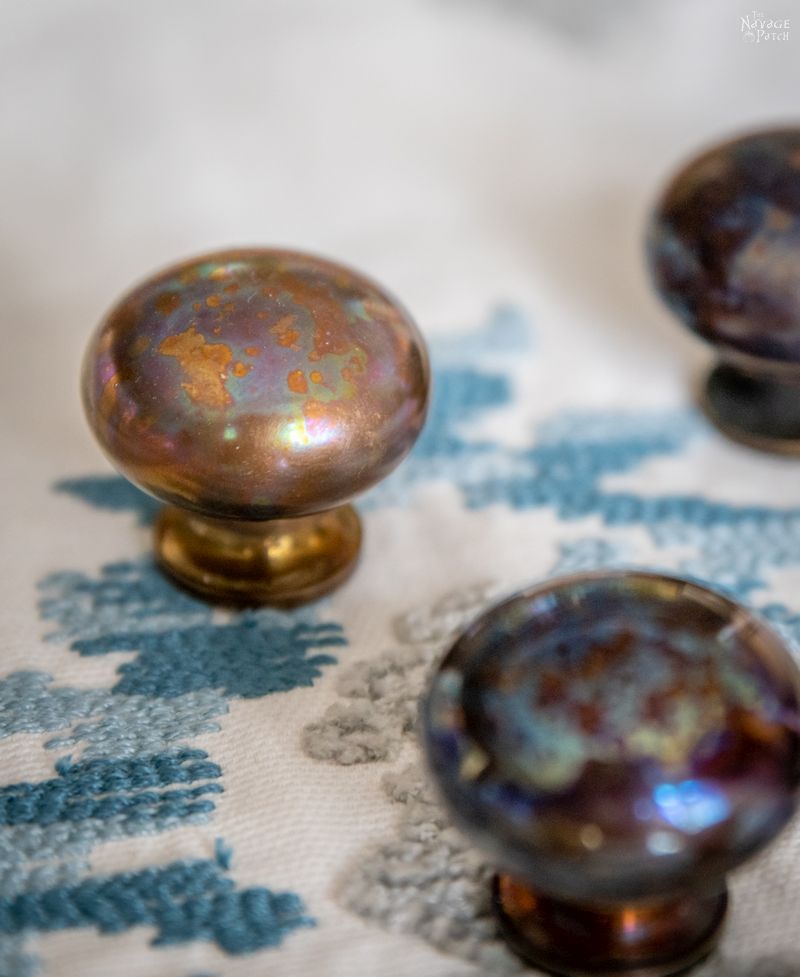
Brass ager is a wonderfully fun thing to play with. But it’s an acid, so be sure to wear your PPE! You can achieve so many different finishes depending on how long you soak the knobs. Rubbing with 0000 steel wool either before soaking or after will further vary your results. Personally, I love the variegated look, and were it up to me (which it most assuredly isn’t), I would have my cabinets’ hardware with a hodgepodge of colors, tones and sheens.
This one is my favorite.

Here’s a more traditional aged look.
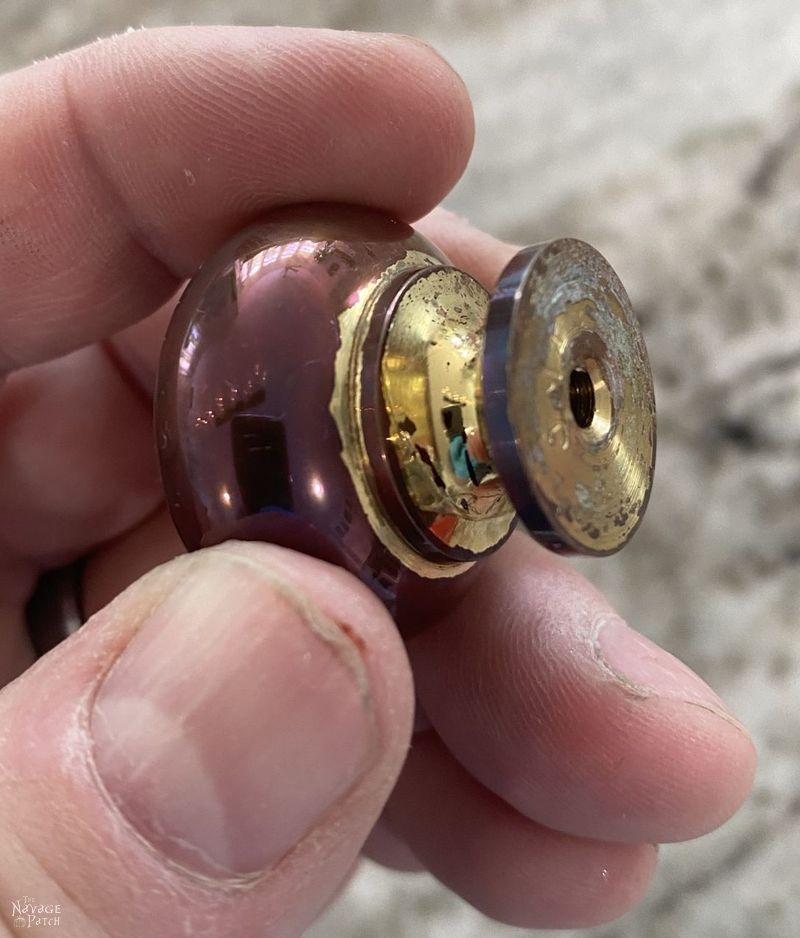
Earlier in the post, I mentioned that the denatured alcohol sometimes took the poly off the round part, but not the base. This is how those knobs looked after aging. Looks beautiful on top – I managed to get a nice purple on this one.

But still brass color below. In order to get rid of the rest of the poly when using denatured alcohol, you’d need to rub that part with 0000 steel wool.
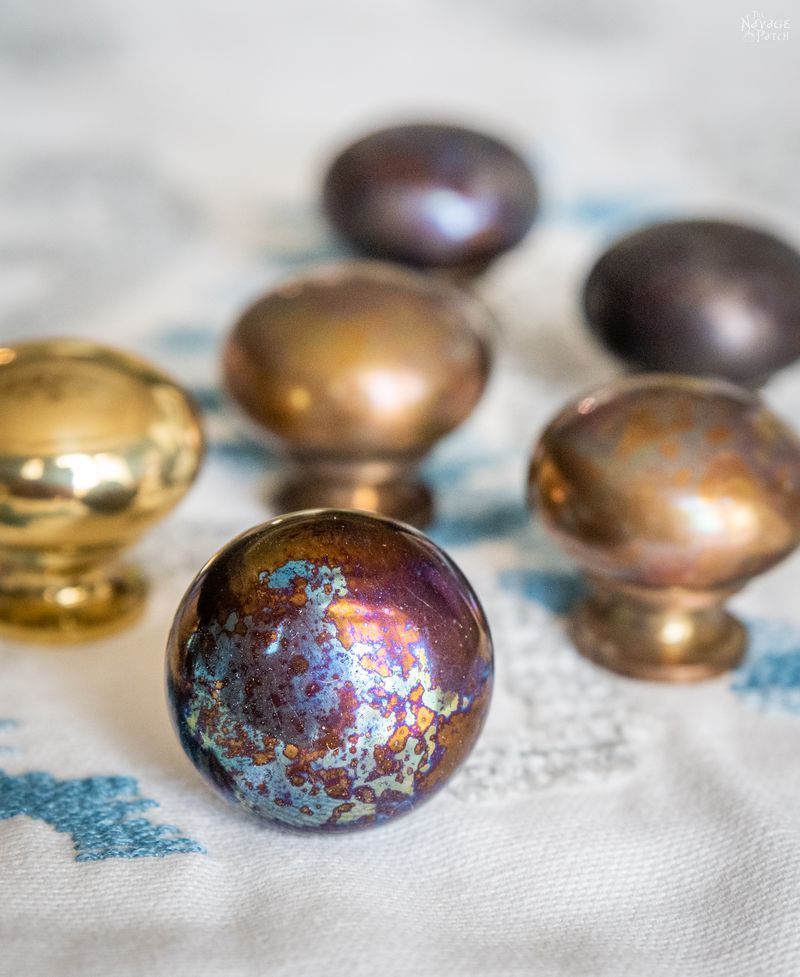
More beauty shots.


Share it on Pinterest & Facebook!


Greg! you figured it out and it looks amazing! I like the really mottled one that you like best too. All of the colors are a win though! Good job.
Thank you so much, Jean! Yep, I love the mottled look! 🙂
gorgeous! do you have any tips for getting the mottled look? Is it solely from the steel wool? I like the mottling you achieved vs a burnished effect. Planning on doing this with our knobs but also curious about doing it on a raw brass light fixture (prior to install). I wonder if I would just wet a rag with brass ager and slather it on. Have you tried doing something similar?
The mottling effect happened on its own. It’s all about how long you leave it in the ager before pulling it out and running it under water. Play around and see all the different results!
Hi Greg! Just curious how you achieved the look of your favourite knobs. Was it the steel wool that created the variation in colour on a single knob or do they eventually bible to create the irredeemably colouring?