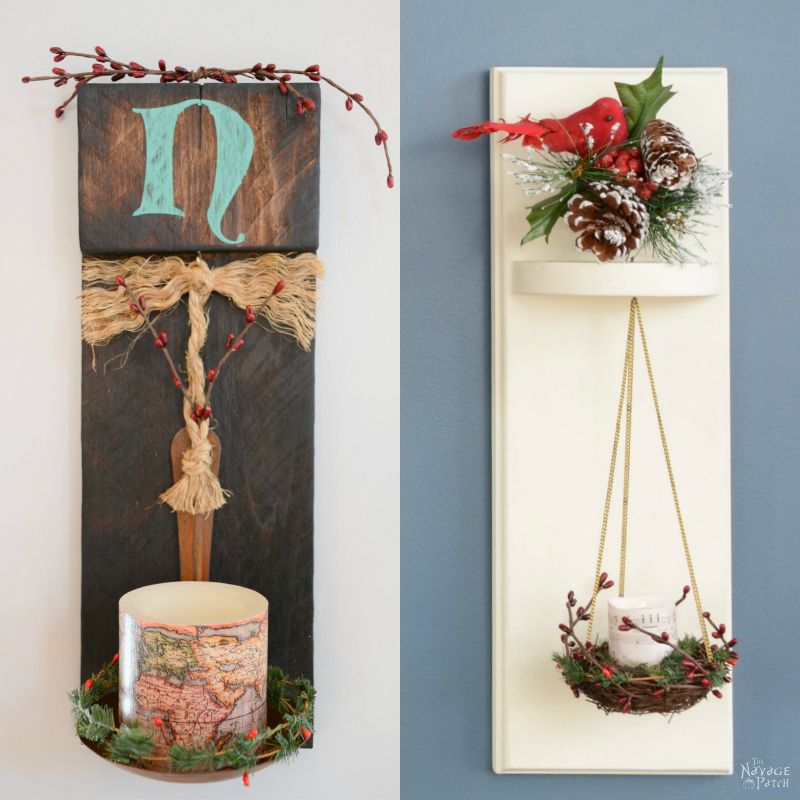
DIY Wall Sconces from Scrap Wood
After making the replacement sconces in Page 1, I wanted to make something a little different for the second pair. I had some poplar scraps lying around, so I decided to use those, since this pair would be painted (poplar doesn’t take stain well). I forgot to take pictures of the scraps I used, but here is a picture of similar scraps that Handan used for her awesome HO HO HO project.


In fact, the circular piece of scrap wood I used for the overhang piece was a scrap from Handan’s project.
I cut the disc in half, sanded down past the center hole and filled in the other holes and imperfections with wood filler.


I cut the two poplar boards to size and routed the edges with an ogee bit.

I decided to affix the overhang to the sconce with glue and screws. To do this, I would drill pilot holes in both the semi-circles and in the sconce board. I marked up the centers.

After drilling the pilot holes, I used a countersink bit on the back of the sconces where the screw heads would be.

I turned the screws until the tips were just sticking out the front side. This would help me line up the overhang.

I applied glue to the overhang and screwed it in.

When the glue dried, I painted the sconces an off-white color.

Normally I would use Handan’s incredibly awesome DIY Chalk Paint, but I’m all angles and elbows when it comes to making that stuff, and since she wasn’t around, store-bought paint from our basement had to suffice.
After the paint had dried, it was once again time for Handan’s help to turn a couple of snooze-inducing white planks into something eye-catching and interesting. She used bird nests that she bought for about $1 each and battery-powered tea lights that she decoupaged with sheet music.
Here’s a quick pictorial of some of her work.


She nailed it! These sconces turned out way better than I thought they would, thanks completely to Handan’s work.


great job on all of the scomces and candles xx
Thank you so much, Chris!
Thank you, Chris!
The two of you need a show! You have such great ideas that are regrettable for the seasoned crafter, yet simple enough for a beginner! I hope to see you on tv one day!!
Thank you, Kay! Who knows what the future will bring? 🙂
You both are so creative! I would never think to build something like this on my own. So eye catching!!
Thank you so much, Angie! 🙂
The wall scone look great. You both made it special in your own unique way and now I finally know how to line up an overhang thanks to the great pics.
Thank you, Michelle! 🙂
Just darling! I would keep up all year and use to decorate for each holiday! Would also make a great gift too! Thanks for sharing.
Thank you, Naomie! Yes, they would make an awesome gift! In fact, we’re giving one this year!
and i bet the lucky person who receives it will grin ear to ear and think they are very lucky to have you two as friends xx happy new year
😀 Happy New Year to you, Chris!
they can stay up all year just change out the top, those little glass bluebirds and pink ones look awesome, and i do love them look at them everyday xx
🙂 🙂 🙂
Both are great but I love the hanging nests. So cute!
I agree, you two on tv would be so much fun!
Thanks Giselle! Handan’s way too chicken to go in front of a TV camera, LOL!
I just love how these turned out!! And you made it so easy and do-able with your detailed instructions. Both look awesome but I love Hanging Nests most.
Thank you, Ashley!
Hello and they are adorable.. BUT did I miss how you attached them to the wall? It always grabs my attention…when I see things…but I……”How did they hang that? and What will go there after the holidays? or did they already have something there hanging that they just replaced with these?….You know….curious minds NEED to know….haha.
ARGH! I totally missed this, Laura! I’m so sorry! We hung those with standard picture hook thingies (that’s the technical term). You know, the ones with the little teeth? If we were to do them again, we’d probably use Command Strips – they’re our new go-to solution for hanging!
These are gorgeous. I would have never thought to hang the candles from the sconce like that. The effect is brilliant – extremely eye-catching and different. Both could easily be found hanging in a luxury homewares store selling for a cool $150 or more for the pair. I’m already imagining a similar sconce for my bedroom makeover in my head. When it comes to design and DIY I’m like a dragon, hoarding away ideas in a big pile.
I also loved the charred wood. Great idea! AND you get to play with fire, so win-win, right? The burned mottled outcome really adds a lot to the finished piece. Every single one would be unique. And of course Handan’s finishing touches just tied everything together beautifully. The nest with the berries and using the thin gold chain to hang it and the candle? Genius. Whimsical yet subtle. A nice juxtaposition between the machine worked edges and the natural bird’s nest.
Thank you, Jay! I just read this aloud to Handan so I could see the smile steal across her face. Thank you for another great comment!
Love that rusty old ladle and the map candle. How country chic! The white candleholder is gorgeous! Good job using old upcycled scrap lumber!
Thank you so much, Barbara! 🙂