DIY Dollar Tree Light-Up Snowflakes
These DIY light-up snowflakes are made from Dollar Tree materials and Govee lights, but they can also be made with all Dollar Tree materials to keep cost to a minimum.
If you hadn’t noticed by now, lights are pretty much our thing, our cup of tea, our bag, our jam, right in our wheelhouse, our vibe, and entirely our aesthetic. In other words, we’re here for them.
Starting with our very first Christmas post 8 years ago, my babes and I have been playing with fun and festive ways to incorporate lights into our lives. (Actually, our infatuation with lights started even earlier, but our first blog-documented projects happen to be the Halloween that preceded the first Christmas, and in the interest of keeping in the spirit, I’m just jumping forward to that first blog Christmas of 2015!)

And we haven’t stopped since. From simple small lighted crafts…

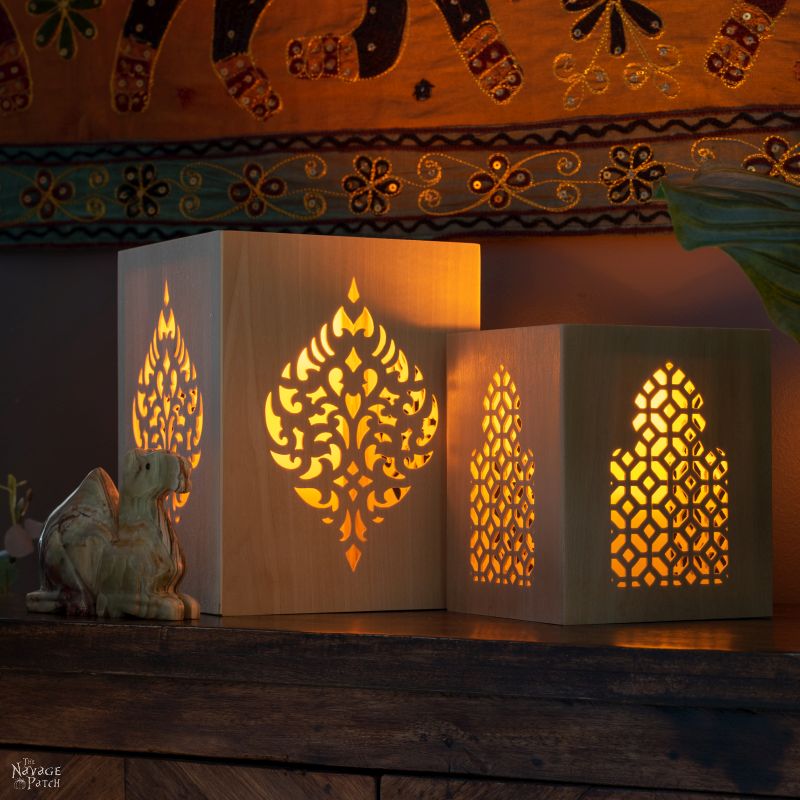
To intricately-carved Cricut creations…
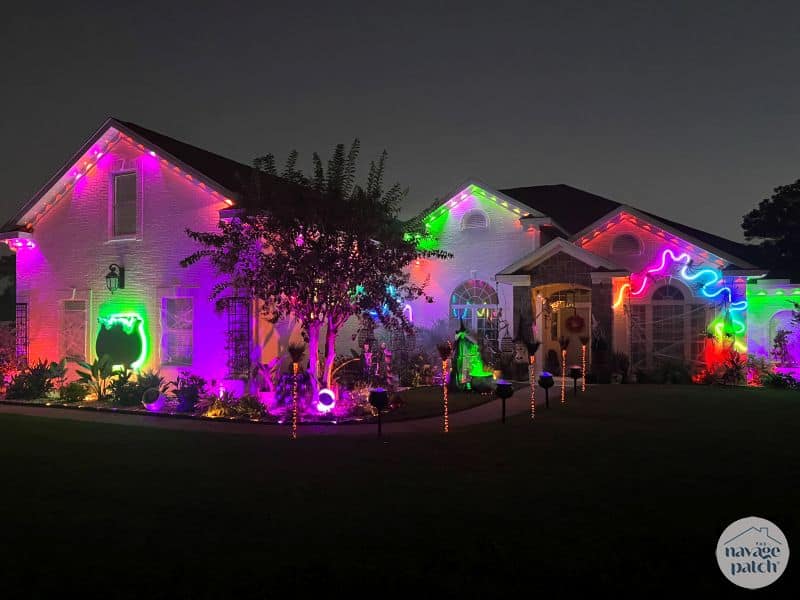
To our entire house in Florida…

If we can find a way to light it up, we’re probably gonna do it!
So it should come as no surprise that our holiday crafts and projects are full of light too!
This Christmas is no exception. We’ve already hung Christmas lights galore, and we have a bunch of DIY light-up decorations we’ve been working on, like these beautiful snowflakes I’ll be showing you how to make.

We love to make beautiful things from ordinary and inexpensive materials. This is why we spend so much time bopping around all the Dollar Trees in northwest Florida! This year, we lit on a method to make beautiful snowflakes from humble DT materials.
And of course by “we,” I really mean “she,” as in “The One I Call My Babes” aka “The Shrimp.”
We’ve been buying those Dollar Tree tabletop Christmas trees for the past couple of years, but they’ve been doing nothing more with their plastic lives than sitting in a storage tote. As usual, I started to question my wife’s sanity every time I’d look into a storage tote filled with dinky plastic trees.
It’s well-documented that The Shrimp moonlights as a Loon, but this was getting ridiculous. However, just as I was about to surreptitiously return the useless white trees and call the men in white coats with butterfly nets to collect Handan, she sprung an ingenious idea on me and all thoughts of padded rooms were banished from the walnut between my ears.

This year, my babes lit on a plan inspired by our first test run of Govee Christmas lights. If you haven’t seen these things, they are amazing! They have the most beautiful colors I’ve ever seen on Christmas lights, and the strand has all sorts of pre-programmed light sequences that can be controlled via an app on your phone. The moment we plugged in a set in the kitchen, Handan had the idea.
We had the trees. We just needed some foam disks from DT’s floral section and some inexpensive red berry stems from Michaels.
So let’s get to it! It’s almost December – we’re running out of time! 😁
DIY Light-up snowflakes SUPPLIES LIST
Affiliate links are provided below. Full disclosure here.
- (6) Dollar Tree white tabletop Christmas trees
- (1) 2-pack of foam disks (floral section)
- Govee Christmas Lights – we used 33ft Govee Christmas lights for each snowflake.
- Dollar Tree tinsel snowflake
- Red berry stems
- Hot glue gun
We love to see our craft projects out in the wild! If you try this seasonal craft project, take a picture and post it on Instagram, be sure to tag us – thenavagepatch
Light-up snowflakes VIDEO Tutorial
Watch our short and fun video below for an overview of our light-up snowflakes before you read the detailed step-by-step tutorial.
Watch Our Tutorial On YouTube
On Tiktok
Light-Up Snowflakes Tutorial
Step 1 – Gather your materials
Each wreath requires two foam disks. How’s that for efficient packaging!

We’ll be using six Christmas trees, but we don’t need the three base legs and the base support attached to the tree. Remove the support, gather the legs and deposit them all in the circular file.


Step 2 – Gouge the foam
For those of us who experienced the 80s, this next step will bring back some memories of Trivial Pursuit. You want to score the foam with the tree stem to make 6 equal pie pieces. I did this by pressing the stem into the foam and then dragging it to create a small channel in the foam.


I then repeated this on the opposite side and then did the same for the other lines.

Right now, many of you are having flashbacks of your favorite category’s color. Mine was green.

The depth of your gouge should be about half the diameter of the tree stem, no less.
Now repeat this on the second disk, but be sure the lines are in the same place, as these two disks will eventually be glued together, and those channels need to match up.

Now gather your six trees and let’s get flaking!

Step 2 – Glue the stems
Lay a line of hot glue in one of the channels, and then press one of the stems into the glue.


One down, five to go. Repeat with the other trees until you’ve filled your Trivial Pursuit pie.


Step 3 – Cover with foam disk
Add hot glue into the channels of the second disk and all over the surface and then press it onto the first disk.


Step 4 – Prep for lights
Group the branches by tier (there’s 5 distinct tiers) and then bend all the branches of a tier straight up. Don’t worry about how the trees look – final shaping comes later. This step simply makes wrapping the lights easier.


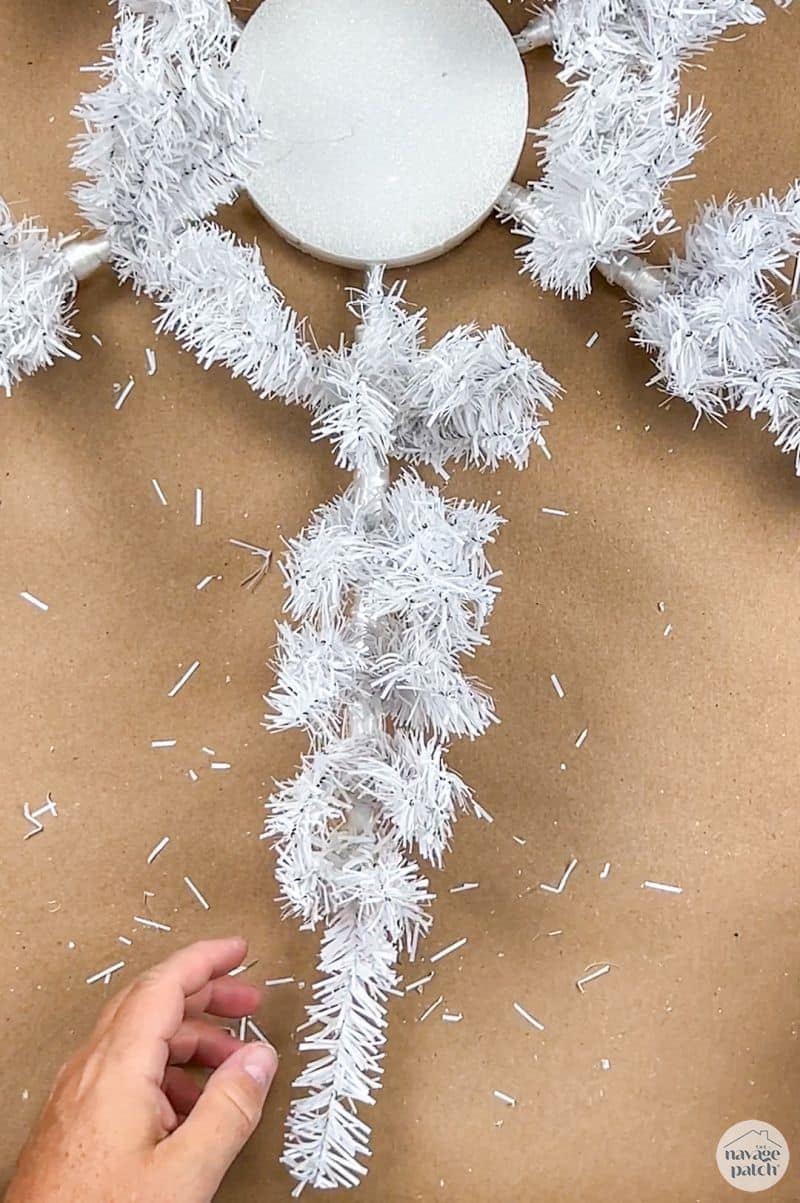
Step 5 – Wrap the lights
Start wrapping the lights at the base of one of the trees and work outward towards the tip. I did this by wrapping two passes in the space between tiers on the way up towards the tip…

I wrapped a few times around the tip…

And then I wrapped once around each space between tiers on the way back down to the base.

Once back to the base, lay the string across the foam disk and repeat on the opposite side.


Carry on like this until all six trees are wrapped. This should leave you with about 2-4 feet of leftover lights which you’ll use to fill the center. I wrapped the excess around a Dollar Tree tinsel snowflake which I then hot glued to the foam. After fluffing up the branches, I gave my light-up snowflake a test run…

Step 6 – Add a pop of color
To make your beautiful snowflake stand out against a light background during the day, you may want to add a bit of color. I used some red berry stems from Michaels, and I think they add the perfect touch of red to keep the wreath looking interesting when the sun is shining. I simply jabbed the stem into the foam and secured it with a small zip tie.

Step 7 – Hang and enjoy!
How you hang your light-up snowflake will depend on what you’re hanging it on. For our brick house, I cut a 4-inch square from a plastic ceiling tile available at Home Depot or Lowe’s. You can use a piece of wood instead. I used a masonry bit to drill into the brick…
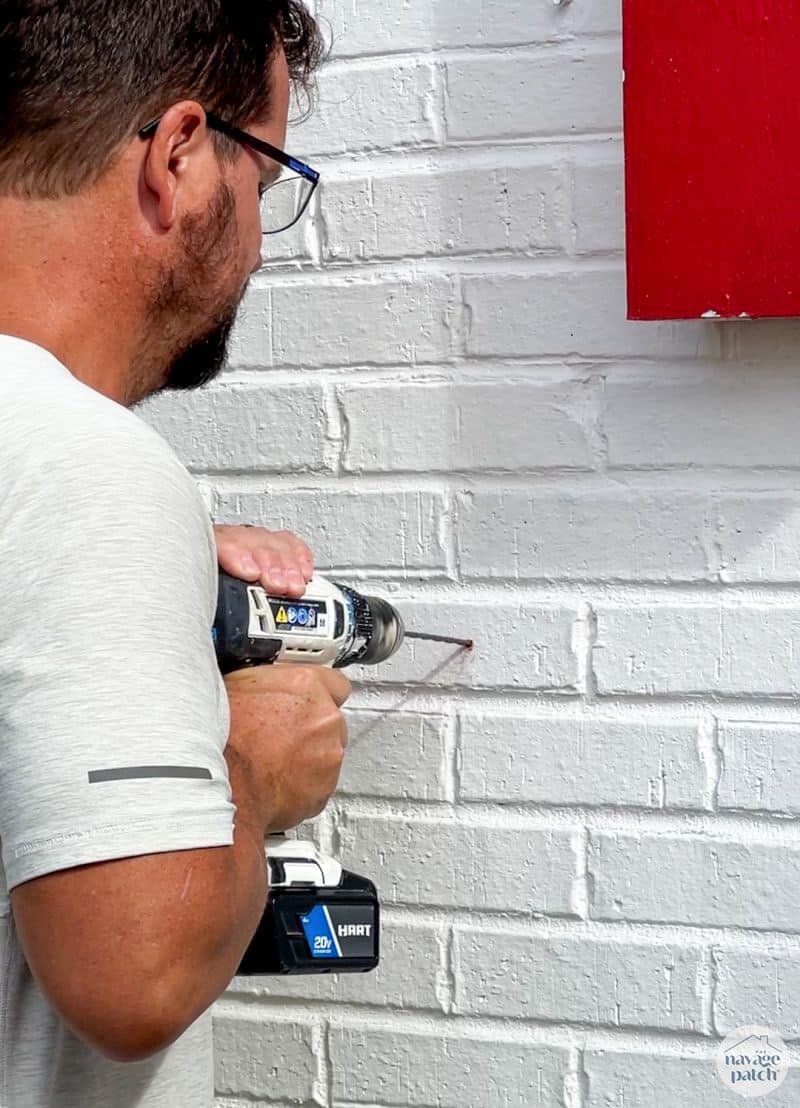
And then I secured the piece of ceiling tile against the brick with a screw.

I put a piece of VELCRO Extreme Outdoor mounting tape on the tile..

And then I pressed the snowflake’s foam disk onto the mounting tape.
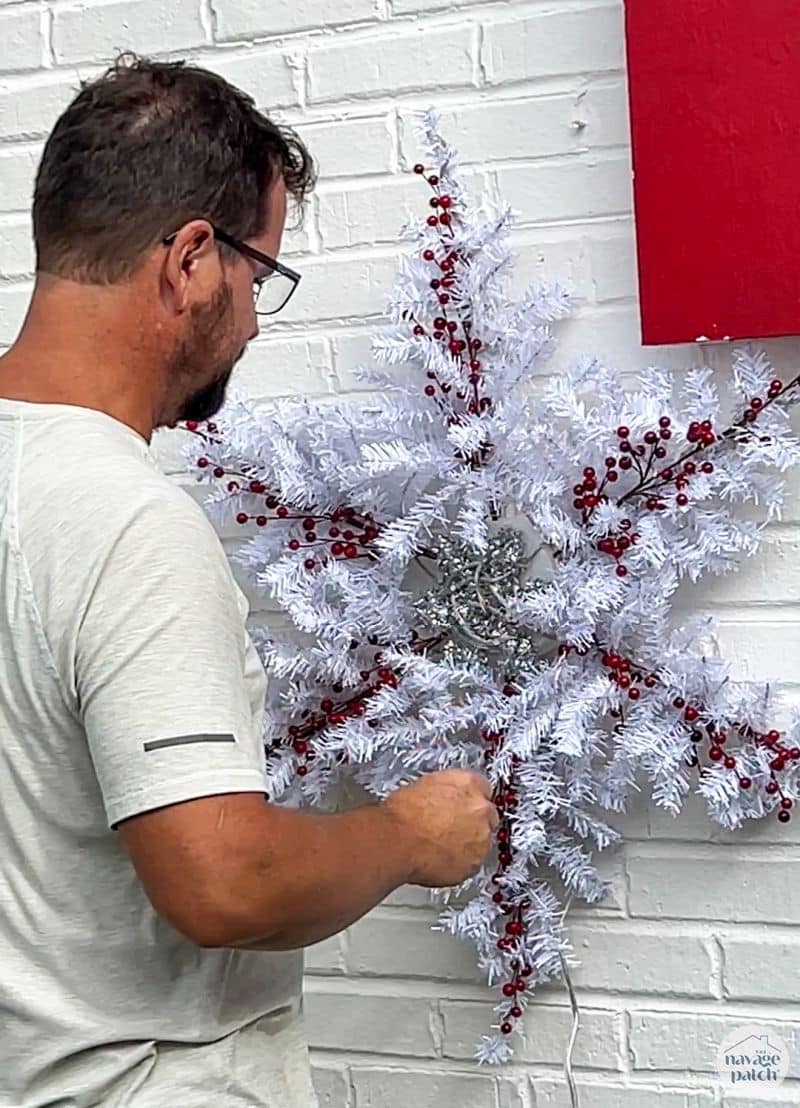
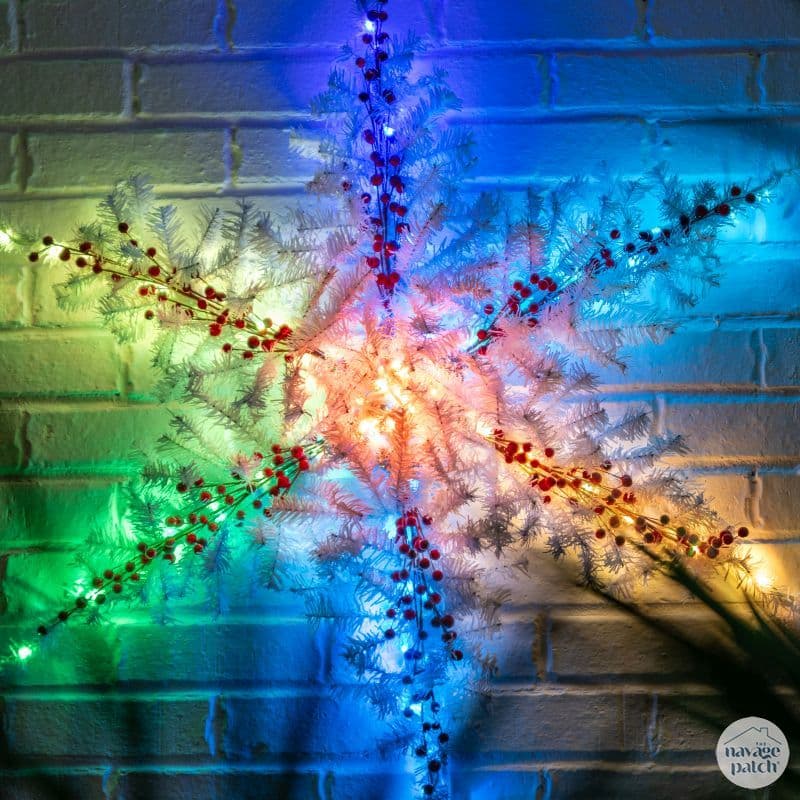
Let’s see how it all came together!
The colors are amazing!


Greg (and Handan), I just want to let you know that I don’t LOVE these snowflakes, but I DO LOVE just about everything else you do. I really appreciate your blog and your emails. So, please don’t hang up your pen and take up sky diving. I mean, of course you should take up sky diving if you really want too. That would make a great story! But, don’t quit here in discouragement. You are a huge inspiration to so many people and you are making a difference in people’s lives that you have never met as you inspire us to creatively make our homes places of peace and rest and beauty. May God be with you! – Anna Joy
This so great on your newly painted (whitewashed) brick!
Don’t hang up your pen! I love reading your witty blog! Sometimes I read phrases out loud to students as a great example of voice in writing.
Love the new format, nothing pops up and covers what I’m reading! I did enjoy this craft and I was really impressed with how easy it is. Well done! But here’s the cup of cold water that doused the flame: colored lights. Complete buzz kill. Make some in clear or white twinkles and add some pictures of those. Don’t remove the others, I think they have a place with many people but traditionalists, like “old fogey” me, love white snowflakes. I’d say, when you do a lighting post, you show some options. Photos are a strength of “The Patch”. Well done.- Derry G.
So pretty! Love that you make your outdoor decorations oversized–many people don’t have things big enough to be seen from the street!
Skydiving is uh-may-zing, but so are your snowflakes!!! ❄️
Don’t hang up your pen yet. Something is wonky when posting comments. I have had this happen a few times where I get a message about being message being authenticated (or something similar). Then my message never appears and I have to rewrite it.
Oh, and still go skydiving! 😄
I love these! I had a whole paragraph typed up about how much of an inspiration you both are but when posting my comment I got a an error message pop up saying ” This page isn’t working HTTP error 405. The reload button did not work and i ended up having to reopen your blog in a new tab.
I’m so sorry about that, Amanda! We’d been having some issues with the comments on our site, but I think we have them sorted now!
Hi Greg & Handan
I don’t recall seeing these pop up in an email, but I do really like them!
You don’t have to hang up your pen, but you can still go sky diving whenever you want (I always wanted to have a crack!!)
Merry Christmas to you all, and have an awesome 2024! – from a fun-loving Aussie 🎄🎅🤶
Thank you, Carmel! I gave up skydiving 23 years ago! :D:D:D