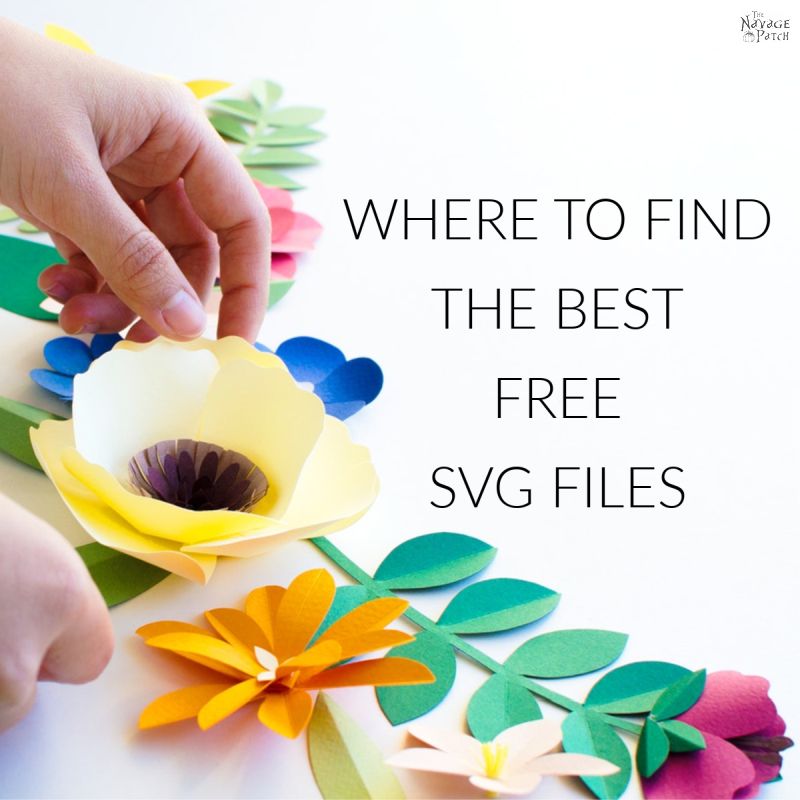
DIY Foil Flower Art for a Bohemian Bedroom
Our classy DIY Bohemian-inspired foil flower art is just at home in your boho-themed bedroom as it is in any room you want a little free-spirited elegance!
Look, if it were up to me, I’d just be over here with a megaphone yelling “Foil flower art! Get yer foil flowers here! They look like drawings, but they shine like foil!”
Simple.
To the point.
No wasteful word salad and gobbledygook descriptors.
But that just doesn’t cut it these days, does it, madam?
Oh, no siree bob! These days, everything needs to be labeled and categorized and sorted into this pile or that, especially when you’re making stuff to share with the world through a blog post or on social media.
It’s not just a thing you’ve made.
It’s a farmhouse thing. Or it’s a coastal thing. It’s a traditional, transitional or a tribal thing. And don’t’ get me started on mid-century modern things!

If you have a collection of stuff in your house, you dang well better be sure it follows the rules!
Of course, if you don’t follow the rules and you’re stuff is all wackadoodle, well then you’re eclectic, and you’re right back on the neatly-labeled path. Smug satisfaction all around!
You can be rebel without a cause, madam, but you sure as heck can’t be a rebel without a category.
Even the free-spirited hippies couldn’t escape the Great Labeling. Somehow, their style got swept up with the meandering artistic misfits known as Bohemians and birthed the boho-chic movement (or so I’ve been informed).
I know, I know, I’m oversimplifying a bit, but I’m just trying to keep up with the trends! (Truth: I don’t give a squishy purple fig about keeping up with kardashians trends, but as I’ve somehow found myself wearing the mantle of “influencer,” it is literally my job to be somewhat and moderately trendy.) Thank god I’ve got my babes to tell me all about what’s hip and cool and what’s totally square and grody to the max, otherwise I’d still be walking around in flower-printed Jams shorts and a popped-collar Izod.
(Please don’t tell me that’s back in style.)
Anyway, apparently we’re planning to have a bohemian (or boho for you trendy types) bedroom. I’m sure you can imagine my excitement.
When Handan first informed me of this eventuality, I couldn’t help picturing a small bistro table in one corner of the bedroom with two chairs occupied by cigarette-smoking Frenchmen listening to a spoken-word performance on an unseen stage. They snapped their fingers instead of clapping.
Hey, wait a minute! I flipped through my mental categories…
Dang! I had the Frenchmen miscategorized! I moved them from bohemian to beatnik. There, that’s better.
Now about that Bohemian bedroom…
I again tried to picture what my babes intended, but this time all my mental pudding could conjure up was a…gypsy?

Realizing I didn’t know the first furry thing about bohemian style in general and a bohemian bedroom in particular, I deferred to my babes’ experience and knowledge and asked her what she had planned.
“You’ll see, my babes,” she said, “I’m still working on the details, but I do want you to make some foil flower art for me.”
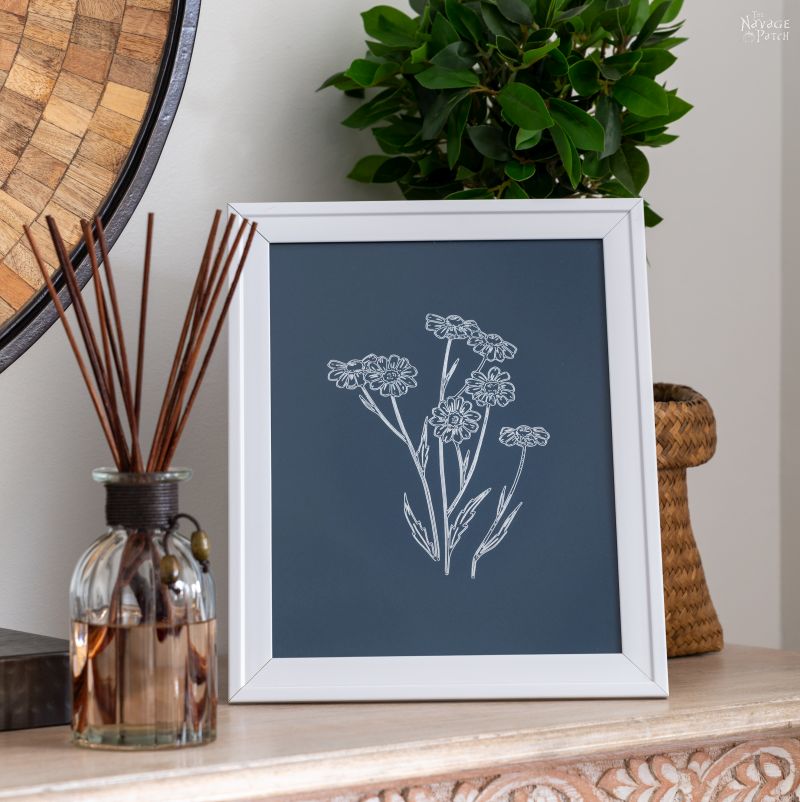
Flowers, I’ve come to learn, are a cornerstone of bohemian decor…as long as they’re brightly colored. I’ve also realized that a no-holds-barred bohemian bedroom is probably a little outside Handan’s comfort zone – I don’t think she could handle the explosion of color and texture. So I’m thinking she’s going for something more bohemian-inspired than full-tilt bohemian. The foil flower line art she planned is the perfect embodiment of boho-inspired: simple wildflowers traced in bright shining foil. Not too much color, but enough to be interesting.
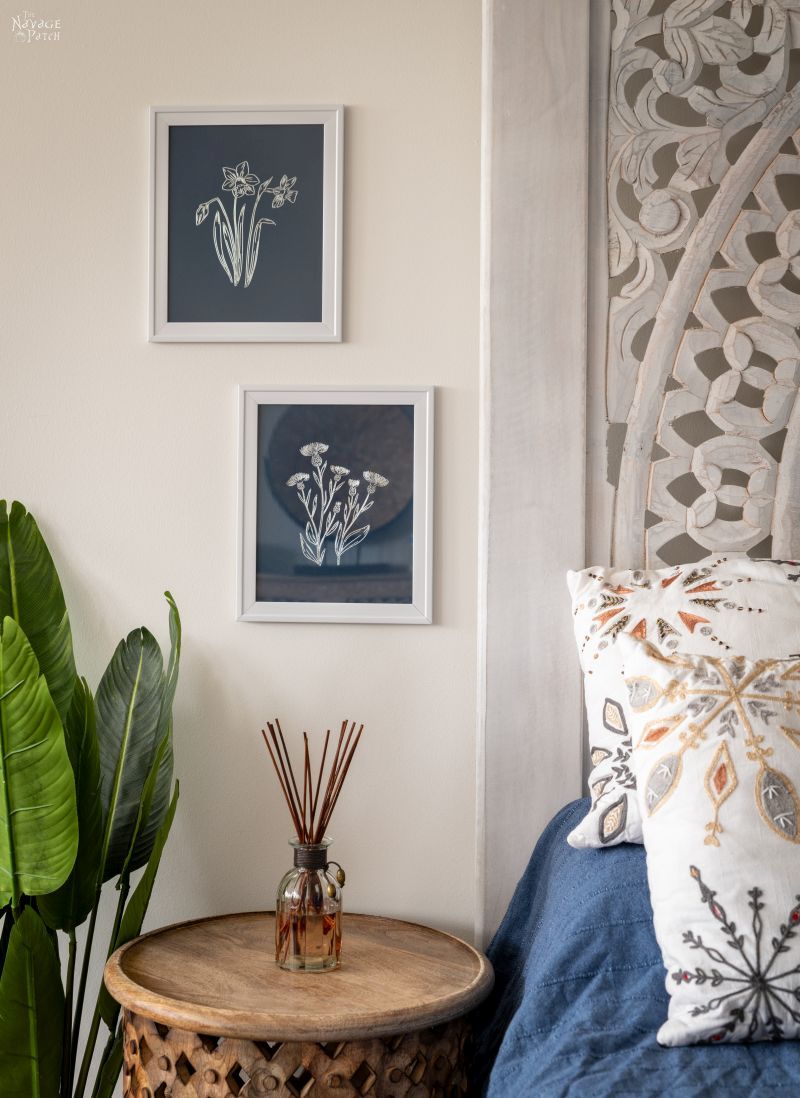
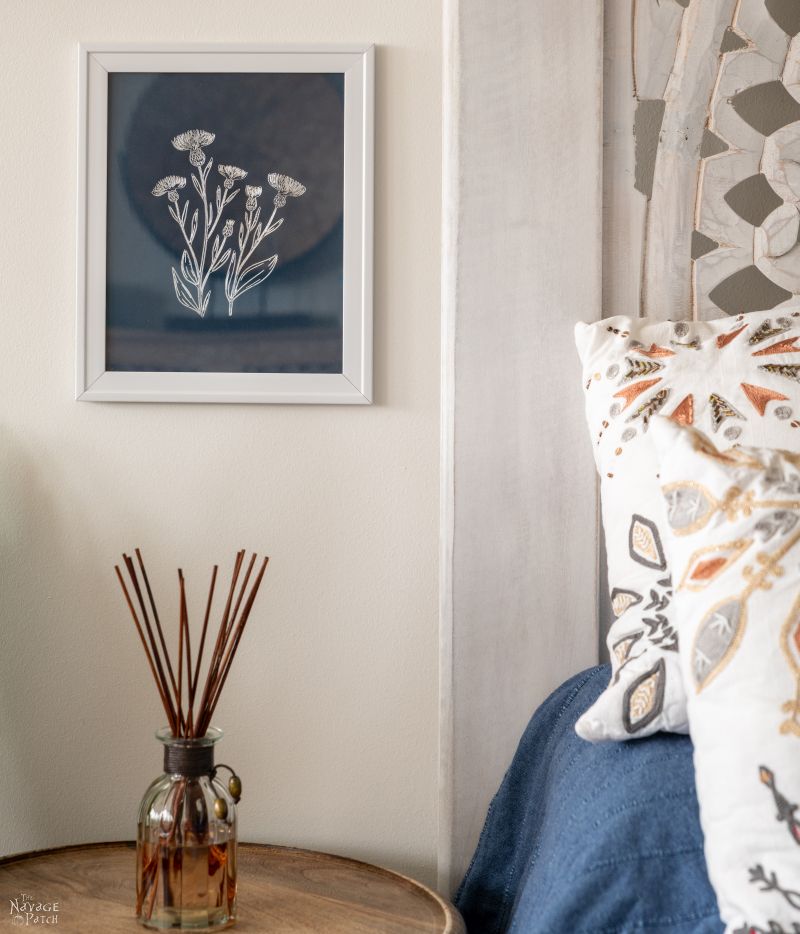
And they would look great hanging next to our bed!
Let’s see how it’s done!
DIY Foil Flower Line Art for a Bohemian Bedroom

This is a sponsored conversation written by me on behalf of Cricut. The opinions and text are all mine.
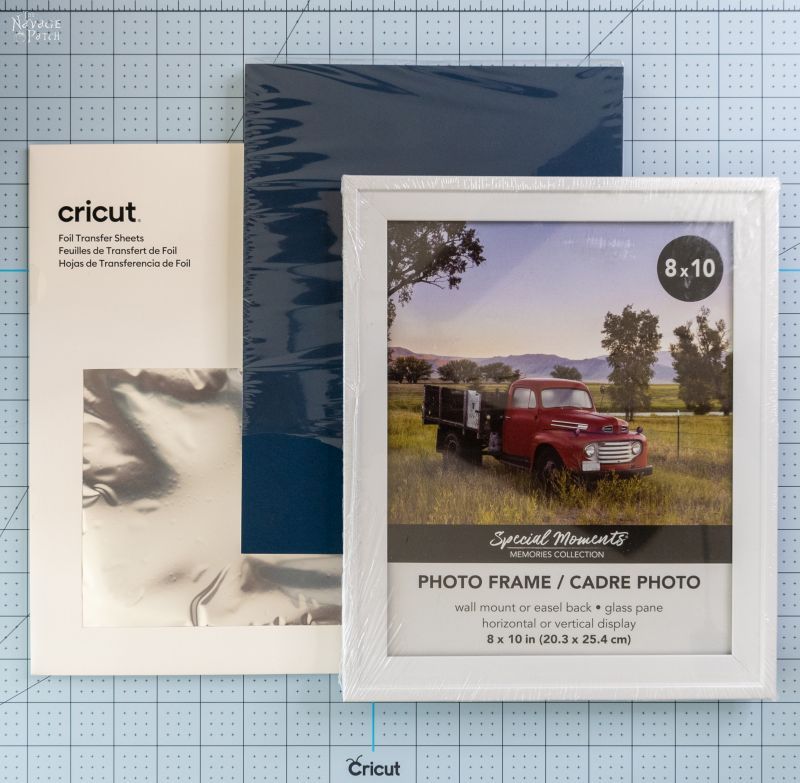
SUPPLIES LIST
Affiliate links are provided below. Full disclosure here.
- Cricut Maker
- Cricut foil transfer tool
- Free Boho-inspired flower art SVGs (available for download in The VIP Lounge)
- Cricut foil transfer sheets
- Cricut LightGrip mat
- Medium cardstock in your choice of color (we used navy blue)
- 8 x 10 picture frames (we used white ones from Dollar Tree)

Step 1 – Design Space
If you’re not familiar with uploading SVGs to Design Space, please refer to our Cricut Cribs tutorial on the subject.
Starting with a blank Canvas, select a square.


In the Size field of the menu bar, click on the lock to unlink the width and height, then change the width to 8 and the height to 10.

Upload one of the boho flowers and insert it onto the Canvas. You’ll notice it’s too big.
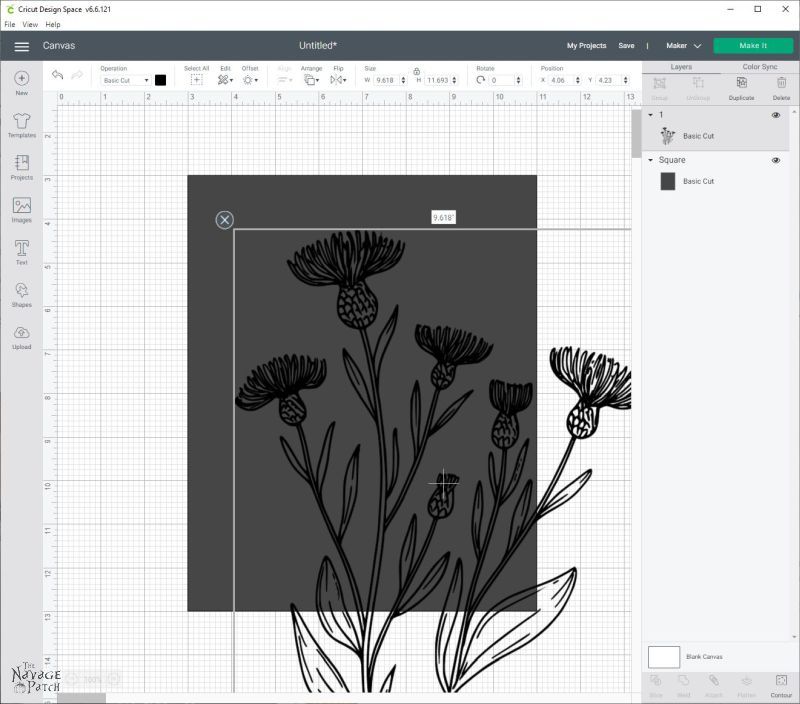
Without clicking the lock icon, change the width to 5 and hit Enter.

Click on the arrow under Operation.

Select Foil—>Fine.

You can change the color of your foil here. It makes no difference for your transfer, but it just shows what the finished foil line art will look like.


To center the design, first select both layers…

…then click Center Horizontally under Align on the toolbar, and then…

…select Center Vertically.


Though it was centered according to the boundaries of the image, we felt it looked better nudged a little to the right. You can move it with your mouse, if you think the overall composition and balance would be improved with a little nudge. Not all the flowers need this little adjustment.
When you’re satisfied, select both layers and click Attach. If you’re not familiar with how to attach, please read our Cricut Cribs on attaching.

Once they layers are attached, click Make It.

Though we’ve selected Fine, we’re not going to be using the fine foil transfer tip. More on that in a bit.
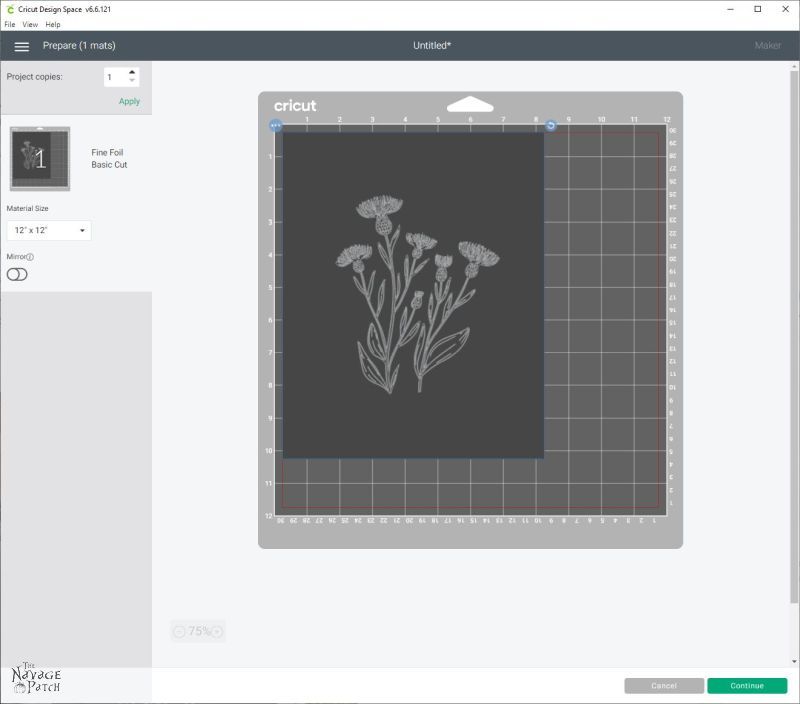
Change Maker’s pressure setting to Light.
Step 2 – Prepare for the Transfer
Note: though the StandardGrip mat is shown in these tutorial photos, we found after a few tries that the LigthGrip mat is much better-suited for this project.
I started this boho-inspired flower line art project by slapping a piece of cardstock on my mat. I quickly followed this up with a thin foil transfer sheet.

Before I had the chance to position the foil, a corner of it dropped onto the mat. When I pulled it off, I saw that it had left its foily goodness behind.

To prevent this, I cut pieces of white cardstock to cover up the rest of the exposed sticky portions of the mat. The foil transfer sheets are gossamer-thin and highly susceptible to static cling. More on that in just a second.

I positioned my foil on top of the mat (shiny side up).

Next, I secured the foil to the mat with the tape strips that Cricut provides with each pack of foil transfer sheets.

I discovered that the foil wanted to fly off the mat and throw itself at the tape as I lowered it down. Fatal attraction? Perhaps. More likely a case of static attraction, like when you were a kid and you rubbed balloons on your head and then stuck them to a wall. Anyway, to combat the flying, statically-charged foil, I put a few sheets of cardstock on the foil to weigh it down, only leaving a small edge exposed for the tape.
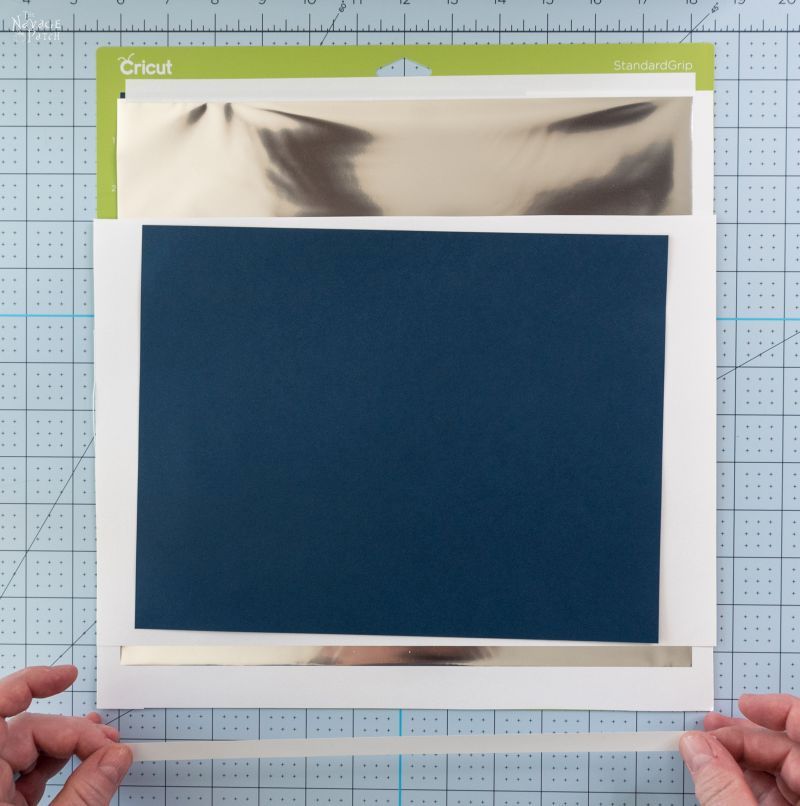
All taped up and ready to rub!

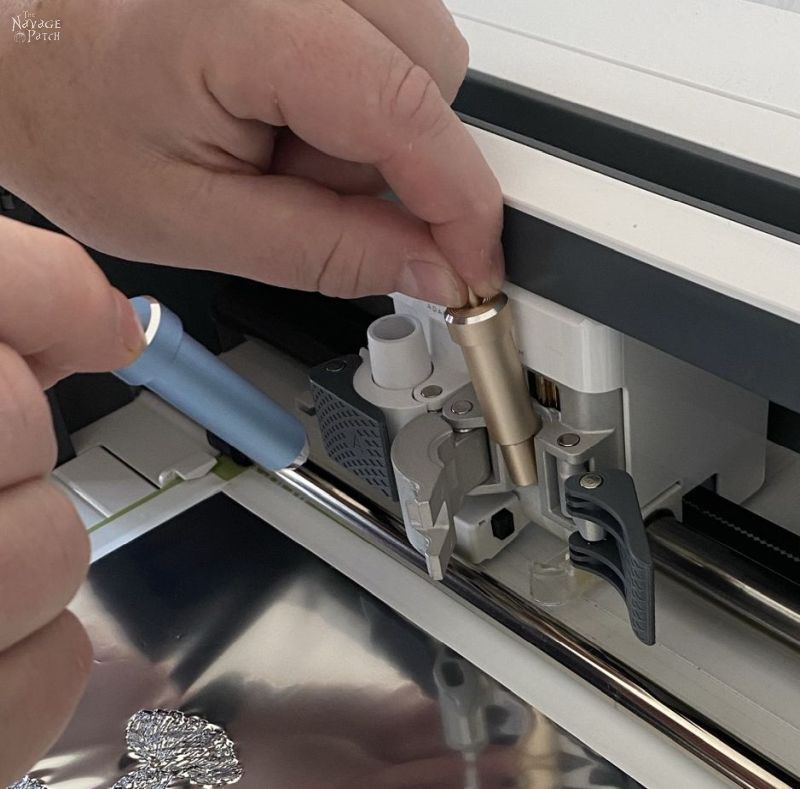
Cricut has 3 foiling tips – thin, medium, and thick.

After several failures, we discovered that the combination of medium foil selection in Design Space, the medium foil transfer tip and the default pressure setting on Maker often resulted in torn foil and aborted attempts (aborted by Maker via the blinking red light of death, not by us). We played around with the settings and tried new variations and found that the following settings worked perfectly:
- In Design Space, select Foil—>Fine, as previously stated.
- Use the medium foil transfer tip (the one with two bands encircling it.
- Set Cricut Maker’s pressure to Light.
Once you’ve made those selections, insert the foil transfer tool into slot B.


Load your mat, and you’re ready to go!

Step 3 – The Big Rub
The foil transfer tool will rub-trace your design, leaving an ultra-fine gilding of foil on the cardstock.

When finished, don’t hit the eject button. You need to leave the mat in there for the final cut. If you want to reuse the foil, you’ll want to carefully remove it as this point, taking care not to dislodge the mat.

Swap out the foil transfer tool for the fine point blade and press Go. Maker will cut your design to 8 x 10.
As always, place the design face-down on the table, and peel the cutting mat away from it while holding the cardstock flat with one hand.

Step 4 – Frame your bohemian bedroom art
Time to frame your bohemian flower line art!


Simple as can be, and it looks great, even in cheap Dollar Tree frames!

These flowers look awesome in any foil color, Here’s one in gold for comparison.
We hung a couple by our bed to kick off the boho bedroom makeover. Don’t get too excited – our bedroom is last on the list of things to get done around here, but the ideas are shaping up!


We love to see our printables out in the wild! If you display our free printables in your home or use our free SVGs in your projects, and take a picture and post it on Instagram, be sure to tag us – thenavagepatch
Free Foil Flower Art SVGs
We created today’s FREE bohemian foil flower line art designs as JPG, PNG and SVG files. Now go ahead and click on the button below to download today’s freebies – they are all in the “SVGs – Stencils” section of The VIP Lounge.
take me to your
amazing freebies library
If you’re not a Navage Patch VIP, you won’t be able to access our Freebies Library. But that can be easily fixed! Subscribe for free on the form below and become a Navage Patch VIP. Once you subscribe, a password will be sent to you in our Welcome email, and that will give you access to The VIP Lounge [Freebies Library].
Share it on Pinterest & Facebook!


These look cool. I like a little bit of Boho touches myself. And ugh, trying to categorize the style of home goods (have to do that in my job writing product copy and articles for a home goods distributors. I swear we need to add a category for some products called Fugly.
Your mention of popped Izod collars brought back all those recollections from high school of preppy co-eds wearing layers of polo shirts with the collars up (I guess the more pastel colors you could combine the better) along with those horrid plaid Bermuda handbags that held keys, a comb, and nothing else. I shudder at the memory.
LOL, categorizing Homegoods! I like the Fugly idea – think they’d go for it? I can’t tell you how many pictures I have of Izods, Jams and braces. Oy.
I love this idea just like I love all your ideas. However I just love reading your posts. You always make me smile and in this world today we need every smile we can get. You should write a book. I know it would be so entertaining. From just seeing a little corner of your headboard it looks like y’all have already dipped your toes in the world of boho chic. I would love to see a full photo of your headboard. I have a feeling it’s really gorgeous. I’m being very serious about the book. It would make the world a little less serious
I’d love to write one someday, Stayce – it’s just finding the time and then, you know, someone to publish it, lol!
“I’m sure you can imagine my excitement”—I might have snorted in public when I read that. And then I full on laughed about the beatnik Frenchmen. The art is beautiful. Your writing makes my day.
LOL, thank you so much, Dana! 😀
This was perfect inspiration! Flowers aren’t really our style – BUT birds are! I have a few SVG pictures of birds that I love and have been wracking my brain on how I might use them. This is perfect! And this is why we enjoy your posts – you inspire us!
Well there ya go, Mo! Birds would look awesome with this method!