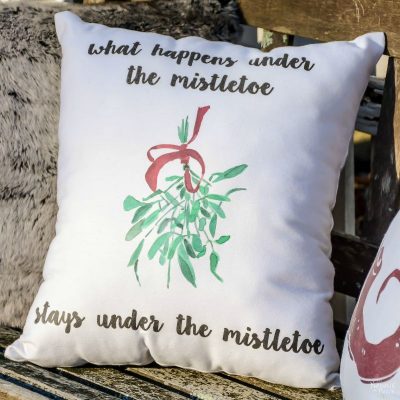
Easy DIY Throw Pillows
These easy DIY throw pillows were inspired by an expensive designer pillow we saw online. The technique is simple, and you can make any design you like!
It is more rare than the white peacock that haunts the grasslands of southeastern Australia.
It has been seen less often than Hailey’s comet.
And it is more elusive than the fabled white tiger that dwells in the forested mountains of central India’s Madhya Pradesh region.
But it does exist.
And it did happen.
What is it, you ask?
It is me being right, and my babes being wrong!
Just this past weekend, when about to start this very DIY throw pillow project, I remembered a specific craft supply that my babes had forgotten about!
Even better, I was able to run into the basement and procure the disputed item in less time than she could say, “I think I’d remember if we had that, my babes.”
Anyway, before we get to my delicious victory, let me back up a few paces, hit rewind, and bring you up to speed.

Recently, my babes was doing her usual thing while we sat and watched TV: simultaneously “watching” the movie and absorbing all the information on the internet.
Now, there’s a reason I don’t watch TV with a laptop on my lap…or a tablet…or a phone: I am incapable of multi-tasking. The moment I shift attention away from the movie (no matter how good) and onto something else (like a web page), my brain immediately filters out 100% of the movie so it can focus on the internet.
But Handan? She can literally split her brain between TV and internet. I’ve never seen anything like it. Normally, when she’s absorbed in something (work or otherwise), it seems to take her full attention. Baris and I can recount the many times we’ve been roundly ignored trying to ask her something when she’s engrossed in work or research. It’s not that she’s trying to ignore us, it’s that she gets so hyper-focused that she is deaf and blind to everything around her!

When she’s watching a good show or movie though, things are different. She’ll still seem just as engrossed in her work as usual, but with only the briefest occasional glance at the TV, she’s able not only to follow along with the plot, but form intelligent opinions and conjectures about what we’re watching!
I can’t count the times where I thought she wasn’t watching at all, only to discover that she was more aware of what was happening with the story than I was! Yeesh, talk about making me feel like a twit!
Anyway, that was us not long ago – I, watching intently, and Handan, seemingly not watching at all.
She looked up from her laptop and turned the screen towards me. This is what I saw.

The price: $100.
I gave her laptop my obligatory eye roll and muttered my usual about more money than brains.
The laptop was still turned my way.
Crap.
That could only mean one thing: she wanted me to make her one. I ventured a glance up towards Handan’s face. She was still looking at me.
Double crap!
She definitely wanted me to make one.
“Don’t worry, my babes,” she said. “This will be so easy!”

Cold comfort in the middle of a good movie, but better than no comfort at all. I sat back and re-focused my attention on the screen. There’d be time enough for pillow-making in the new day.
And that brings us to my victory. The pillow that sells for an absurd $100 is made with some sort of braided yarn. My babes, when explaining how “so easy” it was going to be even went so far as to tell me that I’d be braiding yarn for this project.
Now, forgive my manly ignorance, but how do “so easy” and “braid this boatload of yarn” exist in the same universe, let alone the same project?
I had a moment of panic, as I pictured myself like some modern-day Rapunzel, braiding skein after skein of silky soft yarn.
For the DIY throw pillows?
Hell no!

To make enough rope with which to rappel myself out of this horrid predicament.
But then I had an idea.
Then I remembered.
Why sit around all day braiding yarn like a chump when we already have braided yarn in the basement!
I told my babes about our large wad of braided yarn.
She didn’t believe me.
I pressed my case and then realized I could just waltz down there and bring it back up!
Twenty seconds later, I plopped a big braided wad on the crafting table.
Far from feeling defeated, my babes was thrilled. This meant the project was even easier!

Easy DIY Throw Pillows

SUPPLIES LIST
- Throw pillow covers (we got ours at IKEA)
- Braided yarn – this is from Hobby Lobby. Check out other options/variations here, here, here, and here. You can even use Dollar Tree’s yarn and braid it yourself.
- Fabric adhesive -or- hot glue gun and hot glue sticks for fabric
- Scissors
- Throw pillow inserts (we got ours at IKEA)
Easy DIY Throw Pillows Video Tutorial
Easy DIY Throw Pillows Picture Tutorial
The IKEA GURLY pillow covers come folded, so an ironing was definitely needed.

To protect the far side of the pillow from seeping glue, I inserted some heavy cardstock in the pillowcase.

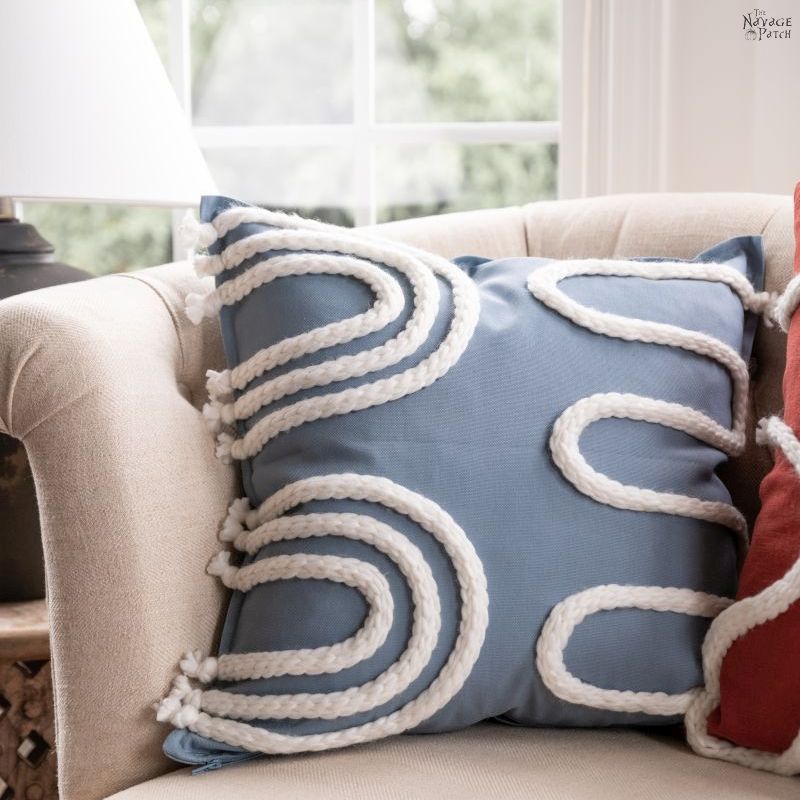
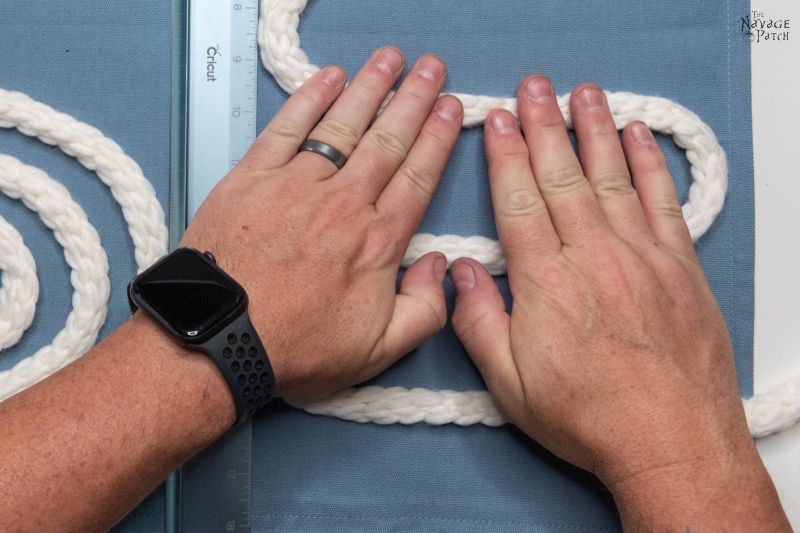
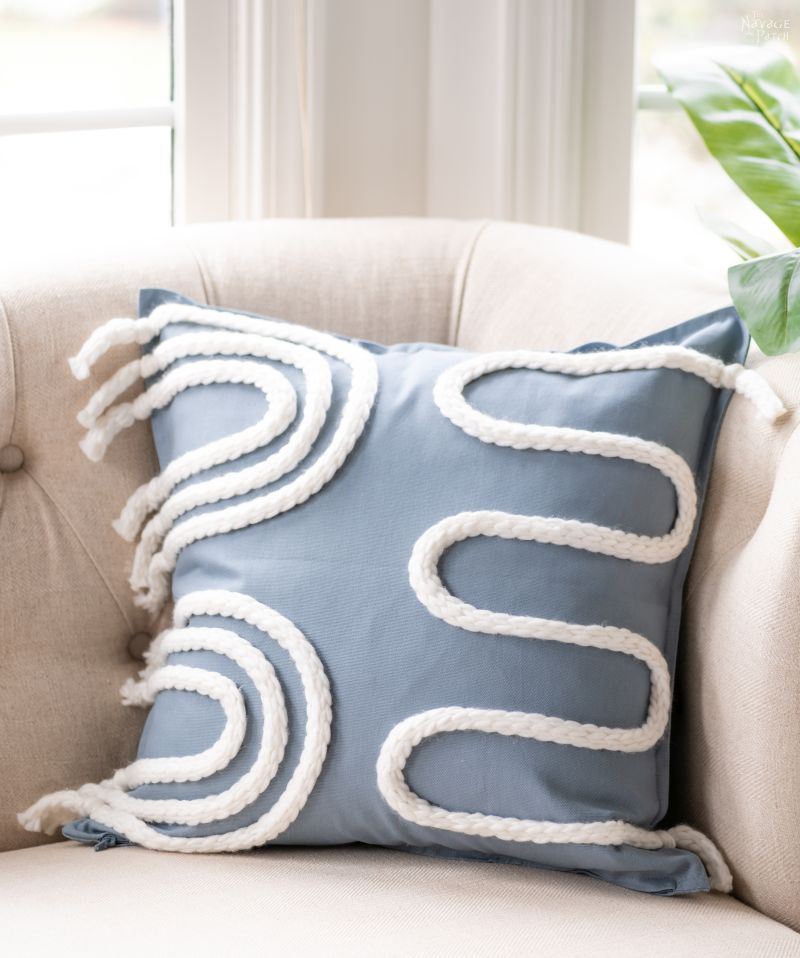
Next, I laid out the pattern. We wanted this pillow to be similar to the one we saw online, but we also wanted it to make it a little more our own.
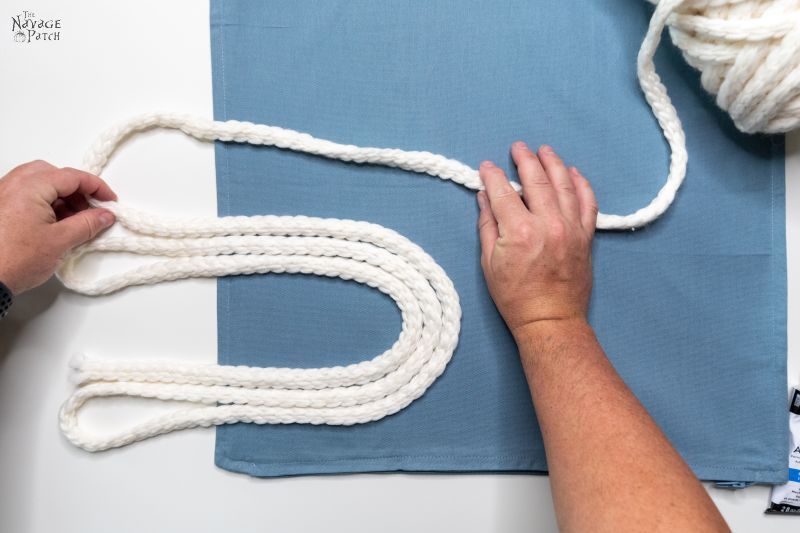
Once I had the basic shape, I spaced the yarn.

Then I cut the shape free from the skein.

Since I wanted two identical shapes on the left side of the pillow, I used the length of yarn I just cut to measure and cut another length.

I considered the hot glue (and I even tried it first)…

…but I ended up using the fabric adhesive. I just found it a little easier to work with, but they both perform equally well for this DIY throw pillow project. Use whichever you’re more comfortable with.
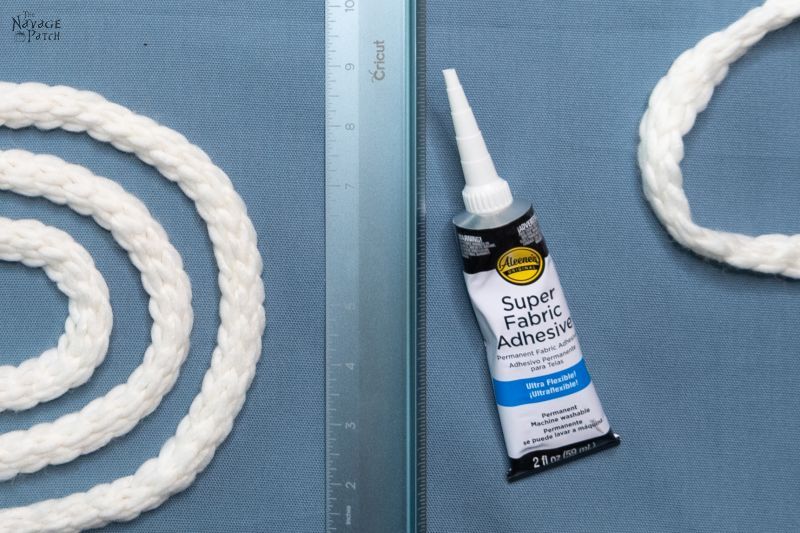
I laid out an identical pattern next to the first one. A straight-edge helped with the alignment.

I then laid out the pattern on the right side of the pillow case.

Time to glue! I tried two techniques and settled on one. The first technique(which I abandoned after gluing the small piece I’m holding in the pic below) involved rolling the yarn over to expose its bottom side…

…like this (I know it’s hard to see what I did there).
Then I added a line of glue to the bottom of the yarn…

When I reached the end of the small piece, I rolled the yarn back over so it was glued to the pillow cover.
There was nothing wrong with the technique, but I felt like it would be a little tough on the rounded parts – plus it was a little hard to keep the exact shape of our design.
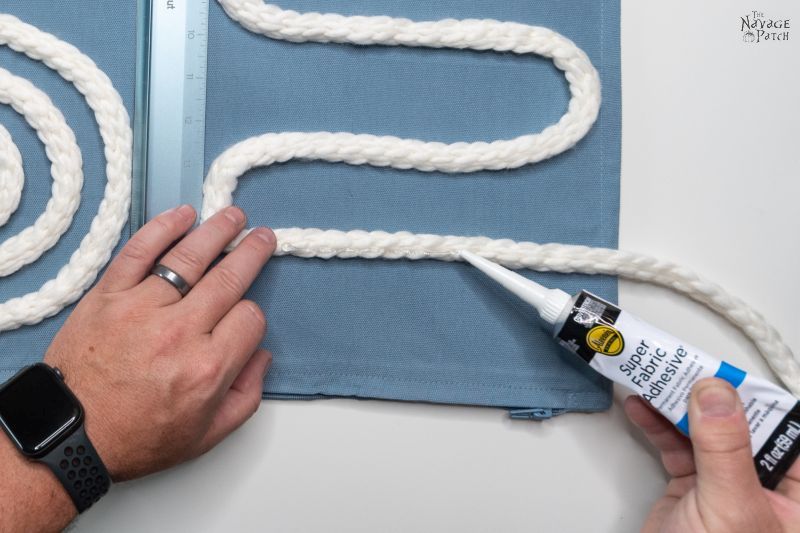
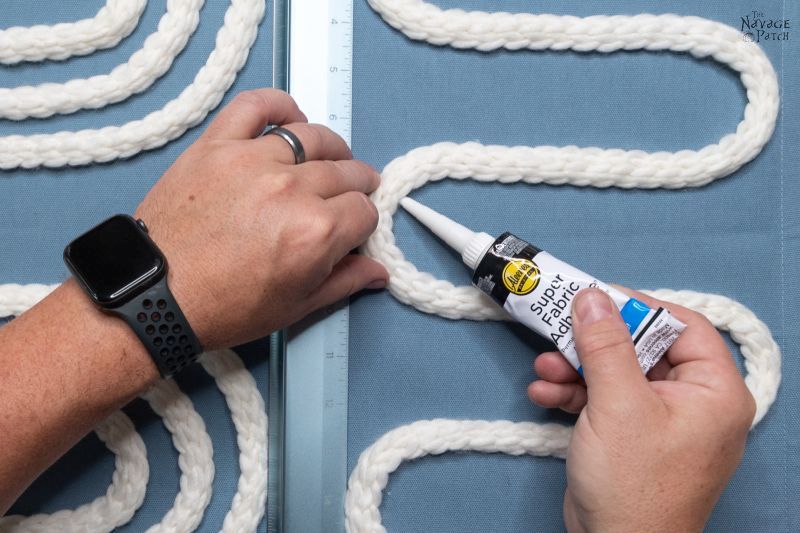
My second technique, and the one I carried on with, was to glue the yarn down, section-by-section, by running the tip of the glue nozzle under the yarn and then pressing the yarn down.

I worked on the straight sections first.

And I kept the yarn in place with my left hand while working the glue underneath.

Once that straight piece was glued, I moved up to the next one.

Pressing down…
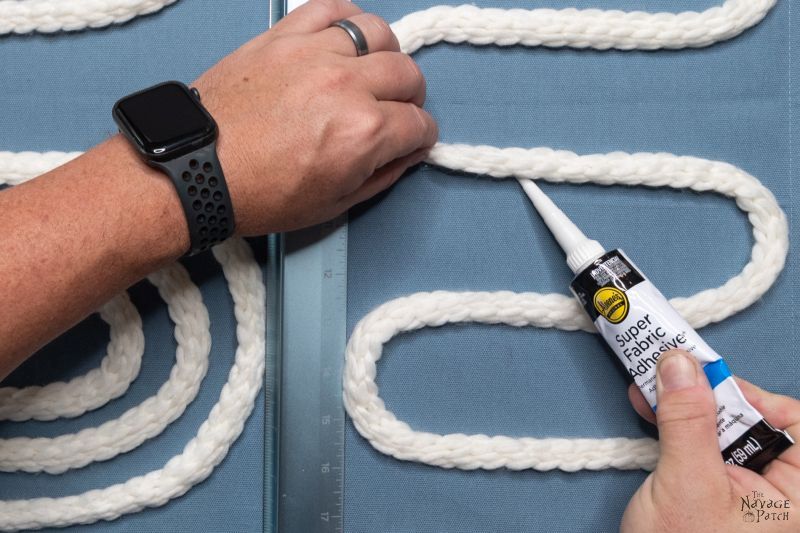
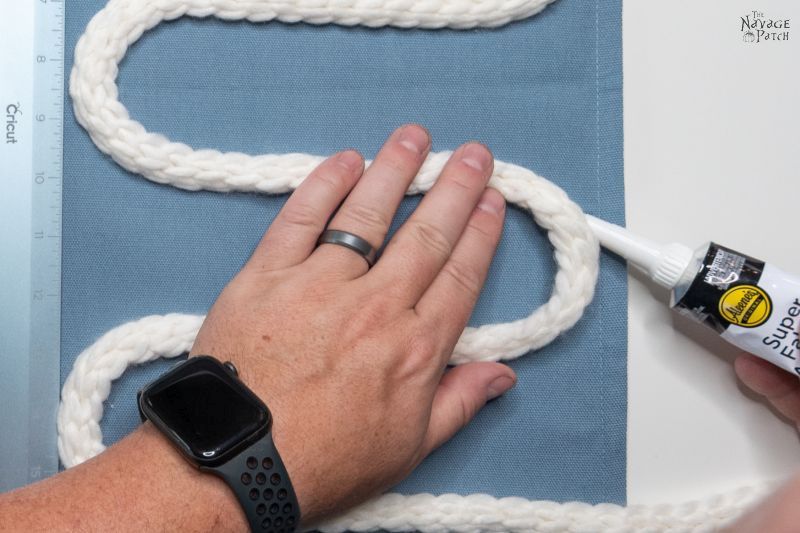
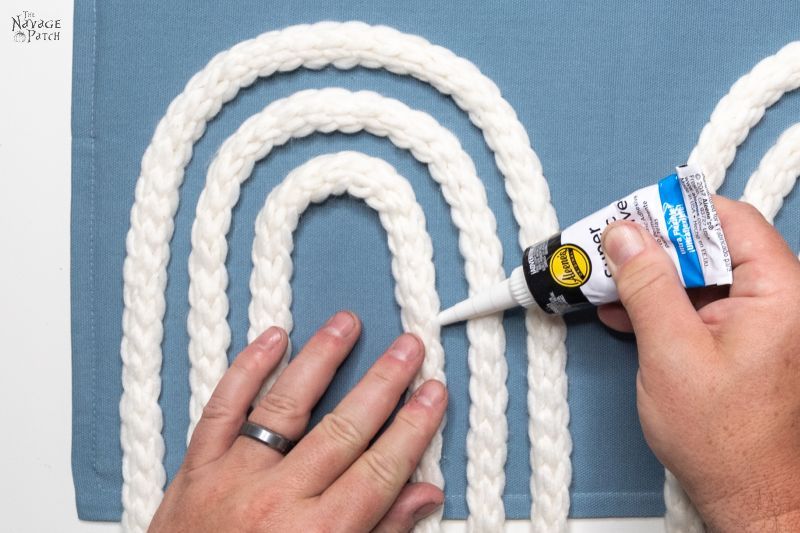
Then, after the straight pieces were glued, I went back and glued the rounded parts.
Pressing down…this fabric glue is fantastic – it grabs immediately, but it still give a little time to reposition in case you misalign the yarn.

On the other side of the pillow, I worked in the same manner – first the straight runs then the curves.

I tied a knot against the pillow wherever the yarn ran off the pillow cover.


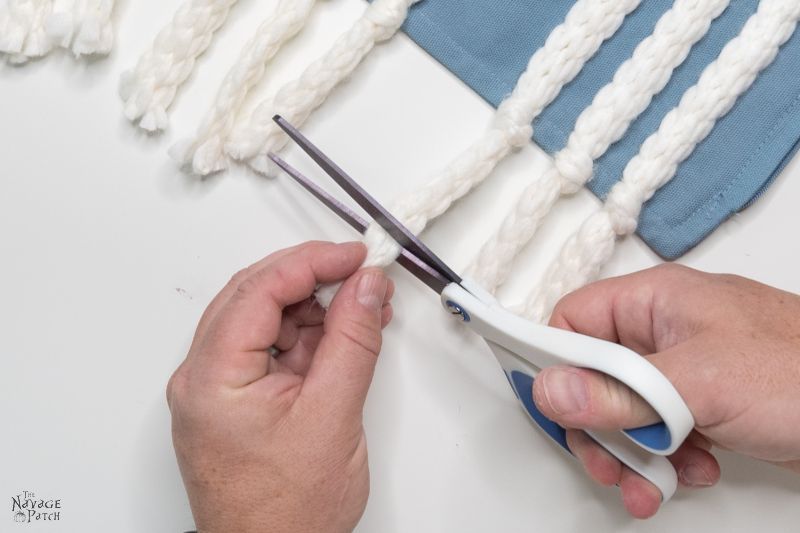
Right side knotted, left side ready to cut.


I trimmed the pieces a bit. Our original plan was to tassel the ends like in the original pillow. But when we tried it on one of the ends, we discovered that the braided yarn we used was braided from a single strand of yarn!
I’ve said before that sewing machines are like sorcery to me, and this single strand of “braided” yarn is no different.
Witches, madam. Witches and wizards make this stuff.
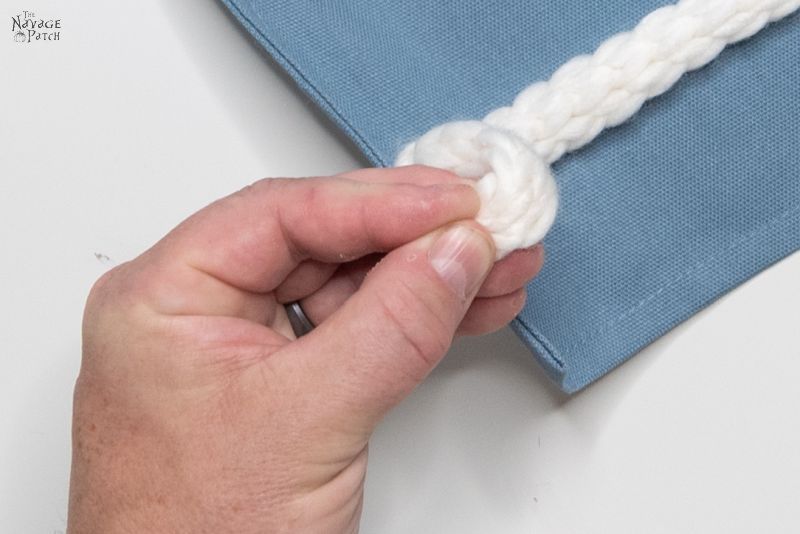
Anyway, since I couldn’t tassel a single strand, and since leaving it as-is would eventually lead to The Great Unravelling, we came up with Plan B: open the end up a bit…

…squeeze in a blob of glue…

And squeeze the end over the glue. We may not have tasseled ends, but at least they won’t be unravelling!
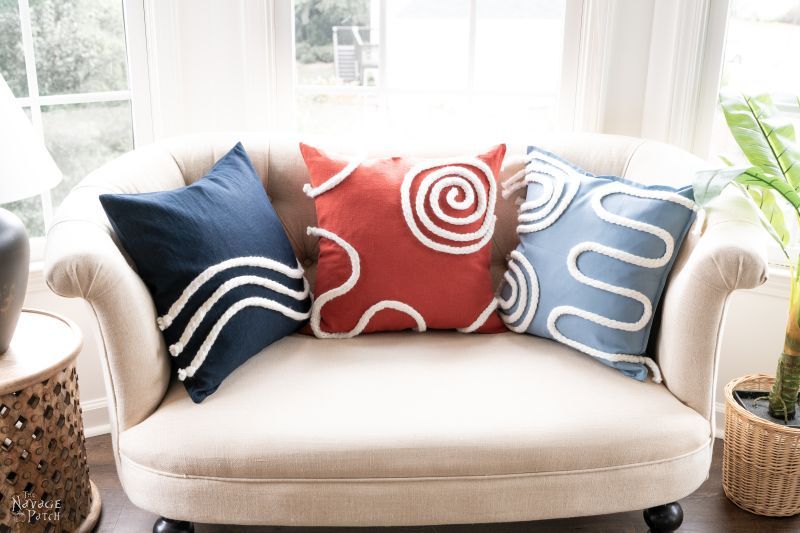
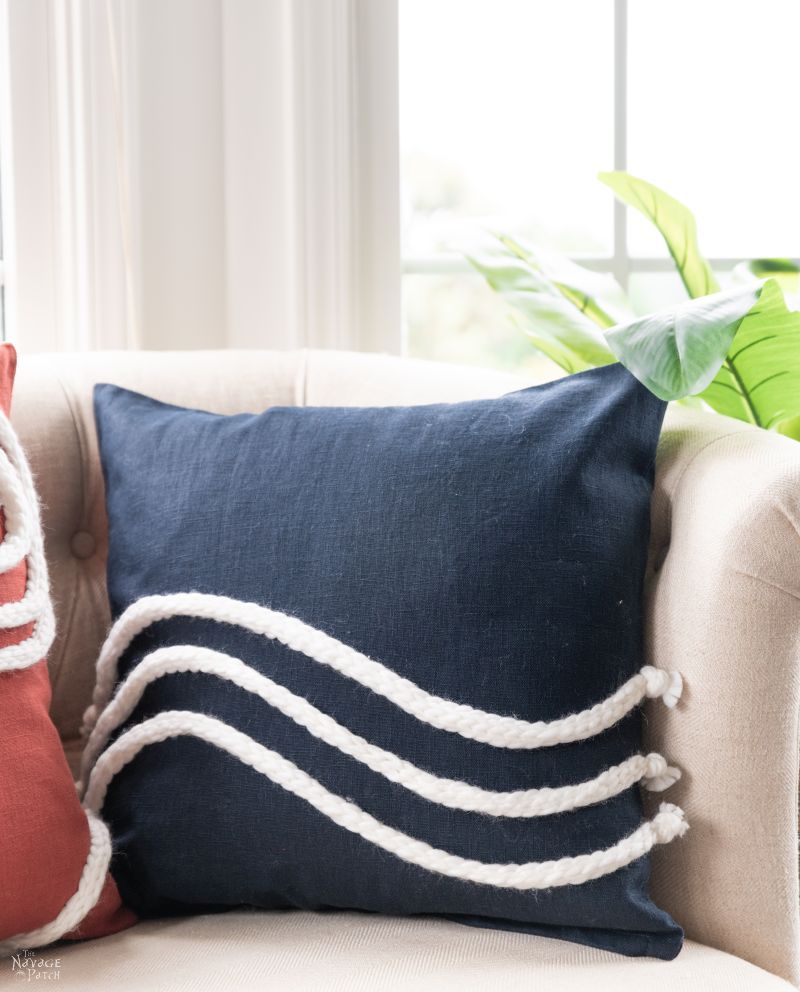
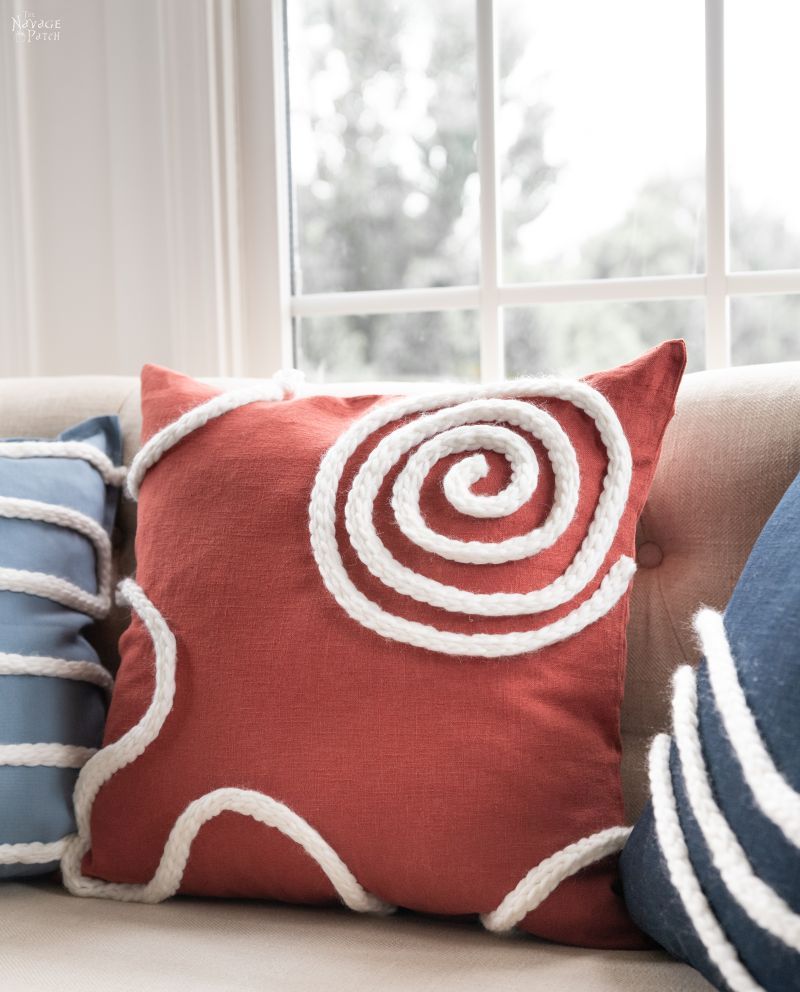
The beauty of this technique is that you can make whatever shapes and patterns your heart desires. It’s so easy! I made two others in different colors after this one.

Let’s have a look at how they turned out.
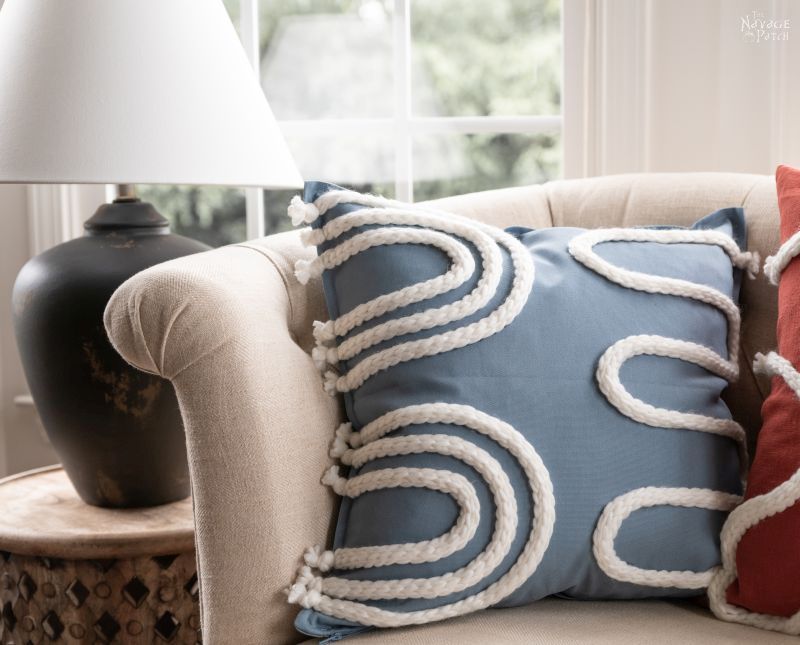
When I made the second one, Handan wanted to trim the ends even more, and she ended up liking that better.

So she went back and trimmed the first pillow’s ends…

I like it both ways, but I think I do like the closely-trimmed ends a little more.
The designs can be intricate or simple. They all look good!


Each pillow costs about $10 to make – even less if you make more. One tube of glue will make about 4 or 5 pillows.


We love it when you share our posts on Facebook and Pinterest!


LOVE these! So cute and easy!
Thank you, Susan! They really are so easy to make, and with those inexpensive IKEA covers, I think they look awesome!
I cannot get an IBM ad to stop popping up over your blog post today to read it. I’ve tried over and over and the ad keeps popping up and won’t stop unless I hit the back button and as soon as I do, here comes the full page IBM ad again. Just wanted to let you know in case it was something on your end.
Hi Karen, thank you so much for heads-up – we indeed appreciate it! I experienced the same thing when I was proof reading the post (after it was published). We contracted the ad company and they are now working to solve this issue as soon as possible.
Same problem with IBM ad. No x to get rid of it. Now, you have the experience not I but could you put the glue on the fabric first then put the yarn on top?
Ugh, I’m so sorry about that ad. Our ad provider is trying to find out where it’s coming from so they can scrub it from their ad network. As for the glue – yes you could definitely put it on first. I prefer to lay out the yarn first so I can get it just the way I want it. I’d be afraid of making a mistake if I did the glue first. But if you have artistic ability and a steady hand, I guess gluing first wouldn’t be a problem!
No ad problem for me! Love these pillows! What a fun project!
Yep, the problem is sorted! Thank you so much, Darla!
These are VERY fun and sophisticated all at the same time! Love them! We use Ikea pillow covers and fillers – they are so awesome for DIY projects. I used their white covers and paint on them. If I totally screw one up I am not out too much money (but I usually just tie-dye my mistakes).
As for the ad – I had it bad when I looked at this on my phone, but was okay when I jumped on my laptop.
Thanks again for sharing and enjoy your small victory (LOL)!
Cheers!
I’m glad they solved that ad issue. Yeesh, what a mess for a ton of bloggers! Ah, tie-dye – I miss those days!
These are cute! Yes there are some people that would PAY $100, but we would be sitting laughing at them.
Will the glue be safe to launder? I don’t think the hot glue would be,
Thank you, Joanne! The hot glue is not safe as far as I know, but the adhesive is. That said, I wouldn’t want to launder the ones I made as I don’t think the yarn would survive!
Nice Job !!!
Thanks, Sue! 🙂
So cute! If I sewed simple pillow covers, it’d be even cheaper. I love making those foldover flaps as I’m not much of a seamtress; setting in zippers makes my brain hurt! I have some of that fat chenille-ish yarn that would be cute, too! Hmm! Like I needed another project! Your tutorials are so clear and easy to follow; thanx!
Oh, yeah – if you make your own covers, then these are super cheap! I hope you can squeeze this into your craft list! 🙂
Love these pillows. You really nailed that fun, coastal feel for summer. I plan on doing a few myself. Thanks so much to you both. Amazing.
Thank you, Kathy! Have fun with them! 🙂
Wonderful post as usual! I agree with the comment below about your tutorials being the best! So detailed and helpful. Thanks again for a great idea for throw pillows. My brain keeps going back to Christmas. I might be able to incorporate this idea into a snow scene. Or snowflakes! Thanks for the inspiration!
Thank you so much, Carol! Yep, your creativity can lead you anywhere with these!