
Garage Makeover Plan
In this garage makeover plan, we’ll outline our ideas for transforming our bare & messy garage into a neat & organized space using mostly on-hand materials!
Look, I’ve seen worse, okay?
And not only have I seen worse, I’ve created worse.
There are two key elements required to transform an ordinary empty garage into an overcrowded and filthy car-hole. The first is laziness, and I’ve been blessed by the Almighty with an inexhaustible supply it would seem. The second is time, because Rome wasn’t built in a day, and even the filthiest, laziest packrat needs time to accumulate sufficient crap to truly overwhelm a space. Besides, spiders need ample time to weave their webs and collect the carcasses of a thousand hapless insects.
In our old house, the two requisite elements of sloth and time joined forces to create this thing of wonder:
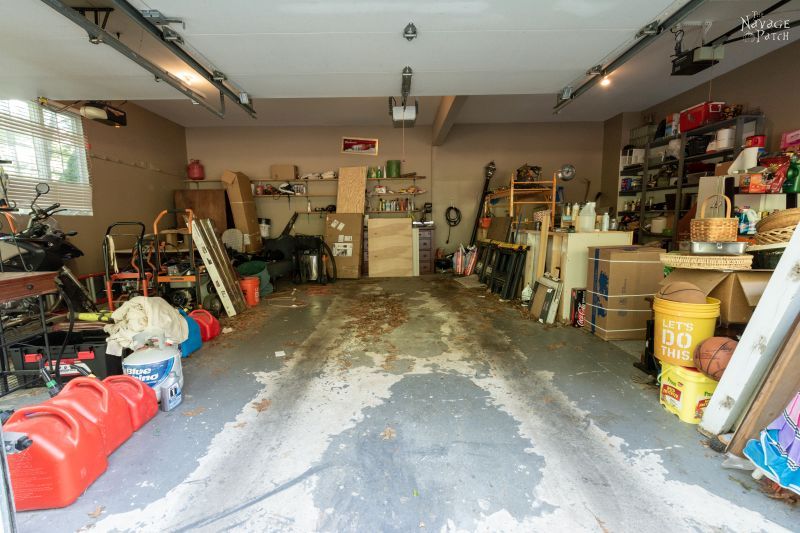
Designed and built to accommodate three cars, this leaf-strewn catastrophe could only manage to house one. The other two spaces were inhabited by a motley assortment of yard equipment, crafting supplies, gas cans, various boxes of mysterious content, unclaimed scraps of wood, oil-soaked oak leaves, scaffolding, a lamp post (obviously) and an old BMW motorcycle that may or may not have functioned at any given moment.

Oh yeah, there was also an antique chaise lounge because, why not?

To say that Handan wanted to give this garage a makeover would be an understatement on par with saying it’s a “tad breezy” while standing in the path of a category 5 hurricane.
It pained her to look at it each day.
It caused welts to grow on her soul.
And, hey, look, I told her I was gonna get right on it. Yes, ma’am…right on it.
To my credit, I did manage to take the pictures shown above.
As for the rest…
Well, I uh…errr, I…what I mean to say is…it never happened.
I was totally gonna do it…but then Handan accepted a new position in Atlanta. So instead of making over that hellish car-hole, I packed up all the crap and hightailed it South.
So here we are in our new house, and again my babes has started to beat the garage makeover war drum.
Which is fine.
Which is good.
Great, even.
But all I’m saying is that the “before” is not quite as impressive as it was in Connecticut, because though I may (in fact) share genetic material with the common tree sloth, this garage has only had one year to molder, and that just ain’t enough time to become the disgusting Pit of Shame needed to wrinkle Handan’s nose and inflict damage upon her psyche.
We love to see our DIY projects out in the wild! If you try this DIY project and take a picture and post it on Instagram, be sure to tag us – thenavagepatch
Here’s how we’re looking. I took these pictures a month or so ago.

Compared to the Connecticut garage, it looks clean enough to eat off of.

But mess isn’t Handan’s only inspiration and driving force. Sometimes, she just needs to change a space.
By the way, there’s a bed in the pictures below. It’s one of the first things I ever built at the old house, long before The Navage Patch was a glint in my babes’ all-seeing Turkish eye. It will eventually be lugged upstairs to the guest room.

The scaffolding is still with us. I’ll be assembling it soon to change out our living room fan and foyer chandelier (finally).
Oh, and look at that! Look what’s hiding next to the fridge!

Yep, it has already graduated from the car-hole to a much more fulfilling life in the living room.

So anyway, my babes has all sorts of ideas for our garage. Let’s dive in and have a look.

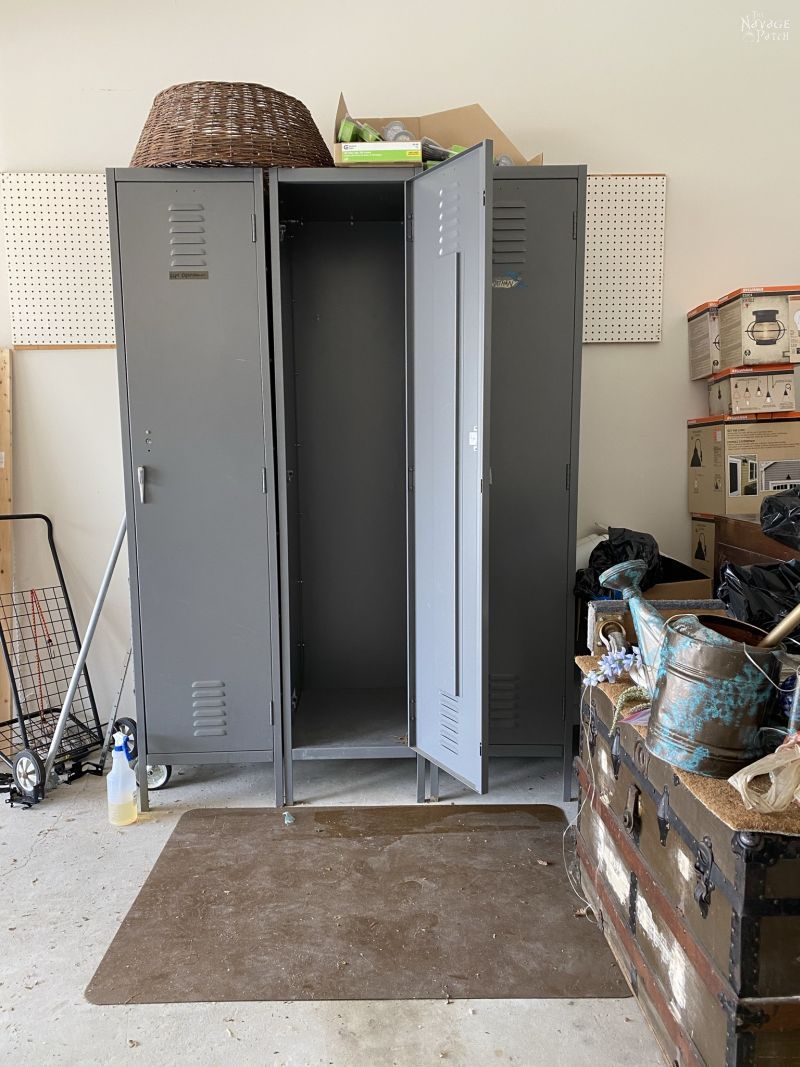
Okay, so the biggest element of that mood board is the locker/shelving unit. Handan has been going ape about transforming the three old military lockers we picked up off Craigslist like 4 or 5 years ago. You can see them in the pictures below.
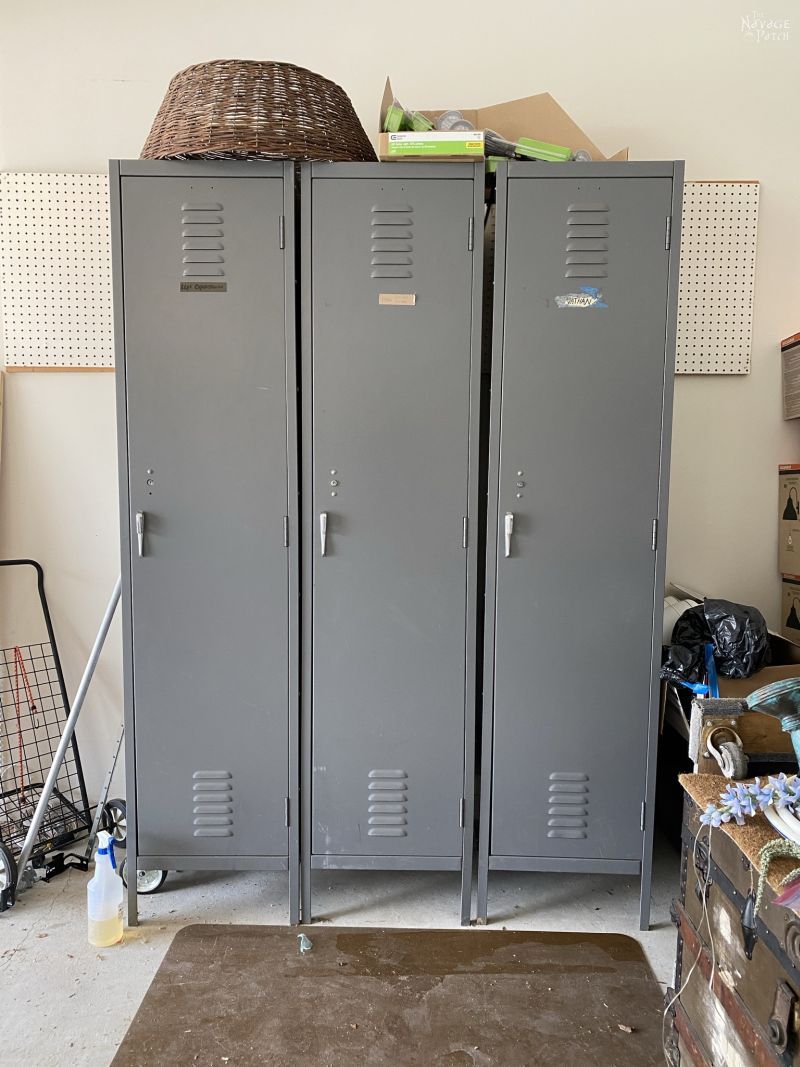

She wanted me to give them a makeover in the old house, but her ideas were half-baked at the time. She didn’t have a clear vision for them, and the garage was a besotted mess…so I did what any normal man would do: I dragged my feet and gave hollow promises about all the makin’-over I was fixin’ to do.
But I did start one freezing fall morning. I remember it vividly, if not fondly. These lockers are held together by nut and bolts, only the bolts are the kind with the smooth semispherical heads – you know, the kind you can’t tighten, because they don’t have a slot for a screwdriver. Yeah, so these lockers were missing about 30% of their bolts, and the other 70% were loose. Since I couldn’t tighten them, I had to buy a whole boatload of new machine screws and locking nuts and one-by-one replace every damn nut and bolt on each of these three infernal lockers. Some soldiers are given the keys to multi-million dollar aircraft. Other less fortunate ones are given lockers like these.
Anyway, here’s her current inspiration for the three ex-military lockers that may or may not be AWOL.

They sure do look sweet, but $1700 sweet? They don’t have that much sugar!
What we have in mind will take inspiration from the shelves above, but we’re also going to incorporate the remaining cabinets from our old kitchen.

I’ve already used a bunch of those old cabinets in the basement for storage, but we kept a few ear-marked for the garage – to use with the lockers and to use with a quasi-mudroom we’ll be making near the door.
Why quasi? Because it won’t be a separate room – just a defined space in the garage next to the door.
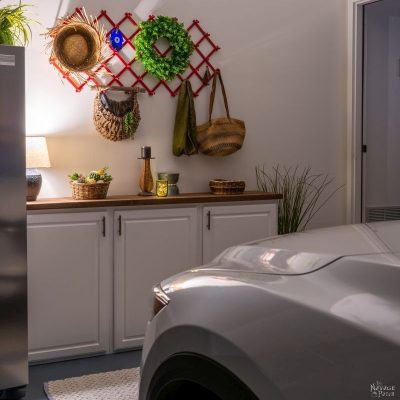
The main goal of this makeover is not only to clean and organize but to bring storage where there currently is none. Aside from that, Handan wants to create a warm and inviting space – one where we can hang out with the garage doors open on stormy nights and watch the lightning and listen to the thunder while sipping cocktails from our lawn chairs. That will mean bringing a few non-traditional elements into this makeover.
She had a really interesting idea to paint the floor.
“Oh my gawd! That is so not interesting!” You’re probably saying to yourself right now. “I’ve seen a hundred painted garage floors on Pinterest!”
Madam, I beseech you now to get your knickers in a twist. While there’s nothing particularly novel or interesting about painting a garage floor, my babes has a different approach. You’ll learn more in upcoming posts, but one thing I can (and will) say is that it will involve the color shown on the paint chip in the mood board.
All good makeovers (at least the ones I’ve been involved with) start with a few coats of fresh paint, and this one is no different, but for one thing: this is the project wherein The Boy (aka Baris, aka my son) learns how to paint a wall! That part is already done. Let’s have a peek at The Day He Became Useful.
I woke The Boy bright and early on a Saturday.
“Are we gonna paint now, Dad?” he asked.
I threw my head back and laughed. “Boy,” I said, “First we need to empty the garage!”
He looked upon the clutter, and I saw a little light go out of his eyes.

Later that morning, when most of the crap had been ferried to the basement or schlepped onto the grass, The Boy looked at me.
“Are we gonna paint now, Dad?” he asked.
I threw my head back and laughed. “Boy,” I said, “First we need to take the pegboards off the walls!”
Thrusting a mallet and pry bar towards him, I motioned him towards the pegboard.
We worked, my boy and I, and together we removed all the pegboard from the garage walls. He was really coming in handy! I will surely miss his help when he’s off at college.

Once the pegboards were down, he looked at me again.
“Are we gonna paint now, Dad?” he asked.
I threw my head back and laughed. “Boy,” I said, “First I need to fix the holes in the wall!”
I set up my camera to film the process. Have a peek at the video below!
[embedyt] https://www.youtube.com/watch?v=UZX4b-RwzF8[/embedyt]
The next day, after I had sanded the repaired holes, The Boy looked at me.
“Are we gonna paint now, Dad?” he asked.
I threw my head back and laughed. “Boy,” I said, “First I need to vacuum the floor and walls to get rid of all the spider webs!”

He looked uncertain, so I put his mind at ease. “Go play video games, and I’ll call you when I’m ready to paint.”

When I shut off the vacuum, The Boy looked up from his phone.
“Are we gonna paint now, Dad?” he asked.
Finally then, and at long last, I said, “Yes, Boy, grab your roller.”
It was glorious! I did the trim, and The Boy worked the main roller.

Together, we painted the garage walls, and now we’re ready to tackle the next phase of this makeover – the painted floor.
Garage Makeover Checklist
Paint the walls- Paint the garage floor
Install smart garage door openers- Buy a garage ready freezer
- Create a garage mudroom area
- Buy or DIY a small side table for the entry
- DIY locker makeover
- DIY shelves for the lockers
- DIY folding work table
- Garage organization


I am so excited to see how this turns out! For some reason, garage clean up/makeovers are my favorite types of posts/videos!
I think you’re going to like it, Jenny! 🙂
Really good video, Greg! (You don’t need no stinkin’ director! ?)
No, but a camera operator might help, lol! 🙂
**reads list – raises hand tentatively**
Ummm, aren’t all freezers technically garage ready? ?
We have been dragging our heals with our own garage, so it will be fun to see what you guys end up doing. May finally inspire us to tackle our own sooner rather than later.
In my opinion, yes. In the opinions of the eggheads and marketers at major appliance companies – no. According to current “wisdom,” garage-ready freezers are better-suited to handle the “extreme” temperature and humidity fluctuations of the common garage. I don’t know – maybe they’re right to some degree, but we’ve all been using “non-approved” fridges and freezers for decades in our garages to no apparent ill-effect. My thinking is – if you have an old fridge inside and you want to move it out – do that instead of buying a new one. This is exactly what we did with our old side-by-side. But if you’re looking to buy one specifically for the job – may as well get a garage-ready one.
For just a beat there, I thought we might have to be concerned with purchasing new appliances.
I went ahead and did some digging. Our garage is insulated enough (and really not THAT much) that it does not reach temperatures of less than zero or more than 110° so our standard fridge and freezer that are out there are good. I guess when (IF) your garage hits less than zero, the compressor believes it doesn’t need to be on and will shut off – causing the food to defrost. So, a garage-ready freezer/fridge has a heater unit that kicks on to trick the freezer/fridge to remain on. If there is no price difference, then yeah, go with garage-ready. However, if your garage is insulated, it would not be worth the extra money.
I feel like most modern homes have garages that are at least insulated. When we lived in CT, we kept soda in the garage, and even if it got down below zero outside, the cans never froze. And here in GA, it may be scorching in the summer, but I don’t feel like I’m going to die (immediately) in the garage. So yeah, I agree with you – buy it if the price is right.
I have been waiting for you to get to the garage makeover. Because that is exactly what I need to have done to mine. I, however, am not handy at all. Still have to hire out for the majority of it. But I am looking forward to the storage ideas you have for yours.
Your garage from CT looks somewhat like mine, however, I can see the floor. And it is only a one car garage, but still bursting at the seams with “treasures”.
I don’t have a basement so my only storage is the garage. Need shelving ideas! Great start. I think mine looked like that about 30years ago. Don’t remember cuz it was so long ago.
Love your story-like posts.
the wait is over, Jennifer! Handan has been waiting as well. She can’t wait to get it done, lol! 🙂
Hey !! Thanks for sharing this!! We bought an epoxy kit for our garage floor-but I’m waiting to see what you guys do because I’m a little uncertain that it can cover the cracks and won’t stick to the car tires when the weather is hot…(Florida!!???) I know you do VERY THROUGH RESEARCH!! So I’m trusting your opinion!!
Hi Anne, a little spoiler alert – we’re not going to be doing an epoxy kit in there, so unfortunately I won’t be of much help there!
Greg, you have a wonderful voice for presenting (and a nice smile too!). You need a TV show… That was a really good tutorial on a job that should be straightforward but catches folk out a lot, I speak from experience! Looking forward to the rest of the makeover,
Thank you so much, Suzie! I will be doing more videos. Way of the future and all that, lol! 🙂
Thank you so much fir thus post, because we have so much junk in our garage that must go! My husband and I keep asking ourselves how did that happen? Thanks to you and your family, we will get moving. You and your family are nailing it!
You’re welcome, Ivory – I hope it helps you to get a start on yours! Projects like these are so easy to put off indefinitely (I should know!). Sometimes the only way to start is just to start – even without a plan!
Good boy, wearing that ear protection! ? ?
I wear it a lot these days, Julie! 🙂
I can truly relate to your post (or should I say garage?). And thank you for a good laugh I needed today. Waiting impatiently for the BIG garage reveal. Keep up the excellent work!
More posts about it coming soon, Marta! 🙂
Oh, Boy!!!!! franki
😀