
How to Remove Tile Flooring
We kick off our guest bathroom renovation project by first removing all the fixtures and then showing how to remove tile flooring.
This is Part 1 of a 6-post series on our guest bathroom renovation
The Idea
Last Saturday began like any other. I woke up before the sun, conjured myself out of bed and tended to the animals in the house while the rest of the humans slumbered. Those hours before Handan and Barish arise are sacred. I have no obligations during that time: nowhere to go, no one to chauffeur, no chores and no responsibilities. But as I focused on the video game silently playing on the iPad before me, there was a nagging in my mind. My last three posts for The Navage Patch had been travel posts, and as much as I love writing them (and I know at least a few people like reading them, despite the onslaught of “unsubscribe” emails that flood my inbox each time I publish them), they never bring the big numbers like our “real” posts do.
The problem was, I didn’t have a project anywhere close to being done, let alone ready to be written about for the blog. What could I do? More to the point, what could I do in a day? (Preferably less, since my Saturday was about to be consumed by driving people around and running errands.) I have a demanding boss with strict quotas and deadlines (she’s also a lovely wife, and I love her dearly), so I needed something to write about soon!
A few days earlier, I had built a charging station for our tablets and phones. It wasn’t painted yet, but maybe I could write about that? The thought left me about as inspired as a top chef at a turnip convention. What else?
Ahhhh, yes! A vision began to coalesce in my mind’s eye. It involved a crescent…or maybe a box? Whatever, but it would hang on the wall by thick ropes of jute…or maybe it would attach with black pipe? Anyway, it would hold and conceal small battery-operated candles, so that their light would flicker against the wall…or maybe they would have LED rope lights? GAH! The damned thing kept morphing from shape to shape in my mind. Before long, what started as a simple wooden crescent had become three boxes connected by black pipe, wired for electricity with a window pane in each that displayed a softly glowing Edison bulb. Good lord, so much for simple!
By this point, Handan was awake, and she could see that I was agitated, because I was either pacing around and mumbling or standing stock-still and staring into the depths of oblivion. She offered a solution: I could write about the [name withheld] she had just finished painting that was to hang over the toilet in the guest bathroom. I seized upon her idea. It was my only hope. Besides, I’d built the [name withheld], so it was my project, too! What’s that? You want to know about the [name withheld]? Well, I’m sorry, but you’re going to have to wait a little longer to find out about the [name withheld], because something came up…
I took the [name withheld] in my hands and walked into the bathroom to hang it up. As I held it above the toilet, I got to thinking about its color. I liked it, but I thought it would be even better if it was more of a pure white. Like the trim. I glanced around at the trim. Blech! The trim had seen better days. I closed the door and had a closer look at it. Zounds! What the hell happened to my lily-white door and trim? It looked like a heavy smoker had taken up residence in the bathroom for the last few decades. The white was streaked with sickly yellow. This would not stand.
“Babes!” I said, straddling the toilet.
“Mmmmm?” She said.
“We need to paint the trim and the door! Also, would it be okay if I asked you to paint the [name withheld] to a whiter white?”
“Yeah, no problem.”
We took the bathroom door off its hinges and set it aside to be painted.
“You know, babes.” I said. “Since the door is off, would you want to quickly paint the walls, too?”
We had been planning to change the color from the current dark blue to the same light gray we used in the living room makeover.
“Yeah, why not?” She said.
I stood in the bathroom, looking out. The room felt huge without the door. I liked it.
“Babes!” I said, staring out of the bathroom, arms akimbo.
“Mmmmm?” She said.
“I like the room without the door!” Too bad it needed one. I doubted future bathroom patrons would appreciate an open toilet.
“Babes!” I said, an idea forming in my oatmeal.
“Mmmmm?” She said.
“I want to build a pocket door for the bathroom!” I said.
Handan walked over to where I stood.
“Okay…” She said. She was looking at me funny. It wasn’t like me to actually suggest more work for us. I was usually the one looking for shortcuts or making excuses not to do things. “Yes, my babes, I think that is a great idea.”
We looked at the door area. I’d have to tear down a wall outside the bathroom and move some light switches and outlets, but it seemed feasible. We looked back into the bathroom.
“Let’s get a new toilet.” I suggested.
“Yeah, okay.” She said. “If we’re going to get a new toilet, then let’s also re-tile the floor.” We had found several boxes of Italian tile at the dump a couple of years before and had them ear-marked for the guest bathroom.
I shrugged. “Yeah, why not?” In for a penny, in for a pound, it would seem.
“Since we have to take out the vanity to do the tiles, you can also finally paint that.” I said.
“Yeah, okay.” She said.
And so a simple trip to hang a [name withheld] over a toilet turned into a full-blown renovation. We didn’t plan it. We hadn’t prepared for it. The idea struck, so we grabbed hold and ran with it. Just another Saturday at The Navage Patch.
Our first stop would be Home Depot for supplies. As we were putting on our coats, a thought occurred to me.
“Hey babes? Let’s put in some wainscoting, too” I said.
“I was just thinking the same thing.” She said.
*****
The Demolition
First, let’s take a look at how things were when we moved in 3 1/2 years ago:
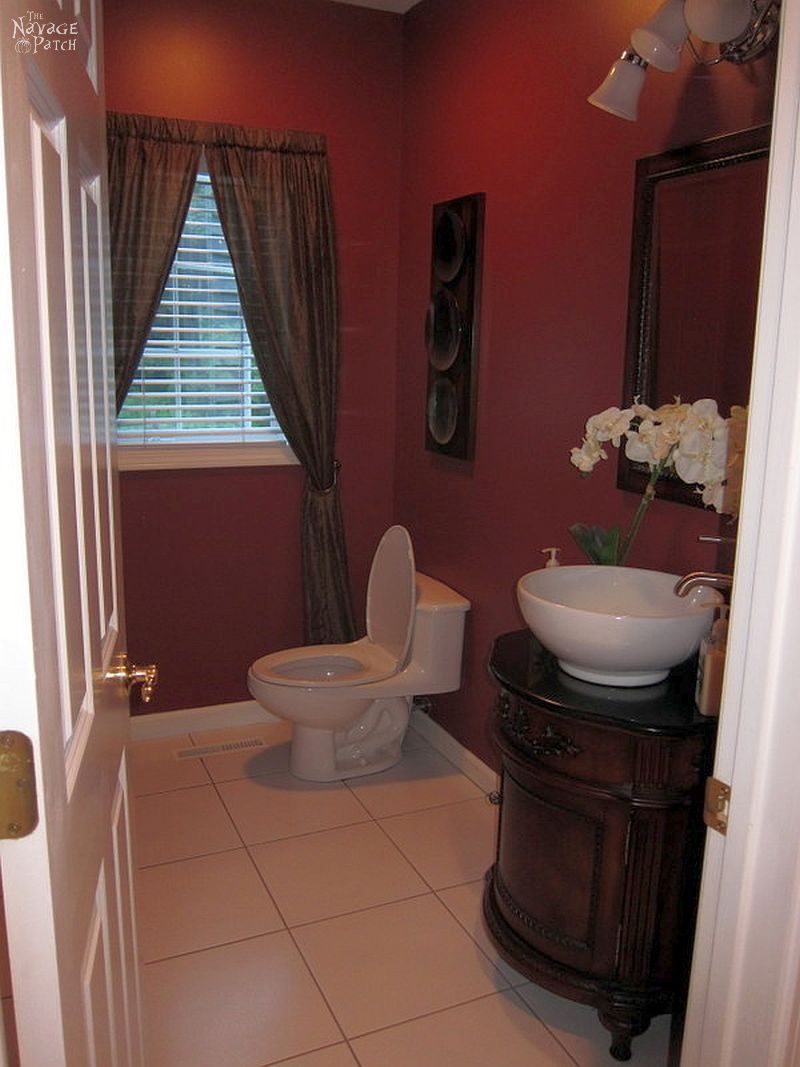
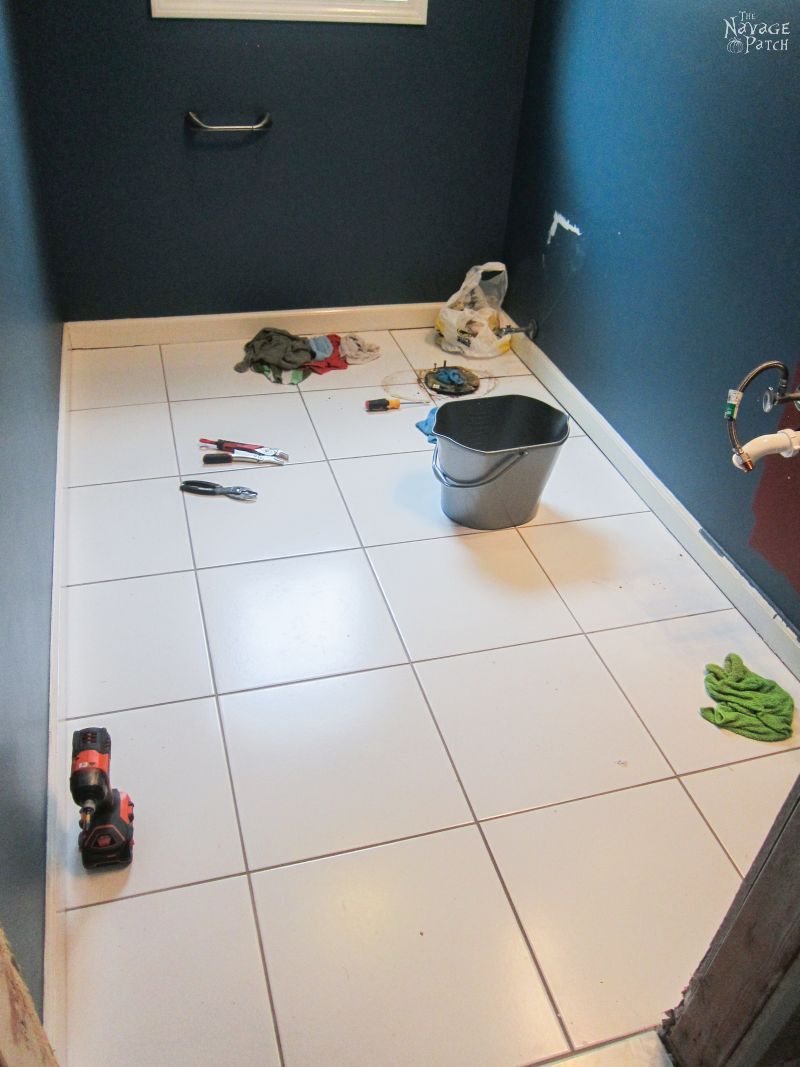
When we repainted the house after moving in, we changed that red to the same blue that I have in my office. This was how the bathroom looked just before demolition began:
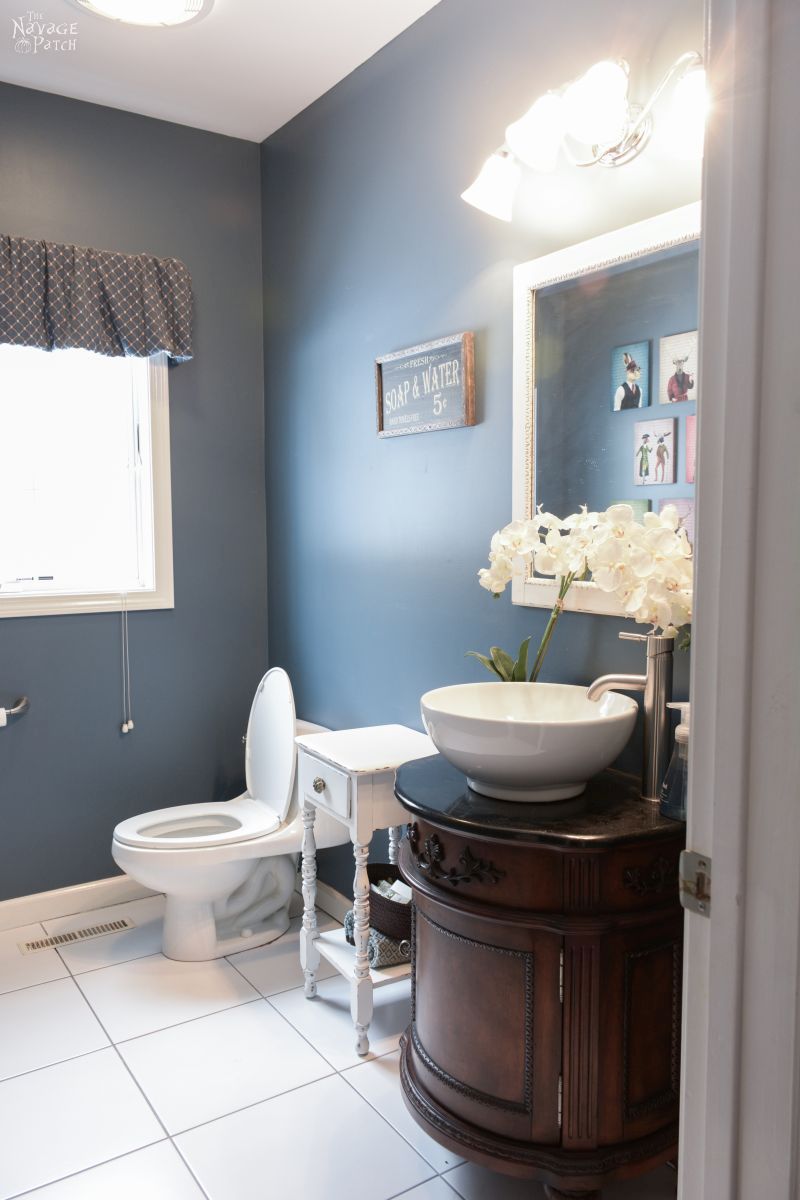

You’ll notice that we kept the orchid. I watered that stupid thing for months before I realized it was fake.
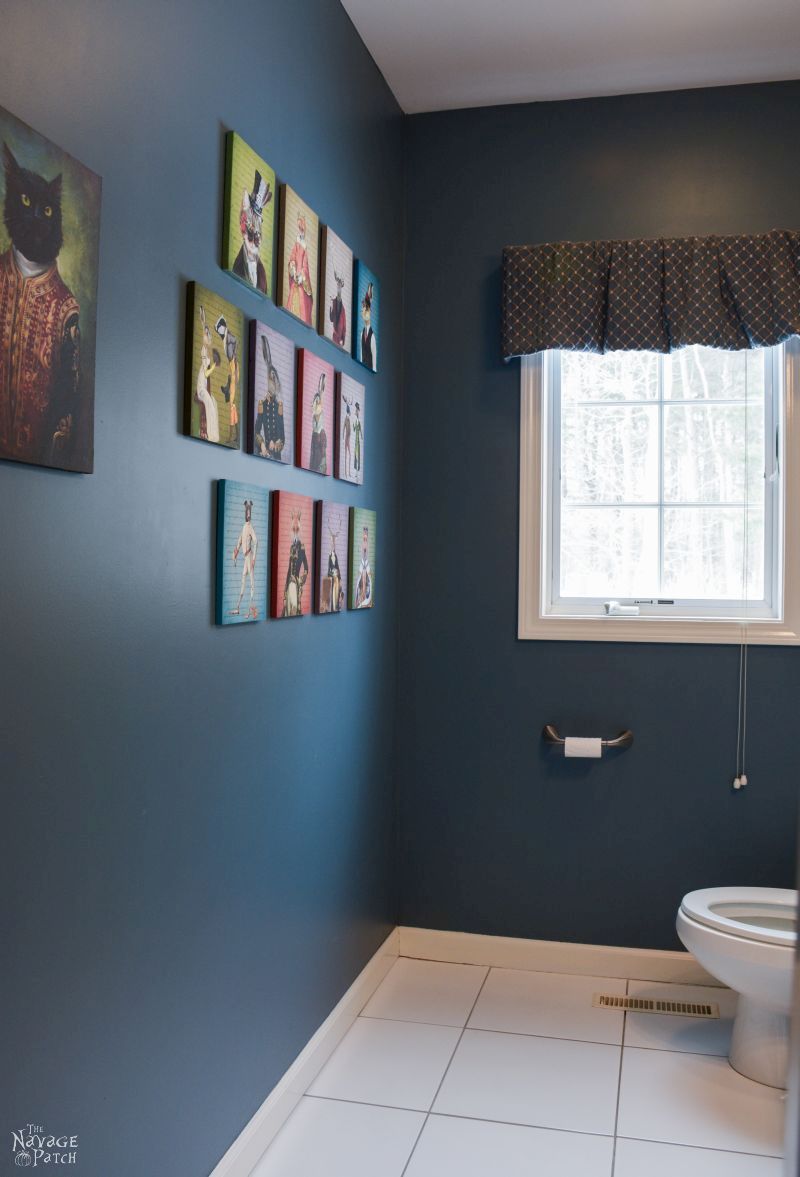
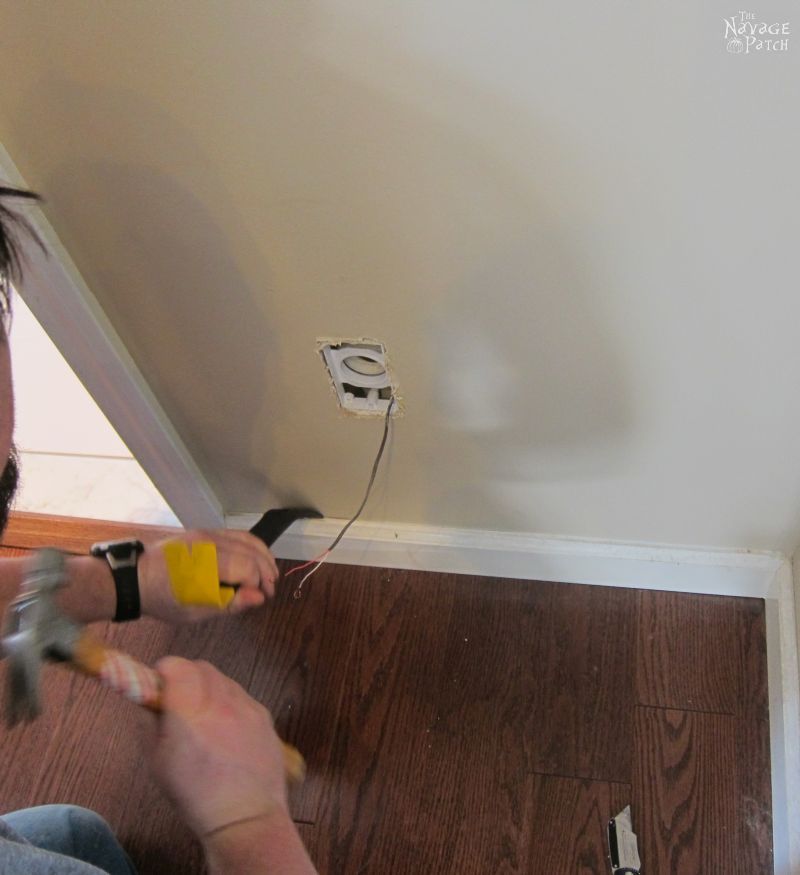
In this view, you can see where the pocket door will go. I’ll have to remove the wiring for the switches and the outlet to accommodate the door. I’ll go into more detail in a later post.

The floor tiles were in pretty good shape. In fact, these same tiles covered the entire first floor before the previous owners installed hardwood flooring over them in the rest of the house.
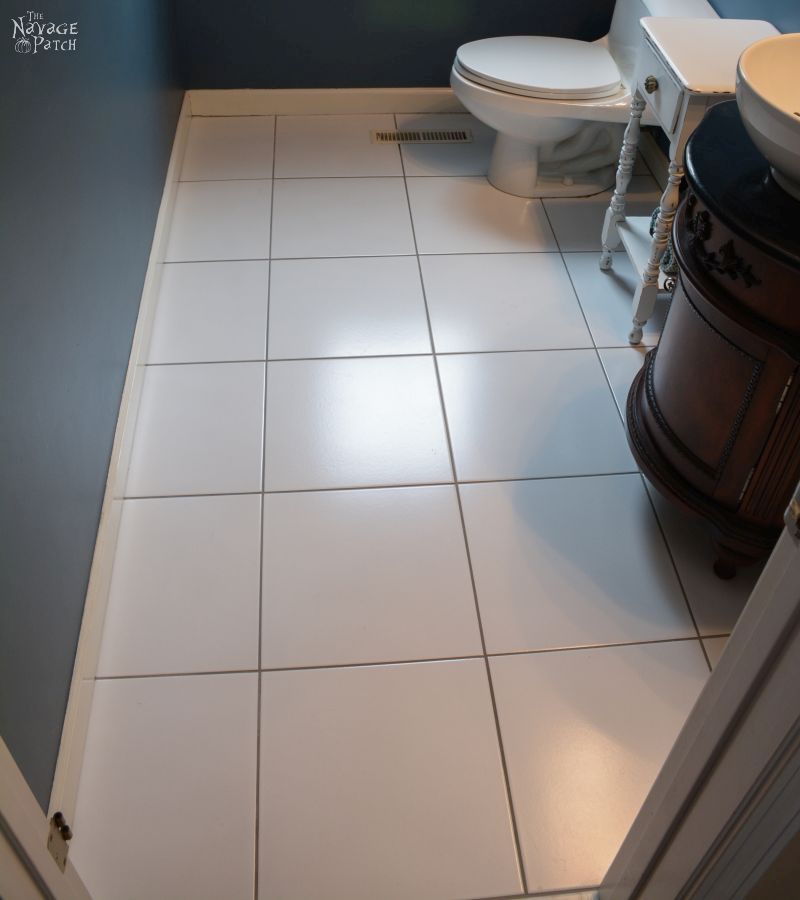
Around the floor register, two of the tiles had cracked.
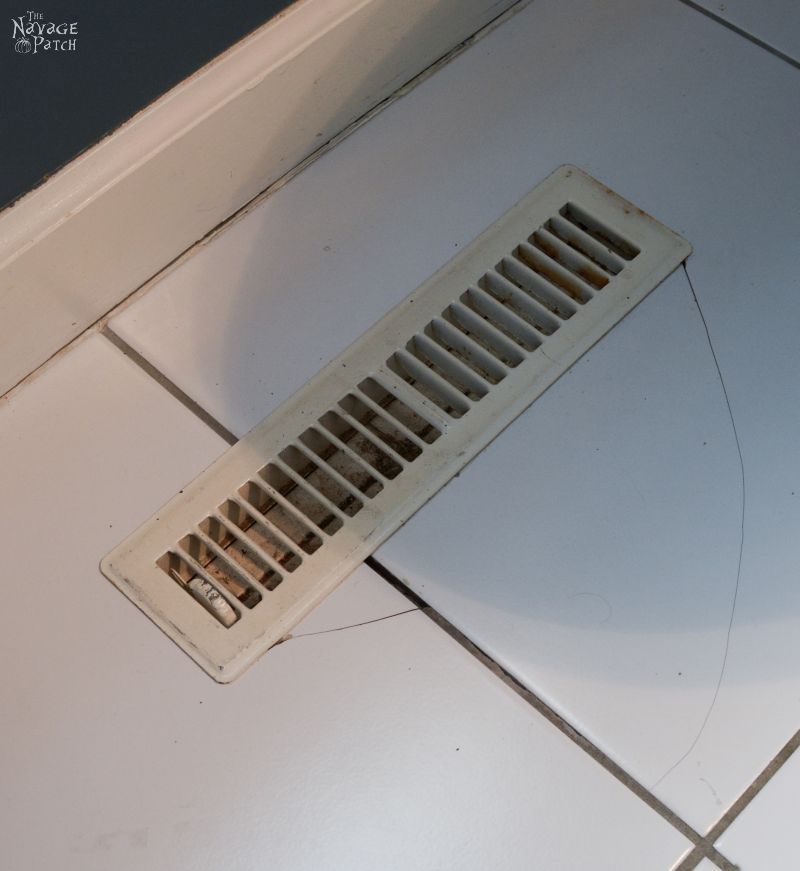
And, yuck, that register was bound for the dump, as well!
Here’s a look at the outer wall of the bathroom, where the pocket door will go.
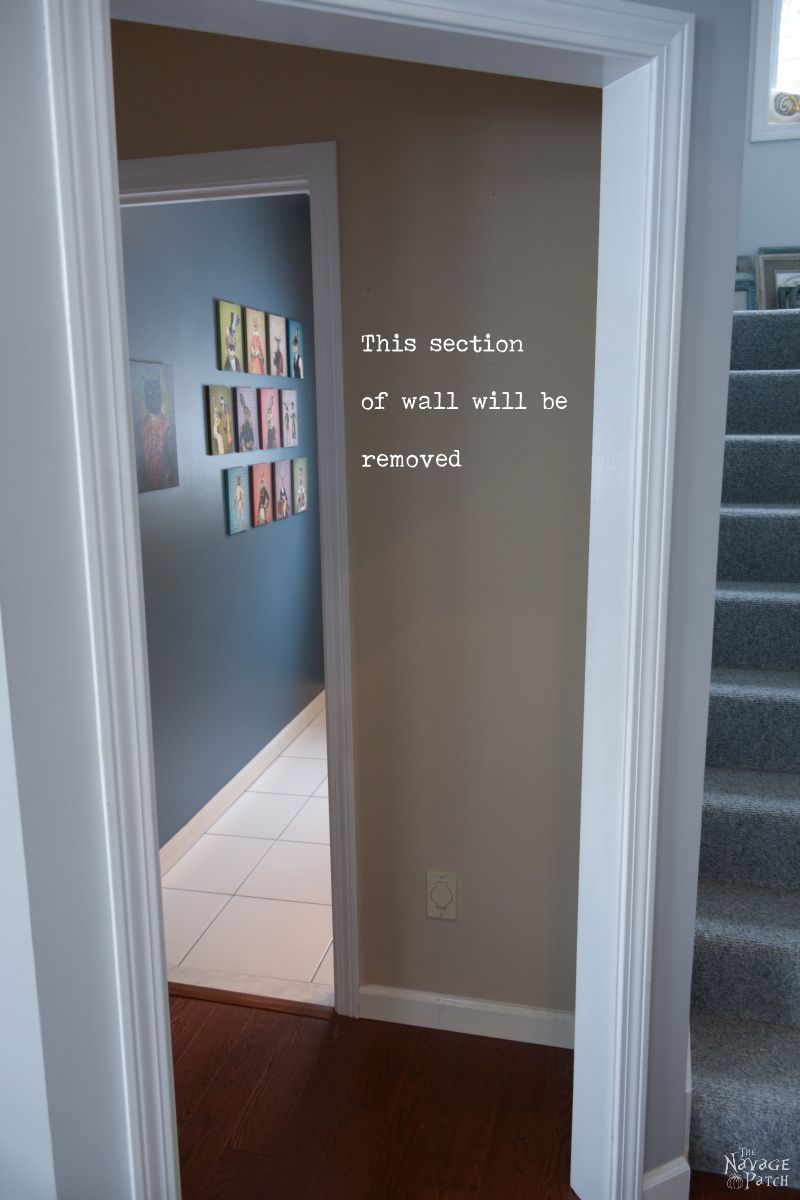
I’ll have to contend with the central vac outlet there. Remember the last time I discovered a central vac pipe behind a wall? But that project is still in the future. I decided to hold off on removing that wall until after we tiled the floor.
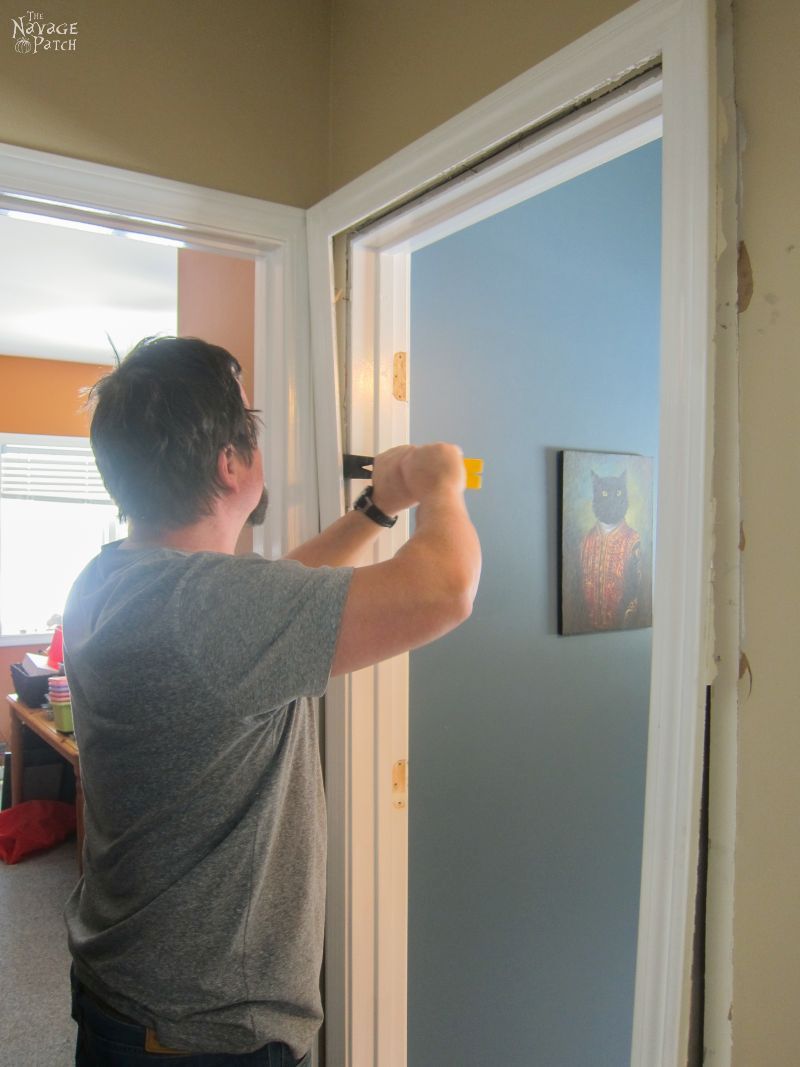
My first step was to remove the baseboard, the door casing (trim) and the door frame. I learned a lesson while removing baseboard for our living room makeover: first cut the caulk with a utility knife…
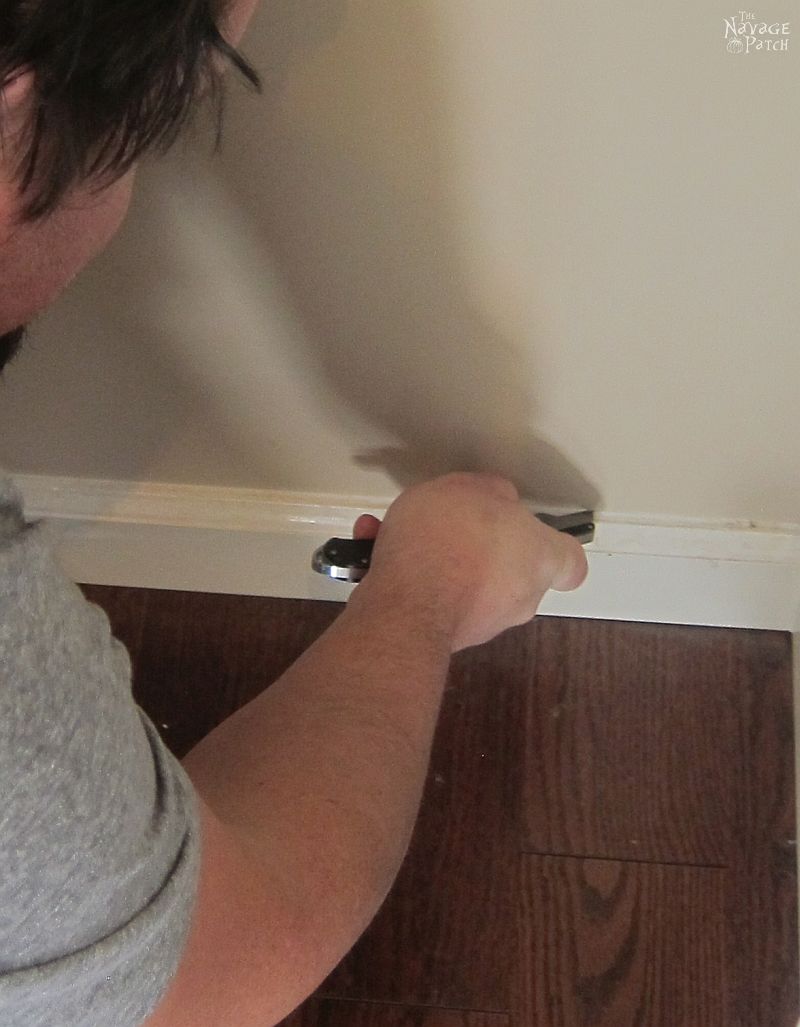
…and then start prying off the baseboard. Baseboard is secured with construction adhesive and nails, but is easily removed with a pry bar.
If you don’t first cut the caulk, pulling off the baseboard has a tendency to tear the face paper off of the drywall along with the paint on the face paper.
Using the pry bar, I removed the casing from around the door frame in one connected piece.

I repeated this process inside the bathroom.
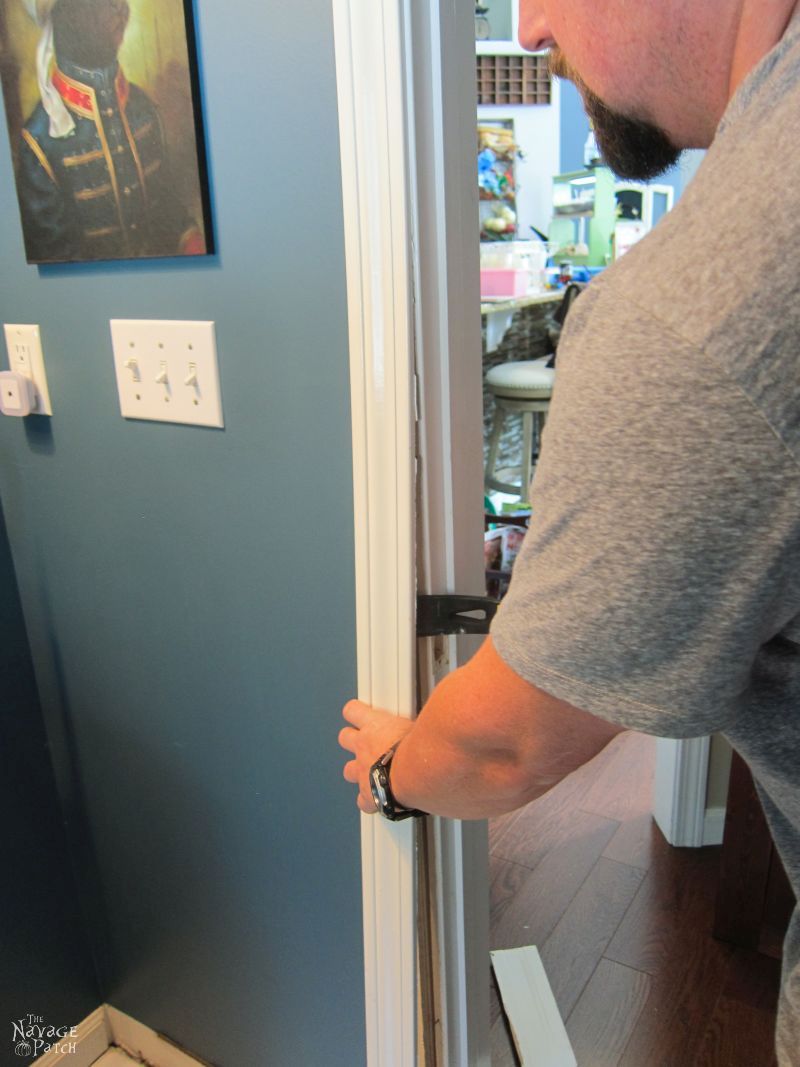
Once the casing was removed, the jamb was exposed. The jamb is spaced in from the frame with shims and secured with nails through those shims. The smart way to remove the jamb would have been to use a reciprocating saw to cut down through the shims and simply slide the whole jamb out. But this was my first time dissecting a door, and I hadn’t done any planning, so I decided to saw through the head jamb with a Dremel saw. Also, though I occasionally suffer delusions to the contrary, I’m not entirely sure I’m smart.


Once that top piece (head jamb) was split, it was an easy task to pry off the two side jambs.

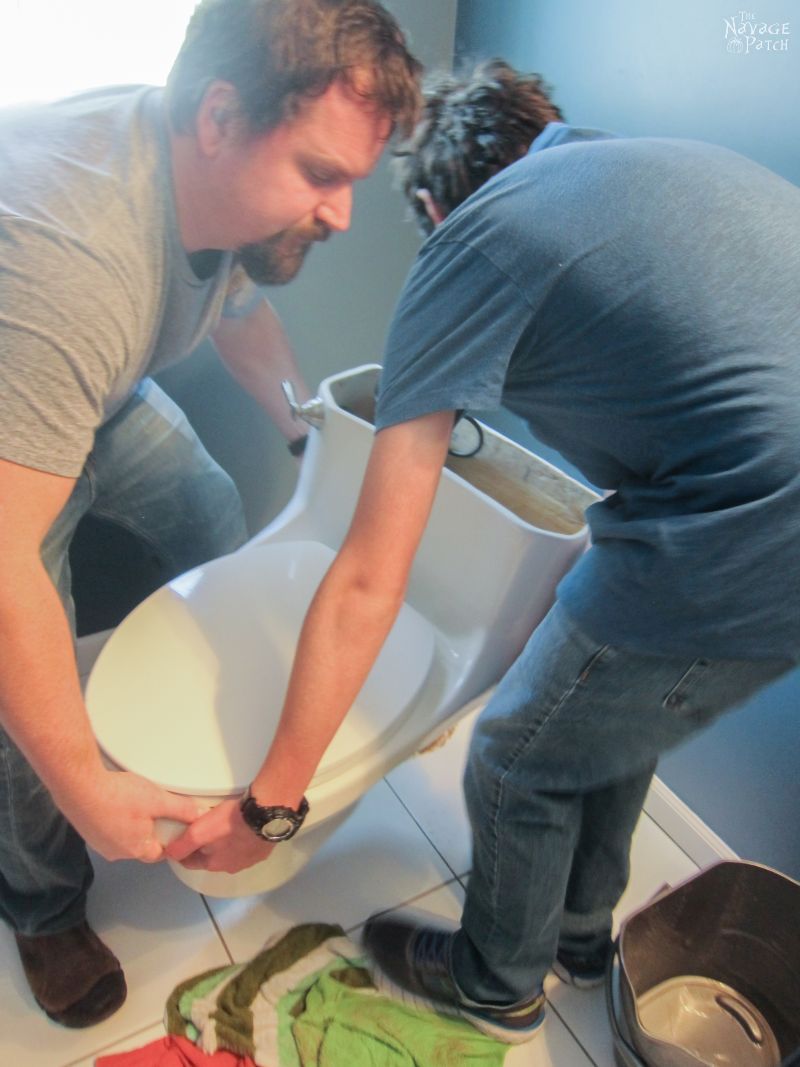
There is still a lot to be done with that door, but that will be a future post. Moving on to the toilet…it was time to remove it. I started by turning off the water, flushing the toilet, and then sponging out the water that remained in the bowl and in the tank. When the toilet was relatively dry, I removed the screw caps and unscrewed the nuts.
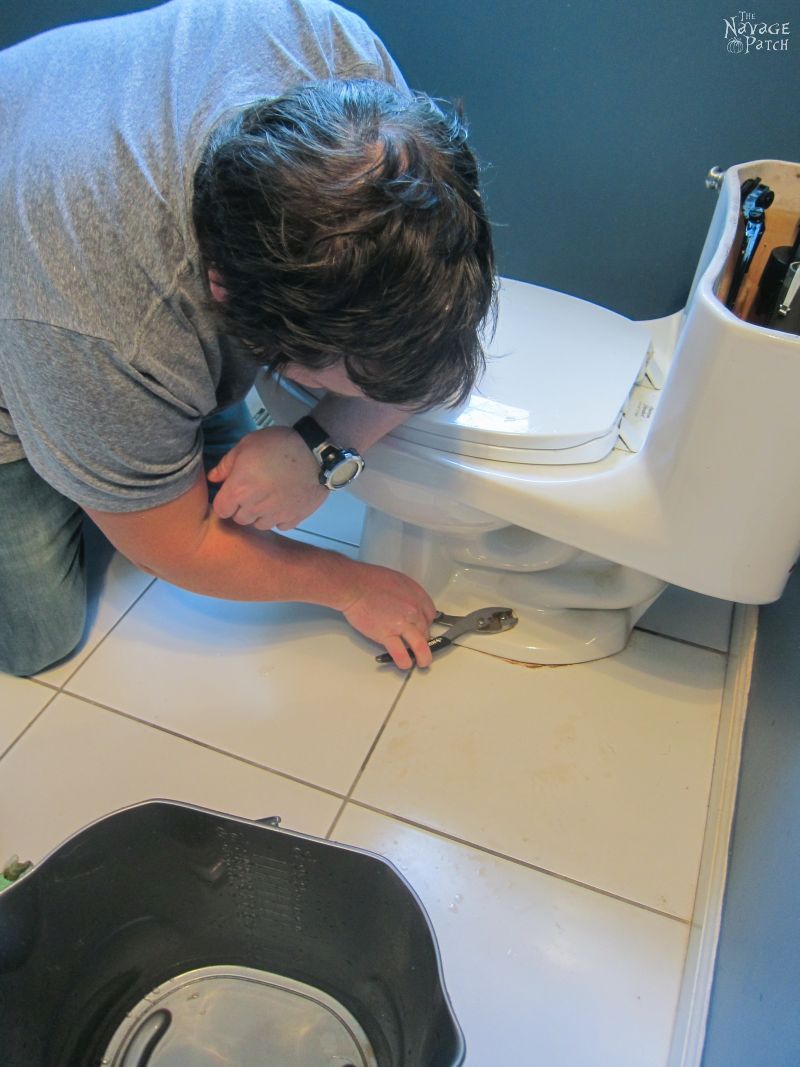
Next, I disconnected the water line.
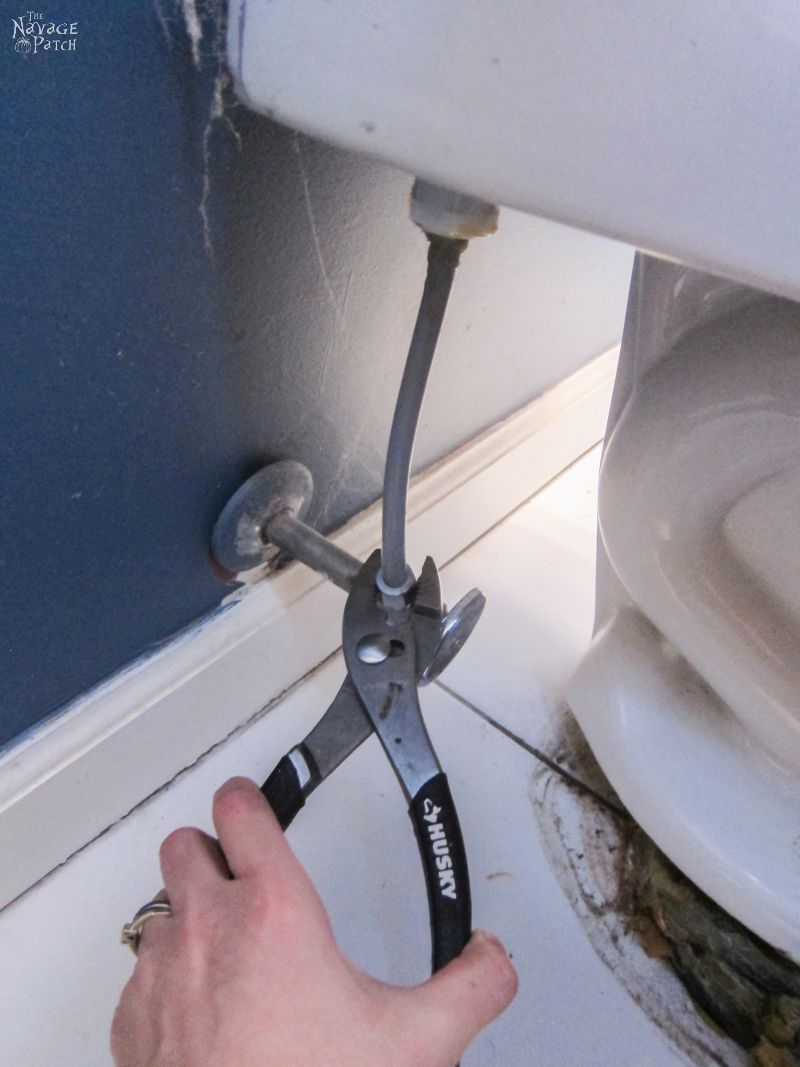
With that, the toiled was free, so Barish and I could pick it up and move it out of the way.
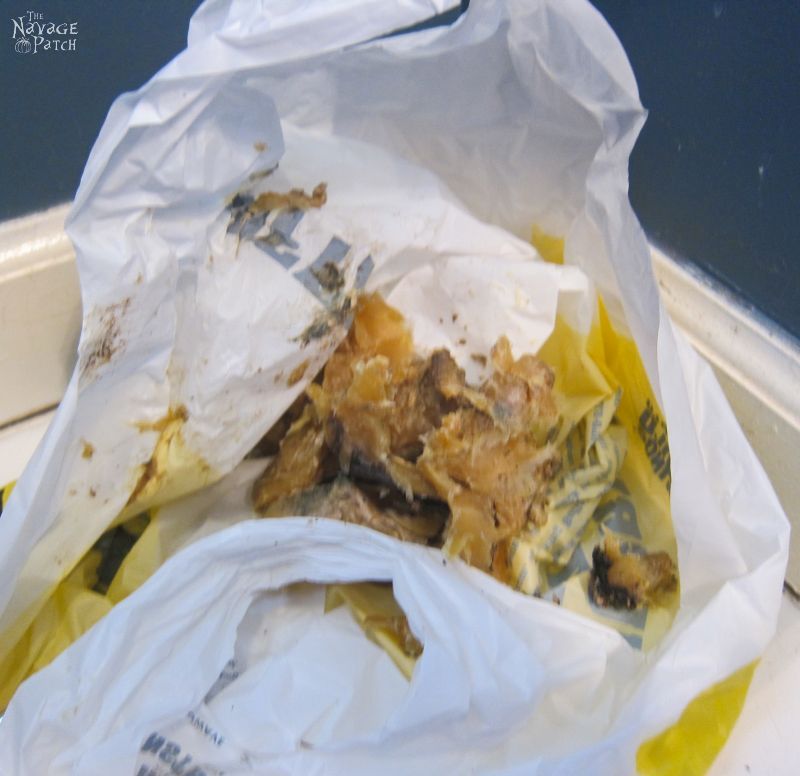
Wanna see something gross? Check this out!
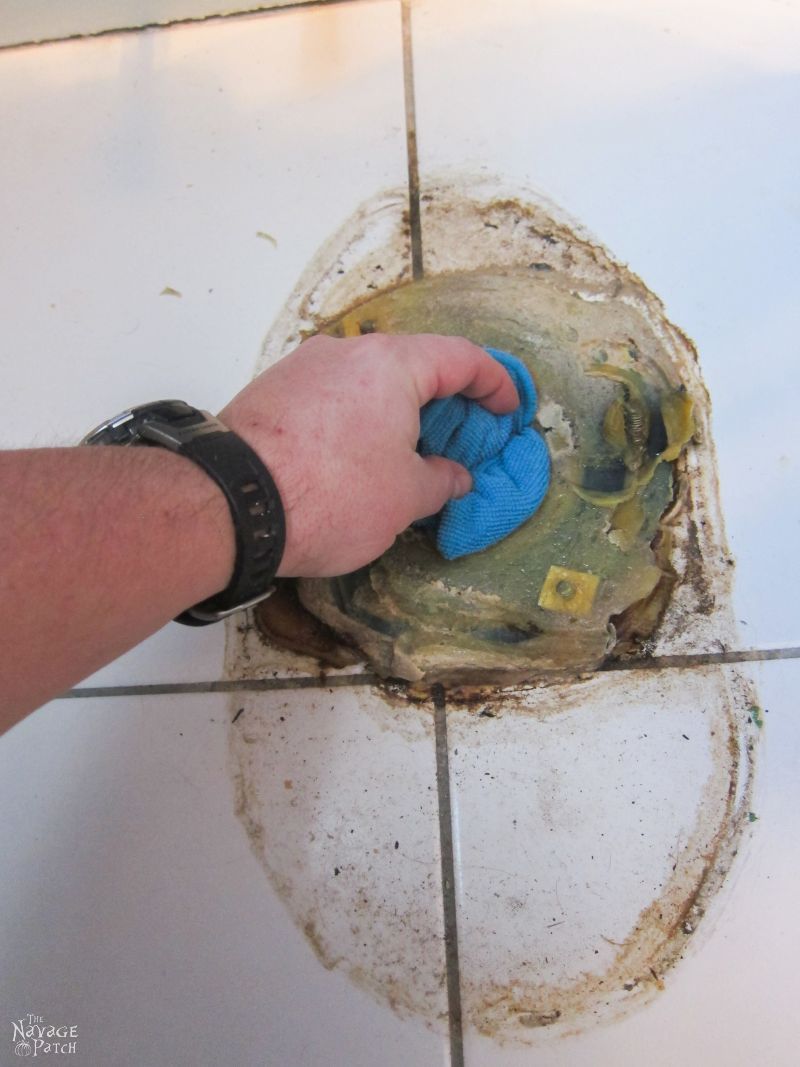
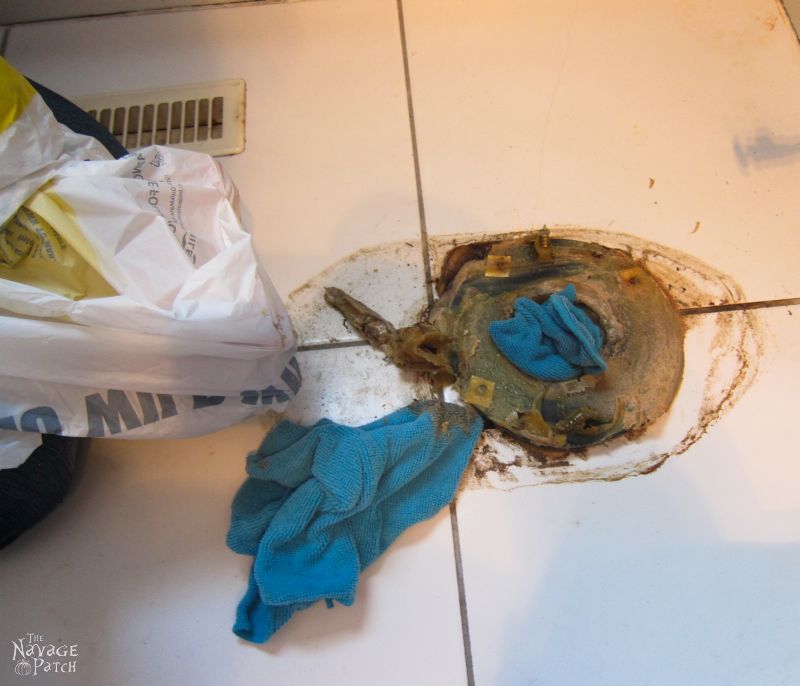
That’s 20 years of grime mixed with the remnants of the wax sealant ring from the original installation. I’m stuffing a rag into the pipe to keep the unholy odors of the leech field at bay.
Next up was the invidious task of removing the filthy remains of the old wax seal.
“Babes!” I called.
“Mmmmm?” Came the reply from another room.
“I need your help!” I said.
Heheheheh.
I monitored the job as Handan cleared the foul goop.
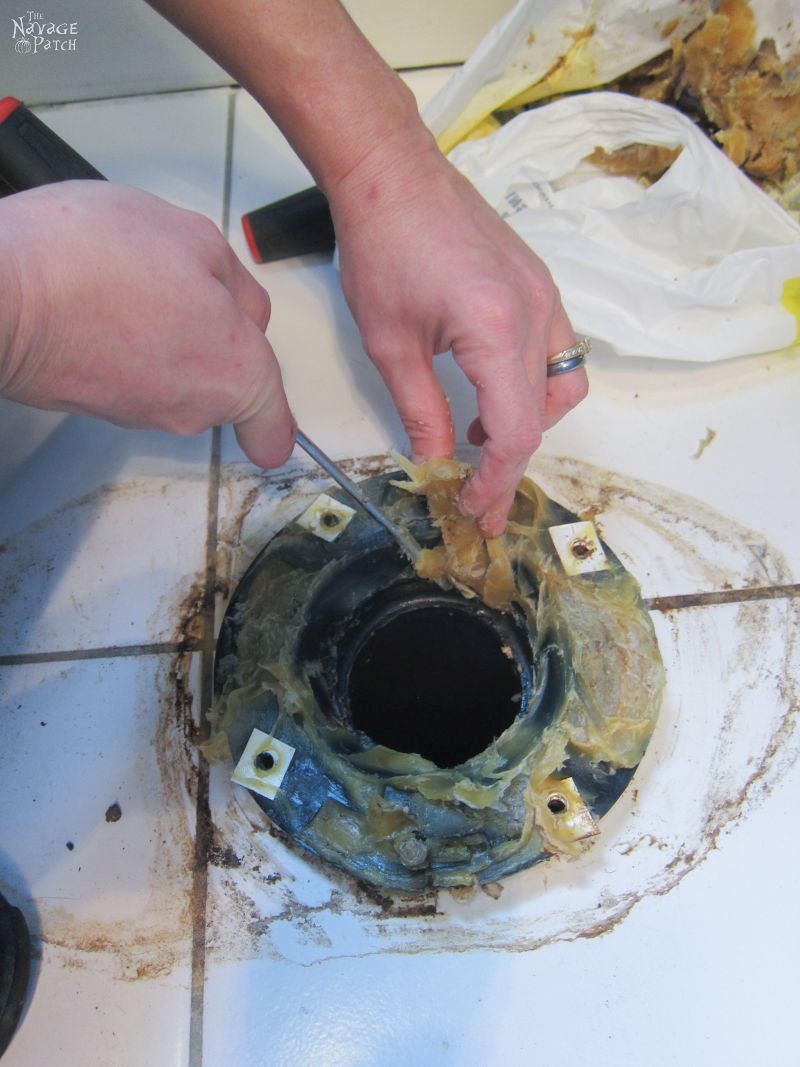
She was far more qualified than I for that job. And I really just didn’t want to screw it up…it was an important job!
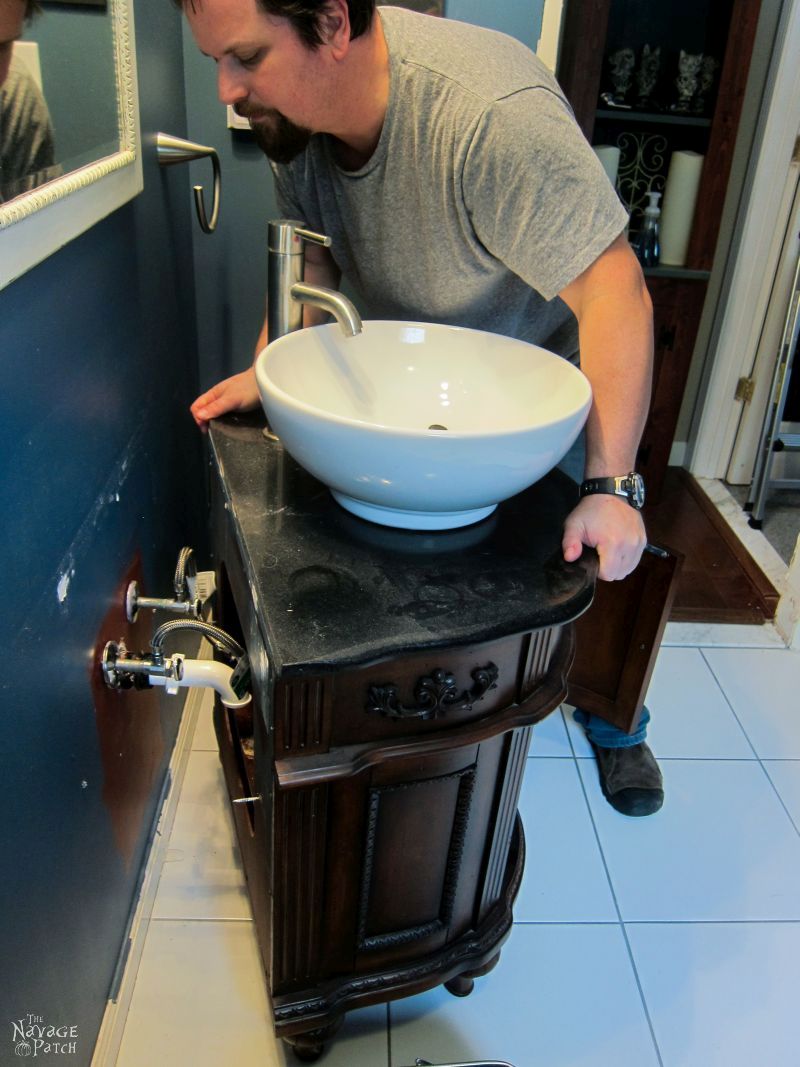
Next up: removing the vanity. That was easy enough. I disconnected the hot and cold water lines, separated the drain pipe and then slid the vanity away from the wall.

As I was monkeying around with the vanity, Handan was busy removing the wall art she had made and hung a few years back. As a testament to just how little we knew about anything back in those pre-blog days, check out how we secured the pictures to the wall:
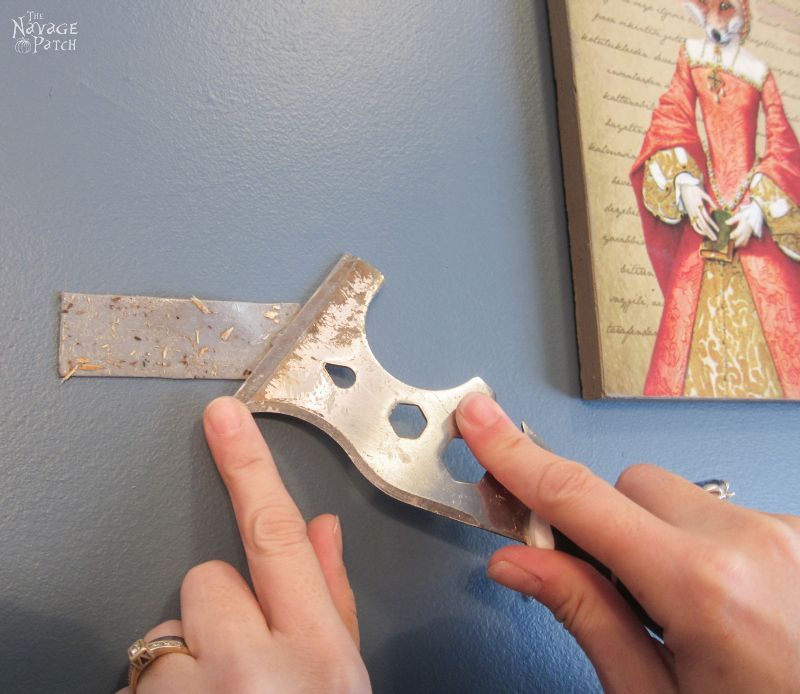
Yeah, that’s super-strength double-sided tape. Can you guess what happens when you try to remove super-strength double-sided tape from painted drywall? Yep, you guessed it.
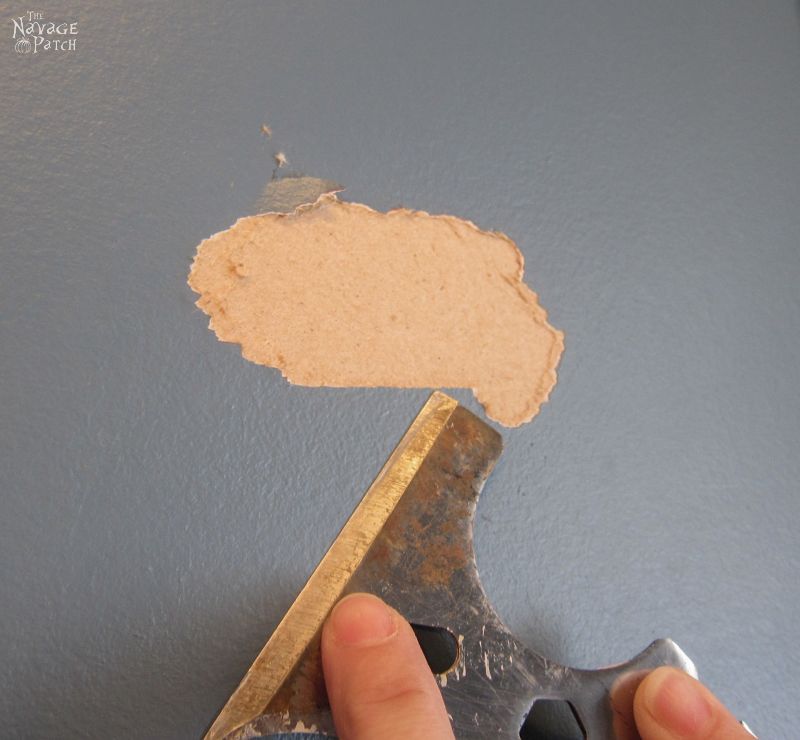
So Handan had a little patchwork to do on the walls…

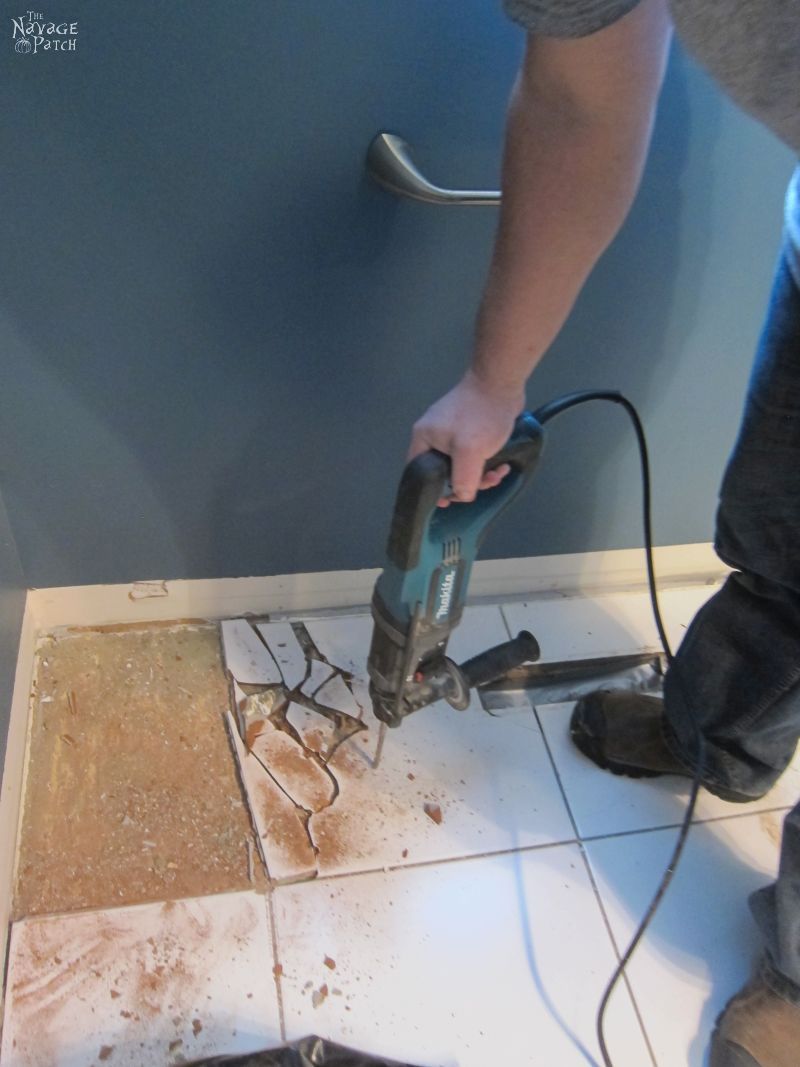
When Handan finished patching the walls, we were ready for the real demolition work: smashing tiles.
The best and easiest way to remove tile is with a hammer drill fitted with a chisel bit. But guess who forgot to buy a chisel bit? That’s right: this guy.
So I improvised with the next best thing: a drill bit. And you know what? It worked beautifully. The first tile took a few more holes than the rest, since there was no room for the tile to shift once it split.

After the first tile fractured and the pieces were removed, it was smooth sailing for the SS Tile Breaker.
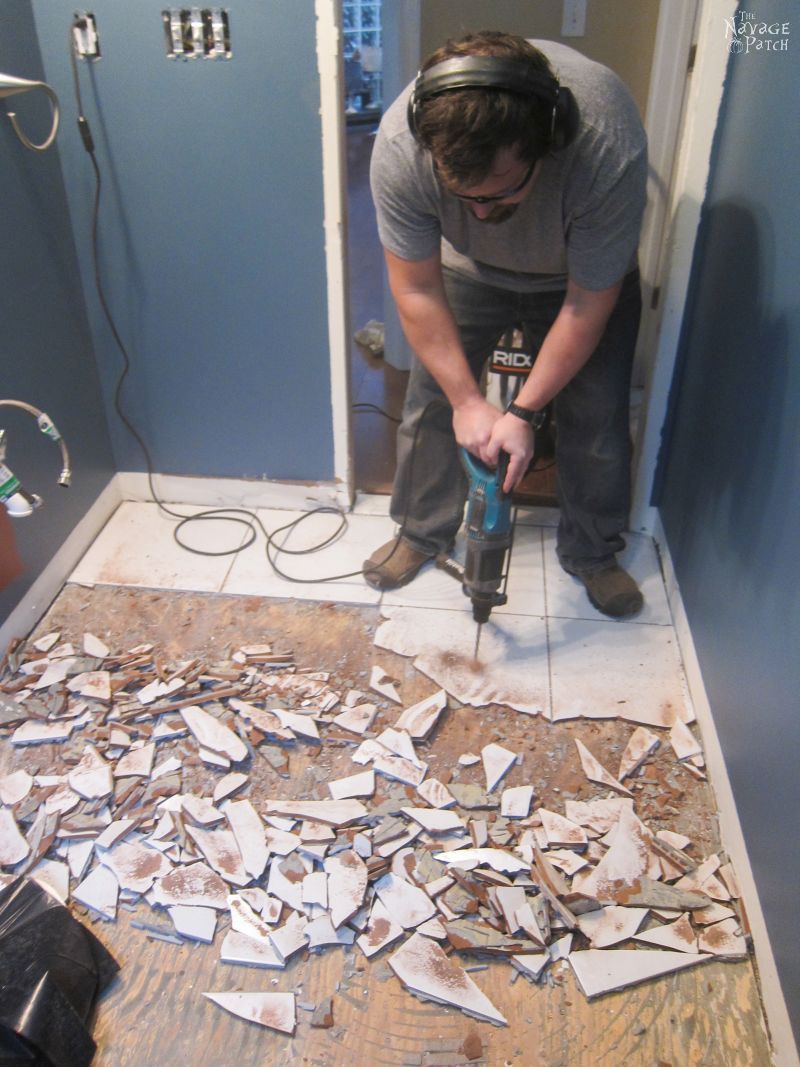
Behind every great tile breaker is an even greater cleanup crew.

Gloves are a must when cleaning up pieces of tile. Just ask Handan the Bare-Handed, who tried to do the job without and now has the scars to prove it!
Once Handan and Barish cleaned up the broken tile, Handan gave the floor a good vacuuming. We could see that there was still a lot of mortar on the sub-floor. It would be a royal pain in the buttocks to chip it all away to make the surface perfectly flat, so Handan suggested that we tear out the sub-floor and install a new one. My wife is a kick-ass engineer, so who was I to argue? If my babes wanted a new sub-floor, my babes was going to get a new sub-floor!
I grabbed my impact driver, sank to my knees and started unscrewing. I looked around me and my heart continued to sink. There were a gazillion screws holding down the sub-floor. I hate kneeling – it just doesn’t play well with my fat. But, I promised my babes a shiny new sub-floor, so it was knee-time for Old Chunky.
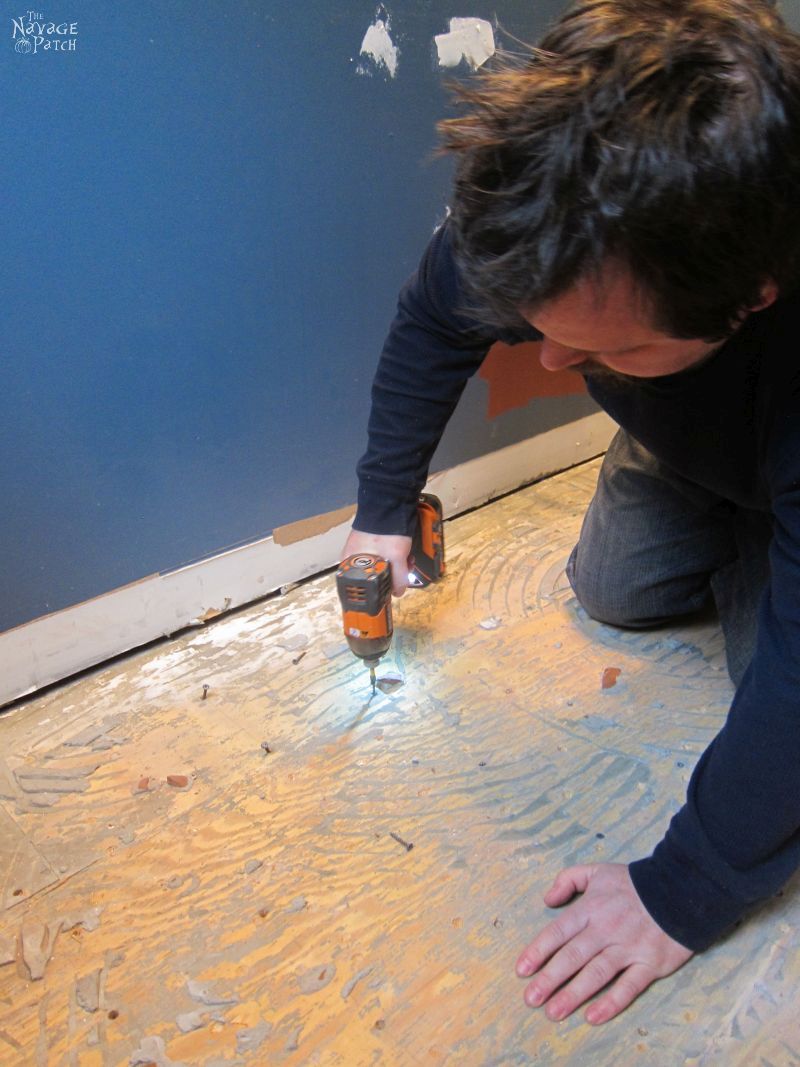
It was here that I started to question my life.
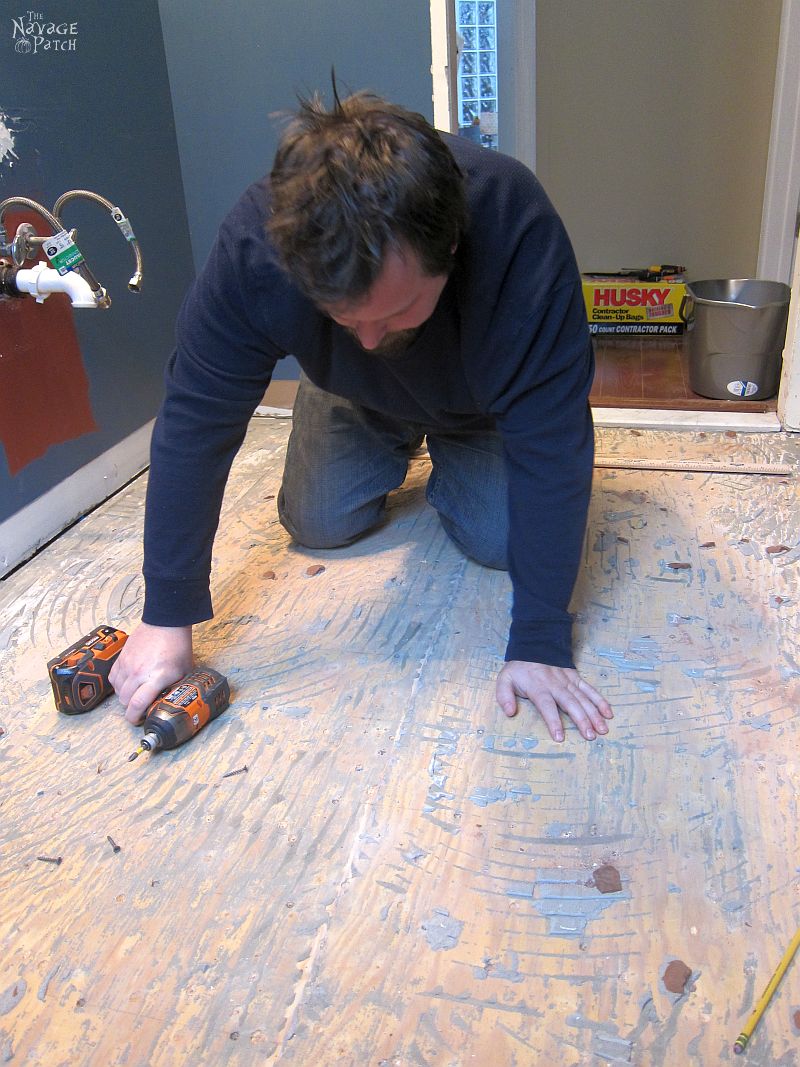

Despite the protestations of my screaming lower back and shattered knees, I finished unscrewing the sub-floor. Well, mostly, because some screws were covered by mortar. Handan and I wrested the sub-floor from the slab using the last of the day’s strength.
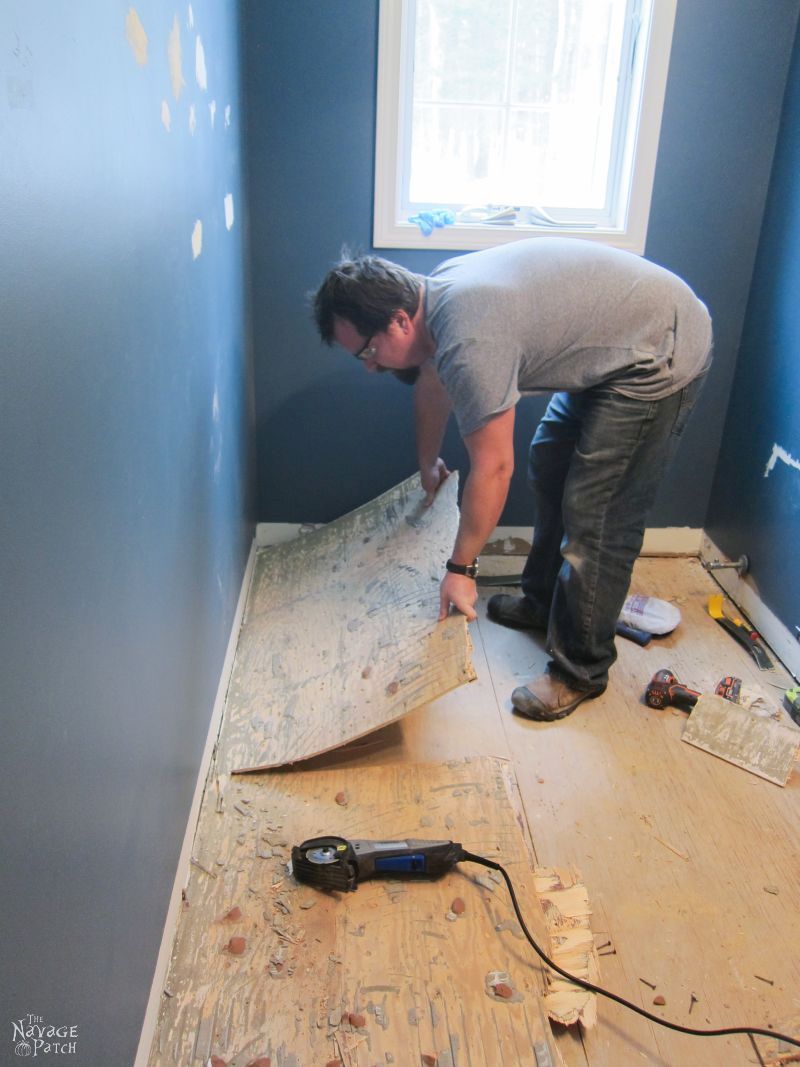
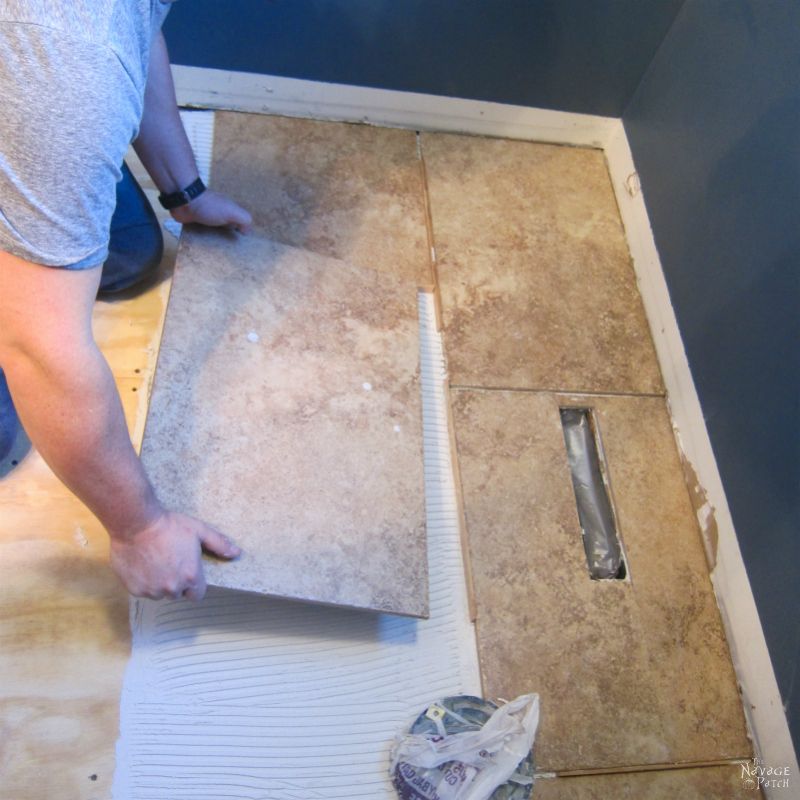
The demolition was done, at least until I removed the wall for the pocket door. The next day, we would go to Home Depot again for some plywood. Then, we would lay the new sub-floor and try our hands at tiling.

CONTINUE ONTO>>
Ouchie, that looks like too many “eina’s” waiting to happen. Can’t wait to see what the next installment brings. Hope the gorgeous purr baby wall art is safe 😉
Thanks, Michelle! Handan will be grouting the new tile tonight while I sip a martini in the background. This weekend, we’ll seal the tile, and then it will be time for the rest!
Wow, what an undertaking! For me, I enjoy the planning but the demo and MESS is the part I wish-away. I don’t enjoy the process but long for the end result! Can’t wait to see how it turns out!!!
Thank you, Cindy! Somehow, Handan and I usually skip the planning stage and get right into the action!
man i hear you on the kneeling and bending, i have a very low stool i use whenever i can, and i am so sorry to hear that people drop you when you post travel adventures, as you know i love them, you could just email me with one every once in a while xx
The travel posts help separate the wheat from the chaff 🙂
🙂
As I was reading this I was thinking “what is going on with Greg?” Typically it’s Handan that initiates this types of projects. Perhaps Handan whispered “guest bathroom remodel” to you in the middle of the night. Looking forward to seeing the finished bathroom. btw – Love your travel posts(those “unsubscribers” are probably non readers or people who don’t enjoy good storytelling).
Hahahaha 🙂 Exactly, right? Normally, even when I initiate a project, he has a hard time going along with it. Hence, when this all started, I was really worried and wondering if he hit his head somewhere without me knowing or seeing it. LOL.
Nadine, I don’t know what was going on with me either, but I had the energy of a 20 year old last Saturday!
Just a thought!!!! Use concrete board for underlayment instead of plywood. Nancy
That’s an excellent idea, Nancy!
Wow! When you guys decide to do something you go all in! I can’t wait to see the results!
I know, right? This one really escalated quickly!
Gosh, that’s more than my hubs and I would get done in a week! LOLZ. Looking forward to stage 2. BTW, I spent a couple of hours one night reading all the overseas meeting, marrying, and traveling posts, and they’re why I subscribed, actually 🙂
I’m so happy you like the travel posts, Anna! I write them for you and my small squad of readers! 🙂
Woo hoo, glad to see you two are back at it!! I am looking forward to reading & seeing Part 3 and 4 complete with a glass of Pinot Gris in hand! LOL
Hi Kaycee…yes, we are certainly back at it! We just finished sealing the tile, so I’ll have a post ready to go early next week (or maybe this weekend, if Handan cracks the whip)! 🙂
Looking forward to the rest of the reno asI will be doing the bathroom in the not too distant future and can use all the inspiration & knowledge I can get. Good job by the way!
Good luck with yours, Bonnie! My advice: don’t overthink it…just jump right in and do it!
I love you two diyers! My trick to get some reno done is to “suggest” it… he veto’s it…. then 2 weeks later, he comes up with this ‘fabulous idea’ (which was mine initially!) that may have a twist or two, but it gets things done!! I’ve learned to let him think the idea was all his!!! Can’t wait to see your finished product!!
Hey, whatever gets the job done, right? I’ll have another post out soon, Karolyn. Thanks for reading and commenting!
I love you guys, too. I just found your blog from a post on Hometalk a few weeks ago. I binge read all the travel posts last week. My hubs and I are beginning DIYers, but did get our basement concrete floor stained this year without a divorce! You two are big inspirations!
Thank you so much, Marilyn! I love to hear when people are enjoying the travel posts. It’s great that you and your husband are DIYing together…it’s much more fun with two! Keep at it, and Handan and I hope to see around our comments section in the future! 🙂
I love you two also. You have a great sense of humor and you write very well. I enjoy all of your blogs.
Thank you, Marcia! Your comments keep us going! Yesterday we were having a technical glitch and getting pretty frustrated with the blog, but your kind words (and Marilyn’s) turned the day around. Thank you for reading! 🙂
Have you ever heard of the term scope creep? If not, you definitely just described it in the most interesting way possible! ? I’m always wary of little updates to spaces because they definitely end up snowballing into bigger projects. That said, I can’t wait to see how the new bathroom turns out! Thanks so much for sharing at the #happynowlinkup!
My sister told me it’s just like the children’s book, “Give a Mouse a Cookie.” 🙂
Love, love, LOVE your travel blogs. And your story of how you two got together……. reminded me of the Harlequin books I read as a teenager (I’m almost 60 now) Travel to foreign lands, adventure, sometimes a hint of danger, and binding it all together a sweet love story. truly lovely. Your diy blogs are great too. You both are talented and creative. Keep both travel and diy blogs coming.
Thank you so much, Annetta! We are delighted to have you along for the adventure!
Those animal pictures are great! You said you all made them? Is there a link? I would love to try something like those. (Also, good luck on the remodel. 🙂 )
Thank you so much, Jen! I sent all the info on those animal prints to your e-mail. I hope you’ll find it helpful 🙂
Extremely helpful. Thank you so much for taking the time. 🙂
Send them to my email, too, please. Or, just put a link! I love your artistic skills. I’ve just started dabbling in art and I’d love to see how you did it.
I just found your blog and love it! So creative and inspiring! I was wondering if you remember where you purchased the lamp on the litttle table next to your toilet. We are off the grid and I have been looking for lights that hold candles that are on timers. It looks like that is what’s inside the lamp?
Thanks,Virginia
Hi Virginia, yes that is a led candle with timer. I bought my candle lamp from Lakeside.com. Here is the link to the set of those candle lamps on Lakeside.com, but I see that the exact one is sold out: http://fave.co/2CfOsDW
Amazon also carries them, but they are a little pricier on Amazon. In case you want to see the exact one I have on Amazon, here is the link to it: http://amzn.to/2CiRTHN
I hope this info helps!
Gotta say, this blog holds up well over time. Love the travel posts, love the she said [he said] commentary, love what I learn from your projects – but mostly I love the full-on LOL belly laughs I get from reading your posts. LL&P.
Thank you so much, Elizabeth! Good to know the oldies are still goodies! 🙂