
Toolbox to Planter
Soon the planting season will start around here, and I am still working to get my herb planters prettied up and ready to welcome their jewels. I started off with some old terracotta pots and got them out of the way, and now it is time to work on the wooden planters…such as this little handsome guy here.
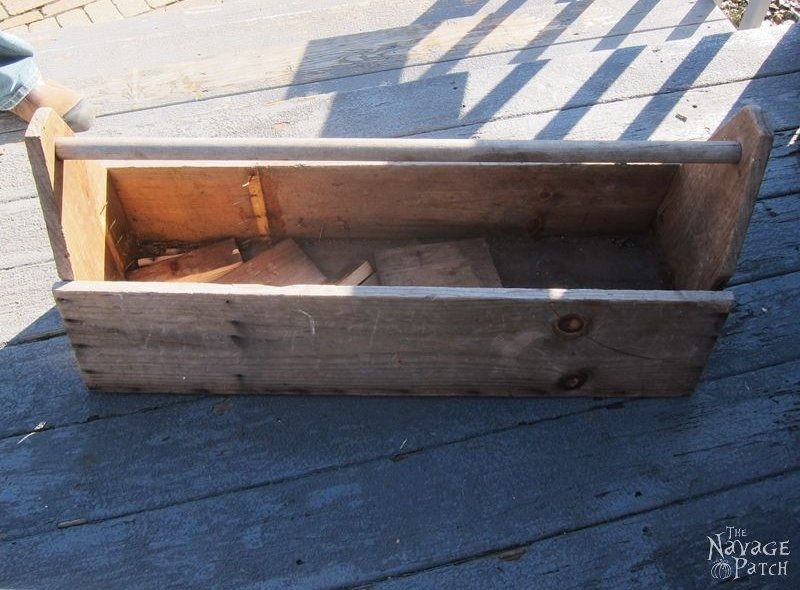
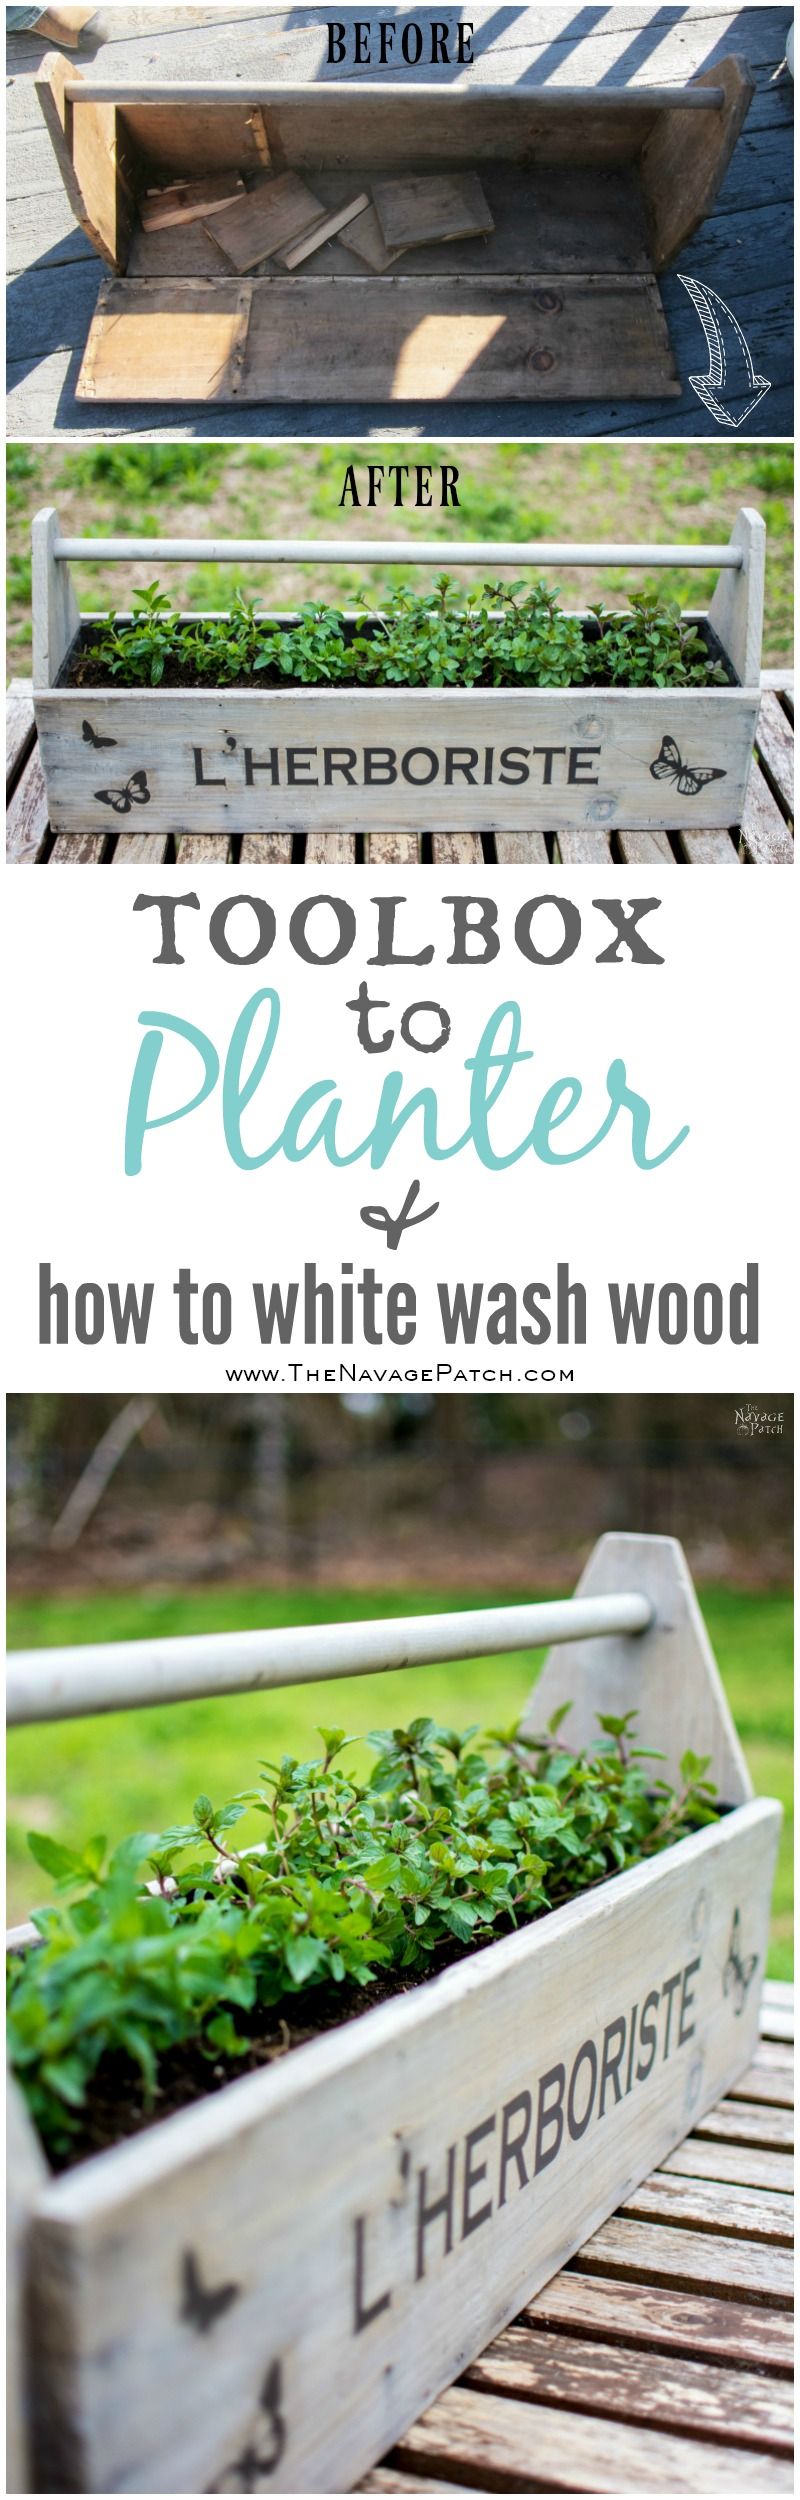
Ok maybe he wasn’t so handsome yet with his face falling apart, but he was going to get there with a little work.
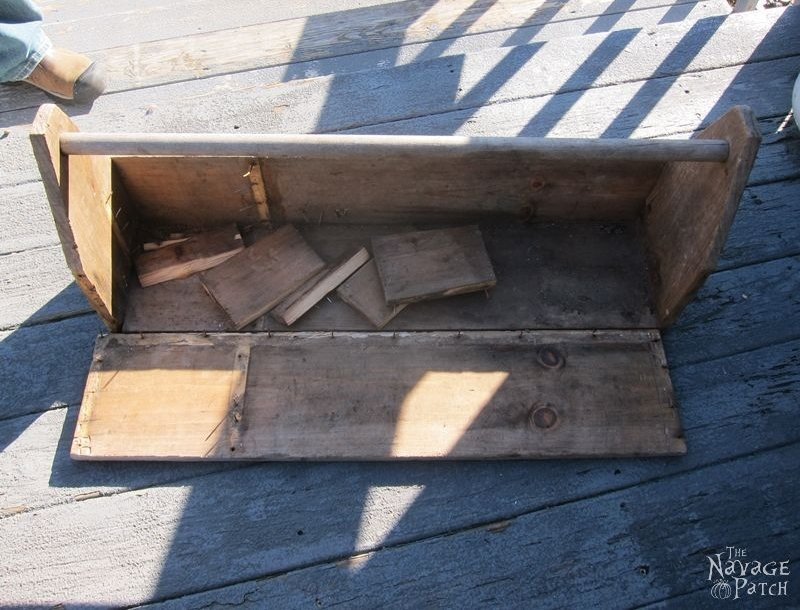
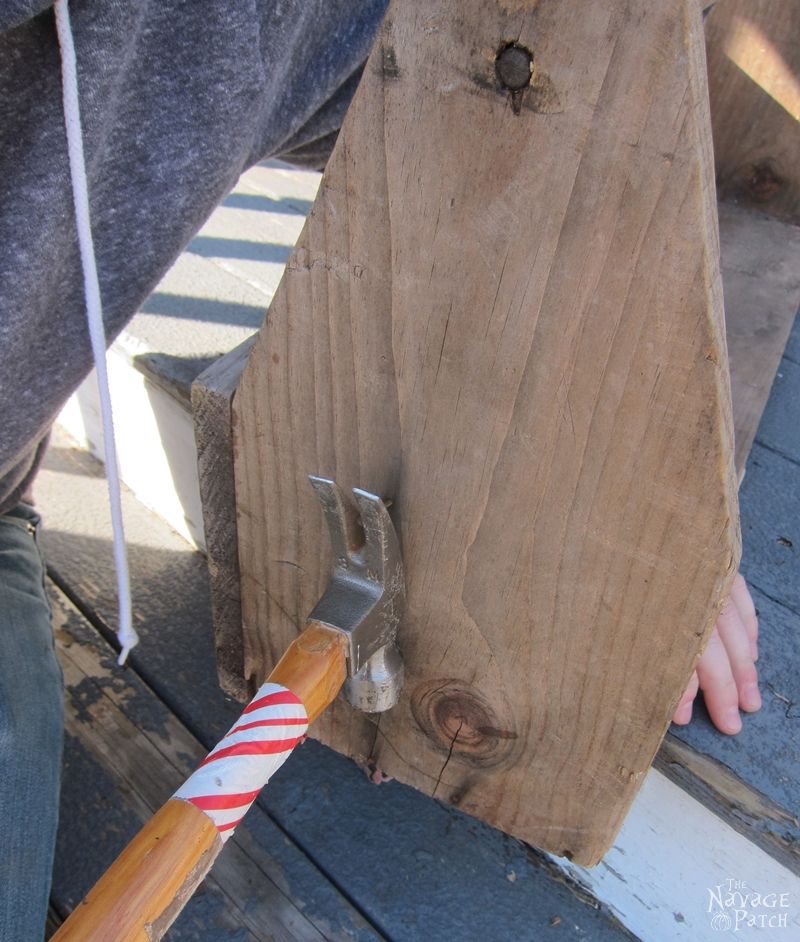
He already had a nice rustic feel with that aged wood, so I didn’t want to slap paint all over him. Instead I wanted to re-finish him in such a way that would embrace his original rustic look. But before anything else, all the rusty old nails which were sticking out had to go. As I don’t have a good history with rusty metal, I asked Greg’s help for clearing the main body from rusty nails.
While Greg was working with the nails, I started preparing my homemade chalk paint. My initial plan was to stencil the toolbox with a nice brownish-gray paint. But taking a second look at the wood color, I thought the stencil could get lost on that wood, so I decided to brighten it a little and give it a driftwood look. To do so, I had two choices: either stain the wood or whitewash it. While Greg was all for staining it to achieve the driftwood appearance, I decided to whitewash it. He knew that it was my first time whitewashing and there was a chance I could mess it up, so he really didn’t like the idea. But when I told him “the worst case scenario is it will get ruined…and if it does then you can make me another one, and I can try staining that one,” he then hated the idea 😀
All I knew about whitewashing was that I should be using watered down chalk paint, so I started searching for the ratio of water to paint. On all the tutorials, the mixture was usually prepared first, then spread on the piece, then immediately wiped off. But some of the tutorials used 1 part chalk paint 2 parts water and some used 1:1 ratio. Since I couldn’t decide which ratio to trust, I thought I might as well come up with my own technique.
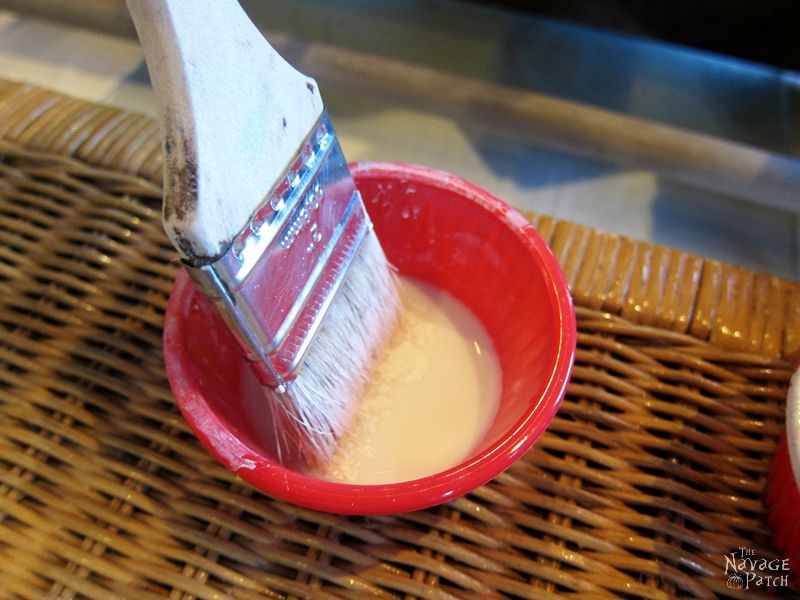
I picked two small plastic bowls. I filled one of the bowls with water and left the other one empty.
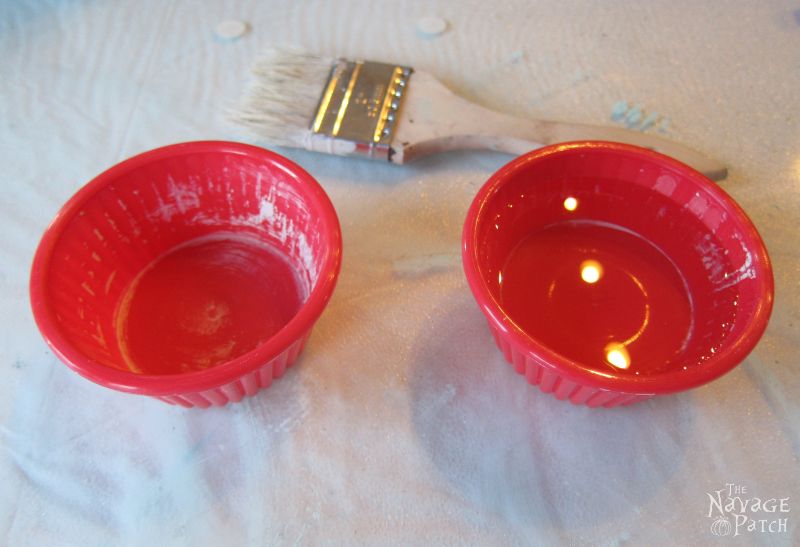
I dipped my chip brush into my homemade white chalk paint just enough to get a little bit of paint at the tip of the brush.

Then, using the empty bowl, I wiped most of the paint off the chip brush.

Next, I dipped that brush into the water bowl to thin the paint even more. You can see from the picture below how the brush is releasing the little paint it had.
As it was my first time whitewashing, I thought working in sections would be a smart way to go. After having a fully wet brush with very little white chalk paint on it, I started brushing the wood.

The picture below shows how thin the chalk paint was. Almost like “only water” with a drop of paint…
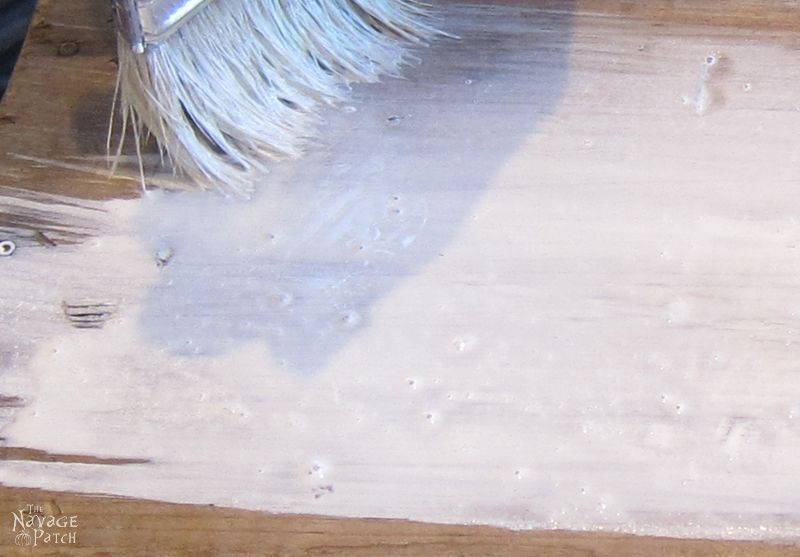
When watered down paint mixture is so watery like this, you would see a lot of little bubbles while brushing the mixture to the surface.

Right after spreading watery mixture, I wiped it off with a paper towel before it could seep fully into the wood.

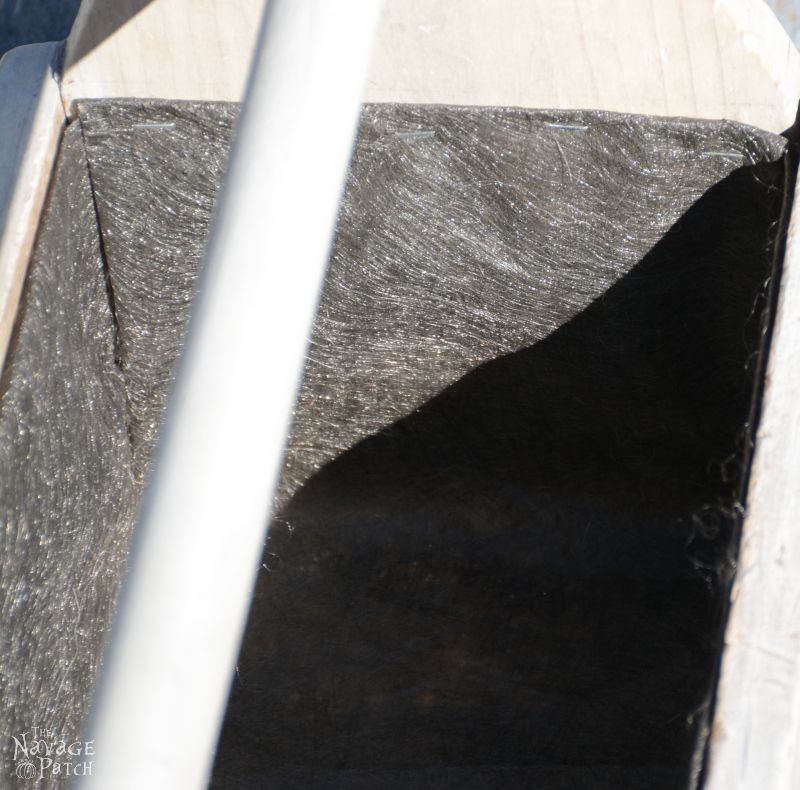
I carried on like this until I got the driftwood look that I wanted. You can see the difference between the whitewashed part and the original wood from the picture below.

What you can’t see from the pictures is that I never thought about putting a drop cloth on the floor and since the paint/water mixture was so watery, it was splashing all over the floor as I was brushing it…lol… luckily I realized the mess I was making early enough and wiped it off easily before it got worse 🙂
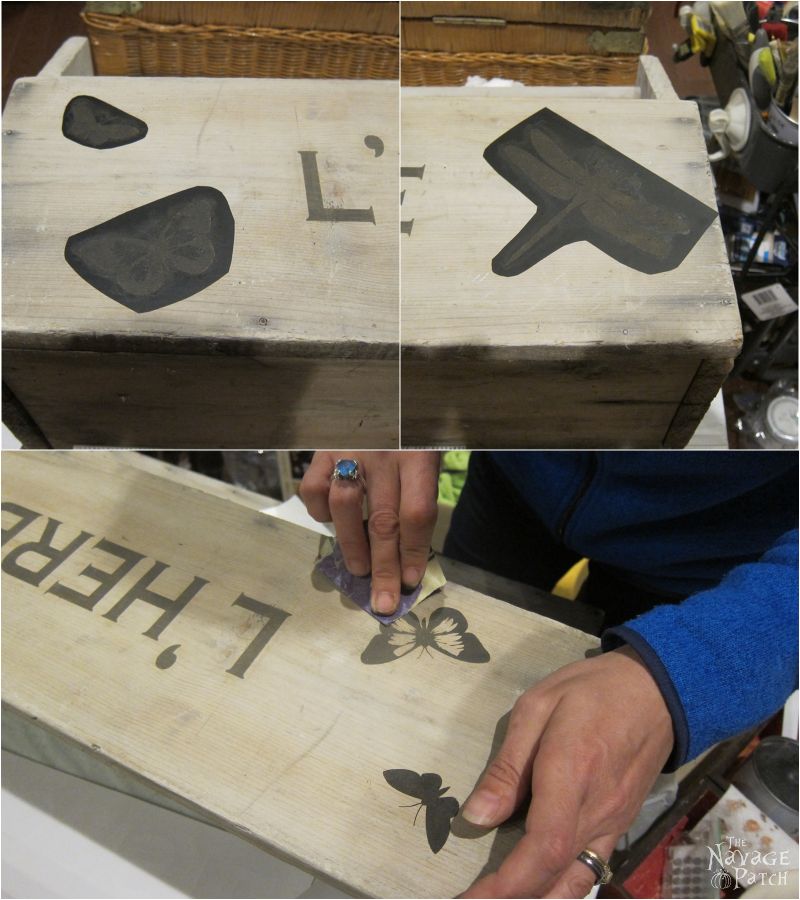
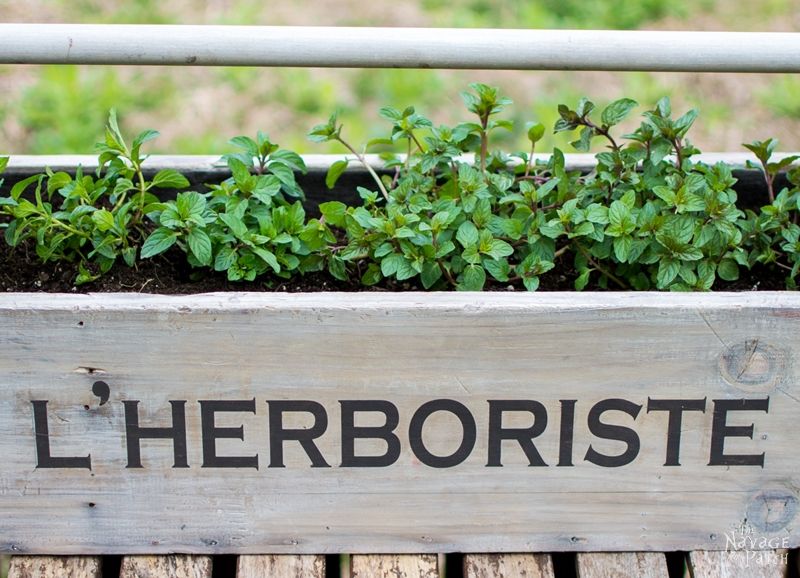
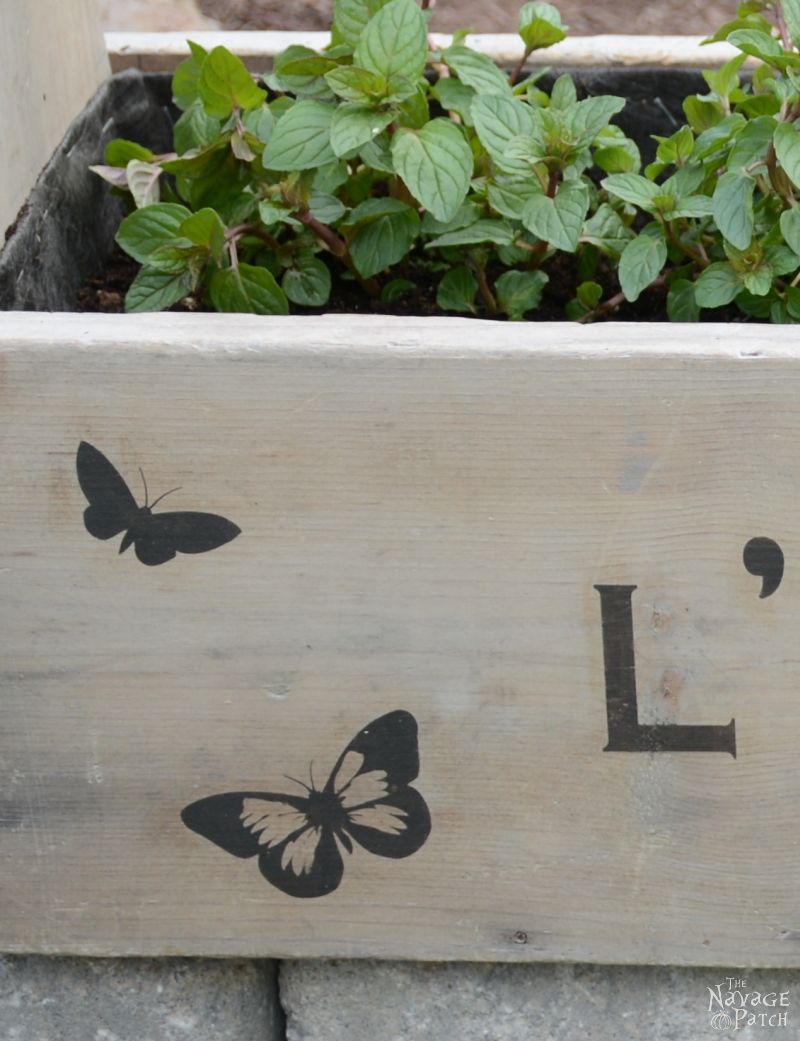
Once the toolbox had that gorgeous driftwood look, I started preparing my stencil designs. I cut the stencils on a re-positionable adhesive backed vinyl using my Cricut…
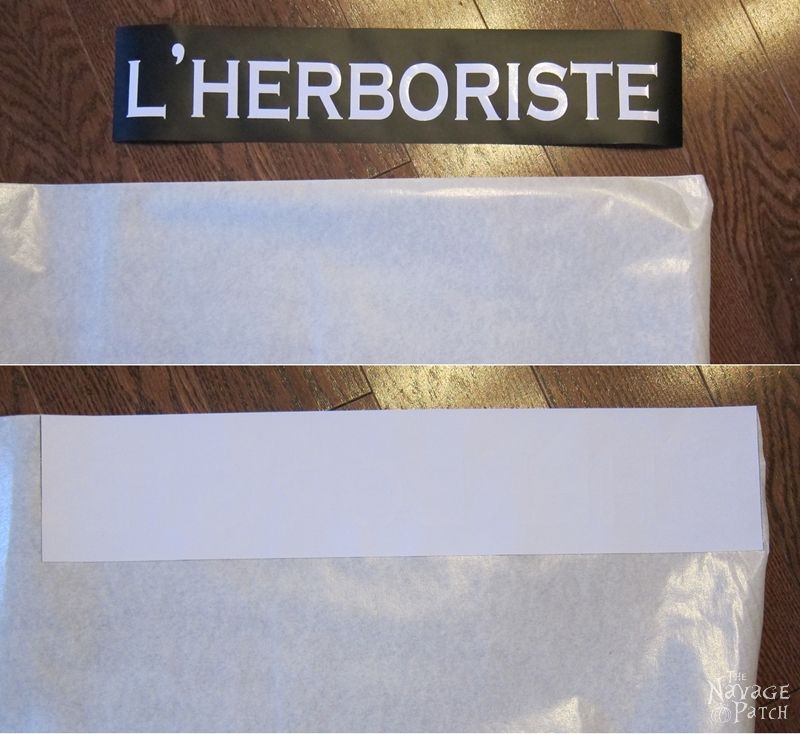
…and I placed the stencils on the toolbox with the help of transfer tape.

The area I was going to stencil was a small area, so I didn’t bother preparing homemade chalk paint. Instead I used the latex paint as-is. The color I chose for the stencil is Home Decorator’s Warm Onyx and below is Home Depot’s matching color code for it.
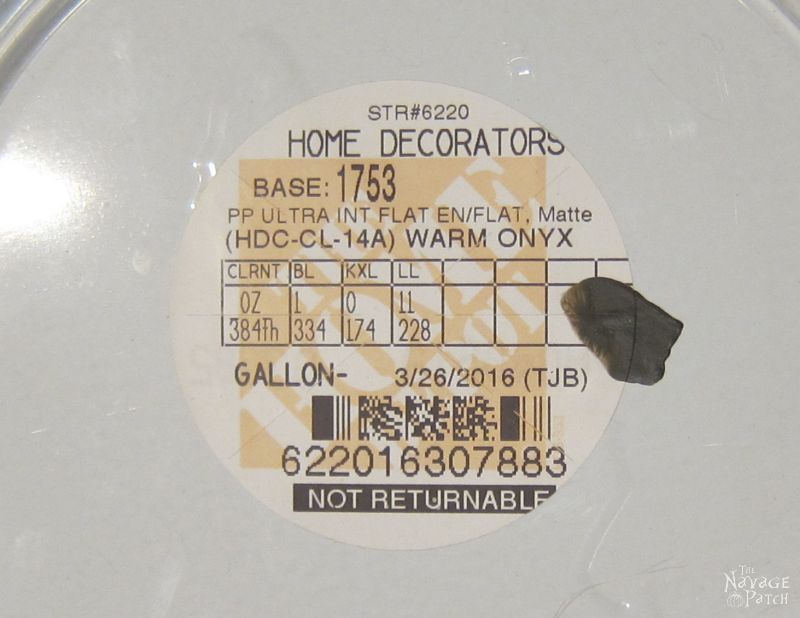
I stenciled the design with a foam brush. I dabbed only a single coat. Once the stenciled areas were dried, using 320 grit sandpaper, I distressed only the lettering and the other stenciled patterns. I did it nice and slow, so I wouldn’t rub off the whitewash of the wood. So far so good…
Next, it was time to protect the driftwood look and the stencils. Since I was going for the rustic look and needed my protective coat to be matte, I applied two coats of Modern Masters exterior dead flat varnish on all surfaces of the toolbox (in and out, including the handle).

This exterior protective coat is slightly pricier than other brands, but because it delivers what it promises, it is worth all those extra pennies I pay for it. It has a milky color when applied…

…but dries clear and dries incredibly matte. So matte, in fact, that I sometimes forget if I’ve put a protective coat on an item or not. Therefore, every time I am going for a rustic look or a matte look, or whenever I don’t want to take the chance of yellowing of white-painted items, this is my “go to” protective coat.
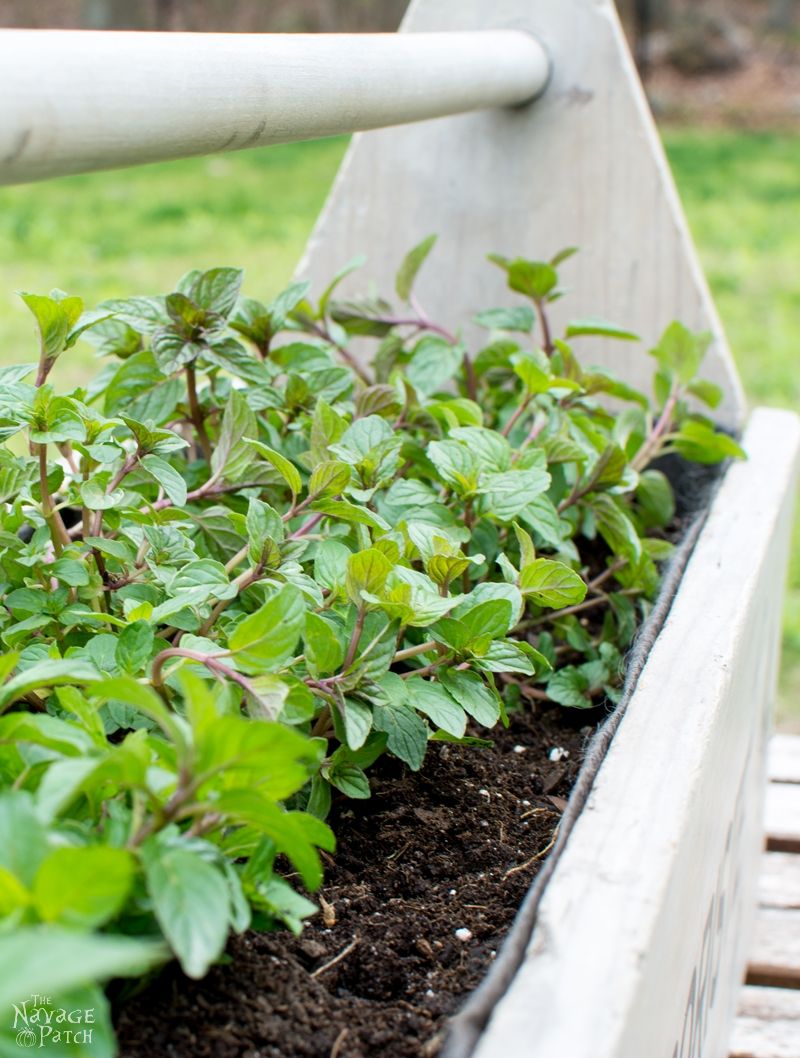
Since the wood was protected, now it was time to put the whole thing together and plant it. Once I nailed the second face in [*ahem* who nailed the second face in?? -ed.], I lined the inside with landscaping cloth.

The toolbox had small holes and gaps here and there, so having a liner like landscaping cloth stops the soil from draining together with the water from those holes and gaps.


After putting packing peanuts at the bottom of the planter, I planted some peppermint and chocolate mint, and the project finally was complete!
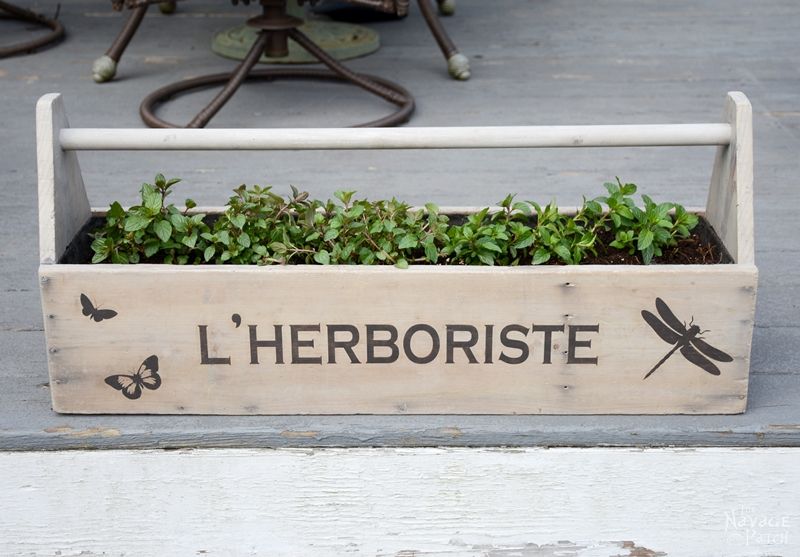
So how do you like him so far? I think now we can call him handsome 🙂
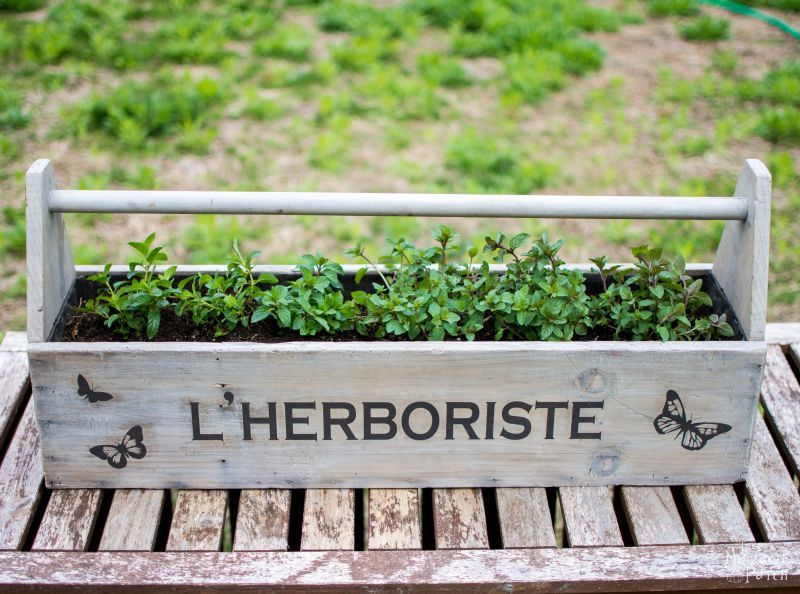


I love how that Modern Masters Dead Flat Varnish keeps everything in its original look.
It is as if I put no protective coat on this planter.


Greg is so happy with the finish as well! And even happier that he doesn’t have to make another toolbox now…lol
Before you leave, don’t forget to save this idea to Pinterest or share it on Facebook, so you can find it again later!
Handan, xo


Great Job! The white wash looks good and I think once you got the paint watered down enough any ratio might have worked as long as you wipe it off quickly. I am planning to do one of these and the tip on the landscaping cloth liner is fantastic as I would never have thought of that!
Thank you so much, Kat! As it was my first time I didn’t want to take the risk and made the mixture entirely like water. But it is great to know that wiping it quick does the trick 🙂
Where did you get that protective finish??? The matte one?
Hello Nancy,
I bought it from Amazon. The link is in the post with blue highlighted words, but here it is once again if you’d like to check it out: http://amzn.to/1T3dOSi
Handan, xo
LOVE your toolbox from the perfect whitewash to the stencils. I’m very intrigued by the MM Dead Flat Finsh and must try some soon. Pinning your planter to share ??
Thank you so much, Marie! Oh there is nothing like MM Dead Flat Varnish. Some reviewers were saying that it actually flattens (mattes) even an existing shiny finish, but I am yet to test that one with a shiny finished thing I have. But I can attest to its quality/durability as I tested that part in CT winters.
Thanks for pinning it 🙂 Have a great week!!
Thanks, I must have missed it in your directions. I just placed an order.
No problem, I am happy that I could help! Have a great week, Nancy 🙂
Very cute! I love the vintage feel you gave your new planter. I so wish I had a silhouette so that I could make the cute stencils! You should come link up at Welcome Home Wednesdays if you have a chance. Party opens 7a CST Wed. Hope to see you there.. http://www.suburbansimplicity.com
Thank you so much, Erin! I will definitely be there at your party!!
Very nice! I’m not crafty so I’m just going to take the toolbox my 7th grader made in wood shop this year, put some plants in, and set it on the deck. Voila! #happynowlinkup
Thank you so much, Katy! I wish my 7th grader was into wood working also. Regardless how much I keep my fingers crossed for him to pick some interest, he doesn’t seem to want to get his head up from his video games… So much that I am getting determined to figure out coding and make a wood working themed video game one day 😀
This is so adorable! I love everything you did with transfer paper. And that color looks so rustic and cute! I need to go hunting yardsales for some old toolboxes now. 🙂
Thank you so much, Gina! 🙂
I absolute adore this!! I’m so glad you posted your method of whitewashing, as I was planning on doing a similar finish on a current project but hadn’t found the right look. Your’s is perfect!!
Thank you so much for sharing this glorious project!!
I would be honored if you would share your posts to the Monday Mish Mash Link Party. http://countrymousecityspouse.com/monday-mish-mash-link-party-15/
*Hugs*
Thank you so much, Amy! and thanks for the invite! I would love to join your party 🙂 xx
Very cute idea. I would love to grow herbs in something like this.
Thank you so much, Charlene! 🙂
This is great. I did not know that you could water down chalk paint. I will be using this tip.
Thank you so much, Sherry! 🙂
This would look SO CUTE on my porch! Thanks for the great tutorial!
Thanks so much, Brittany! Have a great weekend 🙂
Great tutorial, love the project.
Thanks you so much, Carole! I am so glad you liked it 🙂
Great planter from a toolbox. Love the way you changed the look and added stencilled decoration. Thanks for the tip on a clear sealer. Pinning. Visiting from Chic on a Shoestring.
Joy
Thanks so much, Joy! 🙂
it looks fantastic indeed. We need to do more great DIY like this :). Love it..
Thanks so much, Indah Nuria! 🙂
Gorgeous! thanks so much for sharing on craft schooling Sunday!
Thank you so much, Sara! 🙂
From tool box to planter turned out excellently, bravo. Your white wash was great also. Think decorations you put on “him” are just right, not too little and not too much. Your plants look quite fetching in him. Good idea putting landscape cloth in box, will use that if you don’t mind me borrowing idea.
Have had my hubs make a few “tool boxes” in different styles, shapes, sizes that have been sitting around for while so can get busy giving them a quick sanding and painting. That’s if it ever stops raining here. We had 3 nice warm clear days last week after weeks and weeks of cold rainy, blah. Since we don’t have garage or basement have to wait til nice out to do painting, etc. I have nice work table on back deck.
You sure did inspire me, can hardly wait to get those toolboxes snazzied up for plants.
Happy Mother’s Day (if you’re a Mom)and rest of weekend
Thank you so much, Jane! Your weather sounds like our weather…all rain and no sun! Looks like more rain again today 🙁 I guess the landscaping will never get done this year, LOL! I am a mother, thank you! Happy Mother’s Day to you, too! 🙂
Great project! I love the graphic you used and how you watered down the paint to give it a white washed look.
Thanks so much, Paula!
I love this idea! It would be great if you shared it on the DIY linky!
http://www.pleasuresofthenw.com/diy-party-no-4/
Thank you so much, Helen! and thanks for the invite! I just shared it together with Greg’s post 🙂
Thanks for joining us!
What a clever idea! And the stenciling is a nice touch. Chalk paint is definitely a favourite of mine – loved the rustic finish you created with it. Thanks for the inspiration!
Thanks so much, Jelica! 🙂
Love this! And the name. Hope the plants enjoy their new home! Thanks for linking up with Funtastic Friday.
Thanks so much, Victoria! 🙂
Your tool box turned out AWESOME! The plants look wonderful in there new home!
Thank you so much, Sam! 🙂
It is lovely Handan. I can’t wait to finish my move to start working again on projects, and I found in the basement a crate that would look great as a planter. Thanks for the tip about the landscaping cloth, I would not have thought about it!
This post has been the most clicked this week at our Two Uses Tuesday party, so congratulations!!
Hugs,
That is awesome news! 🙂 Thanks so much, Pili!
Crates make great planters. I made some last year (again mostly for herbs) and they held up really good in outdoors conditions. I am sure you will love your crate planter! xx
Handan, this toolbox planter is amazing!! Love the white washed looks you gave it and the stencils you made look fantastic!! You did an awesome job on this! Thanks for sharing at Sweet Inspiration!
Thank you much, Keri! I thank you for hosting such a wonderful party!
Great job and what through tutorial love all the steps. I think I need an old toolbox too! Thanks for linking up to Merry Monday! Sharing on G+! Have a great week!
Kim
Thank you so much, Kim! You too have a wonderful week! 🙂
I just love how that turned out! I wish I would have seen it a week or two earlier so I could have had my husband make it for me for mother’s day. 😉 Now I’ll have to ask for it as a “just because” which will still be nice, but without a deadline! Thanks for sharing at Throwback Thursday!
LOL. I hear you Carlee! Hence my activity on Pinterest reaches its peak (also Greg’s “honey do list”) a week before my birthday and the Mother’s Day 😉
The toolbox turned planter looks fantastic Handan! Thanks so much for sharing it with our party last week! Take care, Tara
Thank you so much, Tara! 🙂
Wow, this is a stunning transformation. I love watching DIY projects unfold and your pictures are fantastic. I’d totally buy something like this and it’s so great you made it yourself! Thanks for sharing with Small Victories Sunday Linkup. Pinning to our linkup board and hope you found some great posts to visit this week!
Thank you so much, Tanya! I love your party!
I love this transformation! The white on that wood is perfection. I chose you as my feature at Dream. Create. Inspire. Link. and will be sharing on social media. 🙂
YAY! Thank you!! Have a wonderful week, Jenny! 🙂
Very cute! Calling food by a french name makes it seem so fancy, so I see the same concept, here! 🙂 Fun idea and Thanks for sharing with us on Throwback Thursday!
Mollie
Thanks so much, Mollie! LOL. I agree [name]! Greg keeps telling me I should stencil things in Turkish since French seems so common these days, but I still like it! 😉
I love that you upcycled something and gave it a new purpose!! I am featuring you tomorrow!! Thanks for sharing on My 2 Favorite things on Thursday!! Hope to see you again tomorrow!! Pinned!
Wow!! Thanks so much, Elaine!! I thank you for hosting such a great party! 🙂
I love, love, love this! Thanks for sharing at Vintage Charm. Hope to see you there again tomorrow morning! xoKathleen
Thank you so much, Kathleen! Your lovely comment means a lot to me 🙂
Handan, xo
EVERY time I see an old tool box, I know it can be reused for something pretty – you did a fabulous job with this DIY! I’ll be featuring it at this week’s Friday Favorites – swing by and say hello!
Oh WOW! Thank you so much, Dawn! I will definitely be there!!
Thank you for sharing this at The Really Crafty Link Party! You did a great job! Pinned!
Thank you very much, Teresa! 🙂
What a great idea for a planter…it’s so pretty! Thanks so much for sharing your project with us at Share The Wealth Sunday!
Thanks so much, Lisa!
What a great find! You did a fantastic job with the whitewash, too!
Thank you very much, Leslie!
Love the idea! Thank you? For the the “white wash” look- there is a paint brand Miss Lillian’s NO-Wax Chock Paint that makes all colors of Glazes and Stains along with Paint of course but my point is I have used the “White Wash Glaze” for that particular look!☺️ It’s so easy to brush on(a little or more for a heavier deeper color) and then wipe off with one maybe two strokes (less is more I did learn!!) The glaze over the paint is absolutely gorgeous!!! I believe there are 8-9 glazes colors?? Check out the website or FB site!!! I would be happy to help with questions if I can as well!
Happy painting all!!
Thanks so much for the great info, Tina! I will definitely check it out! As I love experimenting I am always on the look for new materials 🙂
It is a very good idea to plant the herbs in the tool box. Plus it will be handy for other vignettes around the house if you want to do something different with it..
Thank you so much, Debra! I agree…I am planning to use it also for Fall/Thanksgiving and Christmas decoration 🙂
Thanks for sharing at Peace, Love, Linkup! The next party kicks off tomorrow at 6! Hope to see you there : )
Thanks for stopping by Ashleigh! I will definitely be there 😉
Wow such a great little project! Thank you so much for sharing with us at the Homesteader Hop! I hope to see you again this week!
Thank you so much, Shane!
Oh my goodness, this is so cute! I’ve been looking for a cute way to display some herbs that we have on our back patio. This would be perfect. Thanks for sharing!
Thank you so much, Stefani! 🙂
Fabulous redo! I love the look and usage!
Thank you so much, Brianna!
OOOh! So happy you stuck with the whitewash, it looks great! Aged but not old fashioned, per se. I love the way the stencils pop on the finish too. I love the look of an old beat up tool box, and the flat finish varnish didn’t change that look at all. I’m going to have to look for this product, I really like the results!!!
Thank you so much, Nikki! Yes it was going to be a shame if I painted it. The wood already looked gorgeous, so just went for a little drift wood look.
That flat varnish is something I swear by. When I first ordered it from Amazon I was hoping all those good reviews were right, so I was kinda nervous spending slightly more than what I would normally do on a protective coat. But it has been two years now I am using it and it holds up to New England weather, never yellows or gives any shine to things you apply to. I just love that product!
Really cute planter! You guys have such good ideas. Thanks for sharing at the To Grandma’s House We Go Link Party.
Thank you so much, Stephanie! 🙂
FYI – featuring this tonight. Will share in Tailwind and FB too. Have a good one.
WOW!!! This is GREAT! I love finish! I have been looking for a finish that keeps every MATTE! It is so hard (at least for me personally, I am a little picky I will admit) to find a GOOD matte finish that doesn’t take away from the actual paint job!
I found you through recommendations from my Pinterest board and first read your Chalk Paint recipe and then found this post in the comments section there. You have a NEW SUBSCRIBER!! I absolutely love what I have read so far! Thank you, Thank you and THANK YOU!!!! I think you guys are the answer so some of those pesky things we as crafters and artists have trouble figuring out – Like making our chalk paint, or the PERFECT MATTE finish lol! Even how to white wash and get the drift wood look! I live near the Pacific Ocean, and I have some beautiful drift wood pieces, but I have not lived here all my life, and its only in the last 6 years that I really started enjoying life, you know “smelling the roses” and doing what I actually love doing. So My collection of drift wood is definitely not what many people who live here have, and I have seen other tutorials on getting that driftwood look but it involves A LOT OF bleach. And with my Chronic Illnesses Bleach is not really something I can stomach if I don’t have too. I would PERFER to not work with it. So this is WONDERFUL and in my humble opinion I like this much better.
I even have an idea for doing odd shaped pieces of wood, more like you would find on the beach. I realize painting those types of pieces would be harder, but if you made thin enough paint why couldn’t you dip it in and wipe it off? Yeah it would be extremely messy, but hey that is half the fun right? And some pieces would not be hard to paint at all. Anything to NOT have to use bleach! Anyways thanks you for this beautiful tutorial, and the tool box is GREAT as well! I have a few of those, my dad made me. LOVE THEM for all sorts of things!