
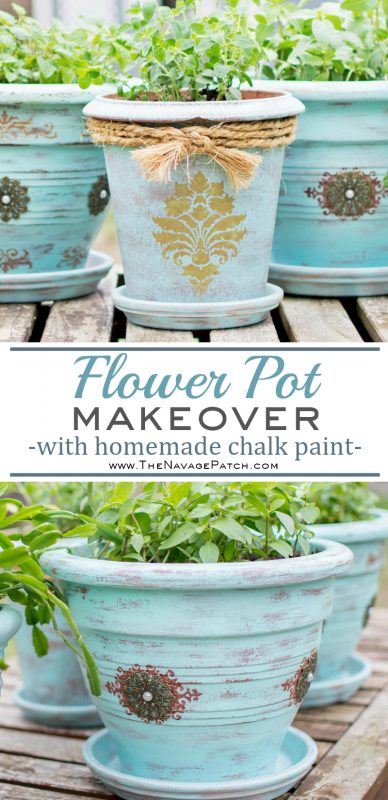
Refinishing Old Flower Pots
I may not have a green thumb when it comes to keeping houseplants and flowers, but like all Turks, I love growing herbs around the house. From spring through summer, we Turks fill our balconies, terraces and tables with mint and globe basil. In Western Turkey, along the Mediterranean and Aegean coasts, you will find potted herbs growing almost everywhere you look: houses, offices, restaurants and bars. Not only do they look and smell nice, but the globe basil especially keeps mosquitoes at bay.
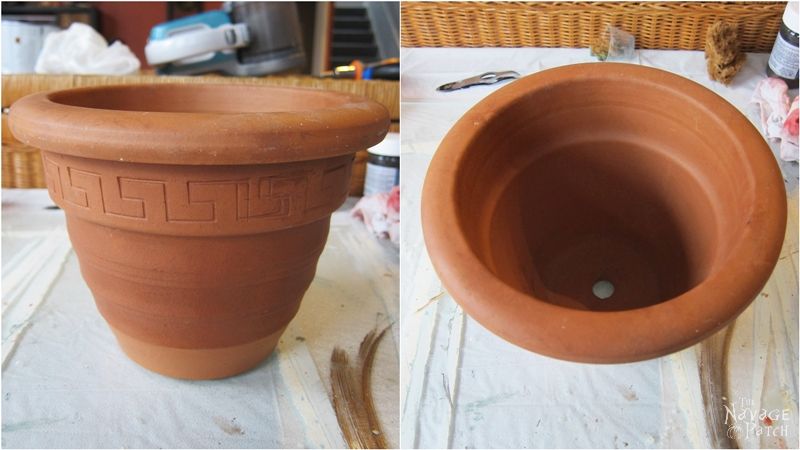
Each year around this time, I start filling our deck with potted herbs, so I can be reminded of my homeland. But this year the weather is a bit late to reach normal Spring temperatures, so I thought I could use my time prettying my plain-Jane flower pots. As I couldn’t wait to start my little project, I forgot to take before pictures of all. But thankfully I remembered to take the before picture of the small pot 🙂
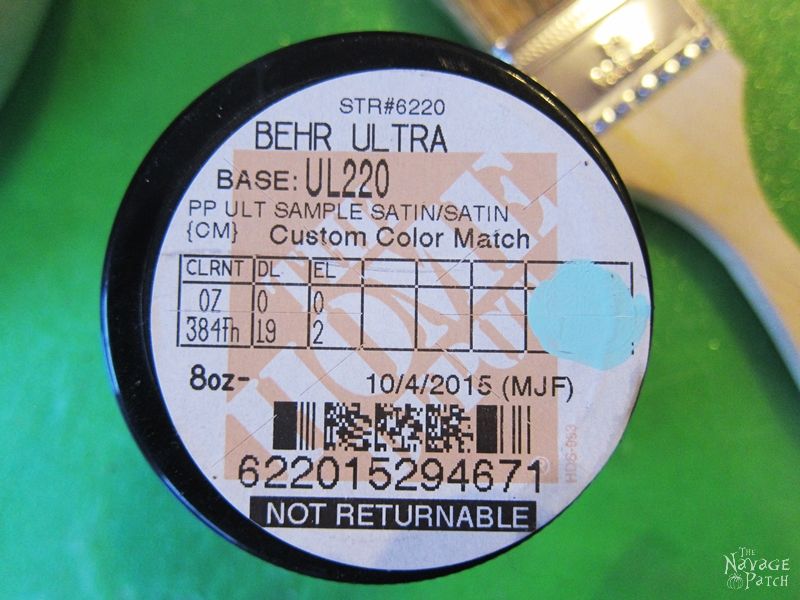
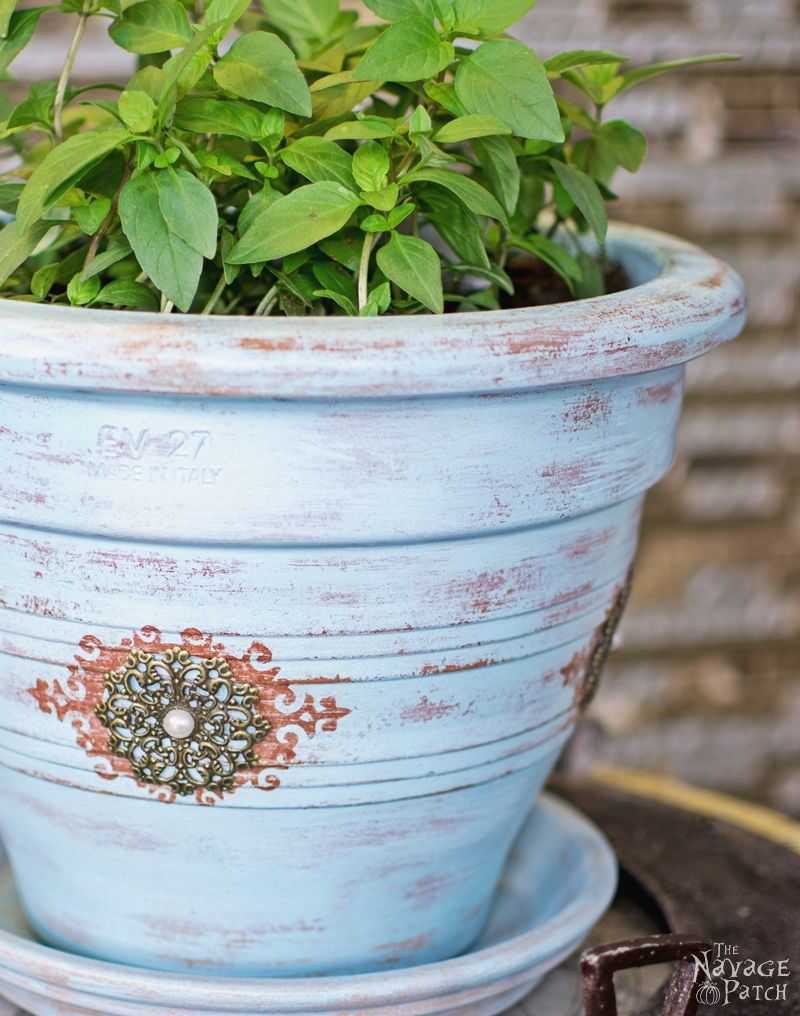
Last year I found one plastic and four terracotta pots at Put & Take. I refinished one of the terracotta pots and the plastic one last summer but didn’t have time to refinish the other three. As I wanted all the pots look like a set, I decided to go with the same aqua hue that I used last year. If you would like to use it in any of your projects, the color code is shown below. Oh, before I forget, this is my own custom color mixture, but I haven’t yet named it, so I am open to any suggestions! 🙂
After preparing my homemade chalk paint in this aqua hue, I washed the pots of dirt and debris and let them dry. Once they were dry and ready for painting, I started brush painting with a half loaded chip brush. While I didn’t cover all the surface with paint, I also didn’t choose dry-brushing because I wanted some areas to get covered almost solidly to achieve that random distressed look I was going for.
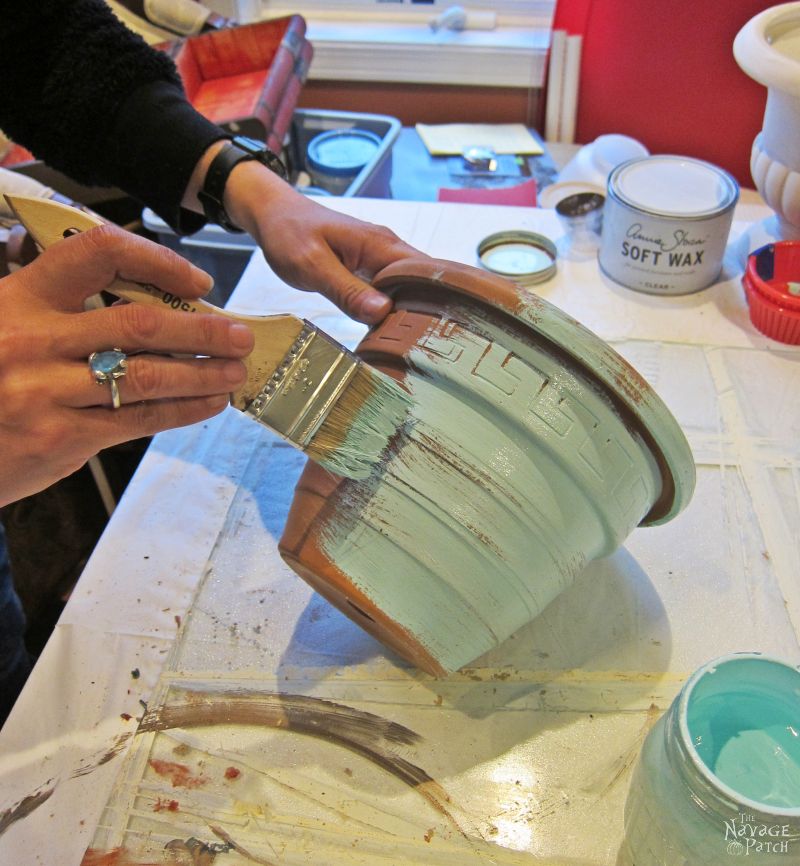
With this last pot, I happened to brush it more than I should, so it ended up looking almost fully painted. As I was going for a distressed look, I had to remove the excess paint with what I call “rubbing” technique. It is basically rubbing the chalk paint off the surface with a damp cloth. When distressing like this, I prefer using either a medium to heavy duty scouring pad, or an old towel, or cheesecloth, depending on how thick the entire painted layer is.
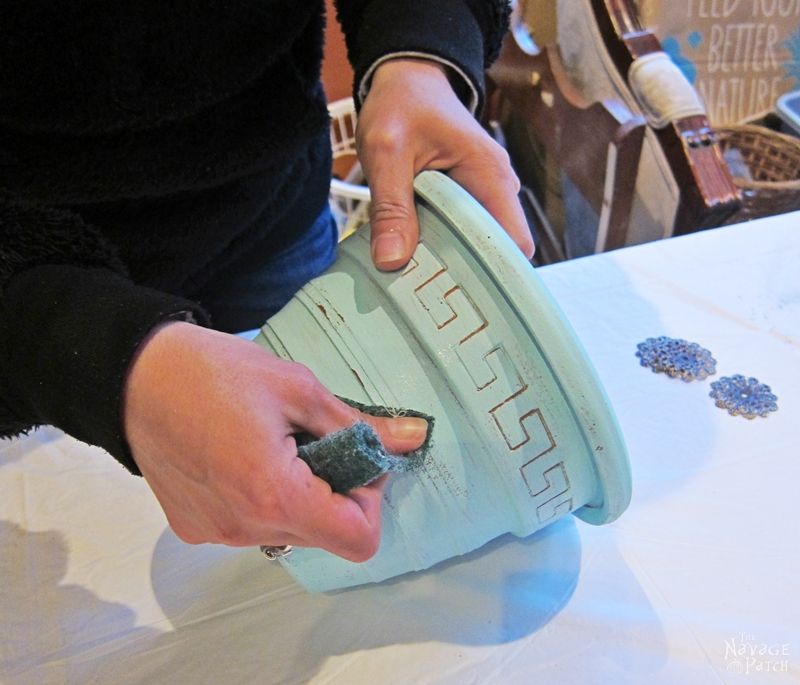
Another note on the rubbing technique: while I distress normal wooden furniture with 320 grit sand paper, I usually prefer the rubbing method when I am working on ornate frames or ornate furniture. I find this method easier than sanding when it comes to those intricate ornate parts. I also use the rubbing method when I paint plastic or resin, because sandpaper can easily eat through the paint (including the original paint on your item) and before you know it, you end up with the ugly plastic or raw resin showing through.
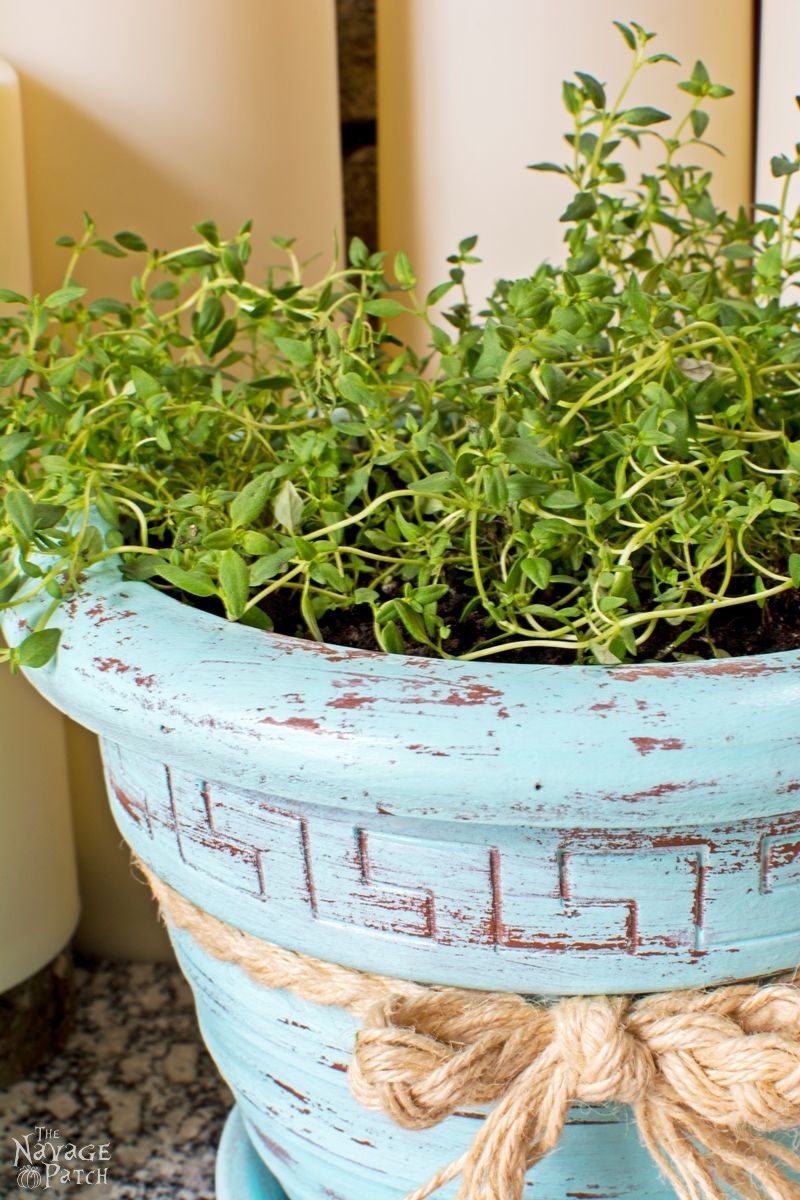
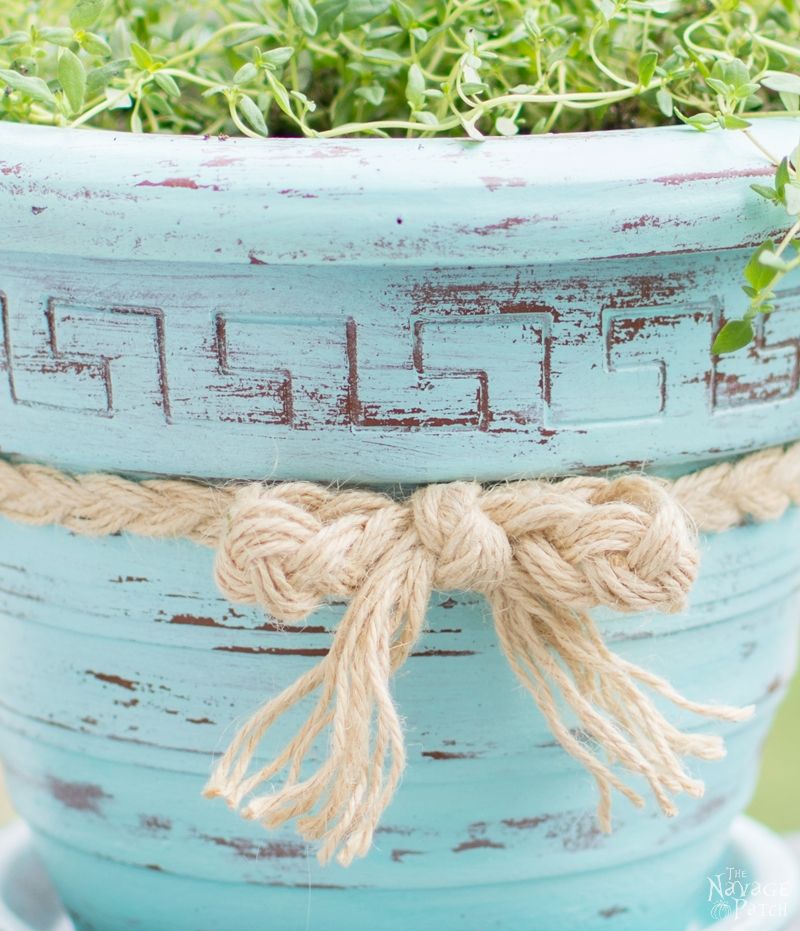
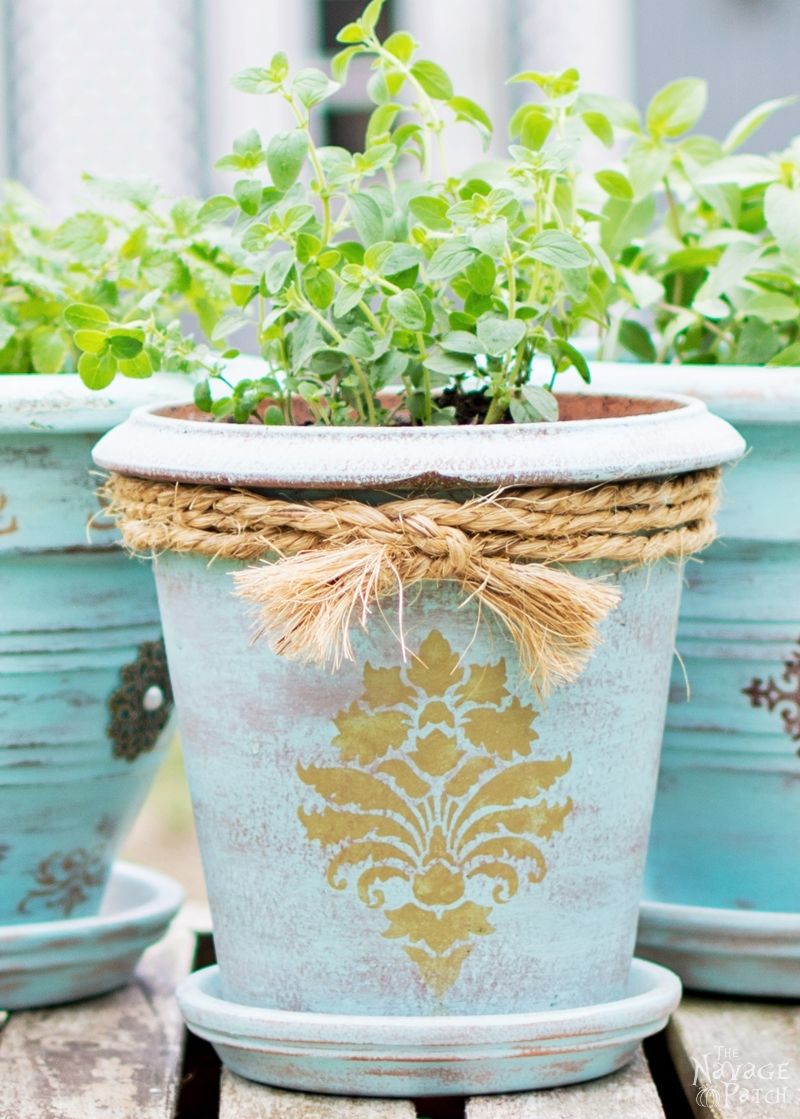
As the painting and distressing was completed, it was time to pretty up the pots with different embellishments. For the small one I chose a braided rope ribbon that I bought at Hobby Lobby. If you don’t have a Hobby Lobby close by you can use this similar one on Amazon.
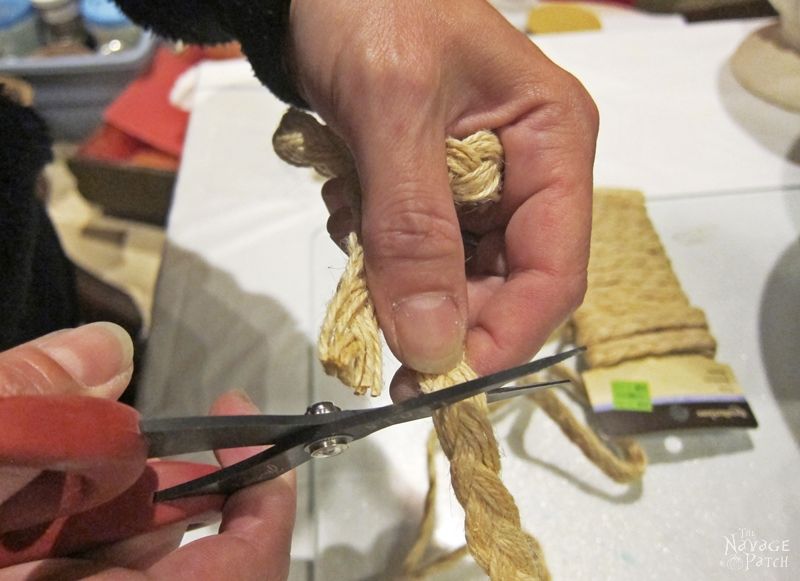
I prepared two little bows with this ribbon.
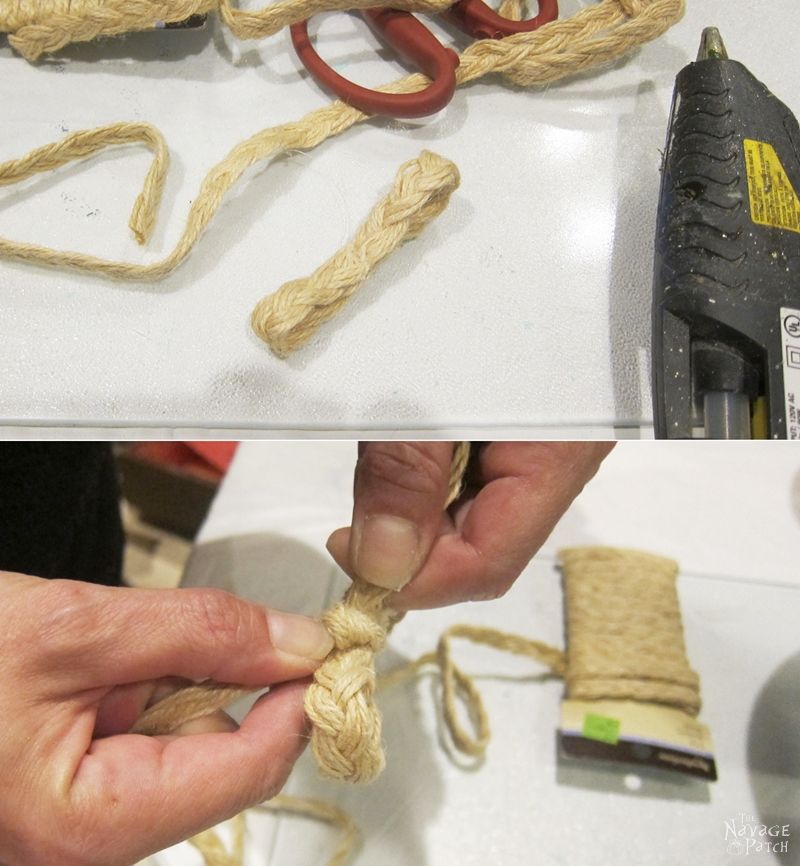
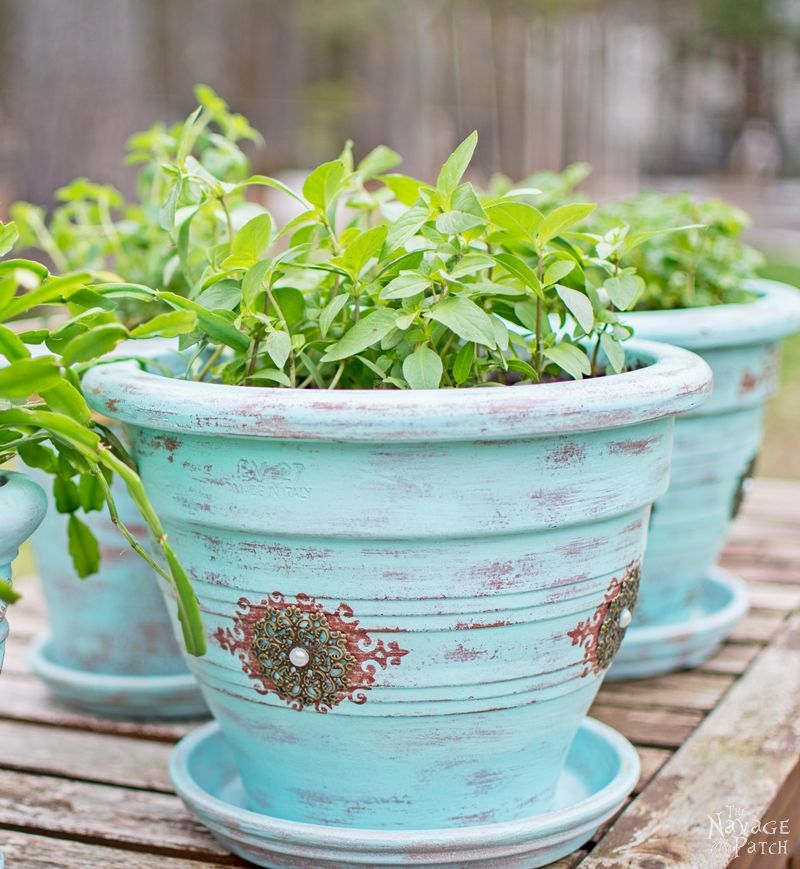
Next, I cut another piece long enough to cover the circumference of the pot and hot glued it on. Then I hot glued the bows on the surrounding ribbon in a way to have them sit opposite each other. With the braided ribbon, the small flower pot had a slight cozy coastal feel to it which I like and find really cute. But with other ones, I wanted to achieve a bit more feminine and elegant appearance, so I decided to stencil them and add some metal filigrees.
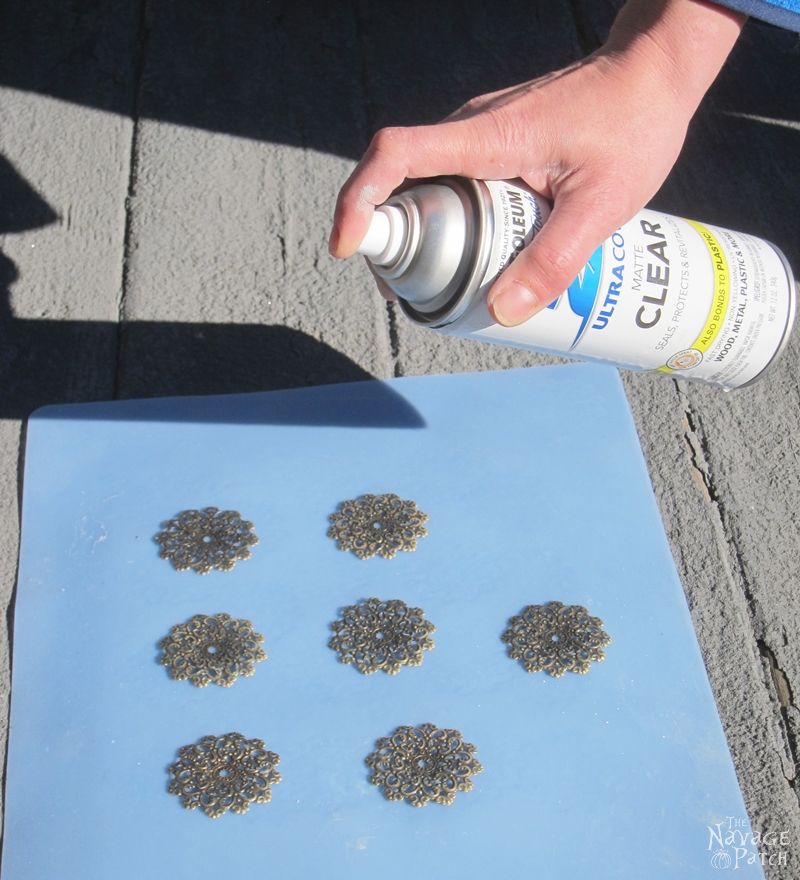
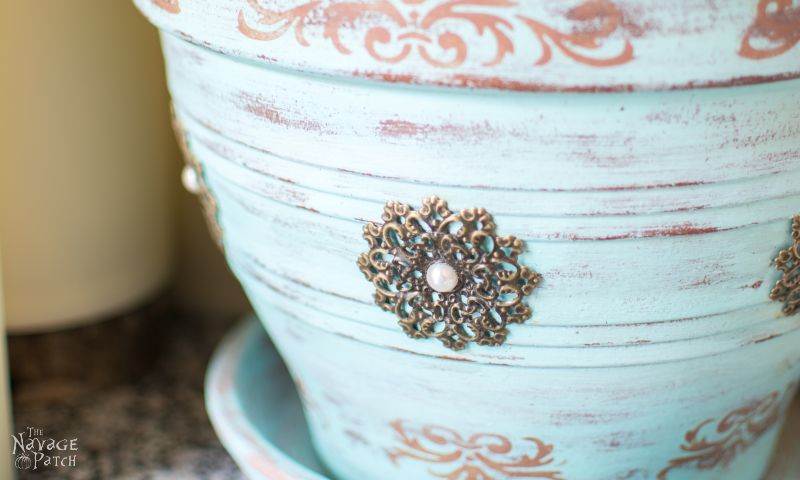
Using metal with flower pots may not seem to be the perfect idea since metal can rust, but coating the metal with exterior-type or oil-based clear coating will solve that problem. To prevent the metal filigrees from rusting, I sprayed them with two coats of clear protective coat.
Once the clear coat was dry, using E6000, I glued half pearls in the center of the metal filigrees and put them aside for the glue to dry.

Meanwhile, I started on the stenciling process. I prepared my stencil designs and cut the stencils on a re-positionable adhesive backed vinyl using my Cricut, and I placed the stencils on the pots with the help of transfer tape.
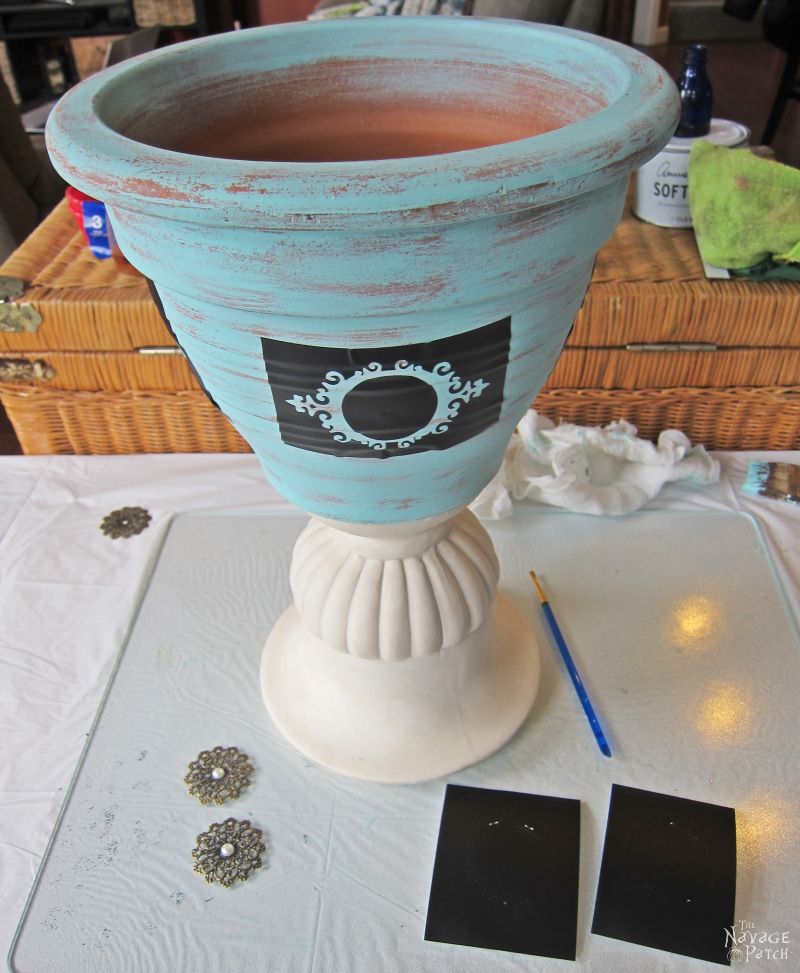
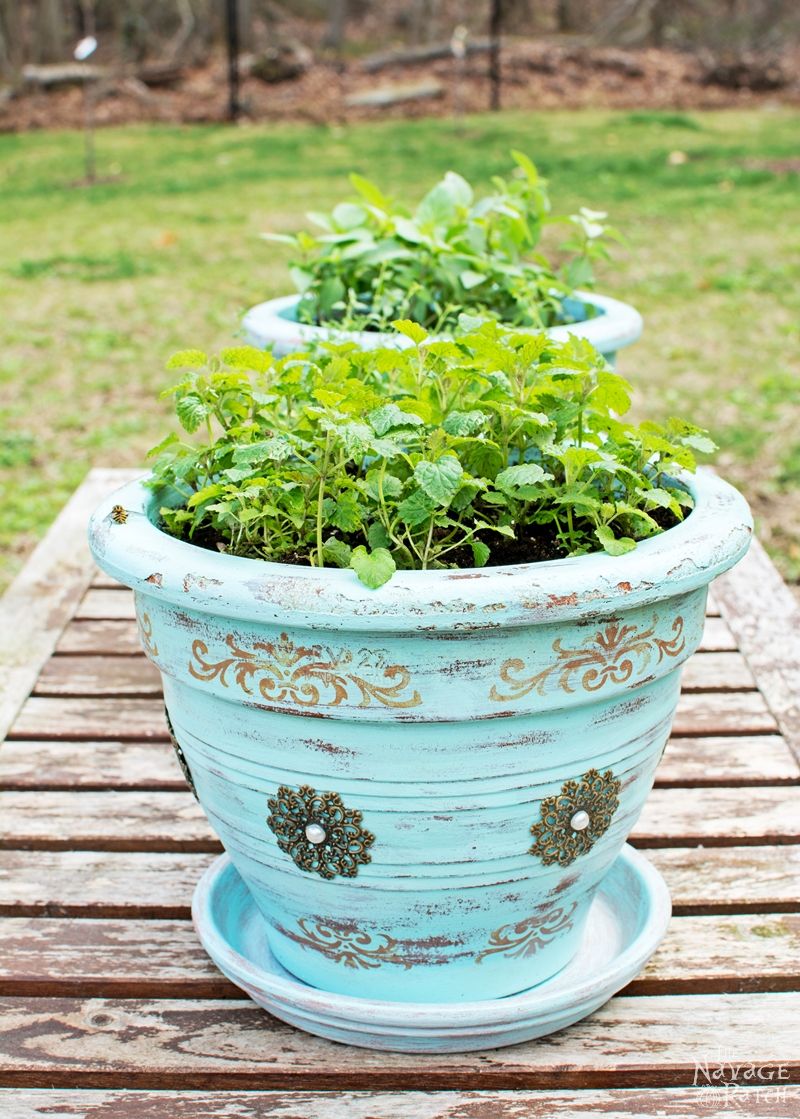
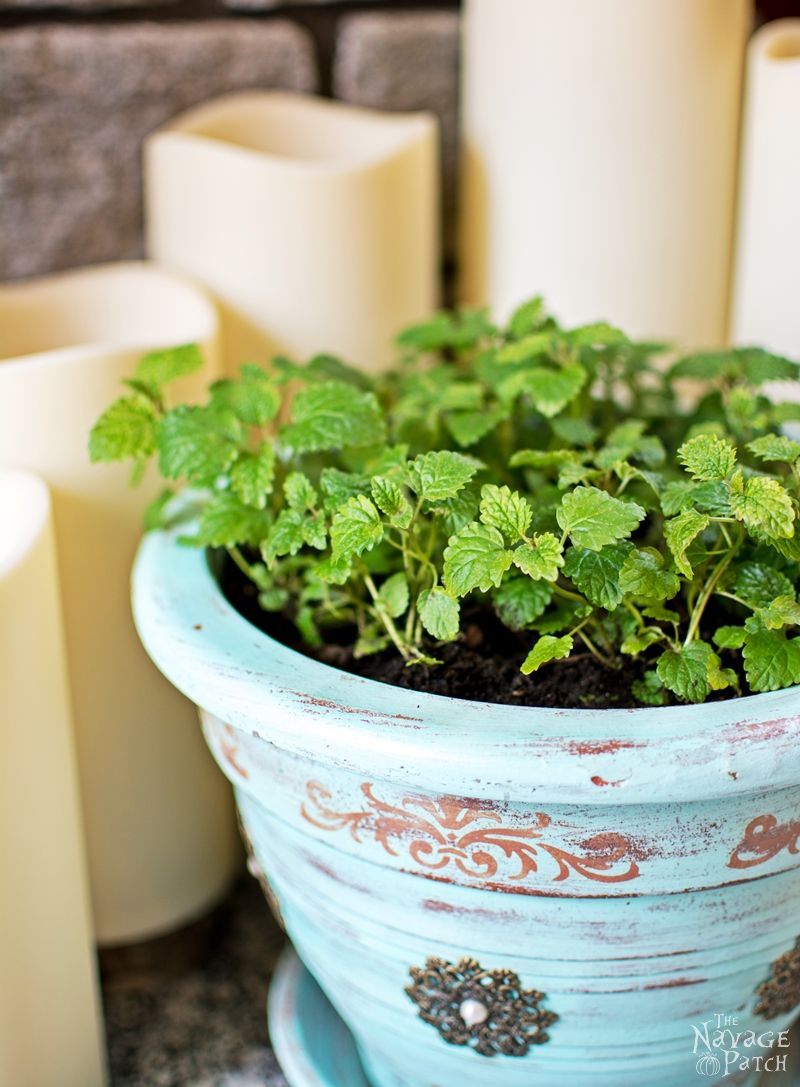
Next I mixed some red, orange, light brown and dark brown acrylic paints to achieve the terracotta color of my pots, and I stenciled the patterns on the pots.
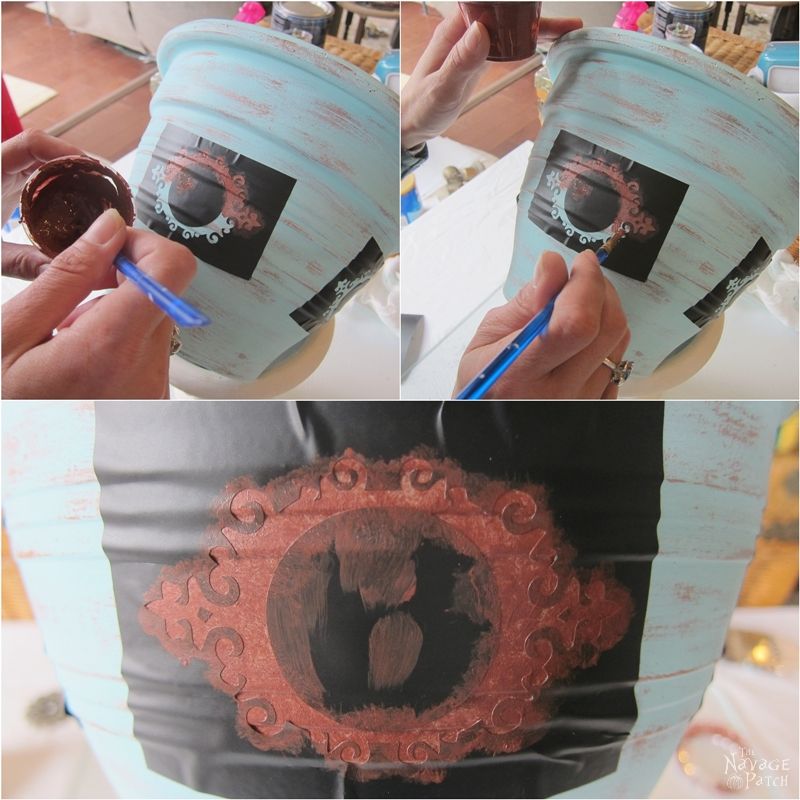
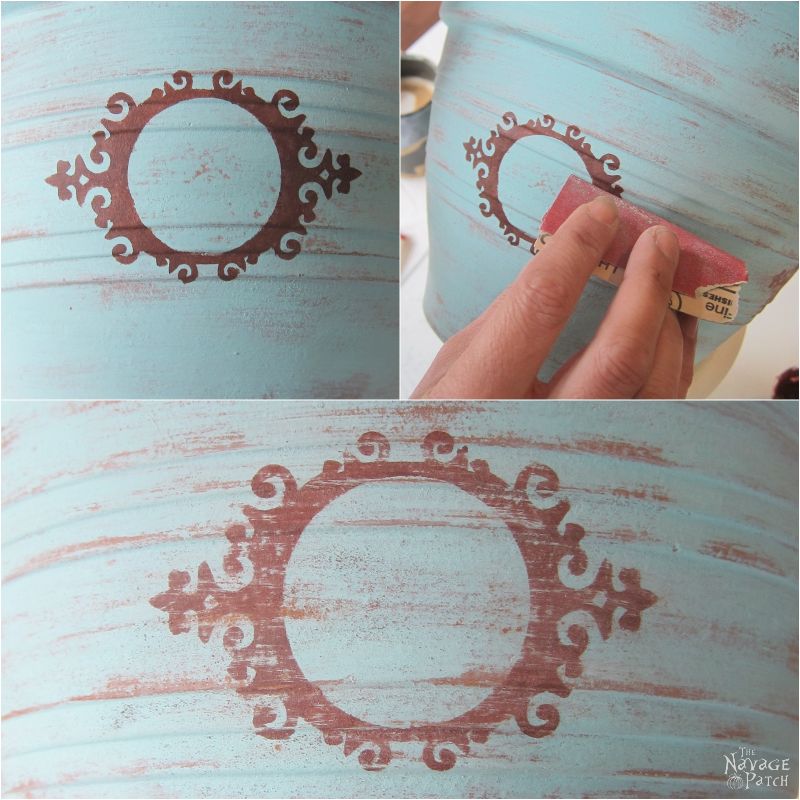
As I wanted to achieve a distressed look, I didn’t fill in the stencil with paint entirely, but instead I stenciled by dabbing the brush so the pattern would look painted uniformly. Where the paint on the pattern looked uniform, I slightly distressed it with 320 grit sandpaper.
Before gluing the metal embellishments, I applied two layers of this protective coat on the painted and stenciled pots. Once the protective coat dried, I used E6000 to glue the metal embellishments.

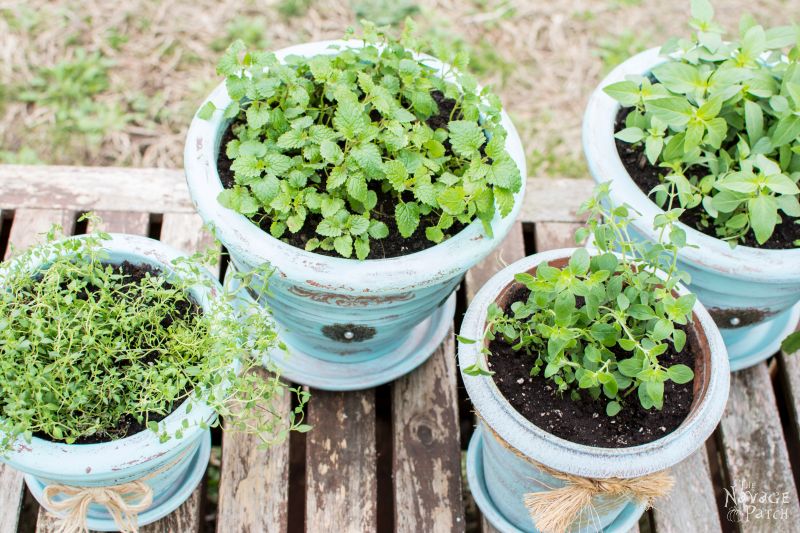
As my pots were finished, it was time to plant some herbs. Unfortunately I couldn’t find any globe basil or mint in Home Depot or in our local nursery. I think the weather is not yet warm enough to have a good selection of potted herbs. But I was lucky enough to find some thyme, Thai basil and lemon balm, so I planted those in my refinished pots for now.
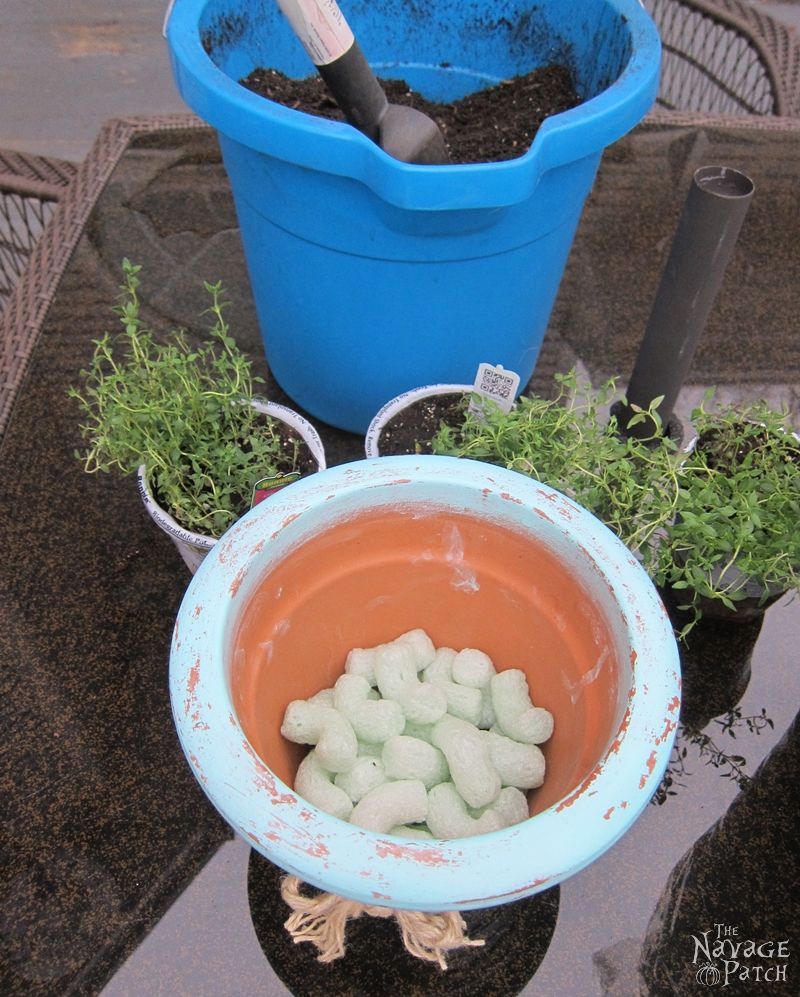
To improve drainage, I use packing peanuts to fill the bottom of the pot. Some use rocks but as packing peanuts have no weight, it eases my life when carrying the pots from here to there. Of course with these small pots, it doesn’t really matter what you use, but when planting big urns, it might be a good hint to keep in mind 😉
Here are my jewels!..

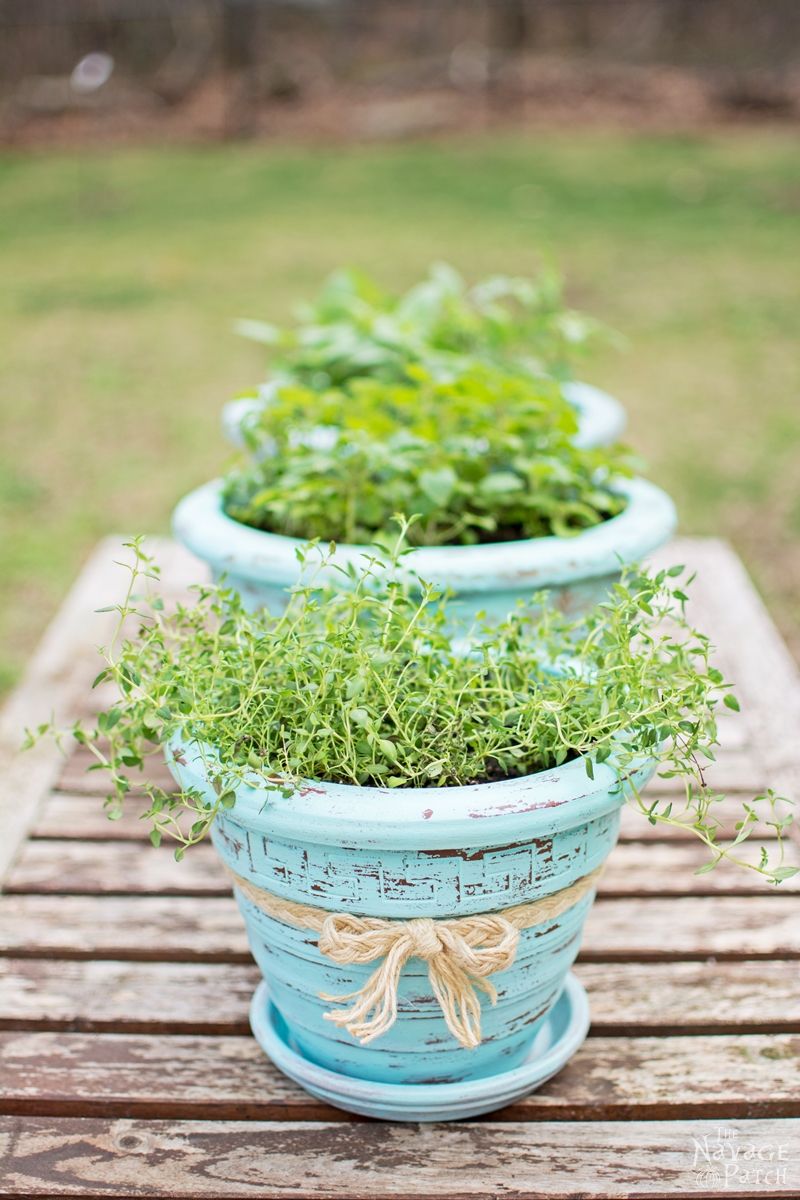
…and my pots are not bad either!

As usual some close-up pictures, so you can see the details better.
I can’t wait to show our deck to you in the summer: I line up these beauties next to each other at the corner of our deck, and in the evening breeze it feels like heaven with all that beautiful scent in the air.
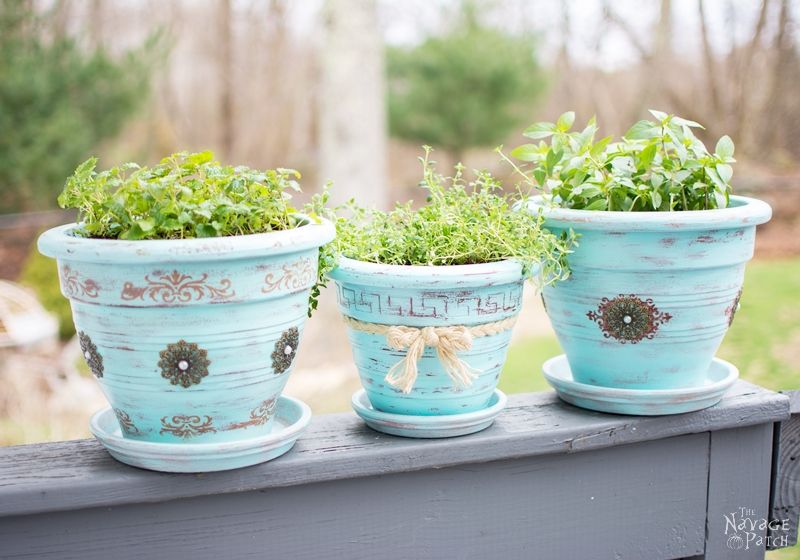
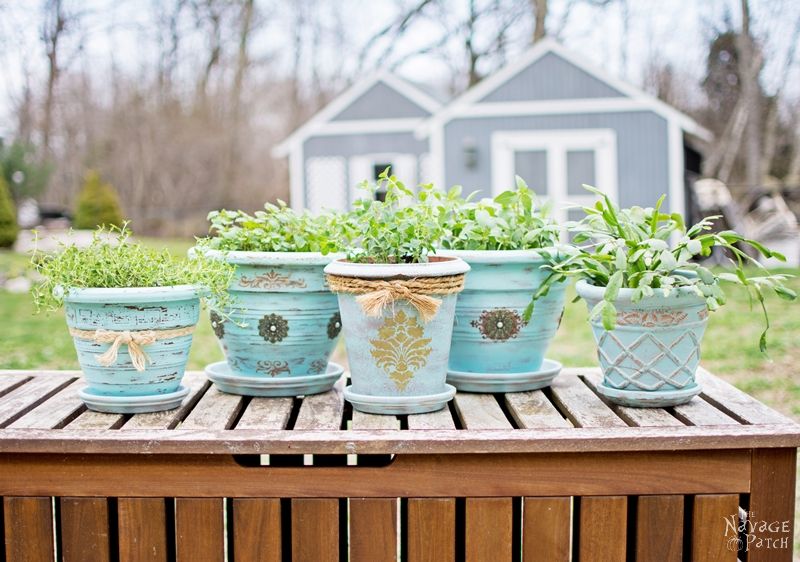
And here they are, all together, including the ones I did last year. Having them all the same color helps displaying them as a set, but the different finishing details breaks the monotony.

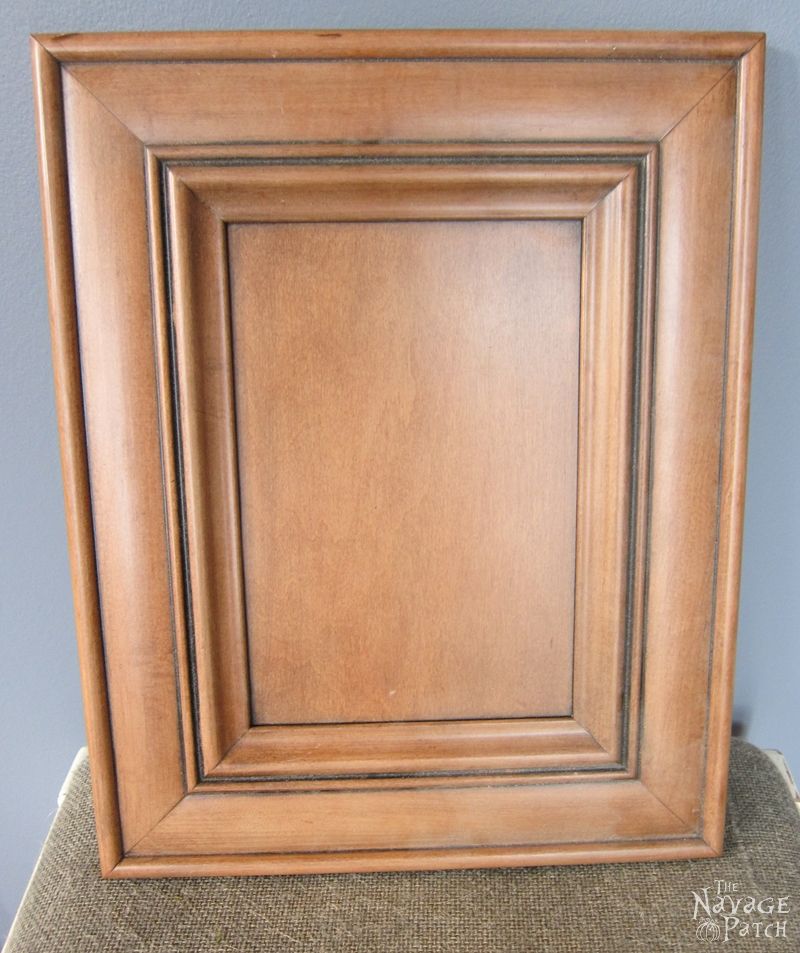
I hope you liked my jewels and their new pots. Since the topic is on jewels you may want to see what I did with this cabinet door sample.
Handan, xo
We love it when you share our posts on Facebook and Pinterest!


Beautiful job! Thank you for the tip about rubbing!
Thank you so much, Christina! =)
wow handan, i am old and i wish you could paint me up and make me look as good as the pots love them xx
lol! Thank you so much, Chris! I am so glad you liked them!! xx
So pretty! I can’t wait to see the door!
Thank you so much, Giselle! =)
Your flower pots are lovely. Love the color and the jewels.
Bev
Thank you so much, Beverly! Oh my precious jewels… I love them tremendously 🙂
These look so pretty! Love them! 🙂
Thank you so much, Sam! I am so glad you liked them =)
Hi, Handan!! I stop by from #homemade and handcrafter to tell you I fell in love with your flower pots!! I love all of them, all the details and the color! Simply beautiful!
I would like to invite you to share with us at our new Sweet Inspiration Party so others can be inspired. It is live every Friday at 3pm UTC.
Hugs,
Pili
Hello Pili! Thank you so much for visiting and that is fantastic news. I will definitely join your Sweet Inspiration Party too!!
Believe it or not, just this week I learned how to join Link Up parties… Though I had to go through quite a bit of trial and errors, I finally understood that it wasn’t rocket science, but I wish someone made a tutorial about Link Up Parties…hahaha… Now next step is how to show the buttons of the ones I join =)
Have a great day! xx
I can understand you, it happened the same to me when I started blogging last year. I hope this tutorial from my friend Keri helps: http://repurposingjunkie.com/2016/04/15/how-to-link-back-to-link-parties/
Love to see your flower pots in the party 🙂
Thanks for linking up!
The post you referred was extremely helpful! Really, thank you so very much for that Pili!!.. and I also loved the emoticons she had under her posts. What a brilliant idea for the shy ones like me. It takes the pressure off thinking how to comment without making spelling mistakes and misusing the words. lol. Now I have to find how to do that on our blog as it would be helpful for our foreign readers 😉
Thank you so much once again and have a great week! x
Very nice! Love the extra details!
Thank you so much, Jenna! =)
Beautiful job Handan, you would never know that some of them are plastic. Each one is like a jewel!
Oh thank you so much, Mary! Your kind words made my day!!
I love these! Thanks so much for linking them up with Talk of the Town. Pinning!!
Thank you so much, Betsy!! =)
Oh how I need this!! I love this!! I just bought some cheap flower pots and this would be perfect to beautify them! Would love to see you at my craft party which is new Thursdays at 7pm EST. Have a great rest of the week!
Thank you so much for visiting us, Denise! I just discovered how to join the link parties. I was telling Greg the other day that there are no tutorials on how to join the link parties and I wish some one did such a tutorial lol. I would love to join your craft party 🙂
You too have great week!
Yay! Domenica and I are thrilled to have you!! I picked your post as my favorite and will feature it tonight at 7pm. Please stop by to see it and link up your new posts!
Oh this is awesome! Thank you so much, Denise!!
I’m late to your painted pots party! Let me say, your finished products are lovely. Your use of stencils and embellishments are clever…such fun finishing touches. I have embraced your suggestions and plan to utilize your technique. I’m ready to tackle the ugliest fiberglass pots ever. They were deeply discounted over the winter at a local big box store, we knew painting them would be a spring project. I’m wondering if you did anything as a final step to help protect the pots against the effects of weathering
and simply being outside? Inquiring minds and all…thank you for your beautiful project.
Hi Deb, thank you so much! Yes, we sealed those posts with polyurethane after painting and stenciling. Good luck with yours!
Visiting again from the Craft Frenzy Party – can you tell I’m drawn to your work! LOVE what you did with these terracotta pots – so pretty. I love your creativity and style – your newest follower! Pinning these also to share ☺
Thank you so much for visiting, Marie!
Same feelings here 🙂 I love all your work and keep pinning from your blog with my little notes to myself: “Her styling is so good, study it!” “Oh I love this, should make one for our yard!” “how organized her crafts room, love love LOVE!” 😀
These are beautiful! Great job!….Christine
Thank you so much, Christine! I am so glad you liked them 🙂
love love love this collections! such a pretty color, I”m a turquoise nut—in any hue it comes in. my favorite pot is the one with the Greek key etching.
Thank you very much, Audra! Yes that one is so cute and I love Greek motives. That is why I didn’t want to over do it and just used simple ribbon around it. =)
Handan, I love, love these flower pots!! The color is perfect, maybe that’s what you should call it “perfection” 🙂 All the details that you put into making these pots beautiful is awesome!! I can’t wait to see what you do with the cabinet door! Thanks for linking up at Sweet Inspiration!!
Thank you so much for your kind words Keri and also thank you for hosting this great party! You are the first to come with a color name suggestion and I think I will cal it “perfection”!! =)
Love these. They came out great! I just wanted to let you that you’re my pick for this week’s featured post. You can view it this Tuesday. Thanks for participating with Wonderful Wednesday Linky Party. Hope to see you again, this week.
Sarah-Ann @ Living Intentionally Simple
Thank you so much, Sarah-Ann! Oh I am so humbled I don’t know what to say! I will definitely visit on Tuesday and surely I will become a regular on Wonderful Wednesday Link Party =)
I love your flower pots and will surely use your creativity to inspire me. You mentioned in the Hometalk comments about the sealer you used before but the Amazon link did not work for me. Do you mind telling me the name of the sealer you have used in the past with great success? Thanks so much for sharing your talent!
Hello Marjie,
Thank you so much for your kind words. The sealer I used last year was this:
http://amzn.to/1NglvIy
Please keep in mind Modern Masters is a little bit more expensive than other exterior sealers. But the finish is great. It is flat (in fact dead flat) therefore looks fantastic with chalk paint and the protection is top notch. Although 2 coats is more than enough I like my pots having that extra protection so I apply it as 3 coats, and I use it even for the interior projects as it gives additional protection for interior pieces.
I hope this info will help =)
Have a great weekend!
Really lovely! I guess growing herbs is something common to many of the Meditteranean countries, as my husband’s Moroccan family also grows herbs but generally concentrates on those that smell great and can be used in tea such as mint, lemon verbena, and another one whose name I’ve forgotten. Thanks so much for sharing on craft schooling Sunday, great to meet you and hope you’ll continue to join the party!
Oh yes definitely! Mediterranean people love using fresh herbs in their teas, salads, and meals. In the hot but slightly breezy summer nights having that divine scent in the air is priceless =)
Thank you so much for stopping by and thank you for hosting such a great party!! I am planing to become a regular =)
Love it! You did a beutiful job on the pots..and I love that even though they the same color..you made them each unique! Thank you for sharing your projects with us at Friday Favorites!! Hugs- Christine at Must Love Home
Thank you so much for your encouraging comment, Christine! I am so humbled reading all these beautiful words from inspiring bloggers 🙂
Also thank you so much for hosting such a great party. I will definitely become a regular! xx
What a fantastic idea. I will have to do this soon. You should link up with us at Family Joy Blog Link Up party this week. Check it out http://thinking-outside-the-pot.com/?p=2407
Thank you so much for visiting and the invite!! I just linked up to your party 😉 Have a great day, Charlene!
Hi Handan, Great job on all the pots! Love the colors and the stenciled designs! Thanks for sharing – I have several pots I need to beautify! Blessings, Janet
Thanks so much, Janet! and thank you for visiting us 🙂
Have a great week! x
The perfect time of year for this project! I’d love it if you shared this on the brand new DIY party!
http://www.pleasuresofthenw.com/diy-party-1/
Thanks so much, Helen! Sure I will! Thanks for the invite =)
Thanks for joining us!
I absolutely love the color you had mixed up for these, and the embellishments are like the icing on the cake! The different accessories really make them all special as well. Thanks for sharing at Vintage Charm!
xo Kathleen Charm Bracelet Diva {At Home}
Thank you so much, Kathleen! xx
Your color mixture is awesome. All of your pots turned out beautiful. It shows that you took your time and did a great job. I wish we had a Put and Take spot! How cool is that!! Thanks for sharing at Merry Monday. Pinning and sharing on my G+ today.
Thank you so much for your lovely and encouraging comment, Shirley! x
Those are beautiful! I’d like to buy them all please. 😉 Just kidding. Well, not really, but I live in a small apartment and don’t have anywhere to put them.
The Starving Inspired
Thank you so much, Iris! =)
So gorgeous! I’m inspired to tackle some of my own pots that are sitting in a pile in the garage. Thanks for sharing over at the Tips & Tricks Link Party!
Thanks so much, Natalie! =)
Beautiful! I’m a newbie gardener (I don’t know if I can even say that!), but I’m definitely going to try this out on a mini pot and see how it turns out. If it does maybe I’ll give the big pots a go! Pinning, stumbling and tweeting this. Happy Tuesday!
Thank you so much, Lindsey! xx
I love this idea, and love the color you used!
If you have time, I would love for you to come and share this post over at the Really Crafty link party that is live right now! http://keepingitrreal.blogspot.com.es/2016/04/welcome-to-really-crafty-link-party-15.html).
Thank you so much for visiting us, Teresa! I would love to join your party =)
Thank you for linking up! Pinned!
Thank you so much!! and thanks for inviting me 🙂
Hi, just a quick note to let you know that I’ve featured this post today on The Really Crafty Link Party Features. Come and grab an “I was featured” button and browse around for the other features here: http://keepingitrreal.blogspot.com.es/2016/04/the-really-crafty-link-party-15.html. Congratulations!
Love the color, love the look, love the small details. WOW!! Beautiful <3
Thank you so much for your lovely words, Leslie! =)
Absolutely love the transformation, so gorgeous! Thank you for sharing with #OMHGWW, so happy to have you as my feature this week! Pop by to see your post featured .. http://fromevijawithlove.com/2016/04/19/sewing-box-makeover-wonderful-wednesday-link-party-3-april/
Oh that is great news! Thank you so very much, Evija =)
What a great way to brighten up a boring flower pot! I love the color you chose.
Thank you!!
What a great little project!! I have many pots that could use a makeover!! I’m glad you joined the party…love your ideas! Thanks for sharing on My 2 favorite Things on Thursday!! Hope to see you again tomorrow!! Pinned!
Thank you very much for your encouraging words, Elaine!
Thank for you for an awesome tutorial and for linking up this week at the Happiness is Homemade Linky Party. Your post will be featured on this coming Sunday’s post. Thank you and have a great week!
YAY!! That is great news, Nicole! Thank you so much stopping by and hosting such a great party =)
Love-love-love these fabulous blue pots! They would look awesome on my newly made over front porch!
Thanks so much for sharing your creativity at the The DIY Collective this week! Hope to see you again tomorrow morning. The party begins at 6:00am EST.
Thank you so much, Ashley! I will definitely hop over and visit you to get some ideas for our front porch 😉
Absolutely stunning! Great idea – might just have a try…
Thank you very much, Marjan!
What gorgeous plant pots. I absolutely love the turquoise color you chose. I lived in Turkey as a child and it reminds me of the faded turquoise window frames we’d see in the country. (Is that what you were going for?) How about naming your paint color Türkiye blue? Congrats, you’re featured this week at the #ThisIsHowWeRoll Link Party.
Thank you, Susan! Yes, I love that color and I remember it from my youth. Always when I mix colors like these, it reminds me of my childhood days on the Aegean Sea. Türkiye Blue is a great name! Or maybe Türkiye Mavisi? 😉 I can’t thank you enough for featuring me in this week’s link party! Çok teşekkür ederim!
These are super cute! I love the color you chose. I have a bunch of old rag tag pots that need a little pick me up! Plus an idea for an herb garden that is just waiting for me to get started working on it. Thanks for sharing this with us at the #happynowlinkup.
I thank you for hosting such a wonderful party, Jen!
You are so creative and live life to the fullest (I think). Thank you for sharing your ideas and instructions. I hope so much that I can come close to replicating them.
Thank you so much for your heart-warming words, Donna! Yes, I try to live life to the fullest…especially after working/living in a war zone (Afghanistan) for a year. That, in a way, taught both Greg and I that as long as we are in good health, nothing else matters in life, and that we should enjoy and be thankful for every breath we take.
I am sure you will do even better with your pots than I did. Please do send a picture or two when you finish them (to handan@thenavagepatch.com) as I would love to see your finished project =)
Thanks so much for sharing this at last week’s Friday Favorites link party. I just wanted to let you know that I have chosen this as one of my features this week. http://aheartfulloflove.com/friday-favorites-week-317/ I hope you will come back and party with us again this week.
Oh wow! This news made my day =) Thank you so much, Jen!!
It’s so great to hear from you! You’re something else!! Donna
So pretty! I love how your decorated pots turned out — I am going to have to give this a try!
Thank you so much, Lauren! 🙂
I love the little metal filigree the most. But I think they look better mixed in with the other designs. Just beautiful! So pretty in fact that I just had to include it in my Earth Day roundup http://www.purfylle.com/2016/04/36-earth-day-ideas.html
Oh wow! That’s great! Thank you so much, Stella!! I’ll pay a visit to see your roundup 🙂
These are gorgeous! I just happen to have a few pots laying around that I am definitely going to use this idea on. And thanks for sharing the color; it will go well with my other garden decor. Looks like summer ice–I love using such a cool color for the warm summer. 🙂
Thank you so much for visiting us, KT! Oh I couldn’t agree more with preference of cool colors for summers. Greens, blues and whites are definitely my favorite colors for summer as I find them incredibly refreshing 🙂
So pretty!
Amalia
xo
Thank you so much, Amalia! xx
This is great. Wonderful work.
Thank you so much, Leigh! 🙂
I love these! All of the these are so pretty! Thanks for sharing the techniques you used and for sharing at Snickerdoodle Sunday. I’ll be featuring this at today’s Snickerdoodle Sunday Party. Hope to see you there.
Oh wow!! What an awesome news 🙂 Thank you so very much, Beverly! I will definitely be at the party!! Have a great weekend, x
Your pots turned out so pretty. I love them. I have a serious black thumb, but I have kept a mint plant alive for a whole year. I’m so excited. I love it in my water with some lemon. Yum. Thanks for linking up to Tips and Tricks. Hope to see you again this week.
Lol… Yes that is exactly how I am with flowers or house plants. Only with herbs and vegetables I seem to have better luck. I guess it is because we use them a lot (for cooking, for salads etc) and having a mutual benefit helps me remembering to water them 🙂 With flowers and house plants they are only there to look nice for a while and that is not much of a benefit for me nor for my tummy 🙂
I will definitely become a regular on your party. Thank you for hosting such a great party!!
Very pretty flower pots. Love the addition of the filaments. Interesting tidbit about adding packing peanuts to pots. Had never thought about that, esp. as I struggle to move big ole flower pots! Visiting from Snickerdoodle Sundays.
Thanks so much, Victoria! Oh yes, using packing peanuts is a great life saver when it comes to big urns and pots. 🙂
The flower pots are so pretty! I like the color, jewels, everything! My very uncreative mind is turning now. Thank you for sharing!
Thank you so much, Teresa! =)
I love your flower pots, they turned out beautiful. I really like the color that you chose, and how you distressed them. The stenciling and emblems are a nice touch. I will have to give this a try on some of my pots. Need some basil to for mosquitos. Thanks for sharing!
Thank you so much, Linda! I am so glad you liked them 🙂
Oh wow Handan, these turned out so beautiful! This is something I think I will try to put on the deck we are currently building, I just hope I can keep whatever I put inside alive. I’m not very good with all of that….(HA!)
Thank you so much, Rose! I am not that good with house plants and flowers but with herbs and vegetables I seem to have luck. I guess it is because they are stronger and less fussier than the house plants. Once they are planted all they need is water every other day or third day and that is all about it. 🙂
Your pots are GORGEOUS! They have been featured on ‘Create, Inspire, Love’ over at Mia Bella Passions.
http://miabellapassion.blogspot.co.nz/2016/04/create-inspire-love-14.html
I hope this brings lots of visitors to your wonderful blog. 🙂
Oh YAY! Thaannnkkk yyoouuu!! Thank you for hosting such a wonderful party Tracey! xx
Hi Handan & Greg! How lovely of you to join us at the Thriving on Thursdays linky party last week. Oh my goodness. Your makeover is just gorgeous. I’m so used to use painting old (or new) pots with one colour but I so love this finish. I’d hate to think how much something like this would cost new. Thanks for sharing it at the Linky party. I’m featuring this post tomorrow. Hope to see you guys again.
Anne @ Domesblissity (Australia)
Thank you so much, Anne! Oh I love your party, hence planning to become a regular 🙂 Thanks so much for hosting it!!
These are just gorgeous! Featuring on Inspire Me Monday next week, thanks for linking up!
Thank you so very much, Kristin! I thank you for hosting such an awesome party 🙂
Wow I love this idea! I really need to refinish my herb pots! I love what you created. Thanks for linking this post up for the Best of the Blogosphere Linky Party! I selected your post to be featured in today’s Best of the Blogosphere Linky Party!
Wow that is great news! Thank you so much, Chelsee!!
I love your idea! Very inspiring. I am going to have to try something like this for my garden soon.
Thank you so much, Katie! Garden projects are always fun and great. I am sure you’ll enjoy it 🙂
I have a question. Will chalk paint last outside?
Thanks. Donna
Hello Donna, I would say no it wouldn’t last outside if it didn’t have any protective coat on it. It is because chalk paint is porous. Hence it will take in water and that will in time show patina, meaning that paint will start peeling or cracking (in CT winters one winter is enough for it). But if that is the look you would want to go for then it is a great thing. If it is not then for outside pieces you would need to protect it with a outdoors protective coat.
Now that said, in CT winters are pretty harsh. So in CA let’s say it would last more winters. So it really depends on how much weather force the piece will be facing.
Thanks for your prompt reply. I live in Alabama. What is your recommedation for a protective coating? I can’t wait to start on your project, chalk paint on terra cotta pots. I was thinking about using 2 paints, a gray and a white. I wasn’t sure which one to apply first. Do you have any thoughts on that? If I can get 1 or 2 successes behind me, I’ll be okay. Thanks!!
Hello Donna,
Go ahead and paint your pots first. If you want to have your pots gray color and white showing underneath then paint them white first, then paint them gray. If you happen to apply too much gray you can always distress with a damp rag and show the white underneath. Or if you want white pots but gray showing underneath then first paint them gray, then white, followed by distressing again.
Since your choice is chalk paint I am assuming you would want a matte finish. And I am again assuming in winters you will be dealing with rain only. If you won’t be leaving your pots outside in the winter time and want them to have a bit more distressed look in time then don’t apply anything over the paint. But make sure you let the paint cure for 2-3 days before planting anything in the pots. Giving that 2-3 days will help with paint’s durability. If you will be leaving your pots outside in the winter time and don’t want your pots to get more distressed in time, then I recommend applying two coats of MM Exterior Dead Flat Finish.
I am giving you the link to the exterior flat finish below so you can check it and read the reviews yourself. I love using it with chalk paint especially, because it dries so flat that it will look as if you applied nothing on the paint. Protection wise it is in the same level with other well known brands, if not better 😉
http://amzn.to/1OAClNK
I hope this helps. When you finish your project please don’t forget to send a picture to us as we would love to see it! I am sure they will turn out so beautiful!! 🙂
Thank you so much!!!
By the way, can you paint chalk paint on galvanized buckets??
Hi Donna, yes you can and without any issues. Put it this way: even glass (which has a very smooth surface) can be painted with chalk paint. 🙂
Thank you. You’re so sweet and patient.
Donna
Oh it is your kindness, Donna! Have a great weekend! xx
Your flower pots turned out beautiful. I love the color you used too!! Thank you for sharing at the Talented Tuesday link up party. Have a great week, Kim
Thanks so much, Kim! You too have a wonderful week! 🙂
I love the re-positional vinyl decal you made with your Silhouette. Great color combos too!
Thanks so much, Sandy!
These are awesome…beautifully crafted and a perfect touch to any space!!!
Thanks so much, Michelle!
These are so pretty! How clever 🙂
Thank you so much, Ang! 🙂
These pots are the cutest! I love projects that take something from drab to fab! Thank you for linking up to Talk DIY to Me! I hope you enjoy the party and come back next Tuesday to party all over again!
I love the fact that not only you have a party theme every week but you are actually informing others of the next week’s theme. I love it and I think that is brilliant idea! But regardless of having projects that meets the weekly theme or not I will definitely be a regular at your party 😉
I LOVE this SO much! Thank you for linking it up at The Creative Corner Link Up! I’ll be featuring you tonight! Pop over and check it out 🙂 I’ll be pinning this project also to my DIY Pinterest Board! Love it! Maria. x
Oh that is great news! Thank you so much, Maria!!
L-O-V-E It! ??Really Gotta do this…Thanks!
Thank you so much, Elizabeth! 🙂
I have several pots that could use this pretty update!
Thank you so much, Roseann! 🙂
What a great job! You make it look easy but I’m not sure I’m very creative. Thanks for sharing this and the beautiful images with us at #OvertheMoon Link Party. I’ve pinned and shared.
Thank you so much, Sue! 🙂
So pretty! I love the colors. Makes me want to go out and get some terracotta pots just to do this to them. Thank you for sharing at Link It Up Wednesday!
Thank you very much, Kileen! 🙂
Hi Handan, What a great idea to spruce up flower pots for spring! You did a great job on yours! Thanks for sharing! Blessings, Janet
Thank you so much, Janet!
These are stunning! Love everything about them. Featuring when my party opens tonight!
Wow, that is awesome! Thank you so much, Carol! 🙂
Such a great color and the string adds more charm.
Maria