
Washer/Dryer Enclosure and Hutch (ORC Spring 2023 Week 5)
The WD enclosure is built, the hutch is installed and the cabinets have been painted. We’re in good shape going into the final 3 weeks of ORC!
I call it the “Wax On, Wax Off” method of ORCing (yes, I’ve made it a verb).
Alternatively, I could call it “ORC on, ORC off,” but ORCing off sounds like it could be shocking, distasteful, harmful and even illegal south of the Mason-Dixon Line. Lord knows I wouldn’t want to be caught ORCing off in the garage laundry room.
Tongues would wag, madam. Tongues would most certainly wag.
And maybe you don’t like the whole Karate Kid vibe or young Danielson. I get it. He was an insufferable dweeb. Thus, I could call it “Playing the Odds.”
Whatever the heck we call it, the simple fact is I can’t seem to get with the Draconian “weekly update” thing that literally every single other ORCer has been doing since the dawn of recorded history.

Welcome to The Navage Patch!
If you’re joining us from the ORC website – welcome! I’m Greg, this is The Navage Patch, and my wife Handan and I are giving a makeover to the laundry room in our new Florida home. This is our second One Room Challenge, and we can’t wait to show you what we have in store for this room!
The thing of it is, no other ORCer has a babes like mine with a project calendar filled out well into the next millennium. Apparently she’s banking on some major advances in the fields of Life Extension and Delayed Senescence. She intends to keep my creaking bones and mildewed brainstem active until we’ve collectively left the Earth and populated the galaxy.
Lucky me.
Anyway, here we are at Week 5. If you’re wondering where weeks 2 and 4 are, I’d like you to walk outside on a clear dark night and find the starry river of the Milky Way. Point your finger straight up overhead. Yes, that’s it. You’re now (probably) pointing right at the heart of our galaxy and the Supermassive Black Hole that lives there.
That is where weeks 2 and 4 went. Sucked into an alternate universe, wiped from existence.
So let’s forget about what I’m missing and focus on what I’ve got! Because now that I’ve built our beautiful SunJoy gazebo, and now that my parents have returned to the hinterlands of New England, and now that I’ve been able to take two consecutive breaths without the specter of a dozen unfinished projects breathing down my neck, I’m finally finding time to properly address our laundry room makeover.
Laundry Room Makeover Week 5 VIDEO
Watch our short and fun video below for an overview of our laundry room makeover week 5 before you read the detailed progress.
Watch Our Tutorial On YouTube
On Tiktok
We love to see our DIY projects out in the wild! If you try this DIY project and take a picture and post it on Instagram, be sure to tag us – thenavagepatch
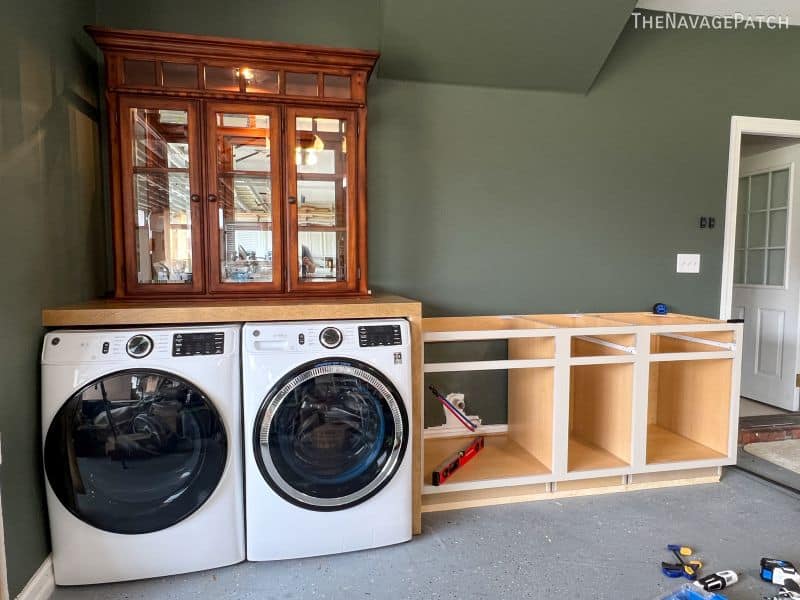
Building the Washer/Dryer Enclosure
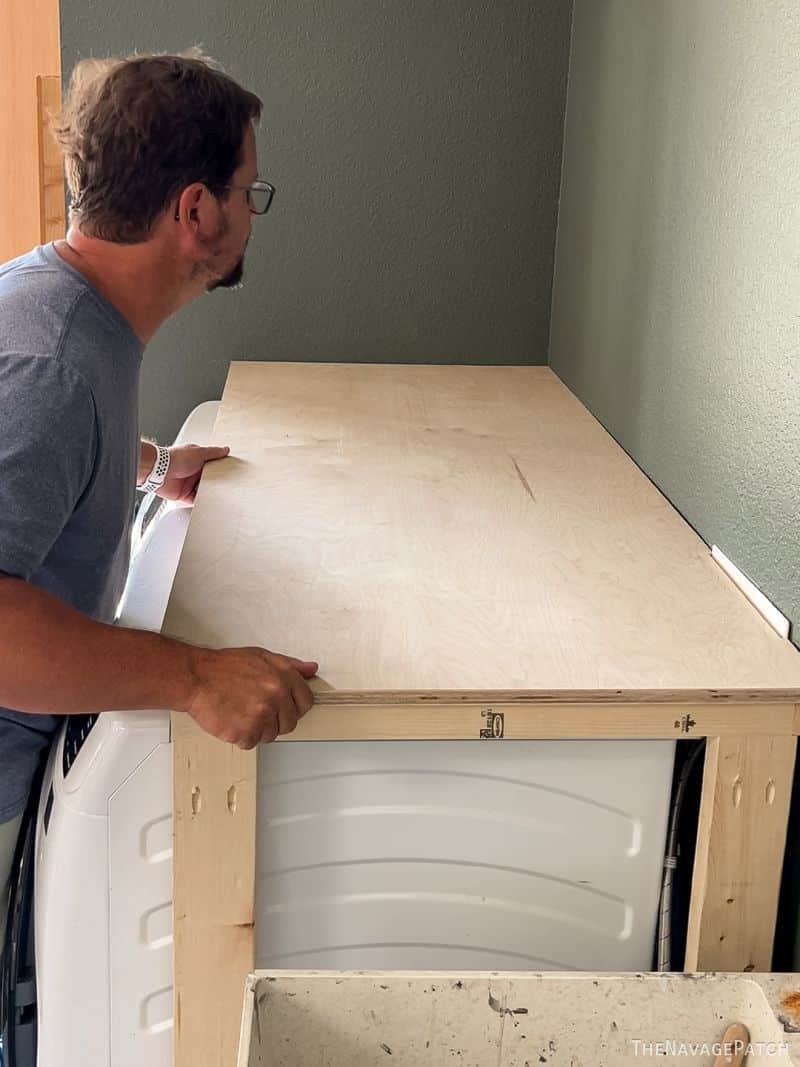
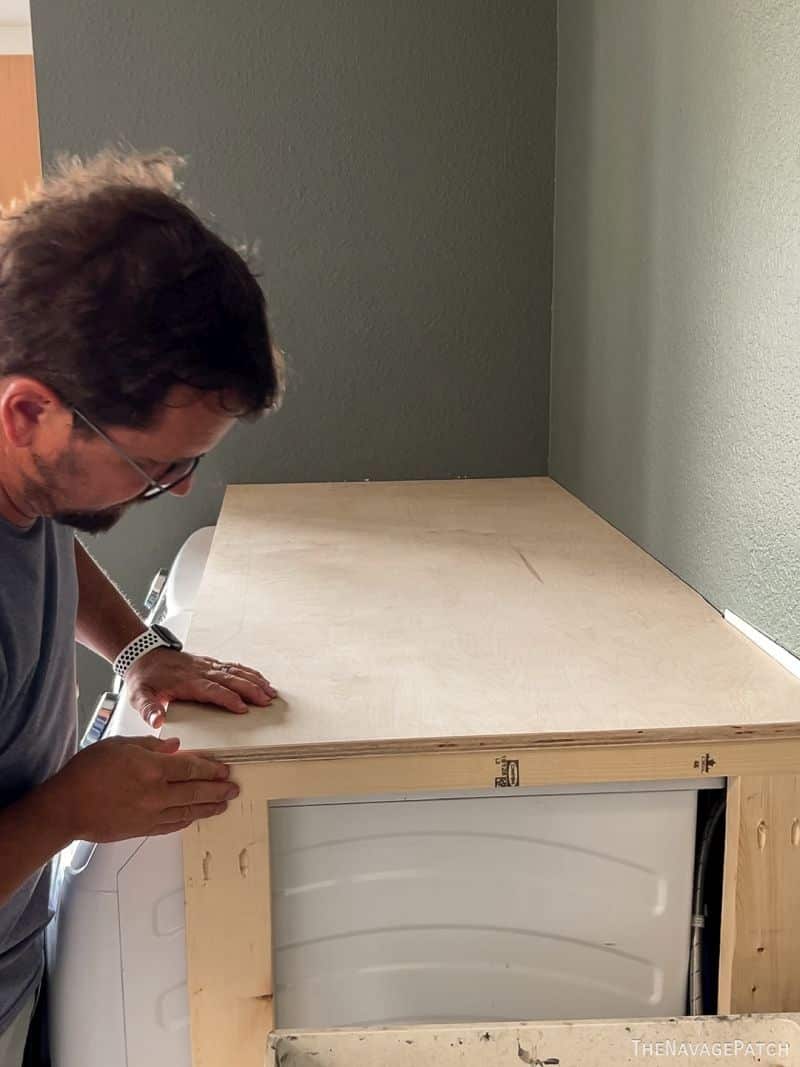
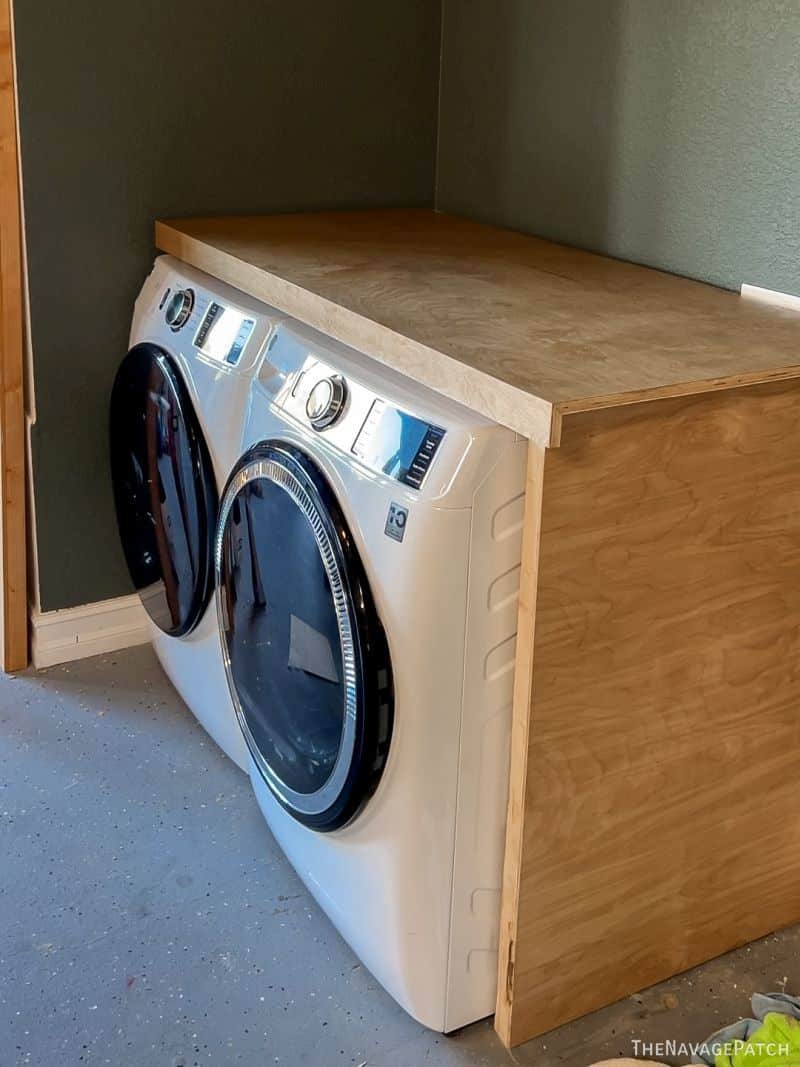
For the WD enclosure and countertop, I wanted something strong but also lightweight and removable. The best way to achieve those goals was to build a frame in place and construct a lightweight plywood countertop to sit atop the frame. This would also give us the required clearance for air flow for our machines.
I installed 1 1/2 x 1 5/8 pine boards along the back and side walls, screwed into studs. The 1 5/8 measurement comes from ripping a 2×4 in half lengthwise.
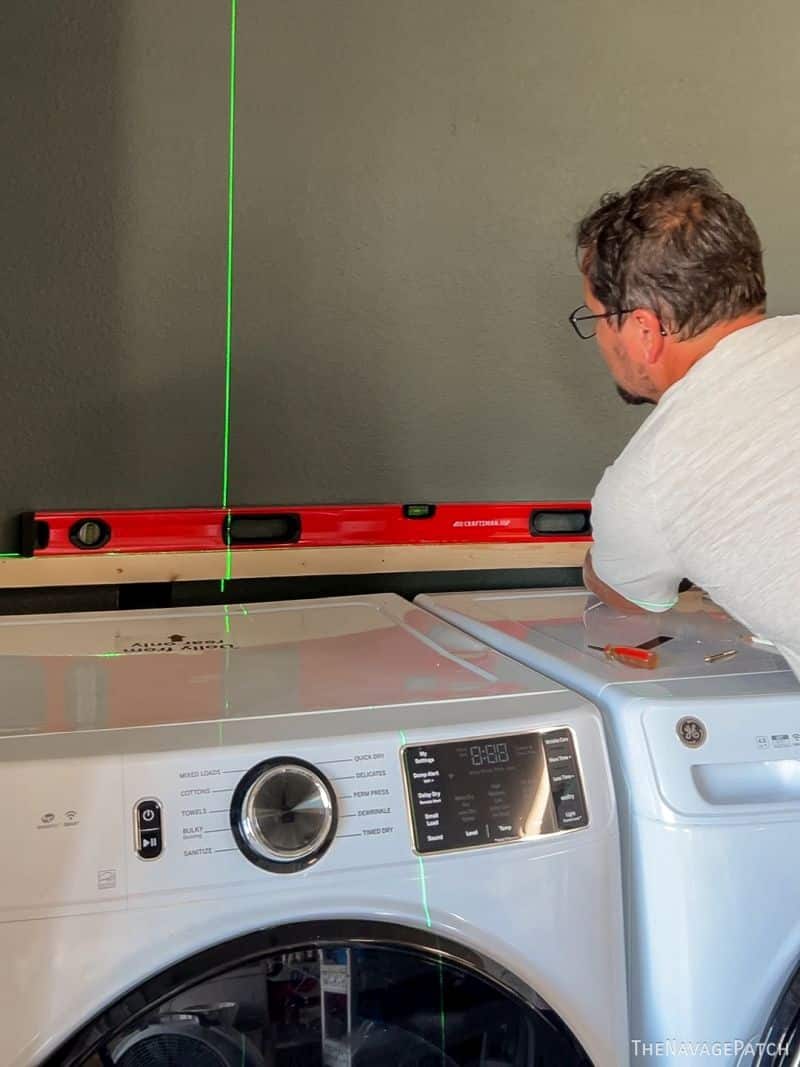
After a year on the sidelines for betraying me during last spring’s Pantry Makeover, I finally got around to calibrating my laser level and getting it back in the game. Still, it’ll have to earn my trust again, so I’m still using it alongside a spirit level.

I built legs for the other side. The floor in this part of the garage slopes in two directions which made everything so much more fun and interesting. I mean, who wants to build on flat floors with square walls? Oh, did I mention the walls weren’t square? No? Well, I will. Just you wait.
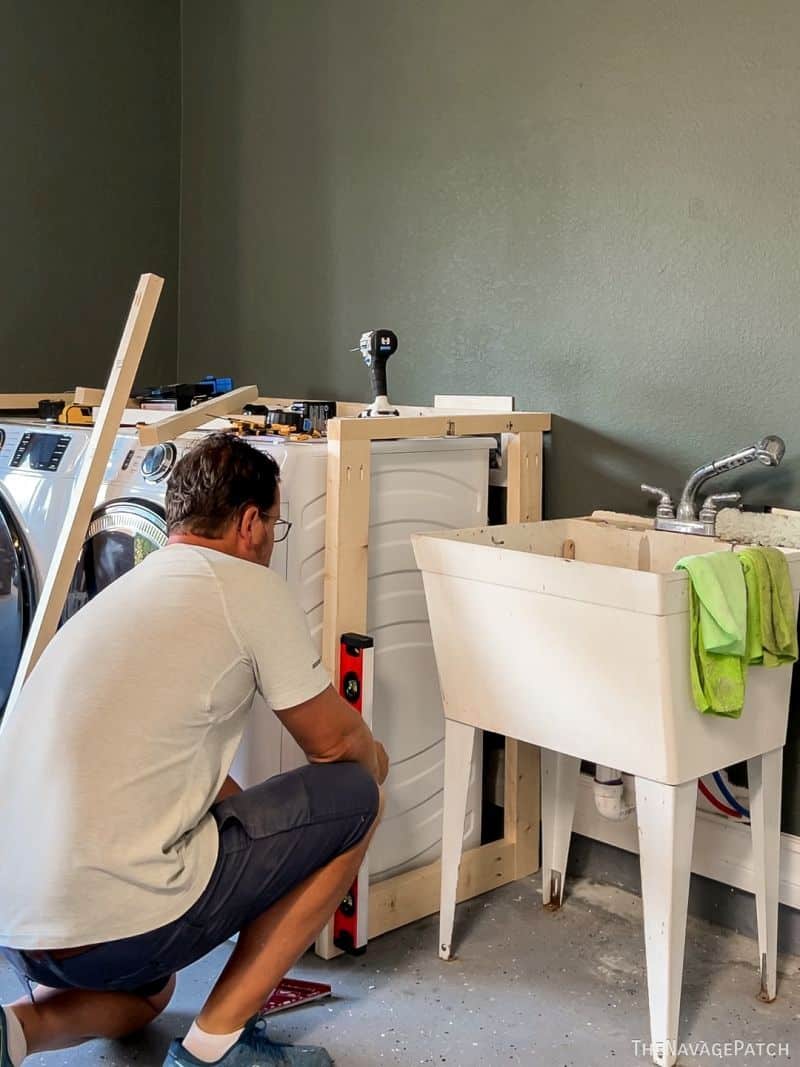
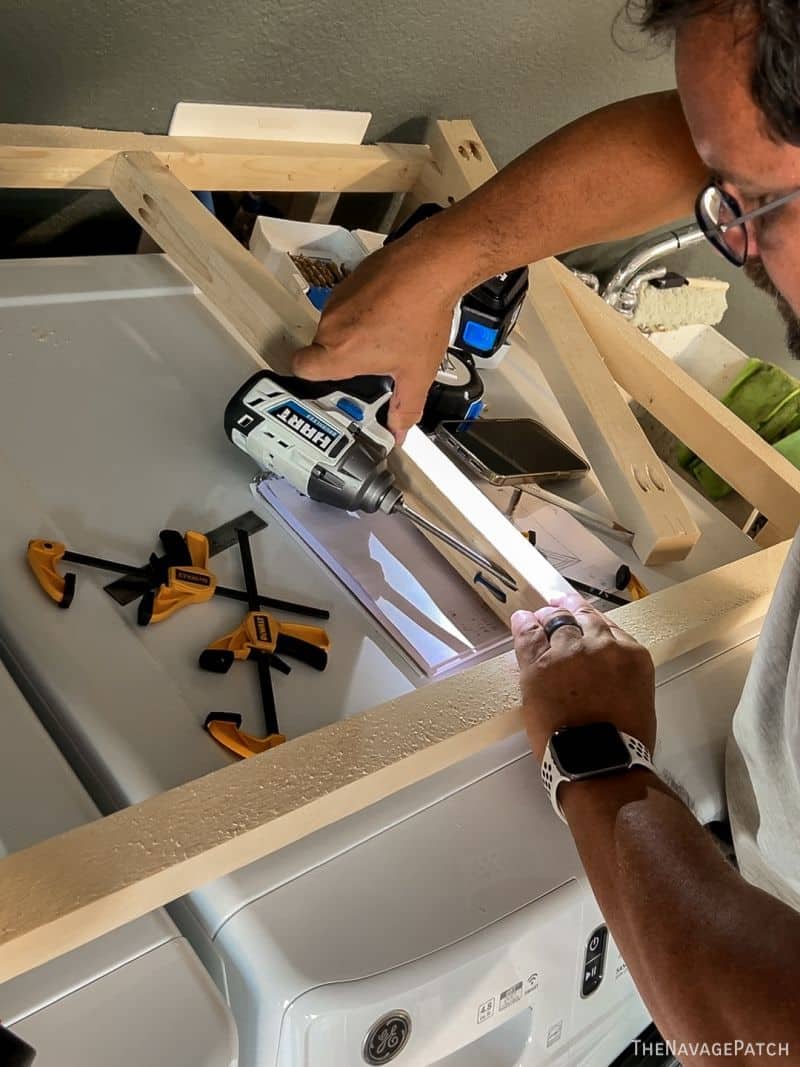
I added a front rail and three supports and secured them with pocket screws.
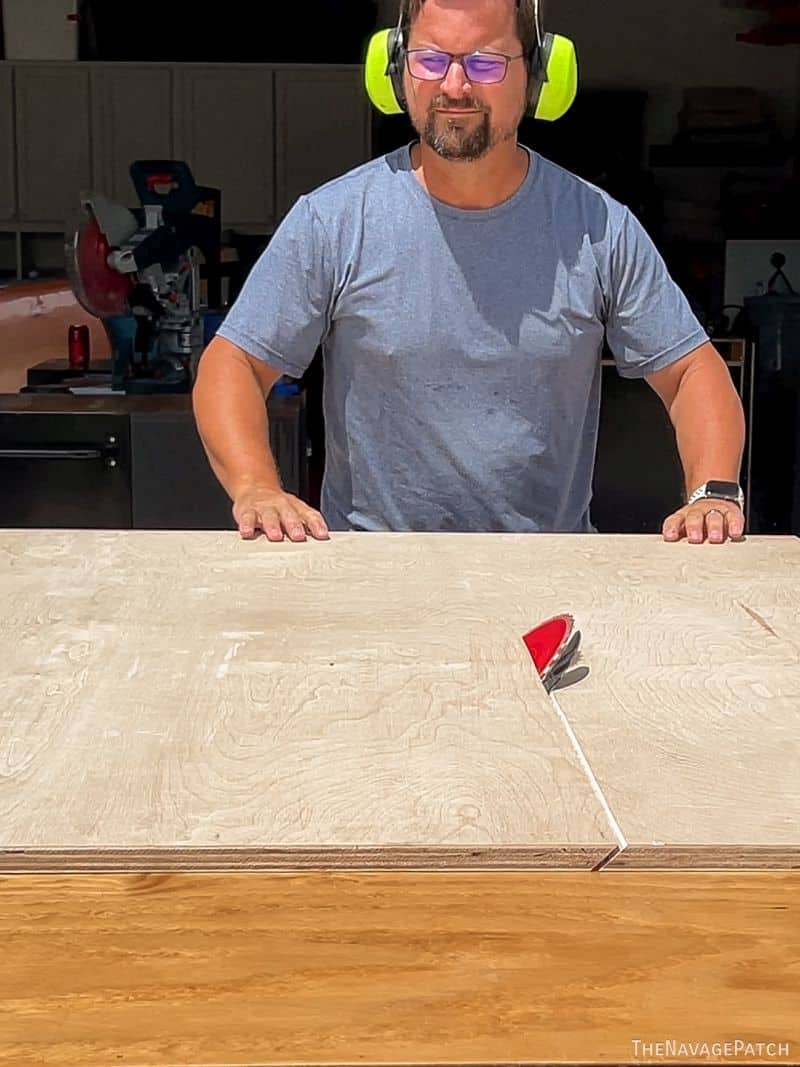
To keep cost and weight down, I used plywood for the enclosure top. When I made an enclosure in our Georgia home, I used a butcher block, which looks awesome, but it’s very heavy and even more expensive. I’ll be using a butcher block for the sink countertop (you’ll see that next week), but for this one, I settled on plywood with a mitered front edge to which I’ll be attaching another mitered piece to give the illusion of a thick slab of wood. Don’t ask about my expression below. I have no idea what I’m looking at with such a Judgey-Judy eyeball!
This is the moment I discovered the walls weren’t square.
It was the old parallelogram conundrum that plagued us during our gazebo build. A rectangle has short side = short side and long side = long side. So often when we build things, we simply measure sides, and if they’re equal, we smile and go on our merry way thinking all is well with the world.
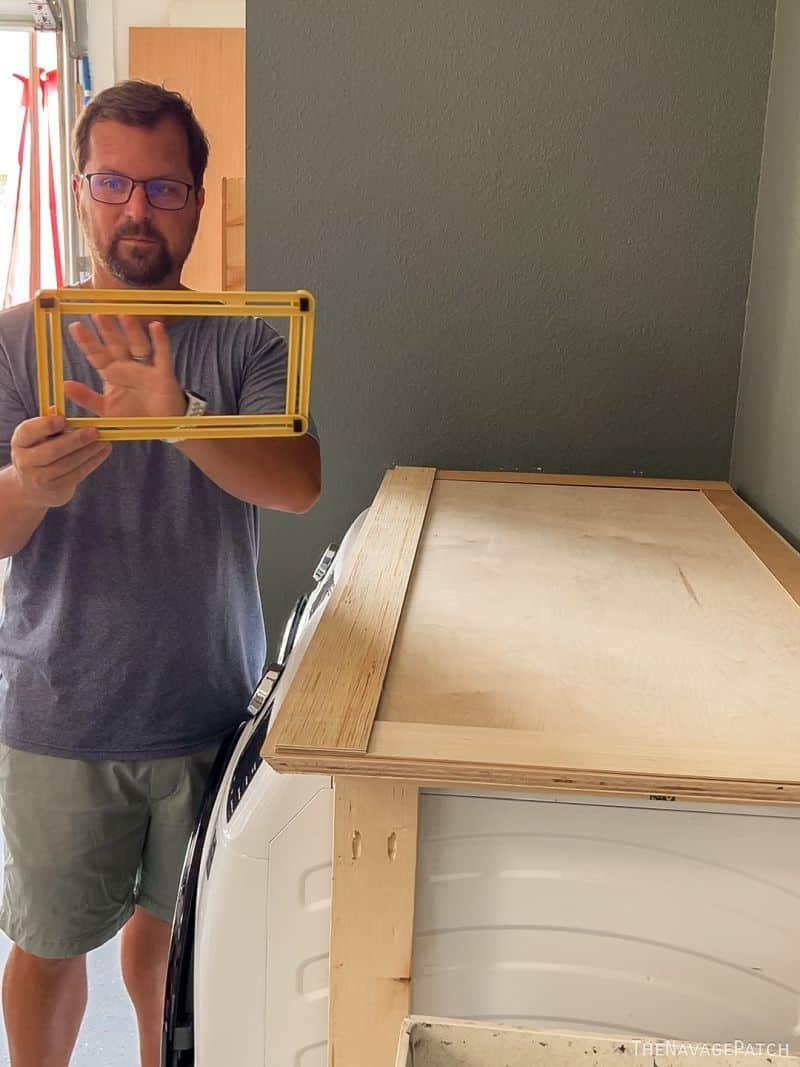
But this shape also has short = short and long = long. But if you constructed a rectangle with those measurements and tried to fit it into the parallelogram shape below…you won’t find it very easy nor fun.
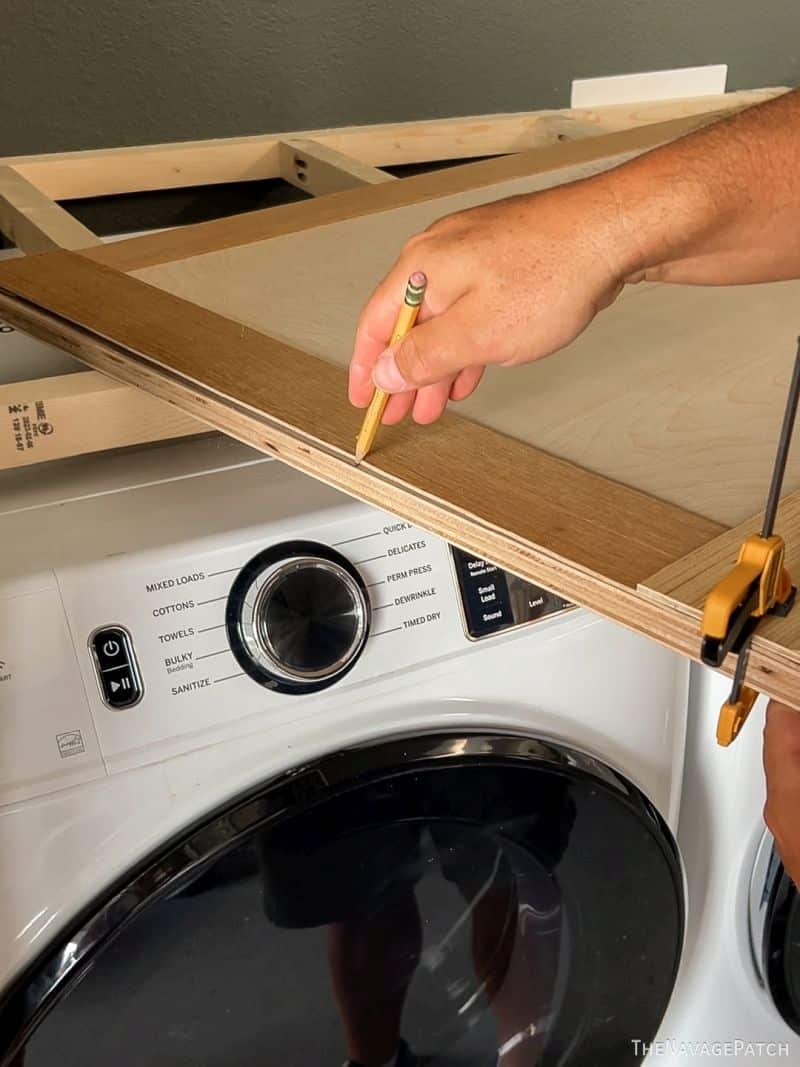
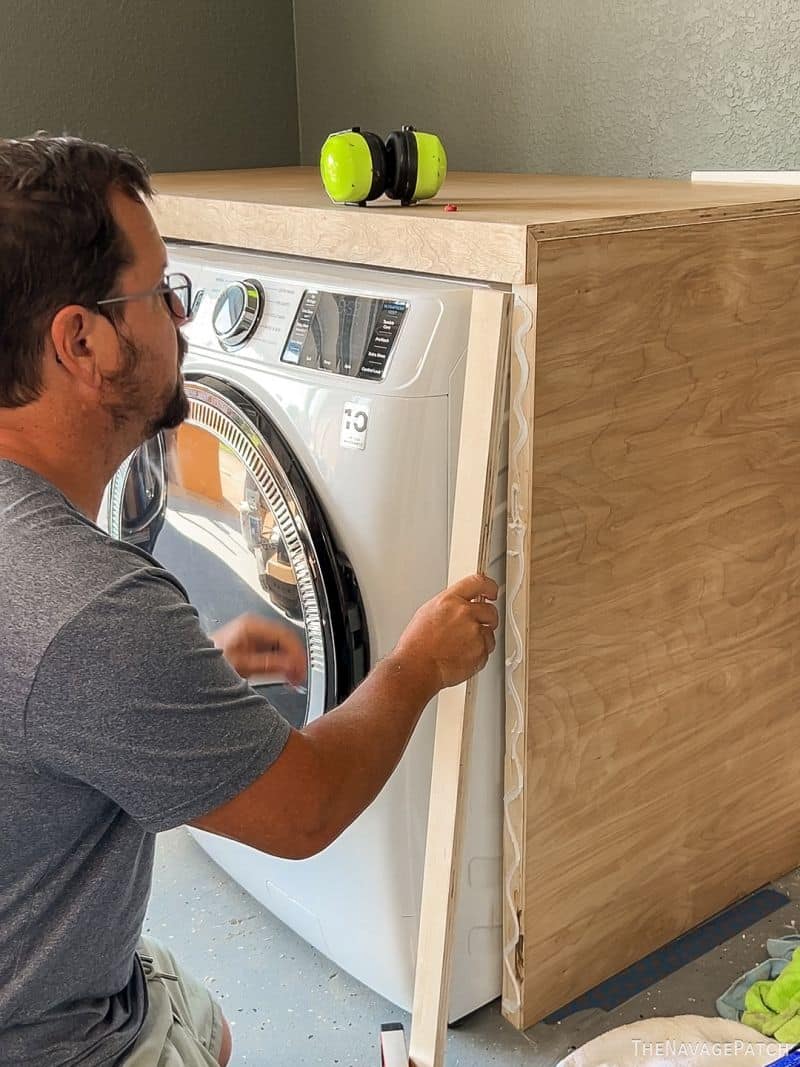
And that was the issue with the walls, but on a less extreme scale. Normally, I’d have to scrap the piece of wood I cut, because there’s no way I could get the elongated parallelogram from my original rectangle, but we came up with a solution whereby I scooted the back leg closer to the opposing wall, and that gave me the extra space I needed to make an angled cut on the wall-side of my plywood countertop.
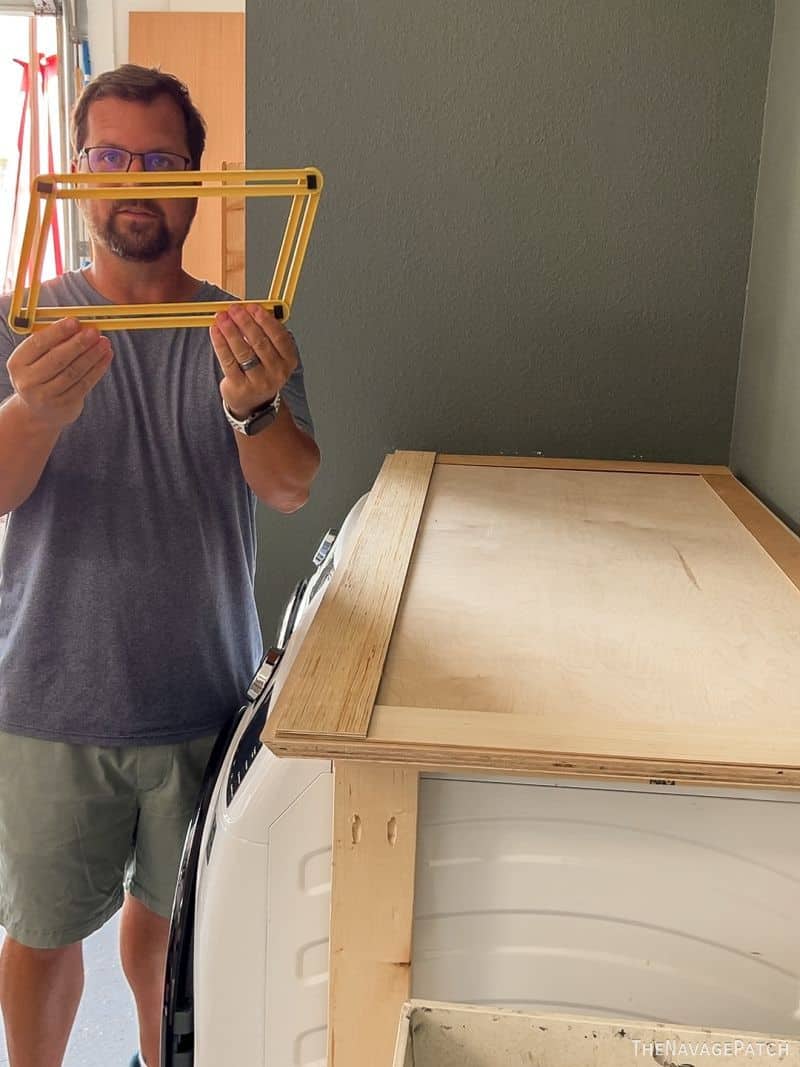
To do this, Handan and I constructed a template from thin wood strips hot-glued together (shown in the picture above). We saw this used in Georgia when our new kitchen island was being measured for that huge slab of quartzite we installed.
Once we laid the template on the plywood, I marked exactly what needed to be cut, and then my countertop fit perfectly!
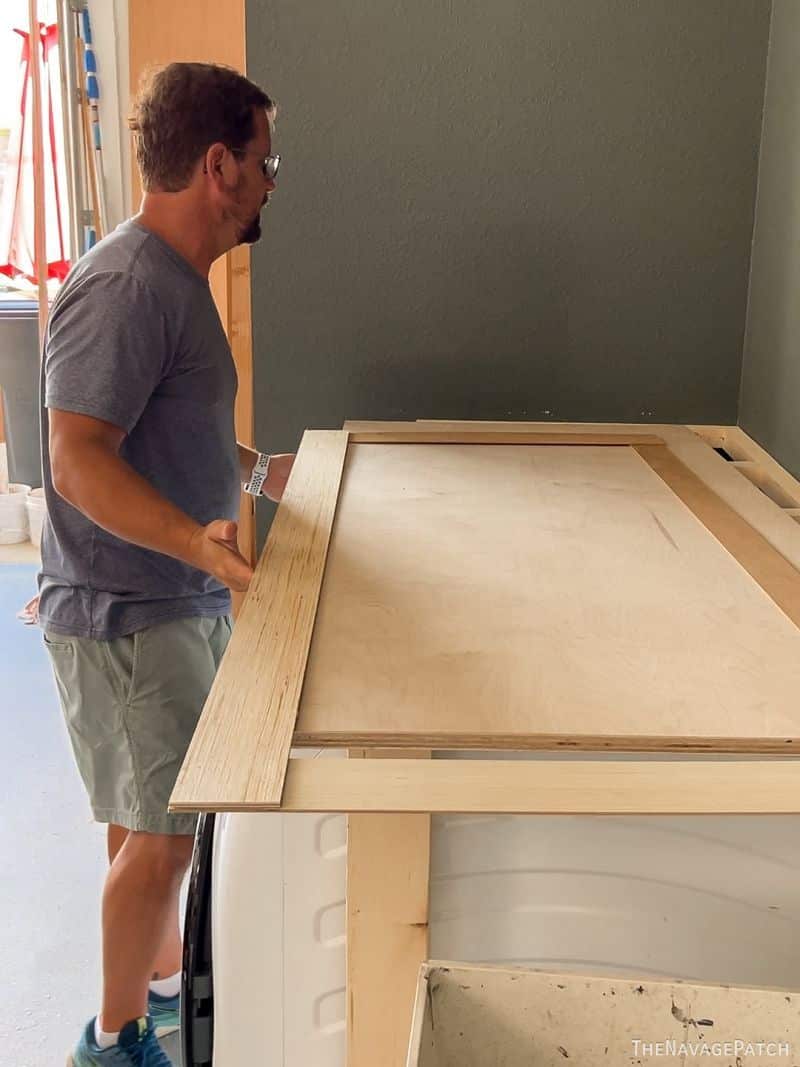
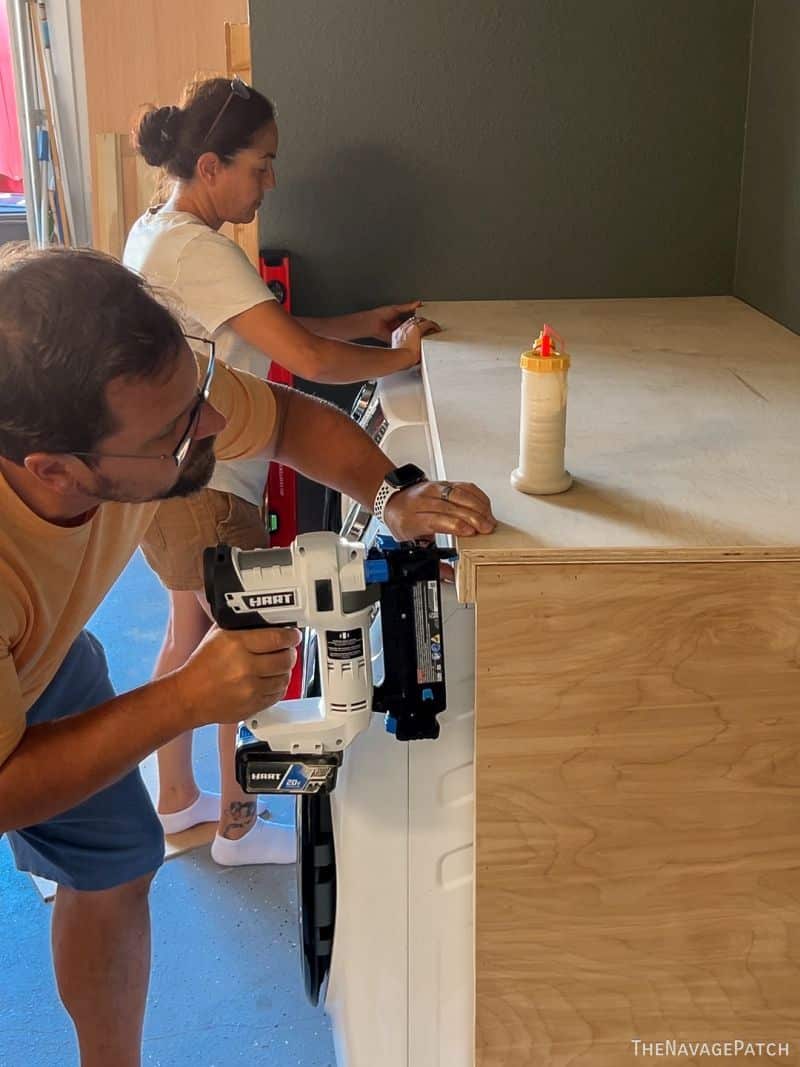
Next I made a side panel from 3/16-inch utility panel and installed it with construction adhesive and brad nails.
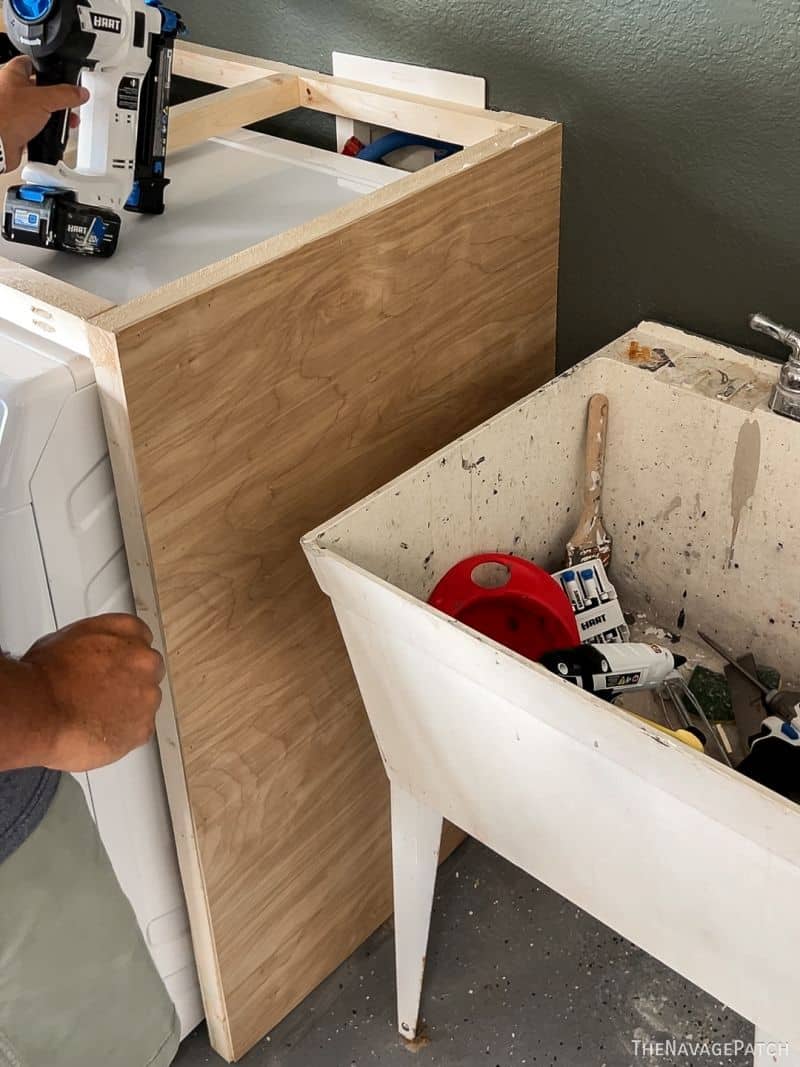
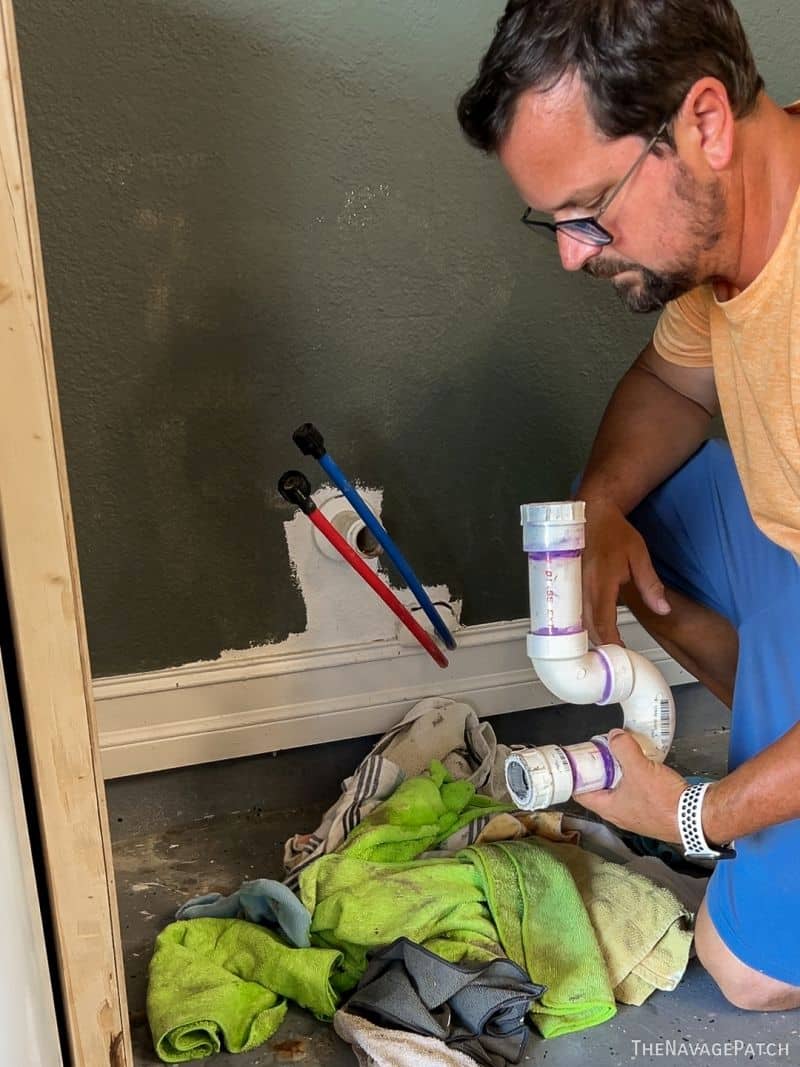
Then I turned my attention to the sink. There was no easy way to remove this beast, because whoever installed it fused all the PVC pipes together with purple PVC cement. After wrestling with it for far too long, I gave up and sawed through the pipes.
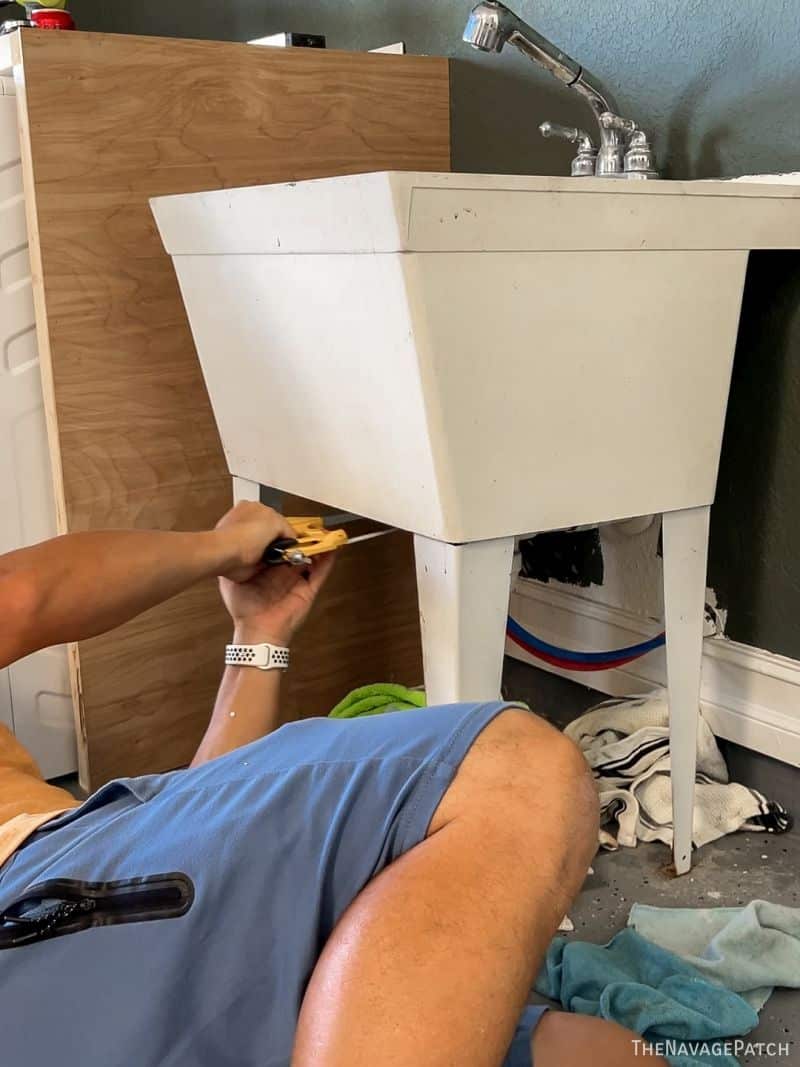
Just add “plumber” to my ever-growing list of skills!
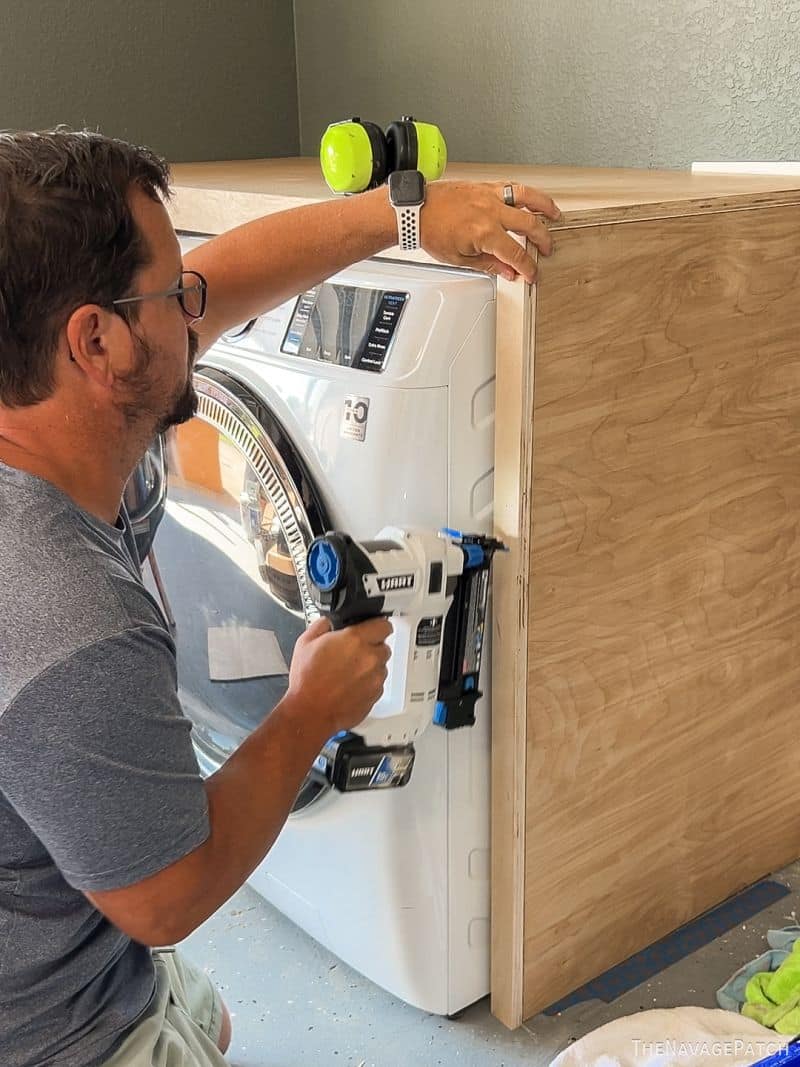
With my babes’ help, I installed the front mitered piece of the countertop with wood glue and brad nails.
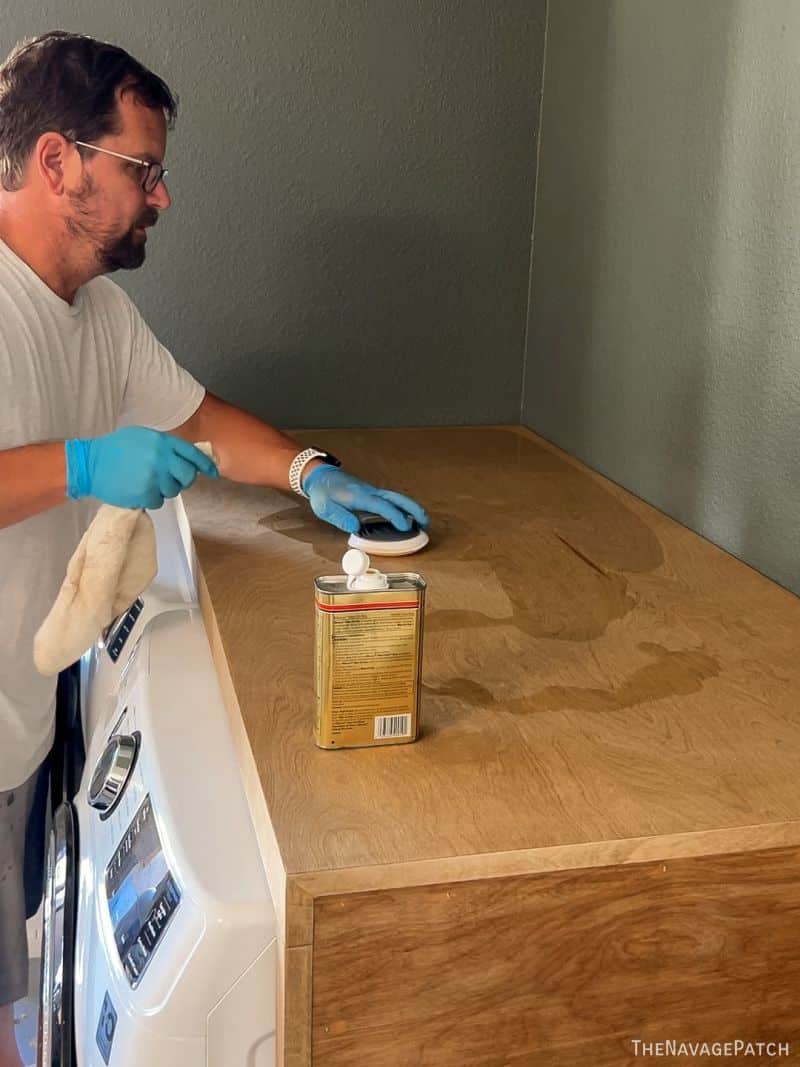
After filling the brad holes and sanding the whole enclosure, I stained it twice – once with Minwax Weathered Oak followed immediately by Minwax Early American.
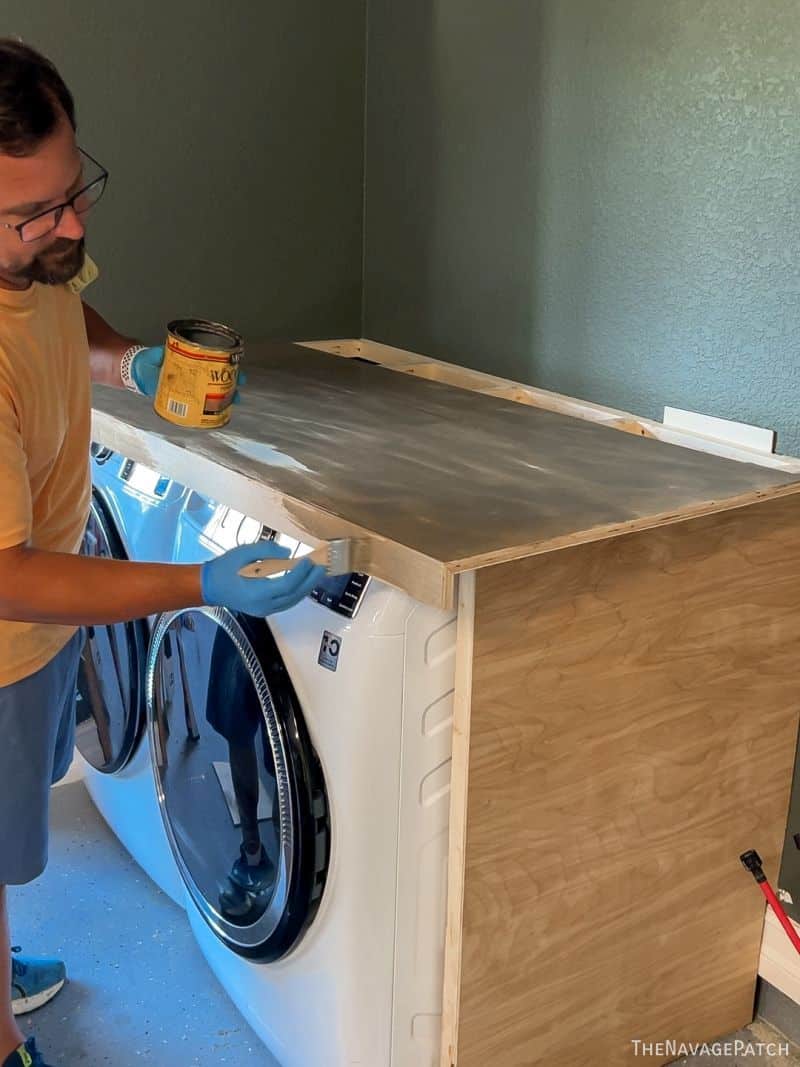
After the Weathered Oak…
And after the Early American (side panel not yet stained).
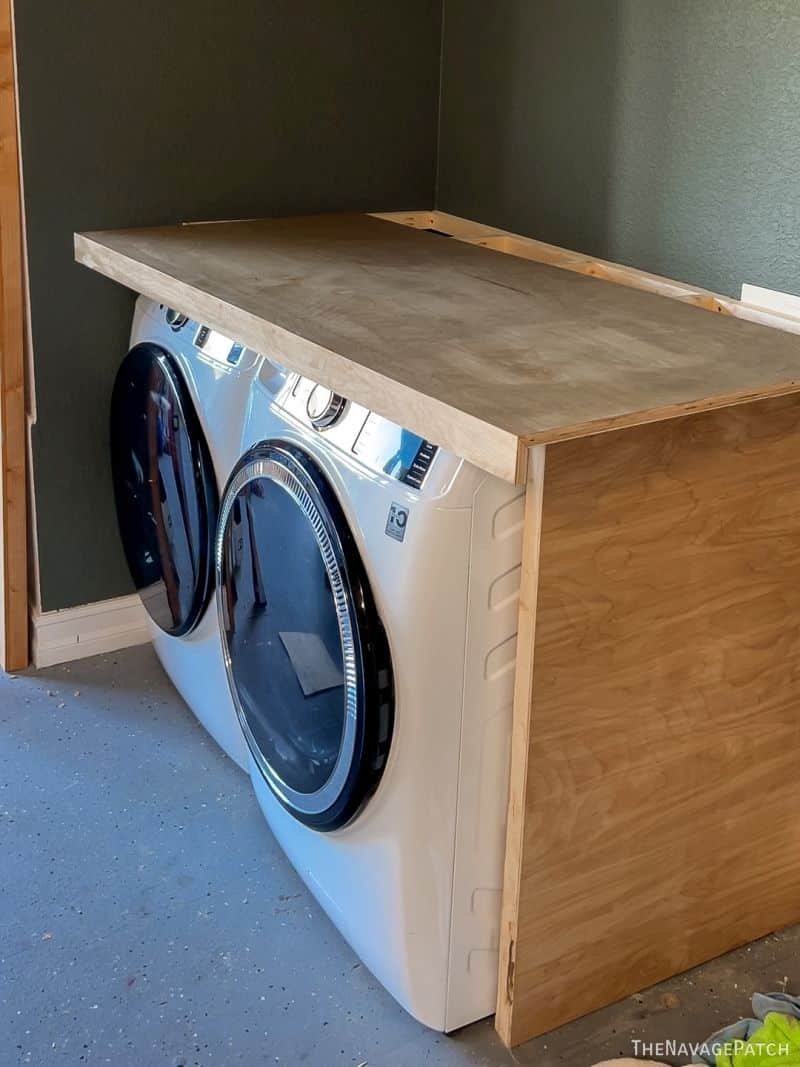
I added a trim piece to bring the front level with the countertop.
Then I added edge banding to the exposed plywood edges and then stained the trim piece and the side panel. I followed that by sealing everything with three coats of satin wipe-on polyurethane.
Cabinets
We wanted something easy and relatively inexpensive for the cabinets. After a lot of hemming and hawing, we finally went to Home Depot to see what they had in stock. I know from experience that their unfinished cabinets can take a very long time to properly sand, seal, prime and paint, so we decided to get pre-painted (not plastic-wrapped) cabinets. We wanted a color called Shiitake from Sherwin-Williams, but obviously we weren’t going to find that stock, so we settled on an odd gunship gray they had in stock. We figure, hey, it might work. If not, it’s easy enough for me to scuff, prime and paint.

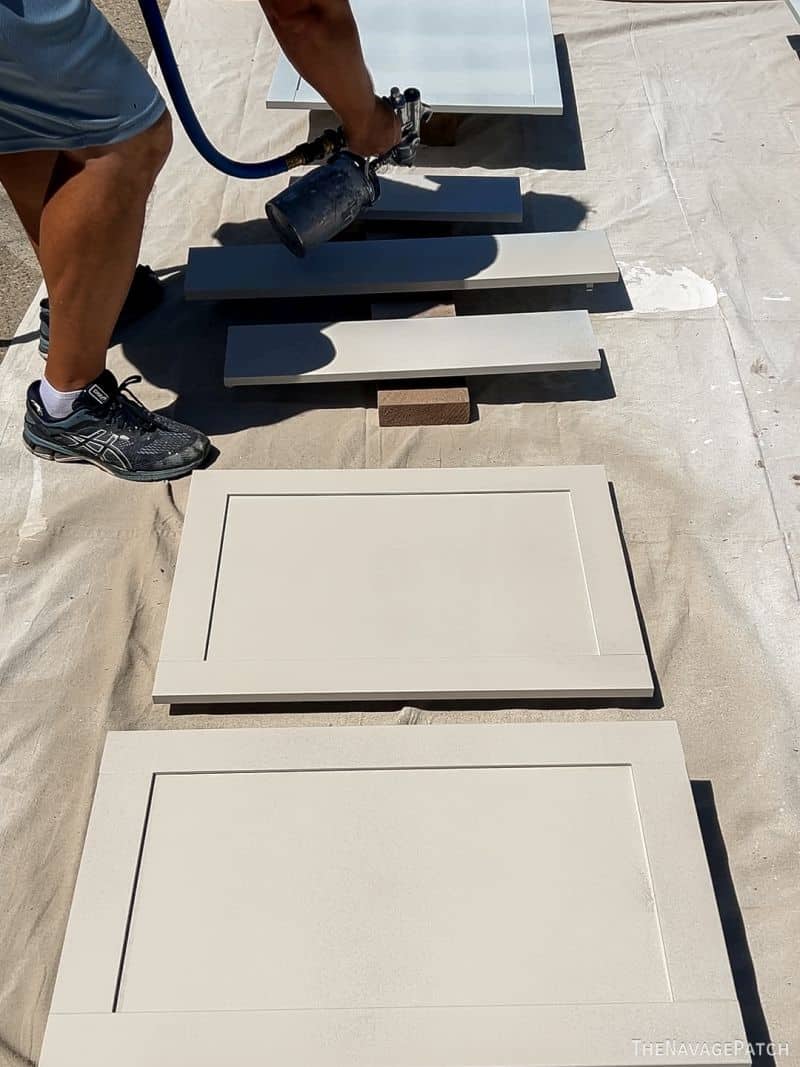
As I suspected, the color was horrible with the colors we already have in the laundry room, so I removed the doors, whipped out my sander and then got busy with my sprayer.
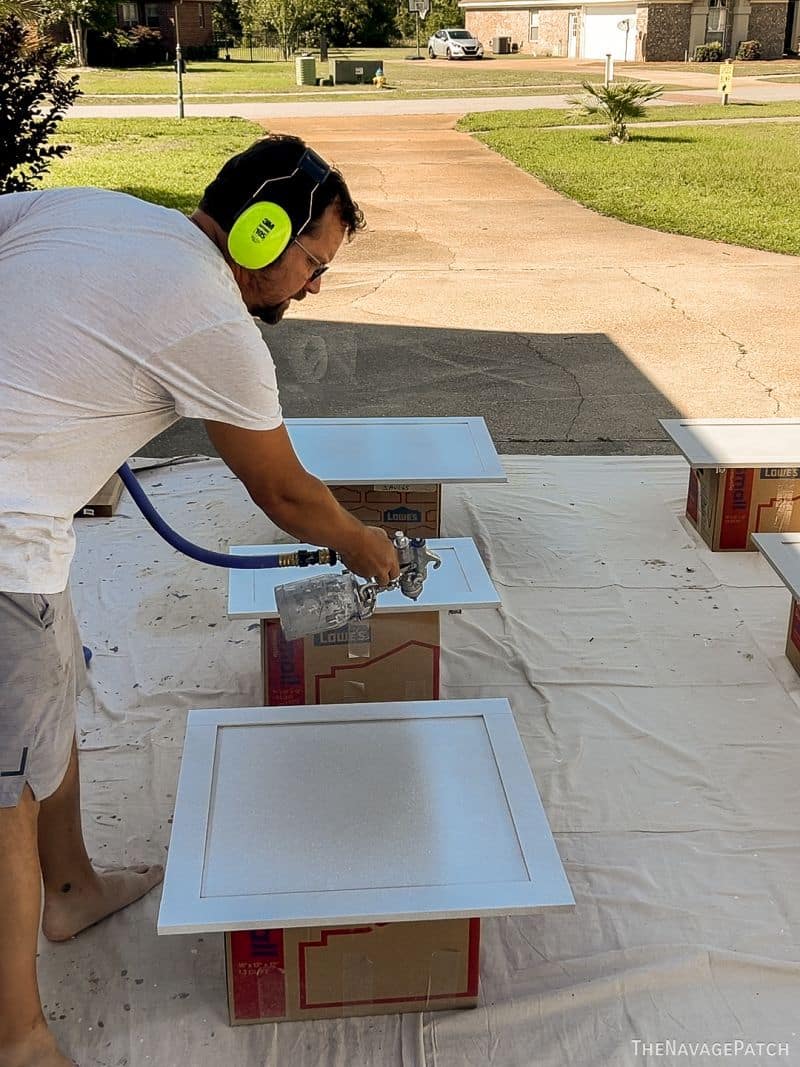
Wow, what a difference!
And finally, my babes and I put the hutch on the enclosure.


And this is where half of Instagram flipped their collective lid.
“I’m not feeling the hutch.”
“I don’t get it.”
“Why?”
And so on and so forth. I guess they’d rather I hang a “Live, Laugh, Love” sign or “You Are Living Your Story,” or some other such bland and soulless sentiment.
They don’t yet see the final vision, but that’s okay – I think most will come around in the end.
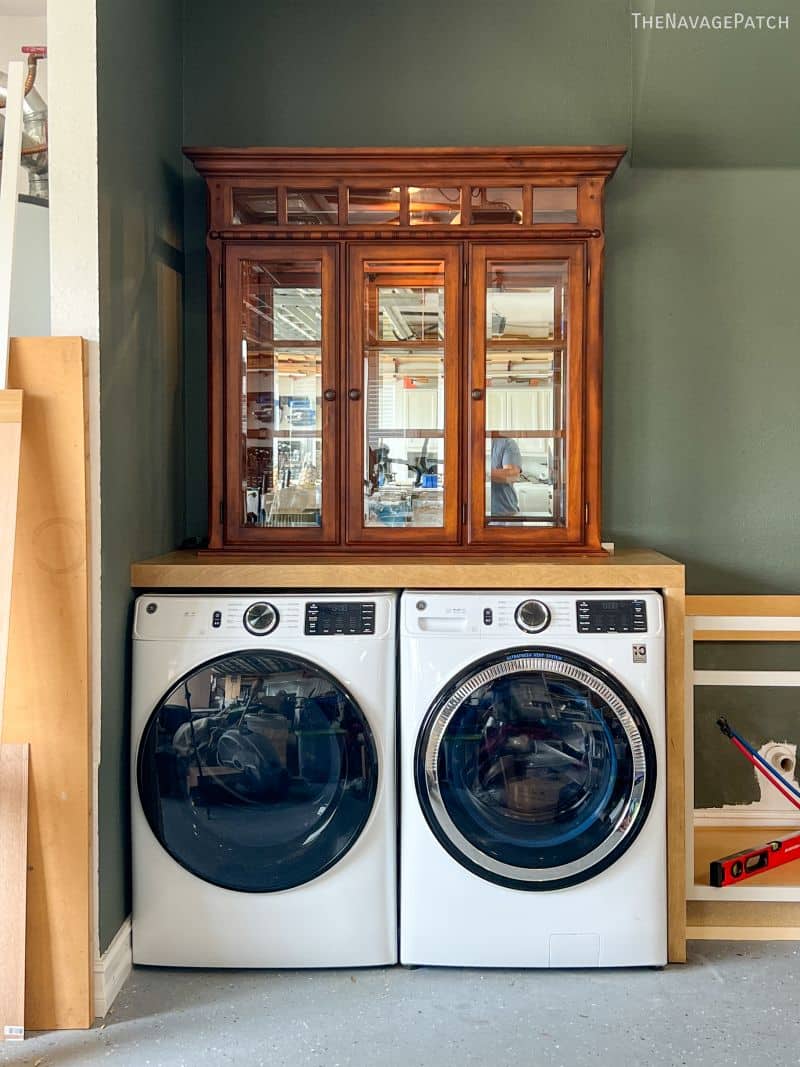
For us, this hutch not only looks beautiful and original, but it is also a cabinet. It holds stuff. And compared to the price of two new cabinets that would need to be purchased and painted, this hutch comes in at less than half that price (with none of the effort). So as I’ve been saying to most of the naysayers – diff’rent strokes – we don’t all have to like the same stuff. What a bland and boring world it would be were that the case!
Anyway, this is where we stand, and we’d like your thoughts on the hutch – even if they’re negative or uncertain. We don’t mind explaining! 🙂
Stay tuned for the final stretch!

I love the hutch. Can’t wait to see the rest of your/Handan’s vision.
Thanks, Betty! 🙂
I’m not going to pass judgement on the hutch while you are still working on the project. I always remind my husband,when I am doing something deemed crazy, to trust the process!!
It is quite a fancy hutch , but laundry could use something to glamor it up!
Exactly! You can’t judge until we finish! 😀
Please tell me you entered your backyard oasis for an excellent chance to win the gift card from Sunjoy! Surely, (stop calling me Shirley😁) you two will win!! Is anything ever square in any house? LOL Not really feeling the hutch either, but hey, diversity is the name of the game!! It’s your thing🎵🎵do what you wanna do!!
We didn’t, Cindy – but since they sponsored the build, we’re probably not eligible! 🙂
You’ve not let us down yet, so go with your vision!
Agreed! 👊
Wow Greg, that cabinet kicks it right up to the”fancy laundry room” category.
Going to be an amazing build!! 🙌👏
It sure does, Shelley! Only the best for my smelly socks! 😀
Love the hutch. Something I would have never thought of and god knows you can always get one for nothing on Craigslist.
Exactly right, Regina! 🙂
I love the hutch. Unexpected and fun. I’m sure Handan will make it beautiful.
Oh, she definitely will, Debi! 🙂
Am I the only one who thinks there should have been woodwork along the wall to the left of the washer/dryer? My ocd is freaking out right now. At least a trim piece to make it appear even.
If we did that, Ruth, we’d lose a few inches on the other side, and we’re going to need all the inches we have! 🙂
I like the hutch! It’s a great re-purpose of something you probably aren’t going to use otherwise. And isn’t this area in the garage? The hutch fancies up the place, and besides, there’s a light inside the top of it. You’ll be able to see what’s inside the hutch and have some illumination on the top of the counter. Win, win. I also like the final wall paint color. Nice job!
Greg, I like the hutch. The only thing in my OCD, are you going to paint the wall where the sink goes? I see what Ruth is saying. It doesn’t matter what we think anyway! It all looks nice and fancier!!
I’m very interested to see what comes next and how you finish out the “room” (area). I am a big fan of repurposing cabinetry especially pieces that are made well and solid. We have an old Hooker tv/entertainment cabinet in solid cherry wood that was our first real furniture purchase when my husband and I married 29 years ago. We bought it with 18 months 0% financing and paid on it for 18 months. Although it doesn’t work for our tv purposes anymore now we use it in our guest bedroom to store extra towels and linens and have a computer set up in the tv area. It’s so big and heavy it could also serve as a safe place in case of a tornado!! Love the wall color and look forward to seeing what the new fancy sink will look like.
I love the hutch because you and Handan will pull it all together in the end. You will end up with the most unique and beautiful laundry room ever! You will be the envy of the neighborhood! B
I think the hutch wld be better if it were painted to match your cabinets. Otherwise, looks great!
I love the hutch top. Great repurpose of a beautiful piece. Looking forward to the finished project.
I have faith in your vision for the hutch 😉!
I may have missed the answer to this but is there a way to access the washer hookup in the wall? I know this isn’t something that needs to be done often but in the event of a problem will you need to deconstruct your whole countertop?
I absolutely love the hutch!
Thanks, Judi!
I like the idea of repurposing the hutch top however the proportions of it above the washer and dryer seem off. It would be better repurposed as a freestanding book self or dispel cabinet. Floating shelves that span the length of the washer and dryer would be functional and more esthetically pleasing to the eye.