
DIY Halloween Candles (Pottery Barn Inspired) & Free Printable Designs
These DIY Halloween Candles are made with our free printable designs, and we think they look so much better than their Pottery Barn inspiration!

As you might imagine, Handan’s project list stretches To Infinity…and Beyond!
While this virtually assures that Yours Truly will be kept busy until his dying day (and Beyond!), it also means that many projects get back-burnered as new “Must-Do-Now!” projects are added to The List.
One such project that has been on the back burner for nearly 5 years (that’s longer than there’s been a Navage Patch, for those keeping track), is an easy DIY version of some candles that Handan saw in the Pottery Barn catalog in 2014.
These two guys.

My babes wanted to do this for flameless LED candles, and she actually made an attempt last year.

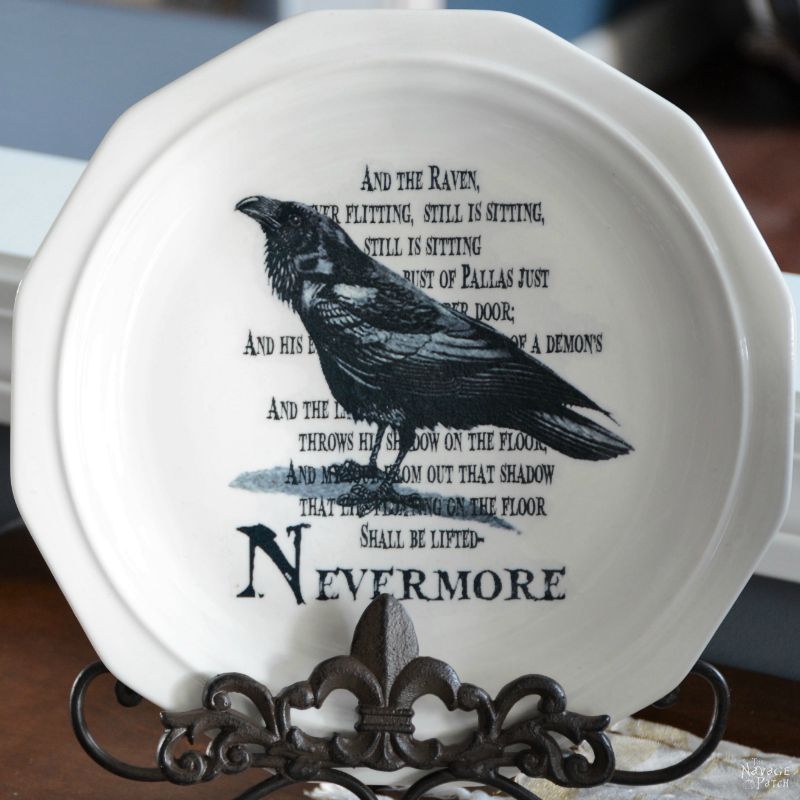
She used the same image transfer method she used for her Pottery Barn inspired Halloween plates.
The candle turned out pretty good, but there was just one small problem.
It wasn’t easy enough!
Not only does the image transfer method take a bit of time to do properly, but it also takes a little skill.
Skill.
You see, she needed a method that Ol’ Short’n’Stupid here could do.
You know…
Sausage Fingers.
Captain Dunderhead.
Baloney Brain.
ME!
Because if I can do it easily, anyone else can do it even easier!
So the image transfer method was out for these Halloween candles, and the project returned to the back burner to simmer in Handan’s brain until she could find a quick and easy way to do it.

Sometime between last October and this past spring, Handan discovered the wonderful world of tattoo paper, and it changed everything!
Okay, it’s not like it changed the world or anything, but we did use them on some Easter eggs that turned out pretty dang good!
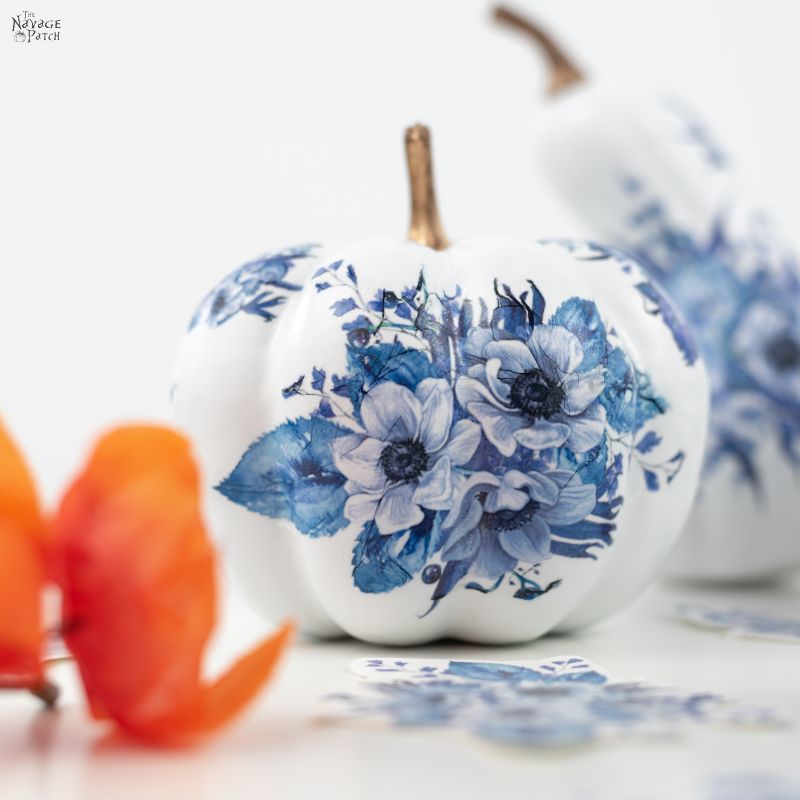
And we put them on dollar store pumpkins and created gorgeous works of art!
Okay, lemme stop you here. I know what you’re thinking.
But you’re wrong.
We didn’t use tattoo paper for the Halloween candles I’ll be sharing with you in a moment.
Tattoo paper is perfect for the eggs and pumpkins – those are spherical and creviced surfaces, and the ultra-thin tattoo decal can be molded perfectly to fit and fill.
We needed something for smooth and flat surfaces – something stronger than tattoos that would work well for larger images without stretching or breaking.
And as you may have guessed, my babes knew exactly what we needed. She called them waterslide decals.
Waterslide, eh?
My mind leaped back to the summer of ’17.
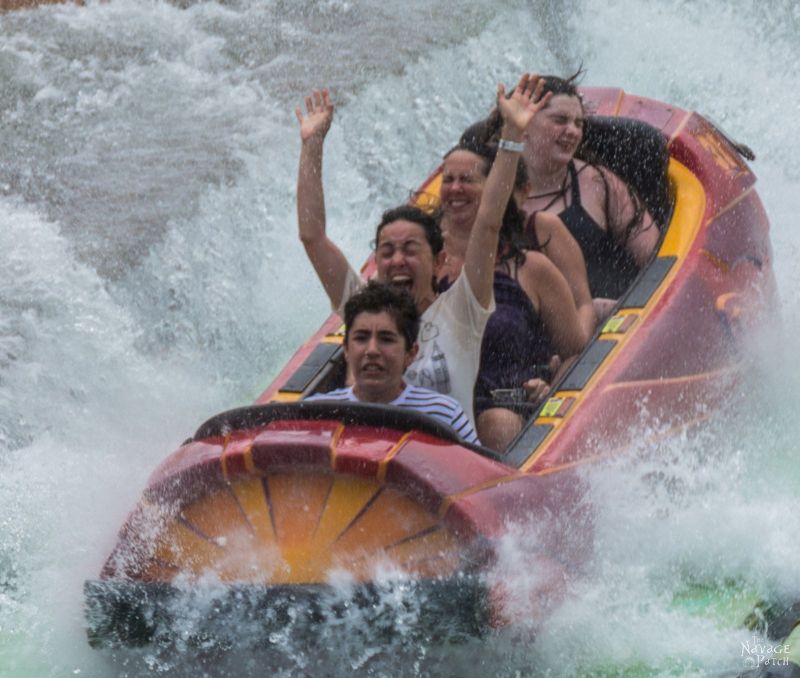
We had just arrived at Universal Orlando, and Handan and Barish wanted to take a ride on one of those log-in-the-water deals. It a sopping wet affair, and since I was the cameraman and moneyman, I opted to sit it out and snap a few pics.
I waited an eternity and took over 200 photos of strangers screaming and getting soaked before my wife and son took the final terrifying plunge.
Later, as I examined closeups of the pictures on my computer, I saw that some had enjoyed the ride more than others…

Much more…
“My babes!” Handan said, snapping me back to the present.
“Hmmmm? What? Oh. Right. Waterslide decals. Yeah, they sound great, my babes. Let’s get to it!”
DIY Halloween Candles SUPPLIES LIST
Affiliate links are provided below. Full disclosure here.
- Flameless LED candles – all sizes welcome (we used big ones from Home Depot and small ones from Dollar Tree)
- Waterslide decal paper for inkjet printers or for laser printers
- Inkjet printer or laser printer
- Free Halloween candle designs (available in the VIP Patch)
- Acrylic sealer (we used Krylon Kamar Varnish)
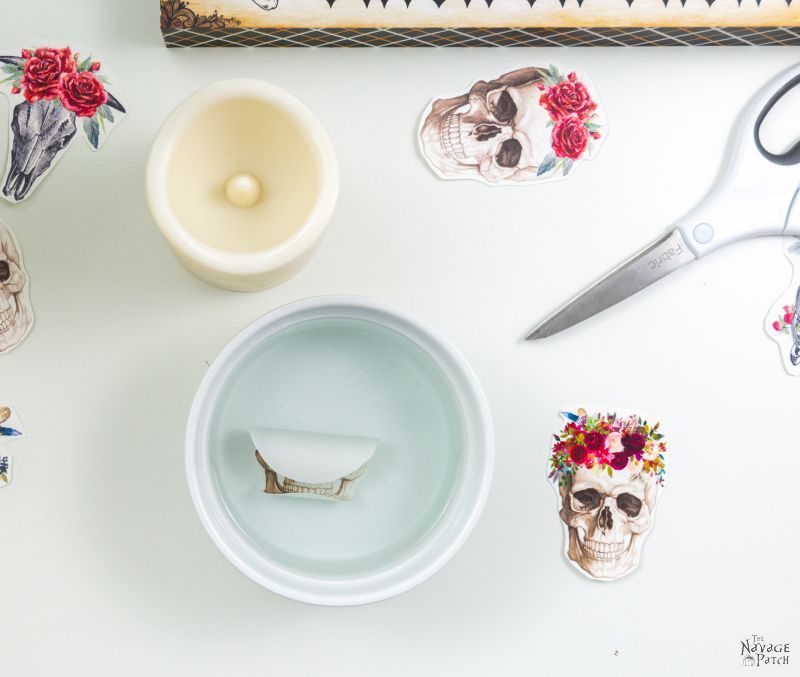
- Scissors
- Bowl of warm water large enough to fit your designs

We love to see our DIY Halloween decor out in the wild! If you make this Halloween DIY decor for your home, take a picture or video and post it on Instagram, be sure to tag us – thenavagepatch
DIY Pottery Barn Inspired Halloween Candles
Step 1 – Print the water decals
Okay, first things first. Depending on your printer, you’ll either need to buy inkjet waterslide decal paper or laser waterslide decal paper.
They are not interchangeable! (Of course we tried!)
So what’s the difference? Inkjet waterslide decals will tend to have more vibrant colors than laser waterslide decals. Other than that, either is acceptable and either works just fine.
The ones I’m sharing with you today were all made with inkjet waterslide decals.

Step 2 – Seal the water decals
*Important! You must use acrylic sealer!*
I sprayed the first several sheets Handan printed for me with Rust-Oleum Matte finish. We then endured several frustrating attempts to transfer the decals, only to have them stretch and break and turn into a gooey mess.
Maybe Handan told me to seal them with acrylic sealer, and I just didn’t hear her or understand the importance of what she said, or maybe she never told me at all. The answer to that is forever lost to history, but it doesn’t matter.
What does matter is that we finally put 2 and 2 together and understood that our problems stemmed from the Rust-Oleum non-acrylic sealer melting the plastic decal layer!
Once we figured that out, I switched over to Krylon Kamar Varnish. This is the same sealer I used on our DIY alcohol ink switch plates.

Problem solved!
Now, regarding how many coats to apply – I sprayed some sheets with one “regular” coat, and I sprayed other sheets with two heavy coats.
This gives two very different results, and I will address them fully in Steps 4 and 5.
Step 3 – Cut out the design
Let your scissors do the walking…


Step 4 – Soak the water decal
Drop him in and watch him curl!

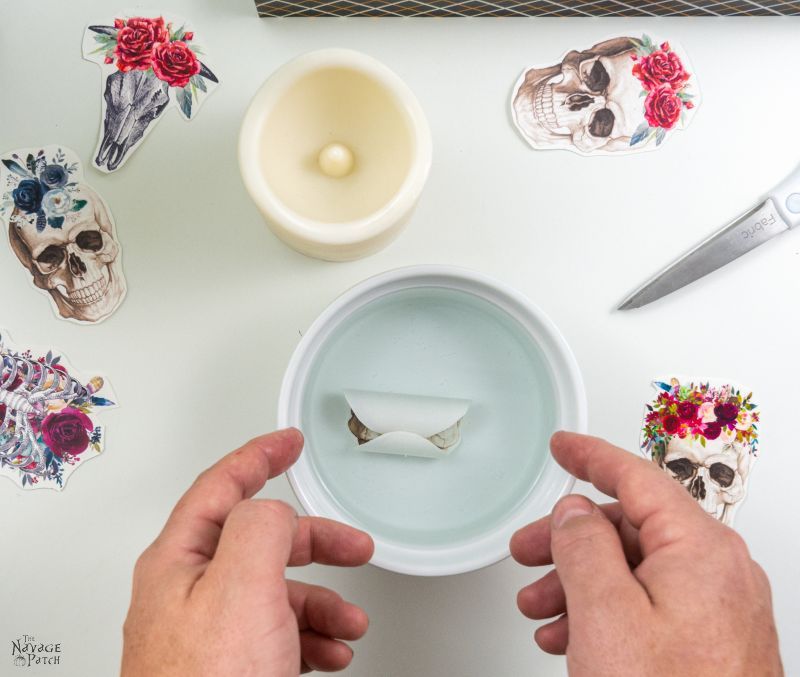
Let him sit there for a minute or so – he’ll start to unfurl.
Use your fingers to fully uncurl the decal.

This small skull took about a minute for the decal to loosen from the backing. Note that the sheet this one came from was sprayed with two heavy coats of varnish.
The large decals that I sprayed with two heavy coats took about 10 minutes for them to fully loosen.
The decals that were sprayed with one coat loosened much quicker – almost right away for the small ones and less than a minute for the large ones. More on this in the next step.
Step 5 – Position and adhere the water decal
When you’re sure the decal has fully loosened from the backing (you’ll be able to slide it around), pull it out of the water and position it on your candle.

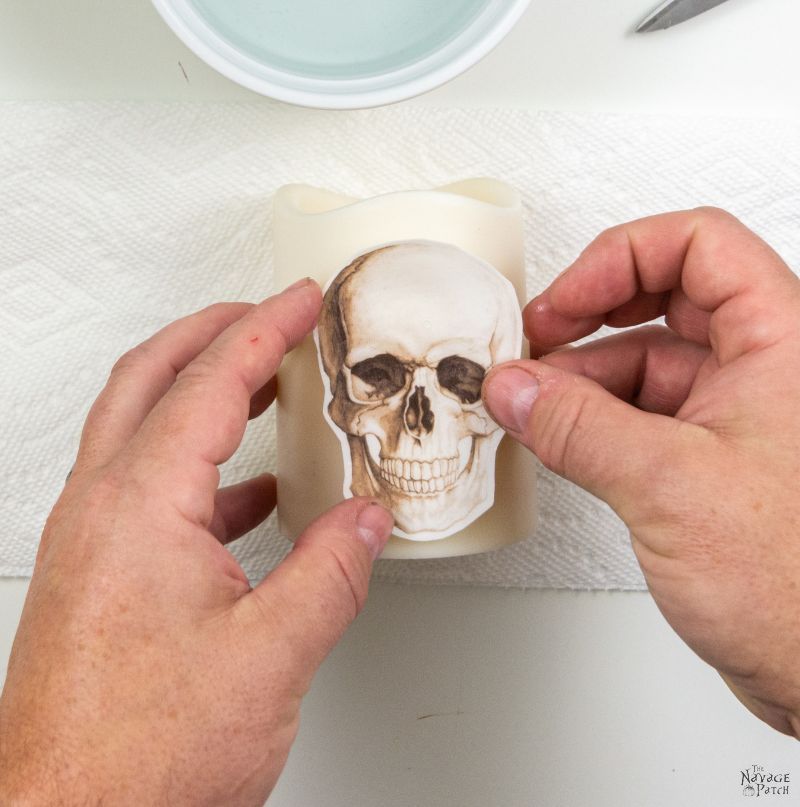
Slide the decal up until the top is clear of the backing. Press the top of the decal against the candle and begin to gently and slowly pull the backing down and off from the bottom.

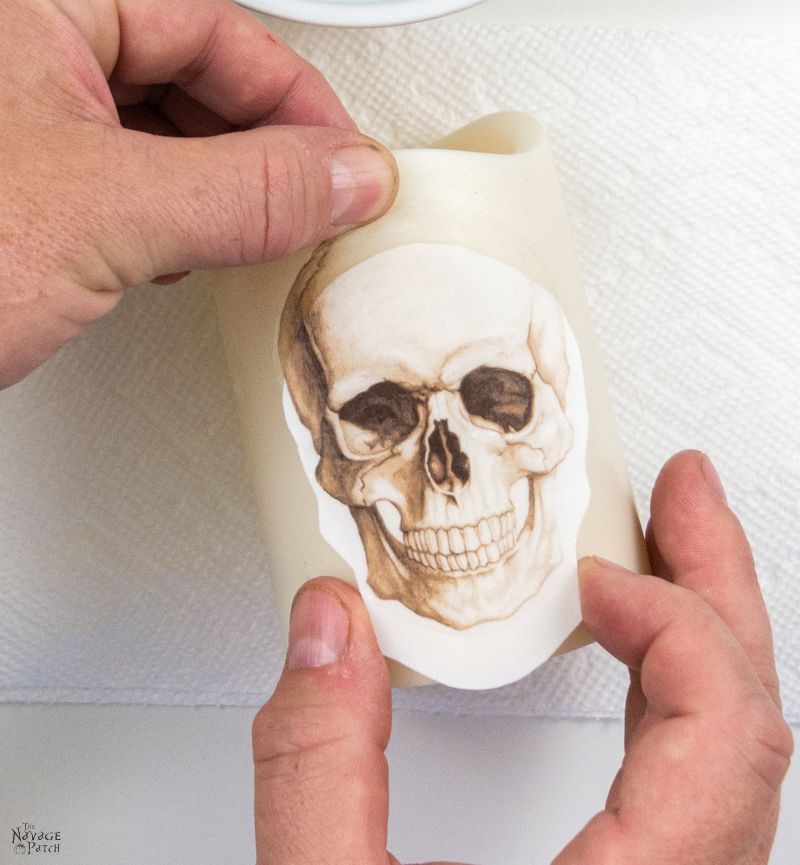

Now that the waterslide decal is on the candle, you can adjust it so that it is straight and positioned exactly where you want.

There will most likely be small wrinkles and bubbles under the waterslide decal. You can easily rub them out with wet fingertips.


You can wipe away any excess water on the candle, but leave the waterslide decal to dry naturally.

We found the decals with two heavy coats of varnish were much easier to work with than those with one coat, especially for the large decals. Though they took much longer to loosen from the backing, they were easier to apply, and they didn’t wrinkle nearly as much as those sprayed with one coat. As an added bonus, two coats gives a deeper shine which brings out the colors even more.

These Pottery Barn inspired Halloween candles are perfect in our spooky display, don’t you think?


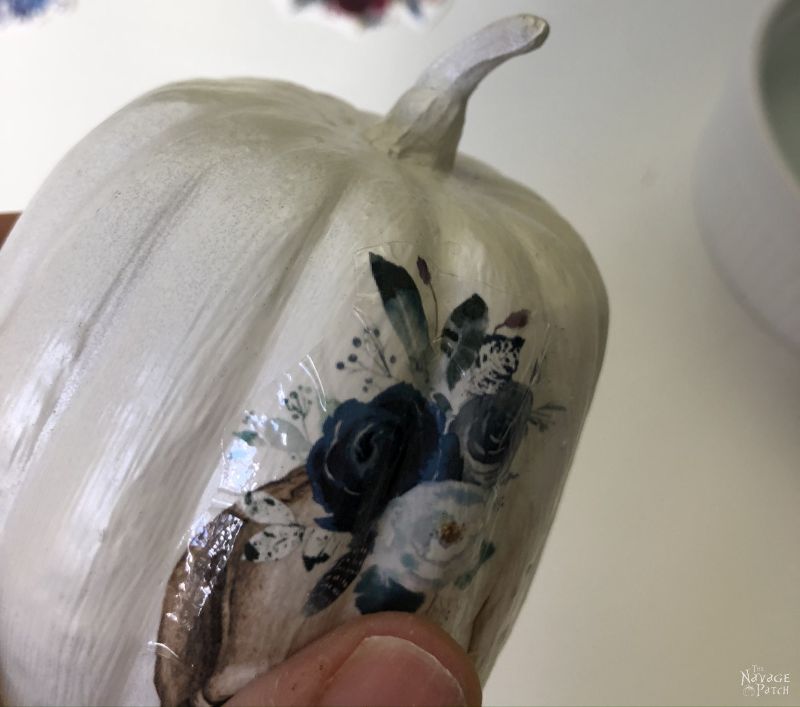
Update:
For those wondering if you can use waterslide decals in place of tattoo decals on oddly-shaped surfaces like pumpkins, the answer is no. To save you time and money, we experimented with it and took pictures. Notice in the pics below how the thicker waterslide decal just won’t conform to all the hills and valleys of the pumpkin. No amount of finger-smoothing could get rid of those creases in the plastic decal. Tattoo decal plastic is a much thinner and more pliable film than waterslide decal plastic. The two are unfortunately not interchangeable.


*******
Free Printable HAlloween Tatoo Designs
All these free Halloween candle designs are offered in the two most common waterslide decal paper sizes: 8.5×11 inch and A4.
We also have two versions: PDF and JPGs. The PDF versions were designed to fit small pillar candles, and they are not scalable. The JPGs were designed to fit large pillar candles, but you can scale them up or down as necessary to be able to use with mugs, plates, etc. If you need help with scaling these printables, make sure you check out Handan’s “How To Easily Resize Pictures” post.
Now it’s time to click on the button below to download today’s free Halloween candle designs – they are all in the Halloween section of The VIP Patch.
take me to your
amazing freebies library
If you’re not a Navage Patch VIP, you won’t be able to access our Freebies Library. But that can be easily fixed! Subscribe for free on the form below and become a Navage Patch VIP. Once you subscribe, a password will be sent to you in our Welcome email, and that will give you access to The VIP Patch [Freebies Library].
Share it on Pinterest & Facebook!


Once again, your designs always improve on the Pottery Barn originals. Very nice.
Thanks, Laurie and thank you for writing – looks like it’s just you and me today, lol! 🙂
Another great idea from the “Patch”! Thank you! I remember the waterslide decals from my childhood, and I had no idea they sold the paper! Fun! (I especially love the skulls that ‘identify as female’ with the floral crowns!) Thanks for your hard work!
Thank you, Terra! I never knew these things existed until Handan showed me. So fun and easy to work with! LOL, I like those skulls, too! 😀
I love your Pottery Barn inspired candles! But I’m so confused as to when to use waterslide decals and when to use tattoo paper. I did try tattoo paper but the paper you recommended was not available (you must have bought it all from Amazon) so I had to settle for another brand I will never ever recommend. My purple flower tattoos that I used on painted glassware to mimic transferware were not as sharp in detail as yours. (I sent Handan an email about my results) I have used waterslide decals before on a metal watercan and I was quite pleased with the results. Now, thanks to you, I’m going back to the glass container and try the waterslide decal to see if that looks better. Only problem – it’s the same brand that I got for the tattoo paper. Wish me luck!
Thank you, Gail! I’m gonna leave the rest of your comment for Handan to answer – she’s the expert!
Yup, way better than the PB originals, love the softer sepia tone with the ivory candles.
Thanks, Paula! 🙂
If there’s something I like almost as much as temporary tattoos, it’s waterslide decals. I have my paper lined up for Christmas to make two handmade baubles for the new additions to the family. I really like the opacity of the images you’ve provided us – definitely an improvement on the PB ones, I think!
Thanks, Jay! We’ll be back with more of these for Christmas, too! 😀
I’m planning to make (meaning Handan is planning for me to make) some xmas candles and glass baubles with vintage Santa images and other xmas images. Look for that post the week after Thanksgiving.
Love these decal candles! I’ve already downloaded and added the slide paper to my Amazon cart and can’t wait to make a couple. Question: in the photo of your Halloween collection you show a very cool Happy Halloween banner, but I don’t see it in your library. Is there a downloadable file for the pennant letters?
Thank you, Leslie! Ah, so you noticed our banner! 😀 You won’t find it in the VIP Patch just yet…you’ll have to wait until next week! 😉
Yes, love it – yay! It’ll be worth the wait 🙂
Handan/Greg,
This post is great. It answered my previous question in one of my last replies. This is awesome and will work perfectly on the project I had in mind. Handan thanks for being the “guinea pig” and trying these out. Y’all are awesome!! 🙂
Awesome! We’re here to help! 😀
I’m so glad this post was helpful! The week after Thanksgiving we are planing to try both waterslide decals and temporary tattoos on some Christmas ornaments. Keep an for that post too, because I think that will be another great trial and error project for us, so we’ll all learn more about the limits of temporary tattoos and waterslide decals 😉
Love these! Great job! I’m not really a fan of “faux candles”, so could I use this technique on real candles?
Thank you, Christy! You could use these on real candles as long as you don’t plan to burn them.
I have kind of the same question as someone above…I would like to make the pumpkins, too (provided I can still find some at the dollar store!) but I can’t afford both Tattoo paper AND Waterslide paper. Could I use the Waterslide paper on the pumpkins, or do you think it wouldn’t work? I am going to order the waterslide paper now so I can make the candles. I can’t believe I’ve been crafting for fifty years and never knew about this stuff! LOL! I like other people’s ideas of making some personalized Christmas ornaments! I’m going to see if Walmart carries the varnish.
Thanks for some great inspiration!
Jana
Hi Jana, unfortunately you can’t use waterslide decal paper for pumpkins. I just updated the post with new information and pictures on this topic just underneath all the beauty shots of the candles. You’ll understand why when you see the pictures. Sorry! 🙁 Regarding the ornaments – we’ve got you covered! We’ll be out with some new printable decals for ornaments and baubles the week after Thanksgiving! 🙂
Another great idea from The ‘Navage Patch’ they look fabulous!, You two are so clever with incredible imaginations, do you ever find time to eat and sleep?!
Thank you so much, Catherine! I always make time for food. Sleep is harder! 😀
What I know is not worth much but, you might make little slits into the waterslide decal around the edges to make it conform to something with texture but probably would still be rough on a pumpkin!
Yes, that would certainly help, but yeah, it most likely wouldn’t be enough to make it as smooth as a tattoo. Good suggestion, though!
I live in a very remote part of Papua New Guinea, so no specialised paper for me. I just printed out the small skulls on normal paper and used blue tac to stick on candle. I’m still very happy with the results. Sorry don’t do Instagram or I would post a photo.
That’s great to hear, Deb, and I’m thrilled that our printables are reaching the remotest regions of the globe! 🙂