DIY Alcohol Ink Switch Plates
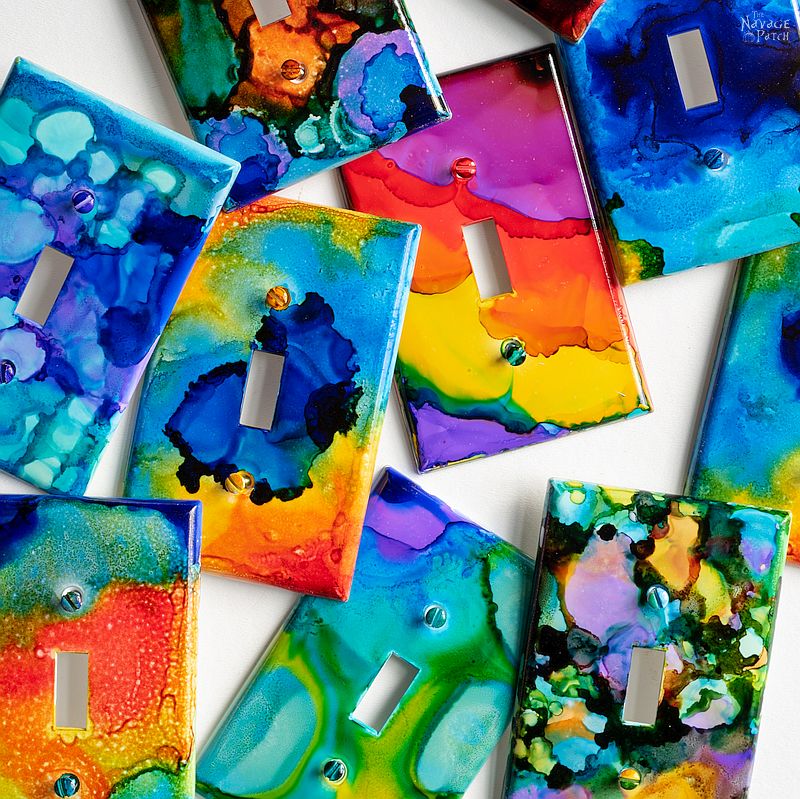
DIY alcohol ink switch plates are the perfect way to bring a pop of color into any room. They’re simple and fun, and no two are the same!
One of our main goals with the Teen Bedroom Makeover is to create a light-filled space in which Barish will enjoy his work time and chill time. To achieve that space, we painted the walls of The First Room to a beautiful off-white color by Behr called Bit of Sugar. Now that the walls, ceiling and trim are all white, his room kinda feels like an asylum.
In other words, it’s the perfect room for a teen, LOL.
Lest the boy go crazy from all that white, we wanted to break the monotony with little bursts of color here and there like these DIY alcohol ink switch plates I made. I told you we’d be bringing some color to your inbox, didn’t I?
Well, here we go! Today we’re proud to present the DIY alcohol ink switch plates I made over the weekend.
Slap your neutrals in the butt, cuz Handan and I are bringing Color Back!1

The best part? Creating these alcohol ink switch plates couldn’t be easier, and the results will make you feel like Monet!
While this much color may not work in all rooms or spaces, we think they’re the perfect addition to a teen room.
Are you ready to bring some Color Back?
A quick note on alcohol inks for those unfamiliar with them. They are meant to be used on non-porous surfaces like these switch plates. They work brilliantly on glass or porcelain. A non-porous surface allows the inks to flow together and create new colors and fascinating shapes. When used on a porous surface, the inks soak in, and the chance for the beautiful watercolor-like effects is lost.
Let’s take a look at what you’ll need.

DIY Alcohol Ink Switch Plate
- Switch Plates – Home Depot sells a 10-pack of oversize plates for less than $5, or you can find them on Amazon
- Alcohol inks – Michael’s carries the Adirondack brand, or you can get a far cheaper set on Amazon
- Isopropyl alcohol
- Small paint brushes
- Small bowl
- Foil-lined tray to work on (you don’t want to get these inks on anything you value!)
- Straw for blowing the ink around (or you can just use your mouth)
- Acrylic sealant (we used Krylon Kamar Varnish)
DIY Alcohol Ink Switch Plates : The Motion Picture
Why read when you can sit back, crank up the sound and let the information flow directly into your brain box? For those who prefer to read, you’ll find a full tutorial with pictures below the video.
DIY Alcohol Ink Switch Plates: The Written Tutorial with Pictures
Alcohol inks will ruin almost anything they touch, so I like to work on a foil-lined baking tray. For the purposes of the video, I put a few sheets of paper on top of the foil, and that is what I worked on. I lined 2 other baking trays with foil to serve as drying areas for the finished switch plates. When I finished a switch plate, I lifted the paper with the switch plate still on it and moved it to one of the drying trays.
Let’s get to it.
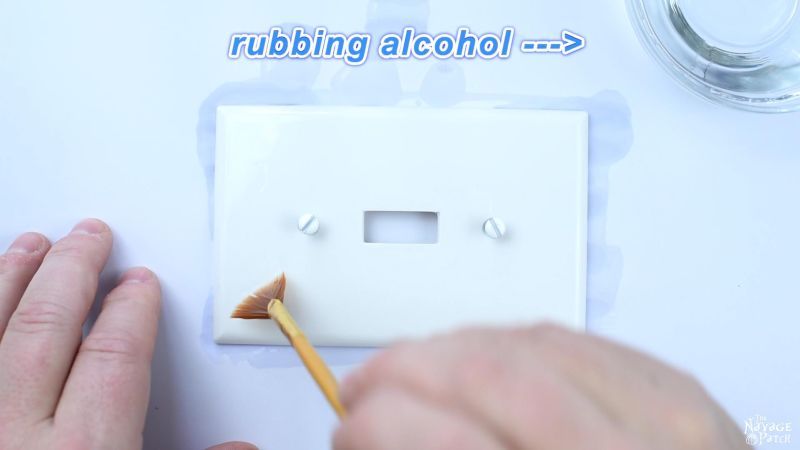
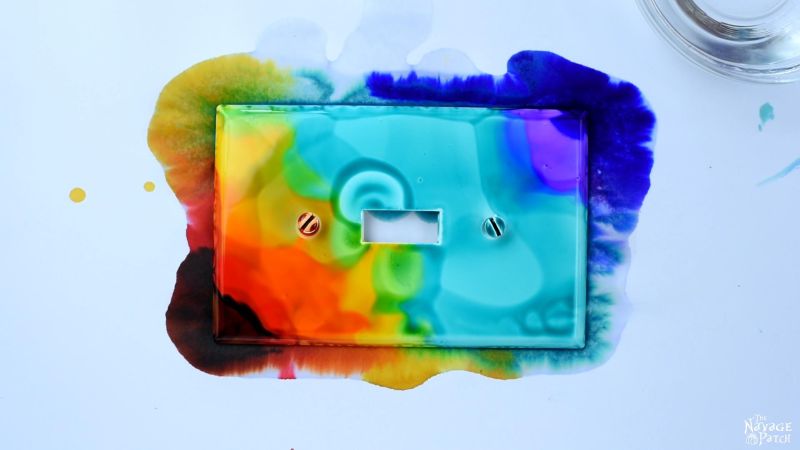
First, I brushed the switch plate with rubbing alcohol.
Then I started adding colors. The inks do all the heavy lifting, and they interact in unpredictable ways.
You can experiment with different methods and colors. Try blowing the inks around. Every switch plate will be different and unique.
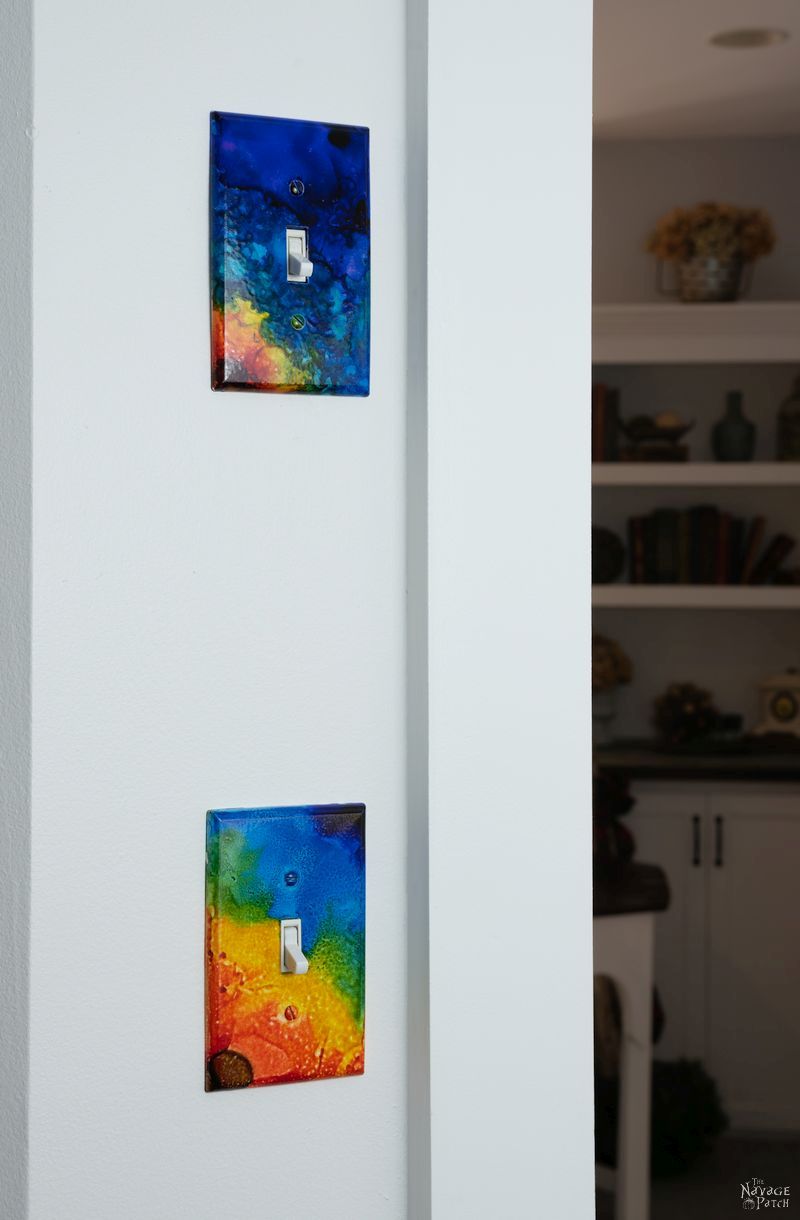
This alcohol ink switch plate is just one of 20 that I made.
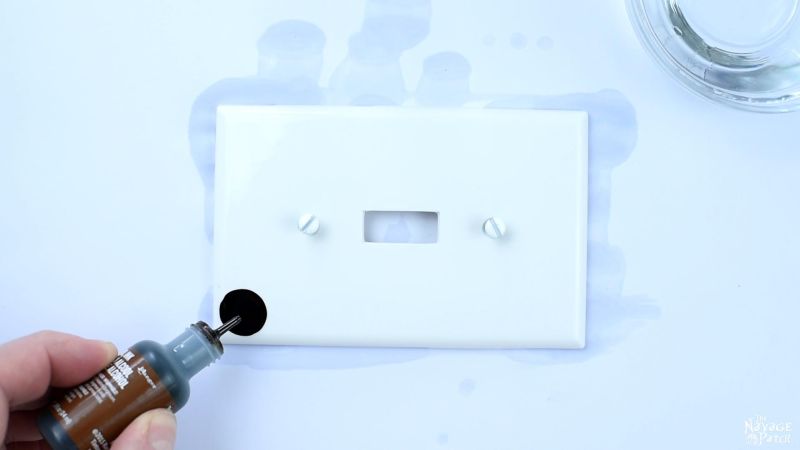
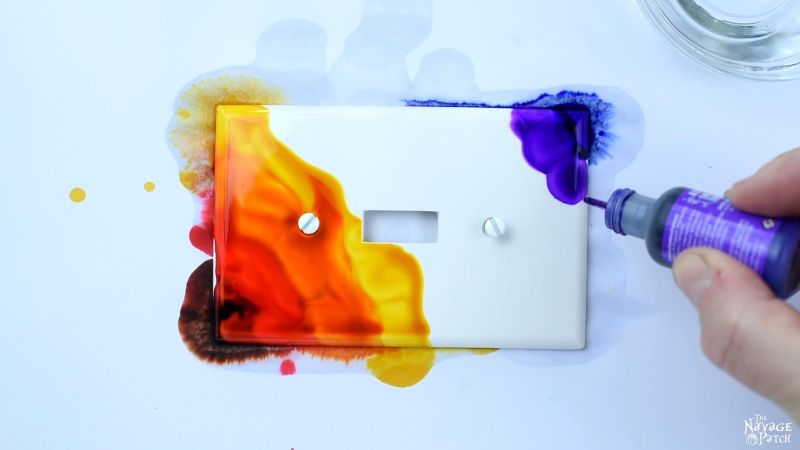
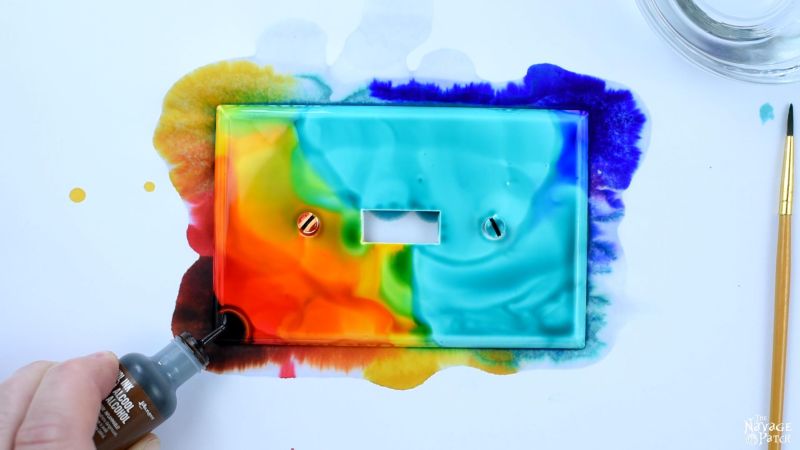
I started with brown in one corner.
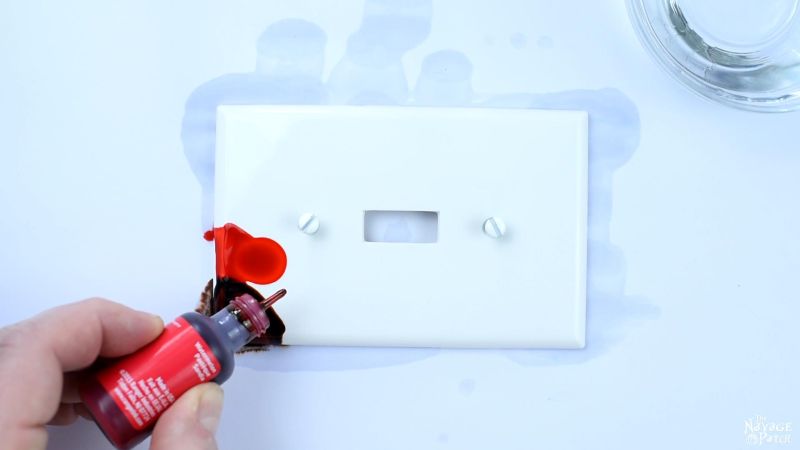
Next, I added some red next to the brown.
I followed the red with orange.

And then I added some yellow.

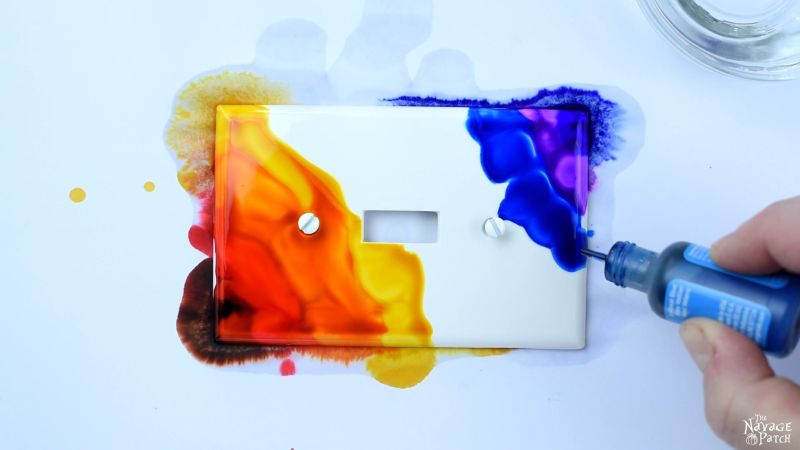
I then moved to the opposite corner and applied a few drops of indigo followed by purple.
After the purple, I put on several drops of regular blue.
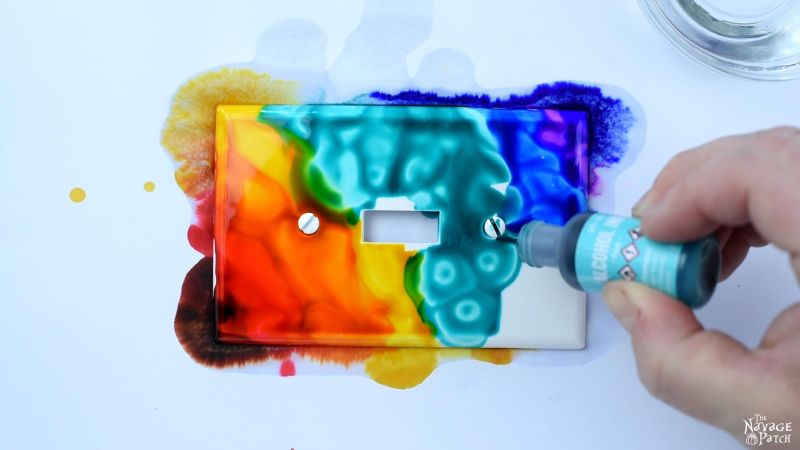
And then I filled the middle with a tealish color.
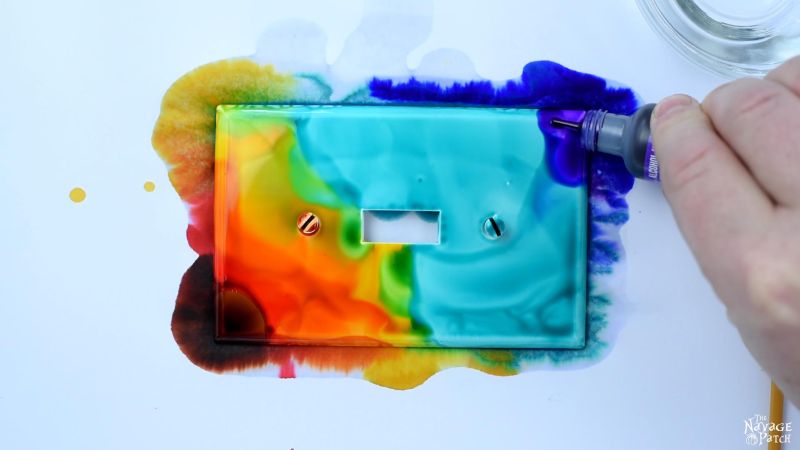
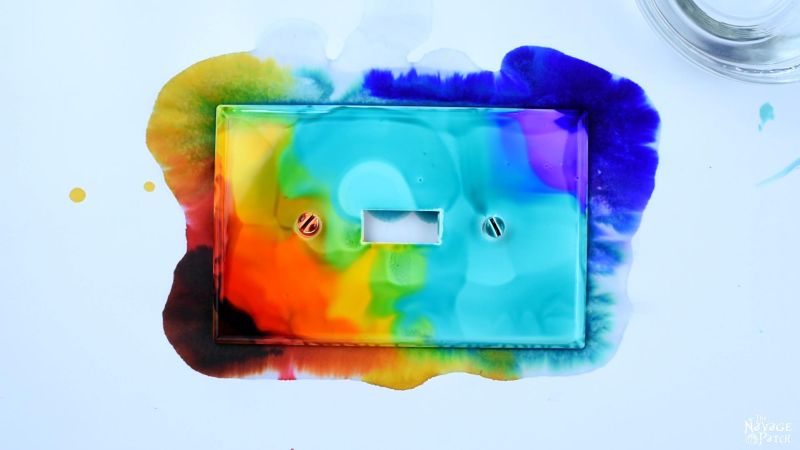
Using a small brush, I covered up any bare spots. I use a few different brushes for the repair work – one for each color family, so I don’t cross-contaminate colors.

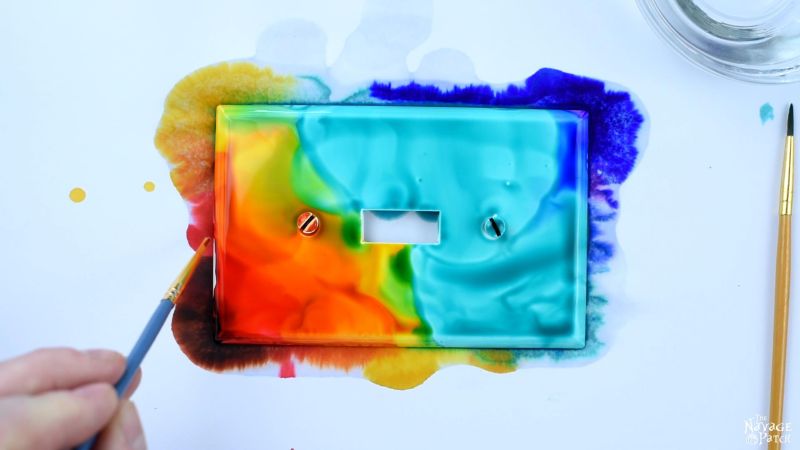
By this time, my brown had been mostly pushed off of the switch plate, so I added some more to the corner.
Ditto, the indigo in the other corner, so I added a few more drops there, too.
A few more minor touch-ups…
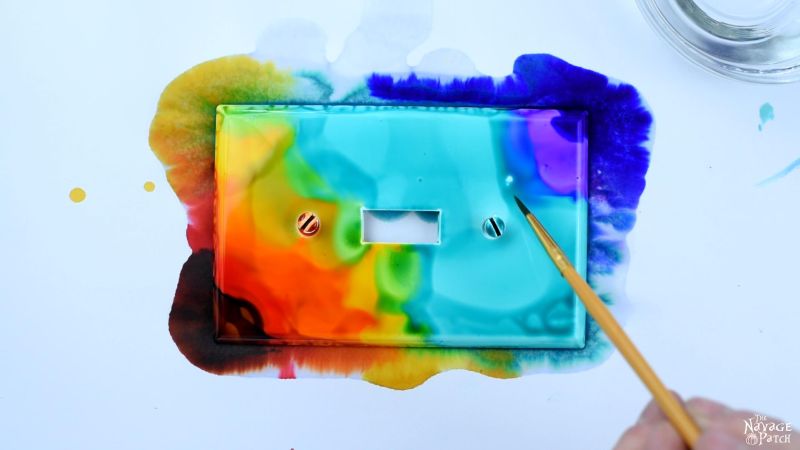
And then I tried to cover a small bare spot by the switch hole by adding another drop of teal.
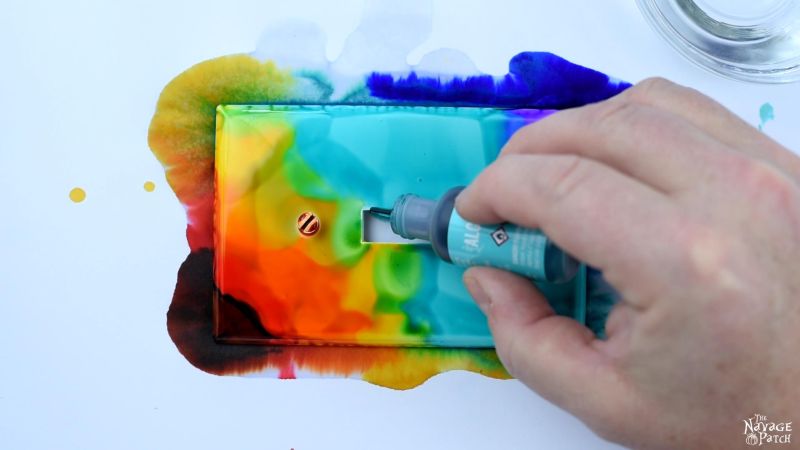
It covered the spot, but it made its own new shape in the design. I probably should have left it alone. Alcohol ink is unpredictable!
After a short time, the inks stopped moving and the DIY alcohol ink switch plate had it’s final form.
I let them dry overnight, and then I sealed them with a spray acrylic sealant. Krylon Kamar Varnish is an excellent choice to seal your alcohol ink switch plates, though any acrylic sealant will do.


I goofed up on my first 10 by thinking I could use any old sealant. Big mistake! I sprayed that batch with Rustoleum Clear Coat, and the solvents in the spray dissolved the alcohol ink. Still, they don’t look too bad…
The best way to finish these, if you have the time, is with clear epoxy resin. I only did the one below with epoxy.
The epoxy will seal up the screw holes, so you’ll need to drill them out once the epoxy has cured.

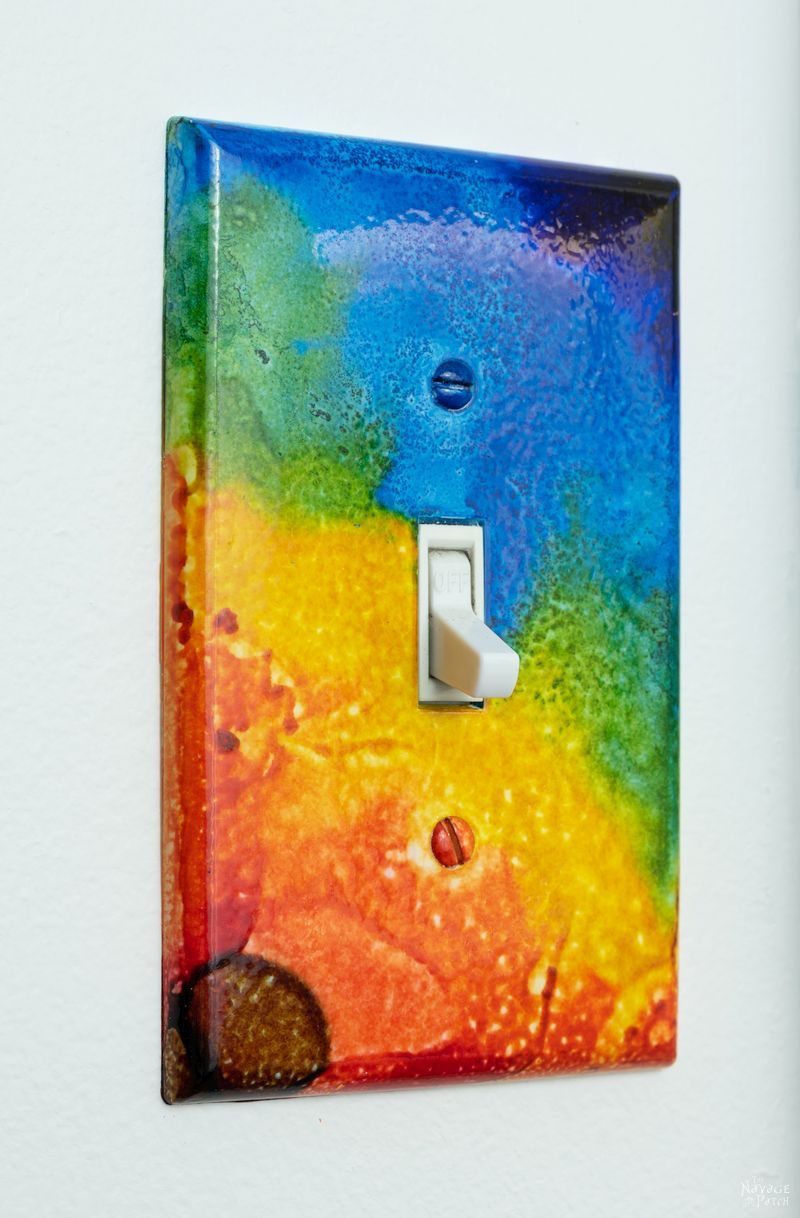
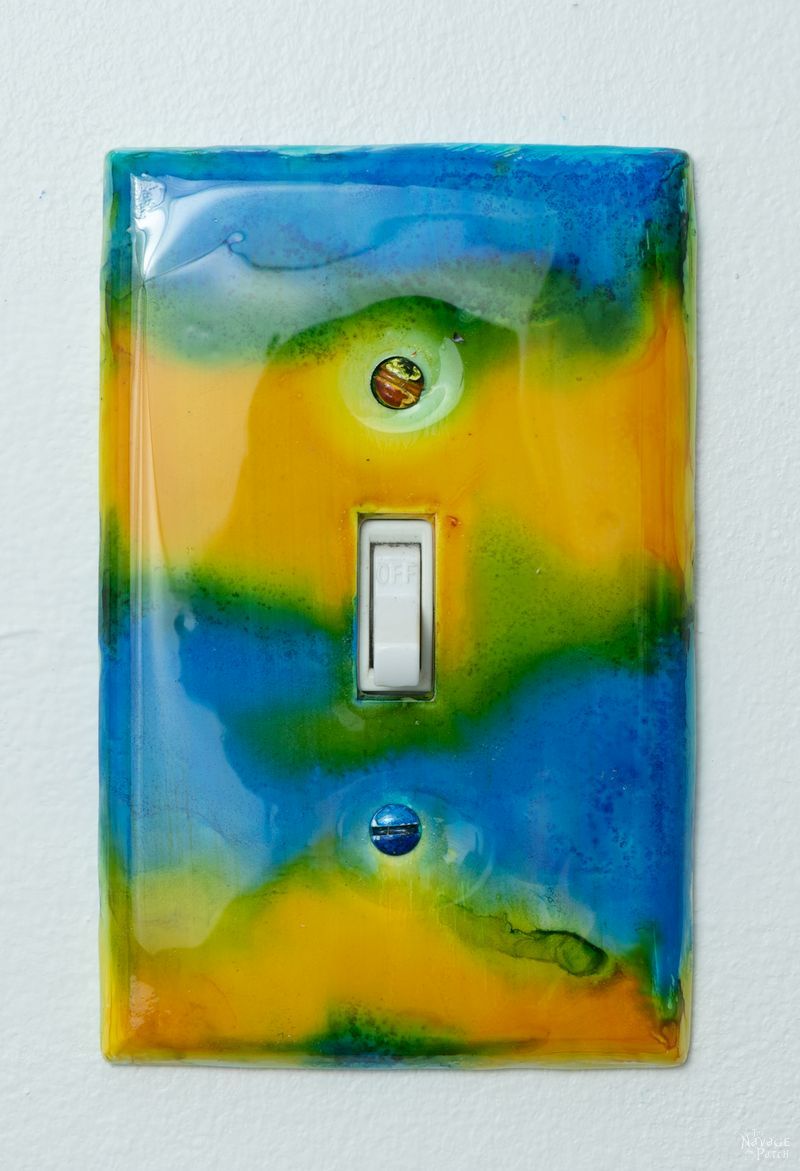
Barish now has 4 of these in his bedroom. Here are the two by the entrance.
Once we finish his teen bedroom makeover, you’ll have a chance to see how these DIY alcohol ink switch plates play with the other elements in the room.
Here’s a look at all the rest.

Okay, so these DIY alcohol ink switch plates weren’t on the original checklist for Barish’s room makeover, but I think we can put them on there and cross them off! Stay tuned for Barish’s new daybed next week!
Teen Bedroom Makeover Checklist (for The First Room)
Teen bedroom ideas and laying out the game planDIY alcohol ink switch plates- Paint the walls
- Build 2 IKEA Billy Bookcases
- Build a daybed
- Hack IKEA Kallax into a TV stand
- Create an accent wall
- Buy or DIY plugin sconces
- Make wooden wall art
- Build a small chess table
- Build 2 guitar display frames
- Buy a new desk
- Change the fan
- DIY fired alcohol ink art
- Hack IKEA Laptop Stand
- Buy throw pillows
- Add greenery: faux plants, air plants, DIY air plant holders
- Metal filing cabinet makeover
- DIY Craftsman style trim
- World map wall art
- Small closet makeover
- Barish’s first room reveal
Click here to see more teen bedroom makeover posts as we continue to cross items off our checklist!
1When Handan read this part, she had no idea what the heck I was babbling about, so I guess I better explain for everyone. “Bringing Color Back” is a reference to Justin Timberlake’s song, “Sexy Back” in which he proudly exclaims that he is “bringing sexy back (yeah).” So while he gets to bring sexy back, we’ll just settle for bringing Color Back into everyone’s neutral lives 🙂
We love it when you share our posts on Facebook and Pinterest!


Alcohol inks look like fun to play with. I should try some wall art with them. I’m looking forward to seeing how you will be transforming Barish’s room.
They are really fun, Laurie! We’ll be doing some wall art for Barish’s room with them as well!
Enlightening!!! Love what you did!! franki
Thank you, Franki! 😀
Love them and all the color! I might need to play with alcohol inks. Keep up the good work and thanks for “bringing color back”! Looking forward to see what you next do in the teen room.
Thanks, Barb! You’ll love the alcohol inks – they’ll make you feel like a true artist! 🙂
YES!!!!!!!!! I’m all for bringing gorgeous, glorious, wild and wonderful color back. I’m so getting tired of safe, boring white, with a hint of “white” to brighten things up. Like really people, live a little 😀 I can’t wait to see how the whole room turns out. Go wild sweet child, ermmm I mean crazy teen.
LOL, we’ve got a lot more color coming your way, Michelle! 🙂
Greg, you know I love you.
That said, and this may be anal BUT…the screws on the light switches should ALL have the slots going North/south, straight up and down, just saying.
The little white area around the switch should be hit with a sharpie so it isn’t WHITE to screw up all that beautimous color.
Keep up the creative work.
Hugs,
Maggie
1-29-19
LOL, you got me there, Maggie! I’ll touch it up. BTW, in this house, we’re East/West – that’s the way Handan taught me. Me? Don’t care one way or the other. I just tried to match the colors 😀
I love you guys! I look forward to your posts because not only are they creative, inspirational and educational, they are usually funny. I love Greg’s credits on the video. Glad to know that no one was harmed in the making of the video!
Thank you so much, Judy! Everything is better with a little humor, isn’t it? 😀
WOW colour has definitely been brought. Gorgeous. If they suited my decor I’d be running out to get some alcohol inks tomorrow…as it is I’m trying to think about how I could use them. Maybe as some background paper… Really nice work as always!
Thank you, Jay! Yeah, they’re not for every decor, but they sure do make a statement! They look awesome in Barish’s room.
You don’t mention what you have the switch plate on whilst you are applying the ink and where they are placed to dry…care to let me in on the secret? I have played with acrylic paint on switch plates and needed to have something in the center to keep the edges from having gravity pull down the paint and have it stick to anything underneath. Can the inks be used on anything that is non-porous…and how do they react with something porous? This looks like it would be fun to create a sofa-picture-sized piece of artwork with…perhaps on metal? Oh the ideas you have unleashed!!
All excellent questions, Susan! I will update the post with the answers. Thank you so much for asking! 😀
You guys are the cutest couple and I read your WHOLE story when I signed up! Love all the cool projects! Thanks!!
Thank you, Pam! 😀
This is SO COOL!!!!
Thanks, Harjith! 🙂
So cool and perfect for a teenager’s room! The 12-year-old boy in me smirked a little bit when I got to the part where it said you can blow on the ink….with your mouth…. With your mouth, Greg, not your butt! Just me? Okay, oops.
I suppose you could also blow on it with your butt, Lori, but the intermingling of fumes could be toxic, lol! 😀
These are TOTALLY AWESOME!!! I wish I had seen these back when my son was still at home ~ he would have loved these in his room. <3 Really fun idea to make a room come alive and hide those necessary plates {I could see doing this to the ceiling vents, too!}. Pinned to several boards for you both. <3
Happy finishing your son's bedroom! I've wall-papered a switch cover before.
Hugs,
Barb 🙂
Hi Barb, thank you so much! I had a blast making those switch plates – I think I made 20 in all! They’re pretty addictive, lol! That’s a great idea to do the ceiling vents 🙂
These are soooo cool! Love the colors, and especially love the look with the clear epoxy resin coating added. I tried an alcohol ink project once but wasn’t happy with it, but I also didn’t use alcohol. Does that help it to run and mix better?
Hi Linda, yes pre-coating with rubbing alcohol makes the inks flow like magic! Give them another try – alcohol inks are a super-easy and forgiving medium, and they make you feel like an artist!
Love these! Friendly update for anyone working with alcohol inks – do a test with any spray on finish. Some contain alcohol and can reactivate the ink! These are gorgeous and the Kamar works great.
Thank you, Suki! Good tip on the finish!