
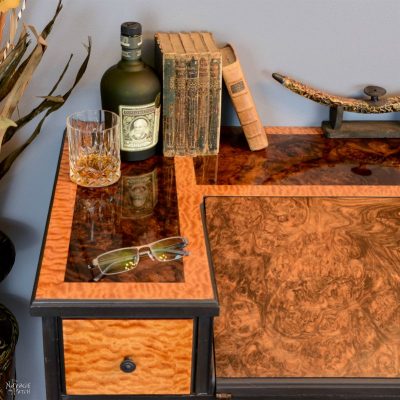
West Elm Inspired DIY Industrial Bookshelf (with Free Plans!)
DIY Industrial Bookshelf / Storage Tower
- 2 Sheets 1/2 inch birch plywood (or any good quality plywood with interesting grain). If you’re building 2 towers like I did, 3 sheets will cover it.
- 1/2 Sheet 3/4 inch plywood (For file drawer bottom. Can also use 1/2 inch if necessary)
- (4) 3/4 x 1/8 x 72 inch pieces of angle iron
- Kreg Jig
- Brad nailer
- Drill
- Impact driver
- 9/16 inch lath screws
- 5/32 or 3/16 inch metal drill bit
- 12 inch speed square
- Wood glue
- Detail sander
- Random orbit sander (optional, but speeds things up)
- Golden Oak stain
- Satin wipe-on polyurethane
- Flat Soft Iron spray paint
- Mineral spirits
- 1-inch narrow utility hinges
- Drawer/cabinet pull or knob
- Magnetic push open latch
- (4) 2 inch rigid casters (for the file drawer)
- 1/4 x 48 inch plain steel round rod (for the file drawer)
- Hacksaw (for the file drawer)
- 1/4 inch Forstner drill bit (for the file drawer)
- Drawer pull (for the file drawer)
- (6) 5/8 inch ball transfer bearings (for the file drawer)

DIY Industrial Bookshelf / Storage Tower Cut List
1/2 inch plywood
- (5) 19 3/4 x 18 3/4 – tops and bottoms
- (2) 18 x 19 3/4 – bottom sides
- (1) 18 x 18 3/4 – bottom back
- (2) 16 x 19 3/4 – middle sides
- (1) 16 x 18 3/4 – middle back
- (1) 18 1/4 x 14 3/4 – middle door
- (2) 10 1/2 x 19 3/4 – top sides
- (1) 10 1/2 x 18 3/4 – top back
- (1) 18 3/8 x 17 – file drawer front
- (1) 12 1/4 x 12 1/2 – file drawer back
- (2) 6 x 17 – file drawer sides
3/4 inch plywood
- (1) 16 3/16 x 17 – file drawer bottom
Steel rod
- (2) 17 3/4 pieces

DIY Industrial Bookshelf / Storage Tower Dimensions


DIY Industrial Bookshelf / Storage Tower Plans
Step 1 – Build the boxes
These boxes are a straightforward build. Use wood glue and brad nails to secure them together. I don’t recommend pocket screws, as the pocket holes would be visible with this project. the pictures below are color coordinated by plywood size.
Tip: when brad nailing, use a speed square to keep your brad holes in a line and evenly spaced.


Step 2 – Build the rolling file drawer
Drill 4 or 5 pocket holes along the underside of the front edge of the file drawer bottom.

Flip the piece over.

Also drill two pocket holes on the inner front edge of the two file drawer sides as shown below. Once the pocket holes are drilled, attach the sides with wood glue and brad nails.

Before attaching the back, drill two 1/4 inch holes according to the dimensions given above.
Attach the back with glue and brads.

Before attaching the front, drill two 1/4 inch holes to a depth of about 1/4 inch according to the dimensions given above.
Attach the front using glue and pocket screws. Note that if you don’t mind brad nail holes, you can skip the pocket screws and just secure with glue and brads.


Step 3 – Sand, stain and seal
At this point, you can sand the file drawer and boxes with 150 grit and then stain with Minwax Golden Oak.
When the stain is dry, seal with 2-3 coats of satin wipe-on polyurethane.
Step 4 – Drill screw holes in the angle iron
Note that you’ll be drilling two like the one shown on the left and two like the one on the right.
Also note that although they’re sold as 72 inches, I found up to a 1/2 inch variance in the heights of the angle iron I bought. With a hacksaw, I trimmed all the pieces to be of
Measuring from the top, drill holes at: 2 1/4, 5 1/4, 8 1/4 inches
Measuring from the bottom, drill holes at: 3, 6, 9, 12, 15 inches
Measuring from the bottom drill holes at: 39, 42, 45, 48, 52 inches

Step 5 – Paint the angle iron
Clean the angle iron with a rag and some mineral spirits and then spray with 3 coats of Rustoleum Flat soft iron spray paint. While you’re at it, spray 52 lath screws and the hinges.
Step 6 – Finish the file drawer
When the polyurethane has dried, insert the metal rods.

Next, flip the drawer over and install the wheels. Note that if you opted to use 1/2 inch plywood on the bottom, you’ll need to plan your screws accordingly, otherwise they’ll poke through and stick up from the bottom of the file drawer.

Flip the file drawer back over and install a drawer pull of your choice.

Step 7 – Assemble the storage tower
Put the three tower components face-down on the floor in their approximate locations.

Note: the screws are to be driven into the sides of the storage tower, not the front or back, so place the angle iron accordingly.
Place an angle iron along one of the sides and secure the bottom piece with the lath screws. Space the middle unit 19 inches apart (I cut 4 pieces of scrap plywood to 19 inches to help with this part) and then attach it with the screws. Align the upper component with the top of the angle iron and drive in the screws.

Repeat this process on the other side.

Rotate the storage tower 90 degrees.

Attach another angle iron. These screws can be driven from the top – it’s a little easier that way.

Rotate 180 degrees.

Attach the last angle iron.

Step 8 – Attach the ball transfer bearings
Flip the unit so that it is laying on its back. Measure 6 inches up from the bottom. Attach the first bearing (represented by the cylinders in the drawing below) 3 inches down from that line (3 inches to the center of the bearing, 2 inches to the mounting plate). Attach the second 8 inches down and the 3rd 13 inches down. Repeat on the other side.

Step 9 – Attach the door
Stand the industrial upright. Align and install hinges on to the bottom of the door so that the door swings downward. Attach a door pull of your choice.
Move the storage tower to where it will live and push the file drawer in.
We love it when you share our posts on Facebook and Pinterest!


Those look great. BTW, you can get wood plugs for pocket holes: Kreg Pocket Hole Plugs
Thank you Laurie! You know, I have those plugs. They’re great when painting the project, but they still stick out when staining. Better than nothing though, I guess! 🙂
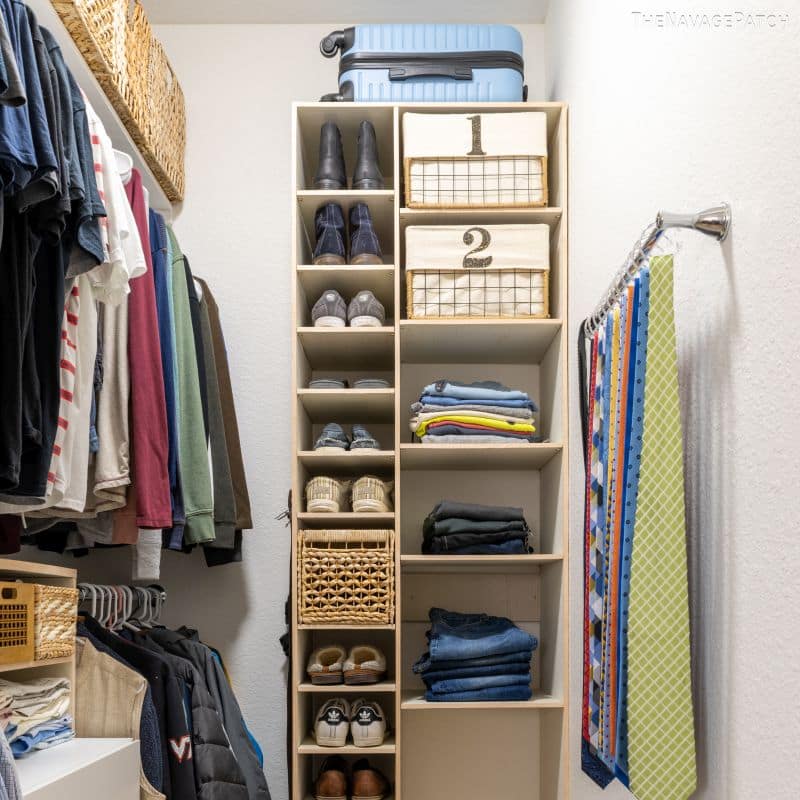
I love those. They’re not to big that they take up a lot of room but still has a lot of storage. And I like your price tag much better. Y’all make a great team. 🙂
Thank you, Kathy – that was exactly the idea! Big storage but small footprint! 🙂
OMGoodness I love these towers and I also love your detailed instructions while providing humor into your blog!!! I always look forward to your tutorials, thanks!
Thank you so much, Carol! It is my pleasure to inform and entertain! 🙂
My favorite build by you yet!! I think it looks better than the West Elm piece! Ooooo ….how about some pottery barn inspired accent pieces?
And I’m hoping you’ve got a few Halloween pieces up your sleeve for the Fall 🙂
Thank you, Tracey! We’re done some Pottery Barn inspired posts in the past. Search for them on our site. Also – Halloween is our jam, so get ready for it! (and also check out our Halloween posts from previous years!) 🙂
Amazing! I love the way these turned out, and your detailed directions are unbelievable. Though this is way beyond my skill set, I love reading the plans (and your comments, of course). Thanks for a wonderful and entertaining blog.
Thank you so much, Dyan! I aim to make it entertaining, even for those who’ll never attempt the project! 🙂
Very nice! I wish my dh were so handy!
Thanks, Rap! Stick a hammer in his hand and point at a nail – he may be handier than you think!
Looks great!
Thank you, Revital! 🙂
Love these! Attractive, sturdy, functional and actually fit in a normal sized room! Looking forward to the Holiday posts. Well done and many thanks.
Thank you, Melissa! We’re looking forward to the holiday posts as well! 🙂
Ya’ll are an amazing team. You can build with mango wood when you retire to the Isle of Snoot – for now, keep knocking out the incredible plywood projects. Great post.
Thank you, Kay! Isle of Snoot – here I come! 😀
Actually, I like your version of the towers much better than West Elm. To me, if I were building, yours is much more functional. Yay to Handan for coming up with the great design. I sure wish my hubby was still able to do the woodworking he was so good (and creative) at doing. I’d have him on a couple of these in a heartbeat!
Thank you, Connie! We also like ours better than West Elm’s – they’re more tailored to our needs. 🙂
I absolutely want to copy this!!
Thank you, Harjith!