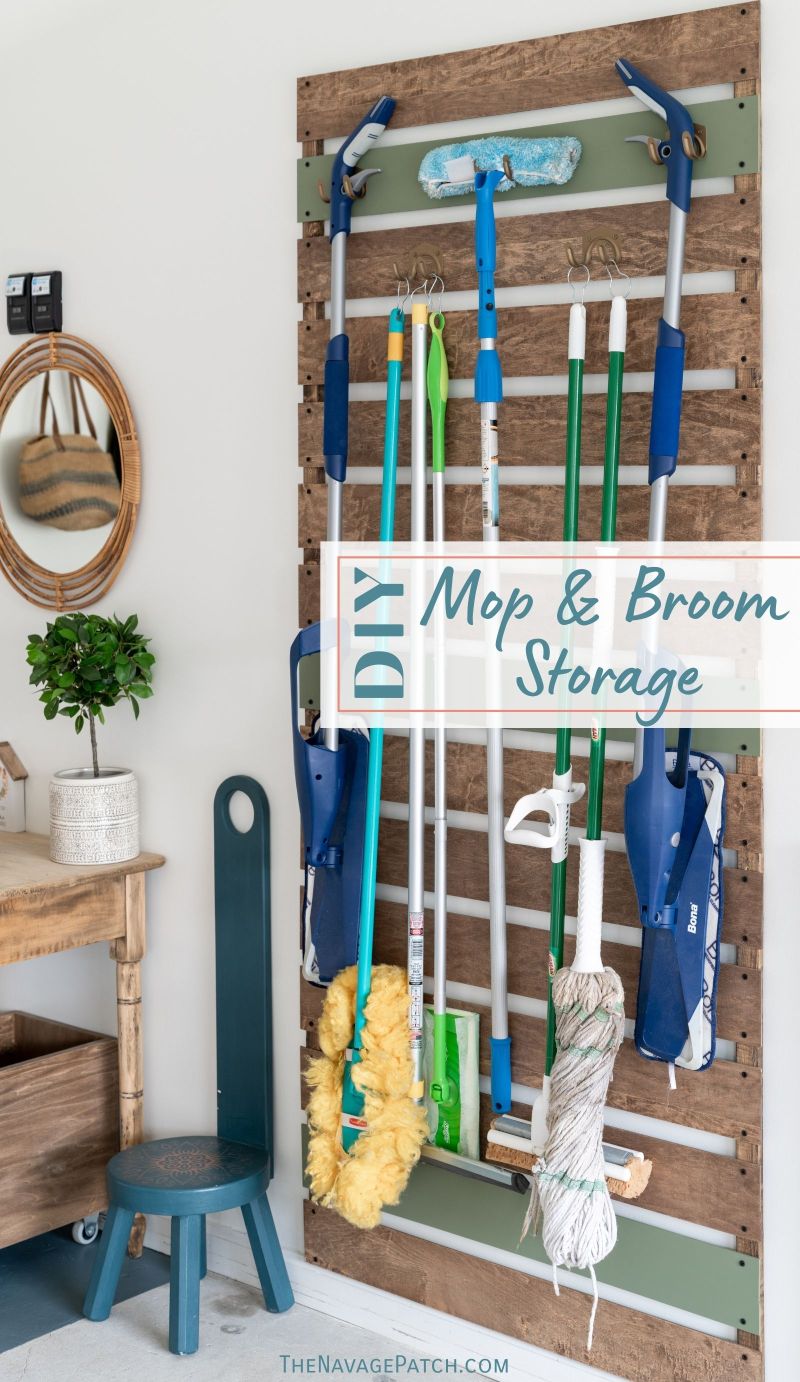
DIY Mop & Broom Storage
This mop & broom storage solution was a last-minute addition to our garage makeover, but it looks great and helps keep the area organized.
You know that awesome feeling you get when you finish a big project, like, oh, say, a garage makeover?
That mixture of pride in your workmanship and relief that it’s finally finished?
That joy of knowing you created something awesome and that expectation of relaxation – if only for a few hours before the next project clock begins?
Yeah, well I almost got that feeling.
Handan and I were finishing up installing the foldable tables in the garage (which I’ll be telling you about in the next post), and I started to have that feeling. You know, the one where your mind drifts towards a martini or a glass of wine. You know – because you’re finishing a project!
Yeah, I was starting to have that feeling. I mean, why shouldn’t I, right? The garage makeover was over, right? All I had to do was drive a few more screws and then it was nothing but martinis, cruise ships and bikini babes, right?
Right?
But then, tragedy.
“Hey Babes?”
Why? Why would she hey-babes me just then?
And I knew it, you know. I knew the moment I heard the tone and timbre of the hey-babes that it was bad.
Because there was guilt in the hey-babes.
She knew the implications of what she was about to ask.
“Hey Babes,” she said, “what do you think of putting some wood slats on the wall over there so we can put hooks on them and hang our mops and brooms?”
And just like that, whatever wind left in my sails, whatever gentle breeze carrying me towards freedom and martinis spilled out and left me marooned on an uncharted island of disappointment.
“Slats? Mops and brooms?” I said, dazed. “Okay, my babes. That sounds like a good idea.”
She outlined her plan, and I got to work. The martinis and cruise ships could wait. If my babes wanted slats and hooks, by god, I was gonna give her slats and hooks!
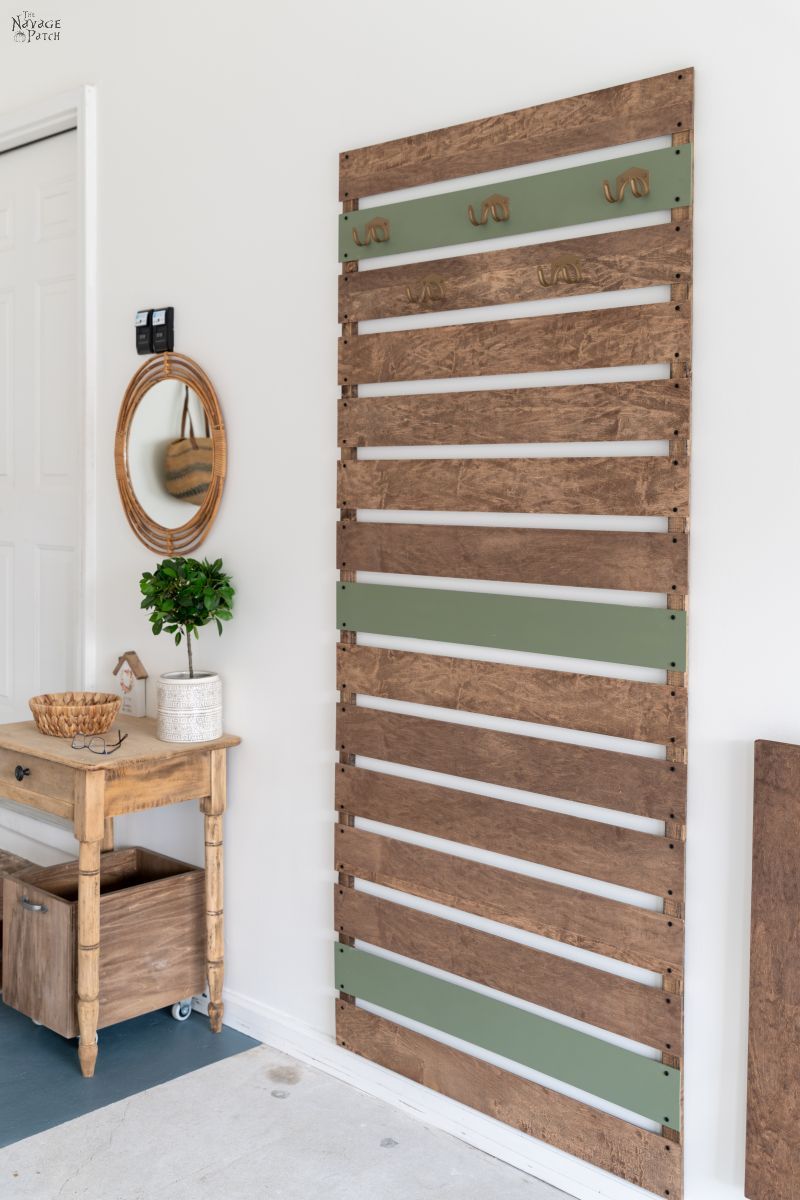
Now, this was one of the few garage makeover projects that required additional spending. Fortunately, all I needed were two 1×2 furring strips for a total cost of less than $4.
When I got those furring strips back home, I stained them to match the other stained wood in the garage, and when the stain was dry, I cut them to size.

Normally, I’d cut first and stain later, but Handan was still a little unsure of just how tall the proposed mop and broom storage rack would be, so I reversed the order.
Back in the garage, I located two studs 32 inches apart on which to install the furring strips. I used my laser level for vertical leveling.

Keeping with the theme of “No Wall Left Unbowed” in this house, I again encountered a weird bulge in the garage wall, similar to the one I found in the pantry when we built shelves in there. I just hoped the bulge wouldn’t interfere with the mop and broom storage plan like the mop and broom storage plan interfered with my garage makeover victory celebration.

Handan wanted thin slats between the two furring strips. I had a pretty big scrap of 3/16 plywood in the basement, but after making some measurements, I discovered it wasn’t quite enough. But since Handan wanted 3 of the slats painted (and the rest stained), I was able to use some leftover scraps from our kitchen remodel that I discovered hiding in a box in the far corner of the basement. They were painted blue, but that wasn’t a problem since I’d be using those for the painted slats. This way or that, I was determined not to buy any more than was absolutely necessary for any of these garage makeover projects!
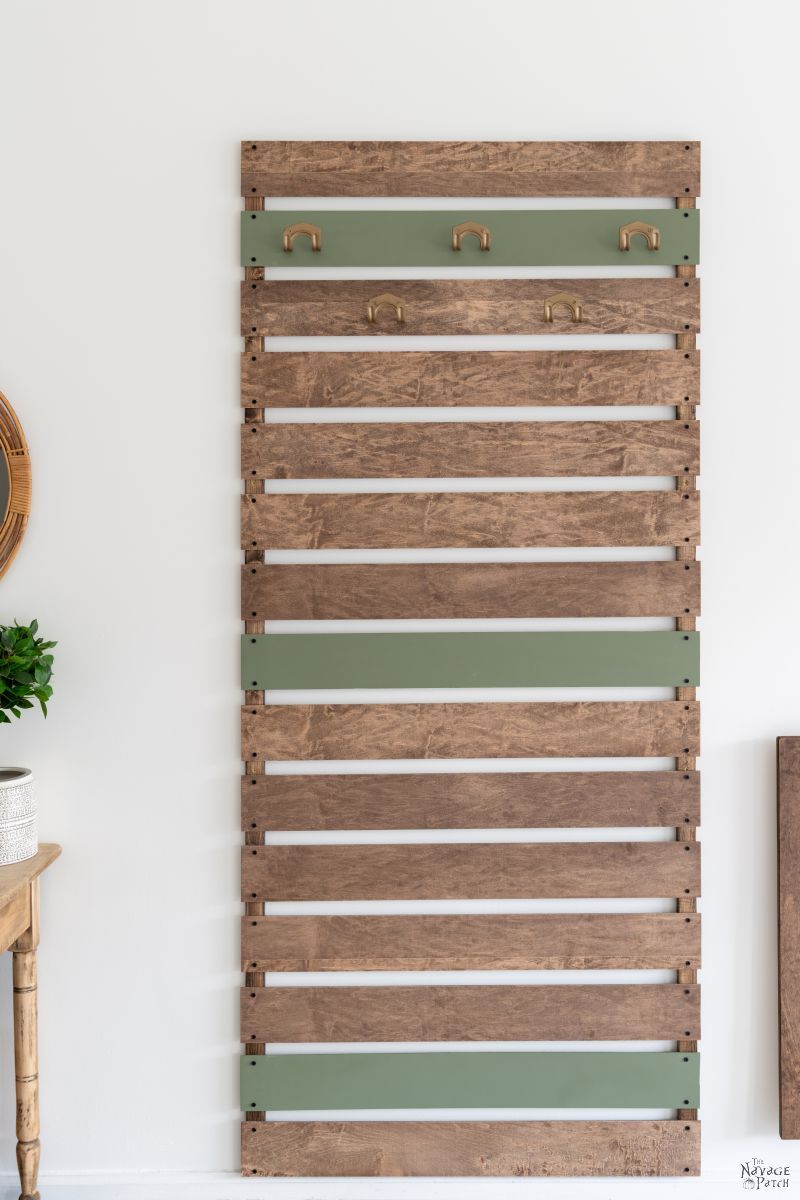
After some careful calculations by Handan, I cut the plywood into slats, then I stained and painted them.

I started by installing the top, bottom and middle slats.
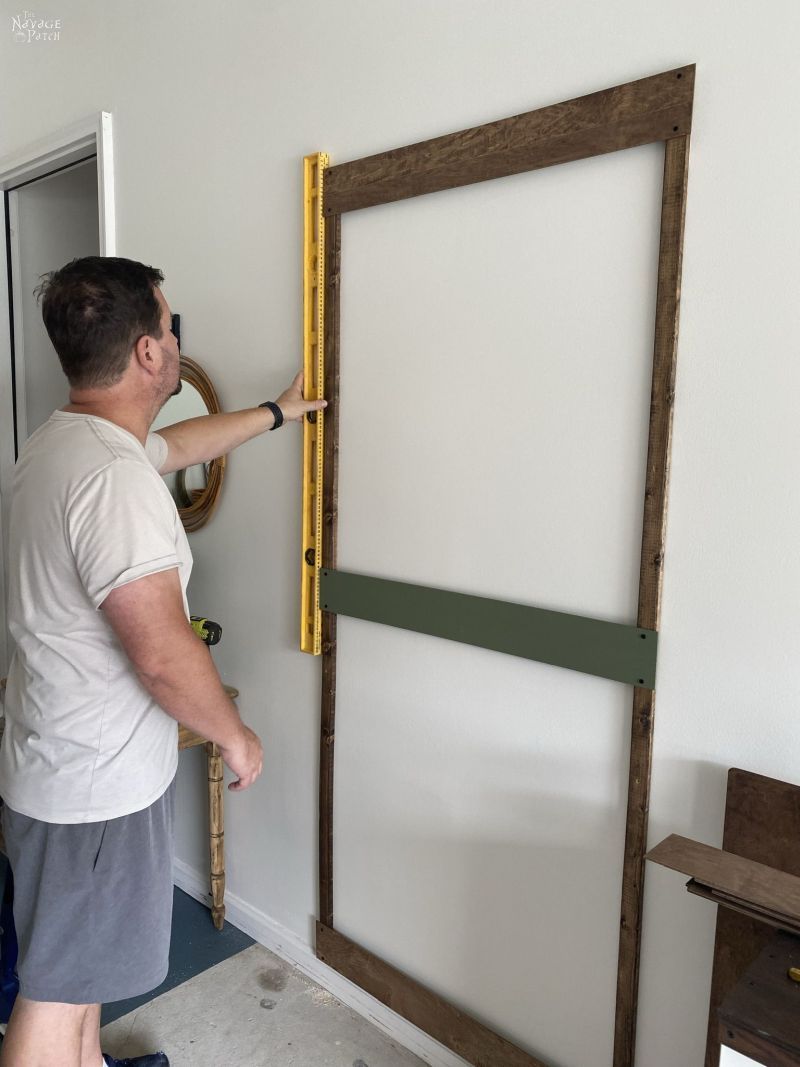
From the middle, I worked upward, then downward, leaving a pre-determined space between each slat.

I measured and marked as I progressed.

Working down now before going back to install the final painted slat up top. I had to do some last-minute sanding and re-painting on the top slat, so it was still drying as I was building.

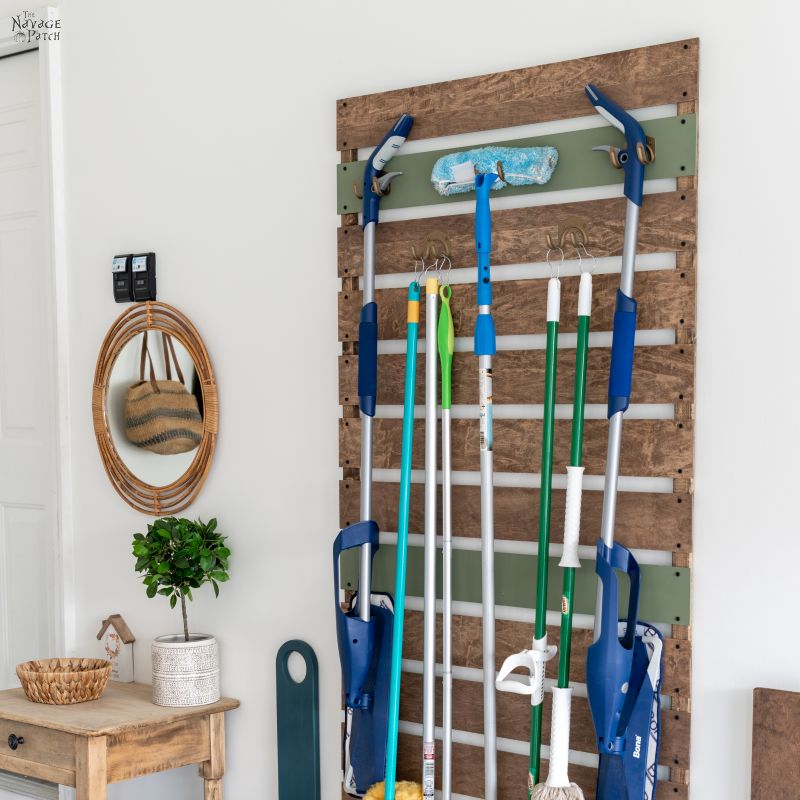
Once finished, I installed 5 Dollar Tree universal tool hooks (I had these on hand – we apparently bought five 5-packs back in Connecticut that I recently discovered in the basement) painted in satin bronze. This camo green/satin bronze combo is the same we used for the repurposed desk hutch component of the garage makeover. Some of you were a little bewildered by the color combination, and I told you that it would show up again…so here it is! 🙂

Besides the camo green and satin bronze combo, I really like how the green looks with stained wood.
Here’s Handan’s last-minute addition to the garage: our new mop and broom storage rack.
I have to admit it looks great….and it gives us a place to hang our wildly overpopulated mop collection.
It doesn’t stop at three…


Eight! (Though I think one is a more of a big fluffy duster masquerading as a mop, and I’m not sure what the wet/dry Swiffer counts as.) You may be wondering where the actual brooms are. After all, this is a mop and broom storage rack! Well, as it turns out, out two brooms just didn’t make the cut. I have one in the basement, and I’m not letting it out of my sight. And the other one – the “floater” is currently outside in a storage shed waiting to be used to sweep polymeric sand between stepping stones.
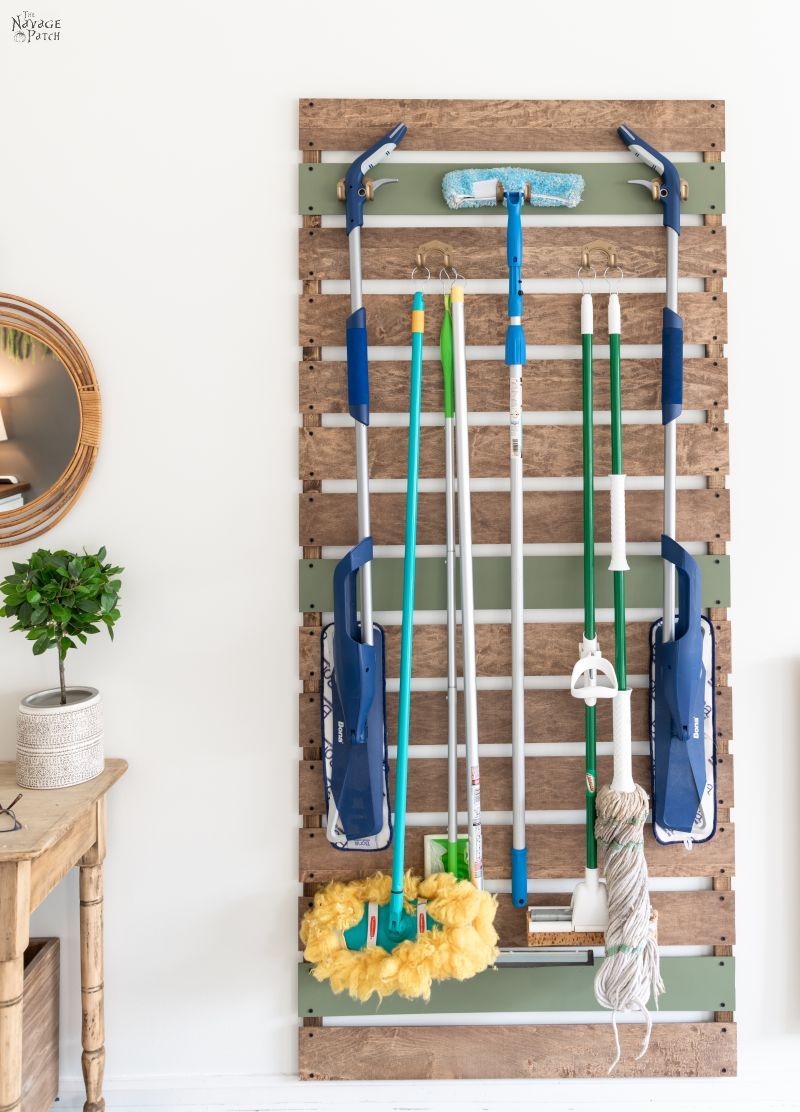
So yeah, some dudes have a wall of power tools in their garages. Others have collections of automotive parts. Me? I got mops.

Lots and lots of mops.
But I also have a happy babes.
And that’s worth more than garage full of tools!

We love it when you share our posts on Facebook and Pinterest!


Nice. One can never have enough hooks to hold cleaning tools. Are those shower curtain rings attached to the mop handles? Genius way to make them easy to hang on hooks (those holes in the handles are way too narrow to work well. Tell me about bulging walls. My circa 1954 house is full of them and they are on the original real plaster walls not wall board is more of a pain to fix.
Thanks, Laurie! Yes! Those are Dollar Tree shower hooks – I never thought to mention them in the post. Ooooh, plaster bulges – that’s even worse!
I need those tool hooks! Can’t find them. : (
They’re a staple in the tool/automotive section of Dollar Tree – both here in GA and in CT.
I love how Handan’s design and your execution of it are always above and beyond.
I too am trying to finish projects without spending any money. It’s easy until …. I get a color in my mind and it’s not one of the 30+ colors I already have! Time will tell which way I end up resolving that dilemma!!
Good work as always!
Sorry about the misspelling of her name. Autocorrect still won’t let me spell it right . Hence the her!! 🙂
No worries! I corrected it for you! 🙂
Thank you so much, Margie! Yep, the struggle is real, lol! 🙂
Sarcasm here, but the matching mops on the outside edges are SO YOU! Impressive!
LOL, I know, right? Why have one Bona, when you can have two! One of them is actually held together with Scotch tape (not kidding – repair not done by me or Handan), so it’s not getting a lot of use anymore.
Kudos to you. I went for functionality over big gorgeous wood thing. I use a small area of my laundry room. I bought a 14” adjustable boring grey holder. That way if I purchase another brand the room I’d flexible. Maybe I can paint it?
Good job as always!
So glad the shower curtain hooks were mentioned at the top. I don’t have a garage, but I still hang my mop(s)- and those hooks out-genious anything I’ve come up with. Guess I’m goin’ to Dollar Tree.
LOL, thanks, Cherie! Handan is great at coming up with brilliant little tricks like that! 🙂
What a great idea! Kudos!
Thanks, Laura! 🙂
One less-obvious thing I like about this project is that if you have fewer mops and perhaps have some smaller tools that need a space it still works with different hook placement. It would even work with simple s-hooks (i.e. the kind with both a smaller and larger end) hung right on the slats
Absolutely! Good idea!