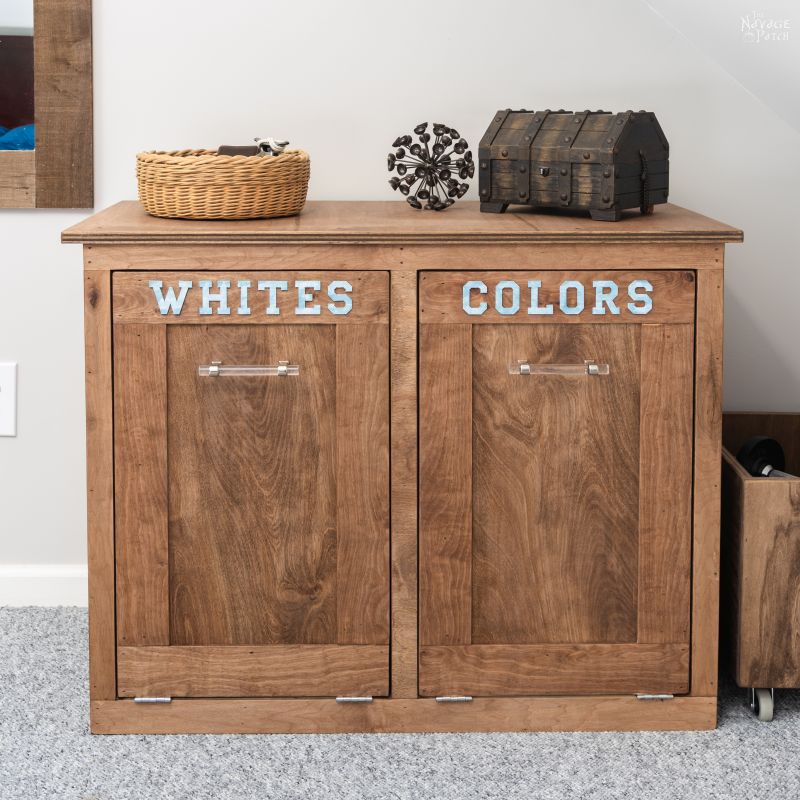
DIY Tilt-Out Laundry Hamper
DIY Tilt-Out Laundry Hamper
- 3/4 inch plywood
- 1/2 inch plywood
- 1/4 inch plywood
- 2 x 4 pine lumber (ripped to 1 1/2 x 1 1/2)
- Braid nailer with assorted lengths of brad nails
- Wood glue
- Speed squares
- 4 utility hinges (1 1/2 or 2 inch)
- Random orbit sander and 220 grit discs or detail sander
- wood stain of your choice (or paint, if you’d prefer)
- 2 small eye bolts
- 2 wood screws
- 2 washers
- Dollar store plant hanger chain or other small chain or rope
- 2 door pulls of your choice
DIY Tilt-Out Laundry Hamper Cut Sheet
- Base (3/4 inch plywood) – (2) 1 1/4 x 33, (2) 1 1/4 x 17 1/4, (1) 17 1/4 x 34 1/2
- Sides (3/4 inch plywood) – (2) 17 1/4 x 35 1/4
- Middle Divider (3/4 inch plywood) – (1) 17 1/4 x 33 1/4
- Top (3/4 inch plywood) – (1) 19 x 38
- Back Chain Anchor Supports (3/4 inch plywood) – (2) 2 1/2 x 16 7/8
- Face Frame Top (3/4 inch plywood) – (1) 1 1/2 x 36
- Face Frame Sides and Middle (3/4 inch plywood) – (3) 1 1/2 x 31 3/4
- Face Frame Bottom (3/4 inch plywood) – (1) 2 x 36
- Hamper Side Horizontal Supports (3/4 inch plywood) – (8) 2 1/2 x 14, (4) 2 1/2 x 15 1/2
- Hamper Base (1/2 inch plywood) – (2) 14 3/4 x 15 1/2
- Hamper Face (1/2 inch plywood) – (2) 15 1/2 x 31 1/2
- Hamper Face Trim (1/4 inch plywood) – (4) 3 x 25 1/2, (4) 3 x 15 1/2
- Hamper Vertical Supports (2 x 4 ripped to 1 1/2 x 1 1/2) – (4) 21, (2) 31
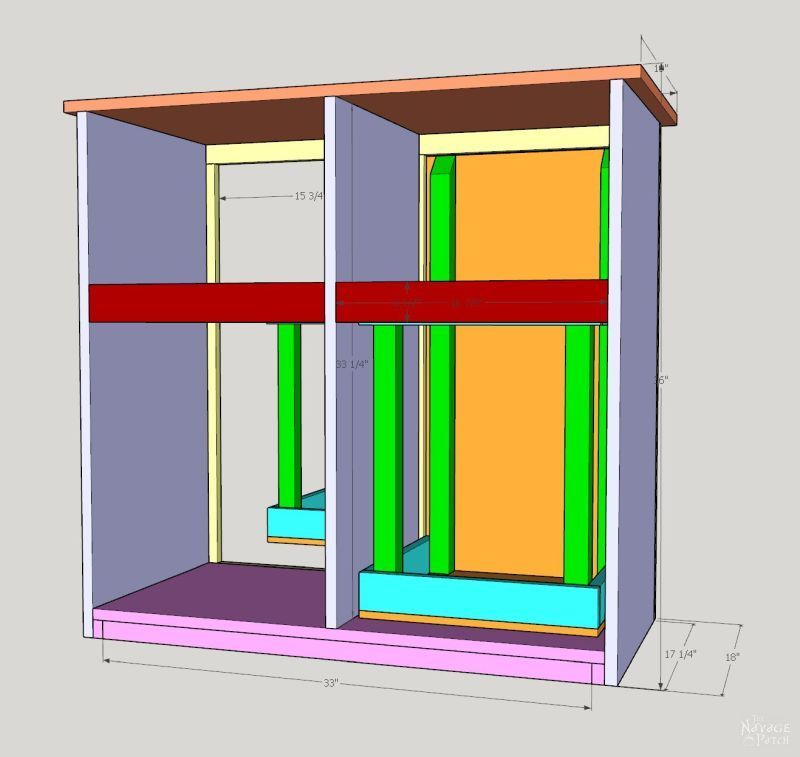
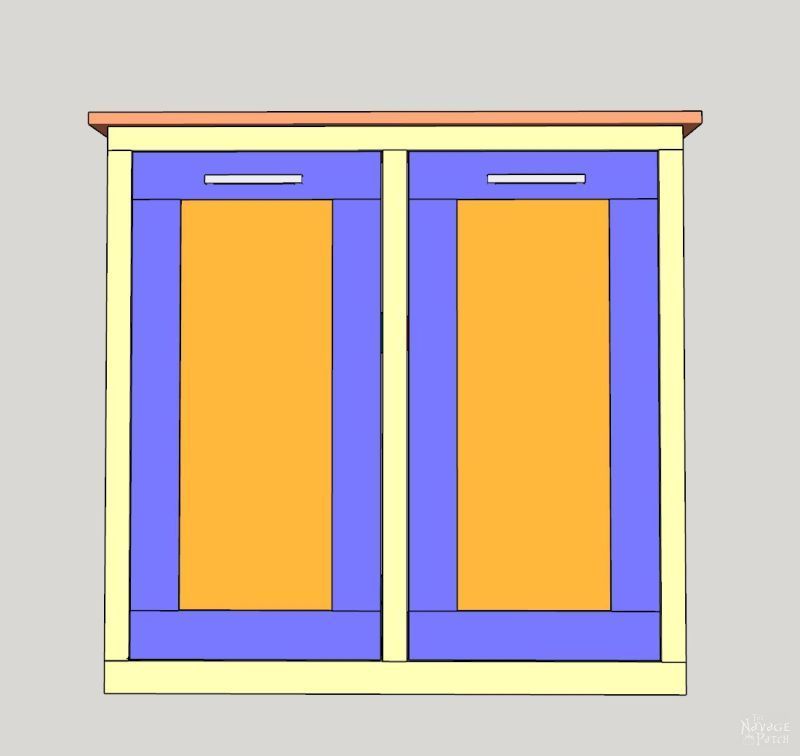
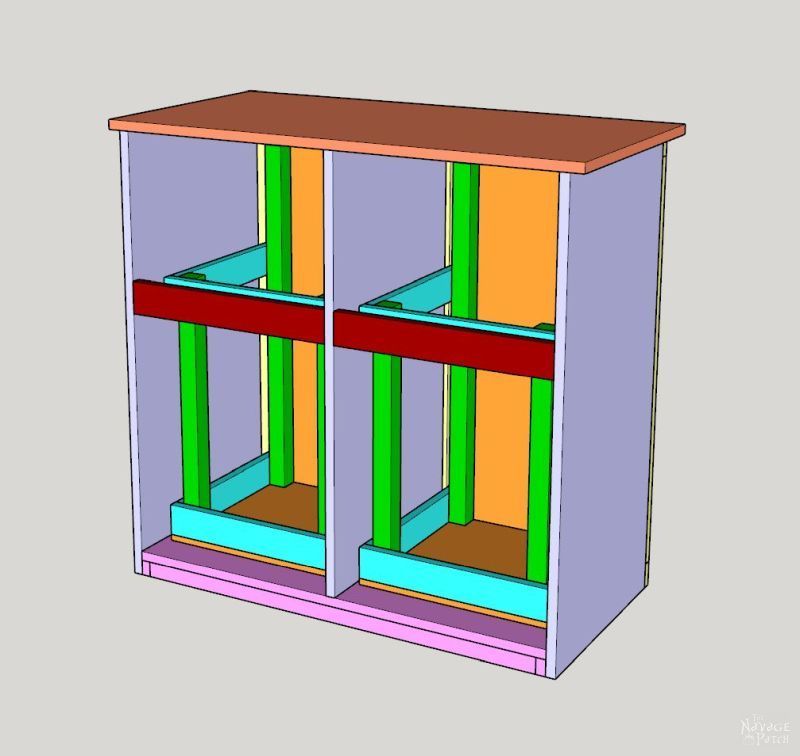
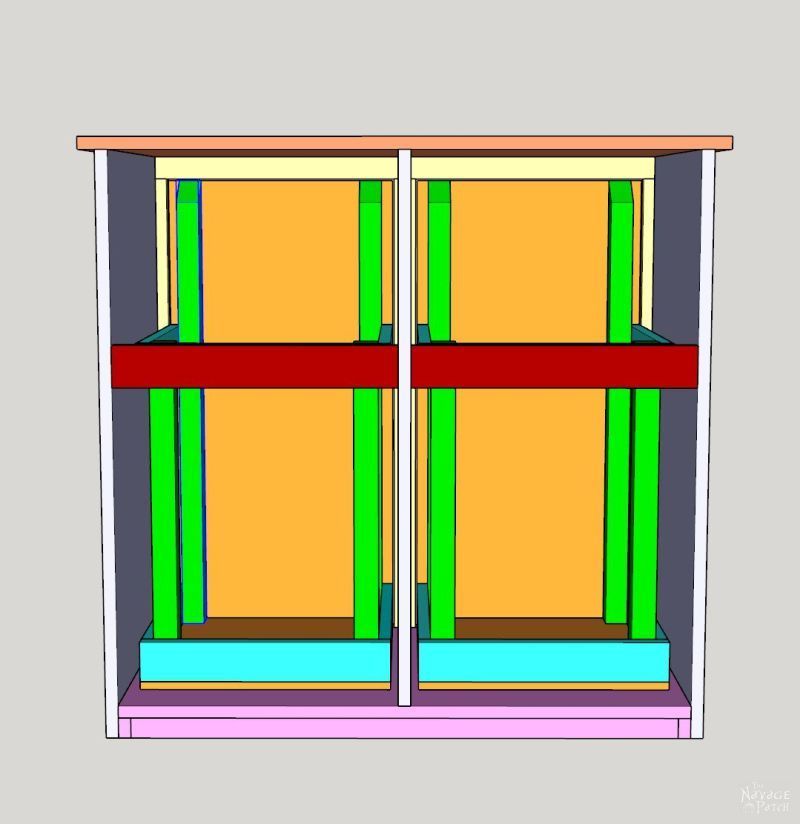
DIY Tilt-Out Laundry Hamper – Dimensions

The red pieces below are 2 1/2 x 16 7/8.
DIY Laundry Hamper – Step-by-Step Instructions
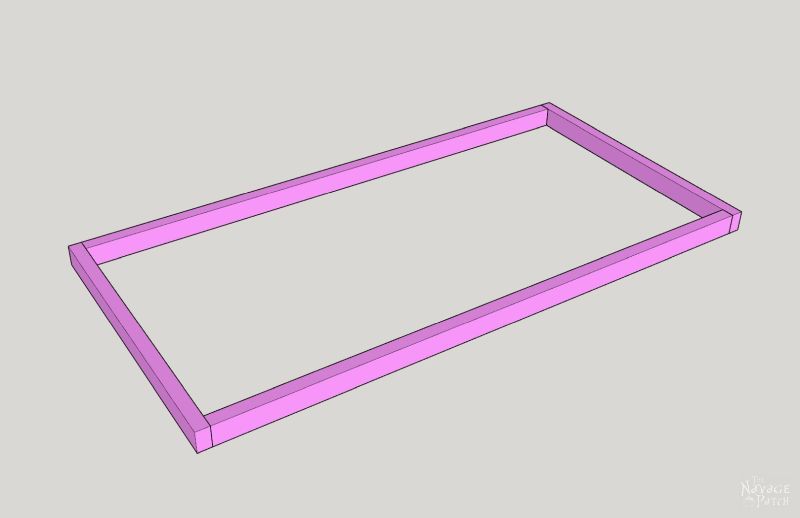
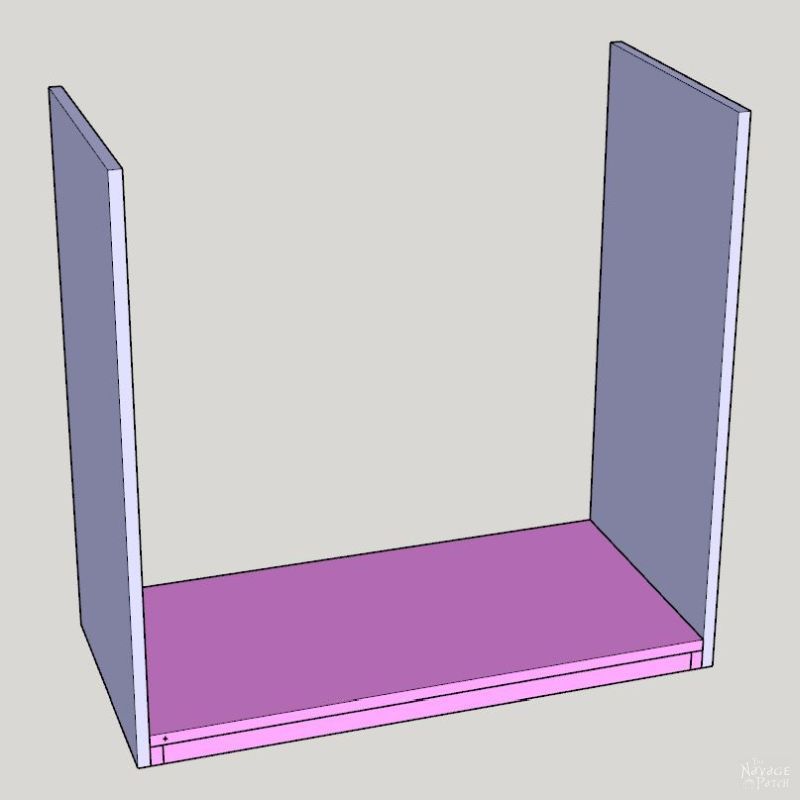
Build the base.
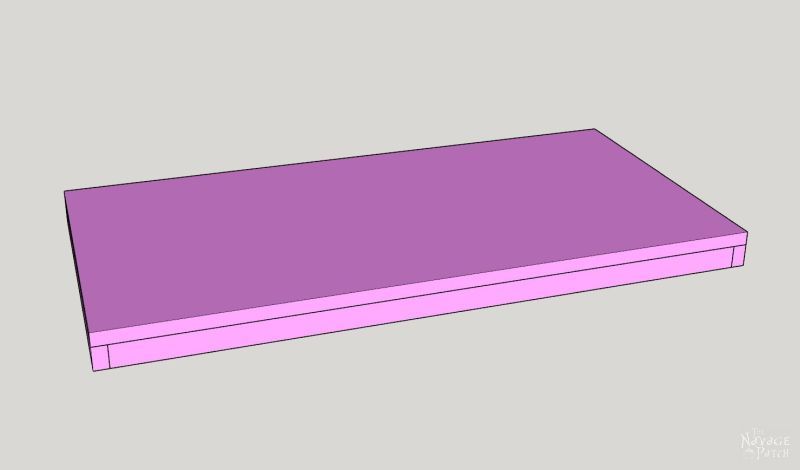
Attach the bottom.
Attach sides.
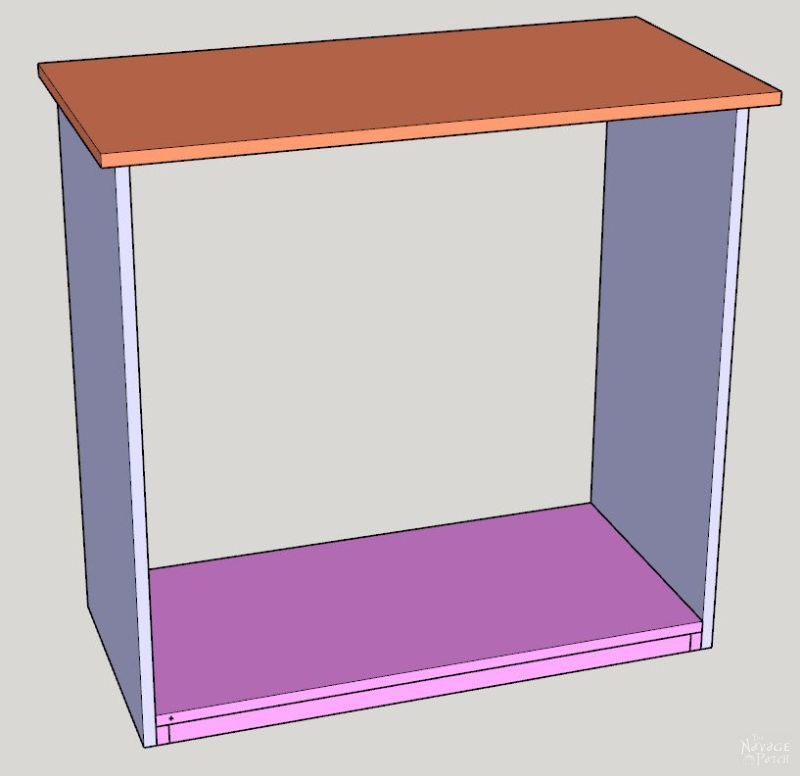
Put the top on.
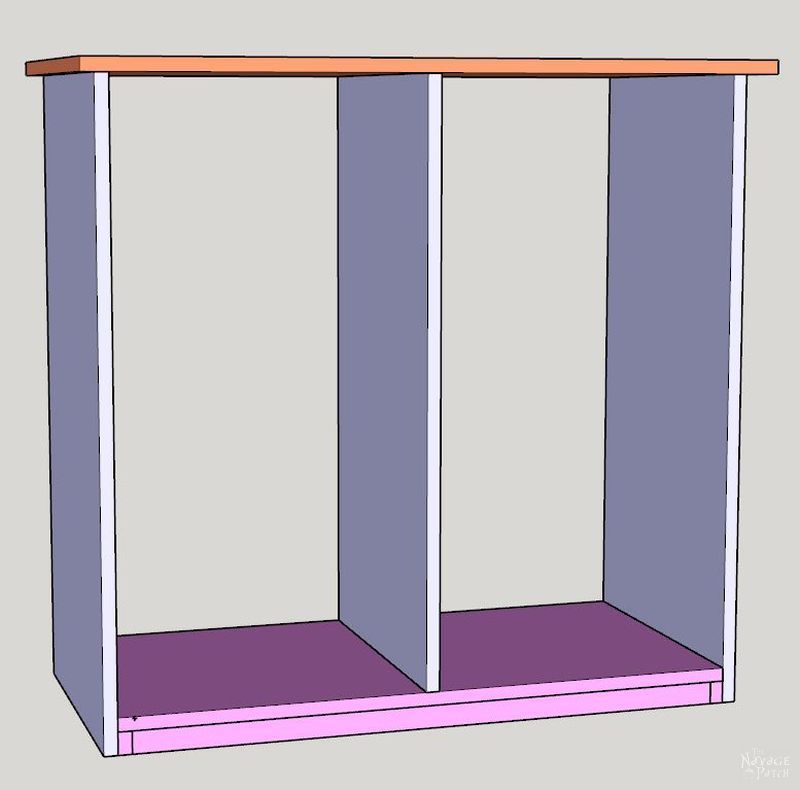
Insert middle divider.
Attach face frame bottom.

Affix face frame sides and middle.
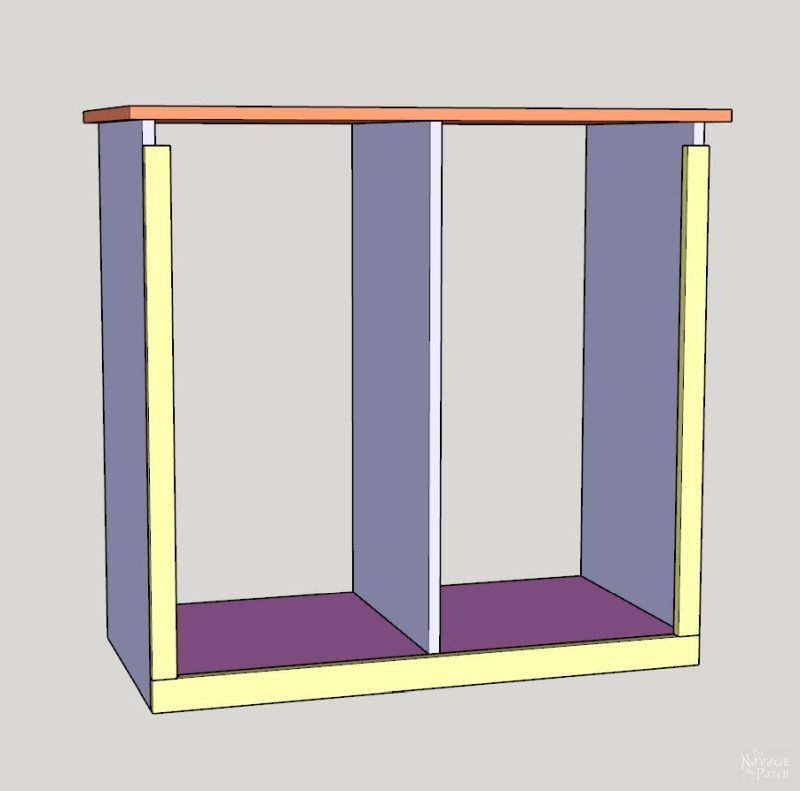
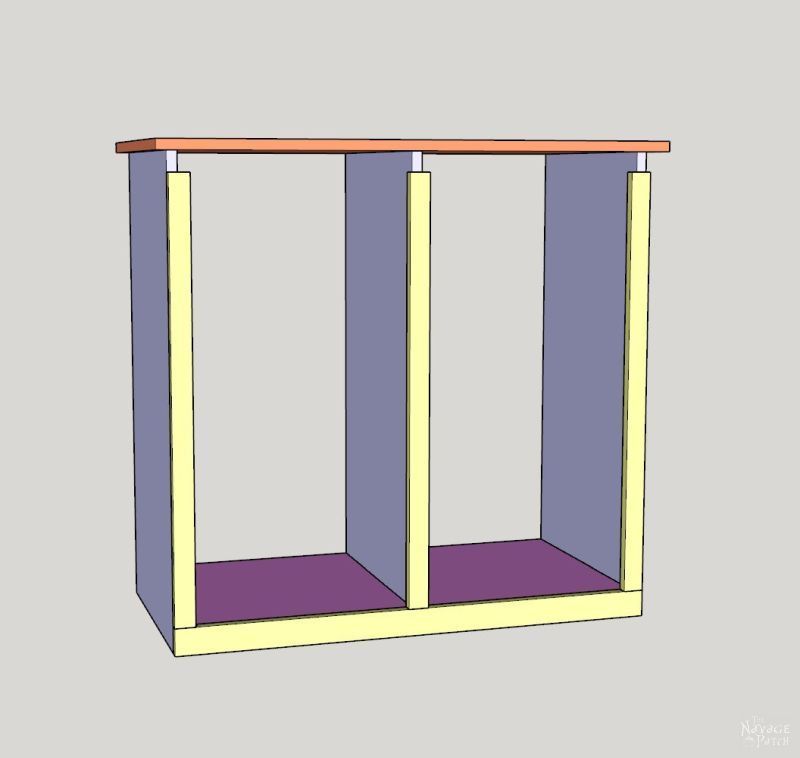
Attach face frame top.

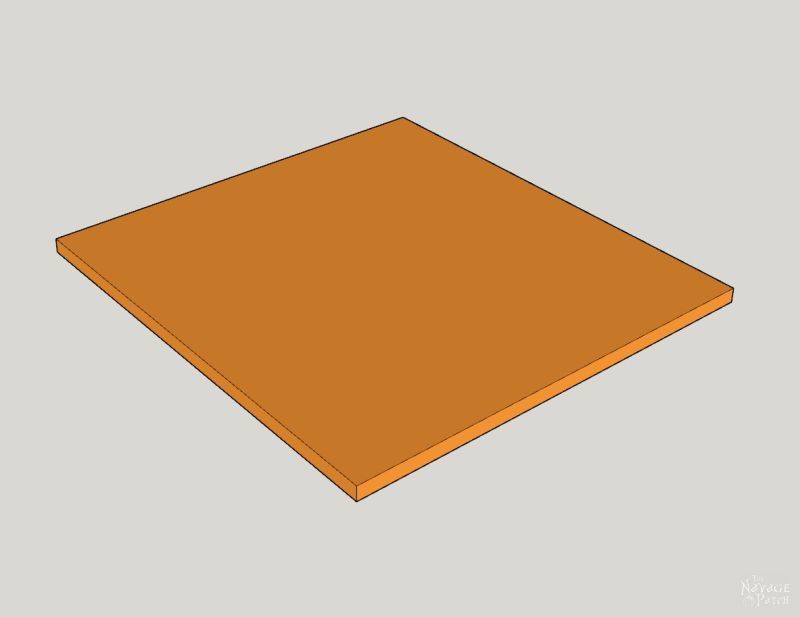
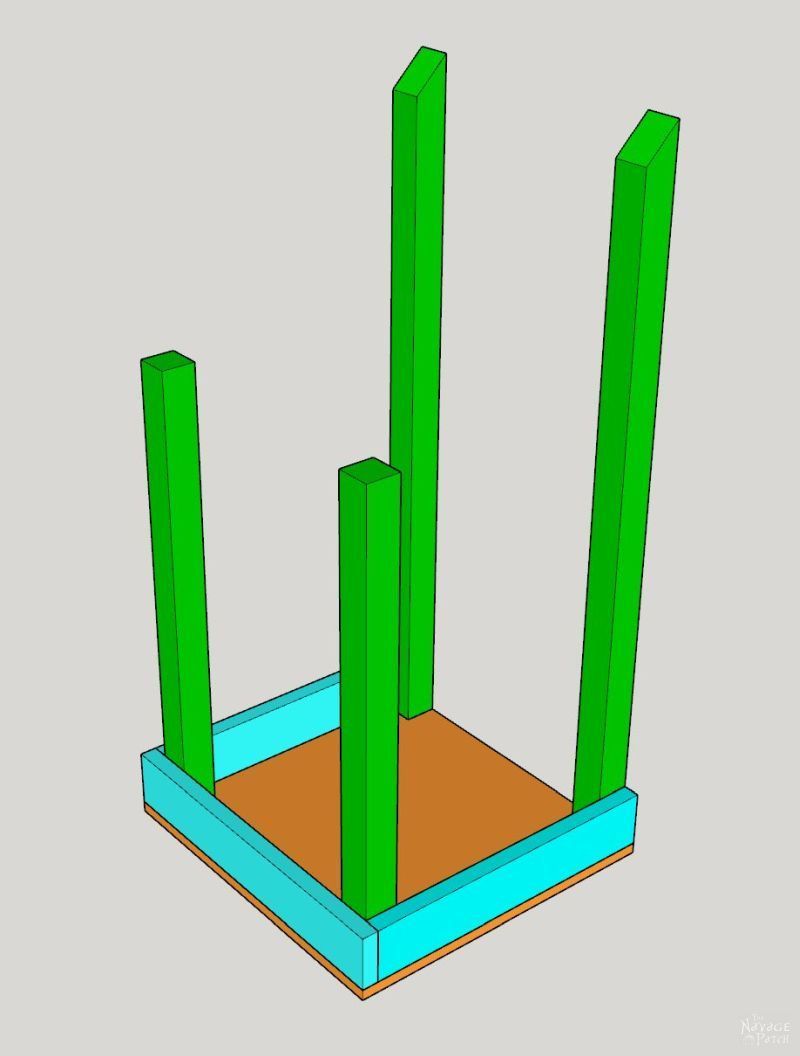
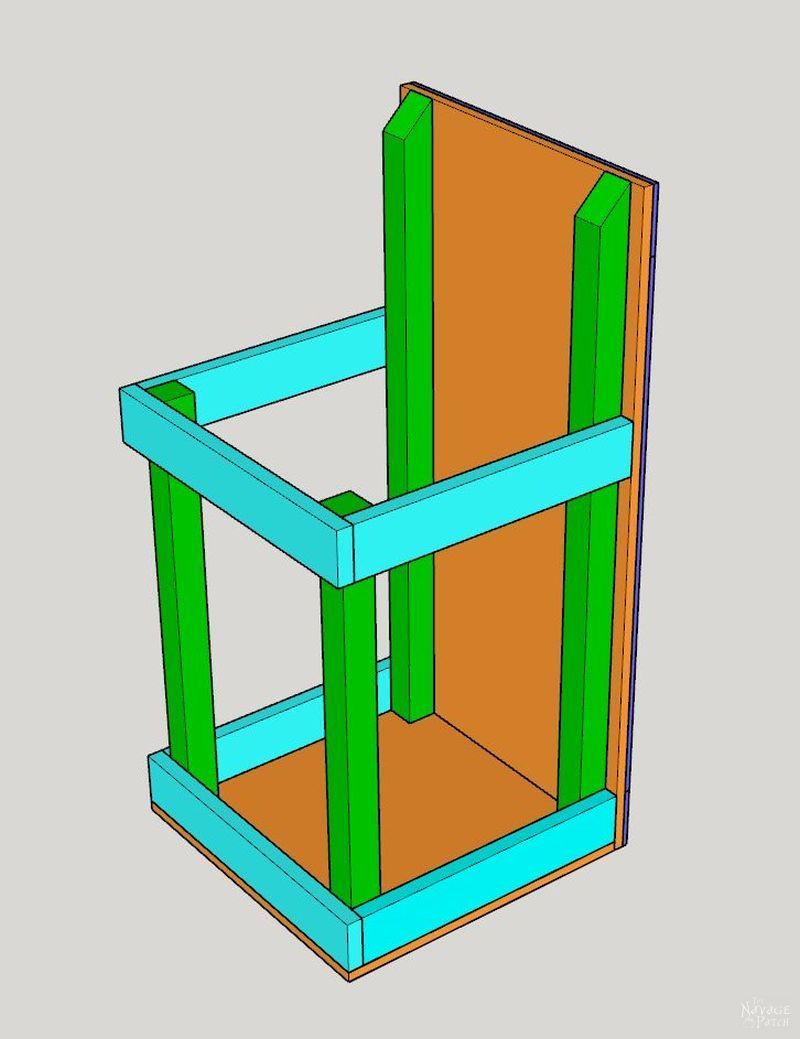
Build tilt-out hampers, starting with the base.
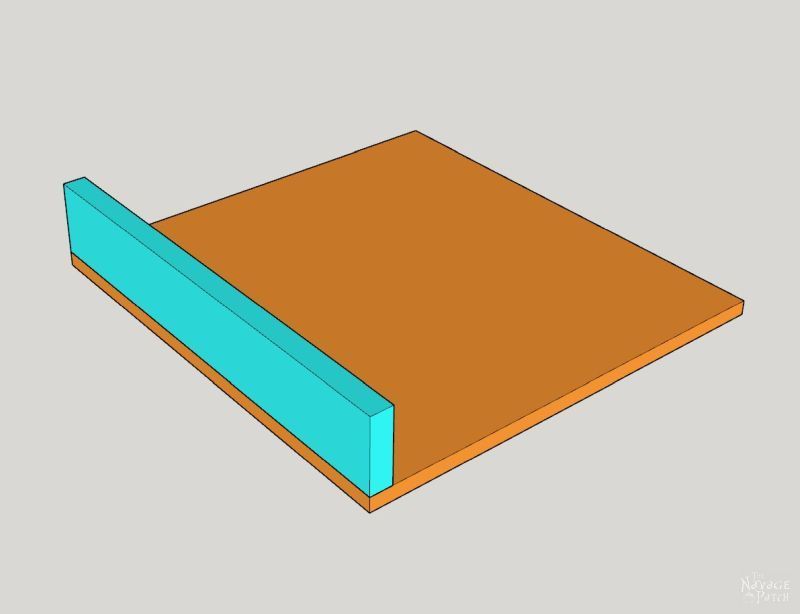
Attach back piece.
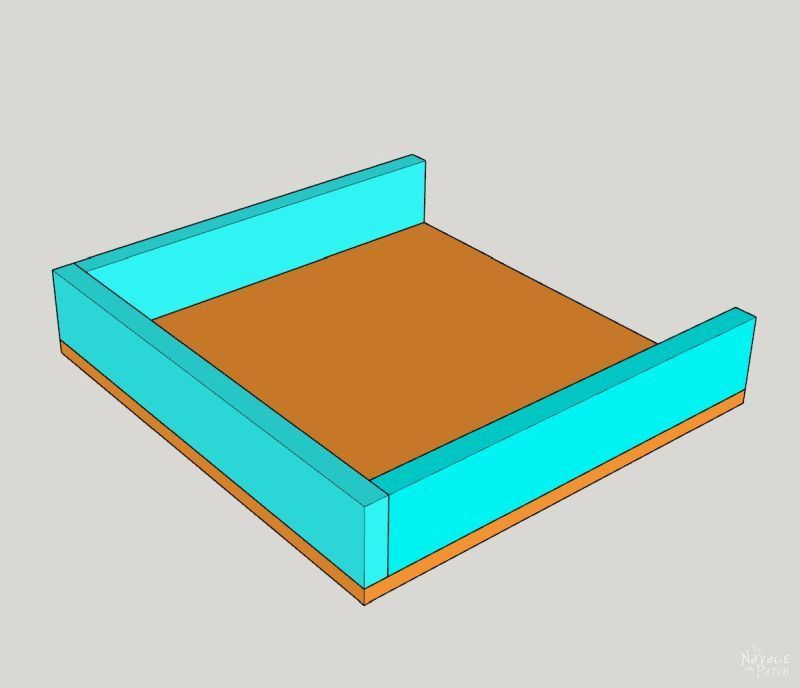
Then attach sides.
Next, attach the vertical members. Angling of the long vertical pieces is optional.
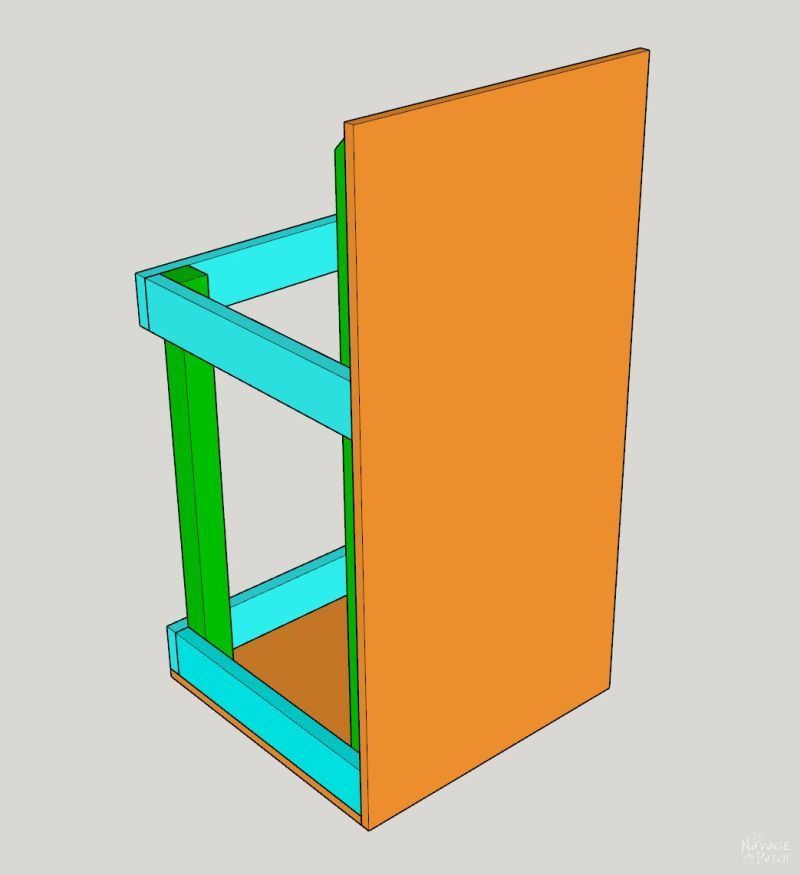
Attach upper horizontal supports.


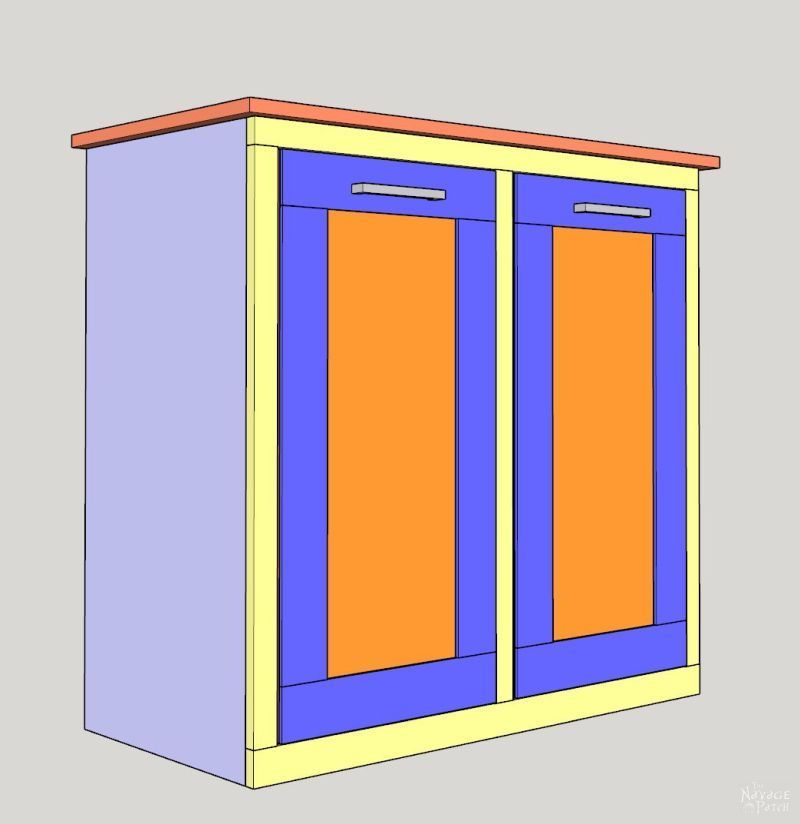
Secure the front door face to the rest of the assembly.
Attach trim.
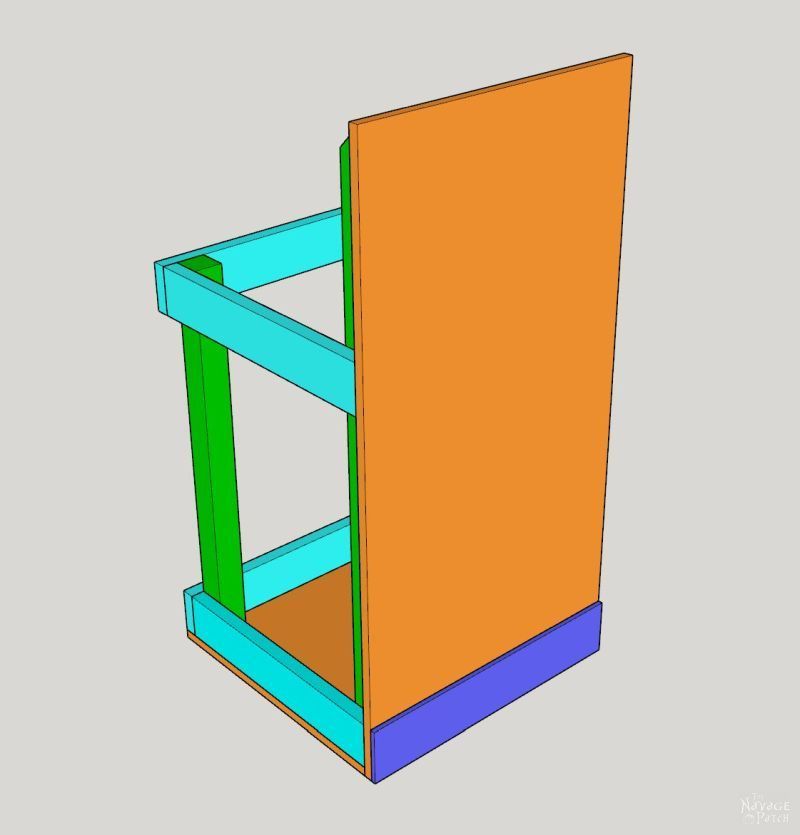
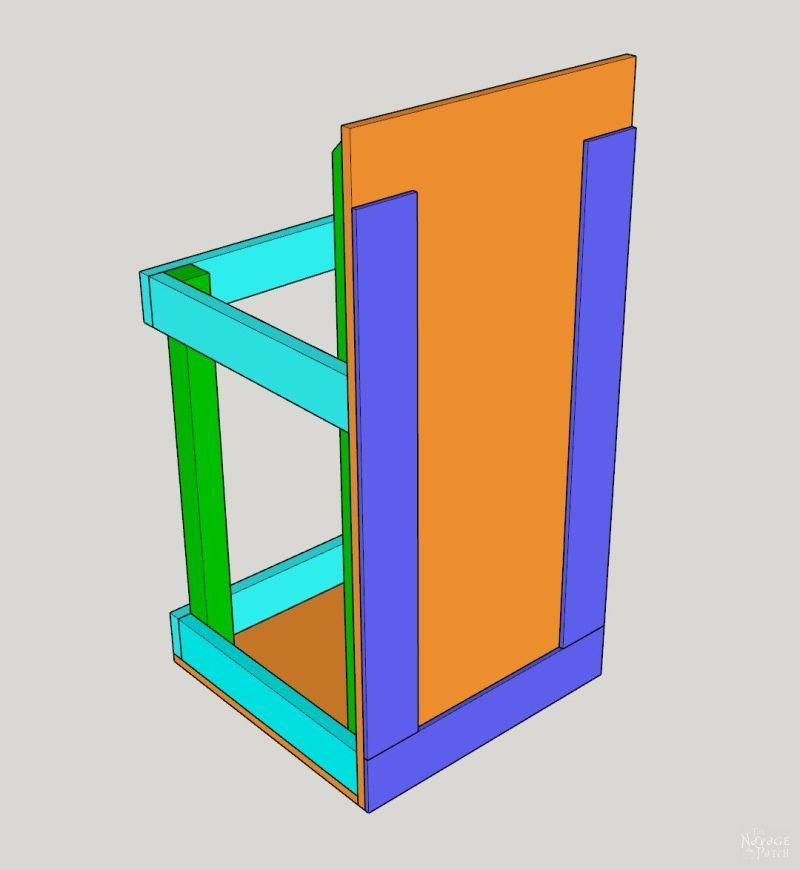

Screw in door pull of your choice.

At this point, install hinges to the bottom and follow the instructions on page 1.
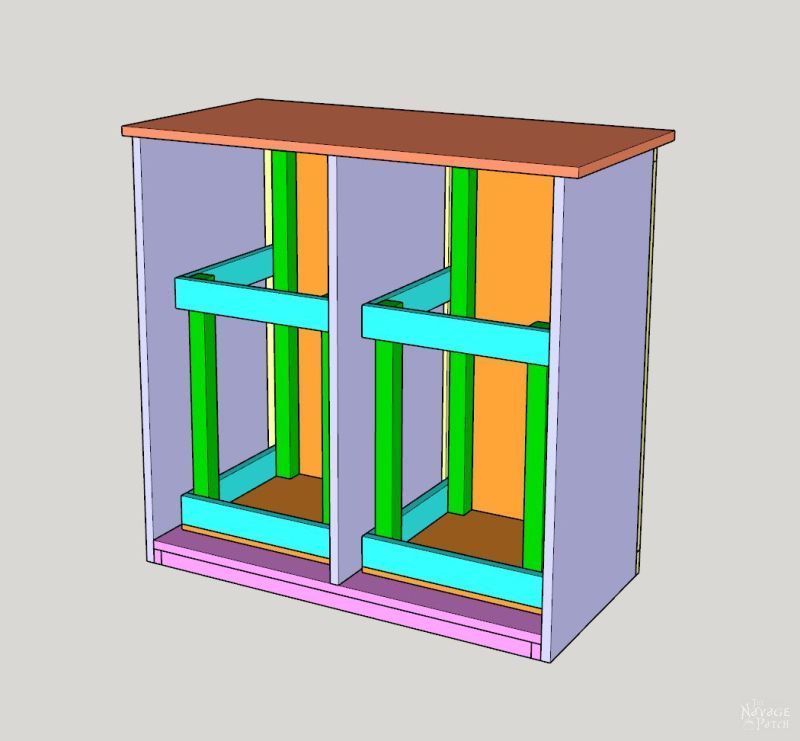
Attach the rear hamper supports.
Attach the chain according to the instructions on page 1.
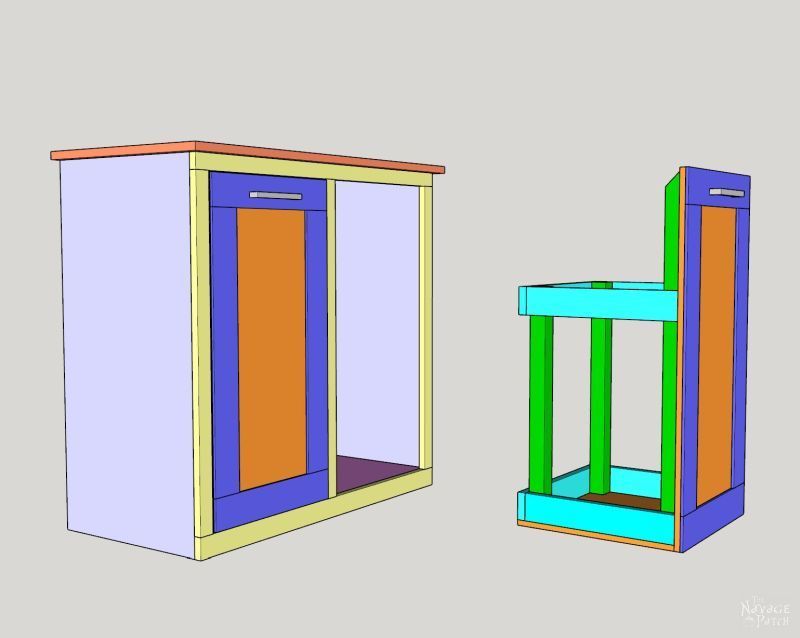
A view with one hamper removed.

We love it when you share our posts on Facebook and Pinterest!


Nice! Now the trick is to see if it works to contain the mess. I heard some people put basketball hoops over launder bins to encourage teens to actually put dirty clothes into the hamper. Whatever works I say.
I really think some of your other label choices would have worked too. “Crusty” and “Soggy”–ewww but LOL and the toxic/radioactive symbols were spot on!
So far, so good, Laurie, but only time will tell! I like the hoops suggestion! Handan was thinking of doing that for our recyclables!
Well you two have created another genius solution to a problem,it looks fabulous. I have a friend who would like this for her hubby who seems to have a teen brain where laundry is concerned, their two very neat sons have long since flown the nest. Her hamper would need to be labeled – smelly oil clothes (heating engineer) and smelly workout clothes (weight lifting fanatic).
Thank you, Catherine! I think a lot of us guys still think like teens when it comes to laundry! 😀
Love it, totally making these for our new house!
Thank you, Mara! Awesome!:)
It’s always appreciated that your plans are easy to follow and simple enough for a newbie woodworker. I look at a lot of plans online and when they start talking biscuits and dove tails I just tune out and usually move on. I don’t want to build the Eiffel Tower, I want something that looks good and I can feasibly do in a couple of days!
This is just fantastic. Looks great but not complicated. And it all ties in so well with what you’ve both done so far. I know from experience that having a place for everything really does help when it comes to keeping things neat and tidy. ADHD brain is a bit like teenage brain. I know my clothes would probably end up less on the ground if I had a great hamper like this!
And that special walnut is just…it really is special, ain’t it?
Jay – thank you so much! You’re right about those woodworking sites. When we first started, I thought I might travel down the more “traditional” woodworking route. But time is precious these days, and I need to get stuff done fast! I love and appreciate fine woodworking, but honestly at this point, brad nails and glue are good enough for me! I hope you give this one a bash!
you havw=e taken such a mundane but necessary problem and turned it into a work of art this is seriously gorgeous xx this ding dong pc won’t let me change that funked up word to have grrr
LOL, you need to show that pc who’s boss, Chris! Thank you so much for your comment! Handan and I hope you are feeling good this spring and that you’re ready to tackle the summer head-on! 🙂
you guys are so smart! i love your projects and your sense of humor!!
Thank you, Karen! 🙂
It’s like a water fountain in the 1950’s…
Love it! This is exactly what I was looking for to build for my bathroom.
Awesome! Good luck to you! 🙂
Great, easy to follow plans. I was looking for something like this for the kitchen, potatoes and jars and so on…
There’s a laundry basket like that in a cupboard that “came with the house” except it’s going to leave when we re-do the bathroom (it’s in very aged and peeling plastic, yukky). It’s got a chain on it so it doesn’t tilt right out on to your feet, which is a handy add on (or would be if it wasn’t broken!). I’m now, after seeing your plans, going to add a wood replacement in the “new” bathroom.
Thaks for giving plans that are possible for those who aren’t trained cabinet makers.
Awesome! I’m happy to hear my plans are getting used! Shoot me a pic or two when you’re done! greg@thenavagepatch.com
Hello! This is exactly what I am looking for however I do not have time to make it. I’m wondering if you’re selling already made ones? I’d love to purchase it from you!
Hi Lana, unfortunately we don’t sell any of our creations – we just pass along the info on how to make them yourself! 🙂
Do you happen to know how many sheets of plywood you needed? I see all the cuts but my brain cannot figure out how many sheets that means lol