DIY Rolling Kitchen Jar Storage
DIY Rolling Kitchen Jar Storage Shelves are a great way to utilize the small spaces in your kitchen when your cabinets and pantry are full!
The Need Arises for Mason Jar Storage Shelves
In order to achieve the goal of pristine countertops set forth in my DIY Slide-Out Shelves post, I needed to relocate most of the crap that had been inhabiting my lower cabinets. For much of the stuff, I followed by my preferred method of dealing with unused and unwanted crap:
- Find a large cardboard box in the big pile of large cardboard boxes taking up considerable real estate in the basement.
- Toss unwanted crap in the large cardboard box.
- Close the large cardboard box (at this point, if done properly, memory of the box’s contents should start to fade).
- Carry the large cardboard box to the basement.
- Search for space, preferably out of the way and hidden (what was in that box, again?)
- Deposit the large cardboard box, turn around and walk away forever. (What box? What are you talking about? I don’t remember any box!)
- Tell no one what I’ve done, thus ensuring the contents of the large cardboard box shall remain undisturbed for centuries.
Too many jars and nowhere to put them
But sometimes those cabinets held things that I needed, like food that we had grown and canned. I couldn’t just toss that sauce into the pit of forgotten gadgets (but you better believe the rest of that crap got The Box!).
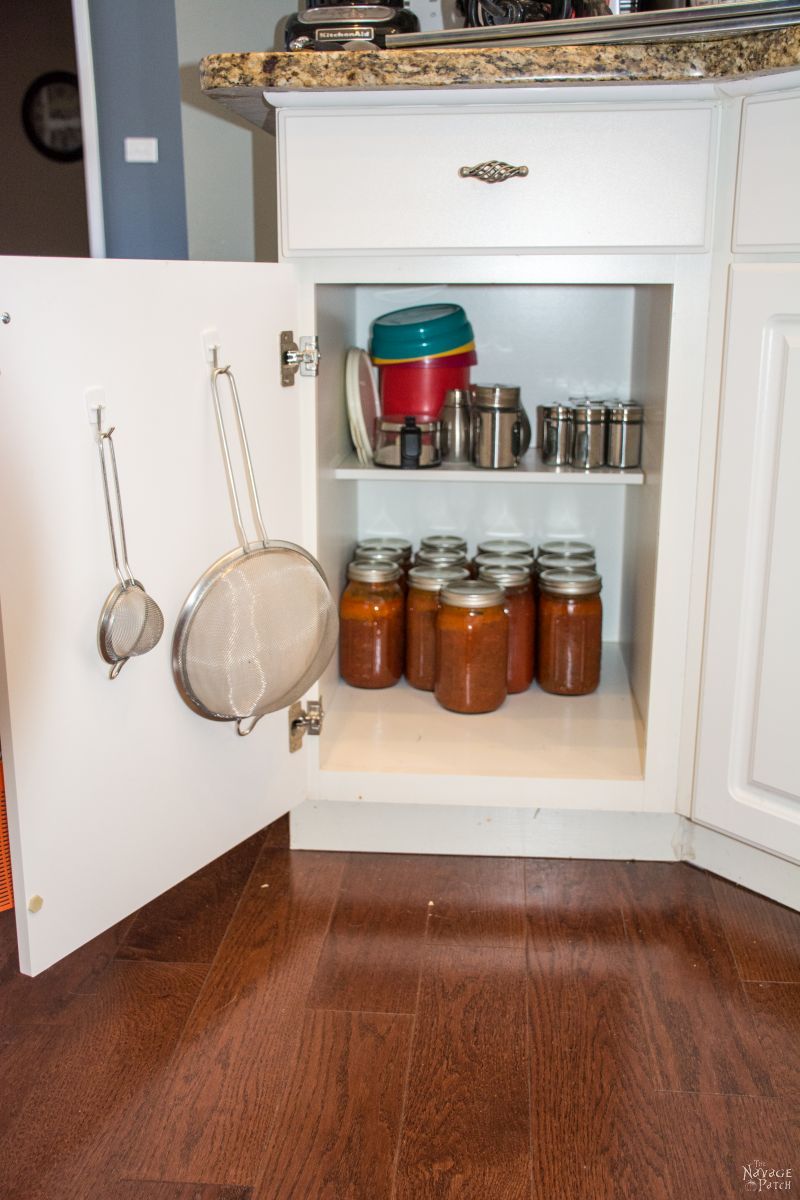
I needed that cabinet to hold my food processor and slow cooker/pressure cooker/yogurt maker/rice maker (which is one of the greatest gadgets of all time), but there was no place left in my crowded kitchen for jar storage.
I certainly couldn’t add them to the pantry – LOL, that would be suicide!
In fact, I needed to brave the wilds of my pantry to rescue some jars of homemade goodies that had been marooned in there since September: ghost pepper jelly, habanero jelly, sweet-and-spicy cherry peppers, peach habanero salsa and barbecue sauce.
There was a whole ecosystem of sweet, tangy, spicy excellence in those jars that had been neglected for too long!
But where to put those colorful jars of butt-puckering perfection?
I scanned the kitchen.
Nada.
No shelf space left, no cabinet space that wasn’t spoken for, and the countertops were strictly verboten by decree of The Commandant.
But wait! What was that there?
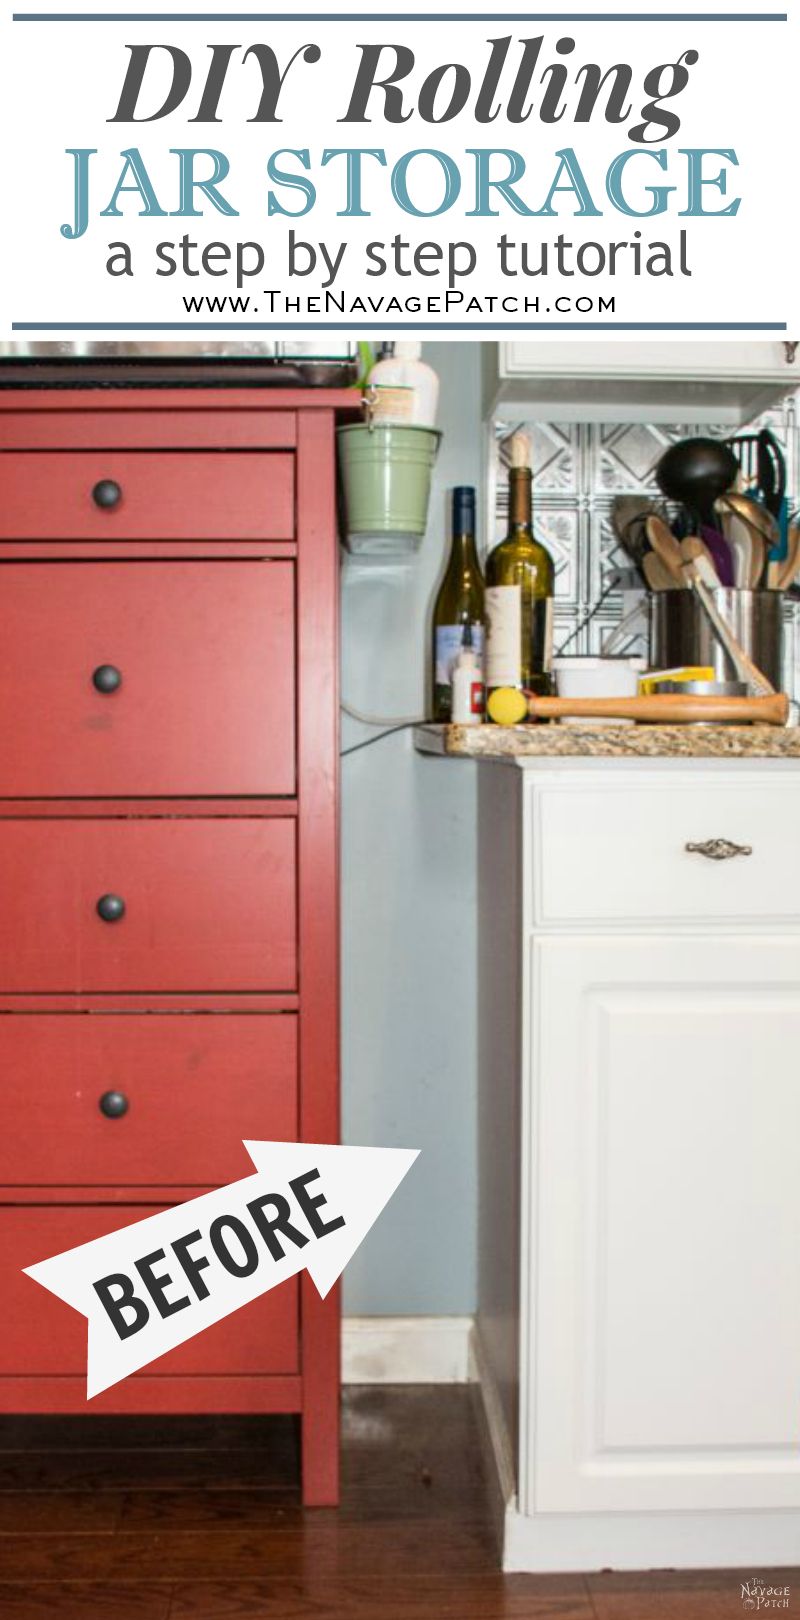
A Secret Space Reveals Itself
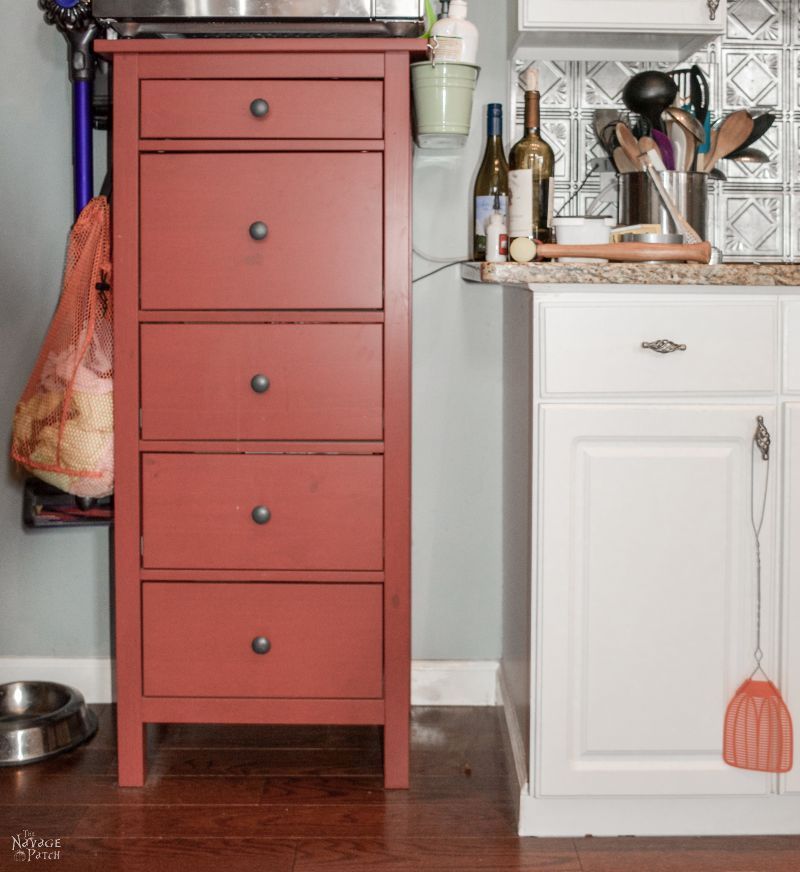
Just look at all that wasted real estate! Go on! Look! (Yikes, just don’t look too hard at all those stains on the red chest of drawers.)
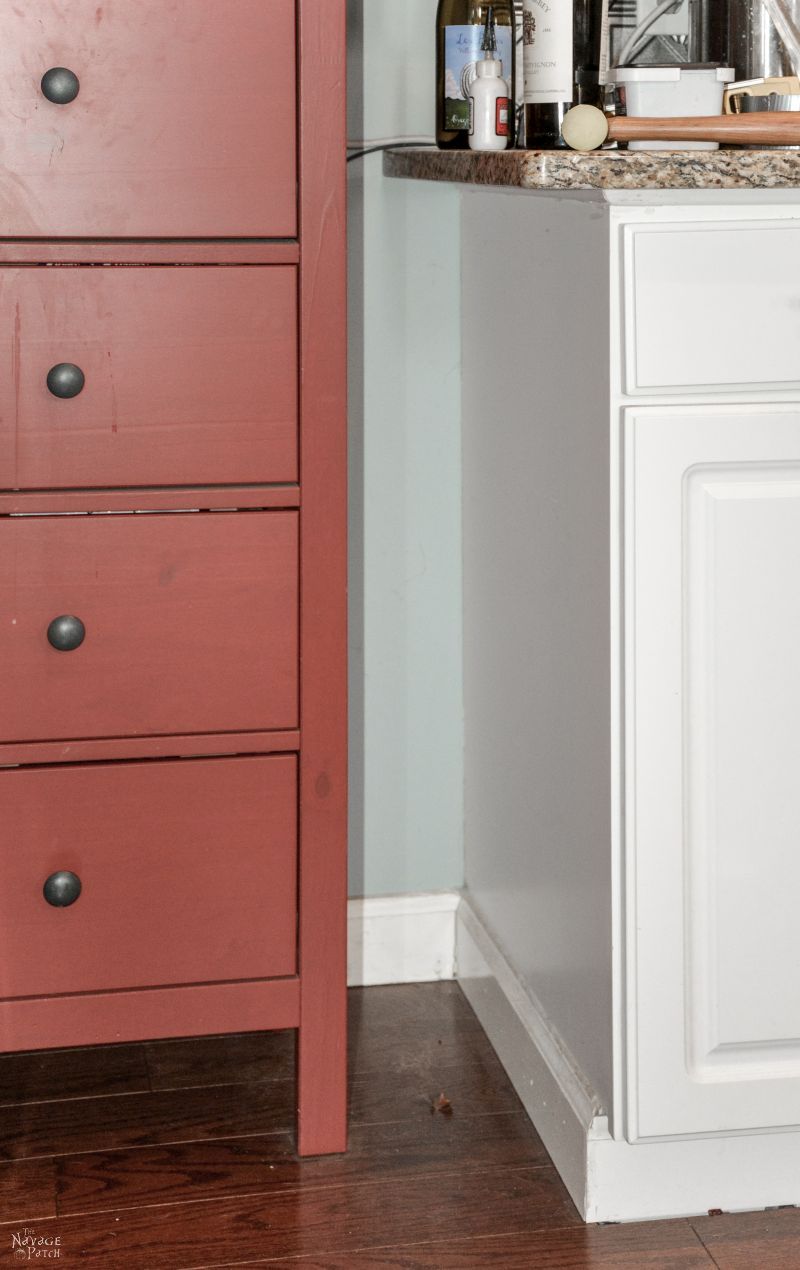
Okay, I could work with that space. People live in smaller spaces in New York City and San Francisco and pay good money for the privilege! I whipped out a measuring tape and took some hasty measurements.
Spoiler Alert: I was a little too hasty, and I screwed up a measurement. When did I discover my error? After I built the damned thing! More on that later.
I jotted my measurements on a small piece of paper and made a quick sketch. I would build rolling mason jar storage shelves to hold my pints and quarts of precious spicy stuff. The rolling shelves would fit exactly into the space shown above: the top of the enclosure would fit underneath the granite overhang, and the bottom 4 inches or so would be recessed by 3/4 inch to account for the baseboard on the one side and at the back.
I descended into the basement to start construction.
Building the Rolling Kitchen Jar Storage Shelves
I can hear you thinking, madam. “Oh, down in the basement with all your boxes of crap?“
To which I reply, “What boxes, madam?”
Planning the Job
I decided to make my DIY rolling kitchen jar storage out of 1/2 inch plywood, and I cut all the pieces according to my sketch and dimensions. I know other bloggers out there take the time to plan their work with computer-aided design and cut sheets and computer-generated plans.
They are right to do so.
I make my calculations in my head and scribble them on a tiny yellow pad of paper.
I make mistakes – usually a lot of them.
Don’t be like me. Plan your work properly.
*****
Sketchup is Better than hand-drawings!
Edit 2019: I’m now one of those “other bloggers” who uses computer-aided design, and my work is much better because of it. Quality is up, and errors are wayyy down.
Don’t be like Old Me.
Old Me was a doofus of the very first order – a mouth-breathing, knuckle-dragging dunderhead who couldn’t plan his way out of a paper bag.
New Me, on the other hand?
Well, now there’s a horse of a different color!
New Me is a Renaissance Man, a Swashbuckling, Sawdust-Sneezing Samurai.
Why, I don’t think it’s an exaggeration to say that New Me is a Hero…
[Ok, my babes, time to come back to reality! -Handan]
Hmph. I was just getting started!
*****
Laying out the Kitchen Jar Storage Pieces Before Assembly
Anyway, here are all most of the pieces. I realized later that I forgot a piece.
Also, I sorta changed the design a wee bit halfway through building.
Again, people, don’t be like Old Me when you build.
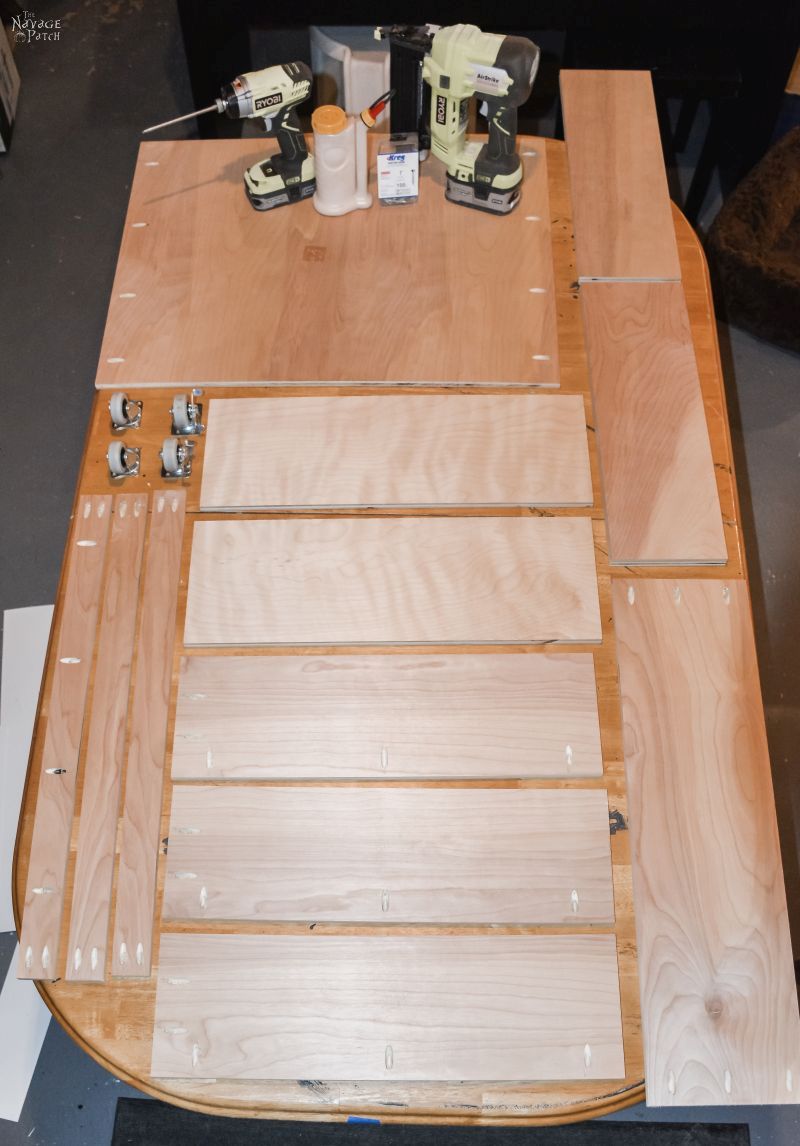
I used my Kreg Jig to drill all the pocket holes. There are also two pieces of 3/4 inch plywood that I cut for the base.
Since I needed the bottom 4 inches to be recessed, and my casters were 2 1/2 inches tall, I needed another 1 1/2 inches in addition to the casters.
I glued two identical pieces of 3/4 inch plywood together to make the 1 1/2-inch-tall base.

I used brad nails to secure the two pieces together while the glue dried.

The base was 1 1/2 inches shorter in both length and width than the bottom shelf of the cabinet. When glued together, I centered the base in the middle of the bottom shelf. This left 3/4 inch all around – the exact width of the baseboard. I traced the outline with a pencil then rolled the base with glue.

Next, I placed the base on the bottom shelf and secured it with brad nails.

Assembling the Rolling Mason Jar Storage Cart
Once the base platform was built, I started by securing the back of the shelf to the base. I put a bead of glue along the joint then screwed it in place.


Then the sides


And the top (okay, okay, I hadn’t actually put the other side on yet. In my original design, I only had one side. I planned to slide the jars to the end and pluck them from there. I changed this plan shortly after taking these pictures).

Once the frame was built, I reinforced it with some brad nails.

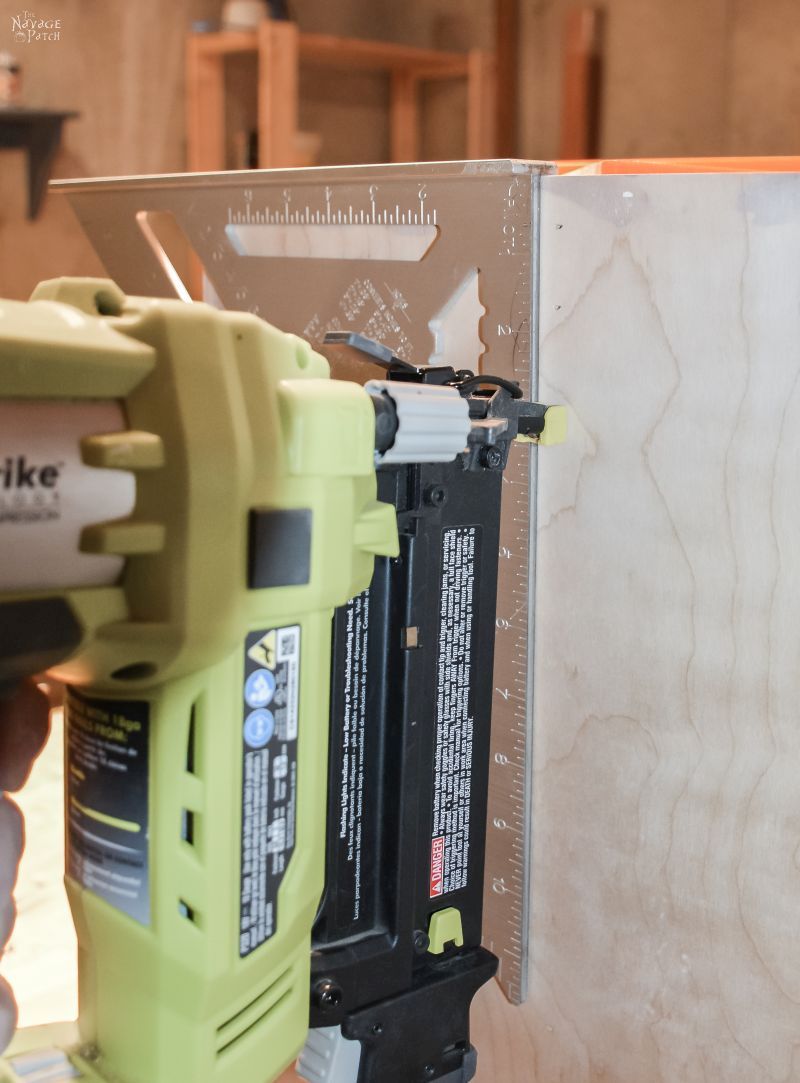
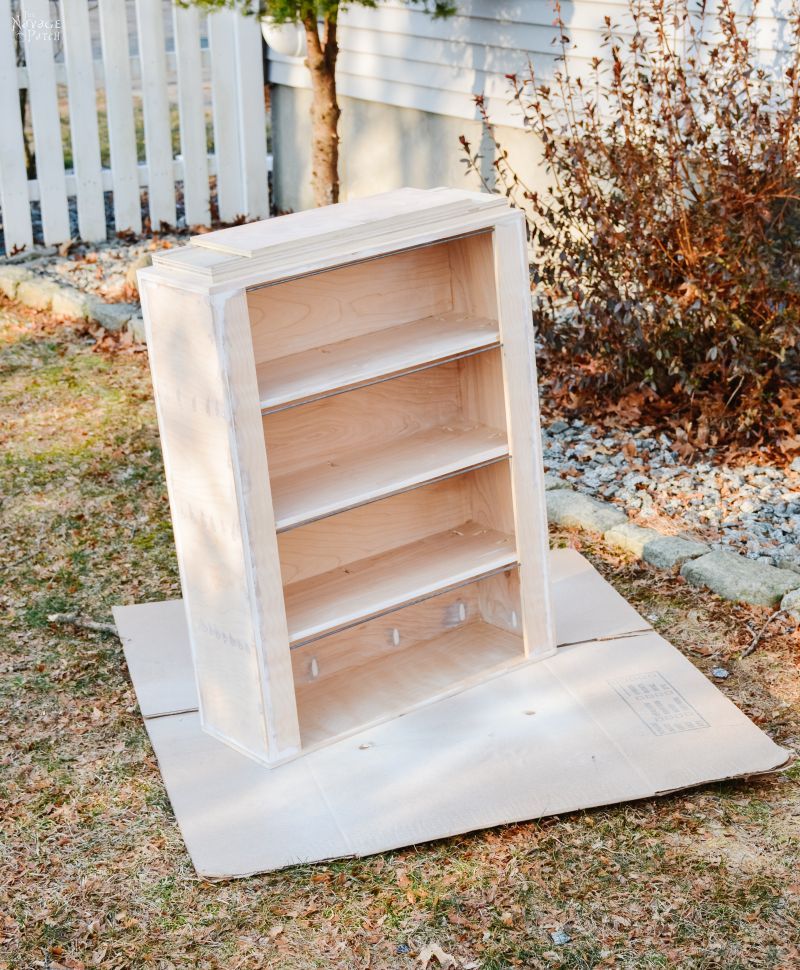
Once the frame was finished, I installed the shelves. I measured so they would be equidistant and marked where each shelf would go, then used two speed squares to make sure the shelves were level and square.


I secured the shelves in place with glue and brad nails shot through from the sides and back, using the speed squares to help me line up my brad nailer in back.


Before attaching the face frame and the metal crossbars, I filled all of the pocket holes with wood filler and the nail holes and gaps with drywall spackle.
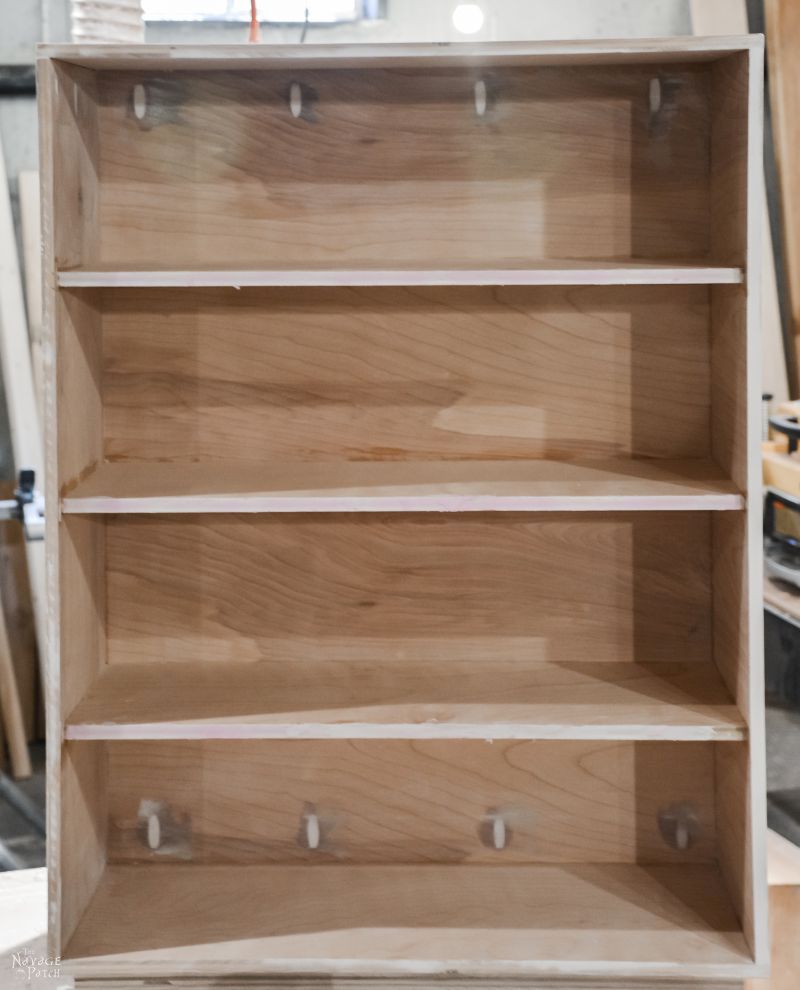

Once that was all dried and sanded, I built the face frame. I drilled holes into the sides of two pieces of plywood. These holes would hold the metal rods.
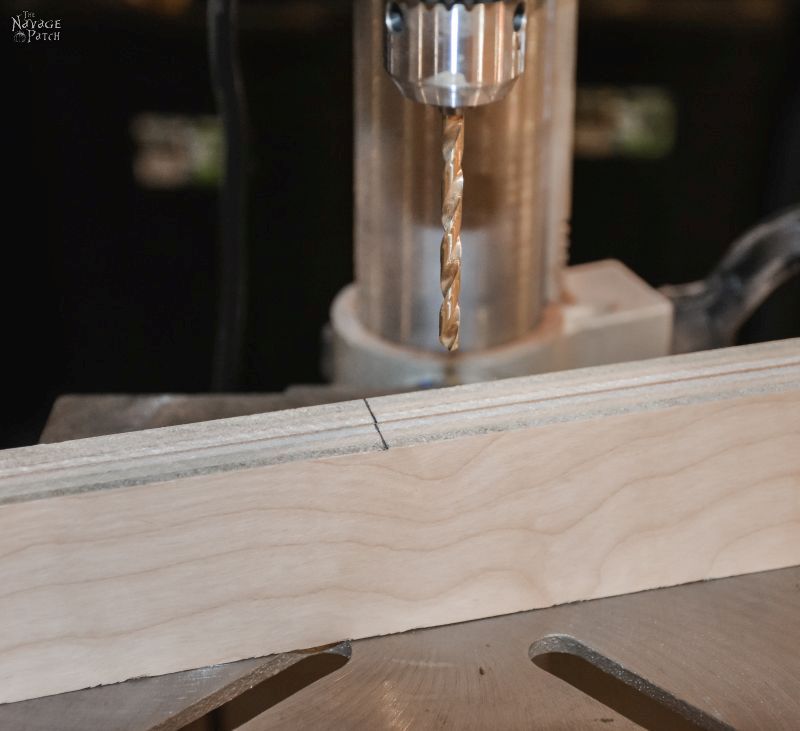

Next, I inserted the metal rods.

Then I glued and brad nailed the face frame in place. I put drywall spackle on the nail holes and any gaps.

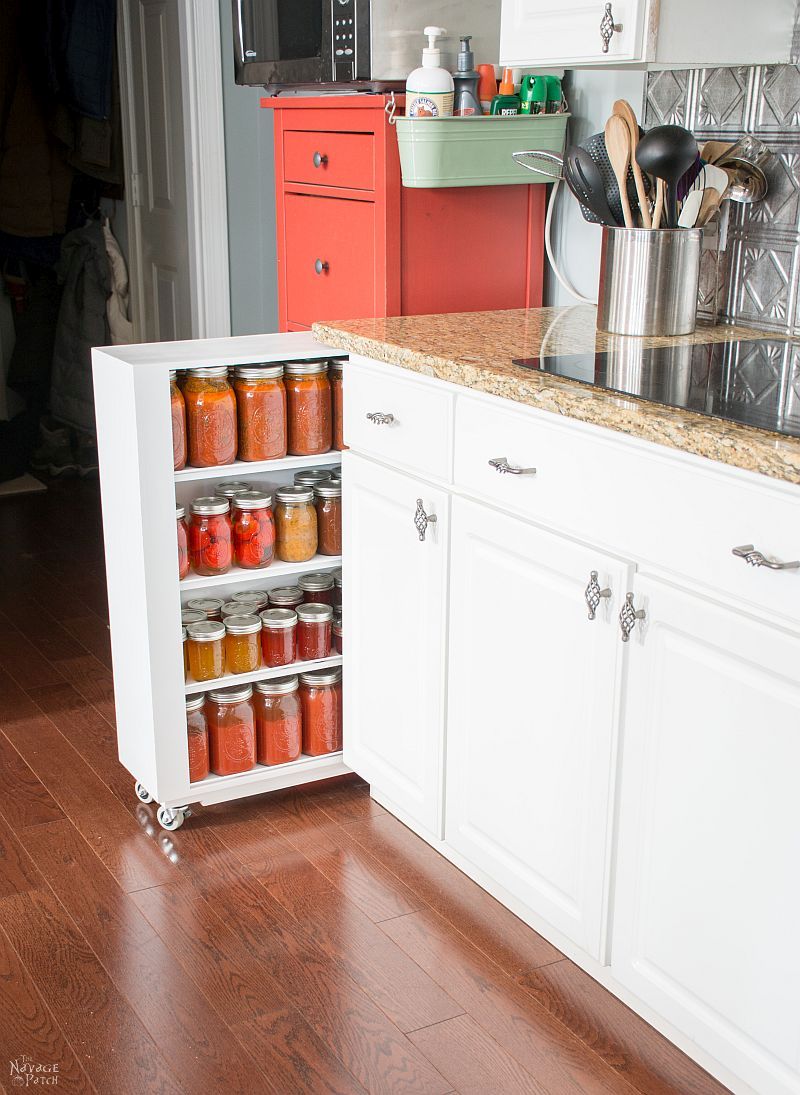
You may be wondering why those bars are so low. They are at the exact height they need to be to allow jars to be placed on the shelves. Since there is very little clearance for the jars, they are not able to tip over and spill out. The only way they can be removed is to lift them up about a centimeter and slide them straight out. That was the idea for the big jars, and this summer there will only be big jars in there. For now, there are some small jars living in there, but I’m not worried about them falling out.
Painting the Kitchen Jar Storage Shelves
I gave the whole piece a sanding, and then it was time to hand it over to Handan for painting.
Handan has a Wagner paint sprayer that she absolutely loves. I’m all ankles and elbows when it comes to spray painting, so I just get out of her way and let her do her thing.

When it was painted, I attached the wheels.
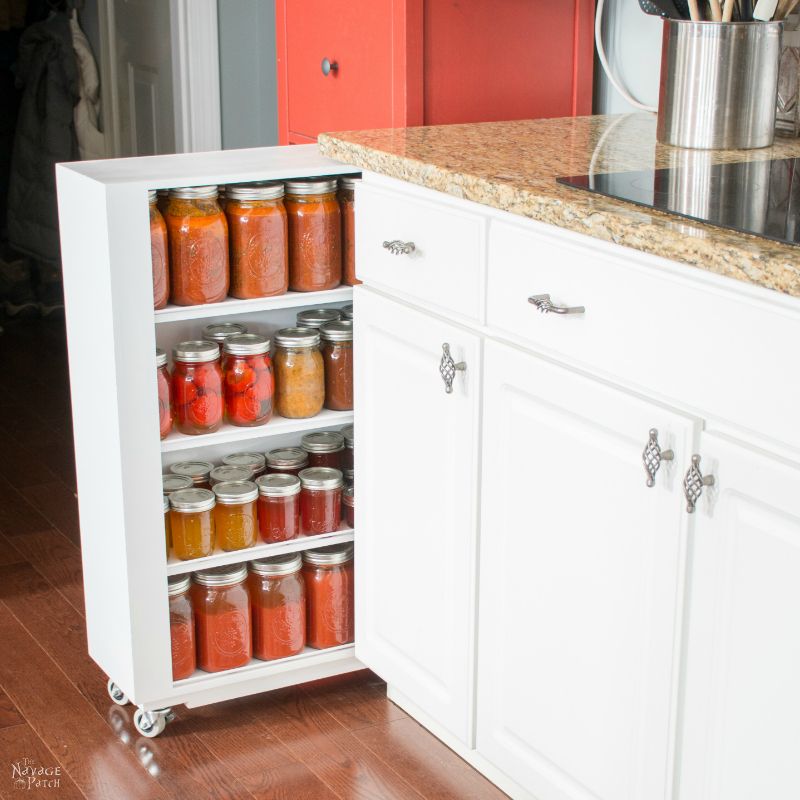
And, wow, it’s done and filled with jars!

An Unsquare House
Astute readers will remember that I said I screwed up a measurement back at the beginning of the post. When I brought this upstairs for painting and tried to fit it in place, I found that it was about 1/2 inch too tall for the space and wouldn’t fit underneath the granite.
How did this happen?
Well, this whole jar storage thing was originally going to be a set of fixed shelves in another even smaller space in the kitchen. I had measured the height from the floor to the underside of the granite over there and applied that same measurement to the new area, (wrongly) assuming that the house was square and uniform and that the counters would be the same height all around the kitchen.
This house may be a lot of things, but square, level and uniform it isn’t!
In order to fix this error and make my rolling mason jar storage shelves fit, I had to cut 1/2 inch from the four corners of the base, where I had attached the casters. By doing so, I lowered the sides down, so they no longer cleared the baseboard.
Ah, well, such is life.
Instead of a flush fit, there would be a small gap on the side next to the stove. I’d have to live with it.
Finished DIY Rolling Kitchen Jar Storage Shelves

We love to see our DIY projects out in the wild! If you try this DIY project and take a picture and post it on Instagram, be sure to tag us – thenavagepatch

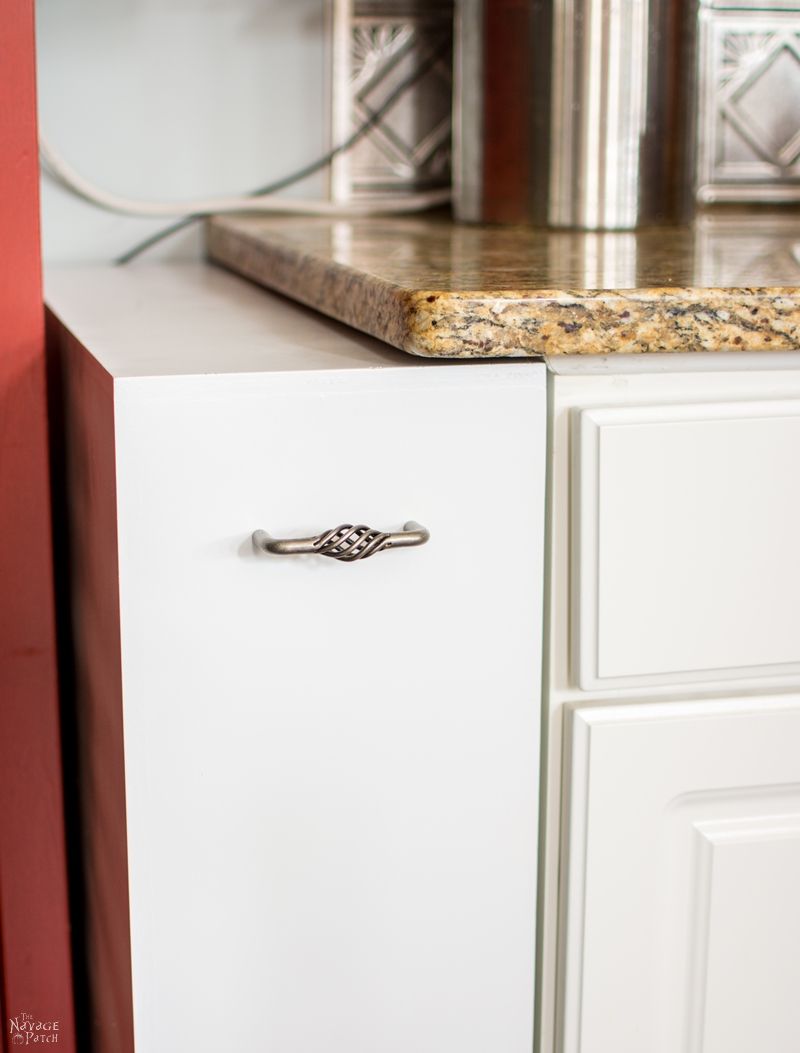
When Handan saw me struggling to pull the loaded shelf out so I could get a jar, she suggested I put a handle on it.
My babes is one smart lady! Why hadn’t I thought of that!

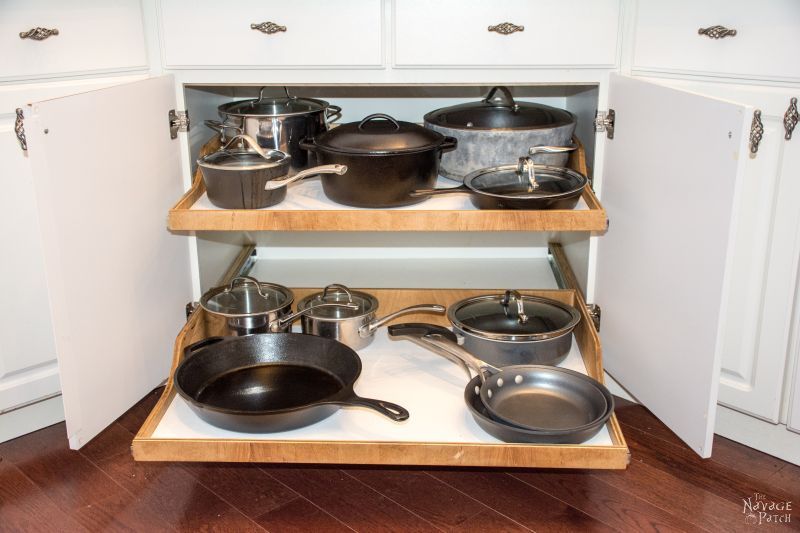
I still have a few more nooks and crannies in the kitchen that I plan to fill. But until I do that, you might like to see how I built our own slide-out shelves for all our kitchen cabinets. Click on the picture below to visit the DIY Slide-Out Shelves tutorial.
Share it on Pinterest & Facebook!


Love it! You two are very handy. I would love to rummage in that basement. What a fantastic workshop! Judging on that fun pig pic in the background of your photo I think I’d find some great goodies. I miss the days of coming up with ideas and asking hubby to execute them…we are getting a little older…well, he is anyway 😉 and so it’s on to smaller tasks…but a girl can still dream….
Looking forward to your next project and the next installment of Greg and Handan. Aloha.
Lol, that pig pic was hanging in my kitchen for a couple of years. Handan made it for me from a print she found online. The top reads: Never Trust a Skinny Chef
🙂
I could hardly finish the blog after that first picture of your “working” area! To say that I am jealous would be an understatement worthy of Calvin Coolidge! But the ideas are great and the writing wonderful and the love story irresistible so I’ll have to continue reading your blogs. Love you two!
Thank you, Derry! Yes, it is a pretty awesome work area…the whole basement is devoted to project storage and workshop!
good job as usual …. i too could not help looking at the pic in the background it looked like a conehead holding a laughing pig to me, see how fun life becomes when you get old ha ha xx
You’re not far off the mark! Here’s a zoom-in on that pic: https://www.thenavagepatch.com/wp-content/uploads/2016/05/sc-1.jpg
You’re good, impressed the heck out of me! The cabinet, the homegrown and
canned goods, and that you, like me, have a basement workshop!
Thank you, Marie! We couldn’t do what we do without that workshop! I’ll take a loaded workshop over an in-home movie theater any day! 🙂
What a smart project – you’ve got to grab space wherever you can, right?
Thank you, Julie!
This is seriously awesome! Thanks for linking up at Talk of the Town – you’re my feature pick for next week! I’m pinning it to the Knick of Time party board, and giving you a shout-out on Facebook!
Angie, that’s awesome! Thank you so much! 🙂
What a practical, yet gorgeous, place to store all those goodies!! I love it!! I also love that you are a “scribble” planner, just like me. LOL I know I should be more particular about things, but I decide halfway through just about everything that there is a “better” way. 🙂
Thank you so much for sharing this!!
I would be honored if you would share your content with us over at the Monday Mish Mash Link Party! http://countrymousecityspouse.com/monday-mish-mash-link-party-15/
*Hugs*
Thank you, Amy! People like us will never become proper planners if we haven’t done so by now! 🙂
What a perfect piece! Wondering if I have a space for one… Thank you for linking up to the Talk of the Town link party!
Thank you, Becky!
Great piece and great storytelling! Thanks for sharing!
Hi Becky – thank you so much! 🙂
Wow, you and Handan are an amazing team!! Is that your basement? Maybe you can host for a while a little Spanish lady who can cook delicious paellas and churros in exchange for the privilege to use it… it’s like heaven. I love that jar storage and adding a handle will make your life easier too.
By the way, I am thinking about getting a Kreg Jig, any suggestion?
Come on over, Pili! I love paella! As for the Kreg Jig, I think the Kreg Master Kit is the most useful and versatile. You can see what is included here:
http://amzn.to/1QSYAOr
You would also need a selection of screws:
http://amzn.to/1rsVqw0
After using it for a while, you will understand which size screws you use most. You can then order larger boxes of whichever you like.
You will find the jig so useful for many different jobs: cabinets, drawers, frames, boxes, dressers…too many uses to count!
Thanks for stopping by, Pili!
-Greg
Thanks so much, Greg, I will have a look at it in detail and watch some tutorials.
What a clever idea! I’ll have to watch my boyfriend make this for me 😉 haha
Ashleigh @ teamnevergoingback.com
Lol – he’ll be so thrilled! 🙂 Thanks for stopping by! -Greg
What an excellent solution to a problem. Necessity is the “Mother of Invention”. Great tutorial too, our entire house is ripped up—and I will keep in mind this little cabinet when plotting out my new kitchen, Thanks, Sandi
Thank you, Sandi! Good luck with your renovations!
Oh my gosh, this is awesome! You are so handy. 🙂
Thank you, Evelyn!
This is extremely cool! I would love to have somewhere else to stow my canned goods. I, like you, am AMAZING at utilizing every nook and cranny of my kitchen. I wish I could share a picture with you…I bought a shelving rack that fit just perfectly between two cabinets, but didn’t factor in the fact that there’s a step-up in the floor right in the middle of this space. Therefore, my shelving rack has 4″ wooden blocks underneath two of the legs to make it fit. I reached a whole new level of awesomeness when I resolved that problem! Lol! Great job on your rolling cabinet, and I especially love the special touch of the fancy drawer-pull. Also love that I’m not the only one with stains splattering the front of my cabinetry! 🙂
Thank you, Martie! I’d love to see your space hacks! Send a pic to greg@thenavagepatch.com
Greg, it sounds like we have a lot in common. You see I have a basement too, but I use it to find things, discover cast asides and bring them back to life. whereas you try to hide all your “non-boxes”. Either way, it’s good to have a basement. This was an excellent idea and I commend you on your ingenuity even if you don’t use any special computer generated programs. It truly looks great and I’m sure better than any store bought storage unit. Kudos to you for solving the little miscalculation. I can’t wait to see what else you’re gonna do in that kitchen. Pinning and sharing everywhere!! Thanks for joining us.
Thank you, Mary! More to come in the kitchen. And when we finally get everything ship-shape and squared away, we will probably tear the whole thing down and build a newer, bigger kitchen. Now, that will be a fun bunch of posts! (Probably a few years away though)
You know I adore your rolling shelf (such lovely organization). You put so much work into your shelf and it shows as it perfectly fits in the space (no one knows about the measurement challenge) and the addition of the handle is not only useful but really dresses up the piece. Thanks for sharing at the #ThisIsHowWeRoll Link Party. I’m pinning now.
Thank you so much, Susan! -Greg
I’ve already picked out a place for this!! I seriously need one – Thanks for sharing on the DIY party!
Hi Helen, thank you so much!
This is amazing!! Looks so very professional and the empty space is nicely used up. Great job!! Thank you so much for sharing at my craft party on Thursday! Would love to see your newest posts this week, which starts at 7pm EST.
Thank you so much Denise! Handan will be linking up this week!
I am so impressed! It’s perfect. And what a great hubby! Thanks for sharing at Vintage Charm! xoKathleen
Thank you, Kathleen!
Wow what a beautiful rolling storage cart for your beautiful canning jars of lovely foods! And how nice you provide great step by step instructions with great photos! Thanks for linking up with Funtastic Friday!
Thank you, Sheri!
Wow…I love how your rolling cabinet turned out! It looks great! I also got a good giggle out of your basement story because that’s what we used to do when we had a basement…LOL!
Thanks so much for sharing with us this week at Share The Wealth Sunday! xoxo
Thank you, Lisa! 🙂
Good Morning!! I wanted to stop by and let you know that your post has been selected as a Feature post for the Welcome Home Wednesdays Link Party!! Stop by this morning to see your post linked up and don’t forget to grab your Featured Button too! ~Lisa~
Thank you so much, Lisa!
I can always use more storage and have the perfect place in my kitchen for this! Thanks for sharing with us at throwback thursday!!
Mollie
Thank you, Mollie!
That’s awesome! Canned goods are a perpetual issue in our house – we used to have a gorgeous pantry space, but then moved, and of course, two giant boxes of canned stuff came with us. Now they all reside on the very top shelves in our cupboards, and I’m too short to easily get to them and too lazy most times to grab the small foot stool out of the garage to retrieve them. I can see this kind of storage coming in handy – what a great idea! Now to get hubby to find his tools and start making one of these for me…
Thank you, Ali! It has been a lifesaver. My kitchen looks big at first glance, but it is a little lacking on storage space, so I’m always looking to convert the unused nooks and crannies into usable space.
I love your site, but I wanted to let you know that there are so many ads I can barely browse your site. I have to go through and try to remove all of the ads at the bottom of the photos first, which sometimes I can’t event do because of how often the site freezes up. Just a suggestion. Love your projects.
Hi Crystal, we’re working with our ad partner to try to speed things up. Thank you for your input – it’s always welcome!
I LOVE that basement workshop! I don’t lust after jewels or furs–I want a TOOLS to make things and a place to keep them. I rent a small apartment and I don’t think the architect even grasped the concept of “pantry” or “storage” space. I’m not married, but I grew up in a DIY family, and not having a place to work on whatever IRKS ME something fierce. I’m 73 and I still like crafting and cooking, as well. Sigh. My mouth waters to see such lovely work turned out and quickly put to use. I’m a step or so beyond scrap-of-paper planning, but not at the computer stage, with no tools there’s not much point in But I can admire good work when I see it.
LOL, a woman after my own heart! Oooh, that must be so frustrating. There’s nothing worse than having no storage! Just a case of greedy developers trying to squeeze as many people into abuilding as they can with no regard to storage needs. Thank you so much for your comment, Carolynn! Have a great weekend!
It took me years to convince my husband there was usable storage beside the fridge.One day it clicked and I got my rolling storage.
https://www.facebook.com/Ree2Race/photos/a.311565322287899/1503766759734410/?type=3&theater
https://www.facebook.com/Ree2Race/photos/a.311565322287899/1503766716401081/?type=3&theater
That is a brilliant storage solution, Marie! Kudos to you for thinking it and your husband for building it!
I too, applaud your workmanship and engenuity…but I have to admit I missed a couple of the pics because I was too busy looking at the pig and wondering where I can find one…?
Thank you, Martina! Yeah, I love that pig, too! Handan found that somewhere online an eternity ago and unfortunately can’t remember where!
I do love reading your blogs they are so entertaining and you are both so clever. i lo jar storage wish i had room for one it would be great when i have a jam making or pickling session. Blwyddyn Newydd Dda to you both.
Thanks, Catherine! Blwyddyn Newydd Dda to you! 😀
I would appreciate some information on the type and style of casters you used. I am re-designing my own kitchen and have this basic concept writ large. Since mine will be rolling across a wooden floor, I am zeroing in on a caster with a rubber wheel. I’m curious what you decided to use.
Hi Lola, I used a combination 2-inch rigid and 2-inch locking swivel casters with rubber wheels –> https://amzn.to/3kDVrtu
I found your blog by mistake. I used to love seeing your posts on Hometalk I think it was. I missed the humor and now I can visit the Patch again. Your rolling cabinet is great and gave me the idea of how to make an inexpensive shelving unit better that I have at the end of my island. I have a VERY small kitchen and storage space is at a premium. The ideas you and your wife posted on HT gave me ah ha moments which I thank you both for. I have a suggestion for you on the wheels. When I need something I check Harbor Freight first. hope you have one near. I needed casters to attach to my small laptop desk I got years ago from Ikea. It was inexpensive and fit the bill for my purpose. I disliked the fact that it didn’t slide easily so I bought felt and silicone slides which didn’t work well. But the silicone was better than nothing so I kept them on a while. Then I was thinking about the problem and an ah haaa moment hit…CASTERS. but I didn’t want just any casters I wanted ones that were relatively unnoticeable. I went on the HF site and found ball bearing casters in 2 sizes, I bought the smaller size. Since the 3 legs of the table were plastic I couldn’t screw them in so I just put E-6000 glue on the caster top and stuck it to the legs and let set for 24 hrs. I have had no problems with the table rolling at all and the glue has stood up to my use of rolling it from the side of the couch to where I sit. I find that Harbor Freight sometimes has products just as good as HD or Lowes at a better price. Sorry my post is so long but thought you might be interested. Have a great day and thank you for sharing your projects..
Hi Leslie, I’m happy to hear you found us again! You know, I’ve never been to Harbor Freight, but you’ve convinced me to give one a try. Thank you! 🙂
Hi! I LOOOOVE everything you do! Will you guys come live with me? JK
I have a question, and wasn’t sure where to ask it, so I am using this space. Do you have any suggestions as to how to display beautiful dishes in a kitchen cabinet with glass doors? I would love to hear from you.
Thanks so much!
Maria