Easy DIY Patriotic Pillows with Free Printables
Beautiful patriotic decor is a snap with these DIY patriotic pillows made with our free printables, heat transfer paper & an iron or a Cricut EasyPress 2!
Welp, here we go again!
Another holiday, another mountain of holiday-themed pillows. We still haven’t put the Christmas pillows in storage, yet here we are pumping out patriotic pillows!
Oh, hello America, and happy 243rd birthday! Here, have a pillow! No really, I insist! Please! Just take it! I’m buried over here!
Men may never fully grasp the allure of pillows. We may never fathom the need to cover every square inch of a sofa or a bed with decorative pillows.
Making a bed is hard enough on its own (*ahem*, or so I’ve heard). Why on earth would you then take the extra step of putting like 10 pillows on top of the 2 good pillows you actually sleep on?
Bedtime: toss the pillows on the floor, because they are, in fact, useless.
Morning: put the pillows back on the bed so the bed looks good for the (exactly zero) people who will be in that room throughout the day.
Insanity.
And what about the sofa?
Where’s a man to plop his weary butt when throw pillows are covering his seat? A man needs to toss those pillows on the floor to access his butt-shaped depression in the sofa, but then he risks a verbal lashing for getting the pillows dirty!
Madness.
Or perhaps I’m missing something?
Perhaps the road to gender harmony is paved with throw pillows.
If only we men could understand. We’re not very bright, you know. I’m sure the answer is hanging right there in front of us. If only we just reach out and grasp it…
But until such a day when we fully understand the female/pillow relationship, it is our duty (and our privilege!) to nurture and encourage the relationship.
Whatever the cost.
The smart and enlightened modern man will feign interest in The Pillow.
He will point at The Pillow in The Store and remark upon its Cuteness. When the woman waffles and says that perhaps they don’t need it – when she suggests that perhaps they already have enough pillows – the smart and enlightened modern man will act shocked! He will grab the Pillow and shout, “Never!” He will then grab one more Pillow (for good measure) and clutch them both to his breast!
*****
A while back I showed you guys how easy it is to make a pillow with iron-on vinyl. I put that pillow on a chair in my office, and there it still sits. I look at it every day, and I love it!
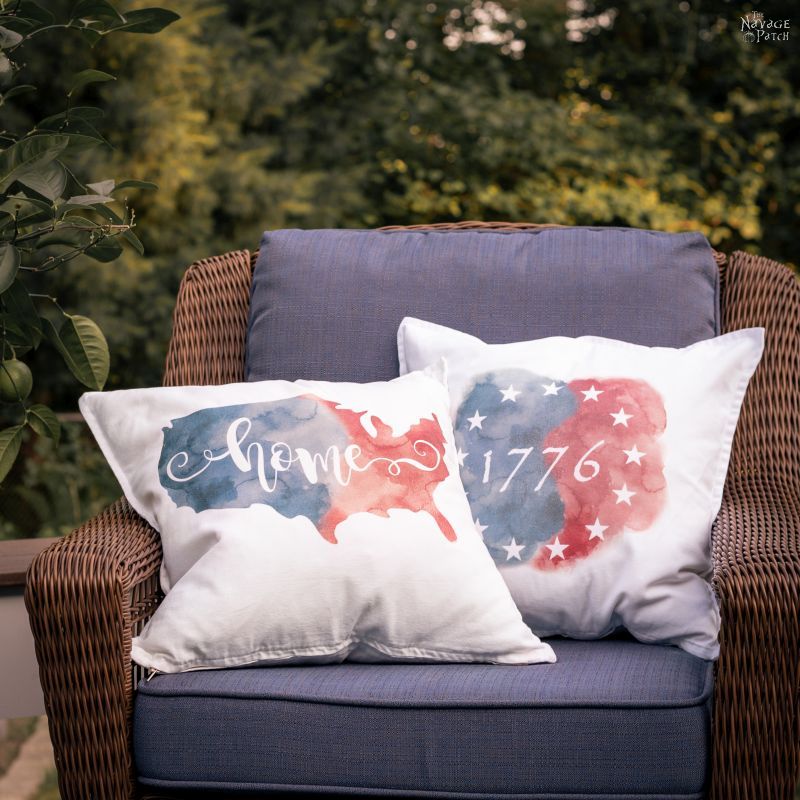
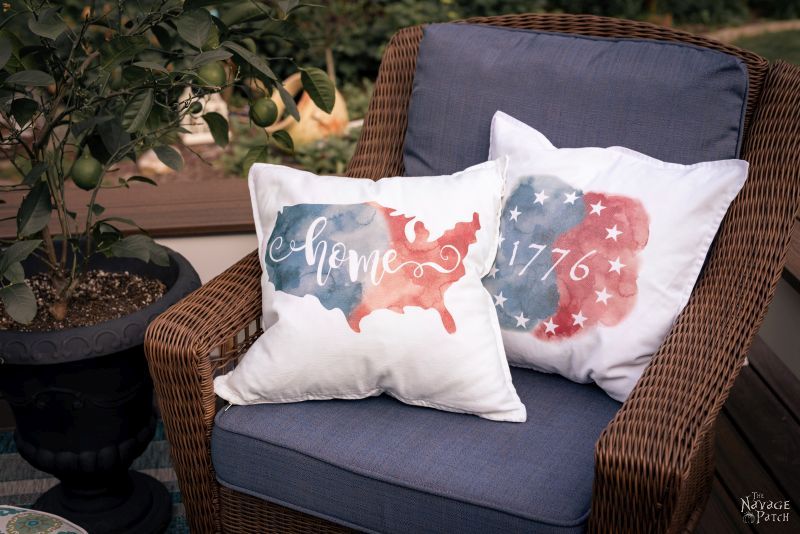
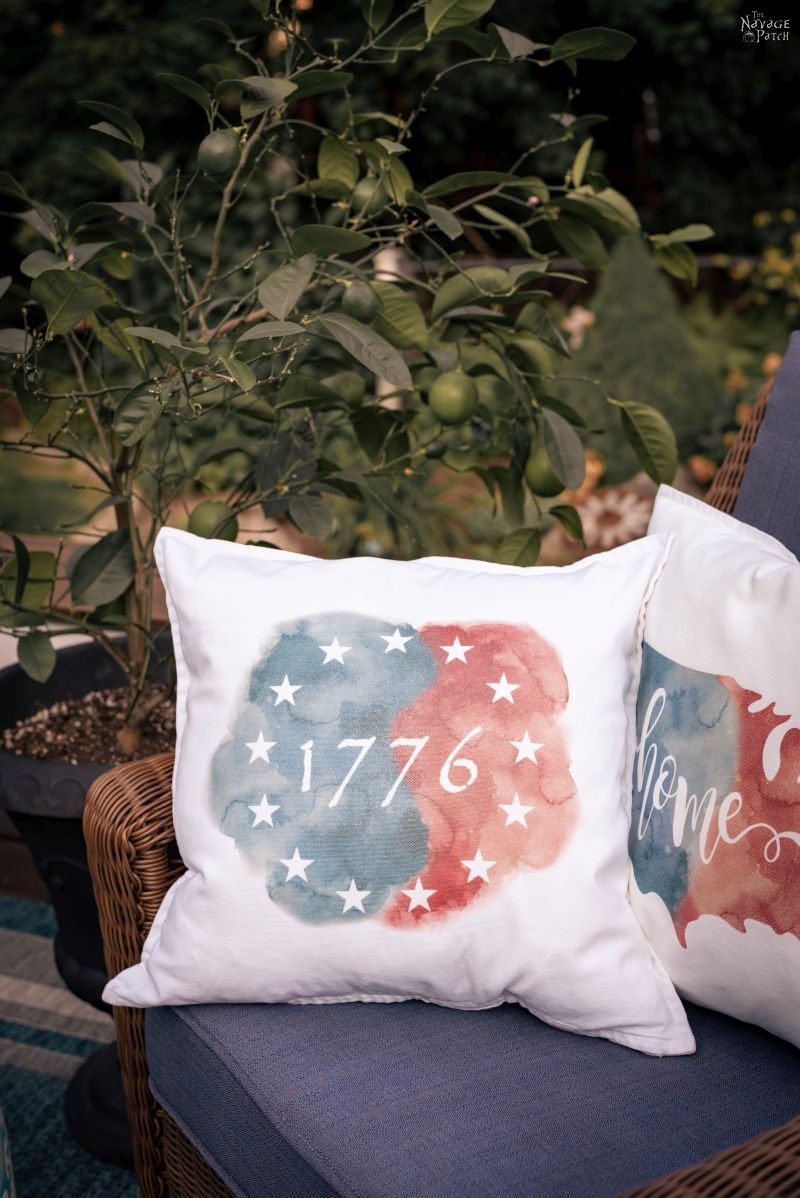
We made the patriotic pillows for today’s post using heat transfer paper, and they are perfect for the chairs on our deck. They’re comfortable, too! I take them inside if there is rain in the forecast, and I bring them back out when the weather is nice…
…hey, wait a minute…
I’m shuffling pillows around like…
…like…
Eureka!
I found the answer!
It was hanging right there in front of me, and yes, I was too stupid to see it!
Ladies, your man will understand your pillow infatuation much better if you can get him to make some pillows of his own!
When a man builds something, he takes ownership of it!
Holy crap, I’m protecting and caring for my pillows!
Today’s DIY patriotic pillows are the perfect “first pillow” for your guy. The designs are not at all “girly,” and they’ll make him feel proud of himself and his country!
Okay, I’ve yapped for far too long. Let’s get on with the tutorial!
Easy DIY Patriotic Pillows SUPPLIES LIST
Affiliate links are provided below. Full disclosure here.
- Pillow covers. We got ours at IKEA, but you can find them on Amazon for about the same price. Here is a set of 2 and here is a set of 4.
- Iron or Cricut EasyPress 2
- Heat transfer paper
- Free patriotic pillow designs (available at the VIP Patch)
- Scissors
- Color inkjet printer
- Hard surface to press on (we used a piece of MDF)

How to Make Easy DIY Patriotic Pillows
Okay, you have your heat transfer paper, right?
Awesome, then let’s get to it.
Step 1 – REVERSE your image
The first thing you need to do before you print our free patriotic pillow designs is to REVERSE the image you want to use. Don’t worry if you don’t know how to do it, because Handan prepared a very easy tutorial on how to reverse an image. Would you expect anything less of her? Of course not! You go check that out, and I’ll meet you right back here, okay?
Good, you’re back.
Step 2 – PRINT your image
Once your image is reversed, print it onto heat transfer paper with your inkjet printer. If you have a Cricut, upload the PNG files to Cricut Design Space. Then using the “print and cut” option on Cricut Design Space, print the image.

Step 3 – CUT OUT your image
If you have a Cricut, just feed in the printed image, load the fine-point blade, select the “Printable Iron-On, Light” material setting, and it will cut it for you. The best part? It doesn’t cut all the way through the heat transfer paper – it just cuts through the transfer layer, so you can have a perfectly-weeded image! Ooooh-Weeeee, that’s good stuff!
If you don’t have a Cricut, then cut out your image with scissors. Try to get as close to the design as possible without actually cutting into it (*ahem* can’t imagine who would do that!)

Step 4 – SET Cricut EasyPress 2 to 375 degrees or set iron to high (cotton/linen)

Step 4a – If you’re using an iron, read Handan’s post about transferring images to fabric
Irons heat differently than an EasyPress 2 or a heat press. There’s a different technique involved, and you’ll need to cold-peel the transfer paper instead of hot-peeling it. More on hot-peel vs cold-peel in a bit.
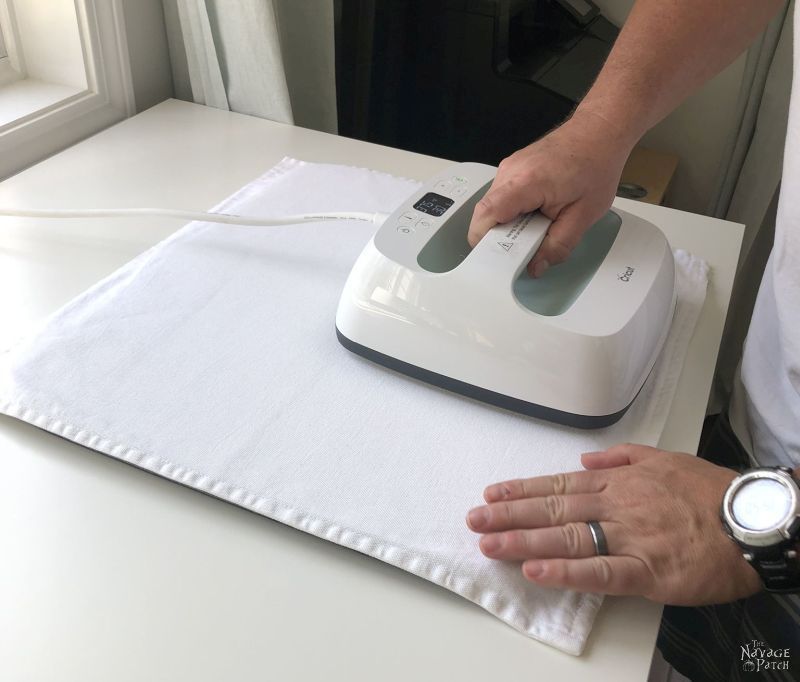
Step 5 – PREHEAT the pillow cover
Preheat the pillow cover for about 15 seconds at 375 degrees. For our first two transfers, we used a Cricut EasyPress Mat instead of MDF just to see how well it would work. (spoiler: it worked fine. You just need to apply a little more pressure than you would on a hard surface.)
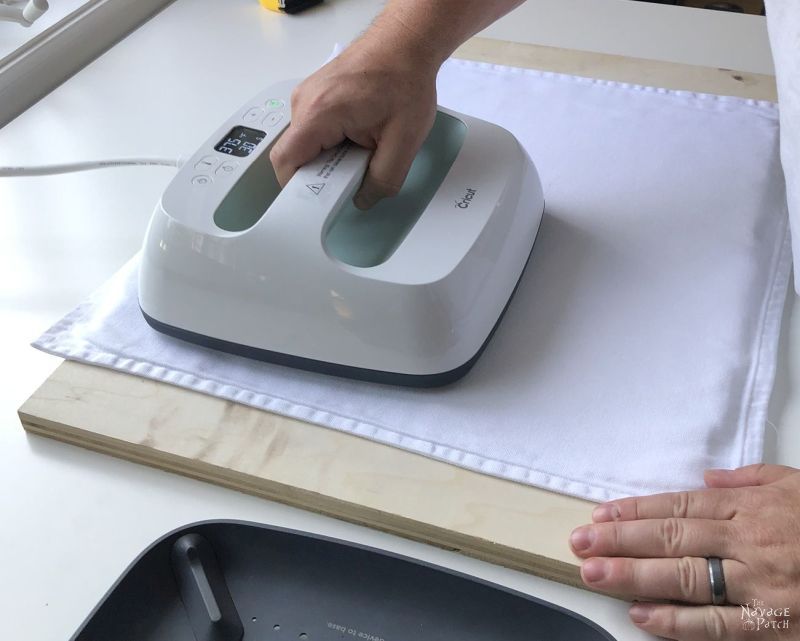
For the other DIY patriotic pillows, we used MDF under the pillow cover.
Step 6 – PLACE the design on the pillow cover
You can either eyeball this step or take a more structured approach. We eyeballed some, used a tape measure on others, and for this one, we used painter’s tape to help us get it centered.
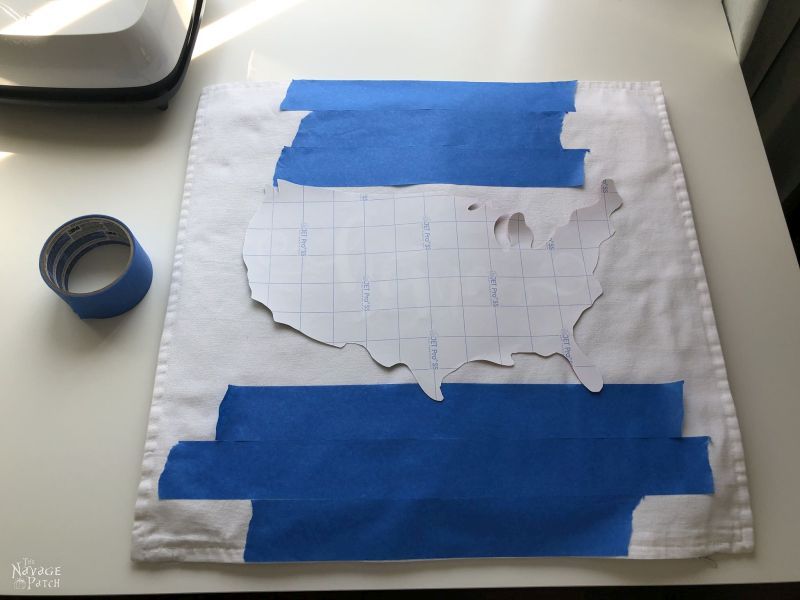
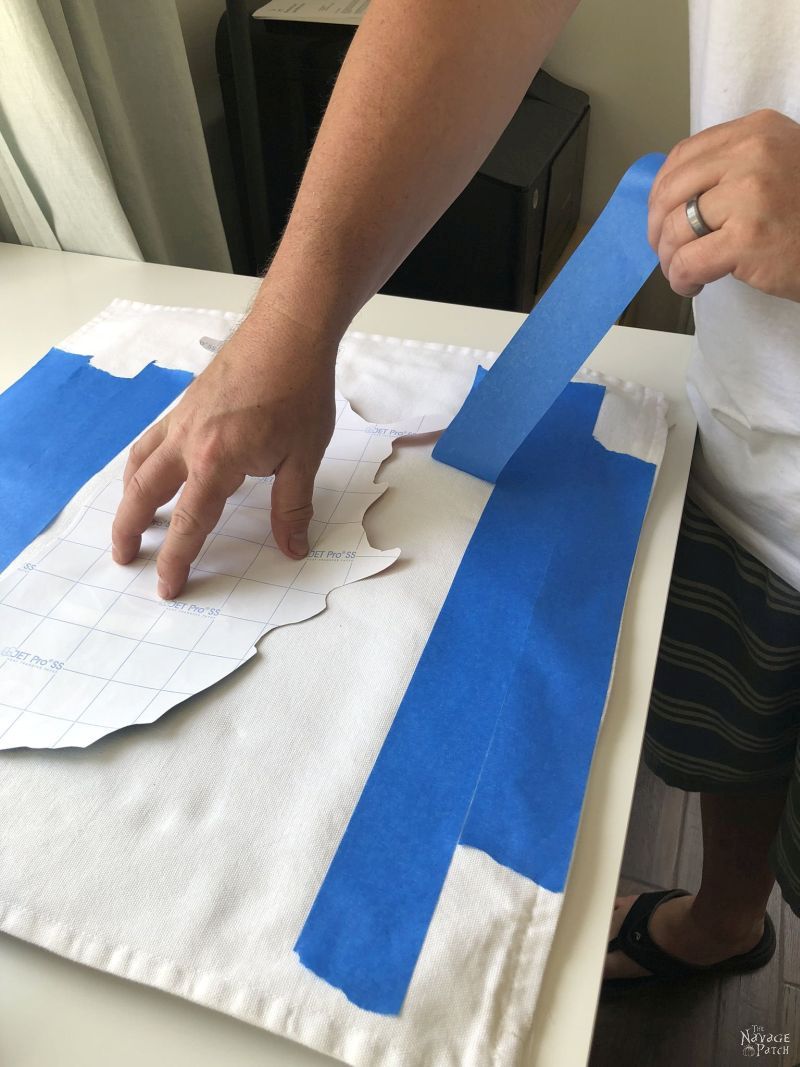
Once it was aligned, I removed the tape while holding down the heat transfer paper.
I eyeballed this one.

Step 7 – PRESS your design
If your design fits entirely under your EasyPress 2 or your iron, press with firm pressure for 30 seconds. If the design is bigger than your EasyPress 2 or iron, move it all around the design with firm pressure for about 90 seconds.

Another design…

And another, this time on MDF…

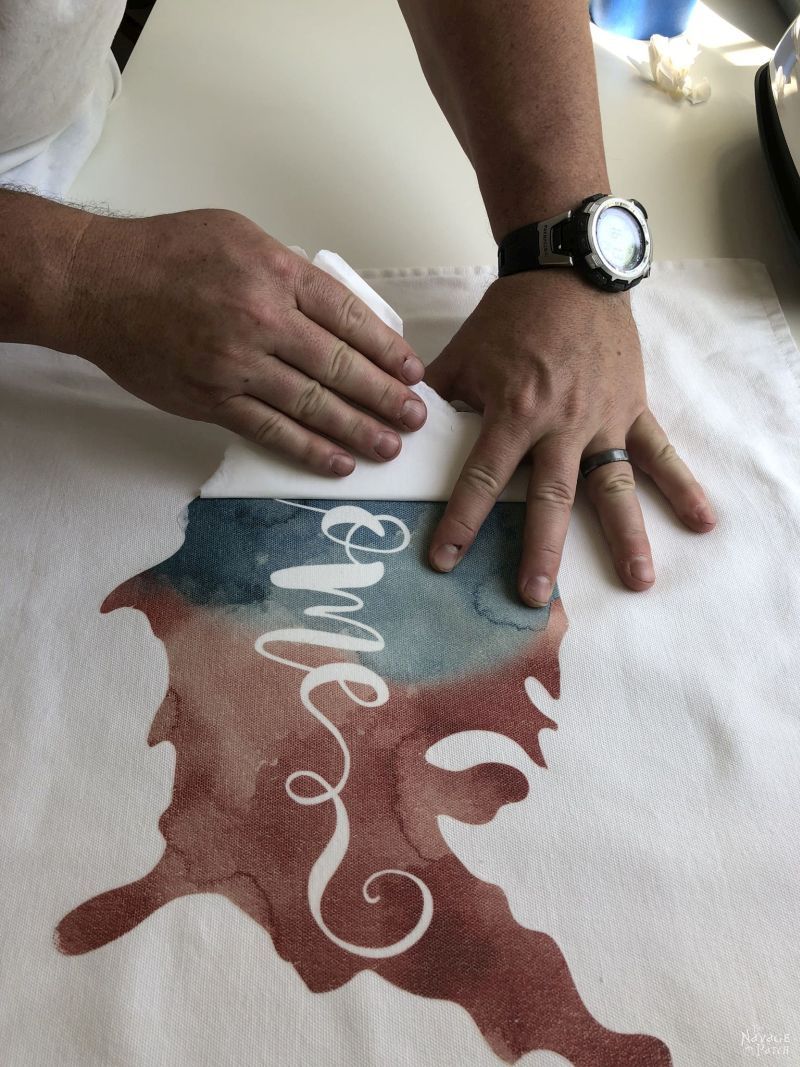
Step 8 – PEEL the transfer paper
Hot-Peel vs Cold-Peel
The heat transfer paper we use can be peeled at any temp, but it is easiest to peel hot. The moment you’re done pressing, you grab a corner and peel. This gives a nice matte transfer, and when done correctly, you can barely see an edge (if you’ve cut your design with scissors). If you’ve cut your design with a Cricut, it’ll be perfect.
Cold-peeling will result in a full transfer of ink onto the pillow, but it will be a little more difficult to peel than hot-peeling. A cold peel will result in deeper colors and a smooth, vinyl-like feel, but the outline of the transfer paper may be slightly more noticeable at the edges if you’ve cut your design with scissors. Again, if you have a Cricut and use it to cut the design into the transfer paper, your results will be perfect.
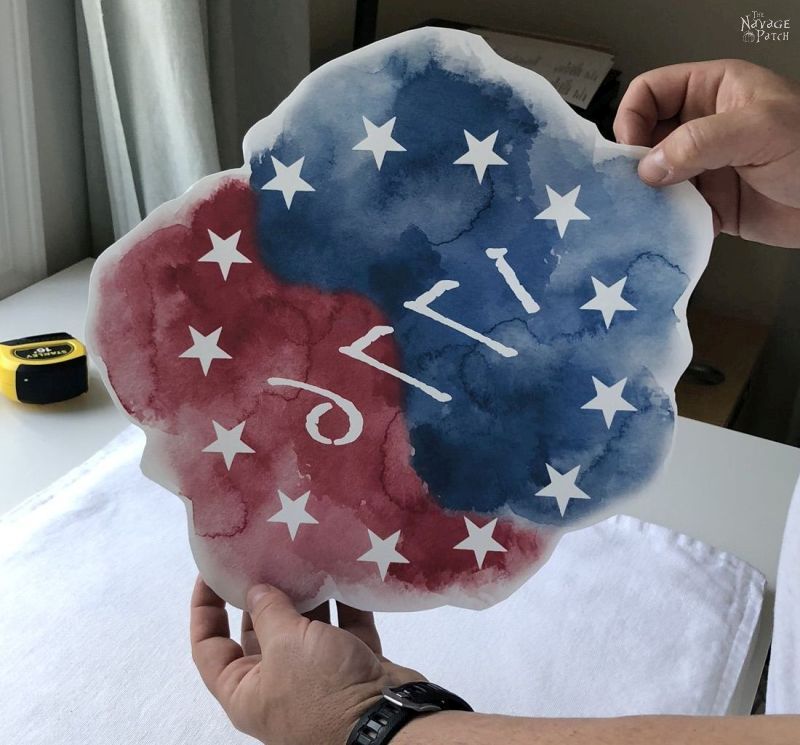
For my first transfer, I waited too long to peel and ended up doing a cold peel. Notice that there is no ink left on the transfer paper. The resulting image on the pillow was a bit shiny and smooth and felt a little like iron-on vinyl. Since we cut the design so close, the edges weren’t all that noticeable.
I peeled the second transfer while still very hot. Notice the ink that is left on the transfer paper. But the transfer is beautiful and has a faded, worn-in look to it.

For this next one, I quickly peeled an edge and then let it cool for a bit. That made the peeling easier and gave results like the first cold peel.


Conclusions on peeling method
It’s a toss-up between the two methods. They both give different results, and it’s really up to your personal preference which one will be best for you.
For us the benefits of a cold peel are the vibrant colors and the silky smooth feel. The drawbacks are a slightly trickier peel and a more noticeable edge if you don’t cut close enough with scissors.
The benefits of a hot peel are a slightly faded and vintage look with almost no edges showing with a scissor-cut transfer sheet. Though the feel isn’t smooth like the cold-peel transfer, it feels more like the rest of the pillow. The drawback is the less vibrant colors.
Tip: If you must peel cold, do try to lift an edge while it is still hot, as it makes the peel easier.
Tip: If you can’t peel fast enough, just go for a cold peel, because at the end of the day both cold peel or hot peel both look great. We had a couple of peels that started hot and ended cold. The result was a half and half transfer that started a bit faded and got bolder and smoother. It just didn’t look or feel right.
*****
Phew! You made it through all my serious lecturing!
Good on ya, mate!
Wait, what?
Why am I writing like an Aussie now, you ask? I’ll tell you after the beauty shots!


Okay, you guys spoke, and we listened!
We understand that our readers are not all American, so we have a special treat for some of our neighbors!
That’s right, Canada, you lovable, hockey-playing goofballs! What’s it all aboot, eh?
You better believe it, United Kingdom, you jellied eel and haggis-eating weirdos! Blimey!
You heard me, Australia, with all your poisonous snakes and spiders! Crikey!
From Handan and I to all of you – Happy Independence Day to Australia on January 1, to Canada on July 1 and to America on the 4th of July!
Sorry, UK friends, but I don’t think you guys have an Independence Day of your own. But you can celebrate when those ingrates, Australia, Canada and America, all declared independence from YOU! Good riddance, eh gov’na? 😀
Free Printable DIY Patriotic Pillow Designs
The first set is for us Yankees!

For our nice neighbors to the north, may we present our Canada design set! Seriously, you guys are too nice. It kinda freaks us out down here! 😀

For our friends across the pond, we have a United Kingdom design set. We see you, Wales, even if no one else over here understands that you’re actually a country! 🙂

And for the blokes and sheilas in the land of Oz, we have an Australian design set. Cheers, from your two favorite Seppos! 😀

We love to see our printables out in the wild! If you display our free printables in your home or use our free SVGs in your projects, and take a picture and post it on Instagram, be sure to tag us – thenavagepatch
FREE Patriotic PILLOW DESIGNS
As usual, here’s some information on these free watercolor DIY Patriotic Pillow designs: today’s freebies come in 16×20 inch size and as JPG and PNG files. As you already know you can scale them up or down as necessary: 16×20 inch can scale down to 12×15 / 8×10 / 4×5 inches with no problems. If you need help with scaling down these printables so you can print them on your home printer, then make sure you check out Handan’s “How To Easily Resize Pictures” post. And if you have difficulty reversing the images, then just follow the 3-easy-steps given in our “How to Flip An Image” post and you’ll be all set.
Although we are calling these “pillow designs,” they are in fact free printables. So if you’re not feeling crafty or don’t want to deal with making a pillow out of them, you can always print and display them in a frame.
Now it’s time to click on the button below to download today’s free watercolor patriotic printables – you’ll find them under the 4th of July section of The VIP Patch.
take me to your
amazing freebies library
If you’re not a Navage Patch VIP, you won’t be able to access our Freebies Library. But that can be easily fixed! Subscribe for free on the form below and become a Navage Patch VIP. Once you subscribe, a password will be sent to you in our Welcome email, and that will give you access to The VIP Patch [Freebies Library].
Share it on Pinterest & Facebook!


Hehe, this is so me and my hubby with the throw pillows (though I don’t usually use holiday themed ones. I do put a lot on the beds and sofas though and am always on the look out for just the right design to switch them out. Hubby always tosses them on the floor or egads sometimes naps with his head on a pillow sham (bad bad boy). You’re right, men just don’t get the pillow thing. (Neither do they get decorative placemats vs ones you can actually use and not care if they get stained. But that’s another story.)
I didn’t get it until I started making them. Now I like them! 🙂
Another wonderful post and tutorial! Even if I don’t get around to making these pillows this year ( kind of have a tons on my plate right now) I plan to do this in the future. The beauty? Now I know what to do and can use any of your designs or mine. Thank you again for your wonderful sense of humor (and expertise)!
Thank you and you’re welcome, Linda!
I love the humor in your blogs and find myself laughing out loud as I read them. Thanks for bringing laughter and useful knowledge into my day. 🙂
Thank you so much, Pennie – I’m glad I make you laugh! 🙂
Well there you go…I’m an Aussie and I didn’t even know we had an Independence Day! ??♀️
It’s probably due to the fact that everyone is totally hung over on New Years Day and totally forgot all about it!!
Our main day that we celebrate is Australia Day, which is on January 26 each year. We all get the day off from work and everyone gets together for BBQ’s and beers.
The guys are usually off watching the cricket or tennis and the girls run around after the kids and complain about how much sport the guys are watching.
Good times!! ????
Maybe all the girls could make a pillow each and throw them at the guys in order to divert their attention from that seductive mistress…sport.
LOL, yeah I can see how New Year’s Eve and day would eclipse your Independence day! 😀
These are awesome AND you guys included some for us other independent countries! I feel all nostalgic and patriotic! Those are so real beaut designs, Handan. Real crackers! Bonza job!
There’s only one cure for that patriotic feeling….beer and explosives!