Faux Stone Painted Vase
This faux stone painted vase is an easy upcycle and a quick makeover that’ll turn even the ugliest-duckling vase into a thing of beauty!
Turns out, we have more crafting supplies than we thought.
Much, much more.
So while we thought the craft room makeover would be a quick project – after all, the painting only took one evening – it turns out we were a wee bit overly-optimistic about how long the unpack-and-organize aspect would take.
And since I’m about as useful as a burst appendix when it comes to organizing, that burden fell almost entirely on Handan. While she zipped and darted around the room, I puttered aimlessly, played music, and tried to look Busy with Important Things. But my real job was to keep my babes energized with a steady supply of caffeine as we worked the past three nights into the wee hours of the morning. I may be a lot of things (some of them even good), but a natural-born organizer I am most certainly not.
I am, however, a world-class clutter-bug and disorganizer! I’m what Marie Kondo dreams of when she cries out in the night from her darkest nightmares.
But I assure you (and I feel like a broken record here) that the craft room makeover is almost done! Look, the last time I gave you the run-around, we literally had done nothing for a week, and the room was in the same state that it was after I gave you the craft room update. This time, it’s so close I can taste it. And believe you me, it tastes terrible! Seriously, who eats craft rooms? But it looks…incredible! We’re 99.9% there, and I’ll have the reveal for you reeeeeeal soon.
While we were admiring Handan’s work last night before bed, she showed me a little vignette she made on one of the cabinets featuring a couple of vases I’d given the makeover treatment last year. Since we were struggling to put the finishing touches on the room at that late hour, I suggested making a post about one of the vases. It involves a painting technique that I’ve shown once before in our DIY Dollar Store Pedestal Tray post last year, but it deserves another look. It’s easy, it’s versatile, and it can be used to great effect on so many different decor items. It is faux stone painting, but it’s not done from a can.
I’ve tried a few times to get a good stone effect from those stone-textured spay paints, but to me it always ends up looking…wrong. I don’t know, maybe I’m wrong, but the stone spray just doesn’t do it for me.
Fortunately for me, my babes found a better way last year, and when I tell you it’s easy, I mean it’s easy – like cereal box maze easy.
This whole faux-stone thing started when Handan wanted me to give a makeover to these two vases we bought while living in Vietnam.
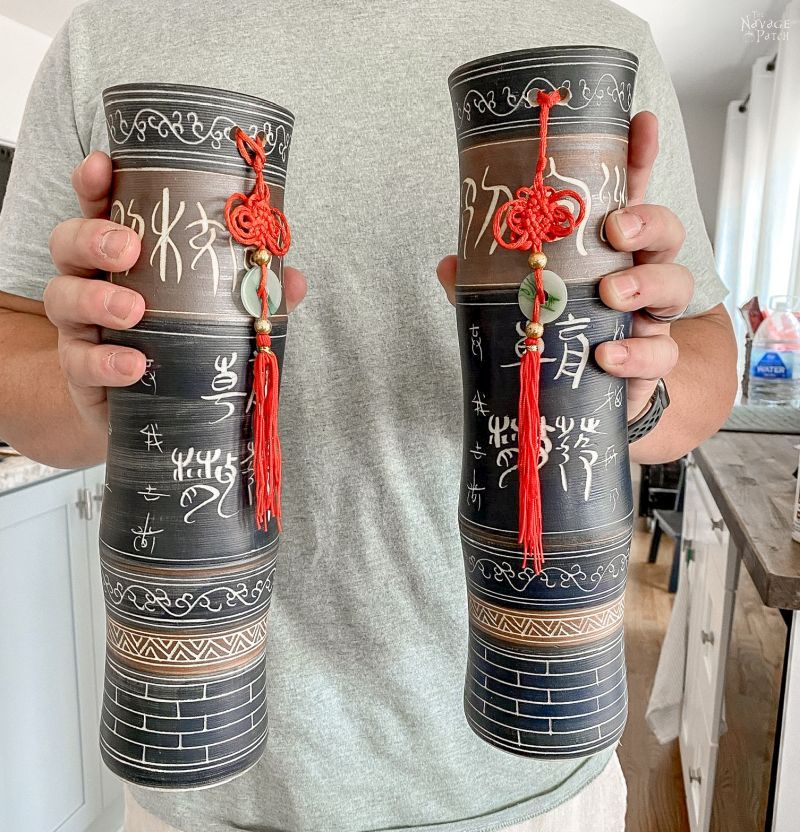
We found so many amazing and inexpensive decor pieces while living there, but once we were back in the States, we realized that stylistically, many of them didn’t fit in with the decor aesthetic that was expected in Blogland. How many times have you been to a farmhouse and seen the bust of Buddha or ancient Chinese scrolls or something made of bamboo?
Not that we’re all farmhousey around here, but you catch my drift. But most Asian decor is, well…Asian (duh), and unless you’re decorating entirely in that style or going for something eclectic, it’s not always going to mesh with Western style. So we still have a bunch of pieces we got during our time there, and we figured it couldn’t hurt to sacrifice these two vases on the Western Altar of Neutral Colors.
To contend with and hide the ancient Chinese inscriptions (sold in Vietnam), Handan told me to thicken up some off-white paint with baking soda. It is the manner in which the paint is applied that determines the stone effect. Let’s have a closer look.
Faux Stone Painted Vase
SUPPLIES LIST
Affiliate links are provided below. Full disclosure here.
- Vase of your choice
- Zinsser BIN shellac-base spray primer
- White or off-white latex paint
- Baking soda
- Chip brush (you can get them at Dollar Tree)
- Lazy Susan (optional)
For those Vietnamese vases, I simply applied the thickened paint and gave rough vertical brush strokes. At that point, we weren’t trying to give a faux stone look. But once we started playing around with brush technique, we discovered an easy way to make anything look like stone. The secret is in the stab.
I’ll show more pics of one of the Vietnamese vases when we get to the beauty shots – it’s part of the little vignette Handan staged. First I want to show you how I made this simple glass vase my babes found at Goodwill into a beautiful faux stone display piece we’re showing off in the new craft room.
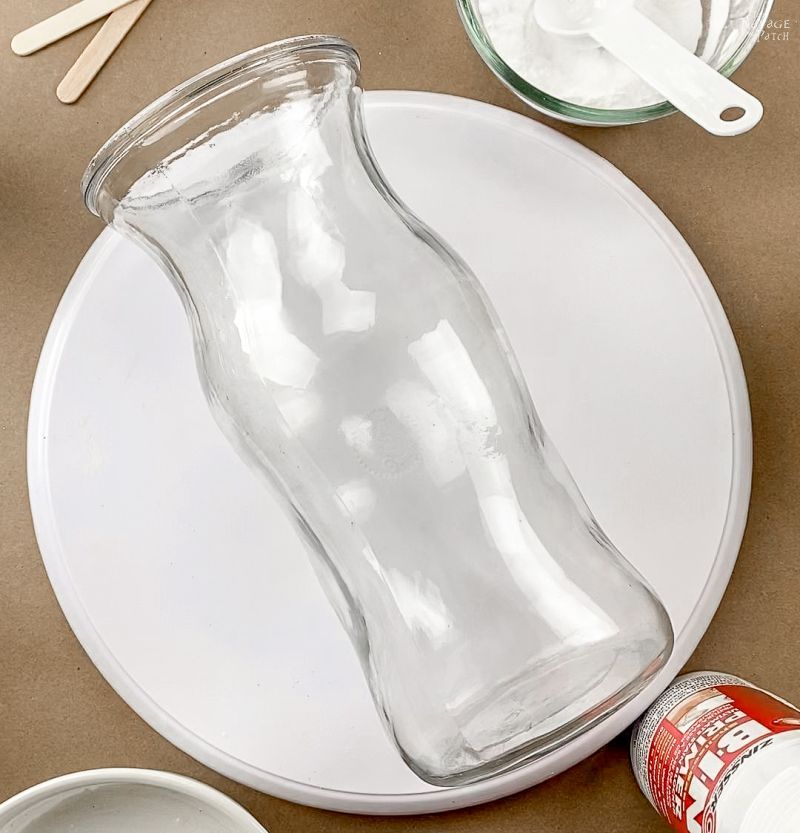
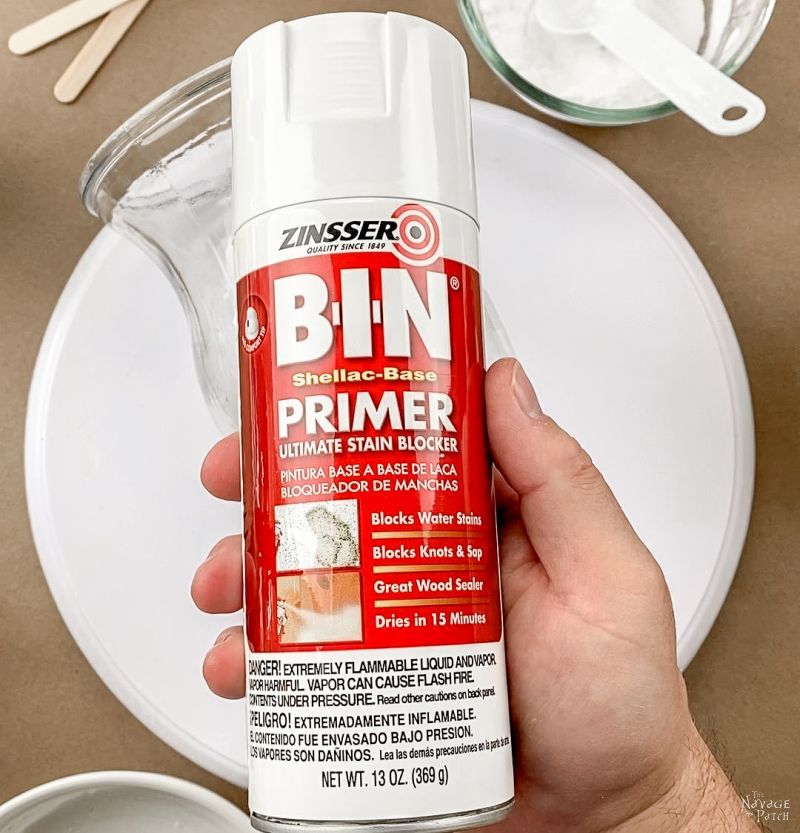
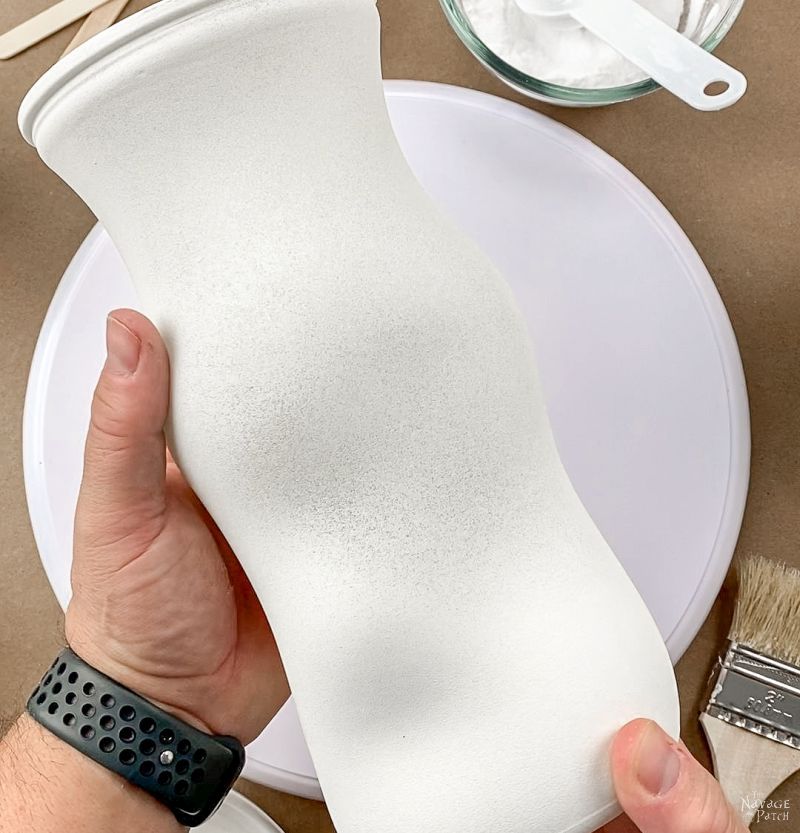
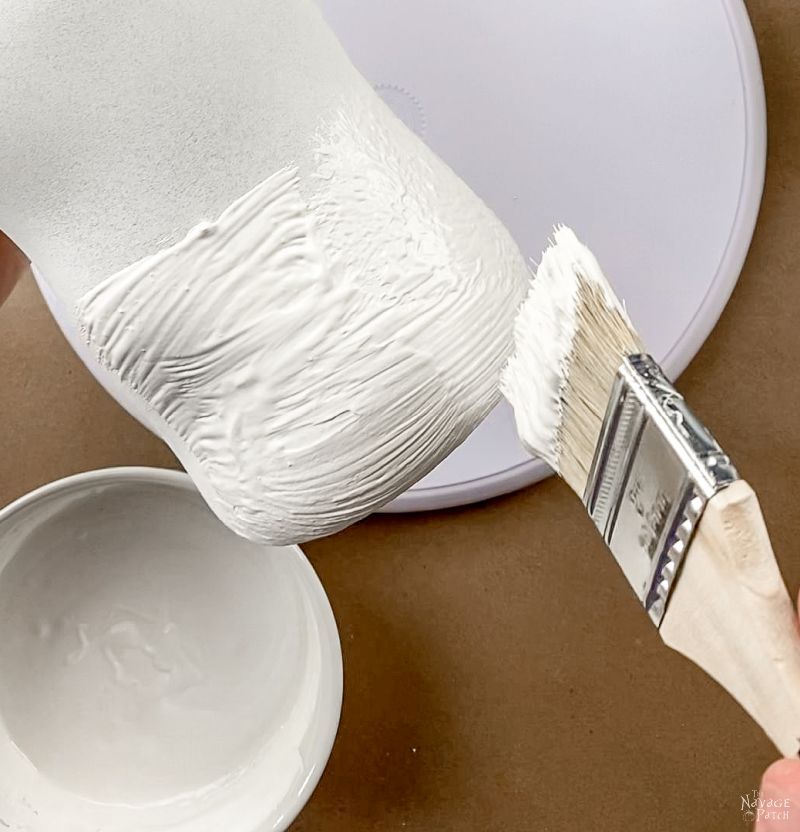
Like any painting project involving glass, this one starts with a coat of Zinsser BIN primer. There is no better primer for glass (or really anything) than Zinsser BIN. It’s a shellac-based primer, which means it sticks to almost anything, and all paints will stick to it. But it is pricey, so though it’s the best primer for almost any job, it’s also overkill for most and a waste of your hard-earned dollars. I always have it on hand, but I only use it when it’s really needed – like on glass. Head over to our DIY Dollar Tree Pedestal post for more info and helpful hints on Zinsser BIN primer.
You only need a little bit for it to work. The photo below shows the absolute maximum amount of primer you want to put on glass. I probably even put too much. Any kind of paint or primer sticks better in an ultra thin coat. And since the primer’s job is to bond to the project piece and the paint that’ll be applied on top, you want to put on just enough to really grab onto that glass.
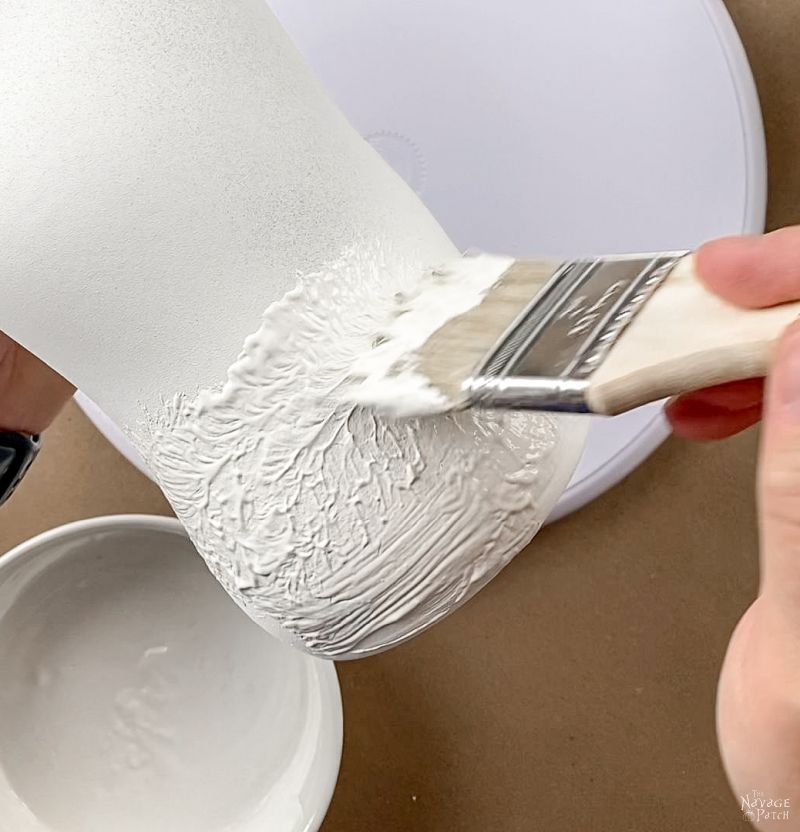
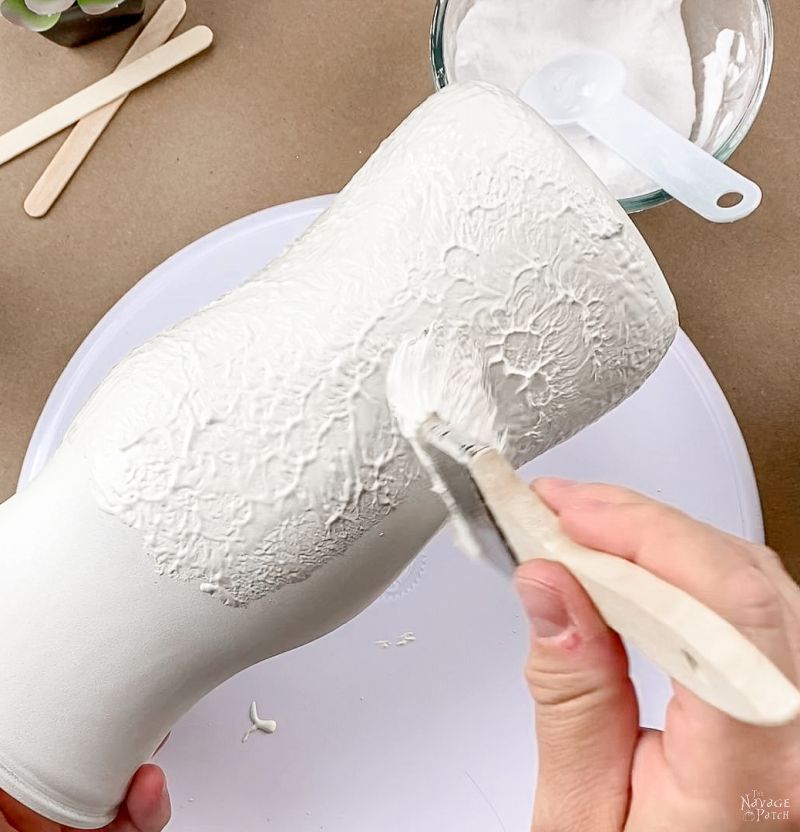
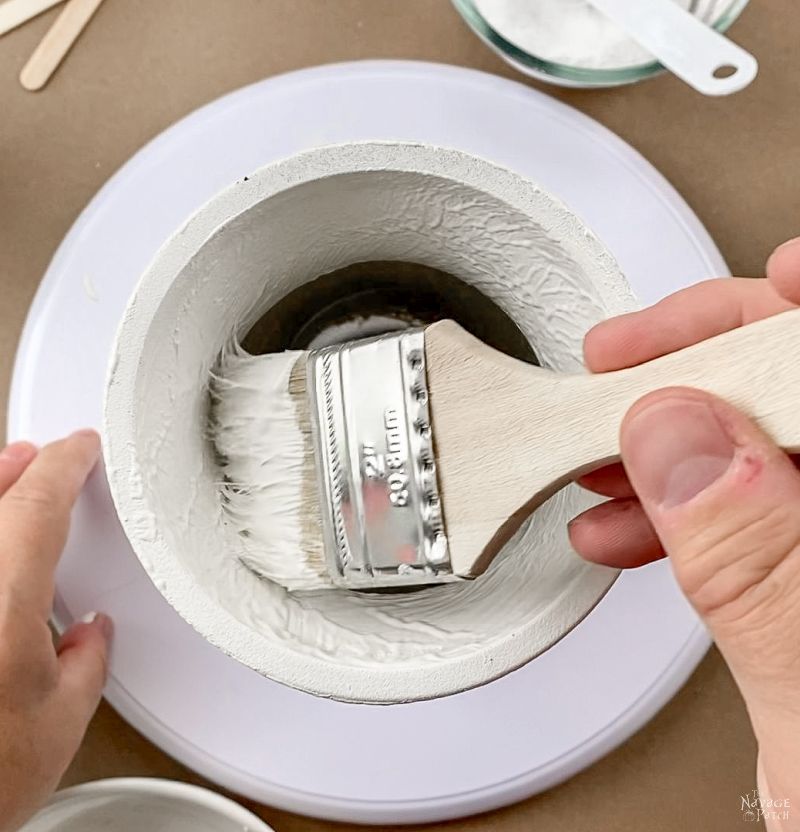
To make the faux stone textured paint, pour your desired color of paint into a bowl – however much you think you’ll need for two coats – let’s say one cup of paint. To that, add a couple of tablespoons of baking soda and stir. The consistency you’re looking for is something like yogurt – but not that watery crap you drink…Yoplait, is it? Blech! The only good drinkable yogurt is Turkish ayran. And not the Greek stuff either – you know the kind you can use to fill holes in the wall? Too thick. You want it thin enough to be paintable and spreadable, but thick enough that when you add texture and dimension with the brush, it doesn’t level itself back to smooth. It’s much harder to explain in writing than it is to actually do.
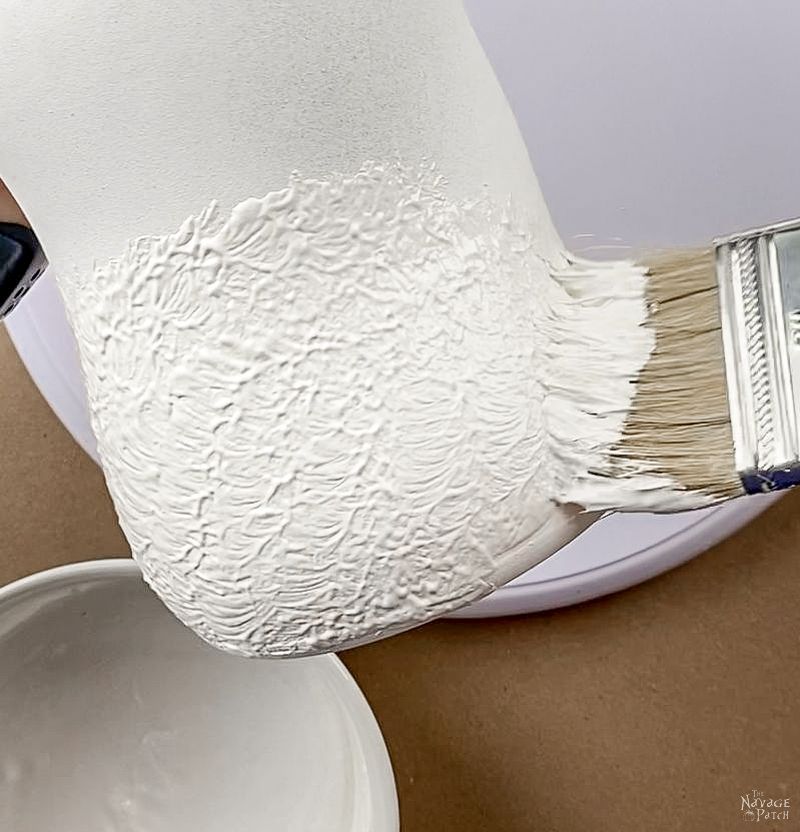
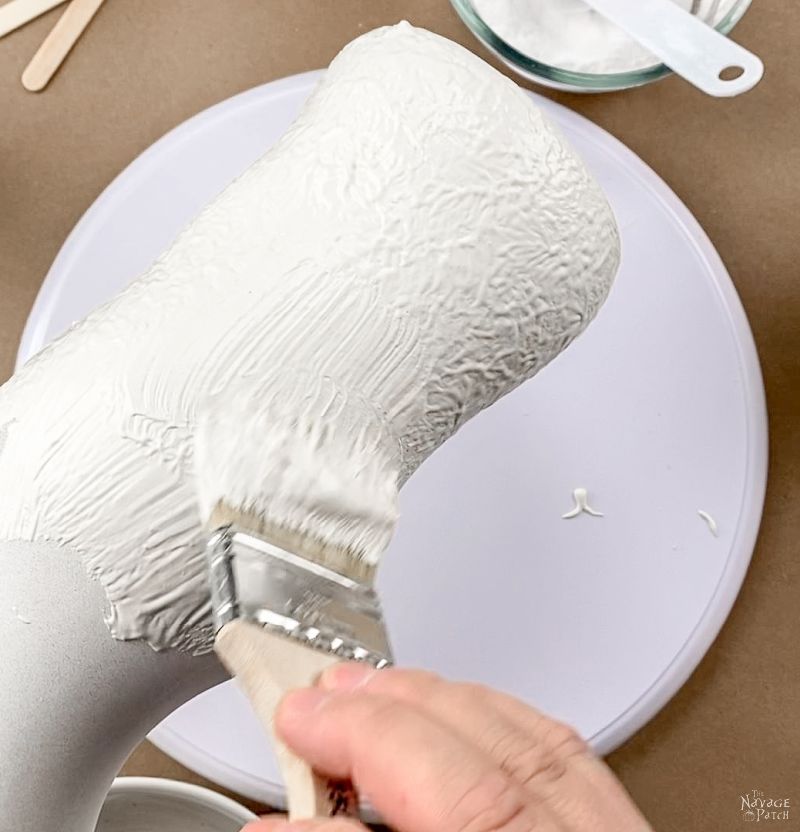
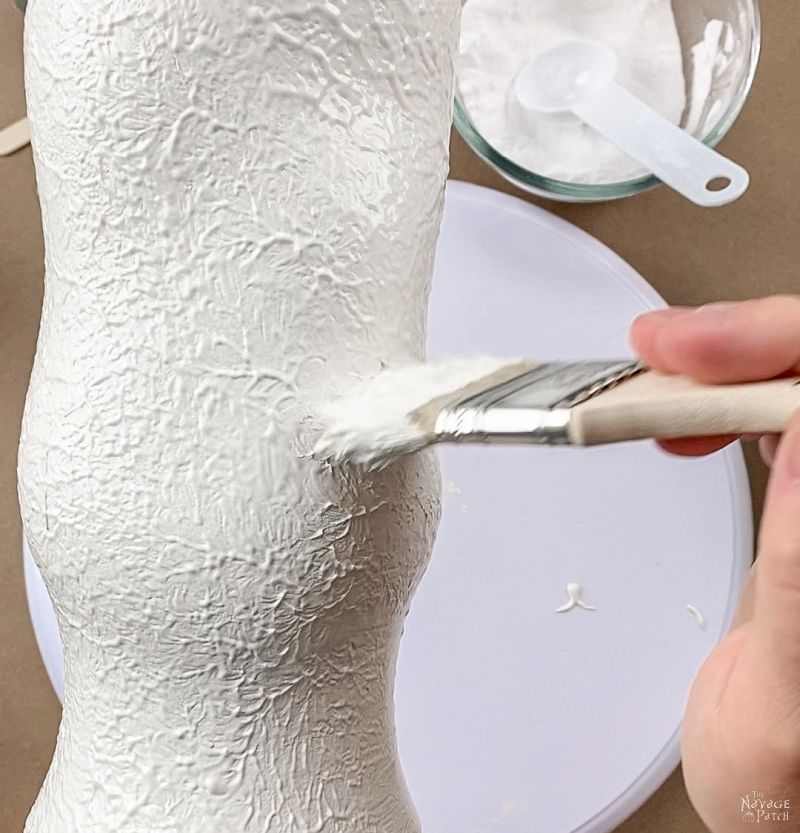
I like to brush some on first and then start stabbing the paint with my brush. A chip brush is best for this kind of work. It’s cheap, and the bristles are perfect for creating the stabby stone effect we’re after.
Stab, stab, stab. Or for you pacifists, dab, dab, dab.
Pretend it’s your boss’s face. Or the taxman. Or the starting quarterback for that football team you just can’t stand! Oooooh, they just burn you up, and that smug face of his!
Stab, stabbity, stabstabstab.

I think you’re getting the hang of it, madam!
So tell me. Who are you thinking of when you’re stabby-stabbing your vase?
WHAT?!
Your husband?
Yeesh, tough bunch.
Anyway, yeah, brush and stab. That’s about the size of it. But I’ve got my eye on you, madam. You know who you are! Husband, indeed!
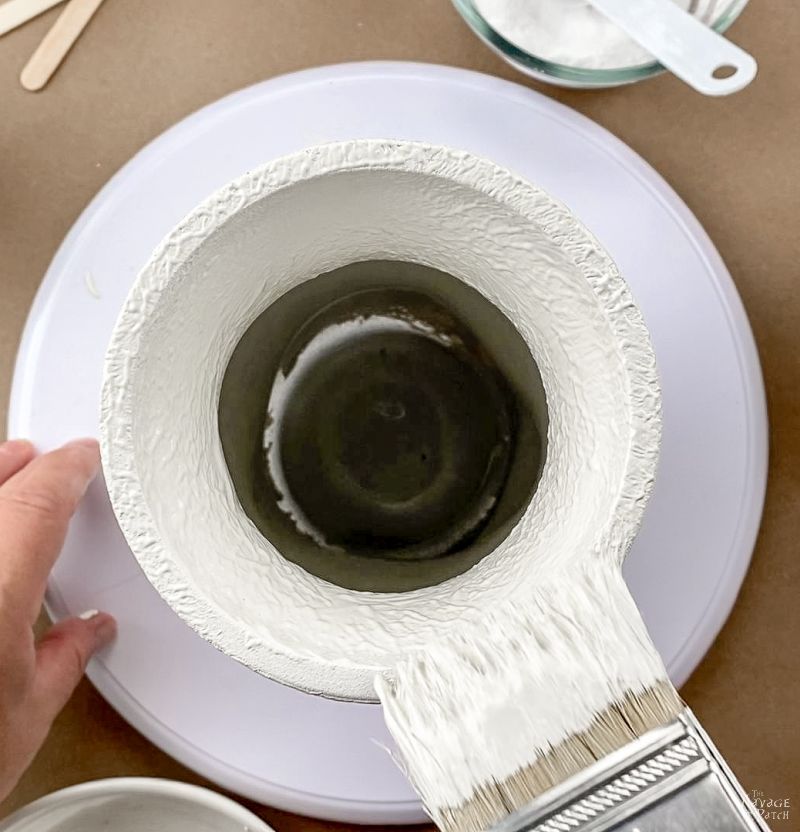
After two coats, I let the vase dry overnight.
And here they are, two moves later, still looking as good as the day I stabbed them into existence.
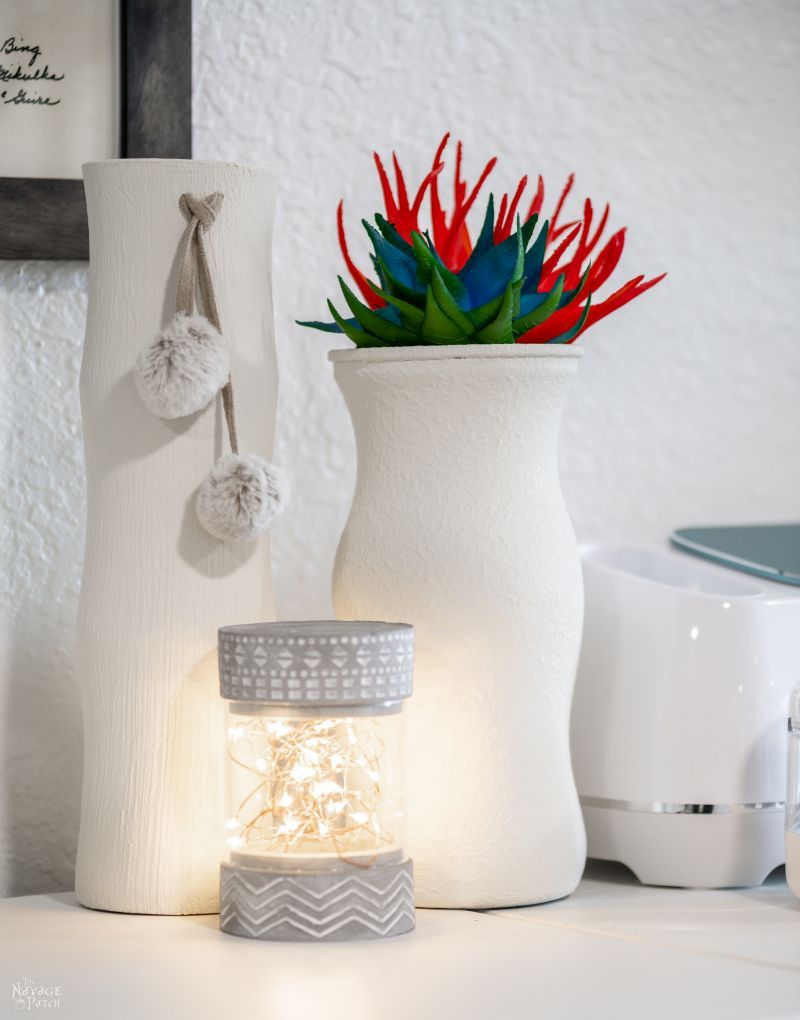
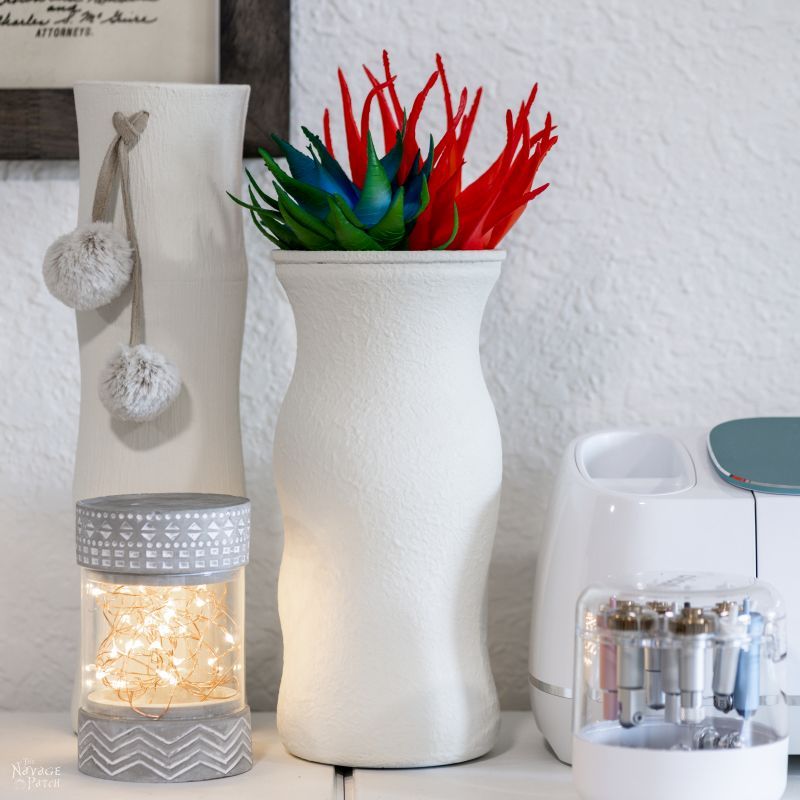
Handan paired the faux stone painted vases with one of the DIY Dollar Tree Concrete Lanterns I had made last fall.
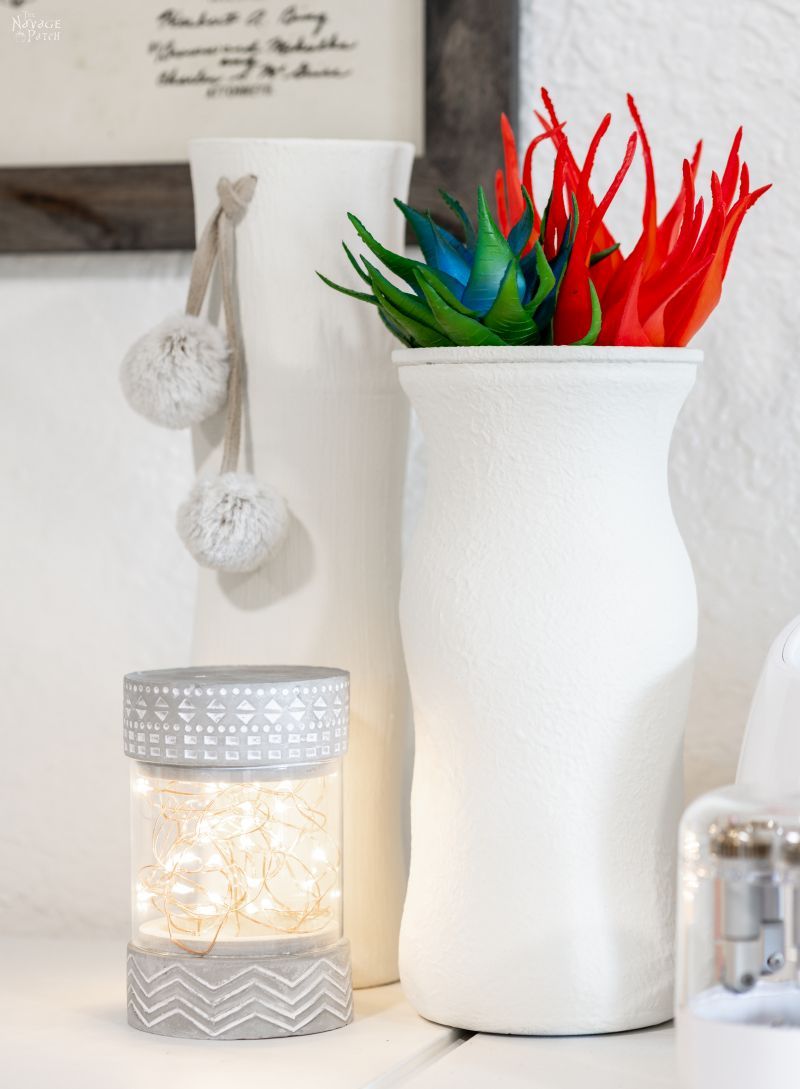
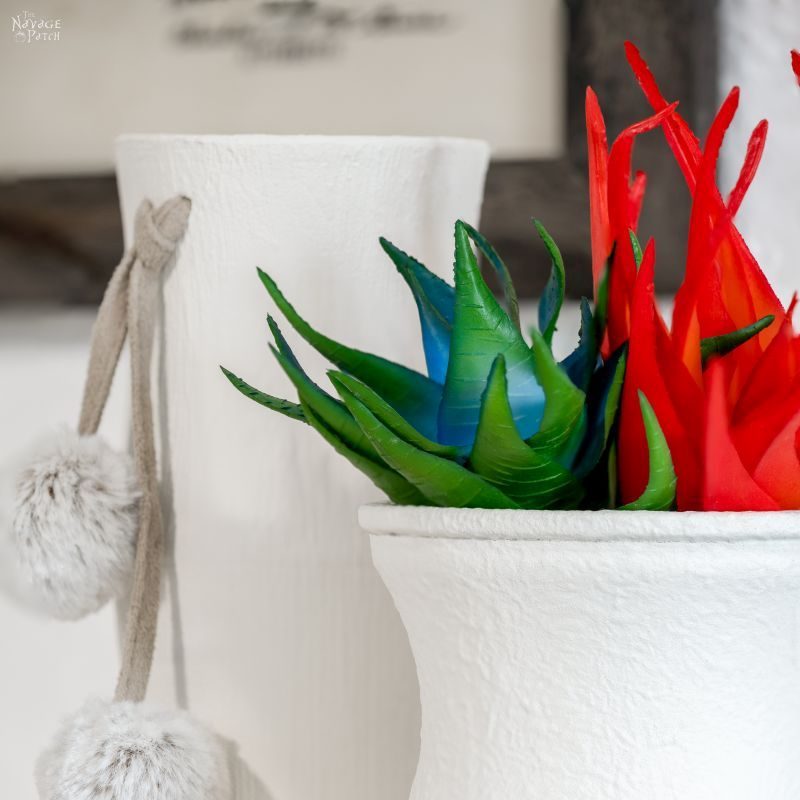
To contrast the neutrals, Handan put a pop of brilliant color atop the glass vase.
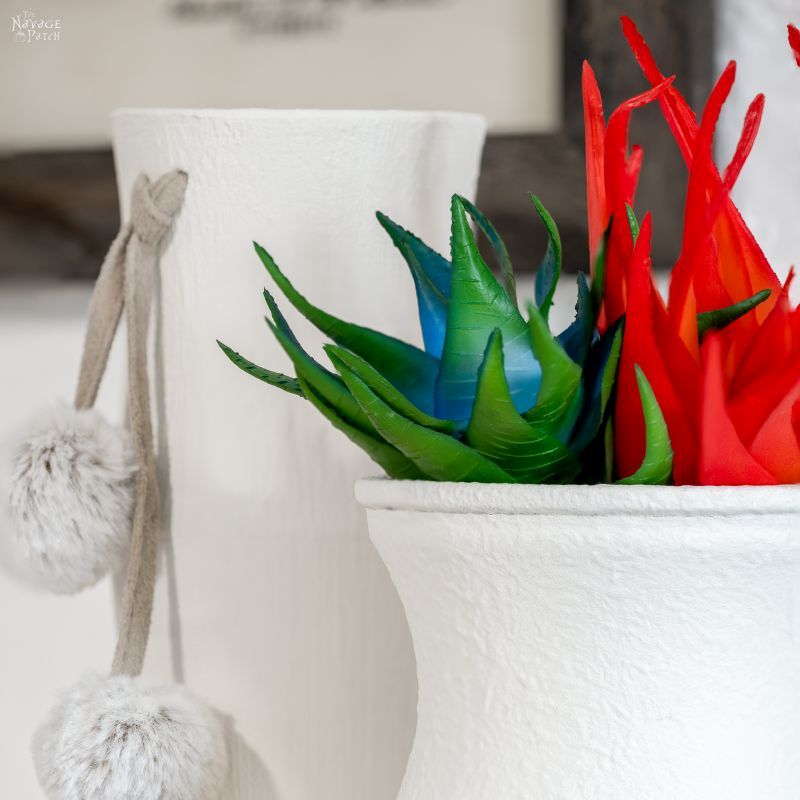
I love the pom pom tassel my babes put on the Vietnamese vase. She made it while setting up the craft room the other night, and I think it complements the vase perfectly.


Share it on Pinterest & Facebook!


These are great and have given me something to look forward to this weekend!
And of course I was thinking of my husband, he still hasn’t worked on our pantry! lol
LOL, give him time. If he says he’ll do it, you can take it to the bank that it’ll get done sometime this decade!
Hi, these vases are fabulous! Did you seal them with anything? I make wine bottle vases and I seal them for outdoor use with polycrylic or epoxy or triple thick. Would that be okay on this type of paint medium? Thank you!
Thank you, Dianne! Any type of sealer that you’d use on regular paint would work on this textured paint. I didn’t bother sealing them, since they’re never going to venture beyond the wall of my craft room! 🙂
I love your blog!! It always gives me a good laugh AND craft ideals. I would never have thought about the baking soda. I know there are other blogs that probably do it but I only read yours. I’m a very busy lady doing flower beds and finishing up in side of my house redo. I save all my crafts for winter time. I’m a new widower of a year, so I have plating of time. Enough of my shit. You’ll do beautiful work !!!
Hi Jill, thank you! I’m so sorry for your loss. We’ll do our best to give you enough ideas to keep you busy this winter. Happy planting!
To get a stone look I always buy a can of sandstone paint. Like the name implies, it has sandstone in it. You can gloop it on anyway you want – a simple brushed on coat just for texture, or the stipple like you’re doing, or big globs here and there and everywhere to imitate real bumpy, uneven stone. It’s fantastic stuff and lasts forever. I’ve also tried the baking soda method but it just didn’t have the same satisfying look when I wanted really bumpy stone. I’ve also tried just actual sand, which works fine if you just want that flat texture of grainy sand, but doesn’t work really for anything else.
I love the stone look, though. Definitely one of my favorite go to’s because of how easy it is to do! I wish I could get the faux wood look down 🤔
Jay, I don’t think i’ve seen sandstone paint, but I’ll keep an eye out for it. The spray stuff here just doesn’t cut it for me. And yes, wood is a whole different story, lol!