The Pond Project | DIY pond and backyard makeover | DIY garden edging | How to lay edge stones | How to edge garden beds | Tips on landscaping | DIY garden decor | DIY koi pond lining | How to maintain a koi pond | Spring planting and transplanting | Pond and backyard reveal | Before & After | TheNavagePatch.com

The Pond Project – Part 1

· ·

There is a delightfully wicked game that Handan likes to play with me each year. In spring and summer, as we labor over some massive landscape or garden project, she says to me, “This is the last of the hard work, my babes. After this project, after this summer, we’ll be relaxing and enjoying ourselves next summer. Just you wait and see.” Then, during the bleakest days of winter, when summer is only a phantom in a fever dream, Handan’s mind, twisted by cold and darkness, devises evil and nefarious plans for the impending spring and unborn summer. Thus, my promised summer of loafing and lounging and carefree margarita-drinking is kicked yet another year down the road.

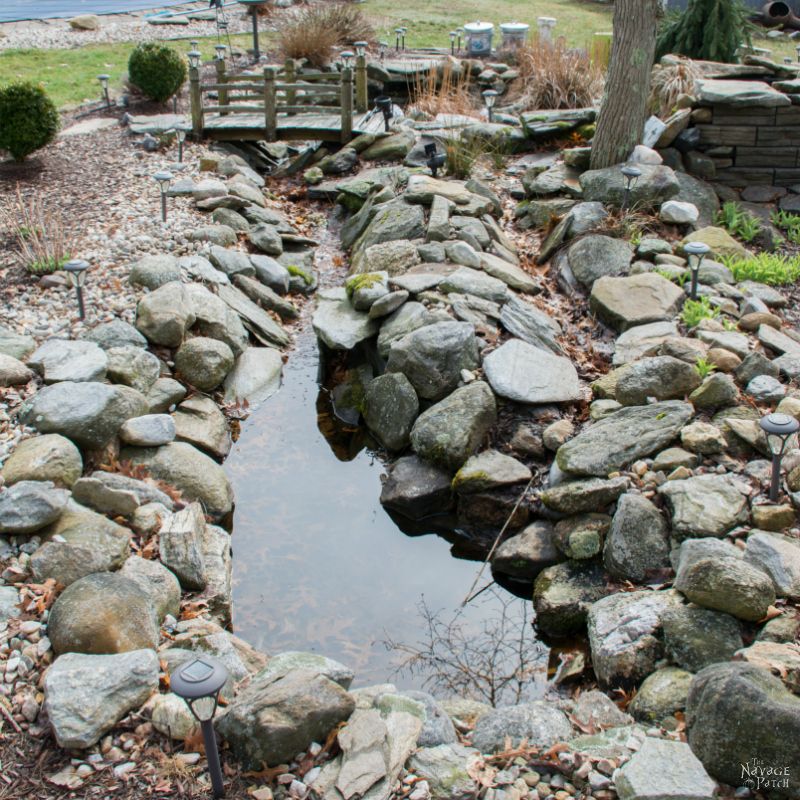
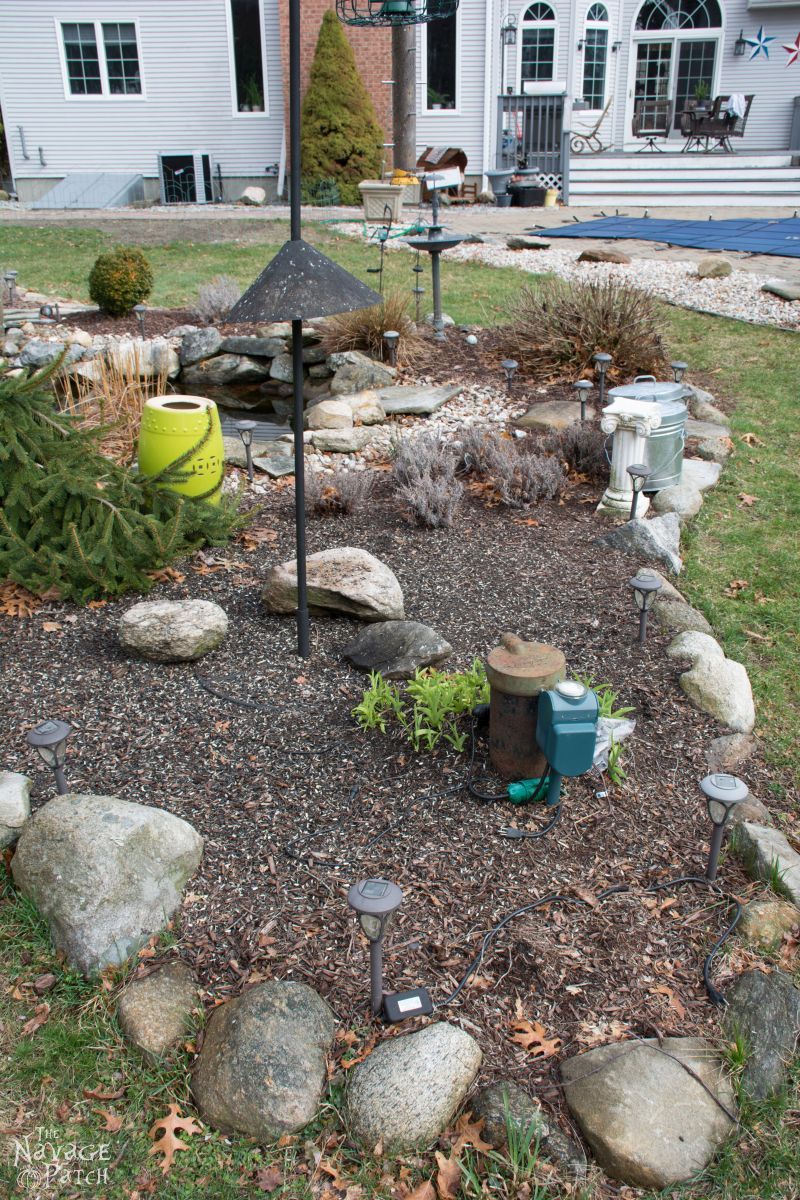
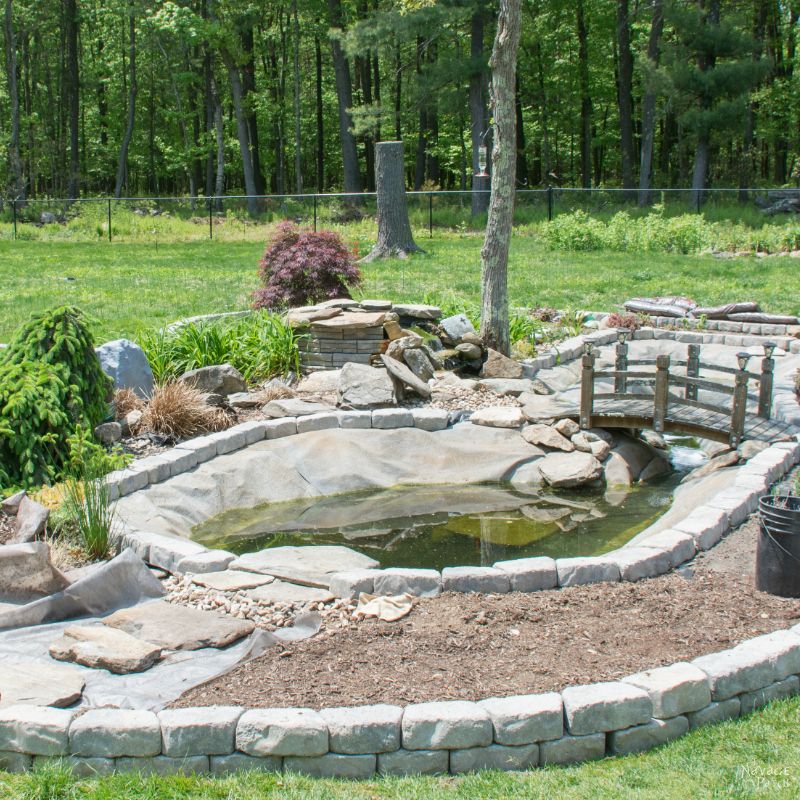
This year’s winter-born project was a fundamental overhaul of our fish pond and surrounding landscaping, and boy, is it going to be a doozy! Here is what we started with.

The Pond Project | DIY pond and backyard makeover | DIY garden edging | How to lay edge stones | How to edge garden beds | Tips on landscaping | DIY garden decor | DIY koi pond lining | How to maintain a koi pond | Spring planting and transplanting | Pond and backyard reveal | Before & After | TheNavagePatch.com

It’s not terrible, but I’ll point out the problem areas that are slated to be rectified.

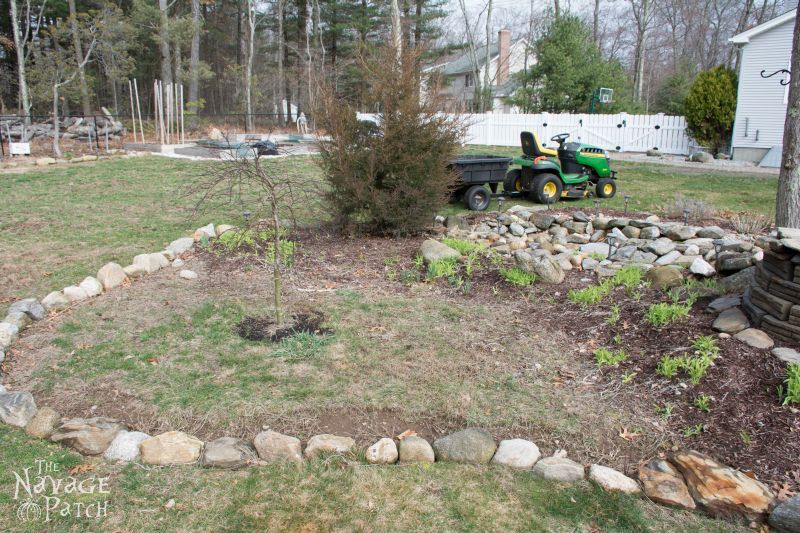
  1. The rock border. Sure, it looks nice and natural, but grass grows in between those rocks like plaque between your teeth. The only way to cut it is with a weed wacker held sideways. Big pain in the butt for yours truly. We want a small wall made from landscape stones that fit together without gaps. But before that, those rocks must go. That’s what the tractor and cart are for: haulin’ rocks!
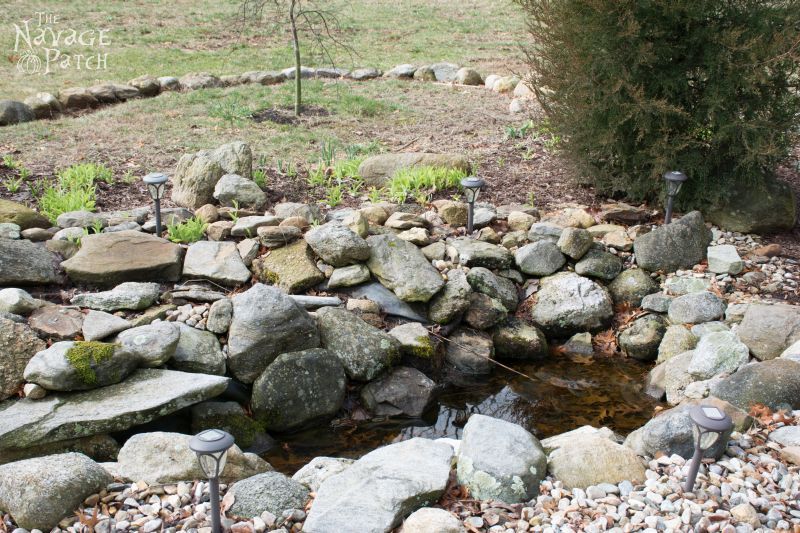
  2. All the big rocks surrounding and inside the pond. They are there for a reason: to hide the black (and in some places, light blue) pond liner. Again, they look pretty nice, but the problem is, they’ve taken over all the space in the pond. There is little room left for the fish. Furthermore, they’ve allowed huge aquatic grasses to grow all around them. They must go. They will be replaced (for the most part) by a product called Rock on a Roll. It’s like wallpaper for your pond that looks like rock. You’ll see.
  3. The little stones surrounding the pond. Why? Good Lord, why? All they do is fall into the pool, create a mess, get sucked into the pump, and piss me off. WHY?!? They must go.
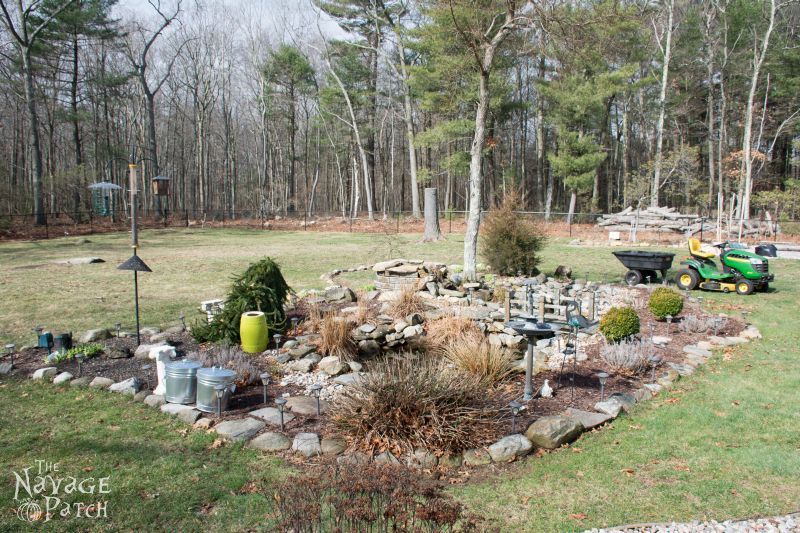
  4. The Montauk daisy monstrosity in the center of the picture. It’s big, it’s ugly, and it pisses me off. It must go.
  5. The dying evergreen at the far end. It’s big, it’s ugly, and it serves no discernible purpose other than to give arm rashes to whomever touches it. It must go.

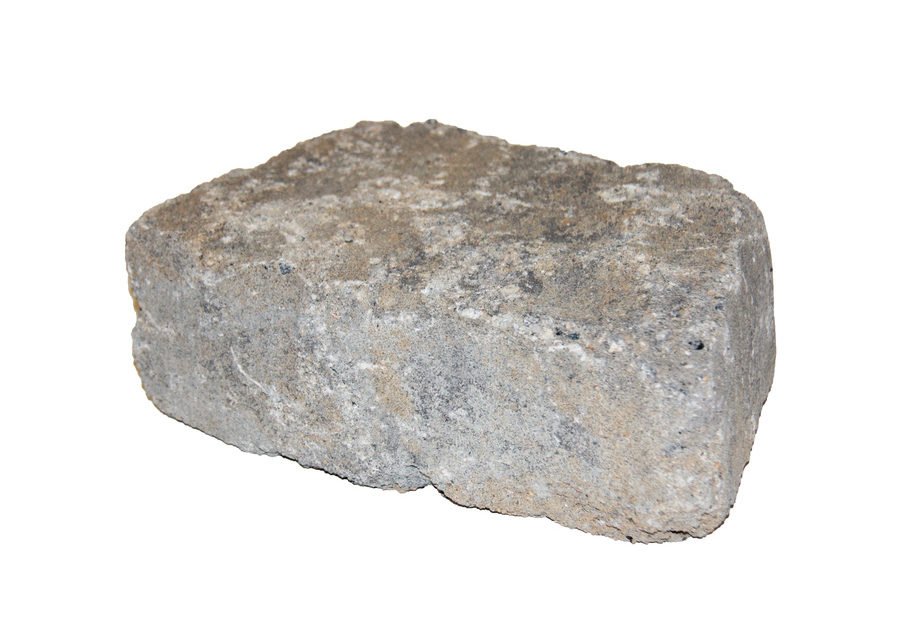
Since we will have a wall about 8 inches tall replacing the rock border, Handan also wants to raise the whole level of the planting area and rearrange the plants. That means pulling out all the plants. It also means topsoil. Lots and lots of topsoil. We got 10 yards delivered. I’ll also use it for some lawn repair. On top of the topsoil, we’ll put mulch. We bought 100 bags and carried them ourselves in multiple trips from Home Depot. Oh, and the bricks! We had 800 of these delivered from Lowes. They measure 11 inches by 4 inches.

The Pond Project | DIY pond and backyard makeover | DIY garden edging | How to lay edge stones | How to edge garden beds | Tips on landscaping | DIY garden decor | DIY koi pond lining | How to maintain a koi pond | Spring planting and transplanting | Pond and backyard reveal | Before & After | TheNavagePatch.com

Now, you’re probably thinking, “800 bricks? 100 bags of mulch? 10 yards of topsoil? Isn’t that a little much for that small area?”

To which I answer, “Yes, ma’am (or sir), it is. But we’re not only doing this area. We have two more areas in the back yard and even more in the front yard. In fact, I’ll probably have to order more of everything!”

So that’s the plan, and we’re stickin’ to it. Here are some more “before” pictures.

The Pond Project | DIY pond and backyard makeover | DIY garden edging | How to lay edge stones | How to edge garden beds | Tips on landscaping | DIY garden decor | DIY koi pond lining | How to maintain a koi pond | Spring planting and transplanting | Pond and backyard reveal | Before & After | TheNavagePatch.com
That’s a sassafras tree growing out of the middle. Did you know that root beer was traditionally brewed from the sassafras root? Hence the name. Modern commercial root beers may be flavored by sassafras (or artificially), but they aren’t brewed in the same manner. One of these days, I’ll dig up some sassafras root from one of the other trees on our property and make root beer. I’ll tell you how it goes.
The Pond Project | DIY pond and backyard makeover | DIY garden edging | How to lay edge stones | How to edge garden beds | Tips on landscaping | DIY garden decor | DIY koi pond lining | How to maintain a koi pond | Spring planting and transplanting | Pond and backyard reveal | Before & After | TheNavagePatch.com
It’s a miracle these 4 fish are still alive. Poor things. Every summer the water turns dark green, and I don’t see the fish from July until maybe October. So I kinda stop feeding them. Out of sight, out of mind, I guess. They’ve lived in the most squalid conditions. I’m a horrible fish-tender. But not this year! This year, I bought a filter and I’ll give them the clearest, cleanest damn water they ever swam in!
The Pond Project | DIY pond and backyard makeover | DIY garden edging | How to lay edge stones | How to edge garden beds | Tips on landscaping | DIY garden decor | DIY koi pond lining | How to maintain a koi pond | Spring planting and transplanting | Pond and backyard reveal | Before & After | TheNavagePatch.com
The bird feeder area. It’s perpetually filthy. I haven’t fed the poor things in months. I’m such a jerk.
The Pond Project | DIY pond and backyard makeover | DIY garden edging | How to lay edge stones | How to edge garden beds | Tips on landscaping | DIY garden decor | DIY koi pond lining | How to maintain a koi pond | Spring planting and transplanting | Pond and backyard reveal | Before & After | TheNavagePatch.com
See the nice water fall? Yeah, we did that last year. Before that it was…you guessed it…a pile of rocks!
The Pond Project | DIY pond and backyard makeover | DIY garden edging | How to lay edge stones | How to edge garden beds | Tips on landscaping | DIY garden decor | DIY koi pond lining | How to maintain a koi pond | Spring planting and transplanting | Pond and backyard reveal | Before & After | TheNavagePatch.com
Last year I began the project of expanding the pond area. Ahem. Never quite finished. See those little green things? Day lillies. They sprout up to be about 5 feet tall, they throw out a flower, and that’s it. They kinda suck. Most of them must go.
The Pond Project | DIY pond and backyard makeover | DIY garden edging | How to lay edge stones | How to edge garden beds | Tips on landscaping | DIY garden decor | DIY koi pond lining | How to maintain a koi pond | Spring planting and transplanting | Pond and backyard reveal | Before & After | TheNavagePatch.com
The 2015 abandoned expansion. The sad thing in the middle is a Japanese maple given to us by my parents. As I write this, it has its leaves and looks much better than the anemic specimen pictured above.
The Pond Project | DIY pond and backyard makeover | DIY garden edging | How to lay edge stones | How to edge garden beds | Tips on landscaping | DIY garden decor | DIY koi pond lining | How to maintain a koi pond | Spring planting and transplanting | Pond and backyard reveal | Before & After | TheNavagePatch.com
The little pool, aka Frog Sex Central. This is where the frogs get it on and lay enormous slimy sacks of future tadpoles. The plan is to get everything cleaned up and widened to the fish can actually swim back here to keep the frogs in line.
The Pond Project | DIY pond and backyard makeover | DIY garden edging | How to lay edge stones | How to edge garden beds | Tips on landscaping | DIY garden decor | DIY koi pond lining | How to maintain a koi pond | Spring planting and transplanting | Pond and backyard reveal | Before & After | TheNavagePatch.com
Rocks. And leaves. Rocks and leaves.
The Pond Project | DIY pond and backyard makeover | DIY garden edging | How to lay edge stones | How to edge garden beds | Tips on landscaping | DIY garden decor | DIY koi pond lining | How to maintain a koi pond | Spring planting and transplanting | Pond and backyard reveal | Before & After | TheNavagePatch.com
That bridge used to be arched before yours truly started galumphing over it. It was designed for fair maidens and wee children, not chunky monkeys like me.
The Pond Project | DIY pond and backyard makeover | DIY garden edging | How to lay edge stones | How to edge garden beds | Tips on landscaping | DIY garden decor | DIY koi pond lining | How to maintain a koi pond | Spring planting and transplanting | Pond and backyard reveal | Before & After | TheNavagePatch.com
Fallen arch, leaf muck and rocks till Tuesday.
The Pond Project | DIY pond and backyard makeover | DIY garden edging | How to lay edge stones | How to edge garden beds | Tips on landscaping | DIY garden decor | DIY koi pond lining | How to maintain a koi pond | Spring planting and transplanting | Pond and backyard reveal | Before & After | TheNavagePatch.com
Ooooh, I hate those little stones!
The Pond Project | DIY pond and backyard makeover | DIY garden edging | How to lay edge stones | How to edge garden beds | Tips on landscaping | DIY garden decor | DIY koi pond lining | How to maintain a koi pond | Spring planting and transplanting | Pond and backyard reveal | Before & After | TheNavagePatch.com
This useless rash machine couldn’t even stay green!
The Pond Project | DIY pond and backyard makeover | DIY garden edging | How to lay edge stones | How to edge garden beds | Tips on landscaping | DIY garden decor | DIY koi pond lining | How to maintain a koi pond | Spring planting and transplanting | Pond and backyard reveal | Before & After | TheNavagePatch.com
Overgrown waterfall. Liner poking through the rocks. This water feature really let itself go!
The Pond Project | DIY pond and backyard makeover | DIY garden edging | How to lay edge stones | How to edge garden beds | Tips on landscaping | DIY garden decor | DIY koi pond lining | How to maintain a koi pond | Spring planting and transplanting | Pond and backyard reveal | Before & After | TheNavagePatch.com
Pssst! Your liner is showing!
The Pond Project | DIY pond and backyard makeover | DIY garden edging | How to lay edge stones | How to edge garden beds | Tips on landscaping | DIY garden decor | DIY koi pond lining | How to maintain a koi pond | Spring planting and transplanting | Pond and backyard reveal | Before & After | TheNavagePatch.com
Cleanup in Aisle Frog!
The Pond Project | DIY pond and backyard makeover | DIY garden edging | How to lay edge stones | How to edge garden beds | Tips on landscaping | DIY garden decor | DIY koi pond lining | How to maintain a koi pond | Spring planting and transplanting | Pond and backyard reveal | Before & After | TheNavagePatch.com
These guys are champs. Seriously, I can’t believe they’re still alive. I dedicate this project to the fish!

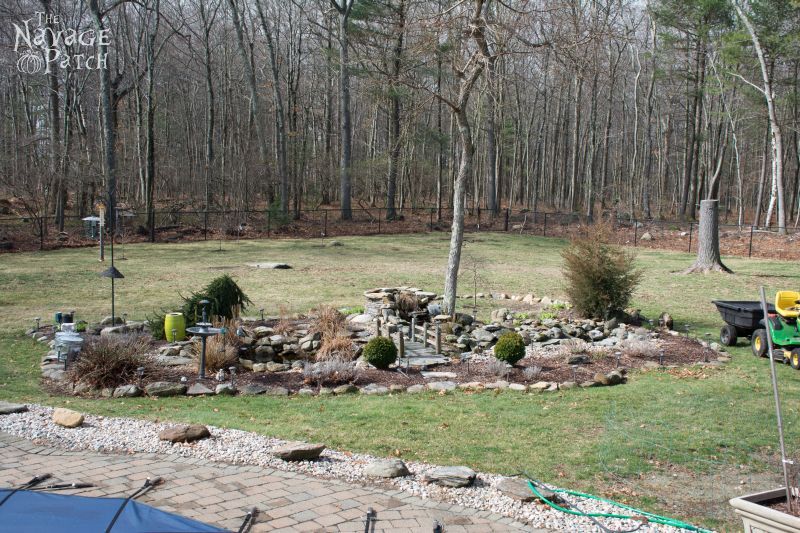
So that’s what we’re working with. We have a plan and we have materials. Let’s see what these hands (and backs) of ours can do!

CONTINUE ON TO>>

TNP Related Posts


Leave a Reply

Your email address will not be published. Required fields are marked *

10 Comments

  1. Greg, as usual you have made me laugh! I think it’s nice you have a place for frog lovin’! Lol! I have to admit what you hate is far more beautiful than I will ever have in my barren backyard! Good luck, I can’t wait to see what you two create!

    1. Thank you, Giselle! The old pond area didn’t look too bad, but it was very difficult to maintain. The new look we’re going for will be simpler, cleaner, and very easy to keep tidy. Thanks for stopping in again! đŸ™‚

  2. You should put in a dry deck fountain. It will do triple duty as a patio, water fun and evening water dusplay at night. Could add music.

    1. Hi Burke, that would actually be an awesome thing to do when we get the area around the pool concreted in a year or two!

  3. Greg…. you and “Professor Nefario” will have a resplendent pond with fish doing backflips of joy. đŸ™‚ thanks for the laughs and the details. It’s easy to laugh when I won’t be doing the hard work. I look forward to vicariously enjoying your new pond creation.

  4. oohhh my…all i can say is..i am glad it is not me doing this. Your wife must hate you! Pent up anger? haha Seriously this looks like a gigantic project, but i am anxious to see the end result, you think maybe by next week it will be done? haha. Well i am glad i tuned in at this point…sounds like a big job but will be so worth it! Go for it!

    1. Thank you, Bernice! Actually we are very nearly done. The pics for this post were taken two months ago, and we’ve come a long way since then. I’ll have the next part of the project published either this weekend or early next week.

  5. I can’t wait for the results! As usual I LOVE your writing style. You and your wife remind me of my hubs and I 29 years ago, and still today, but I may have already said that in another post. I will spell your name correctly tho in this one, Greg. Lol. Anytime I tell my hubs that I’ve been thinking he just groans. Haha. That means there’s a project coming up. I love your backyard and am excited to see how all your hard work paid off. I’d love to place a chaise lounge by your water feature and enjoy your yard but I’ll leave that to you so you can enjoy your hard earned margarita. All my best to you both!

    1. Andi, the next time you and your husband find yourself in New England, we’ll have that chaise lounge waiting for you!