The Column Conundrum
I must be getting wiser in my old age.
Or maybe I’m just learning when to be cautious.
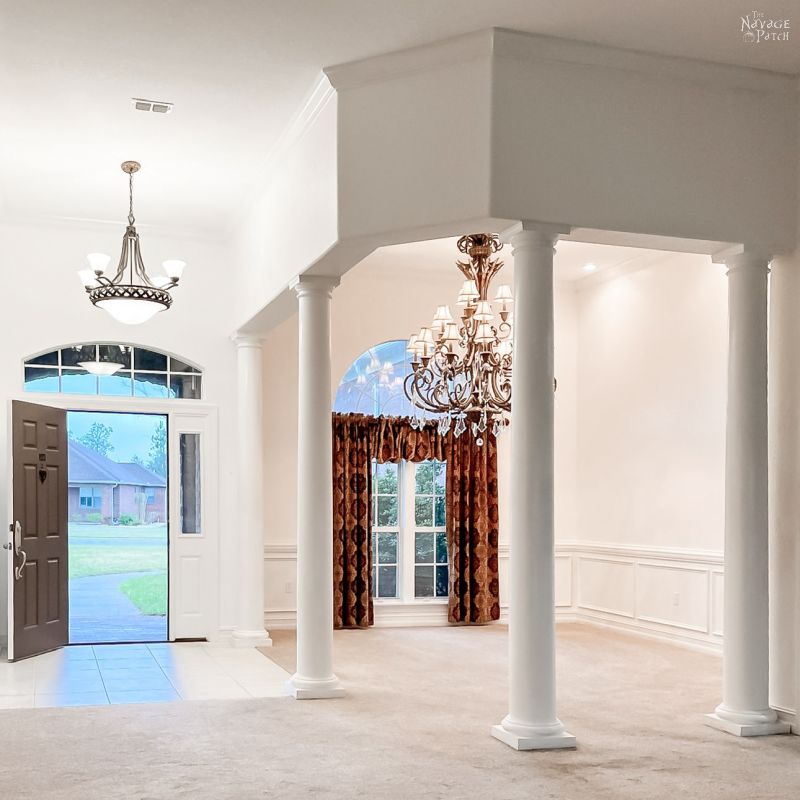
I first told you about our dining room columns in my Empty House Tour post a while back. For those who didn’t read that post or for those (like me) who have the memory of a salted garden slug, please indulge me while I refresh your memories on those columns.
Those columns…
I have so much to say about these columns, yet sometimes I’m just at a loss. What were they thinking just doesn’t cut it. It feels like the builder – a run-of-the-mill American contractor who slaps together houses for a living – needed a subcontractor to finish up the interior.
Maybe his regular crew was sick, or on another job, or out fishing in the Gulf. I don’t know what the precise circumstances were, but on the day it came to flesh out the interior of this golf course house back in 2006, the builder found himself in need of an interior crew.
This builder – let’s call him Bob – was no slouch. He had resources. So Bob picked up the closest Yellow Pages and thumbed his way through until he found what he was looking for. There in the Builders and Contractors section of the antiquated directory, spelled out in bold black letters against the pale yellow page was Bob’s salvation:
Luigi’s Italian Interiors – Just like-a-da Old Country!
And when Bob picked up his Motorola flip phone and dialed Luigi, he set in motion a series of unfortunate events that culminated in our dining…room?…space?…region?
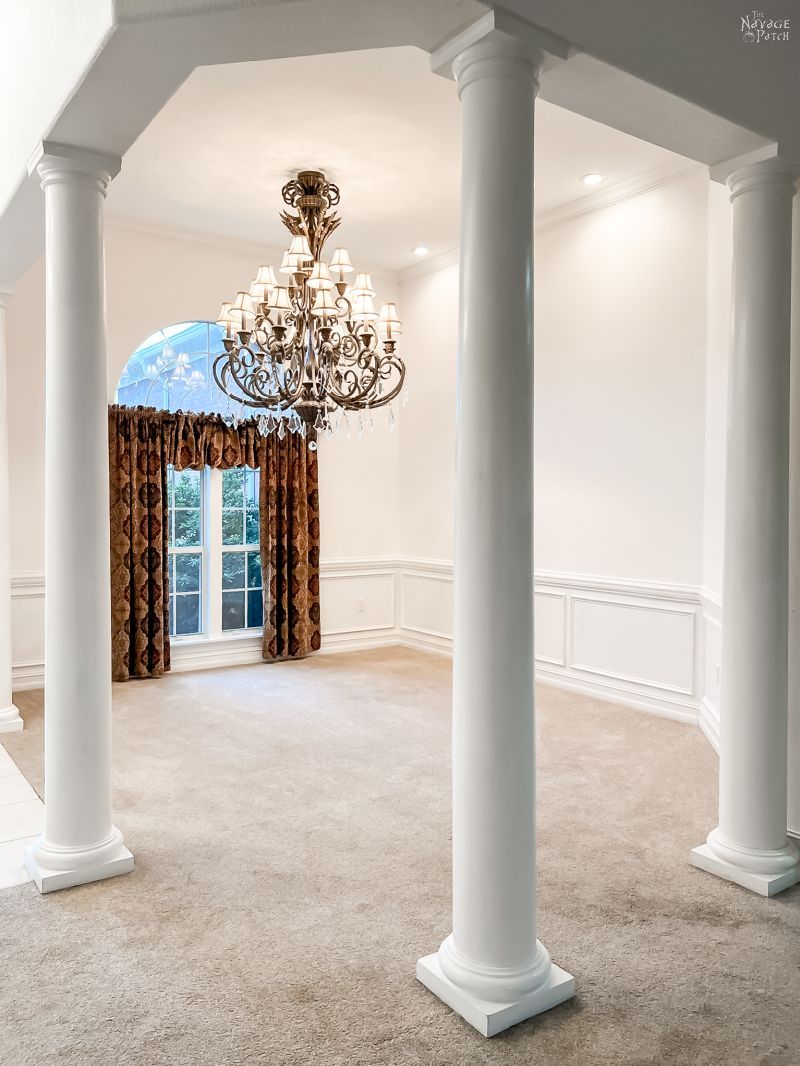
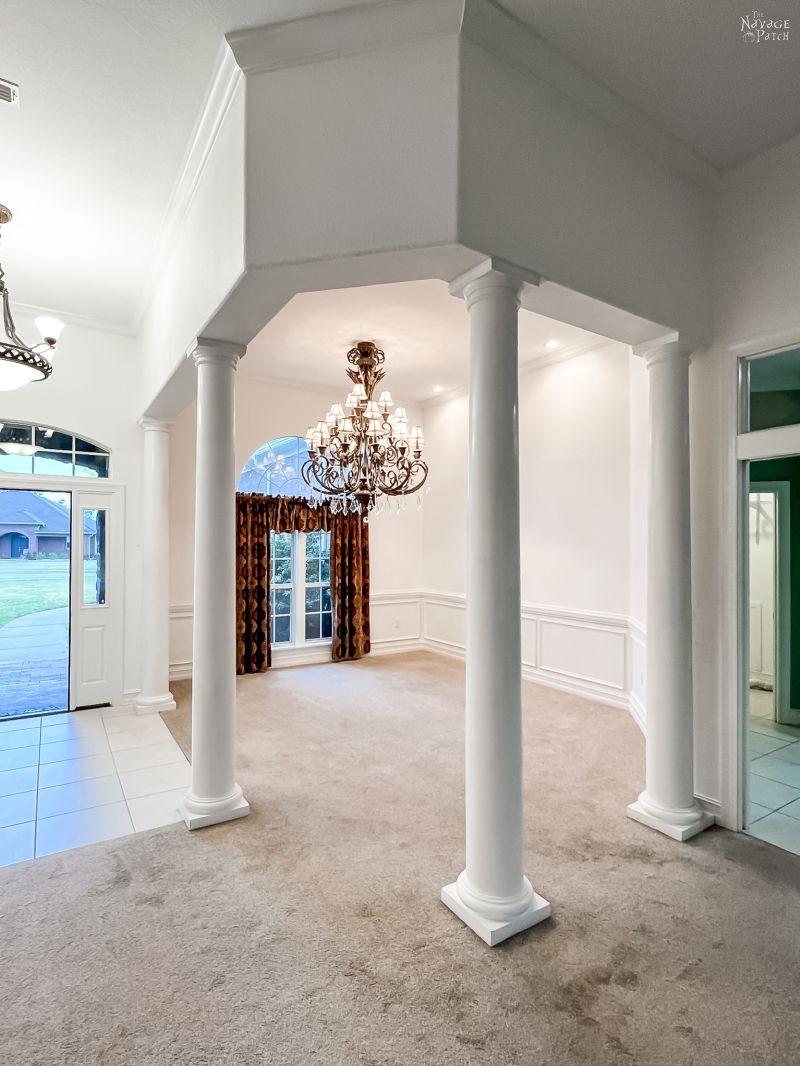
Nothing about these columns makes sense – not their size, not their placement, not the weird shape of the wall above them. It’s as if they exist only to annoy and thus are succeeding admirably at their mission.
Obviously, the columns have to go – my babes had already declared that intention before we even put an offer in on the house.
Back then, when she first suggested their termination, it seemed like an easy proposition.
Bang ’em out, carry ’em out. I figured it was an hour of work, then on to the next phase.
But DIY can be a dangerous mistress. It’s easy to get seduced into a false sense of self-confidence and develop an inflated sense of one’s own true skill.
In other words, cobbling together a few room makeovers doesn’t qualify you to build a house.
Now, removing these columns is certainly not on par with building a house, but as we began to plan the space further (which of course would start with me ripping those columns out), I began to get a little nervous.
What if they’re load-bearing? What if Luigi wasn’t just tossing columns around like spaghetti? What if they had a purpose beyond looking hideous?
At first (still ignorant about residential columns), we theorized that any load must be borne by a metal pole sheathed inside the column. Thus the column would be decorative. To test this theory, I drilled a small hole in the end column next to the front door. I then stuck a chopstick from Panda Express (which my babes absolutely loves) into the hole and wiggled it back and forth. There appeared to be nothing but empty space within the column.
Handan and I took this as proof-positive that the columns were not load-bearing. We decided then and there to remove the wretched things.
Hooooo boy…
We researched columns at that point and found the exact ones installed in our home. The were made of fiberglass and the decorative bits on the top and bottom just slid into place. They were probably just held on with caulk and could be easily removed.
(and we discovered the columns made by this manufacturer are load-bearing)
I set up my ladder, climbed to the top of the column by the door and started in on the top of the column with a mallet and pry bar.
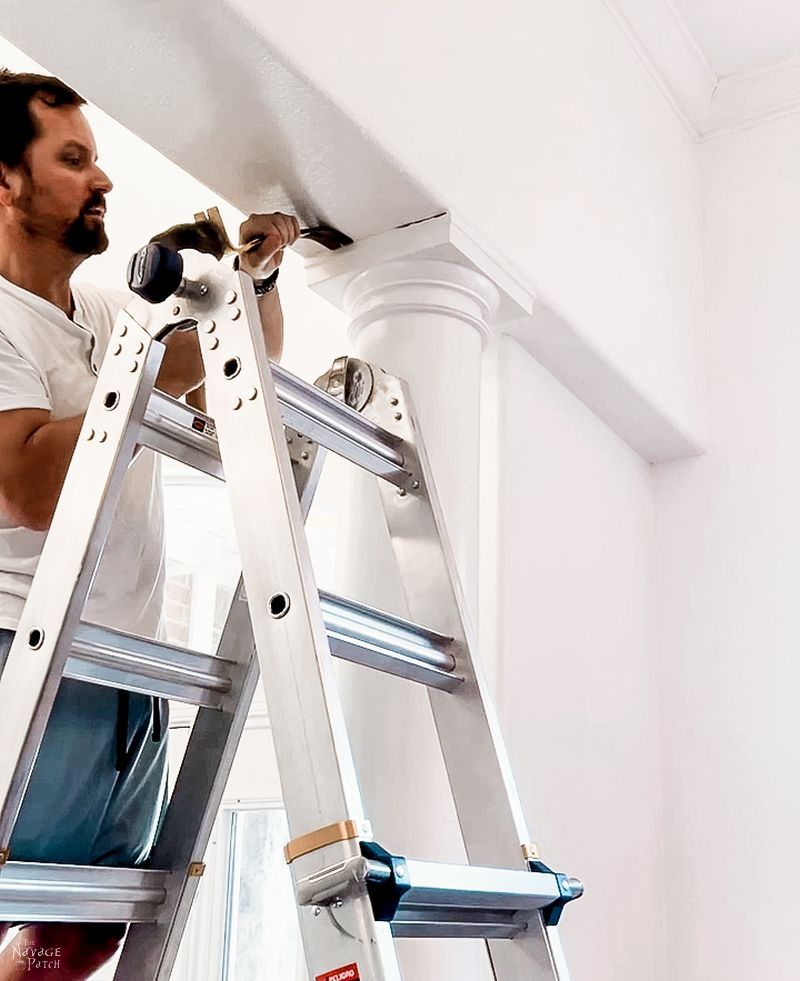
It was slow going. That thing was on there tight! Maybe they used some glue along with the caulk? After a bunch of whacking and very little progress, I tried a new tool: a utility knife. Hey, what better tool for cutting caulk?
I did manage to create a space, but that trim wouldn’t budge. Time for a new tool: a long screwdriver to probe around with.
My probing led to the discovery of nails, and lots of ’em. And dinky brad nails, but the longer, thicker, more pain-in-the-ass kind. This discovery necessitated the use once again of the mallet and pry bar. There was no way to pry free of the nails – my only option bas to break the nails through repeated bashing with the hammer and pry bar.
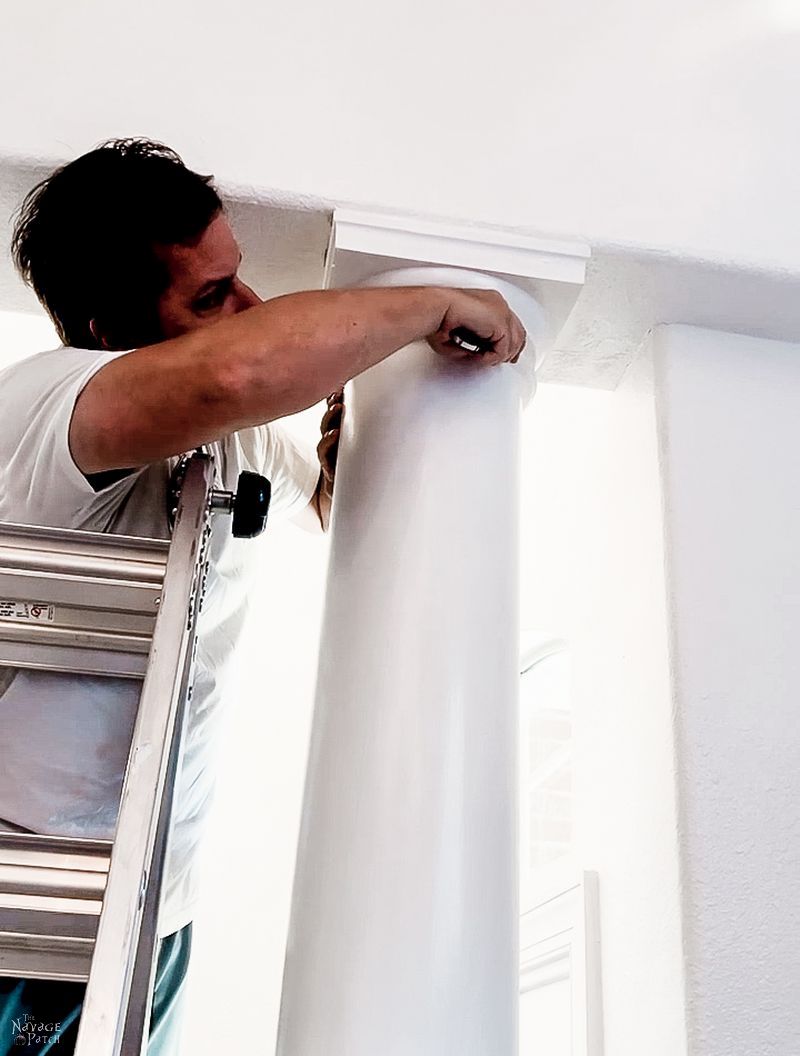
It was slow-going, but I managed to break through every nail and free the trim piece. Unfortunately, my babes had a little mix-up with the camera and was recording when she thought she wasn’t and not recording when she thought she was, so I don’t have video (and therefore a good video-capture) of the removed piece. The best I could find was this picture, captured from the video of her climbing the ladder to film me (when she thought the camera wasn’t filming).
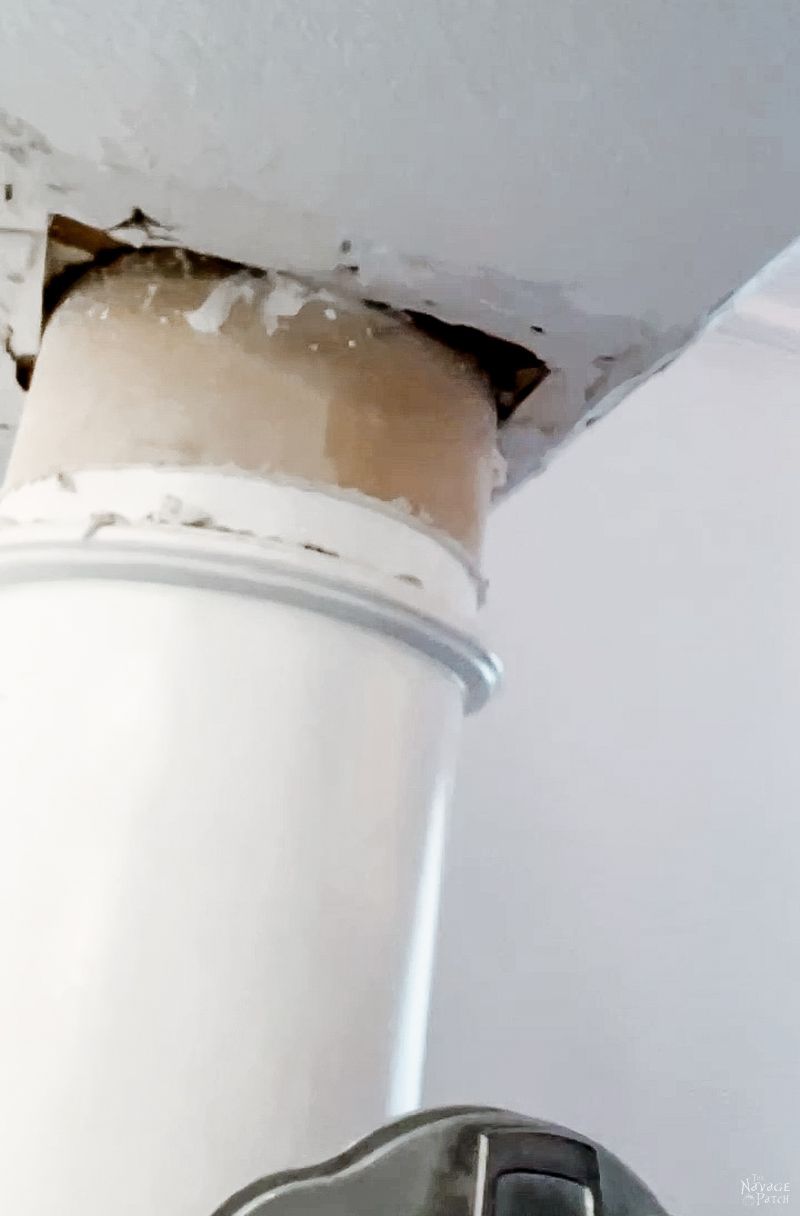
With the top trim removed, I could get a better look at what was going on with this column. It looked to be firmly planted underneath a support beam.
I had a bad feeling these were all load-bearing columns. Handan followed the beam outside, and we had a look in the attic. It was a roof-support beam, and so the columns had to be load-bearing.
Drat.
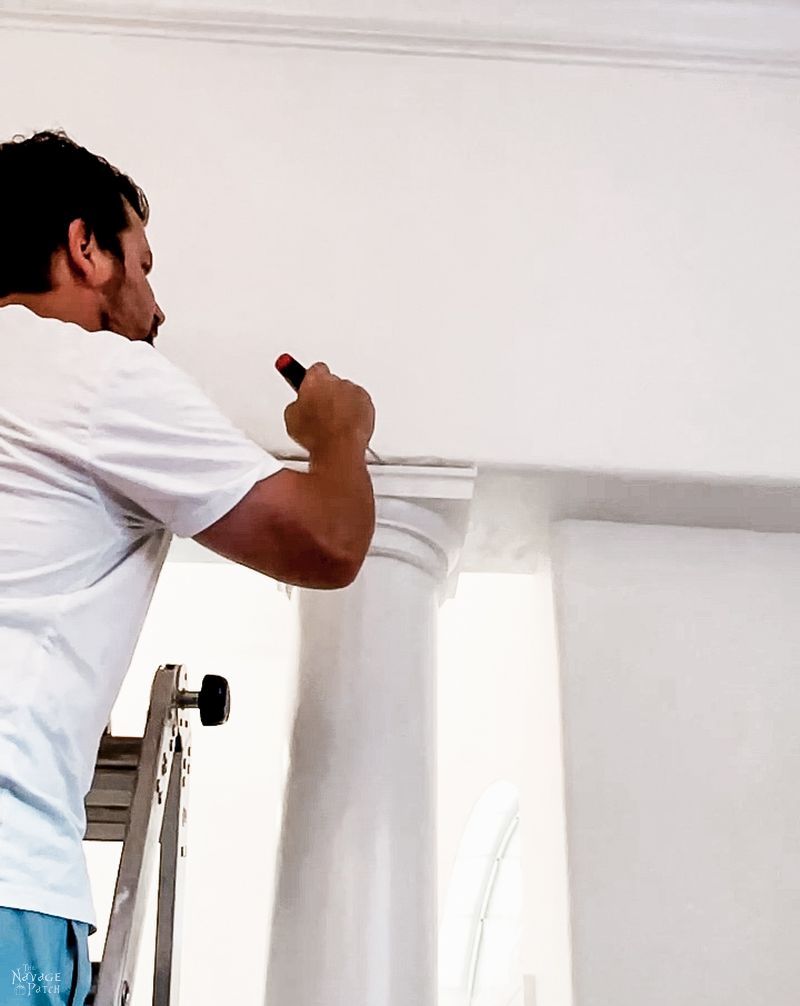
I decided to drill a test hole in the center column – the one that looked to be the most load-bearing. Maybe it would have a center-post, and I’d still be okay to remove the other ones?
I drilled hole and stuck my Panda Express (Handan’s fave) in there and wiggled it back and forth.
It struck something. But…
But it wasn’t a metal post. It felt more like…a cable?
I had to see for myself do I drilled another hole perpendicular to the first and shined a light through it while putting my eye up to the other hole.
There it was. A cable running from floor to beam.
I went back to the first column and drilled a second hole.
Yep, it also had a cable. I didn’t catch it at first with my chopstick because it wasn’t centered in the column but instead ran up one side.
Things were looking grimmer by the minute. Not only were these columns load-bearing, but they had tension cables running through them that could only be there to help hold the roof on during a hurricane. We didn’t know it at the time, but of the four tension cables, the one in that center column was the main one – twice as thick as the others and under tremendous tension. More on that tension later.
As I mentioned earlier, it can be tempting to throw caution to the wind when DIYing and try something above my pay grade. This temptation is all the more seductive considering this is my job, and everything we do and share has the ulterior motive of getting eyeballs on our blog page. But sometimes knowing my limits and acting within them is better in the long run than recklessly forging ahead into unfamiliar territory and risking catastrophe.
Thus, we decided at this point that the column removal and wall building were best left to a professional, especially considering Handan’s wall plan would require us to remove the main tension cable. The others could stay – the walls could be built around them. But the main one had to go, and that would require a new solution to keep the roof from going all Wizard of Oz during the next hurricane.
After speaking with several local contractors, we settled on one we trusted – Danny Hernandez, a contractor out of Tallahassee. His father and nephew have a landscaping business we’ve already worked with, so we’re comfortable and happy with the family, their work and their prices.
Sensing we knew exactly what we wanted and wanted it just so, Danny sent his most meticulous man to complete the first part of the work: column demolition and wall framing. I watched as he started the job. That first act of destruction always leaves a knot in my stomach. It’s that feeling of knowing we’re past the point of no return. We’re all in now.
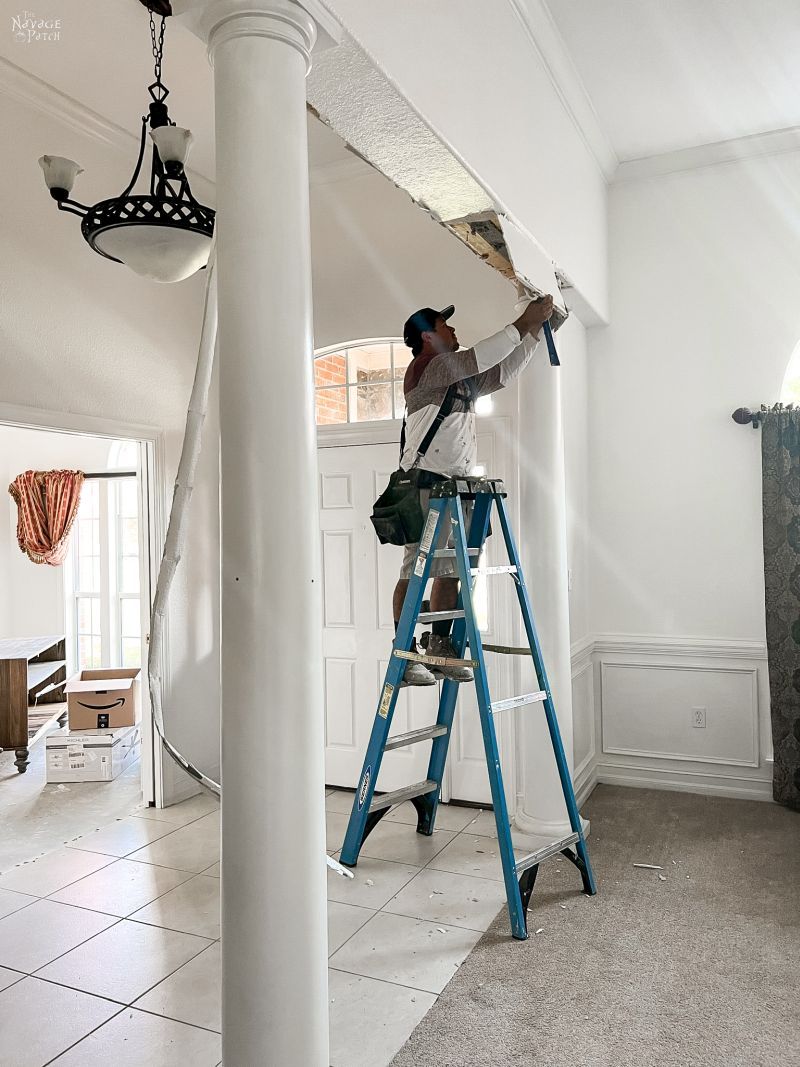
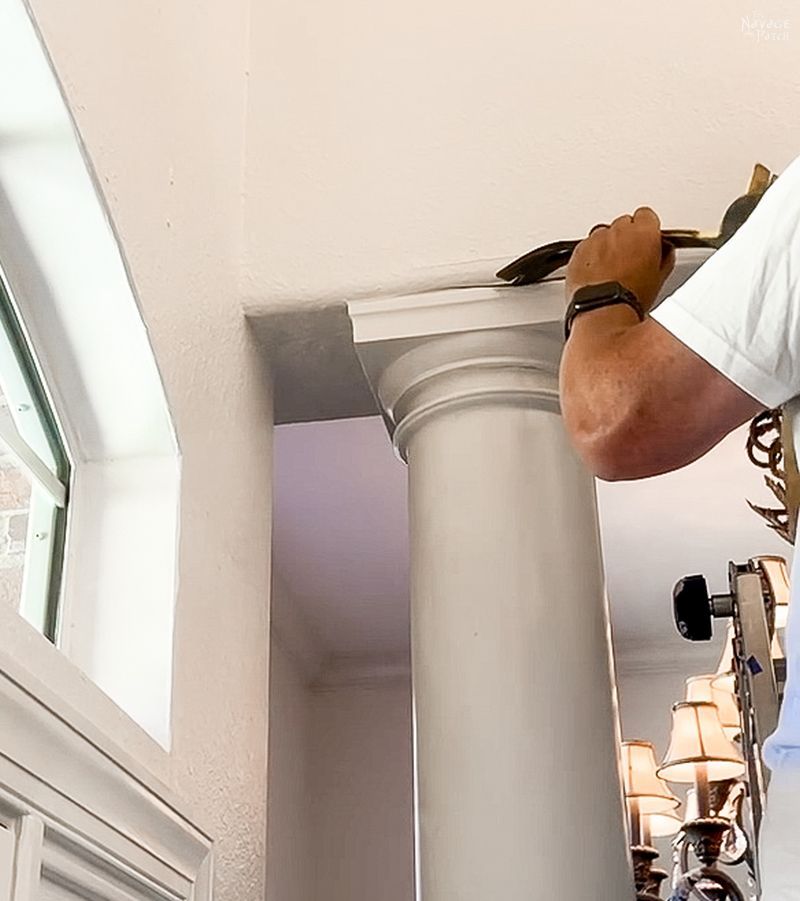
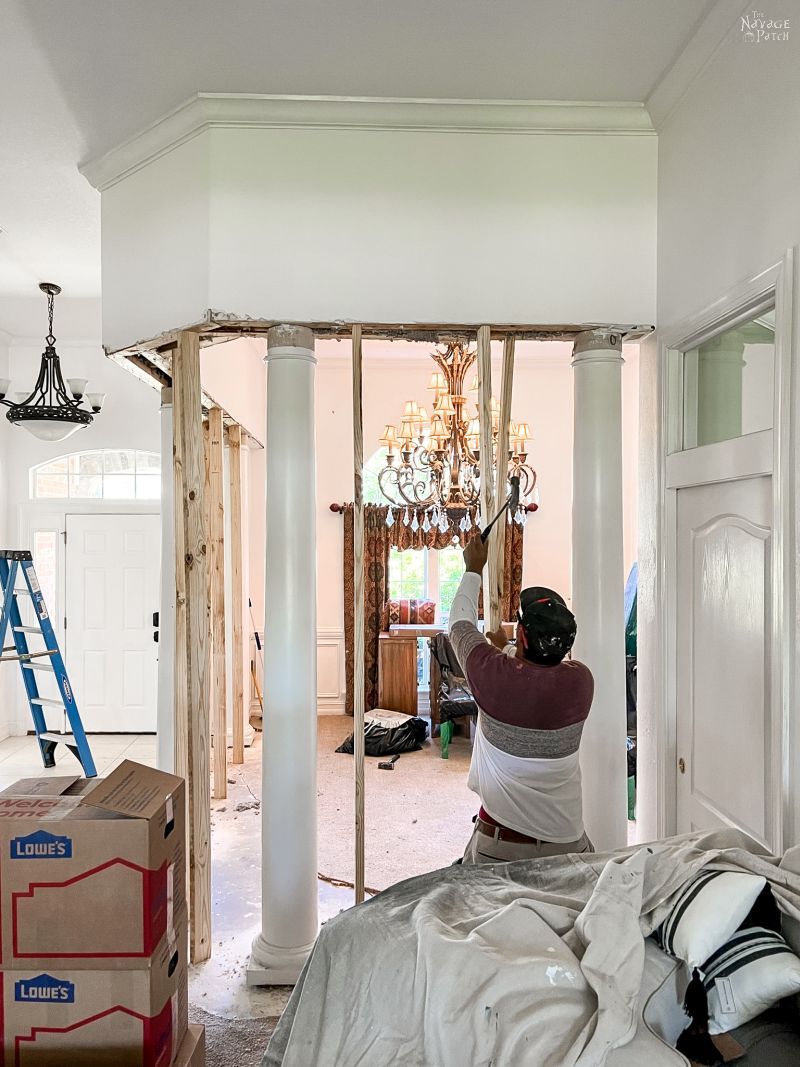
Before removing the columns, he started by removing the soffit so he could have a better understanding of what was going on internally.
It was messy work, as the insulation poured down from above. The stuff looks like oatmeal crossed with Stove Top stuffing.
He also removed some of the tile in the foyer. I’ll soon be removing the rest of the tile and all the carpets so I can lay LVP flooring throughout this whole area. And that’s another series of posts you’ll be reading in the coming weeks! 😄
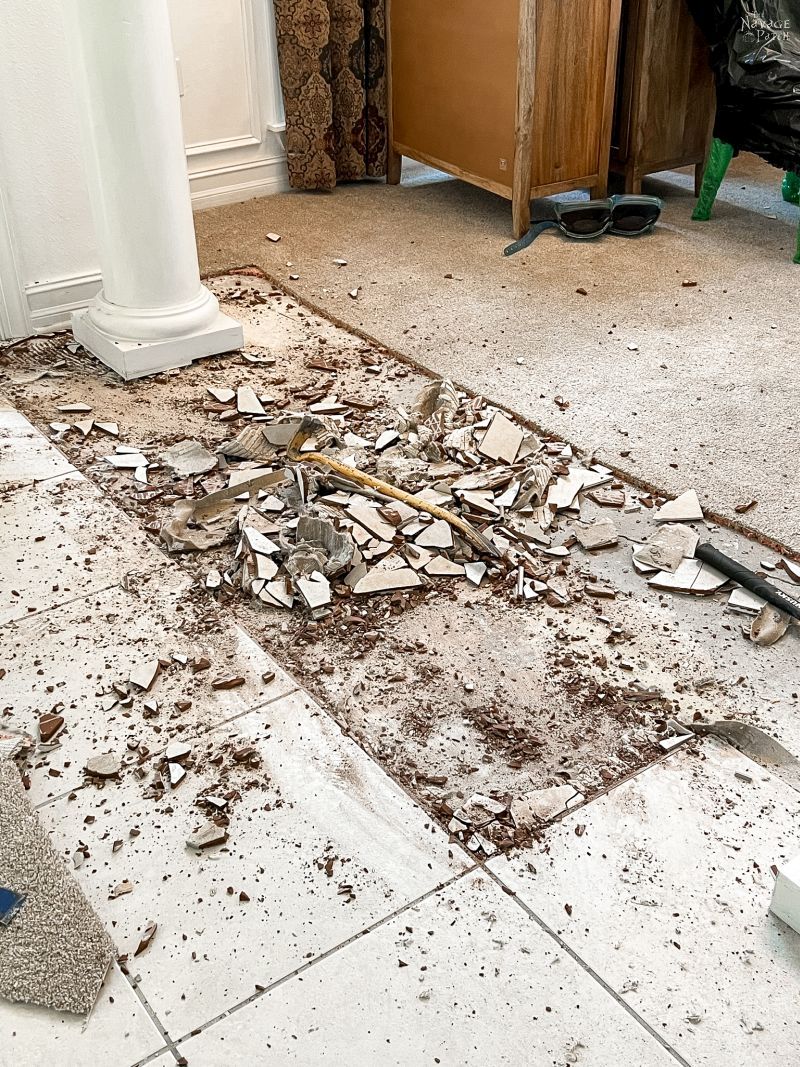
Seeing how hard he worked removing five tiles with a hammer and crow bar, I know I’ve got my work cut out for me removing the rest. I’ll be using a hammer drill though, so hopefully it’ll go a little quicker and smoother!
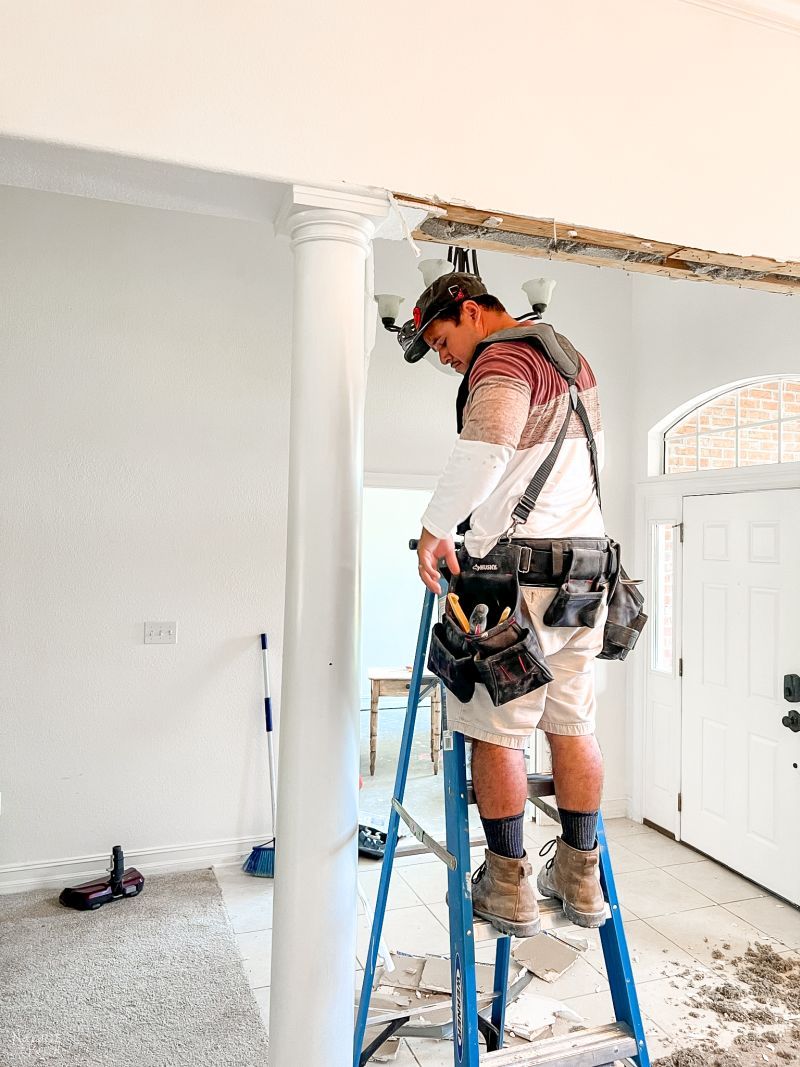
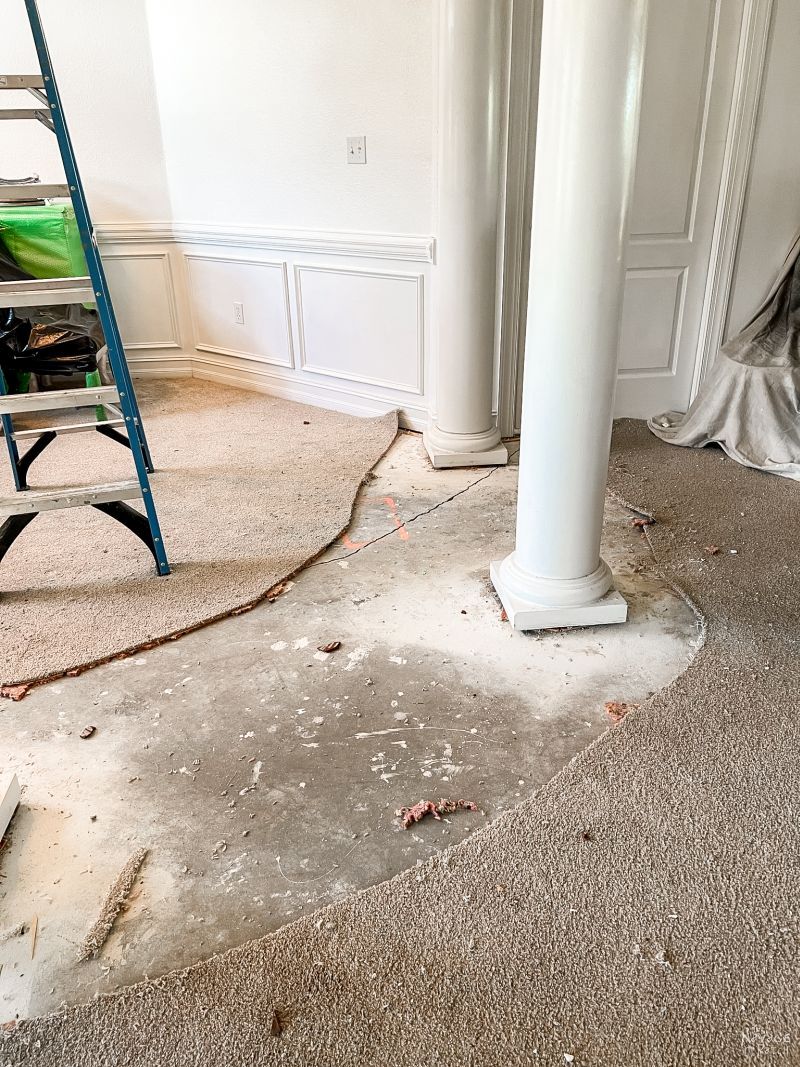
He removed some carpet so he could start his wall build. We told him not to worry about being neat or precise, as I’d be removing the rest of it soon enough.
In the absence of a ruling by a structural engineer, but in the seasoned opinion of our contractor Danny, we were all operating under the assumption that these columns were load-bearing, but not oh-my-god-the-sky-is-falling load-bearing. The difference is that the former could be tackled with temporary 2×4 supports while the latter would require a house jack.
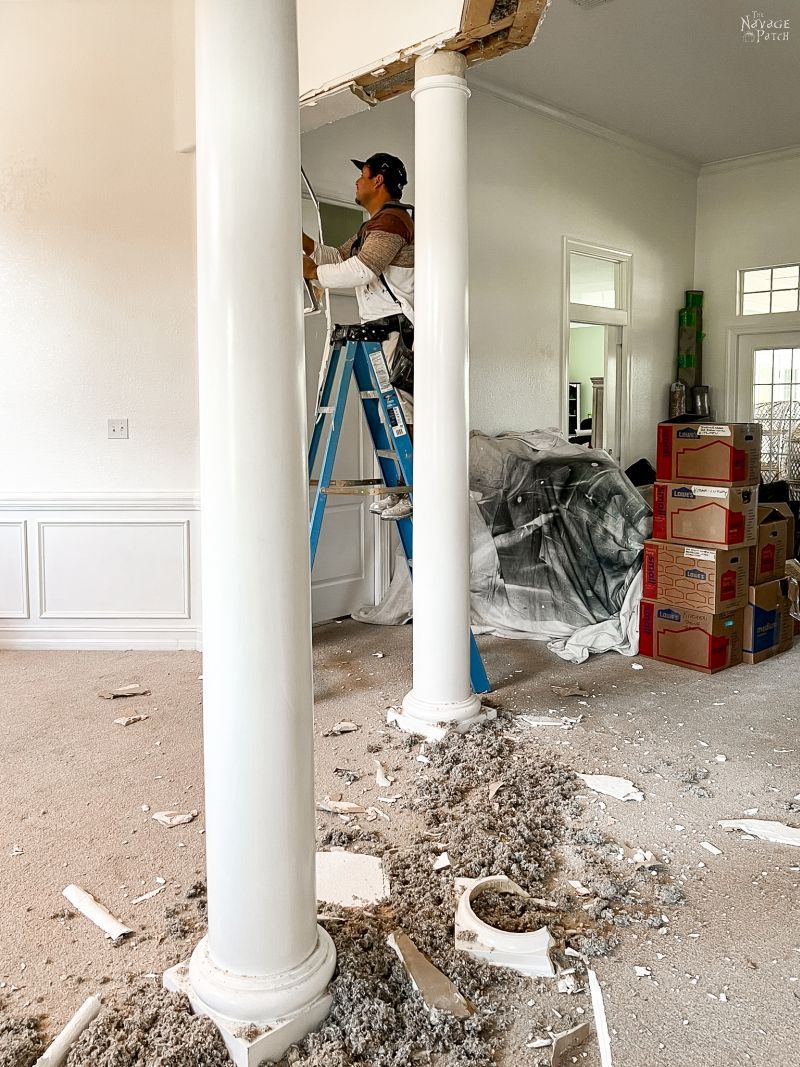
Our carpenter (who spoke no English and whose name I never caught) installed the supports.
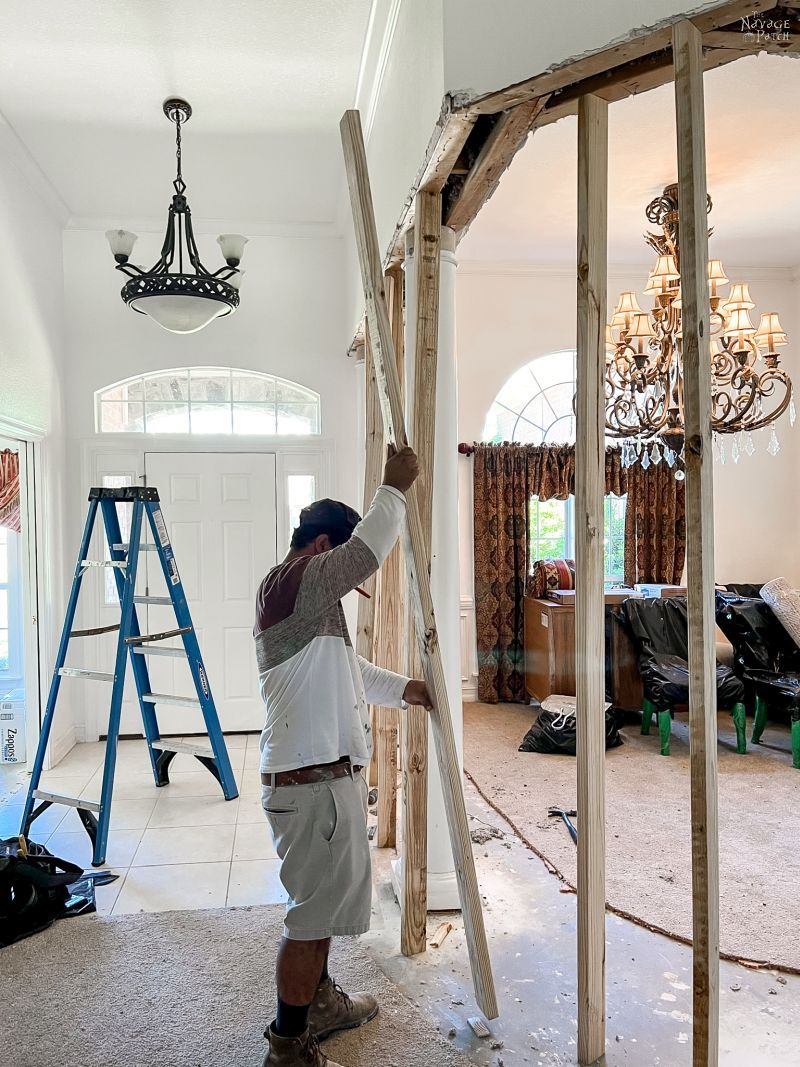
He cross-braced the vertical supports.
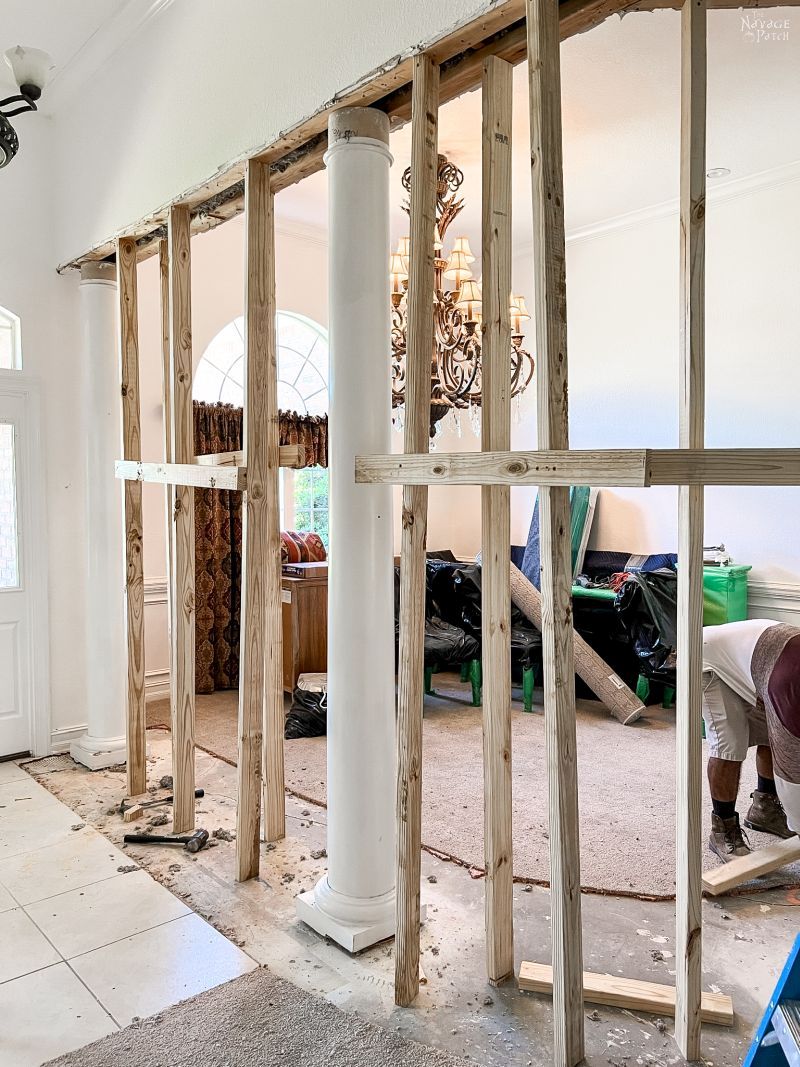
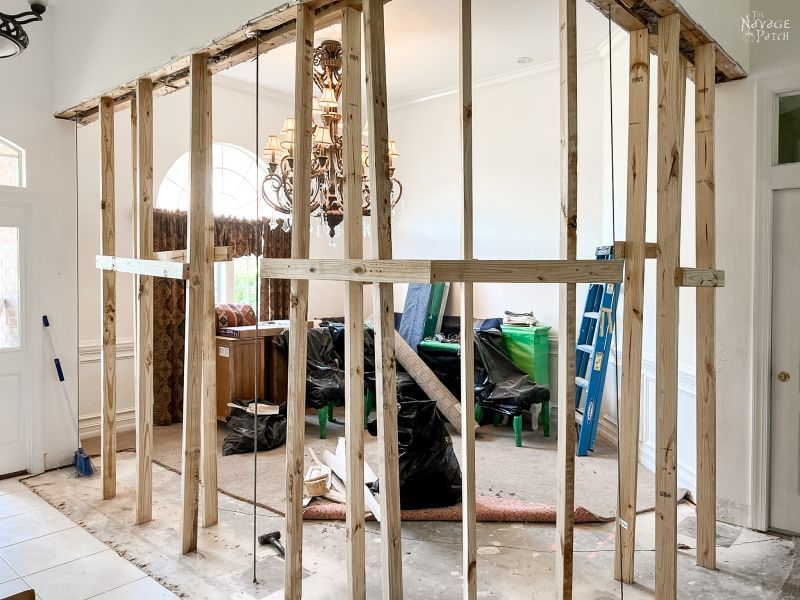
Satisfied our roof wasn’t about to come crashing down into the dining room, we proceeded with the column removal.
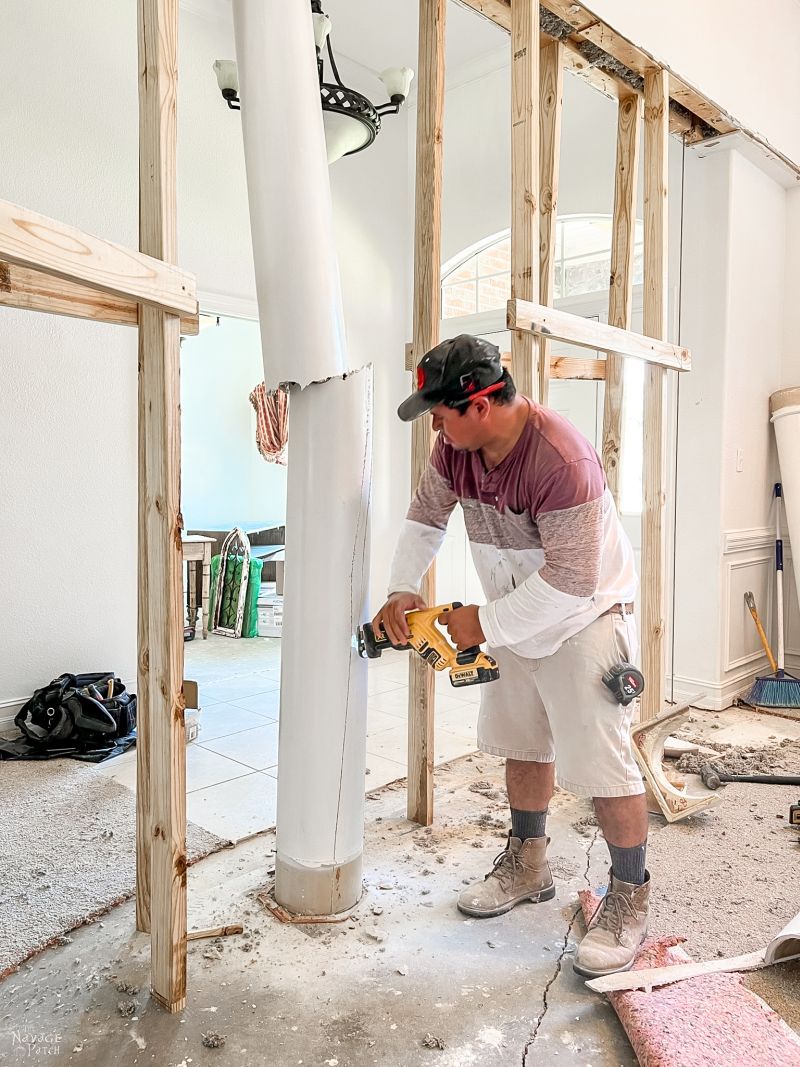
Holy Macaroni! I never would have guessed how strong these columns are! Thank god I didn’t carry on with the removal myself. It took this guy an entire afternoon, armed with a reciprocating saw and a sledge hammer, to remove them!
And they are heavy! Man-oh-man, I had to move the pieces the next day, and just one quarter of one of those columns weighs a ton! I have no doubt that those things could hold up a house after seeing how hard it was for our contractor to cut through them and then feeling how massively heavy they are.
With the columns removed at last, Handan and I could take a good look at those tension cables.
Danny stopped by that afternoon as his guy was finishing up for the day, and he told me he wouldn’t be able to remove the main tension cable, as there was too much risk involved. If the cable was cut in its current state, there’s no telling the damage it would do as it explosively de-tensed. Anyone caught in its path would be cut in half, not to mention what it could do to the house.
This posed a problem, to say the least. We didn’t want the wall to run as far as the cable for aesthetic reasons, so we had to figure out a solution.
When the worker had left, and before Handan returned home from work, I set up a ladder and climbed up to have a look at what was keeping that cable in place and how it was tensioned. I turned a flashlight up into the exposed soffit to the support beam about two feet above. The cable went through the beam and was anchored to a plate on top of the beam – or at least that was my assumption since I couldn’t actually see the top of the beam from my vantage point. The tensioning was accomplished via a turnbuckle beneath the beam.
Sweet!
Where there’s a turnbuckle, there’s a way. Or something like that.
When Handan arrived home, I explained the situation and then showed her the turnbuckle.
“Let’s do it, my babes!” she said and scrambled up the ladder before even changing out of her work clothes.
I brought her two pairs of vice-grip pliers – she could fit her arms up into the narrow opening much easier than I could, and she was able to lock the pliers onto the upper and lower components of the turnbuckle.
“Which way do I turn it?” she said.
I had no definitive idea, but I had a notion. “Like this,” I said motioning with my two hands.
I shuddered inwardly at the thought of it being the wrong way and accidentally over-tensioning the cable to the snapping point. But I doubt either of us was that strong. In any event, she couldn’t budge the turnbuckle.
“Lemme try,” I said. “Scram, woman! My turn!”
I climbed up, turned my hands in the aforementioned direction, and…
“Did it loosen?” I said. It felt like it loosened, but was it wishful thinking?
“I don’t know, my babes. I think so. Try again,” she said.
I couldn’t maneuver my ham hands to re-lock the pliers, so Handan went up again, and back and forth we switched – she locking the pliers and I loosening the turnbuckle. Yes, loosening – the cable was definitely getting less taut. After a time, I didn’t need to lock the pliers, and shortly after that, the cable was slack and entirely de-tensioned. I Facetimed Danny and showed him the cable.
“We’re back on for the original plan!”
With that last hurdle cleared, Danny’s guy set to work framing the new walls. In my next post on this topic, I’ll share some pictures of that process and talk a little more about Handan’s grand vision for these new walls.
There’s a lot happening all at once here at The Navage Patch, so keep your eyes peeled for more projects, more posts and more lunacy as we try to keep our sanity turning our new house into a beautiful home!


Oh my goodness, I had everything clenched while I read this, can’t wait for the next installment!
Coming soon, Jean! (And we had everything clenched while de-tensioning that cable, lol!)
You two are two very brave individuals. Reading that made my underarms and palms sweat. I was genuinely terrified for you both! Of course, you know this means I’m going to keep reading!! ha ha
It’s always an adventure here, Karen, lol!
Oh, wow! I’d have been sweating bullets over that! As it was, I was tensed up just reading about it. Eager to see the next post(ing).
More coming soon, Rebecca! 🙂
Now we all need to be de-tensioned, not like after high school detention :),
LOLOL! 🙂
Can we talk about the other elephant in the room, that chandelier! It is going, right?
LOL, yes! It will definitely be going!
So now I want to know where/how you put in a new tension cable if you have removed the “main” one. Not living in a place where such things are required or used (to my knowledge) the workings of this have me curious.
I’ll be writing about that in the next post, Chris!
👍
Greg, please don’t scare your parents like that again! We hope to see each of you in one piece when we visit!
But the house is going to look amazing when you visit!
And…..exhaling…..jeez that was tense. And now I want Chinese…..
I hear Panda Express is good… 🙂
I really enjoy reading your posts! You could be an awesome comedic writer ! No, you are! I look forward each week to your posts and when you do more than one a week, I have died and gone to heaven!! Keep up the good work! I, too, had a knot in my stomach, but I’m relieved to see you two figured it out! Praise God! Good work.
Thanks, Diane! When Handan and I work together, there’s not much we can’t solve! 🙂
Hello Greg and Handen.
The house is coming along so well! I get so excited when I see another post from you guys.
I love what you are doing with the place, and I can’t wait to see how you address the door situation. 😬
All will be revealed in time, Nicolette! 😀
Holy Handyman! That was a nail-biter for sure. Too much for me. I think I would have to take a drive somewhere while the contractor(s) did their magic. No. Freaking. Way. could I stay and watch. Wishing you all the best on this project.
LOL, I had to watch to make sure the house didn’t fall down!
😂😂😂
I have only one word…three letters…that’s all I’ll say at this time… This better be worth it…franki
Franki, I think it will be worth it! 🙂
Scary! I’m glad you got some pros in! And thank you for using migrant labour! Especially in the tough times we’re in.
I know my limits, Jay! 😀
Have you finished and will you be posting soon? This is the exact project we want to have done and our house is almost identical to yours. We are just scared at what the end results will look like.
After all this time, we’re still getting there! We’ll have it done this year though!
LOL when I was younger, uhh let’s just say…”many” years ago, I had a friend whose parents had those same columns in their dining room and I remember thinking they were the COOLEST thing! I always wanted them in my house. Like many trendy items, they have run their course and are hideous. I love your work!
Thank you, Kelly! Yep, they may have their place in mansions and palaces, but not in the average home, lol!