Ornate Frame to Wall Clock
“The cobbler’s children have no shoes”…Greg believes whomever said this must have had a wife like me. I have no choice but to agree with him, as I really am a living example of that saying: I am a Project Controls Manager, and my expertise is in time & cost planning and management of multi-billion dollar construction projects. Though I’m one of the best Project Control Managers in the Construction Industry, I just can’t stay on schedule in my personal life. Greg’s punctuality and my bad habit of being late for everything is like the running joke in our lives…so much so that I had to make this clock to ease Greg’s job in answering “When?” questions with “Now” so I would be on time for everything.

I know… ridiculous isn’t it? At least it makes a great conversation piece 😀
As Greg is getting pretty tired of his role as the alarm clock of our home, he suggested that I should make some pretty clocks [I didn’t use the word “pretty” -Greg], so while I’d adorn our walls with my projects, they would also serve a good purpose…hahaha. Did I tell you guys that I love him so much? He is quite witty and always puts me in tears of laughter while getting his point across!
I liked the idea so much that I started my search on Pinterest for some inspiration right that evening. I found so many fantastic clock ideas, but these particular two grabbed my attention. I liked the weathered stenciled look on one and the ornate frame on the other.
 |
 |
| Amazon.com | Antique Farm House |
With the inspiration I got, I first paid a visit to my overflowing frame stash, then to my little clock pile in our basement – yes, I am that organized. Ok, maybe it is because grouped piles tend to look smaller to the eye… and that illusion helps keeping Greg’s sanity when he is working in the basement! LOL.
Among the ornate frames, I picked this one as the most suitable for the project. I bought it at a tag sale for $20 last summer. Normally I wouldn’t pay that much for this size ornate frame, but it was wood and in really good condition, so it was well worth the money.

Next I found this clock which was also perfect for my need: it had nicely shaped hands, the perfect size for the frame. Best of all, I didn’t have to buy a new mechanism!

I carried on going through the supplies list:
- Frame – check!
- The clock mechanism – check!
- Homemade chalk paint – check!
- Greg (to cut the backing board) – check!
Having everything I needed, I started working on the frame. I gave it 3 light coats of my homemade chalk paint in Warm Onyx color.

This is one of those interesting colors that loves surprising me: depending on how you finish it, its hue entirely changes. Seriously!… It is normally a brown color with a grey hint, and stays the same if you just leave it as is or apply clear wax. If you apply dark wax it turns into dark brown with almost no hint of grey to it. And if you apply white wax, it apparently turns into…well you’ll see the final color in a bit, so let’s keep that as a surprise till then.

Next, I worked on the backing board that Greg cut from 1/4 inch plywood. Before painting it, I found the center of it…
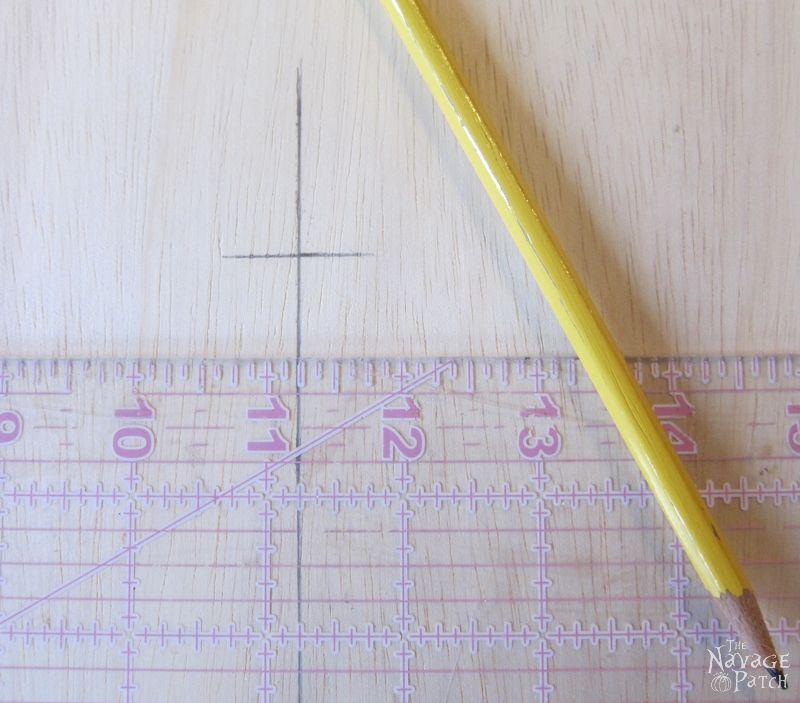
… and drilled the center of the board.

Then I installed the clock mechanism and checked if the board’s depth was a good fit for the clock mechanism. After seeing everything was perfect, I started painting the plywood with 2 coats of DecoArt Americana Chalk Paint in Primitive color. Then just to give a little twist to that subtle color, I whitewashed it using the same method in my toolbox to planter post.

While waiting for the paint to dry, I prepared the stencil design and cut the stencils on a re-positionable adhesive backed vinyl using my Cricut. After placing the stencils with the help of transfer tape, I started dabbing homemade chalk paint with a sponge brush. Once all of the design was filled in with 2 light coats of homemade chalk paint, I peeled the vinyl off and slightly distressed the stenciled design with 320 grit sandpaper.


Next, I painted the back of the board in the same color.

Then I waxed the entire backing board (back and front) with MMS white wax, and to my surprise that brownish grey paint turned into a beautiful smokey grey with no brown hint to it.

As I loved that color, I went ahead and white waxed the entire frame as well.

As everything was painted, I started assembling the whole thing.

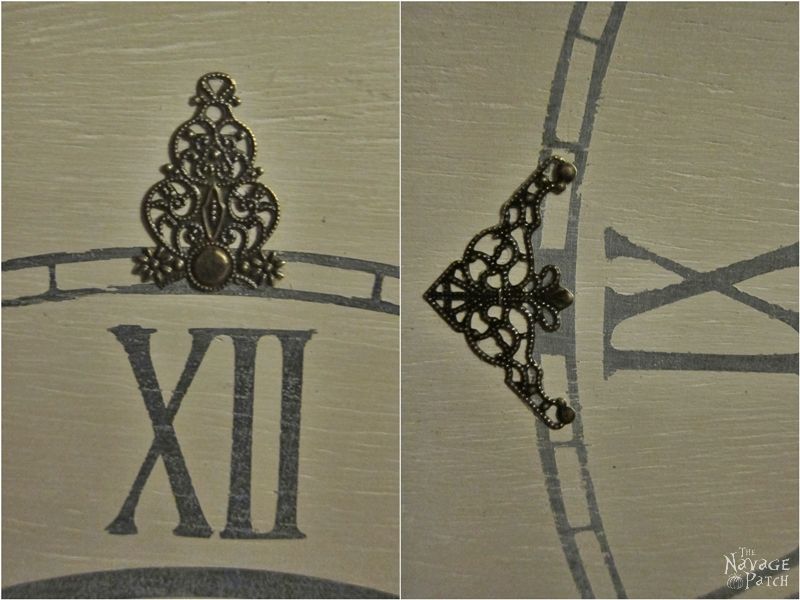
As the final touch and to make it more like a store-bought clock, I decided to add some embellishments at the points of 3, 6, 9 and 12. I chose 2 oval-ish shaped and 2 corner type filigrees for that. I cut the oval-ish ones in half…

…and glued those by 6 and 12, and the corner ones by 3 and 9. With that my wall clock was finally finished!
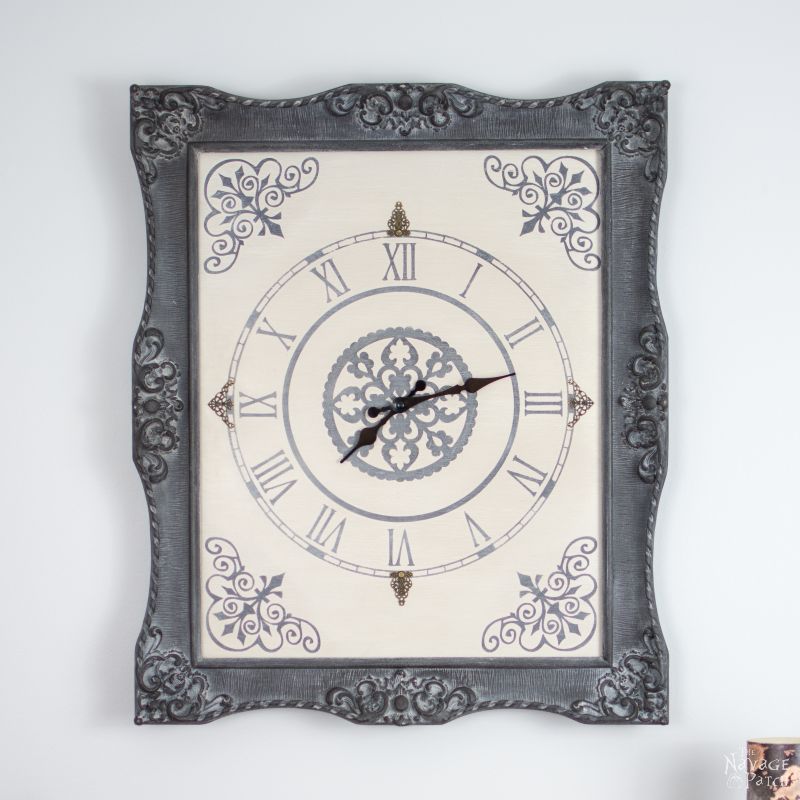
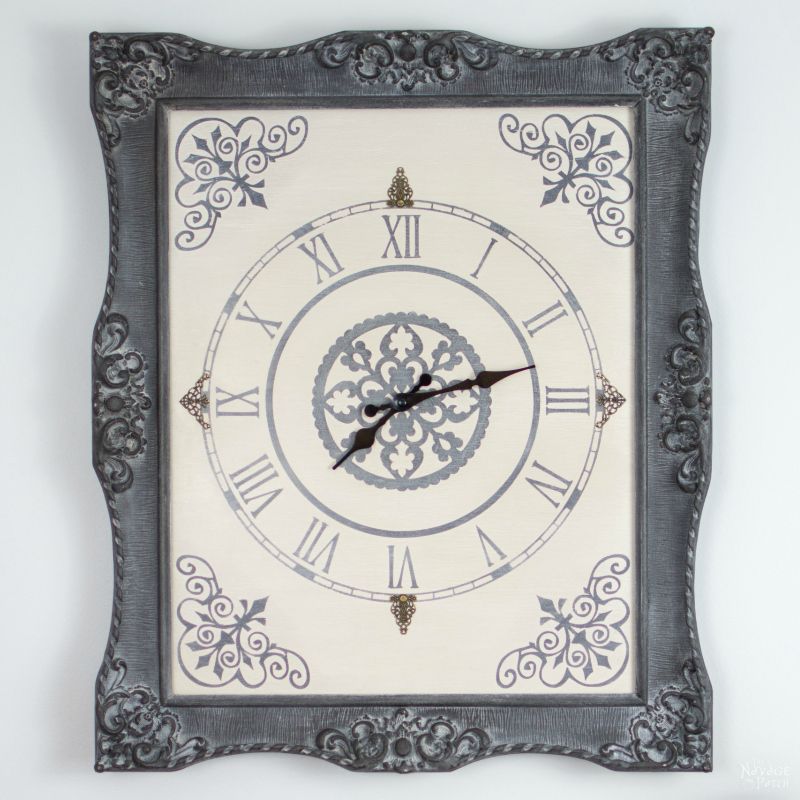
Now it is time to show you the beauty shots 🙂

So how do you like it? Not bad at all is it?

Maybe not the best one out there, but handsome enough for me to buy it if I saw it in a store…
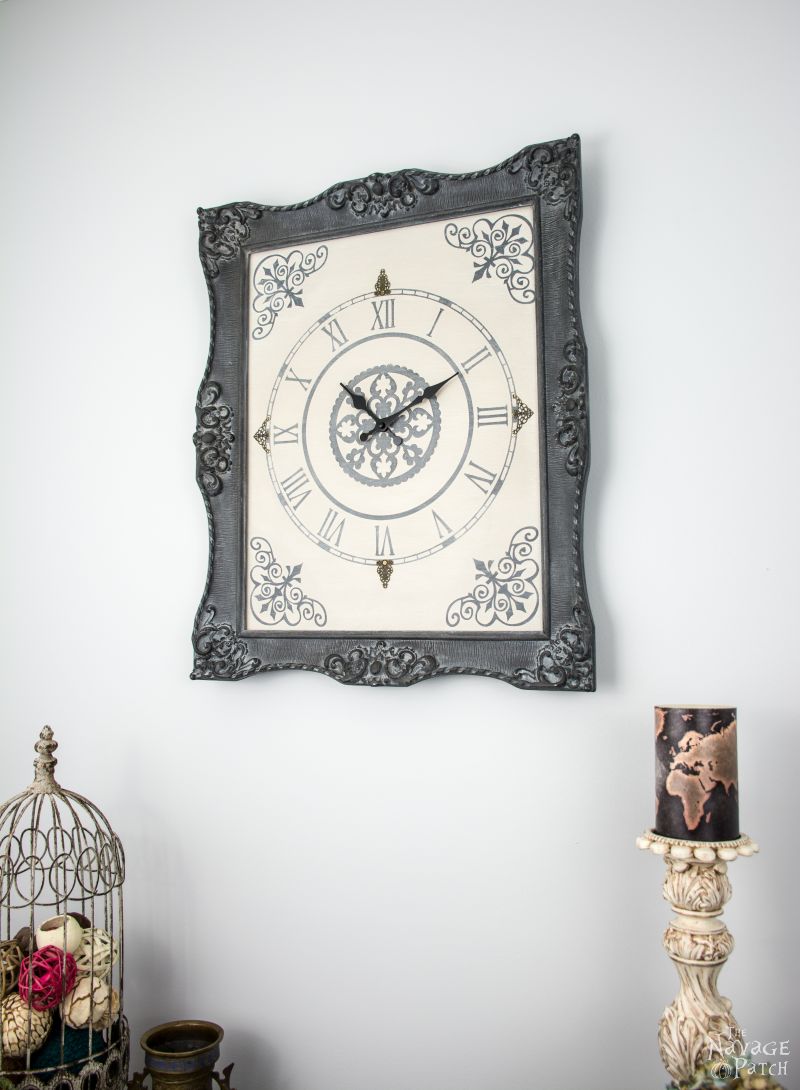
…and the fact that it is unique makes me feel really great about it!

What I love most about it is its color. Frankly speaking, I never thought that brownish grey would turn into such an elegant grey, so it was such a wonderful surprise to me. But now that I know how to achieve this smokey grey, I will be using it in more projects.
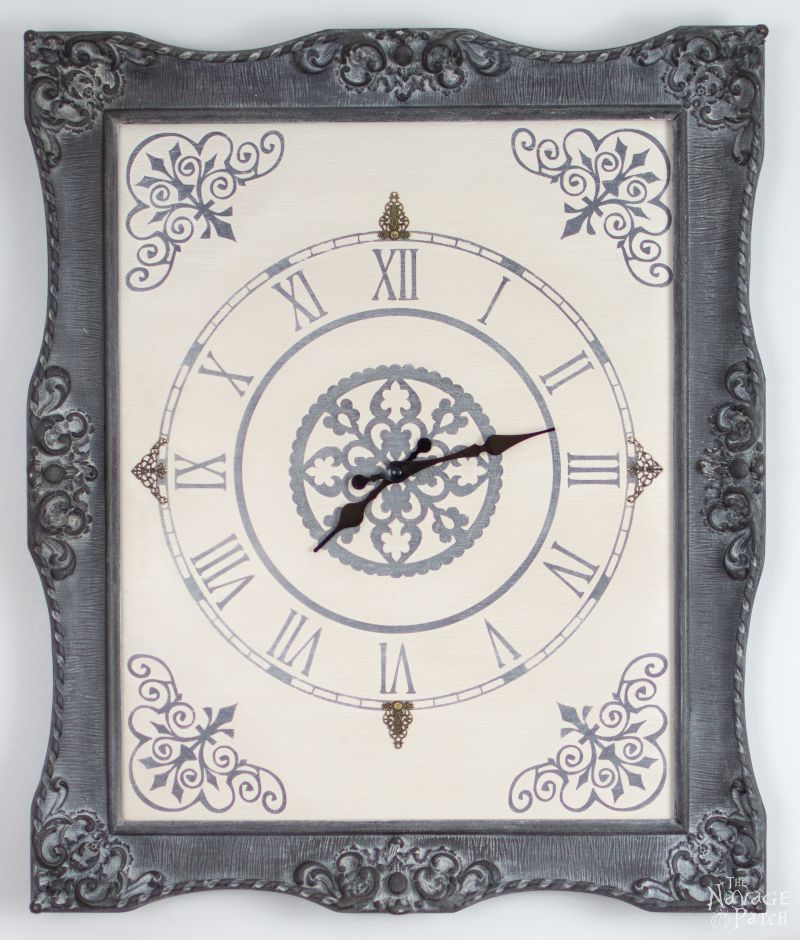
And as usual, some close-ups for you to see all the details…


This time I couldn’t help myself putting more photos than ever. Can you tell that I am really proud of my clock?
Are you wondering what happened to the old round clock’s frame? Well…me being me, of course he didn’t get discarded. For now he went back to his place in the basement. But hopefully soon enough you’ll meet him again with his new role, as I have a cool plan for him 🙂
Handan, xo







handan this turned out so beautiful it looks like a piece of old art, but i am afraid you shot yourself in the foot because now you can’t ever be late xx
HA! I could fill the walls and halls with clocks and feed her cuckoos for breakfast, and she’d STILL be late! The only clock that matters around here is ME!
Thank you so much, Chris! Your lovely words always brighten my day!
LOLOLOL. Someone knows me well, doesn’t he? 😀
WOW. so stunning!
Thank you so much, Marie!
I love this! I am going to pin this and share it to our Facebook and Twitter. I am thinking this would be a great crafting project for us Casserole Gals to do together. Thank you for sharing! Rhonda
Thanks so much, Rhonda! I am so glad you liked it 🙂
You have the greatest ideas! Loved how you transformed a picture frame into a pretty clock. Love the paint color with white wax and the graphics. Adding the filigrees took this clock to the next level of pretty – love!!! Pinned to share ☺
Thank you so much, Marie! Talking about great ideas, I have to say nothing can ever come close to your DIY Patio Water Wall!! I can only imagine how peaceful it must feel listening the water sound…I indeed love that project and hopefully by the end of this summer Greg will be making something similar for me 🙂
WOW Your clock and frame would put ready made’s to shame. This is so darned gorgeous I’d want to buy in a store. Don’t think clocks at Hobby Lobby are this nice/awesome. You really did it gal. Liked the round clock but framed one is quite superior. That gray color and finish is very striking. Would be quite nice in our living room, have light gray walls with white/aqua accompanying colors. Enjoy this beauty.
Where did you find those metal filigree pieces?
Happy week
Thank you so much, Jane! I found them at Amazon. Here are the links for both if you want to check them out:
Oval shaped filigrees: http://amzn.to/1T8Q59z
Corner filigrees: http://amzn.to/1Tb5h38
You too have a great week!
Not only is this gorgeous, but it’s such a creative reuse for that old frame!
Thanks for linking up at Talk of the Town – I pinned it to the Knick of Time party board, and will give you a shout-out on Facebook tomorrow!
Thank you so very much, Angie! You lovely words made my day!! xx
This is absolutely adorable and I want one. It would be perfect for my entryway. Thank you for sharing your tutorial!
Thanks so much, Jen! 🙂
What an awesome project! Beautiful.
Thank you so much, Virginia! Now I have something a bit more useful than just a good looking frame 🙂
That is just beautiful! Better than any store bought clock! Thank you for sharing it at The Really Crafty Link Party! Pinned!
I thank you for your lovely comment and hosting such a great party!
I love your clock! It’s fabulous!
Thanks so much, Mandy! 🙂
Visiting you from DIY Crush, very clever design and re-purposing!
Thank you very much, Carole! 🙂
What a lovely project. Even though we have clocks on the appliances and such I really like to see a beautiful clock on the wall. You have that now.
Thanks so much, Debra!
Absolutely amazing! I love this idea.
Thank you very much, Tina!
Clever!! Thanks for linking up at our Tips & Tricks Link Party!
Jessica
My Life by Jess
Thank you so much, Jessica!
I love this! It turned out beautifully!
Thanks so much, Amy!
What a wonderul idea and beautiful project! I would have never thought of making a wall clock out of that frame! Brilliant! Thank you for sharing at Sweet Inspiration #6! Happy Saturday!
Thank you so much, Katrin! Have a great weekend! 🙂
This is stunning! It all came together beautifully. Thanks for sharing at Snickerdoodle Sunday. Sharing all over!
Thank you so much, Beverly! You are an ACE! xx
Popping back by to let you know I’ll be featuring your lovely clock at tomorrow’s Snickerdoodle Sunday Party. Hope to see you there!
Oh thank you so much, Beverly! You made it my day! Hope you have a fantastic week ahead! xx
It looks great! I love the little details.
Thank you much, Kristie! 🙂
I adore clocks and yours is beautiful! Thank you so much for sharing with us this week for Snickerdoodle ! Sunday! Pinned to share 🙂
Thank you so much for your lovely comment and for hosting such a great party! 🙂
Superbe !!!
Anna
Thanks so much, Anna! 🙂
This is so neat! How was it taking apart the old clock? Is it just as simple as a snap off, snap on? Very cool and creative!!
Thank you, Christin! Taking the clock apart was very easy. I unscrewed the back of the clock’s frame to reach the clock mechanism. Then, I pulled the pin from the front to take out the clock arms. Once the arms were out, I pulled the back part of the clock mechanism from the clock’s frame.
Handan this is so beautiful! You are insanely talented! I can see this at a store going for hundreds of $. The best thing that I have found about being a DIY blogger is that pretty soon your home fills up with lots of unique pieces that no one else has. They cannot be bought anywhere because you’ve made them. And of course you get so good at this that if you need something and you cannot find it, you just make it. Case in point this clock. Now you cannot be late anymore, no more excuses for you. 😉
Thank you so much, Mary! I agree! I love filling our home with the things we make, because everyone of them end up having a story (our story) throughout the makeovers 🙂 And each one becomes a unique piece with that story behind it.
Great tutorial for this beautiful DIY clock! Thanks for linking up with us at Welcome Home Wednesdays! Can’t wait to see what you share with us this week!
Thank you so much, Rebecca! 🙂
Your clock is absolutely beautiful Handan! What a fabulous idea, and your tutorial was just great. Thanks so much for sharing at Vintage Charm.
Thank so much, Tuula! I am so glad you liked the tutorial 🙂
This is absolutely gorgeous! I’m still working my time “efficiency,” but this would be nice addition to my home… while I’m still working everything out. lol! Thanks for sharing at #FFBH 🙂
Thank you so much, Jazelle! 🙂 I wish I could do that too. Then again, I guess I love Greg’s funny reminders, hence not really working hard on that issue 😉
I love your clock ideas (and the story, lol!) and Thanks for sharing with us at throwback thursday!!
Mollie
LOL. Luckily Greg has the patience to put up with me 🙂 Thank you so much, Mollie! Have a great weekend!!
Thanks for sharing on Peace Love Link-up! And congratulations are in order because we will be featuring you in our next link up! It goes live tomorrow at 6 so grab a button and drop off anything else you might be working on! : )
Oh wow! Thank youuu!!! I will be there with more projects! 🙂
GORGEOUS PIECE….LOVE, LOVE, LOVE!!!!
Thank you so much, Michelle! 🙂
My favorite is the one that says NOW instead of numbers!! Thanks for sharing on the Pleasures of the NW’s DIY party!!
Thank you so much, Helen! That one entirely started of as a joke, but later on turned out to be the greatest conversation piece. It makes me smile every day I see it 🙂
Love it! I know how you feel about making a unique piece. It makes it that much more special. Thank you for sharing at Link It Up Wednesday!
Thank you so much, Kileen! It does indeed makes it special and that is the beauty of the DIY 🙂
That clock is gorgeous and I can see why you brought that frame it is just gorgeous and finishes the clock of beautifullly,
Thank you so much, Amber 🙂