Thrift Store Baking Dish Makeover
Using Cricut-made stencils and glass etching cream, we created some beautiful etched thrift store baking dishes – perfect for home or for giving!
Though the Golden Years of the casserole were waning as I grew up in the 70s and 80s, we still ate our fair share of them, and they were de rigueur when going to someone else’s house for a holiday or potluck.
Back then, kitchen possessions were sacred. If you brought a casserole in a baking dish (or brownies or a cake), you expected to get that baking dish back. I guess everyone had their own method of identifying their bakeware, but my mom’s was to stick a piece of masking tape on the bottom of the baking dish and write “NAVAGE” on it with a Sharpie.
To this day, I’m absolutely bamboozled by how many decades, bakings and washes those pieces of masking tape have endured without falling off! It shouldn’t be possible. My mom may actually be some sort of wizard – I’m not sure.
As I grew into adulthood and learned the ways of flame and food, I carried on the traditions of my youth when visiting friends. Casseroles may no longer have been the belle of the ball, but I refused to give up on them. The first time I cooked my curried chicken broccoli casserole for some friends in San Francisco back in the early aughts, one of the dinner guests described it as “sublime.” That’s not a word I’d normally associate with the humble casserole.
And my lasagna (itself a casserole) grew to such fame among my California peers that it was renamed in my honor – Navagna.
Navagna dinner parties were legendary feasts where cheap wine flowed like water and breath smelled of buttery garlic bread.
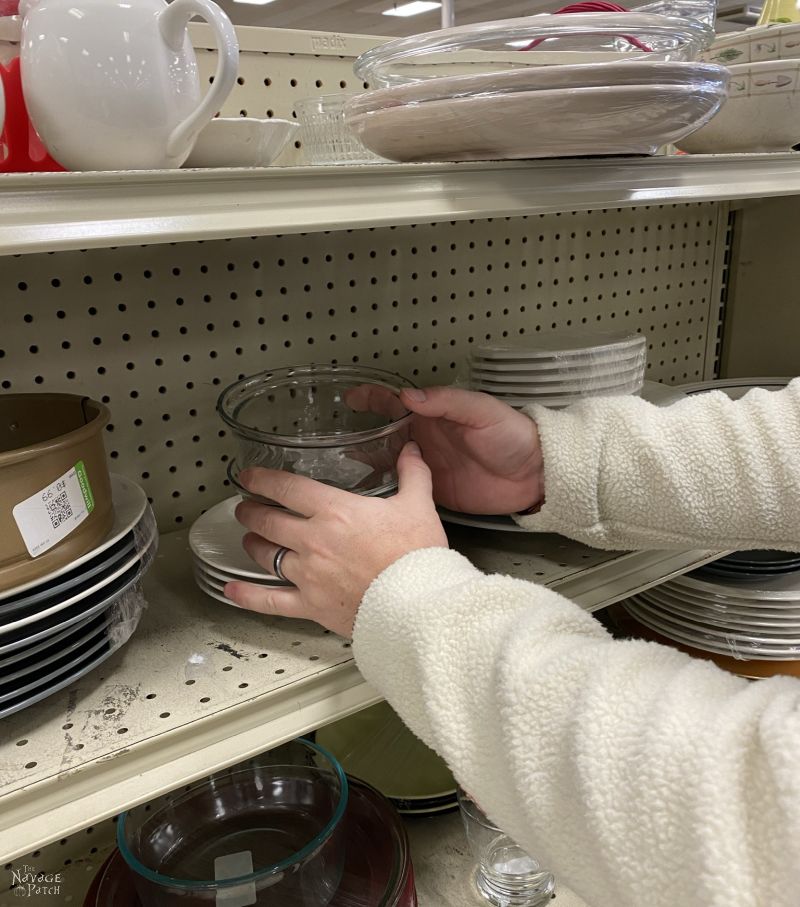
But whereas my mother’s baking dish was always branded as the property of Clan Navage, the dishes I shared with friends on those carefree nights in the city were set free to roam where they may. Perhaps a friend would make something to bring and leave at another dinner party. Sure, it meant I went through a lot of baking dishes, but I was young and single, with a few shekels in my pocket, so I didn’t mind the expense. As I’ve aged and taken on the responsibilities of a family and a house, I’ve kept up the tradition of giving, though not as often as when I was young. And since Handan and I spend so much time browsing through thrift stores, I prefer to buy my baking dishes secondhand.
I didn’t know it at the time in San Francisco, but an idea was forming deep within me – an idea that was only fully realized this year.
While brainstorming ideas for this post – using Cricut for a thrift store baking dish makeover – it occurred to me that what I’d been doing was paying it forward, but with cooking and baking.
And then it came to me.
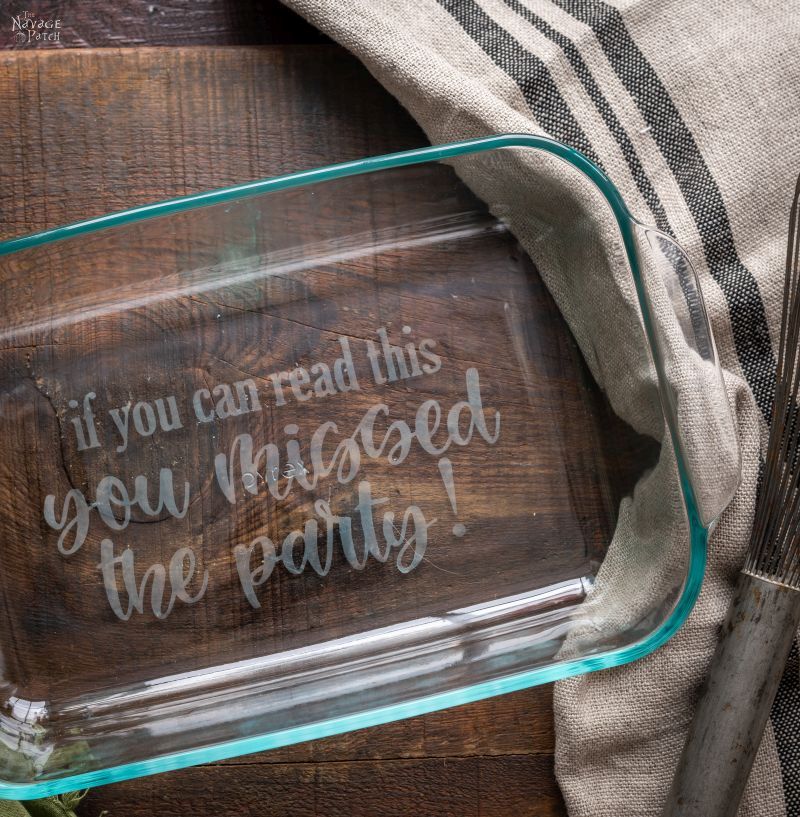
The Giving Dish.1
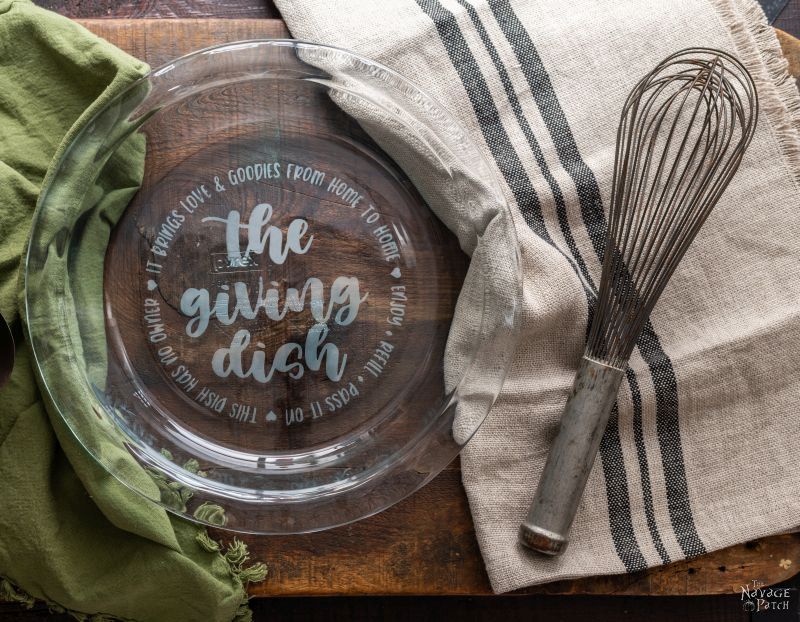
Something you make – lasagna, cookies, casserole, brownies, whatever – and pass on to someone else. When they finish, it is their turn to refill it with whatever they choose and pass it on to someone else.
The Giving Dish has no home, and it belongs to no one. It travels from home to home and brings joy wherever it lands.
The idea for The Giving Dish came to me in January. The time felt right for a little selflessness.
Now it’s one thing to give some brownies to a friend and tell them the lore of The Giving Dish.
But it would be quite another thing if the dish could tell its tale.
Masking tape and Sharpies wouldn’t cut it. We needed something more precise and more permanent.
Glass etching.
With Cricut-made stencils and glass-etching cream, each Giving Dish could announce itself and give instructions for the recipient.
It was the perfect thrift store baking dish makeover.

But we didn’t stop there!
For the baking dishes you want to keep, we have some fun stencils as well!
This was a really fun project, and we learned a ton about glass etching. It’s something we will absolutely be doing more of in the future, and we’ll have a full tutorial, including all of our hard-learned lessons.
But for now, let’s have some fun with our Cricut Makers and Explore Air 2s as we etch some thrift store baking dishes.
Now, you obviously don’t have to use thrift store dishes! I fact, we ended up using a mixture of old and new, and I’ll get into the reasons in just a minute.
Thrift Store Baking Dish Makeover
This is a sponsored conversation written by me on behalf of Cricut. The opinions and text are all mine.
SUPPLIES LIST
Affiliate links are provided below. Full disclosure here.
- Cricut Maker or Explore Air 2 (you could also use Cricut Joy for some of the smaller designs)
- Baking dish and glass etching SVGs (available for free in the VIP Lounge)
- Cricut Stencil Vinyl or Permanent Vinyl (we used some permanent and some regular, but we don’t recommend regular)
- StandardGrip cutting mat
- Weeding tools
- Cricut Brightpad (optional)
- Cricut Scraper
- Blue painter’s tape
- Cricut transfer tape
- Thrift store baking dish (you can find cheap ones at Target and Walmart, if you don’t want to search around thrift stores)
- Armour Etch glass etching cream
- Small foam paint brush
- Nitrile gloves
Not all baking dishes are created equal
I’ve know for some time that Pyrex changed their glass formula a while back. What I didn’t know until we started playing around with etching for this post, was that the old formula won’t etch. From their launch in 1915 to 1998, Pyrex baking dishes and measuring cups were made of borosilicate glass – a much tougher, scratch-resistant, and thermal-shock-resistant type of glass than standard soda-lime glass. So tough, in fact, that it cannot be etched, at least not with consumer-level etching creams. In 1998, they switched to soda-lime glass – a move entirely driven by profit. So while the Pyrex glass of the last two decades is of inferior quality to the older stuff, it can be etched. So how do you know if that thrift store Pyrex is pre- or post-1998? I’ve read that pre-1998 Pyrex is written “PYREX,” while the newer stuff is “pyrex,” but I’m not sure if that only applies to measuring cups. The only way to be certain is to dab a little drop of etching cream in an inconspicuous spot and wipe it off after a minute. If it left an etch mark, you’re good to go. If not, you’ve got yourself a quality piece of baking gear – hold onto it!
You may be tempted to try etching IKEA baking dishes because they are so inexpensive. Don’t. We tried, and it doesn’t work. Turns out, they are made of borosilicate glass, as is all Pyrex manufactured in Europe. Apparently, quality still matters over there. However you can etch IKEA glass that is not meant to be baked!
Another big brand for baking dishes is Anchor Hocking, and though I haven’t tried, I have read that they are etchable as well.
What the heck is glass etching cream?
To sum it up: it’s an acidic cream that acts as a micro-abrasive. Because it is acidic, care should be taken when using. Read all the instructions and warnings on the label, and be sure to wear nitrile gloves to protect your feelers. You many notice crystals in the cream. Don’t worry, it’s normal – those crystals are the active ingredient. But if there are two many of them, you risk “buning” the glass, if they stay in contact with your design too long. In that case, it’s recommended to submerge the closed bottle of Armour Etch in hot water for a couple of hours and then shake the bottle well.
A note on the process pictures
We made a whole bunch of etched baking dishes, and we failed at a whole bunch more (before we learned that you can’t etch borosilicate glass), so you’re going to see all sorts of process pics with all sorts of colored vinyl and different shapes and sizes of baking dishes. Don’t worry if there’s no continuity of color, size or shape – the process is the same!
Step 1 – Upload your SVG to Design Space
You can find our Giving Dish SVG, as well as many others for glass etching in the VIP Lounge. If you are uncertain how to upload SVGs to Design Space, please check out our Cricut Crib on uploading SVGs.

Once the SVG is on the Canvas, you may resize it according to your baking dish size. We found that 6.25 inches worked great for a standard-size round pie dish. Once you’ve dialed in the size, click Make It.

Now your SVG is on the Design Space Mat. First, you must mirror the lettering, then click Continue.

Step 2 – Prepare the cutting mat
Place your stencil vinyl on the StandardGrip cutting mat, then feed the mat into your Cricut Maker or Explore Air 2. Note, we used some permanent and some regular vinyl in order to use some of our less popular colors. We don’t recommend using regular vinyl for this project. We did have some bleed-under issues with regular vinyl, and unfortunately, you’re kinda stuck if that happens. Kinda, not entirely – we’ll show you a cool work-around to fix minor flubs. But the best way to avoid any issues is to use permanent bond vinyl. It will ensure the best adhesion of your stencil and minimize the chances of bleed-under.

Step 3 – Press the button
Yeah, that blinky letter “C” with antennae…press it!
Step 4 – Weed the stencil
It was around sunset when I weeded the Giving Dish stencil, and the light was a little dim in our new craft room. It was the perfect time to use our Cricut Brightpad! It really makes weeding easier. It’s by no means a necessity, but it’s a little luxury that gives my aging peepers a little break.


Step 5 – Prepare the baking dish
Remember, we’re putting the stencil on the bottom of the baking dish! Flip it over, and wipe it down with rubbing alcohol or glass cleaner.
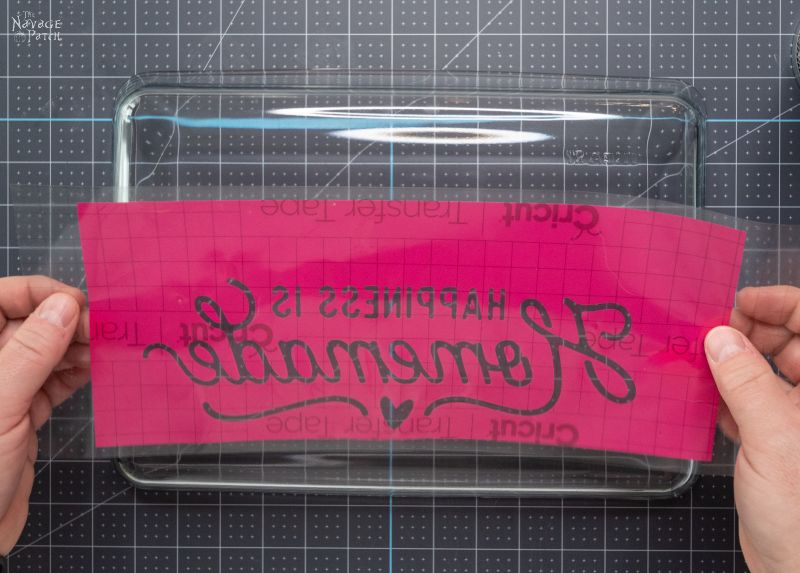
Step 6 – Transfer the stencil to a piece of transfer tape
You may need to use your weeding tools to coax some of the smaller pieces onto the transfer tape.


Step 7 – Apply the stencil to the baking dish
I lined up the dish on the centerline of my Cricut self-healing mat – this made it easier to eyeball the placement of my stencil. Eagle-eyed madams will note that I’m putting this stencil on an IKEA baking dish. We all know what that means, right? Yep, this particular etch didn’t work. Not one teensy little scratch. But hey, it’s a nice picture of devilishly good-looking fingers, so…not a total loss, amirite?
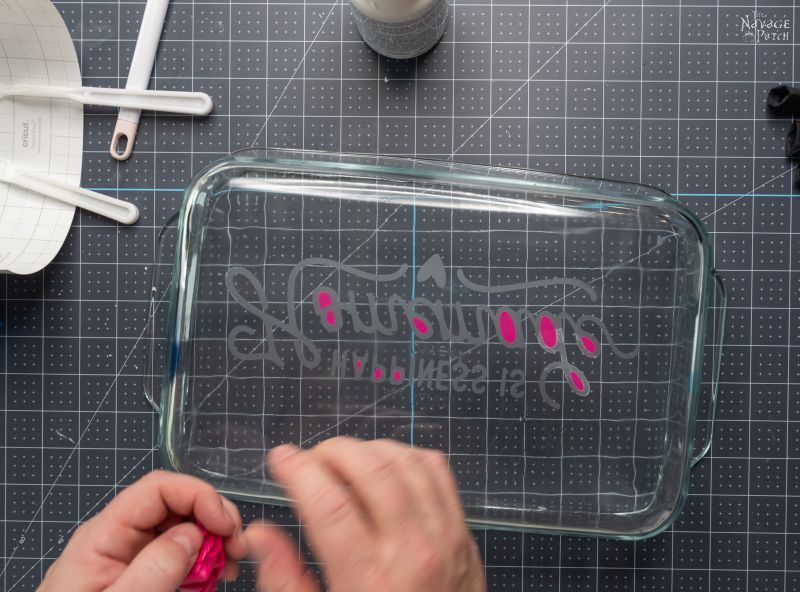
Step 8 – Destroy all air bubbles
Air bubbles are an existential threat to the success of your baking dish makeover. They must be hunted down and eliminated. The best tool for beating back the bubbles is Cricut’s scraper. But don’t get suckered in to using the white edge – we found the handle works better for these intricately-lettered stencils.

Step 9 – Tape around the edges with blue painter’s tape
This prevents any accidental oopsies from ruining your beautiful baking dish.

Step 10 – Apply the etching cream
Shake the bottle well.

Apply enough to cover the stencil when brushed around.

Wipe the etching cream around the stencil, and continually and gently work the cream around with a foam brush

This video shows the best way to achieve a nice, uniform etch. I’m not applying any pressure – I’m just moving the cream around the stencil. Some say not to leave the cream on for more than a minute. As long as you move it around as shown below, you can leave it on for 5 minutes or longer for a beautiful, deep etch.
Step 11 – Rinse
Rinse the baking dish under lukewarm water. You must do this in a stainless steel sink or a plastic utility sink. If you wash into a porcelain or shiny fireclay sink, you risk etching the finish on the sink, and you’ll lose that lovely shine you paid so much money for. 🙁

Step 12 – Peel the stencil
After rinsing and drying, it’s time to remove the blue tape and peel the stencil.

Success!
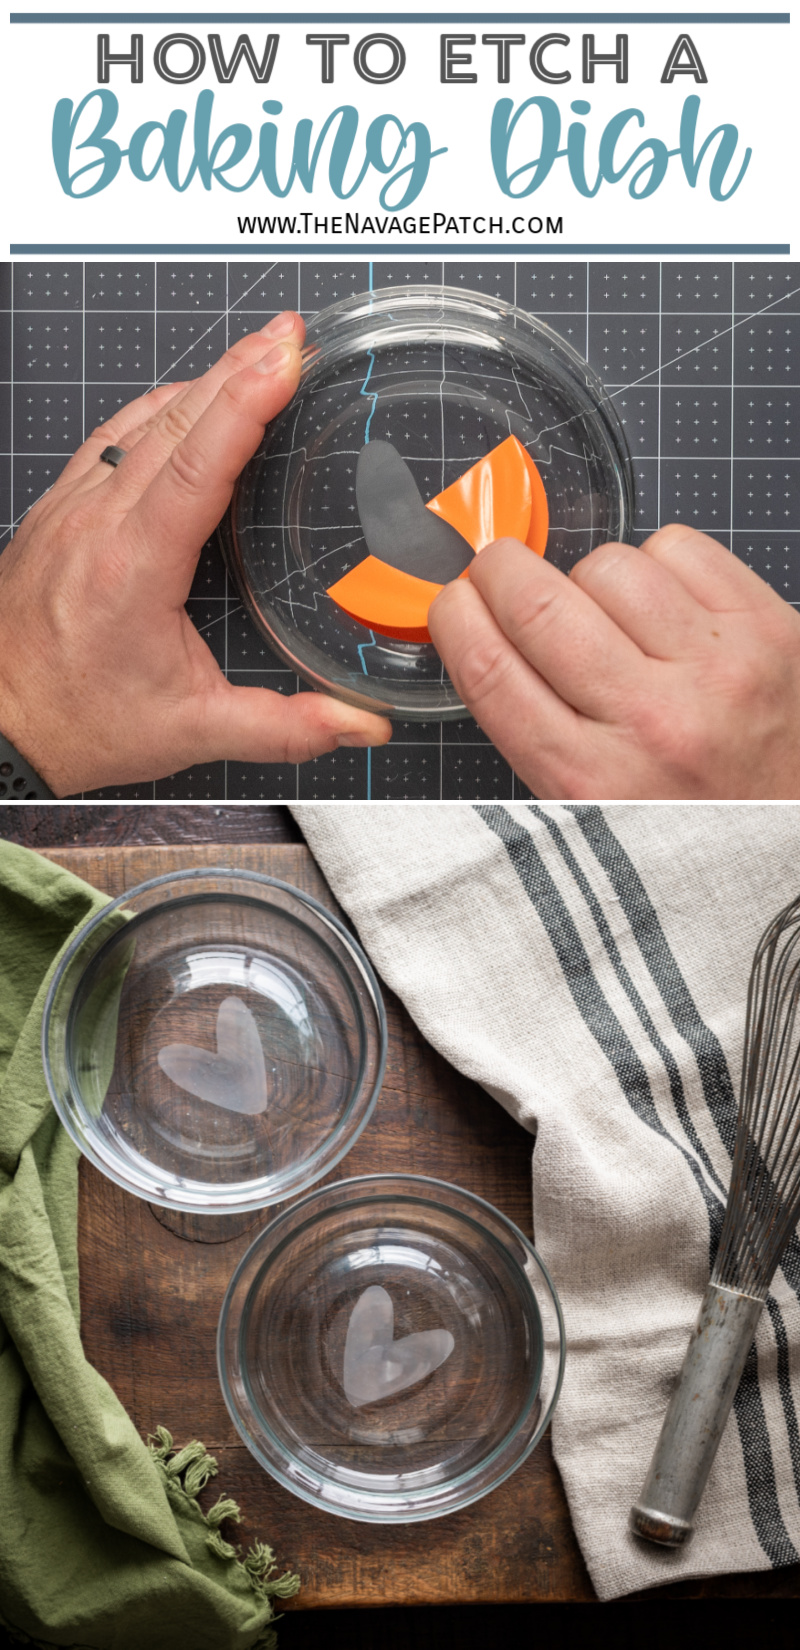
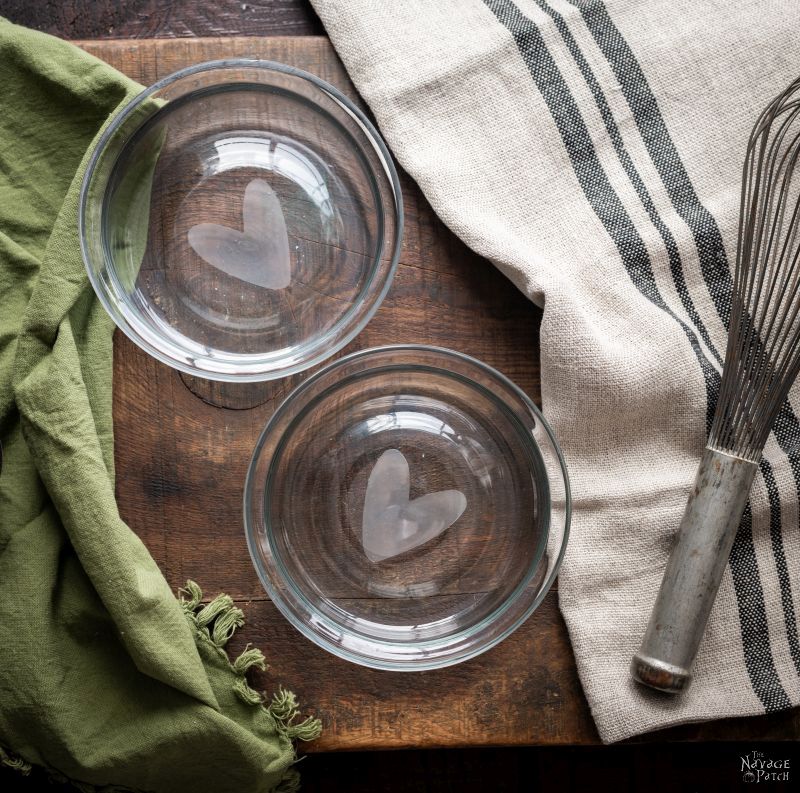
Ooopsies! I goofed! Do I have to sit in the corner?
Hey, it happens, usually to me. See this heart? I used regular vinyl for the stencil, and I didn’t quite get all the air bubbles out. This was the result:

I thought I’d have to live with those two little imperfections, but then I remembered when I was rinsing and drying my first etched dish, before I had it totally dry, there was a wet spot that I thought was an area that didn’t get etched. The water made the etch seem fainter. Once I properly dried the dish, the etching was uniform. I knew that lacquers can have a similar effect on hazy landscape lighting solar panels, as I discovered a few years back, so I thought perhaps clear nail polish might clear up an errant etch.

I put a small dab of nail polish next to the two flaws. I didn’t want to get too close with the nail polish brush in case it touched the good part of the heart design. Then, with a toothpick, I carefully worked the nail polish towards the flaws until I had them covered.

A pretty good fix! Now, this particular thrift store dish (of which there are two), is meant to be a candy bowl, so it’s never going to see any heat. I don’t know if my nail polish trick would work on a baking dish. I’ll have to try it out to see.

The results
Our experiments with etching thrift store (and non thrift store) baking dishes was a great success, and despite our many setbacks, Handan and I had a blast making them. I have a blast doing any craft with my babes. Making is just better when you share it with someone you love! Let’s have a look at some of our baking dish makeovers!

The Giving Dish
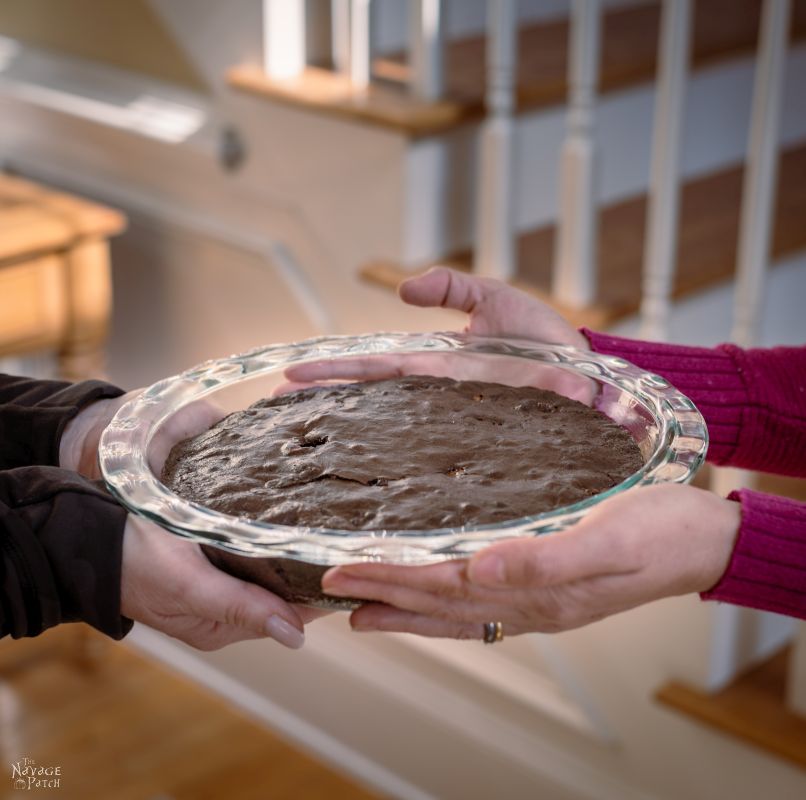
Last, but definitely not least – here is our Giving Dish.
I had to send it out in the wild, but I wasn’t quite prepared to bake a pie. But who says you can’t use a round dish to bake a traditionally rectangular treat, right?
Introducing the Reese’s Peanut Butter Cup Crunchy Chewy Brownie…baked in a pie dish.

If you like your brownies a little crispy on top with a gooey-chewy middle, this recipe is for you!
We love to see our printables out in the wild! If you display our free printables in your home or use our free SVGs in your projects, and take a picture and post it on Instagram, be sure to tag us – thenavagepatch
Handan and I delivered this very first Giving Dish to our neighbors across the street. Beth accepted the handoff from Handan.

Little Charlie wouldn’t stop staring at me. I think he was expecting a treat of his own!

I guess next I’ll have to make a Doggie Giving Dish!
1Some of you may have realized that my Giving Dish idea is pretty similar to something called “the giving plate.” What can I say? I came up with an idea I was so proud of and excited for, and then I Googled it…only to find out I wasn’t the first to have the idea! Oh, well, it’s the sentiment that counts, right? 🙂

FREE Baking Dish SVG Files
We created today’s FREE Baking Dish SVG designs as JPG, PNG and SVG files which are resizable and compatible with Cricut and all other cutting machines.
Now go ahead and click on the button below to download today’s freebies – they are all in the “SVGs – Stencils” and “For The Kitchen” section of the VIP Lounge.
take me to your
amazing freebies library
If you’re not a Navage Patch VIP, you won’t be able to access our Freebies Library. But that can be easily fixed! Subscribe for free on the form below and become a Navage Patch VIP. Once you subscribe, a password will be sent to you in our Welcome email, and that will give you access to the VIP Lounge [Freebies Library].
Share it on Pinterest & Facebook!


Wonderful ideas! Thank you for your generosity!
Thank you, Anne – you’re welcome! 🙂
I love these and will definitely be giving this a try! Many of my baking dishes are old and we do love to thrift (and visit IKEA) so I’m glad you pointed out they don’t etch. Hopefully I have some I can play with or I guess I’ll be shopping for newer ones to give away. Thanks for the great post!
Thank you so much, Pam! Have fun! 🙂
Love this project! I’d like to carry it further and do a gift set… a pie plate for quiche and a set of monogrammed wine glasses…. the new stemless ones. Will the stencil tape work on the curve of the glasses?
Thanks, Karen! Stencils will work on curved surfaces – you sometimes need to make relief cuts (see this post: https://www.thenavagepatch.com/diy-rae-dunn-ornaments/ ), but with some finagling, they’ll conform without too much trouble.
I do a lot of glass etching. Wine glasses can be very difficult to use a stencil on. One place that I find to have a huge glass selection at is the dollar store. I have found the same glassware there as I have seen at the thrift store for twice the price.
You are so right, Kathy, and we already have some Dollar Tree glass etching projects in the works!
Greg, I love the idea of the Giving Dish. I plan to do that. How do work around the name raised on the back of the dishes?
Thank you, Ethel! I just ignore the raised lettering – it doesn’t get in the way too much. Just be sure to really work the stencil in those areas to ensure there are no gaps for the etching cream to seep under.
What a wonderful idea! Thanks so much for sharing!
You are so very welcome, MaryLou! 🙂
Ty so much for your ideas & instructions. You are so amazing sharing so much of your life & family. Your homes are lovely.
God bless.
Thank you so much, Marcia. Blessings to you and your family. 🙂
Thank you, Thank you, Thank you! My friend and I have been talking about doing this for a while. I’m so glad you did a tutorial on how to do this because your tutorials are the best!
You’re welcome, Patricia! I’m so happy you found it useful! 🙂
Love this! And Love you guys for posting it!! During this time-we all need a little ❤️ LOVE!! I would have NEVER thought of getting Thrift Store baking dishes!! I just get cheap ones from Walmart and don’t expect them back!! Genius to get them from the Thrift Store!! And I am 60 years old!! Never thought of it til you opened my eyes!??
Thank you, Anne! We agree – it’s time to spread a little something different! Glad we taught you something new about thrift store baking dishes! 🙂
I love this but what could I do if I don’t have a stainless or plastic sink at all? I have a so ugly I hate it white kitchen sink, but even if I hate I don’t want to hate it more LOL. I love your potluck stories too. I grew up in the 60s and 70s mostly the 70s, and potlucks were almost a weekly thing whether at church, at the grands house or my aunts or just friends getting together.
We have a few real family traditional dishes like a broccoli cheese dish made with, of all things lol, cheezwiz frozen broccoli, Ritz crackers and lots o butter. One time I said why is this soooooooooo good, my father said butter more butter and cheese enough said. Seriously I love that dish.
Anyway you brought back a ton of memories, like my grandma phoebe’s tamale pie casserole or my other grandmas potato dish so many great times that miss so much especially these days where it feels like the world is evil and sad memories of the church basement filled with voices and smells of pure love good things to think about. Thanks. Lori
Hi Lori, maybe you could tape a garbage bag in your sink, with a hole cut where the drain is? Your broccoli casserole sounds awesome – I’ll have to come up with a keto version!
I love this idea! Thank you for sharing.
Just an FYI, Oracal makes a stencil vinyl called Oramask that works awesome for more intricate designs.
As always, you guys rawk!! ?
Thanks, Mo! Just ordered a 50-foot roll of Oramask!
Mo, you’re a genius! That Oramask is incredible! Thank you for the tip!
I love this but unfortunately, I do not own a cricket. Do you have any other suggestions?
You can make your own stencils if you keep them simple. I have never bought a stencil although I can’t put a lot of detail in it. I get many ideas from clip art. Besides flat surfaces, beer steins are one of the easiest pieces to learn on.
Thank you for sharing these files … what a great idea!
Thank you, Debbie! 🙂