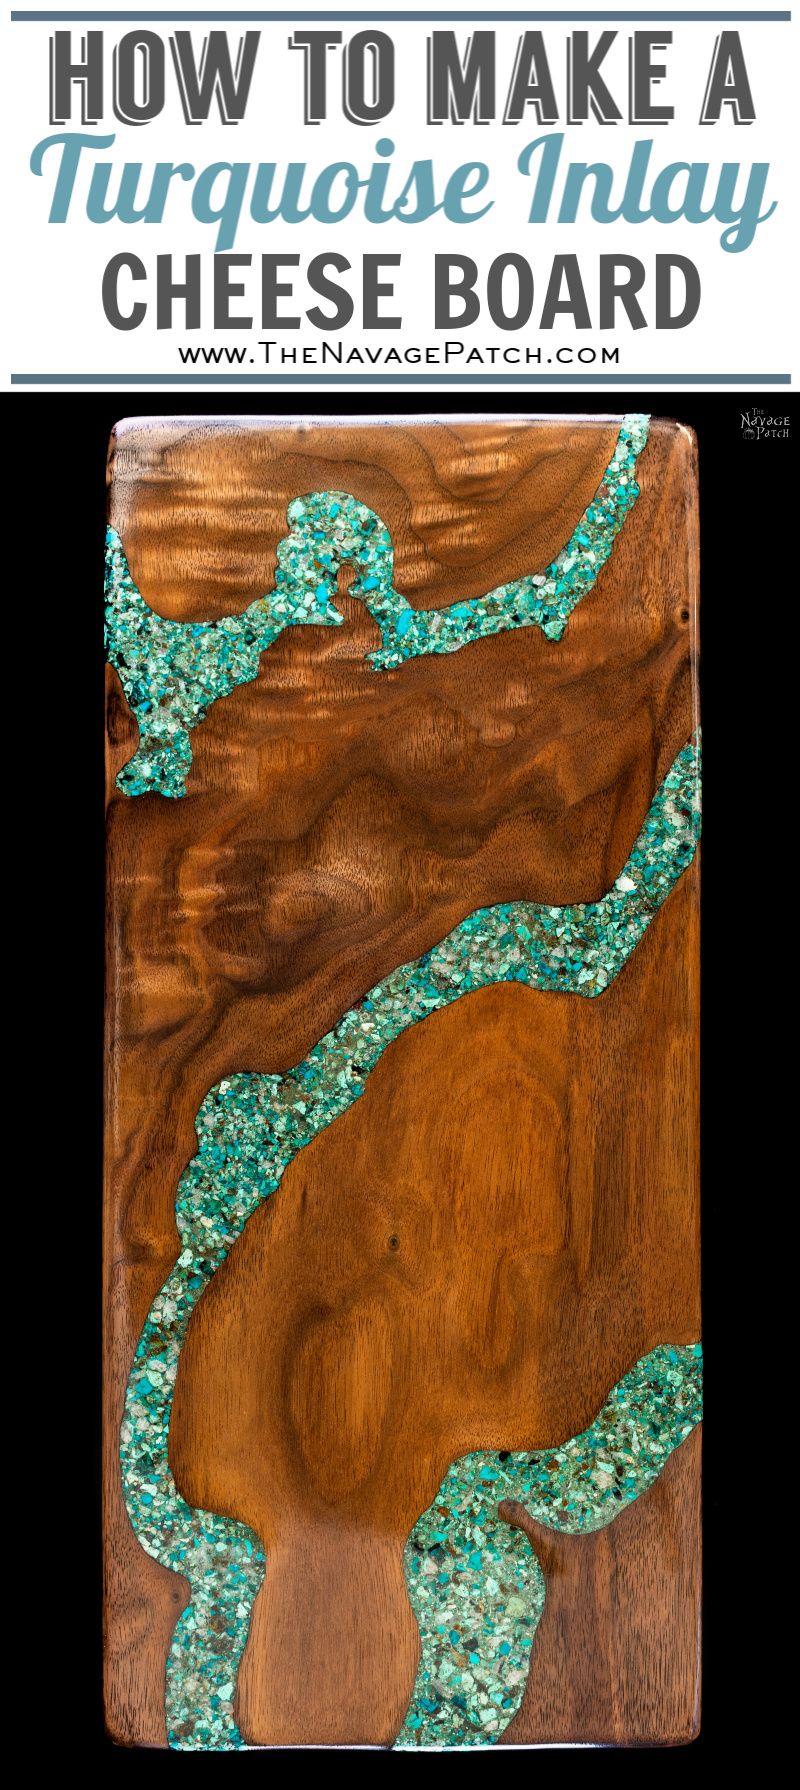
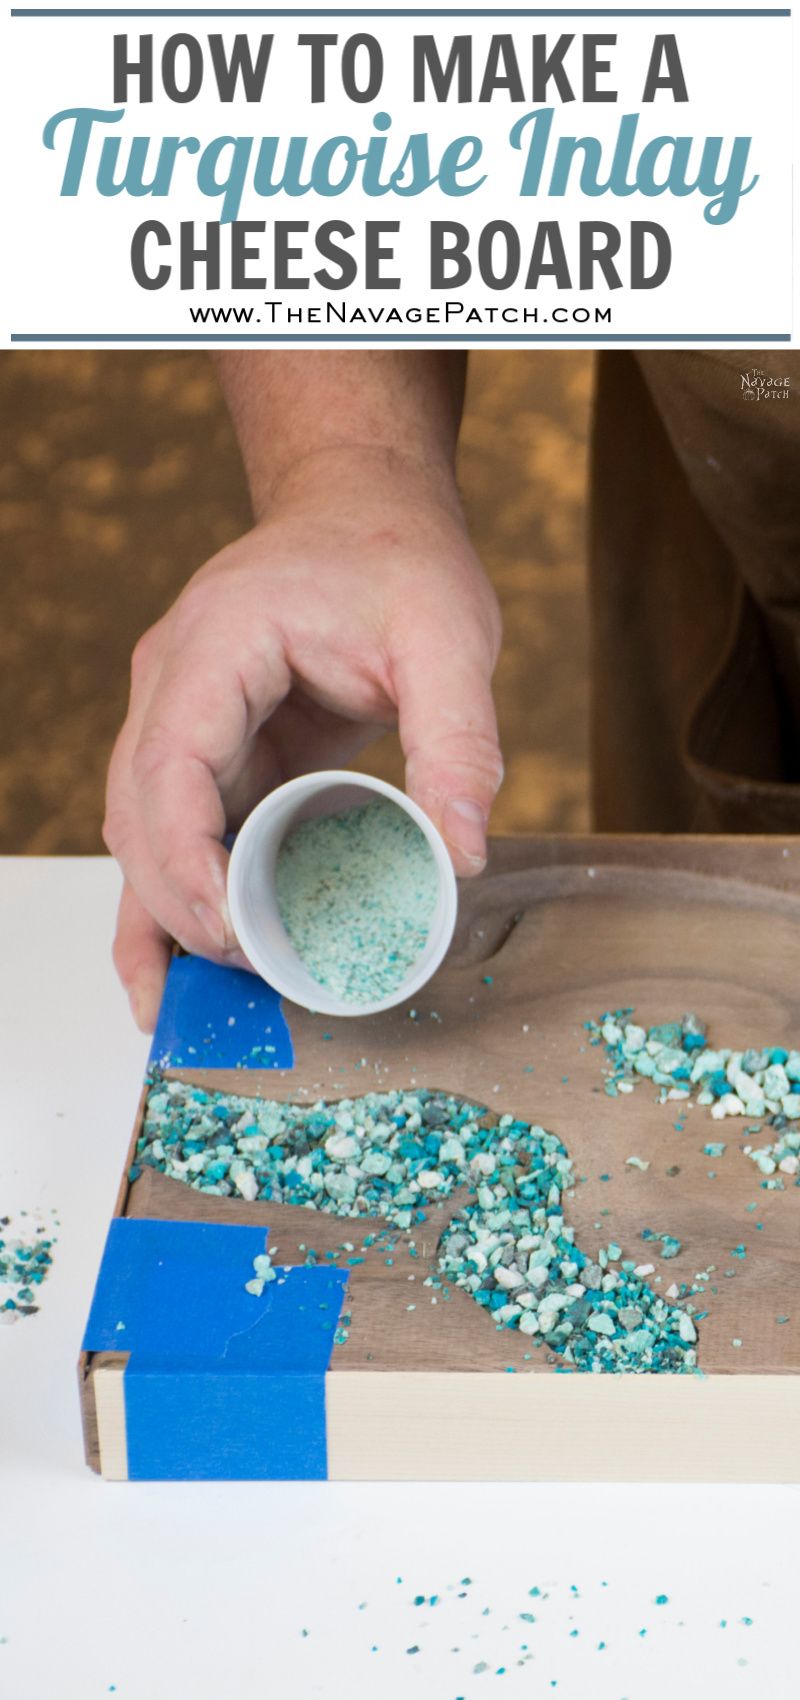
How to Make a Cheese Board with Turquoise Inlay
In this tutorial, I will show you how to make a cheese board with turquoise inlay. I’ll also teach you how to make your own crushed turquoise from raw ore.
Soon after we launched this blog, I wrote a tutorial for making an end-grain cutting board. I didn’t want to write the post. I honestly didn’t think anyone would care. There were already hundreds of videos and tutorials for making cutting boards, so why would anyone want to read mine? I was a relative newcomer to woodworking, and a total noob to blogging. But my wife wanted me to write it, so what choice did I have? (answer: none)
That little tutorial, which I was totally against writing, went on to become one of our best-read posts! The lesson is obvious and applies to all men: always listen to your wife. They know things.
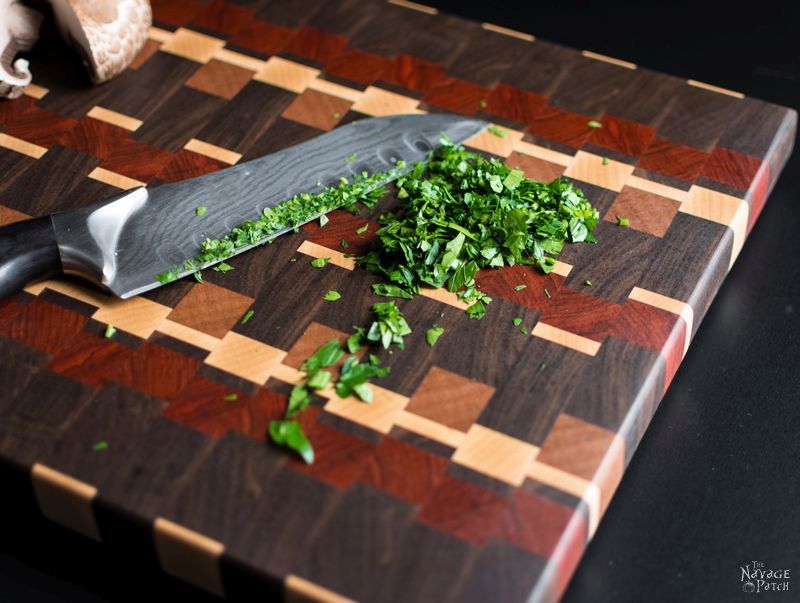
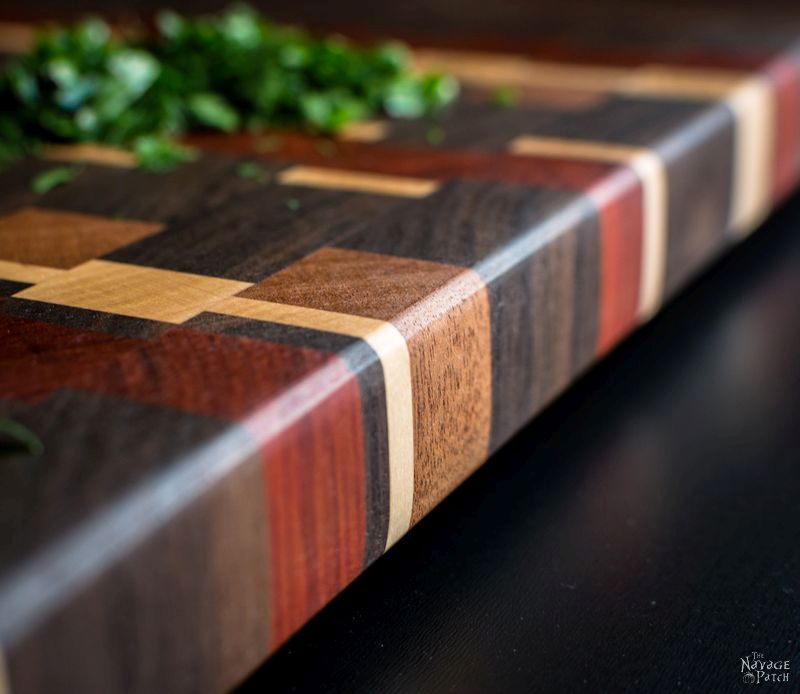
Although, looking at the picture above, maybe she had a point. But the downside to that post was that I was deluged with orders for cutting boards that Christmas season. I could accommodate a few people, but my basement lair workshop is not set up for mass assembly, so I had to turn most people down. Besides, with the labor involved, even with a substantial price tag, making boards was not an economically sound business model. So those Christmas boards were my last. I was boarded out. I didn’t want to look at another cutting board, unless I was chopping onions on it.
But as the months wore on, I found myself thinking about cheese boards from time to time. Cheese boards can be identical to cutting boards – that is, they can be end-grain or face-grain and used for cheese or chopping. But cheese boards allow a freedom of construction that traditional cutting boards do not. A cutting board needs to stand up to, but be gentle on, a sharp knife (wood and plastic rule for cutting boards). A cheese board does not. So, whereas you wouldn’t dream of chopping veggies or cleaving a ham hock on a piece of stone, you wouldn’t think twice about running that little round cheese knife through a wheel of brie plopped on a shiny slab of marble.
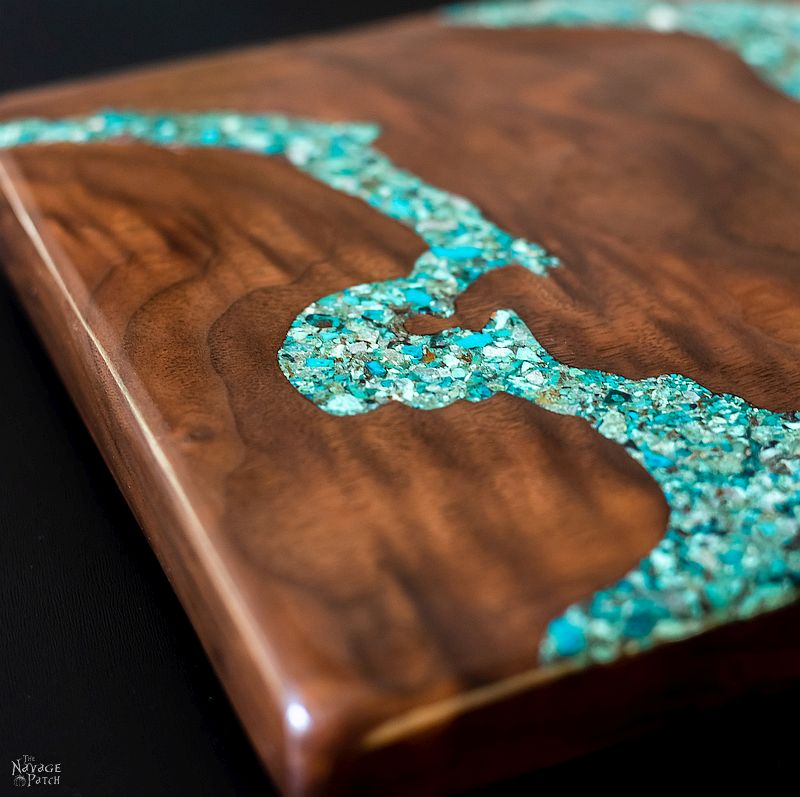
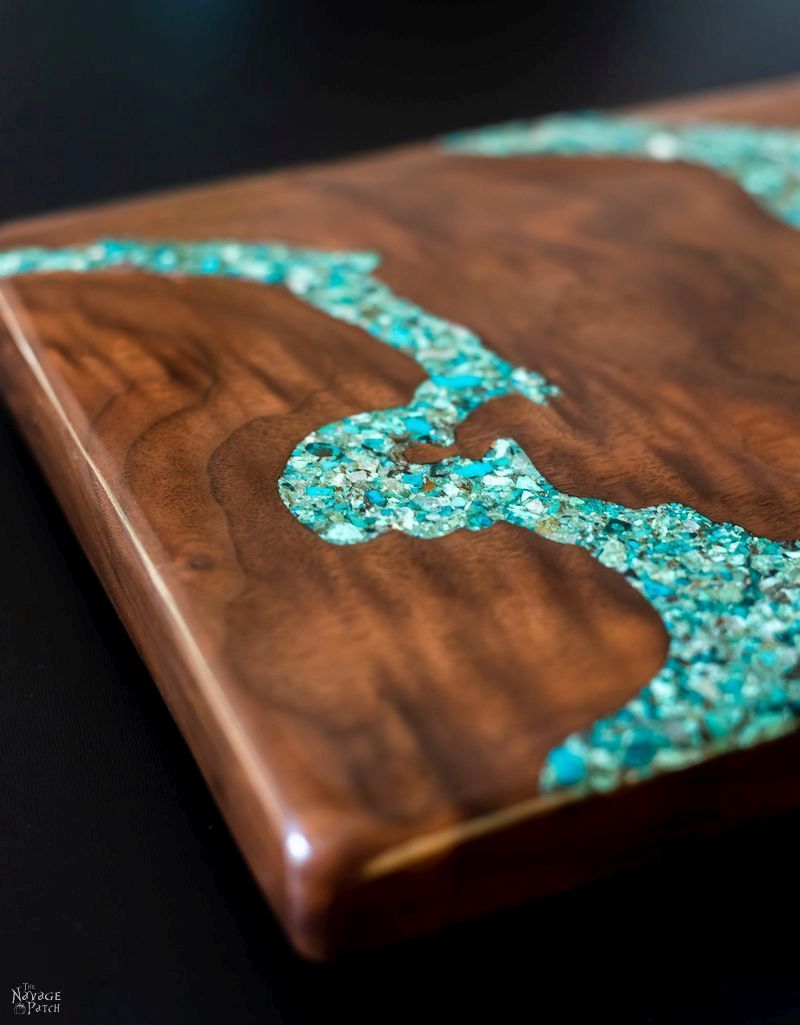
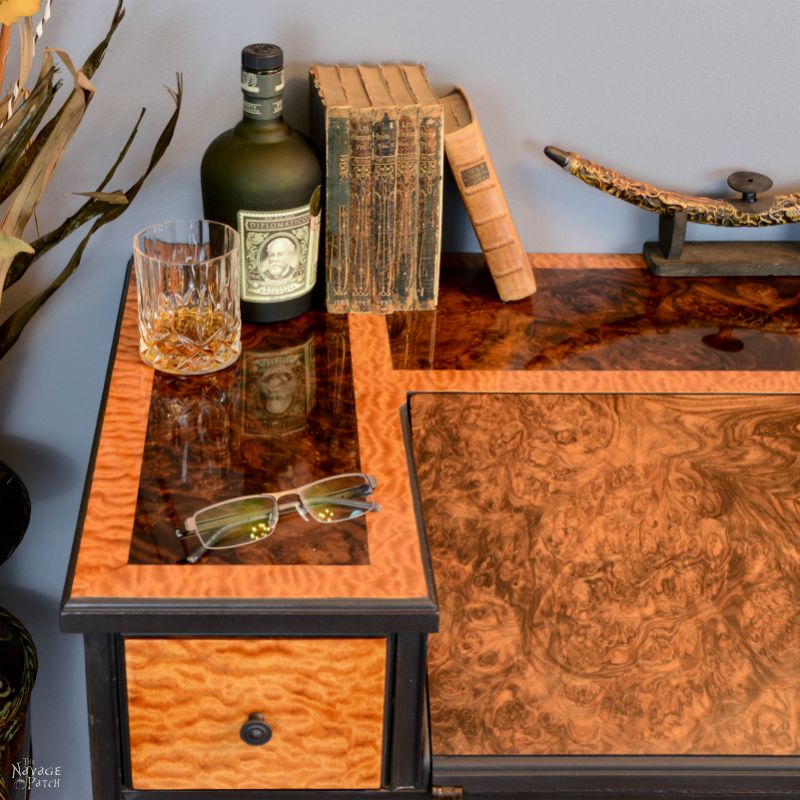
That thought of a stone cheese “board” got me thinking. What if I made a new kind of cheese board? Something with class and elegance. The board I had in mind would be made of walnut with rivers of crushed turquoise inlay coursing through its grain. I had just the piece of wood in the basement…
How to Make a Cheese Board with Crushed Turquoise Inlay
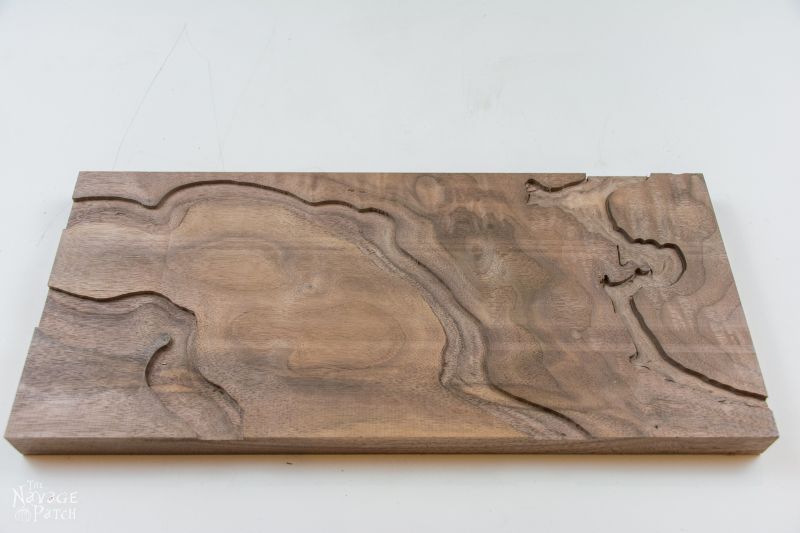
Two years ago I bought an 8-foot length of walnut that was 8 1/2 inches wide and about 1 1/2 inches thick. Normally walnut has rather straight and uninteresting grain, but this piece had highly detailed (figured) grain running down its length. I wanted to use it for something special.
Well, as the months rolled on, I used a piece here and a piece there for some end-grain cutting boards I was making, but I never got a chance to showcase that beautiful figure. I held onto a piece in the hopes that one day I’d use it in a project where the walnut’s beauty would shine. That day had arrived.
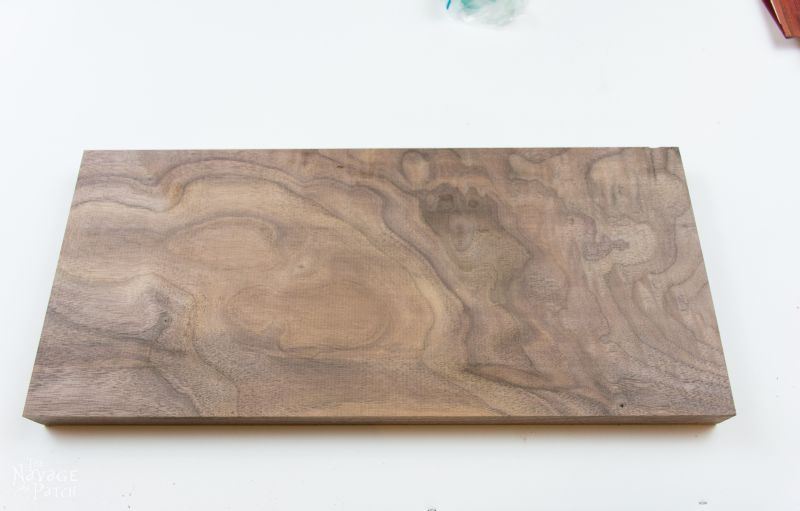
Instead of cutting the board into strips, I would keep it whole. I wasn’t worried about it warping at this point – the board had been sitting in the basement for two years enduring hot, humid summers and chilly, bone-dry winters. If it were going to warp, it would have done so already. Besides, the crushed turquoise inlay would help keep it straight.
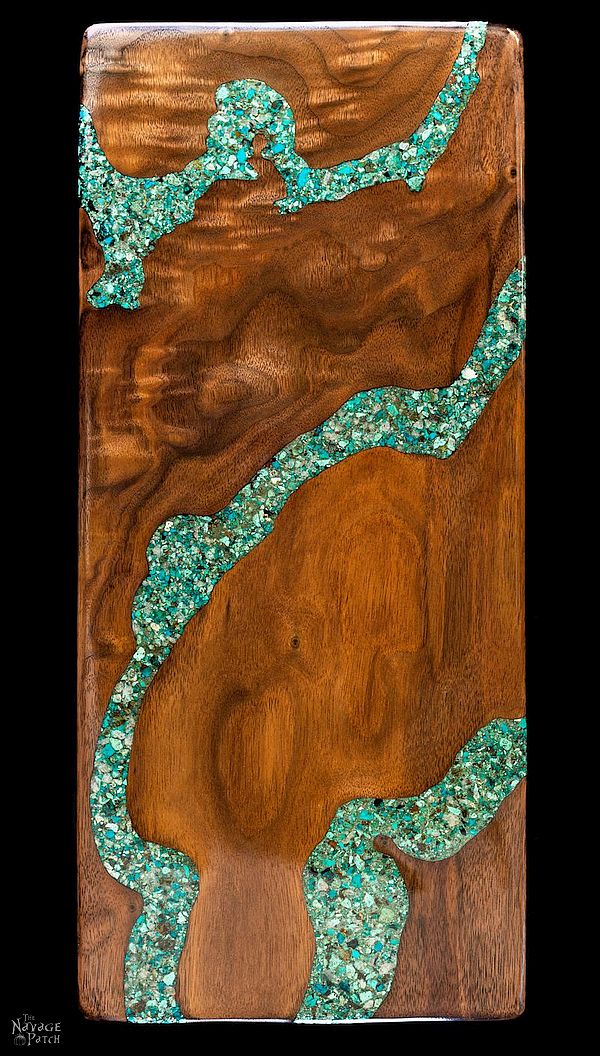
There were some interesting grain patterns there. I outlined three of them with pencil.
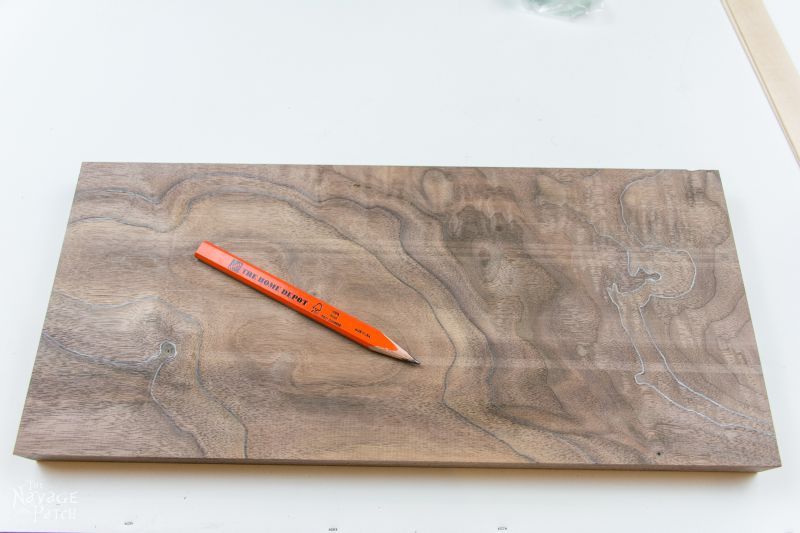
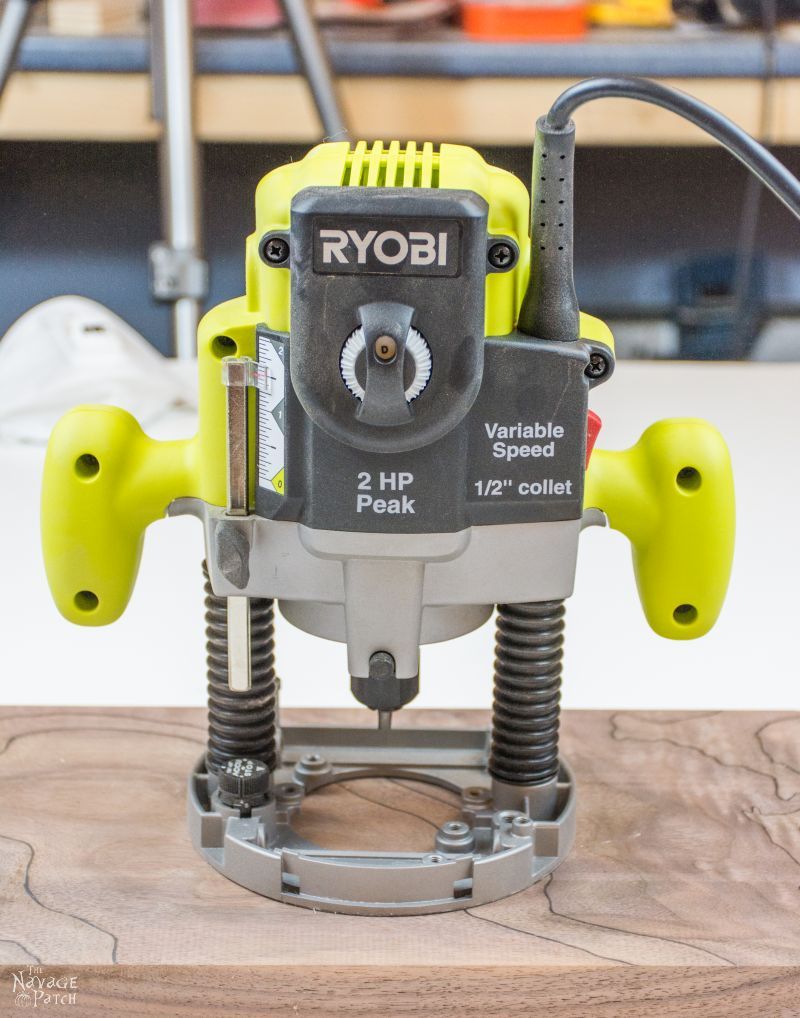
These would be my three turquoise inlay rivers. I used a plunge router with a 1/16 inch straight bit to trace out the edges of my rivers. I set the depth to about 1/8 inch.
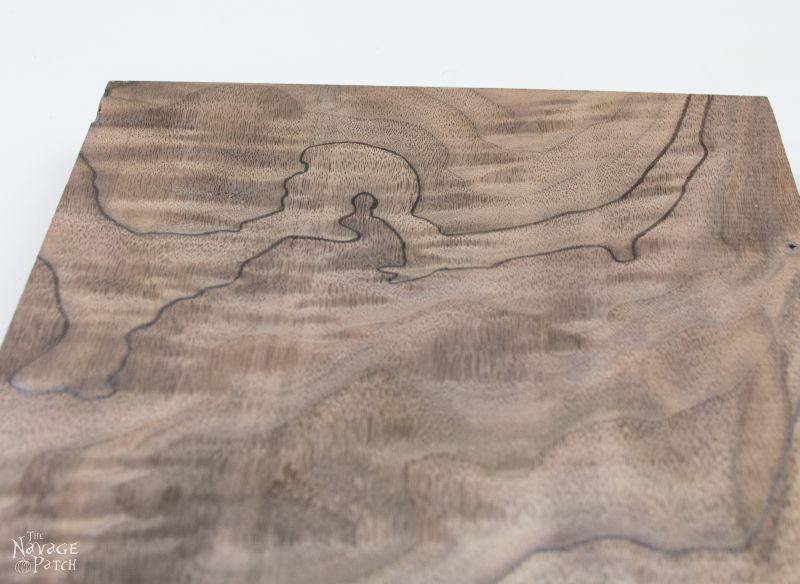
This is how it looked when the initial tracing was complete.

Next, I swapped out the 1/16 inch bit for a 1/8 inch straight bit. With this bit, I chewed away at the remaining wood in the riverbeds.

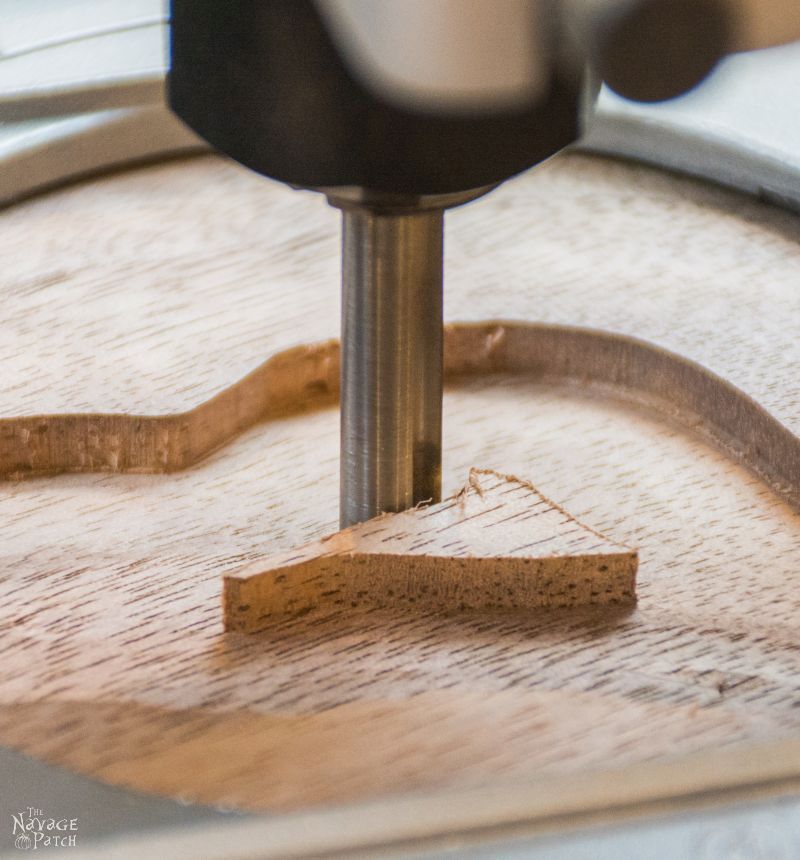
Until the board looked like this.
How to Make Your Own Crushed Turquoise from Raw Ore
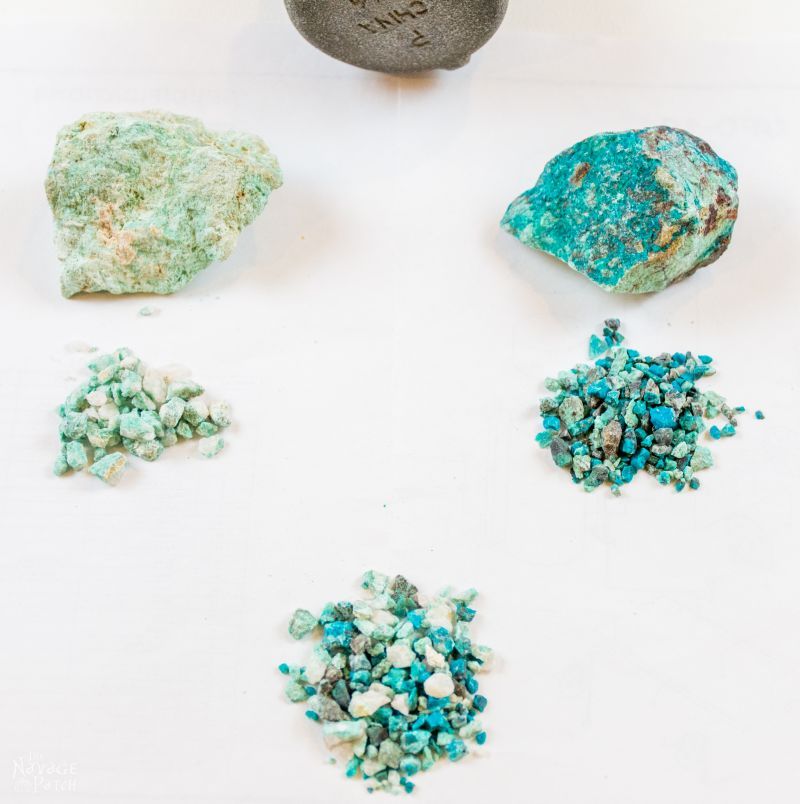
The board was ready for the crushed turquoise inlay, but first I had to get some crushed turquoise! I had gone through the hair-whitening task of pricing crushed turquoise a couple of years ago when making my Beauty in the Beast console. Jeezum Crow! I would expect a baggy full of gold nuggets and maybe a piece of the Holy Grail for the price these people were charging for crushed turquoise! As is always the case when confronted with heart-seizing sticker shock, I found a way to DIY my crushed turquoise. I found several people on Ebay who sold rough raw turquoise. I bought some from one seller that had pure turquoise mixed in some white rock ore. I bought some from another seller that was a mix of turquoise and chrysocolla.
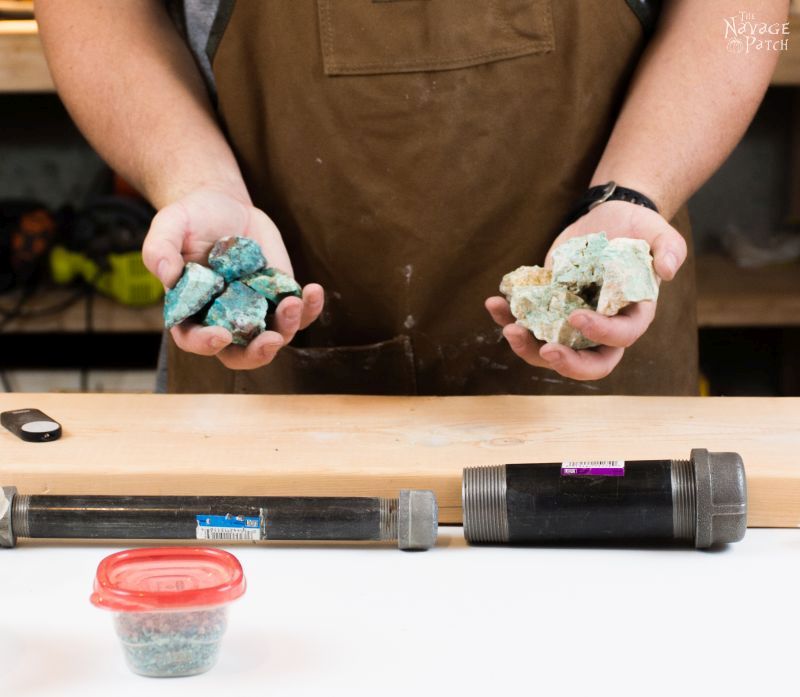
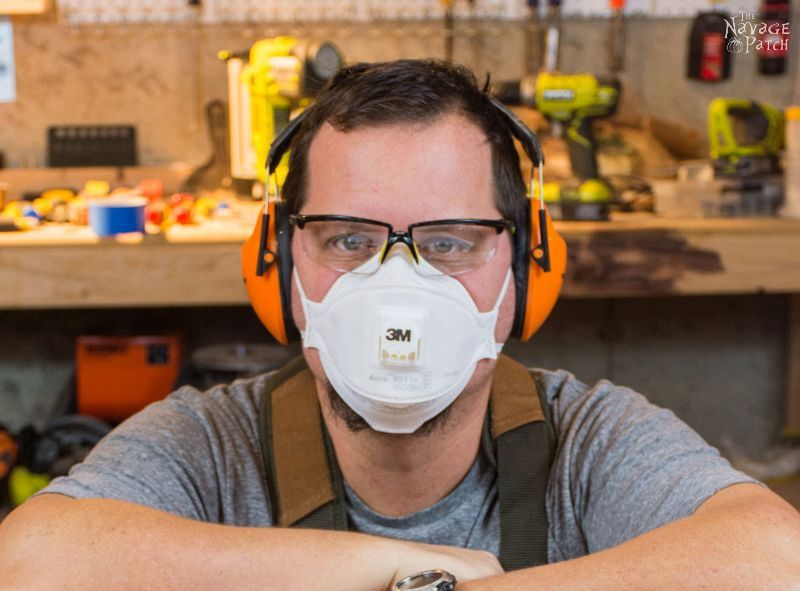
There are two pieces of pipe in the picture above. One is 1 1/2 inches wide by 6 inches long, and the other is 3/4 inch wide by 10 inches long. The narrow pipe has end caps on both ends, while the shorter pipe only has one end cap. I used them to crush my turquoise. Before starting, I put on the appropriate protective gear. Turquoise dust (or any rock dust, for that matter) is bad for the lungs, so I wore a particulate filter mask. Since hammering the rock was really loud, I wore hearing protection. And just in case a stray piece of rock decided to fly towards my eyeballs, I wore safety glasses.
First, I selected a piece of ore.
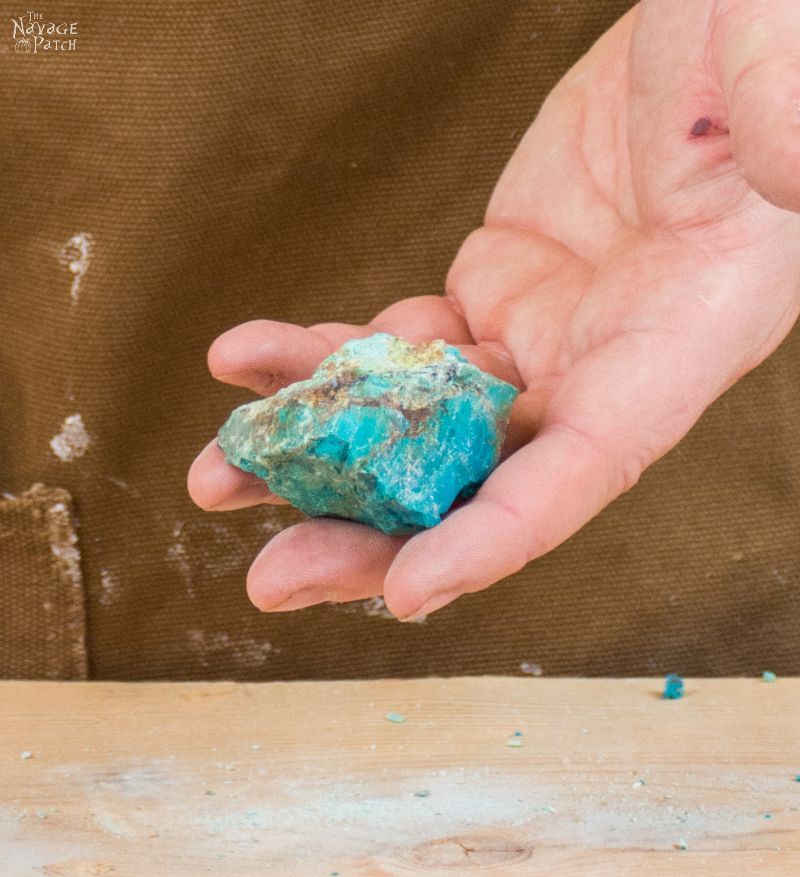
Then, I checked to see if it would fit into the wide pipe.
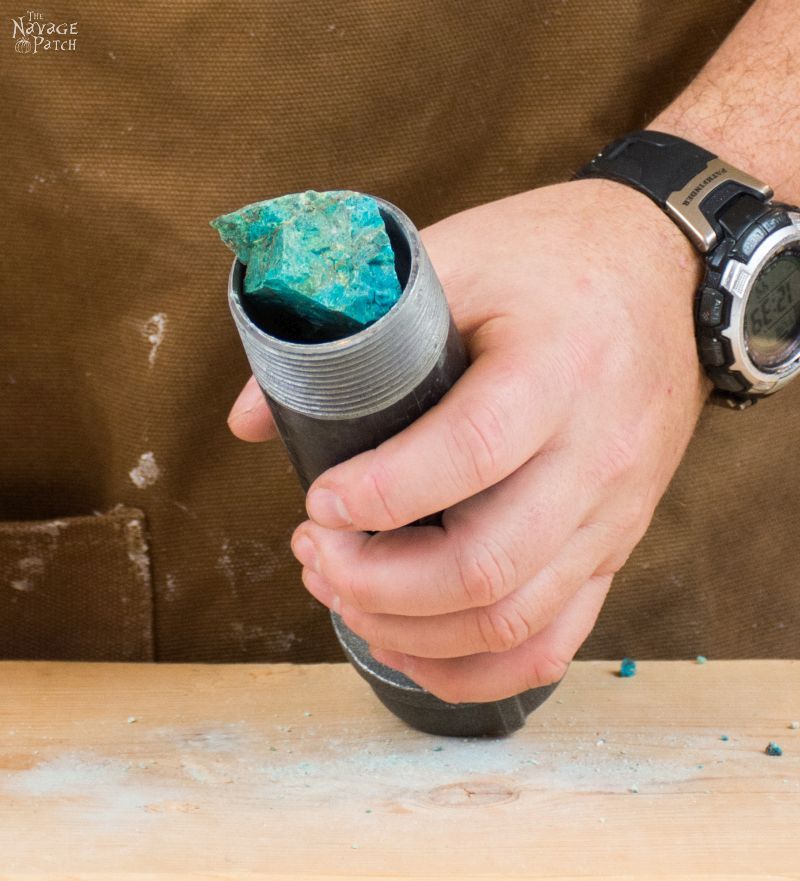
This piece of turquoise was a little too big, so I hammered it in.
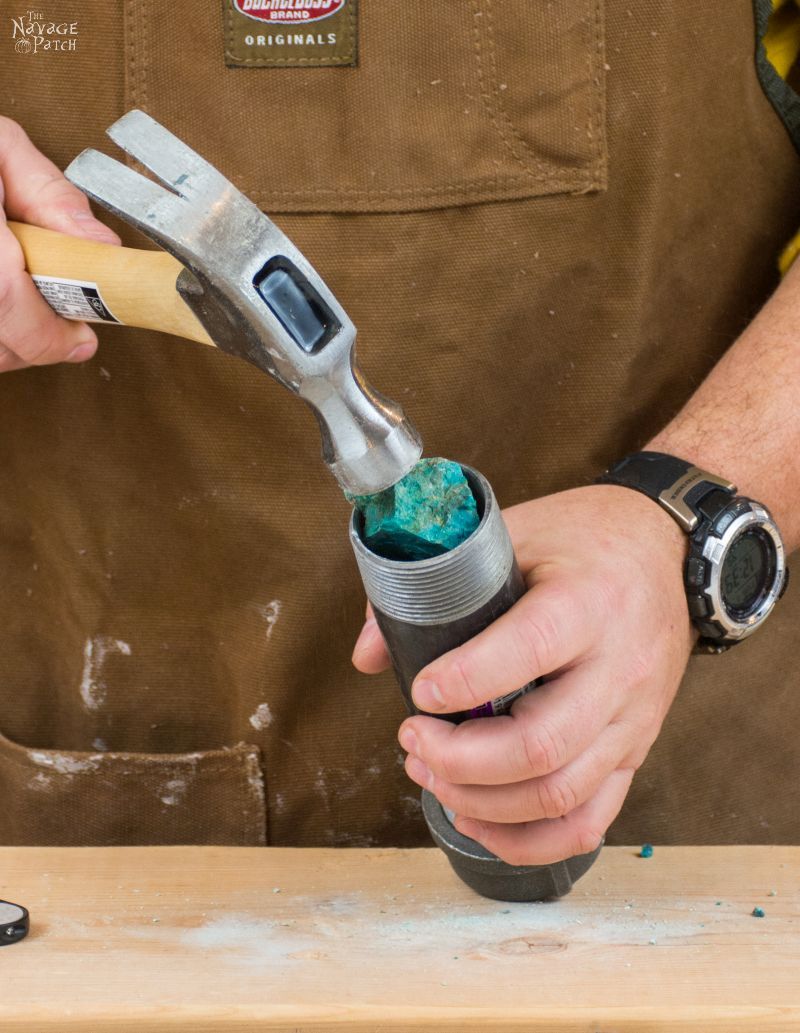
I then inserted the narrow pipe and beat it with a hammer for a little while, occasionally dumping the pieces into a box to check how things were going.
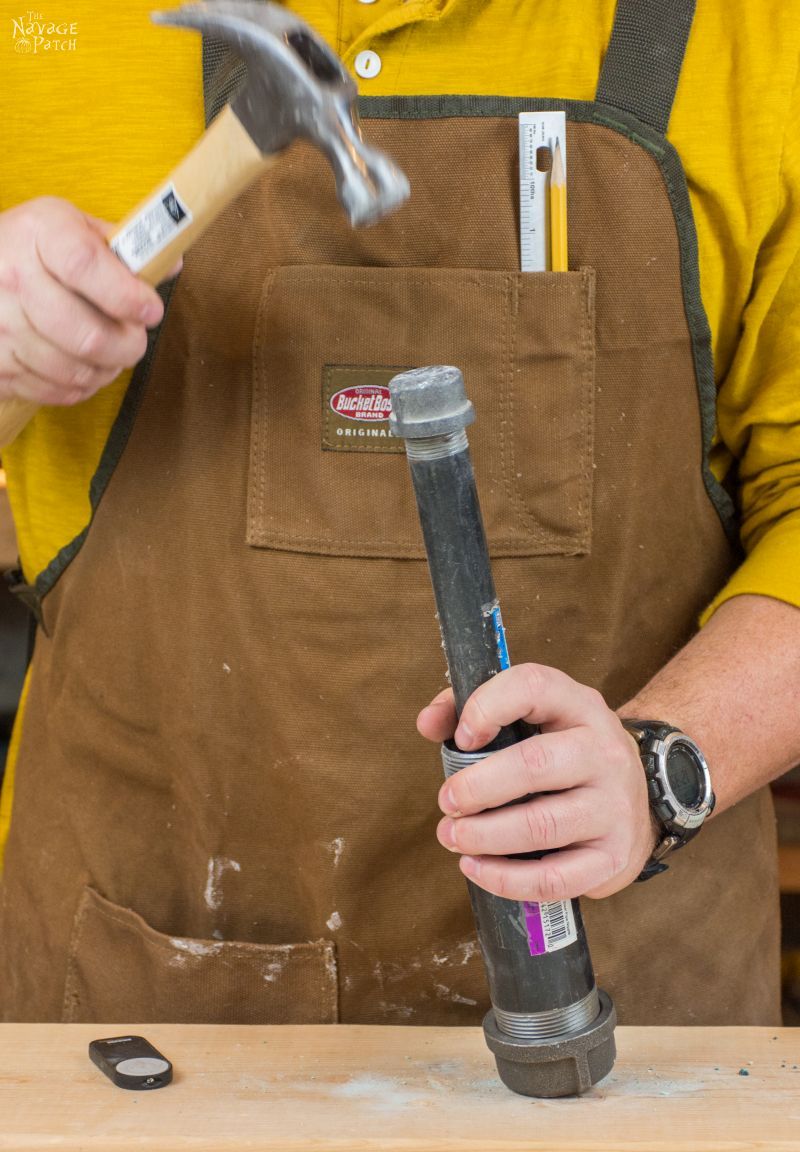

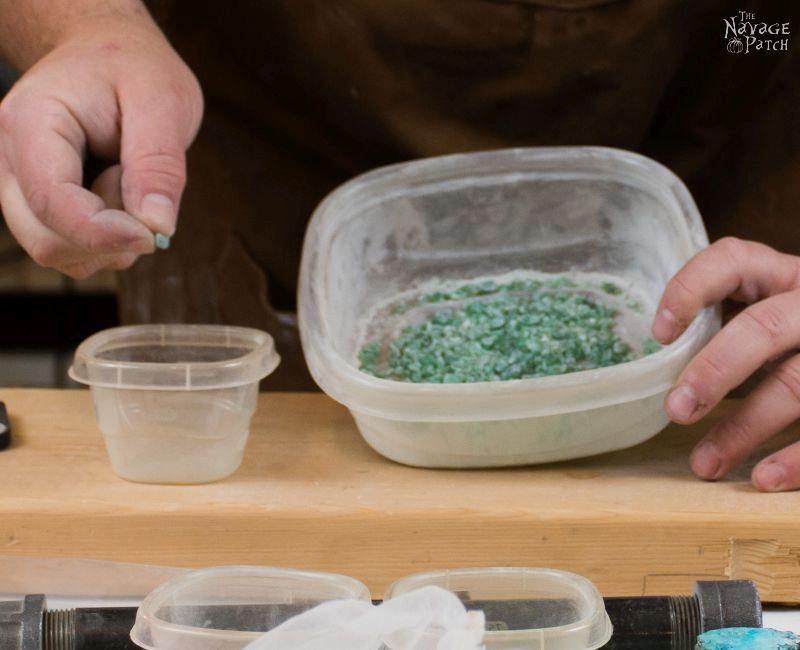
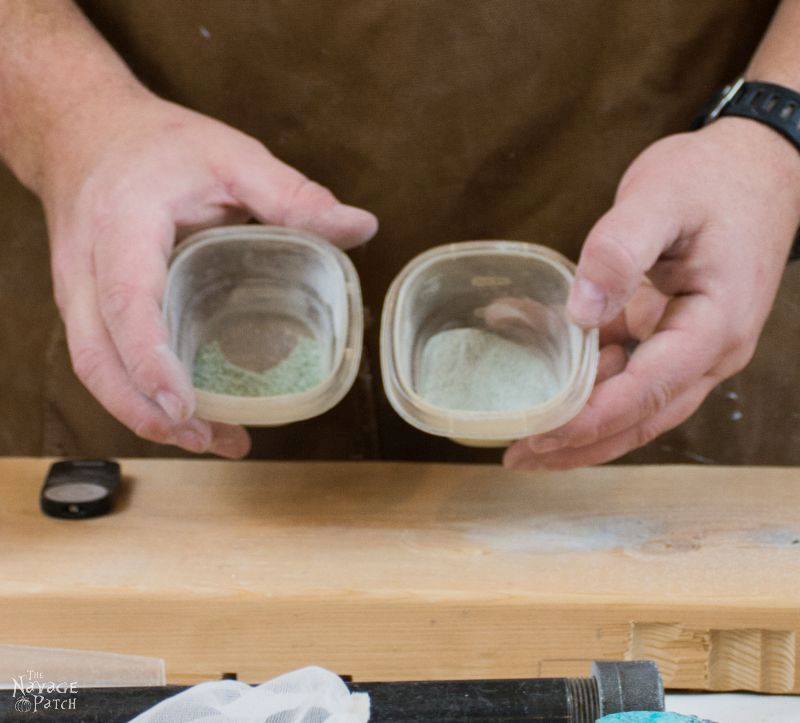
I picked the bigger pieces out of the box and put them back into the pipe for some more beating. When I had the biggest pieces down to the sizes I wanted, I started grading the crushed turquoise by first running it through a strainer.
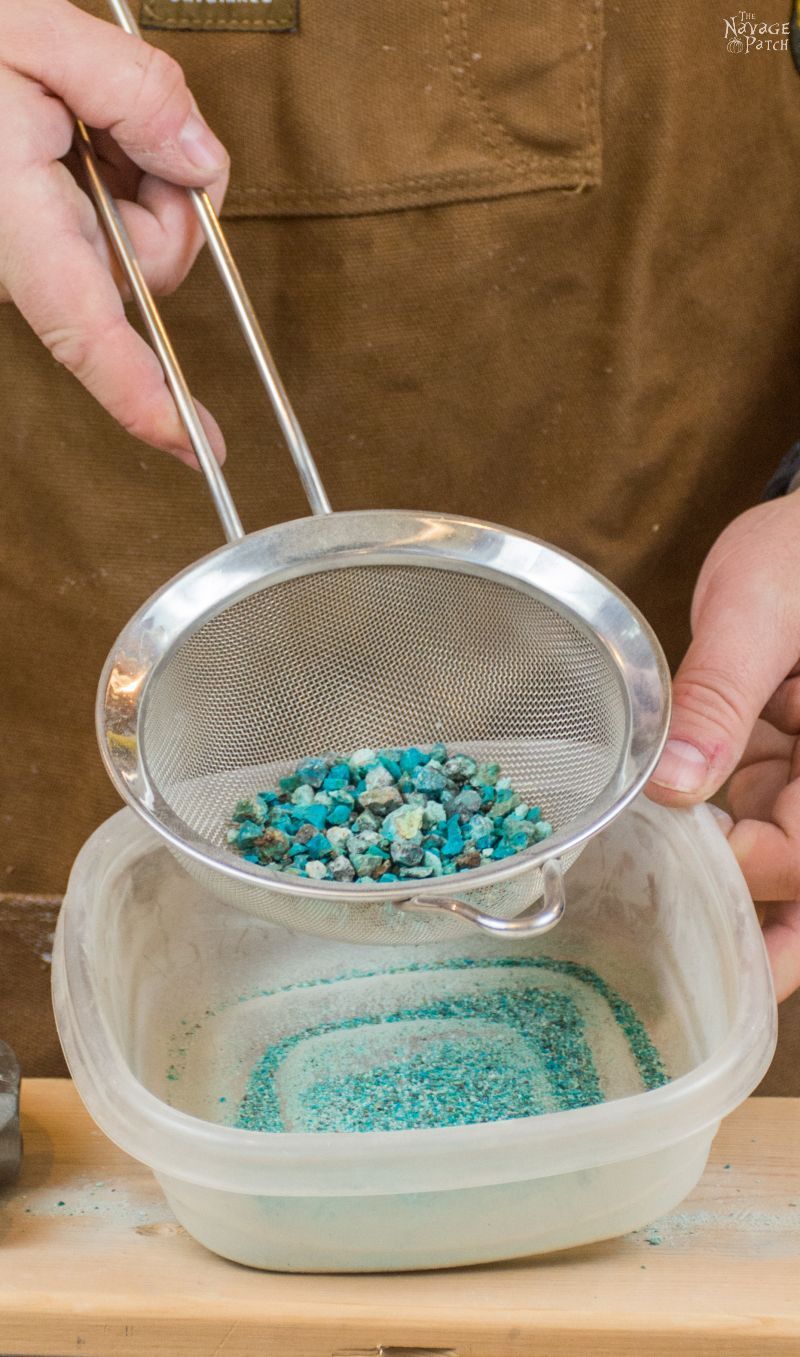
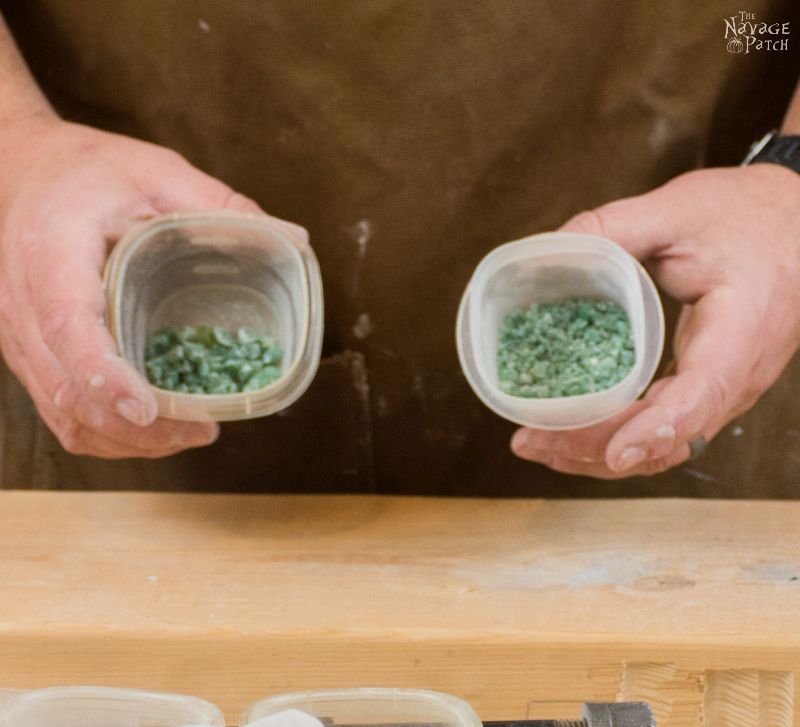
I then separated what was left in the strainer by hand into two different grades. (The following few pics are from a different batch. I include them to show the process.)
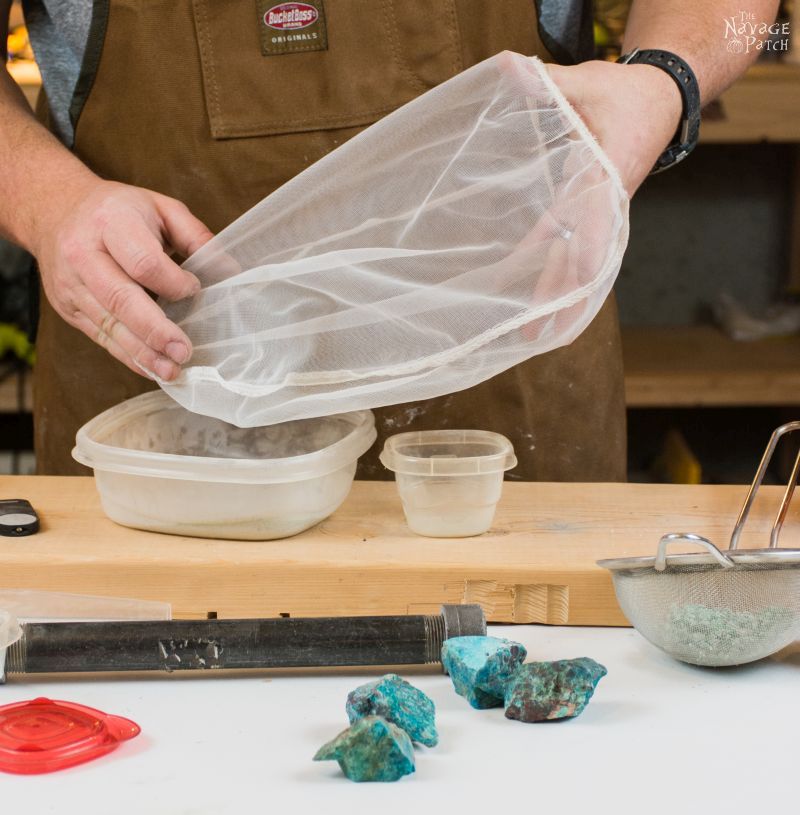
I then further separated what I had strained by straining again with a fine mesh bag or paint strainer.
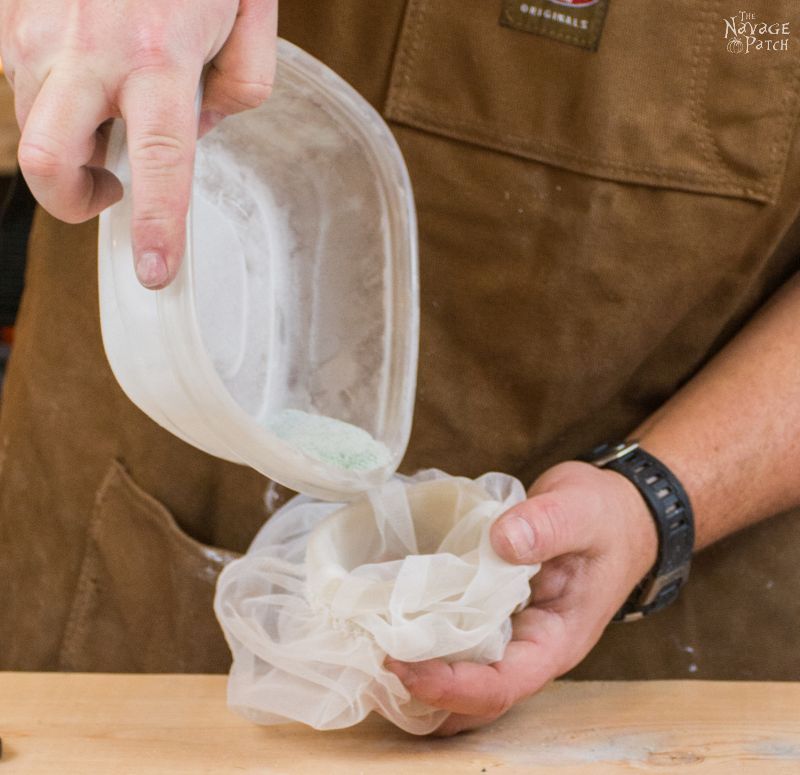
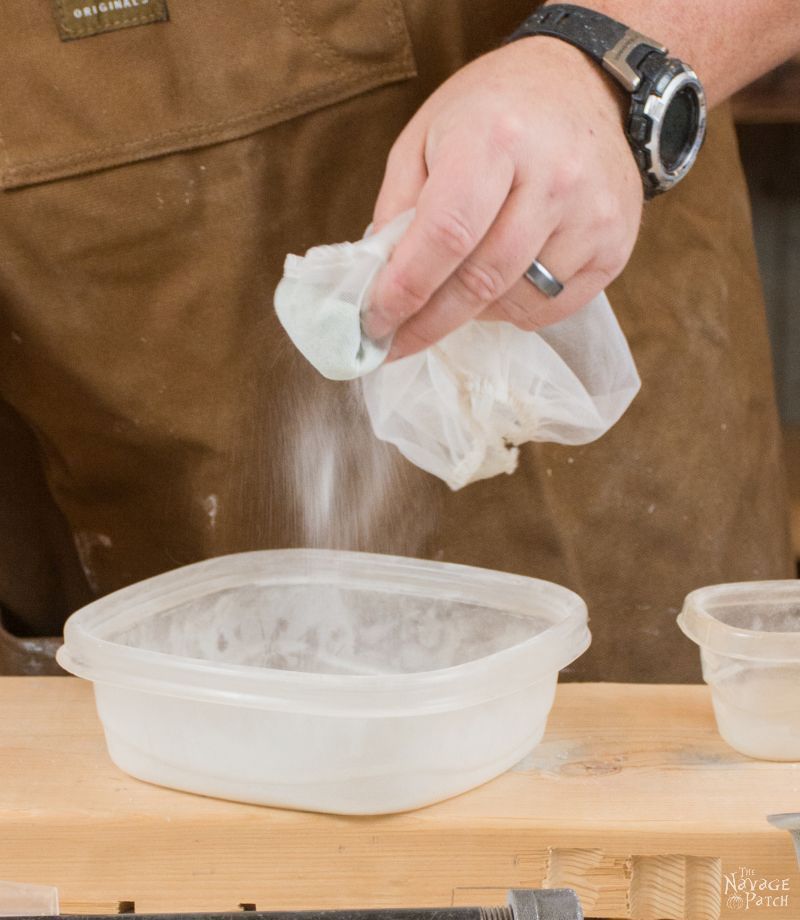
This gave me four grades of crushed turquoise to work with. (Again, this pic is from a different batch of pure turquoise that I crushed from jewelry – that is why the color is different.)
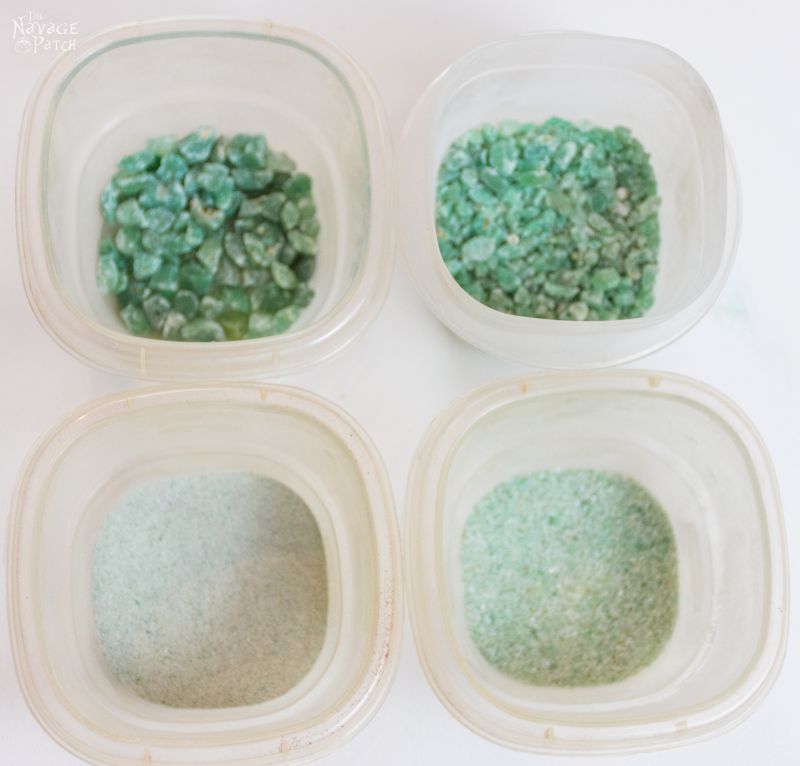
I crushed both types of ore and mixed the equivalent grades of each together, so I could have the two shades of blue plus the white rock. I liked that look better.
Laying the Crushed Turquoise Inlay
Once my stone was crushed, I readied the board for the turquoise inlay process. I wanted the board to have rounded edges, but I wouldn’t be able to route the edges with a roundover bit once the stone was inlaid, or the stone would destroy the bit. I decided to roundover the edges first, and then round the stone later by sanding.
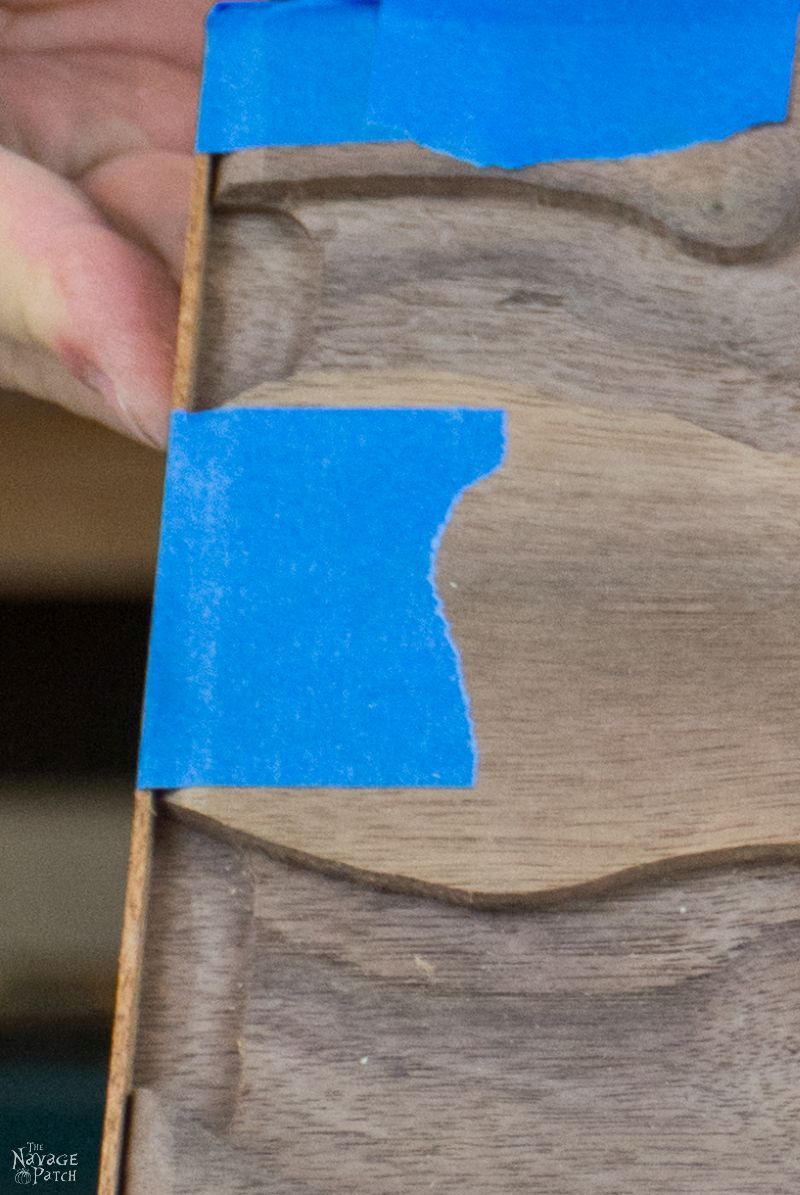
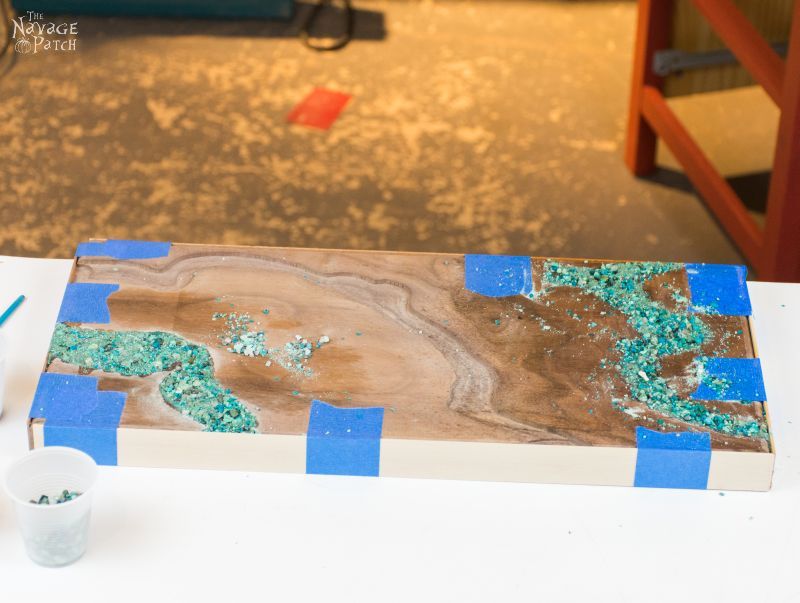
To prevent the crushed turquoise from running off the edges, I taped thin strips of hardwood all around the board to act as a dam for the turquoise.
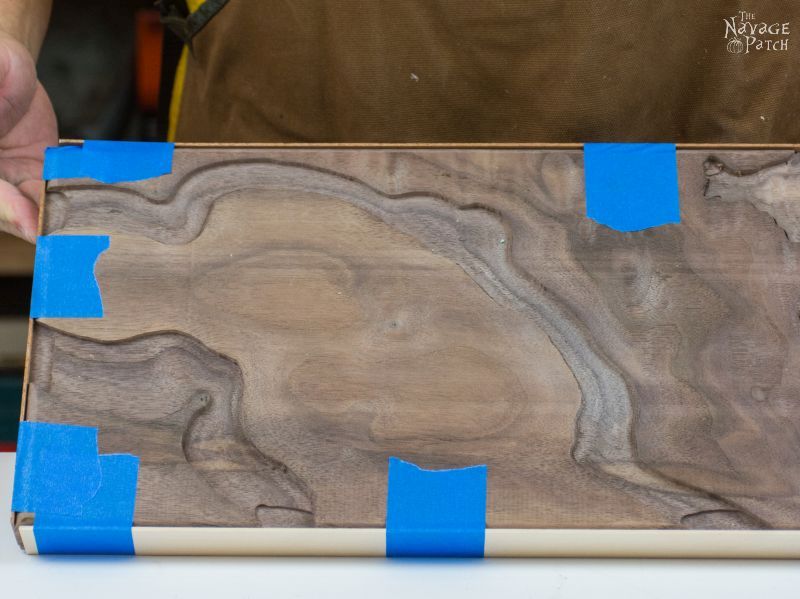
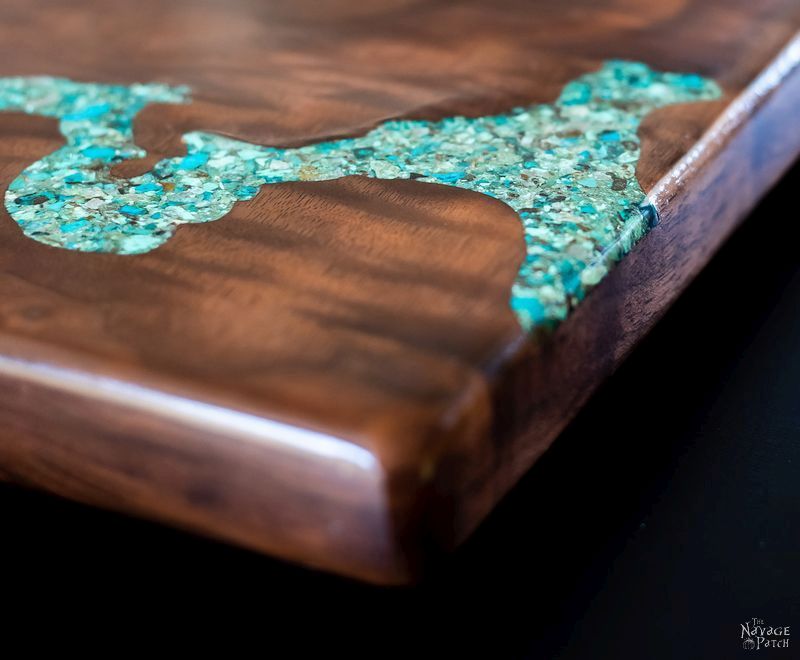
Notice that I routed a little deeper at the edges, about 3/16 inch, to give a better look when viewing edge-on.
Now that the board was prepped, I was ready to begin the turquoise inlay process.
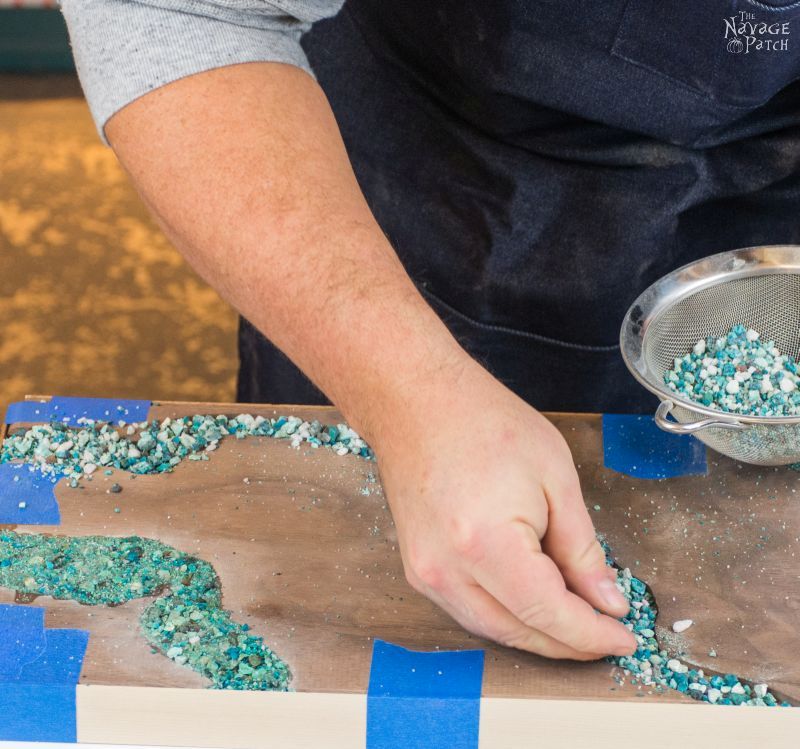
I started with the largest grade, and sprinkled some crushed turquoise into the first riverbed.
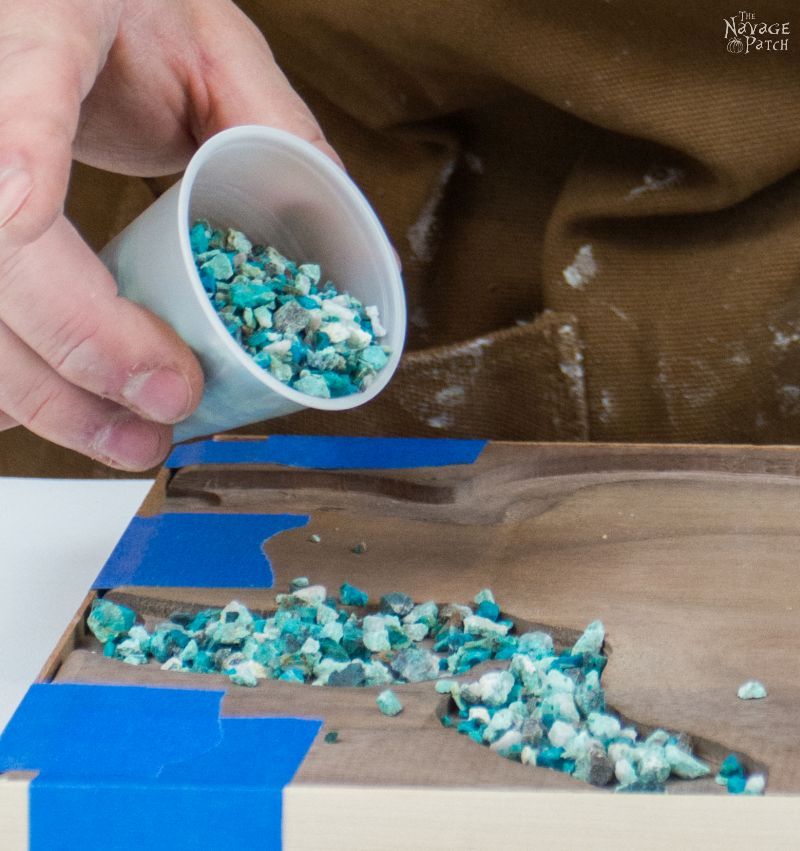
I followed with the next grade down.
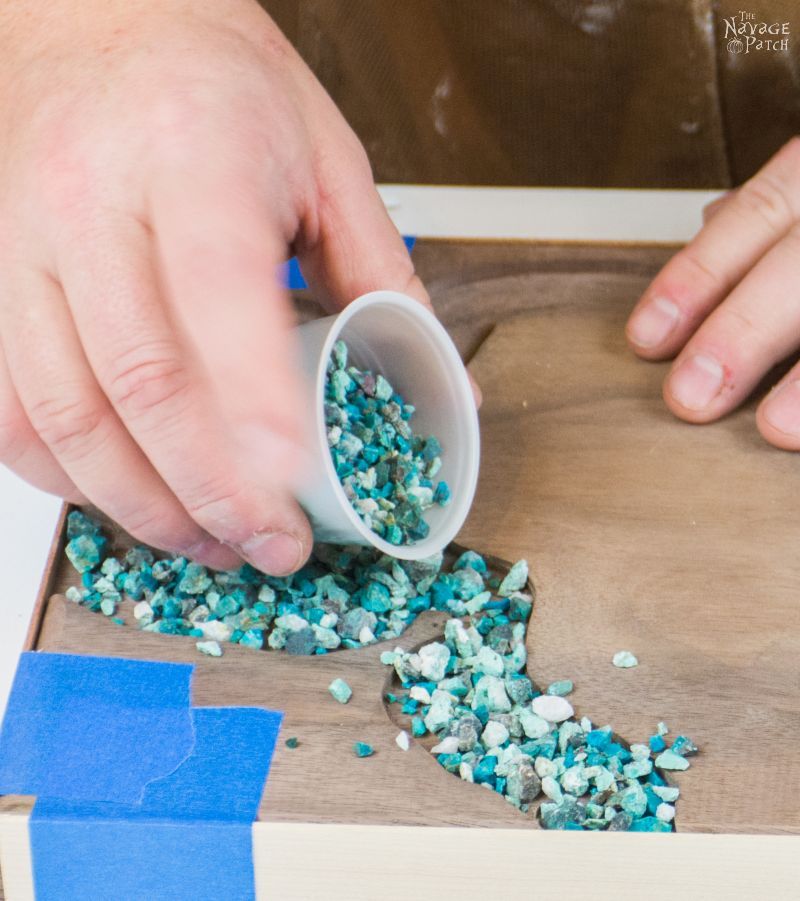
And so on…
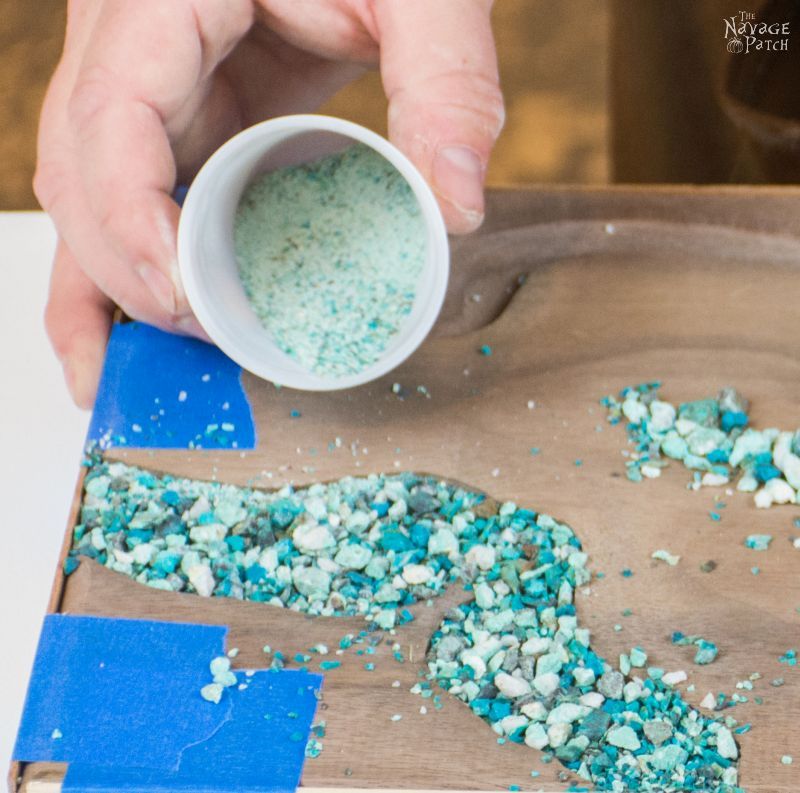
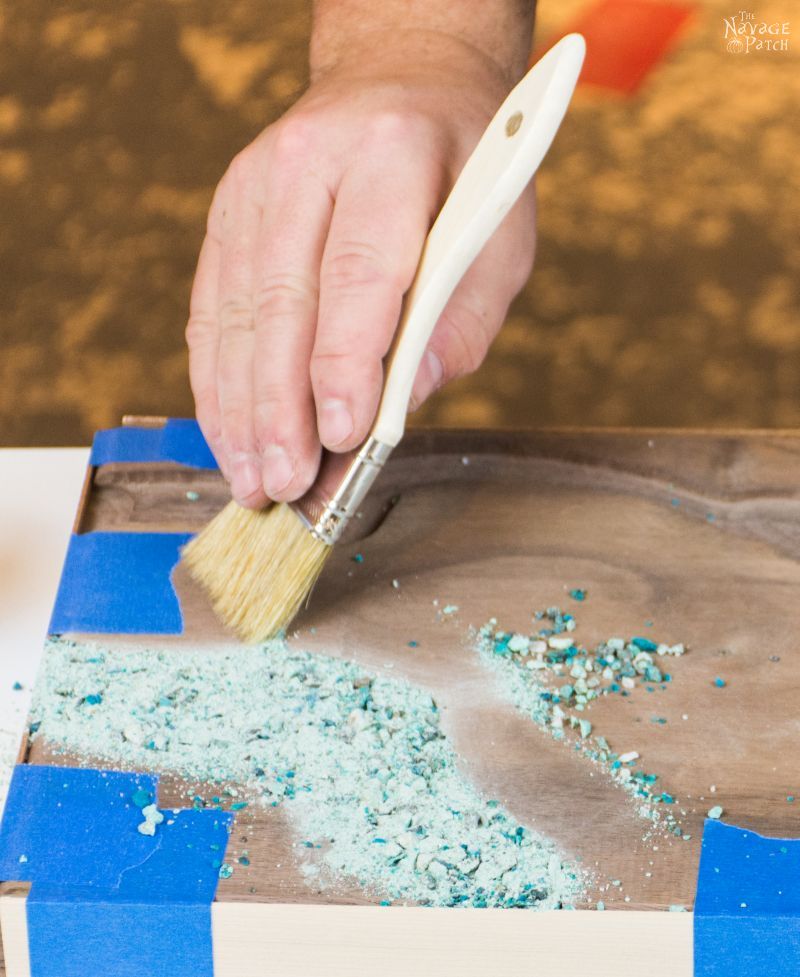
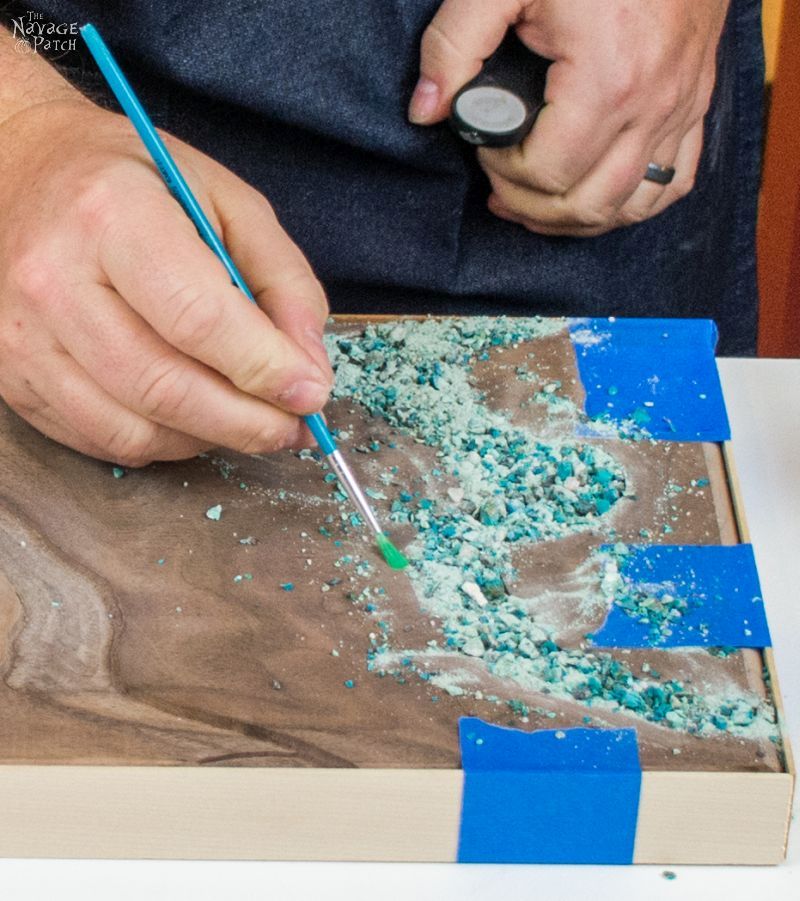
…Until I had all the space filled and sitting just proud of (above) the board’s surface. I used a chip brush to clean the little stuff off of the board and into the groove.
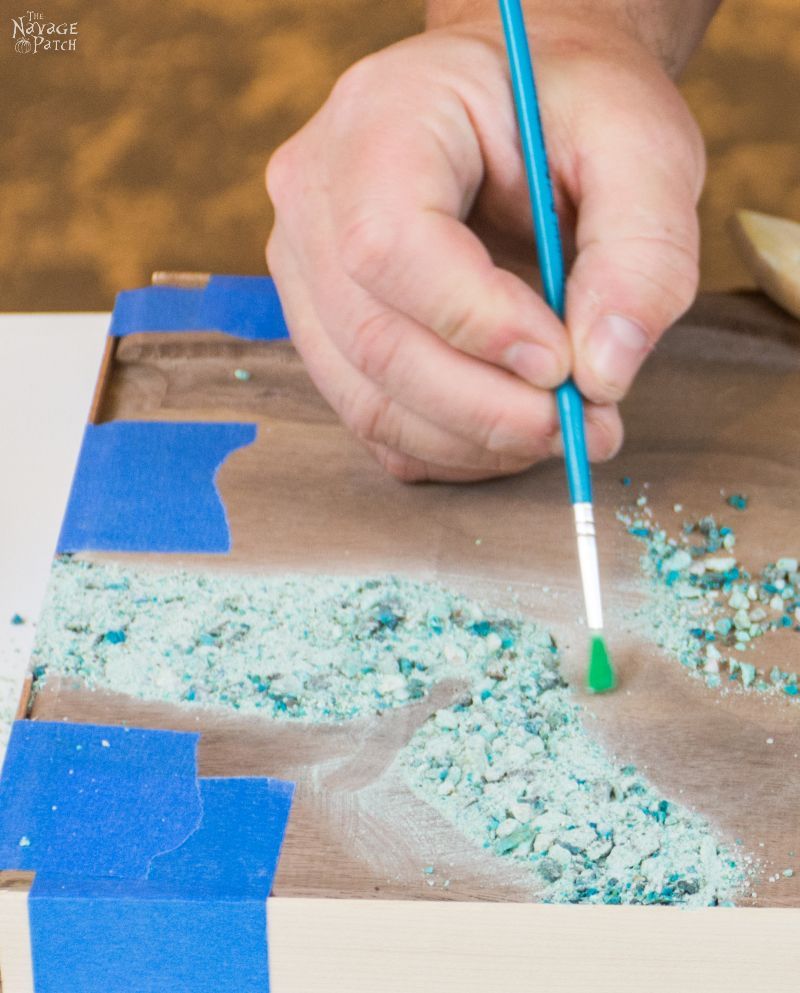
And I used a small paint brush to further define the edges of the groove.
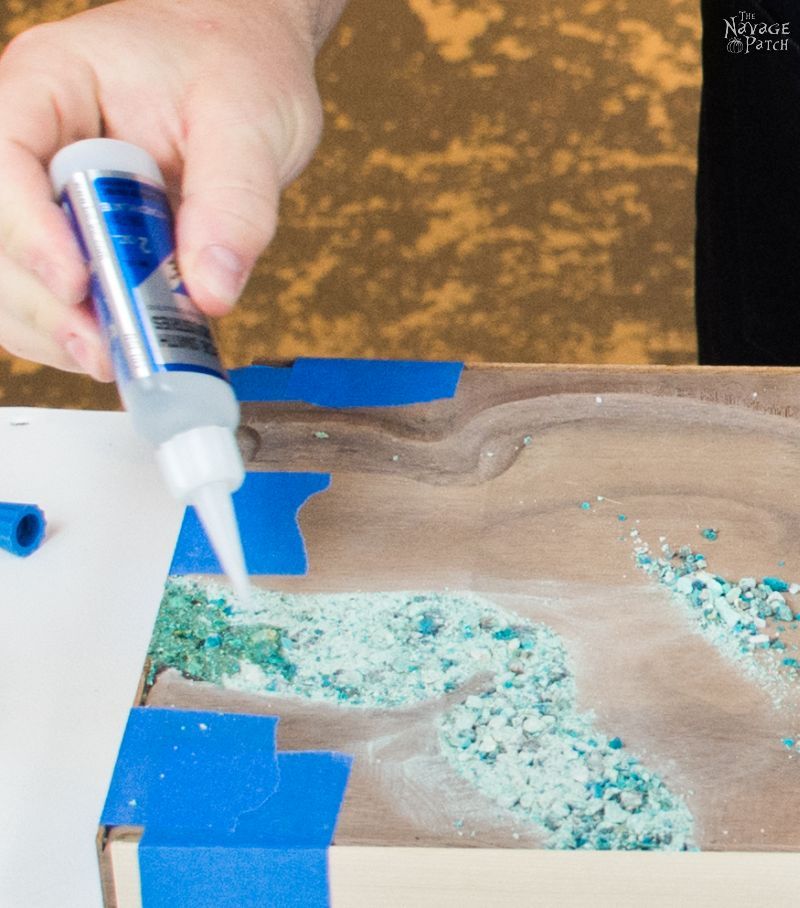
Once I had the crushed turquoise placed to my satisfaction, it was time to gear up with PPE (personal protective equipment). Gluing isn’t loud work, so I didn’t need hearing protection. The stone dust wasn’t flying, so I didn’t need a mask. But I was working with cyanocrylate glue, aka CA glue, aka super glue. You may not have noticed when using small amounts, but the fumes from CA glue burn the eyes like acrid smoke or acid. Simple protective glasses wouldn’t help. I needed something more.
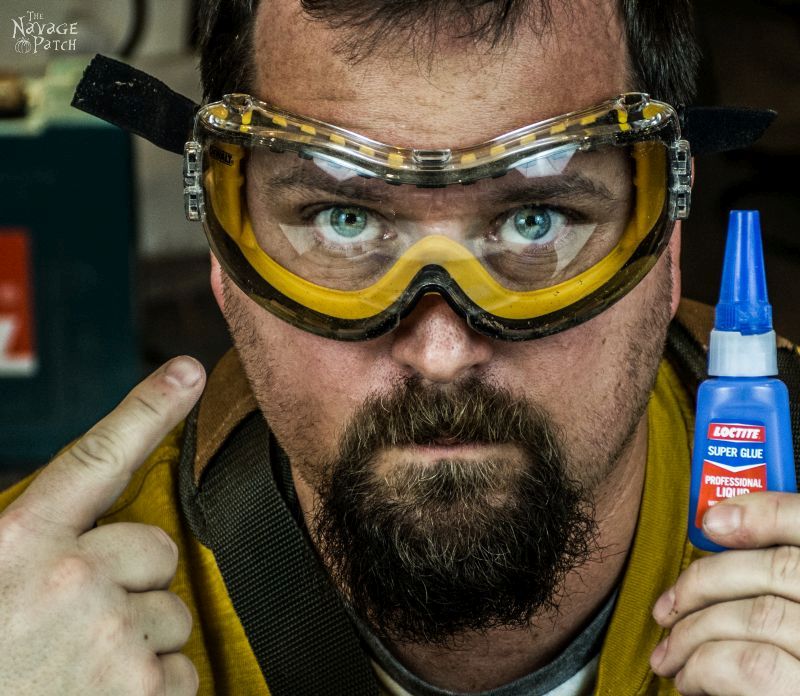
With my peepers protected, it was time to break out the CA glue. I recommend Bob Smith Industries Insta-Cure Super Thin CA Glue for inlay work. He may have a generic name, but his glue is the best. You’ll also want to order a refill bottle. Besides being the best CA glue out there, the price is orders of magnitude lower than if you were to buy the equivalent amount of those dinky little bottles they sell at hardware and grocery stores. And since even super glue takes an eternity to dry when you’re really anxious to keep working, an absolute must-buy (and one of the coolest products on the planet, IMHO) is Bob Smith’s Inta-Set Spray. If you thought super glue dried fast before, your jaw will fall through the floor and into the basement when you see this stuff in action. Without going into the exact chemistry of the reactions involved, the spray creates an exothermic reaction with CA glue and cures it instantly. The bottle says “a few seconds,” but it’s way faster than that for small amounts. It’s one of the coolest things ever, and you’ll want this stuff if you’re going to tackle inlay work.
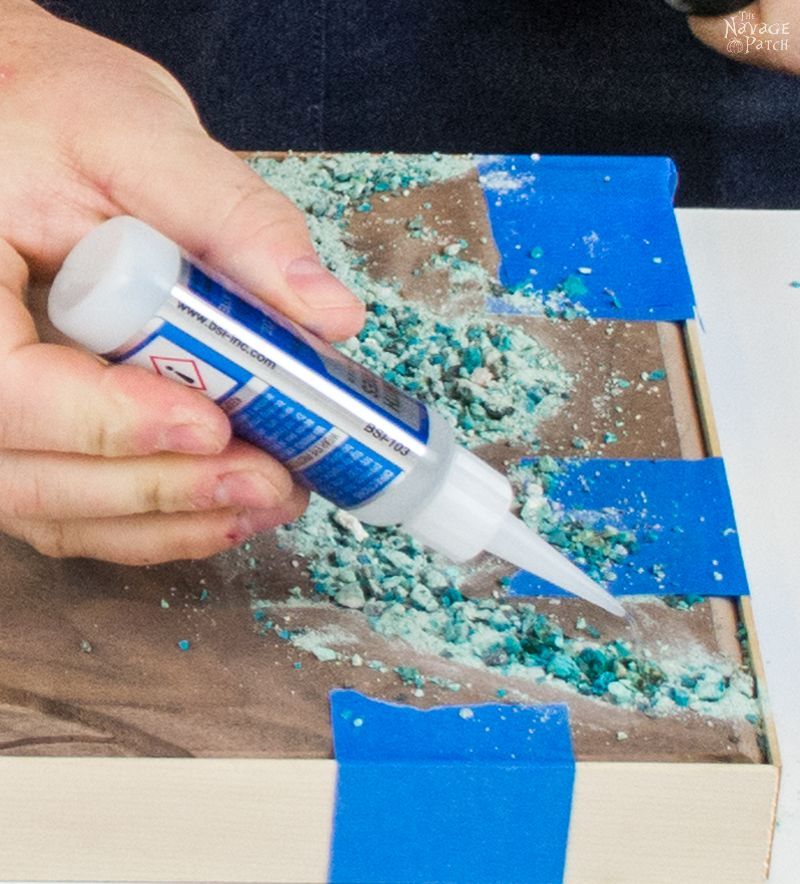
I applied the CA glue generously, ensuring that it soaked all the way through the crushed turquoise.
I then sprayed it with the Insta-Set.
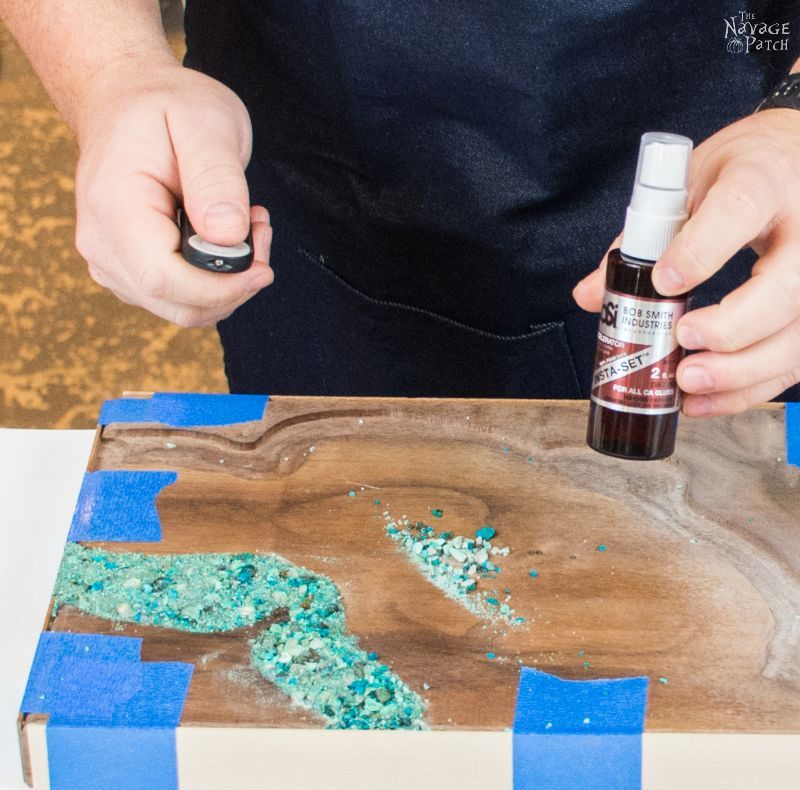
A note about Insta-Set spray: it creates a powerful smell that most people can’t stand. To me, it smells pretty good. But you want to step away after spraying. Too much of that smell will have you seeing giant purple lizards crawling out of the walls of your workshop while wee leprechauns tickle your kneecaps with dodo bird feathers. Best to stand back and let the reaction take place without you.
I repeated this process for the remaining two turquoise inlay rivers.
When all was filled and glued, I set the board aside and let the glue cure overnight.
Next was the hard part. Not only did I make three huge swaths of crushed turquoise inlay, but I filled them a little too tall, so I had a lot of rock to remove. The bigger your inlay, the harder it is to smooth it out. Better to do your first board with thin lines or even small circles (like from a Forstner bit) than huge rivers like mine. But I knew what I was getting myself into when I started the project, so I had to knuckle under and start sanding.
Grinding and Sanding the Crushed Turquoise Inlay
I started with the beast: my belt sander.
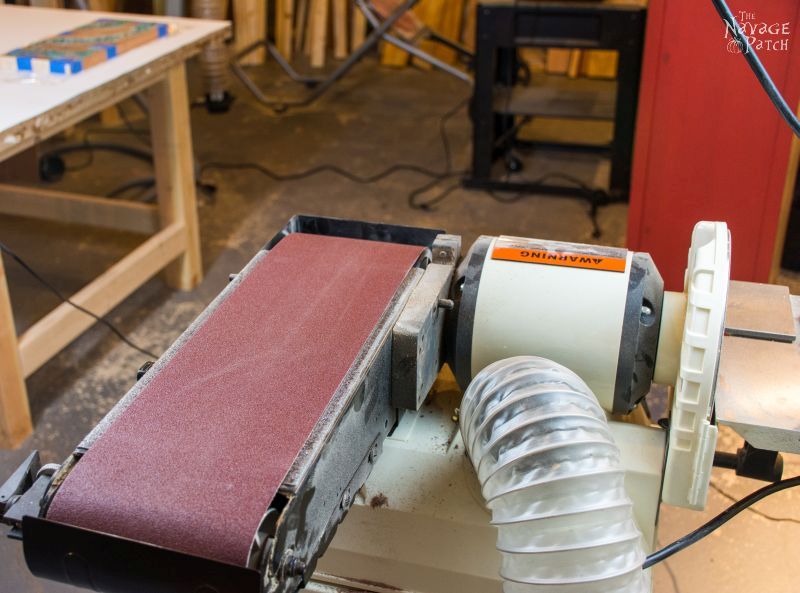
I blew through two brand new 80 grit belts in no time, and I had barely scratched the surface of my stone. I needed a new plan.
I decided to try an angle grinder. It would be risky, and I’d have to use a light touch. I geared up again, this time with full respirator, goggles and hearing protection. The stone would throw up simple dust, but the CA glue would send some really nasty vapors my way, and a simple particulate filter (dust mask) wouldn’t do a damn thing to protect my lungs from those toxic fumes.
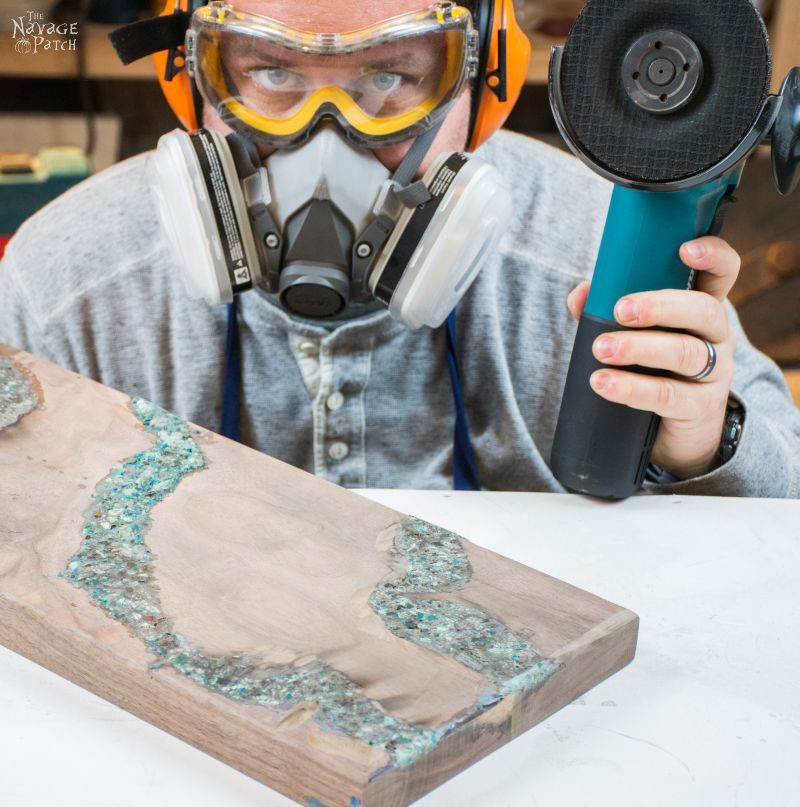
To keep the board from flying off the table, I held it in place with a clamp.
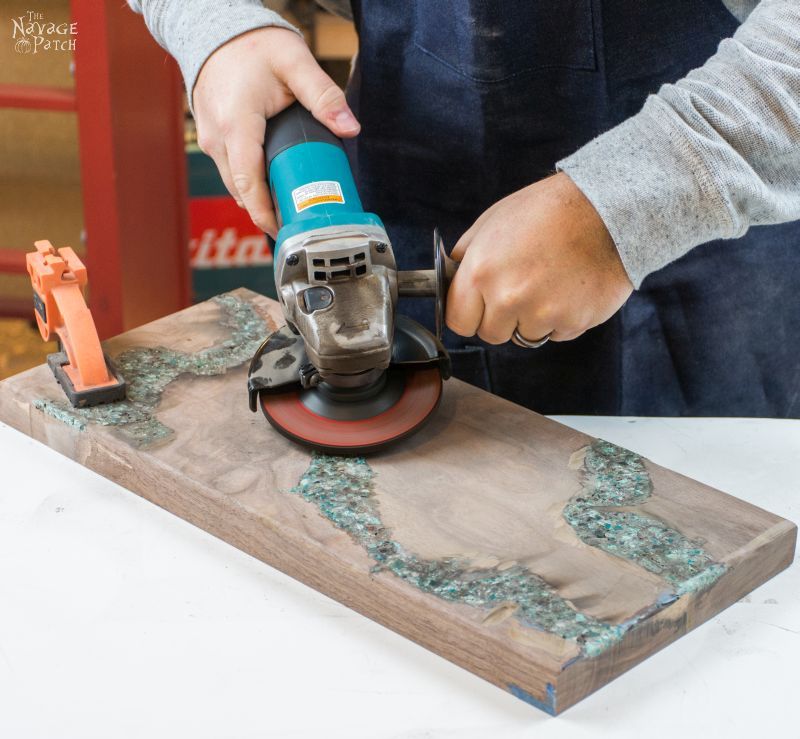
Even with all my gear, I had to take breaks to clear my eyes. Burning CA glue is just about the nastiest stuff I’ve encountered in my woodworking and DIYing thus far.
Once I had ground the turquoise inlay down to a more manageable level, I started in with my random orbit sander and 60 grit discs. I took off the respirator, but I remained geared up with PPE.
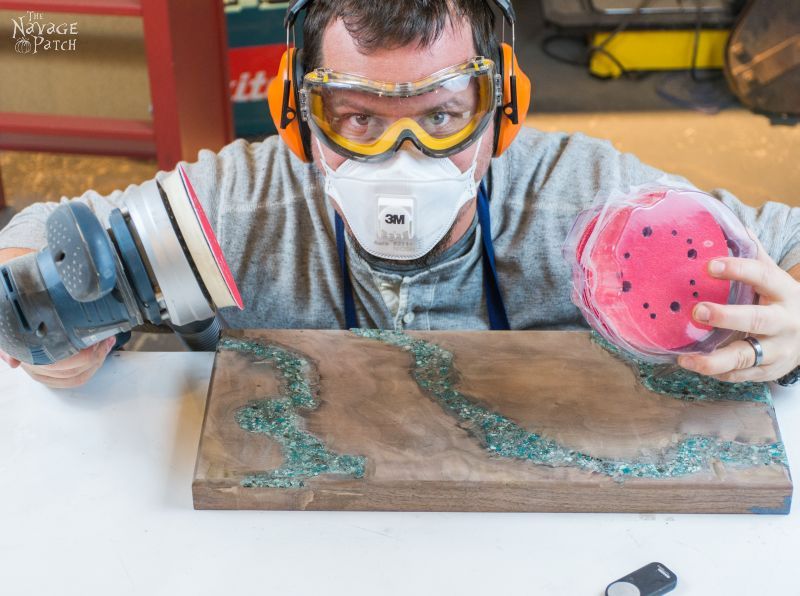
I went through a lot of 60 grit discs, I didn’t count them, but expect to burn through 10, 20 or even more, depending on how much inlay you have.
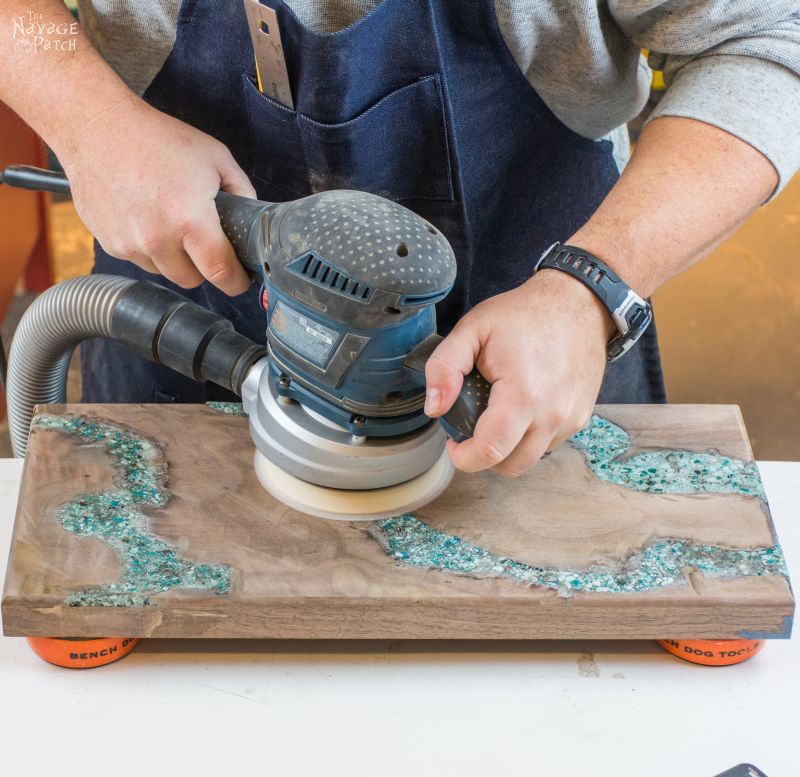
When sanding this much stone, I haven’t figured out a way to get the stone dead flat, nor to get the stone at the exact level of the wood. The stone will have some small variation and will still stand just proud of the wood. As you run the sander over the board, the soft wood will always wear away quicker than the stone. To me, it is the nature of the beast, given the tools I have. With smaller inlays, it is easier (and possible) to get the stone flush with the wood. This is something to keep in mind before you start your project. Personally, I don’t mind the variations in elevation. It is a handmade product and has the imperfections that go with handmade things. Also, I like to use pretty large pieces of crushed turquoise, and that adds to the difficulty when sanding. Smaller pieces mean easier sanding, so you may want to keep that in mind when thinking about your first inlay.
Once I had the inlays sanded to an acceptable state, it was time to do some fill-ins. When using all the different-sized crushed turquoise, it is hard to get every bit of space filled with stone or glue, so I always end up doing a second round of filling and gluing. For round two, I only use the smallest two grades of crushed turquoise and the CA glue. Sanding was a cinch for the fill-ins, since I only used the really small bits of stone.
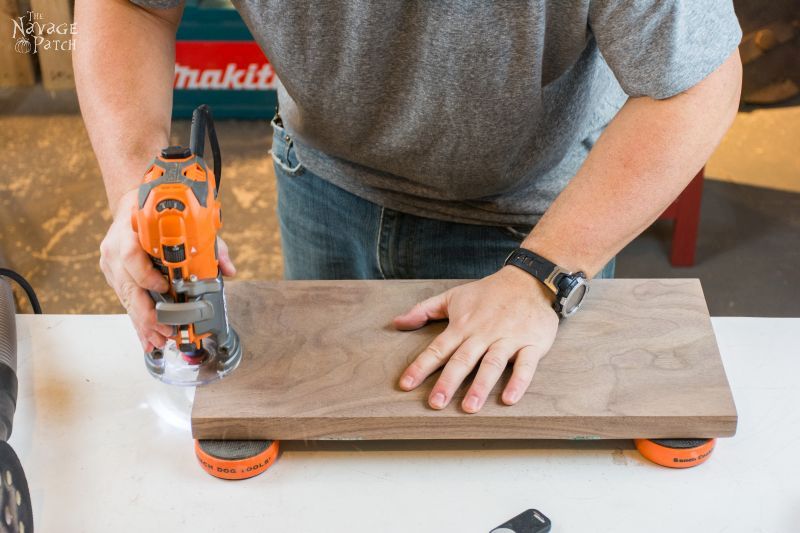
After the 60 grit, I flipped the board over and routed the bottom edges with a roundover bit.
I then worked my way up through the grits, using 80, 100, 120, 150, 180, 220, 320, 400, 600, 800, 1000 and then 1500, until I had the piece almost shining even before putting a protective coat on it. After 150 grit, I again did a final touch-up with the finest grade of stone and CA glue and then carried on with 220 and higher.
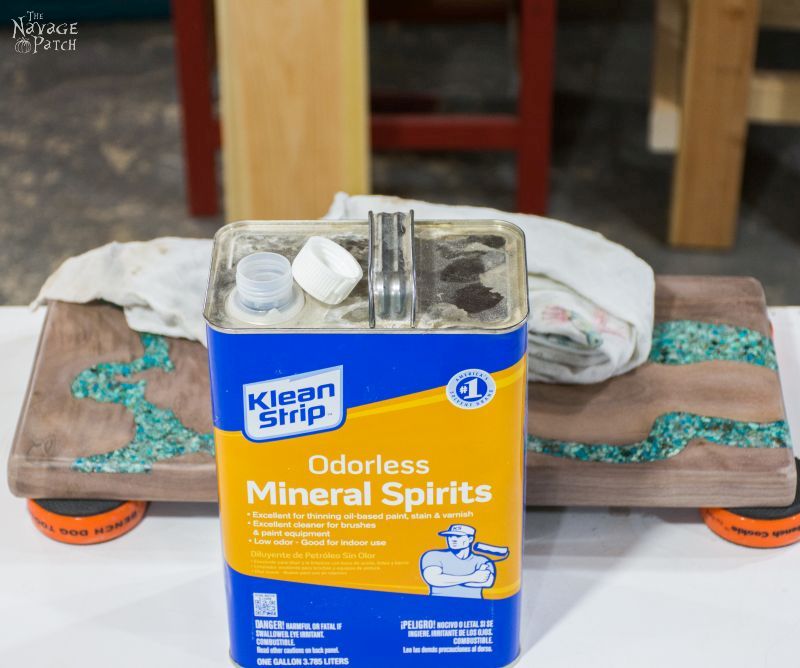
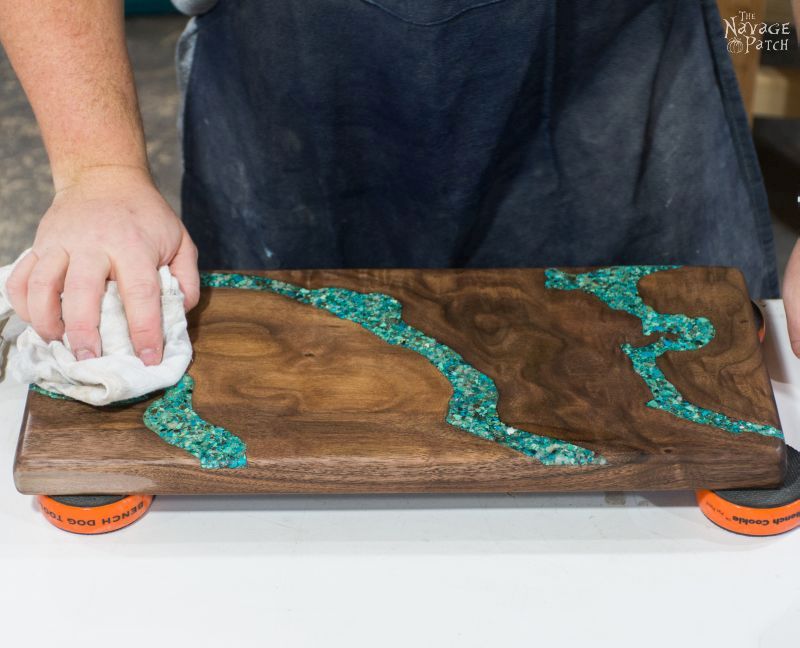
I cleaned off the dust with mineral spirits.
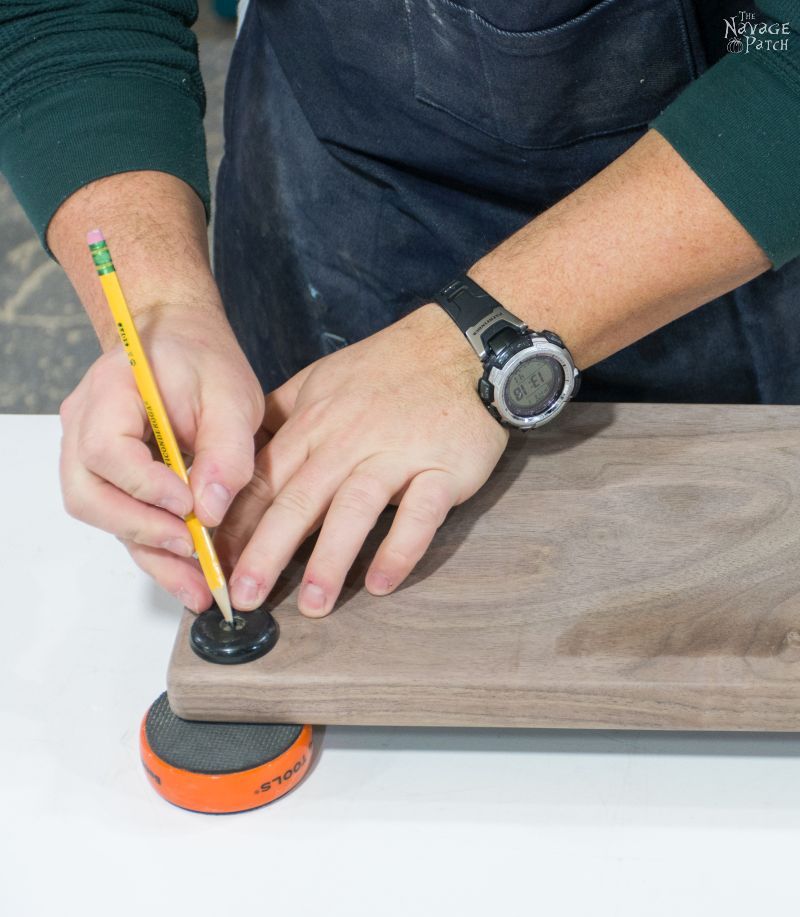
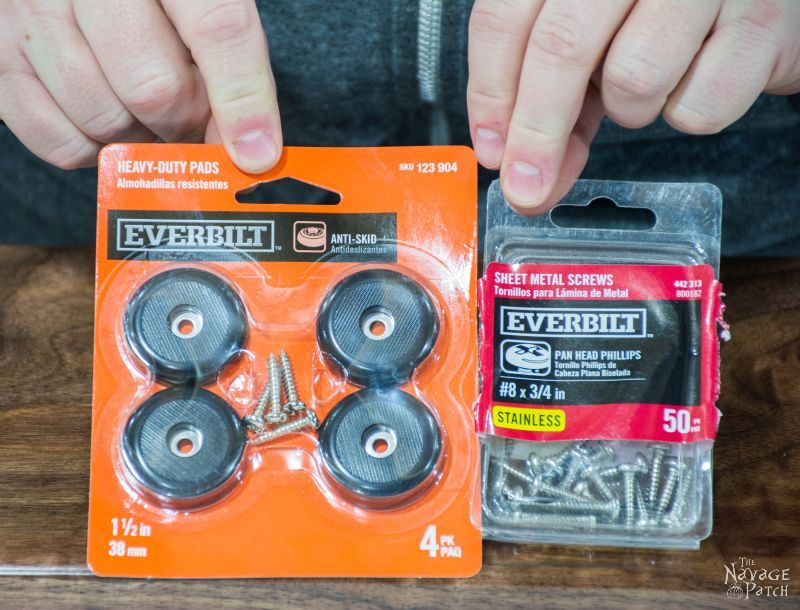
Then I flipped the board over and marked where the rubber feet would go.
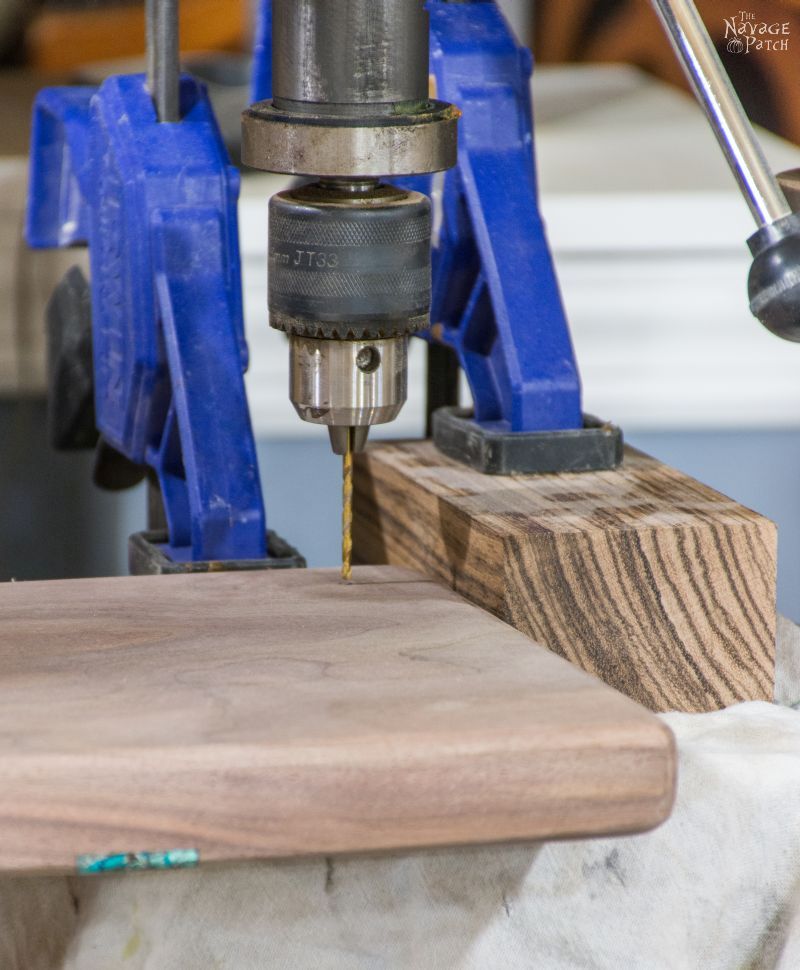
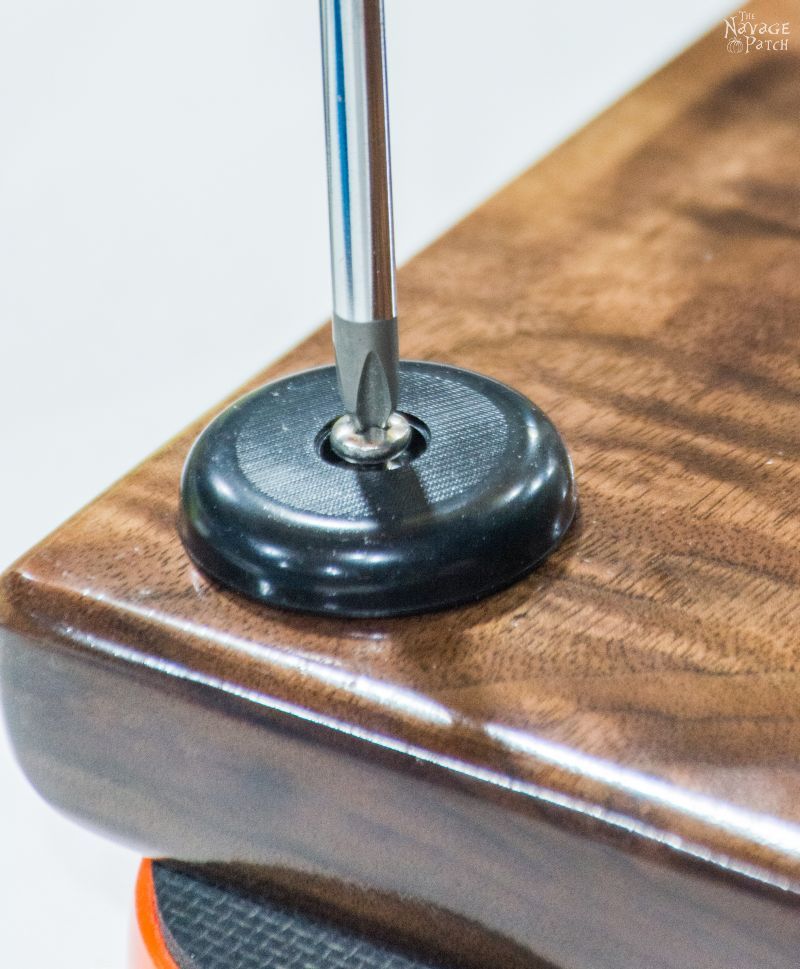
I then pre-drilled the screw holes that I would later use when attaching the feet.
Finishing the Turquoise Inlay Cheese Board
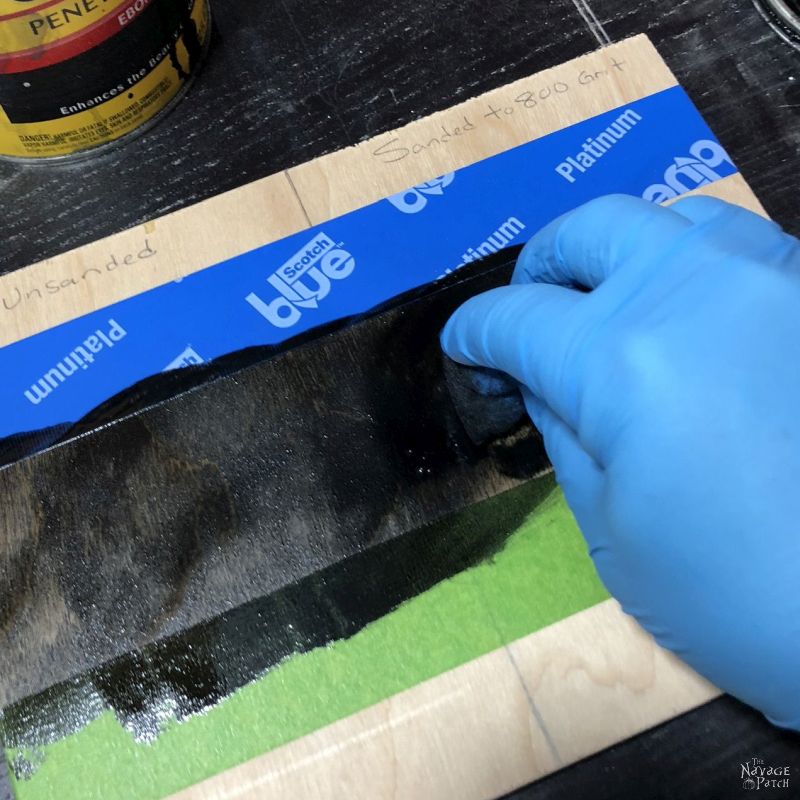
The board was then ready for finishing. I grabbed my go-to finish for cutting boards and cheese boards.
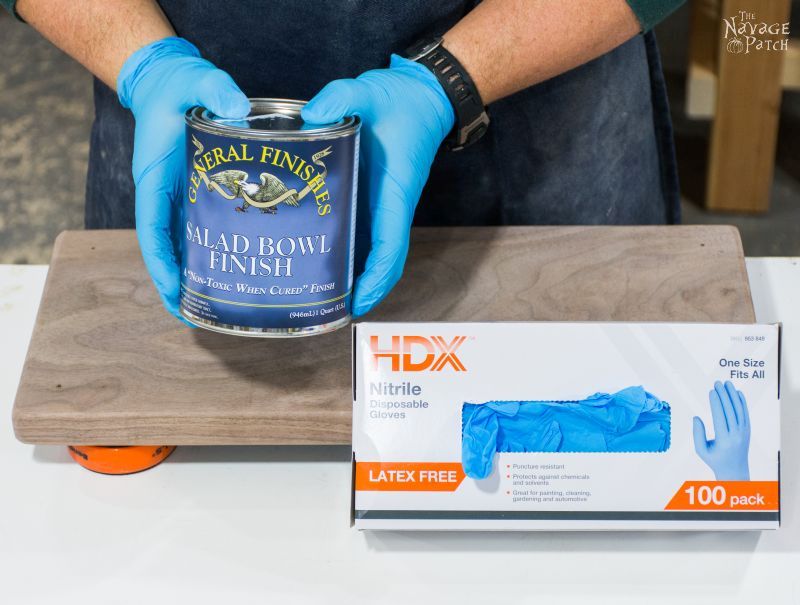
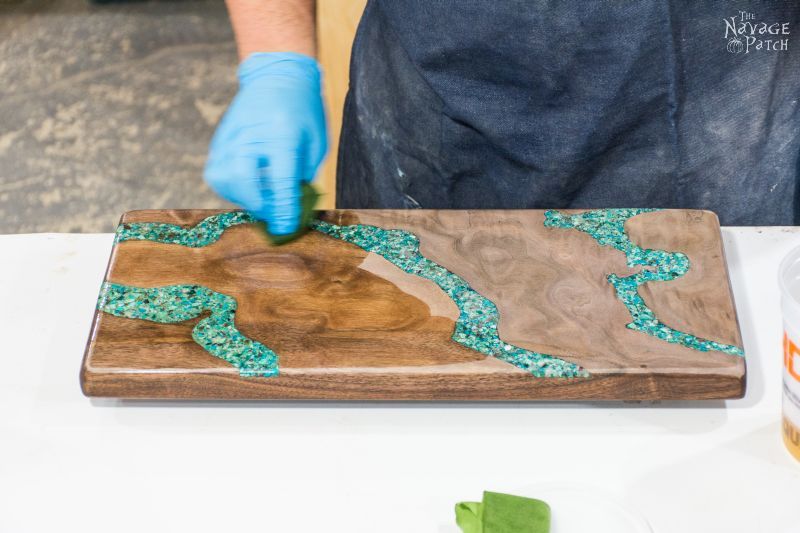
I won’t use anything other than General Finishes Salad Bowl Finish for my boards. It is a wipe-on finish that is food-safe when cured. I used nitrile gloves to protect my hands.
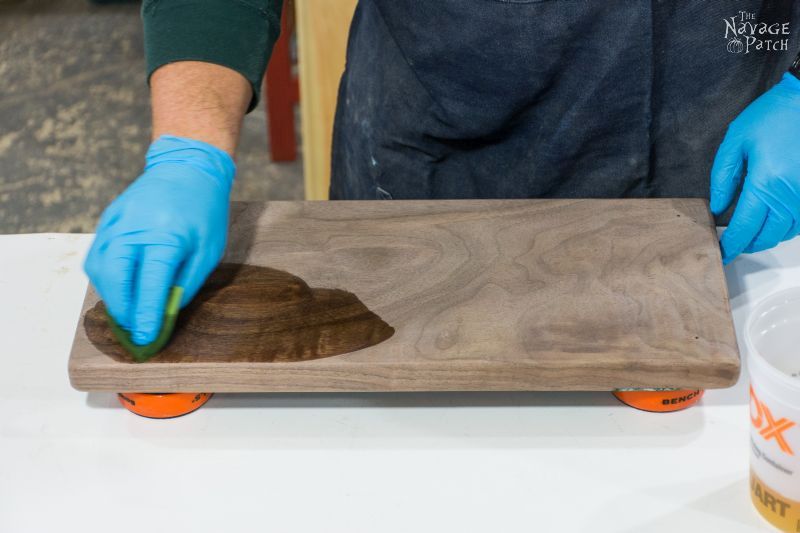
For the first coat, I mixed the Salad Bowl Finish with mineral spirits in a 40/60 ratio and applied it liberally to the board, starting with the under side.
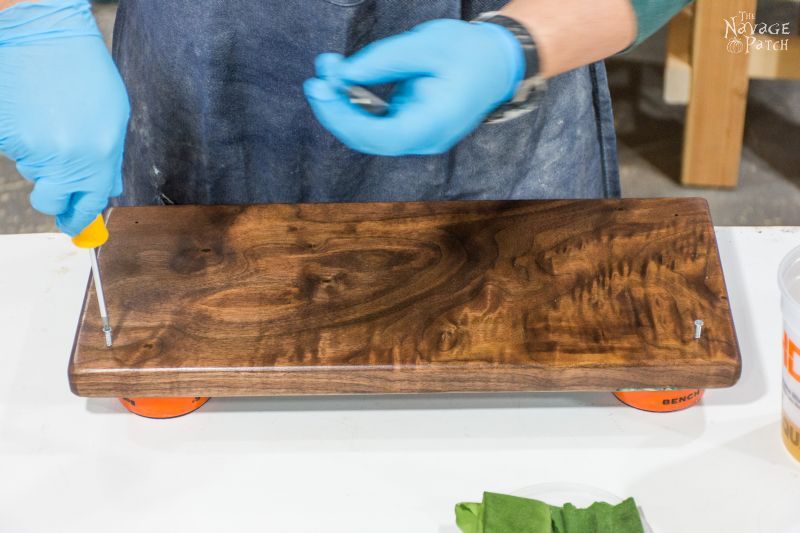
Before turning the board over, I slightly inserted four thin screws into the pre-drilled holes to act as legs when I flipped the board over to work on the top.
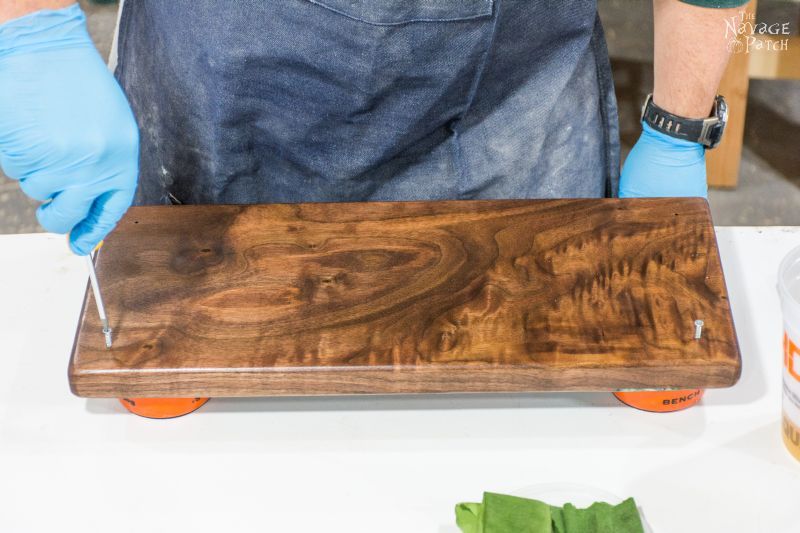
I applied the finish liberally to the top, letting the wood drink as much of it in as possible.
After about 8-12 hours, I lightly sanded with 2000 grit sandpaper, using barely the weight of my fingers for pressure. For the second and third coat, I increased the ratio of finish to about 50/50, again waiting at least 8 hours between coats and sanding with 2000 grit after each. For coats 4, 5 and 6, I used the Salad Bowl Finish undiluted, and sanded after each coat.
When I was done finishing the board, I attached the feet.
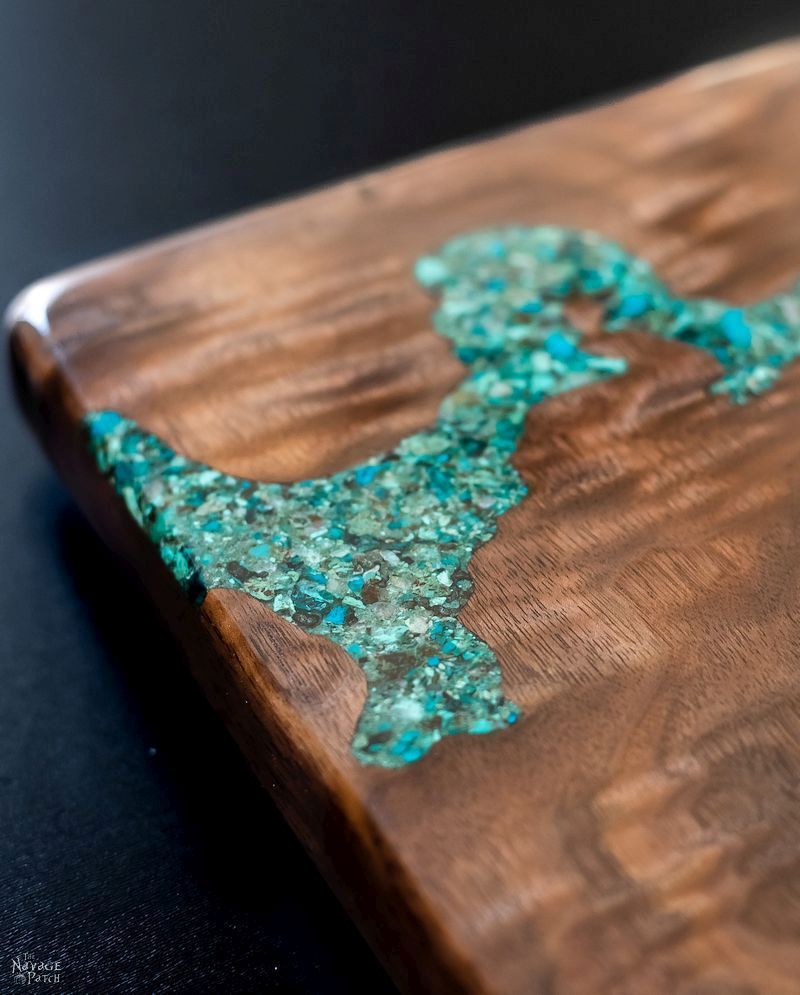
And my crushed turquoise inlay cheese board was done!


I hope you enjoyed this tutorial on how to make a cheese board with crushed turquoise inlay, but if stone inlay is more than you’re willing to tackle, I also wrote an easy-to-follow tutorial on to make a cutting board which will teach you how to make the board pictured below.
We love it when you share our posts on Facebook and Pinterest!


So beautiful. I was trying to calculate the actual time it took you to do this, and I gave up, but I definitely need to work on my DIY patience quota. Your vision and attention to detail is aaahmazing. Thanks for sharing.
Thank you, Kay! Yeah, this one took a while, but it’s worth it in the end! Doing these projects over the last couple of years has done wonders for my patience!
Greg — Once again you’ve come up with a winner. I am familiar with your “Making a Cutting Board” (because I did it), but this is just over the top in a GOOD way. Kudos to you for thinking of this and for the excellent write-up on how you executed it. It is always good to “see” how you completed a project. Thanks for sharing this one.
Hi Steve – great to hear from you, again! Yeah, this was a tough one. I knew as soon as I finished gluing the stone that I’d be in for a long ride to get the board in shape. That angle grinder saved my hide! I’m sure fine woodworkers would faint if they read this post, though! Thanks for commenting, and I’ll be awaiting the photos of your inlay board! 😀
This is wonderfully beautiful – I’m totally fascinated!
Thank you so much, Terry! 🙂
wow greg gorgeous,although i have no intention to ever make this beauty, i couldn’t turn the pages fast enough to watch you ply your magic, i would just have to frame the board and display it in a place of honor xx
Thank you, Chris! I kinda feel the way you do about using it…and that’s why I’m selling it! 😀
It’s really beautiful! How much you asking for it, or did you post it and I missed it LOL
Thank you, Pat! This one is for my use 🙂
I’m always fascinated by your attention to detail and it shows in the finished product. I also appreciate your attention to safety.
Thank you, Regina! Safety was never much of a consideration for me until I started working as a Health and Safety manager in Afghanistan. I learned a lot and saw first-hand what happens when people work in an unsafe manner (it’s not pretty!)
Absolutely beautiful!! I love the grain in the wood – Thanks for sharing on the Pleasures of the NW’s DIY party!
Thank you so much, Helen!
Oh, my goodness that’s beautiful!!!
Thank you, Derry!
Beautiful and so much work. Great job!
Thank you, Stephanie!
That is so gorgeous! And you make it sound so easy!
Thank you so much, Joanne!
Wow. That cutting board is just gorgeous! Obviously it was a lot of work, but the end result is amazing.
Thank you so much, Leslie!
Great looking board!
You put so much work into this project!
I have a box that I bought off of eBay that has inlay turquoise.
I was interested in the technique after I purchased my box a few years ago.
Thank you, Deb. It was a mystery to me how they did it, and that is what inspired me to try it myself!
Wow! That is really cool, and so neat to see the process! Glad to find you though the Fresh Market Friday linkup!
Happy Friday!
Megs
Thank you, Megs!
Gorgeous! Very well done!
Thank you, Lisa!
What a beautiful tray. Intensive labor but at the end it is worthy. Your post will be feature at this week http://www.fabifabu.com/2017/02/12/inspiration-galore-project-party-21/ Hope to see you next week with another fabulous project. Thanks for sharing!
Thank you, Fabiola!
Beautiful!!! I don’t know if I had the patience for such a project, but it really is worth it, because it is really stunning! Love the turquoise! Thanks so much for sharing at Sweet Inspiration, Happy Weekend!
Thank you, Katrin! You have a great weekend, as well!
That’s amazing! I think this might be a little above what I would be able to do myself, but I love seeing the process.
Thank you, Erlene! Sorry for the late reply! 🙂
I have never seen a board made like that. That is stunningly beautiful! Great job so happy I got to see all about it via the meet up monday linky!
Thank you, Suzie!
Greg this is a mad talent you’ve got mate! It turned out so rediculously beautiful and I wish I had your patience because I’d use this technique to make SO MUCH STUFF (but I’m way too lazy so it’s not happening any time soon). Thanks for joining the To Grandmas House We Go link party – I’ll be featuring you this Wednesday at House of Hollingsworth Blog. Cheers, Kate xx
Thank you so much, Kate! 🙂
WOW! This is a true piece of art. The turquoise inlays are absolutely gorgeous. Thanks so much for sharing at the Wednesday Showcase party.
Thank you, Kati!
Just amazing and so beautiful. You’ve got amazing patience!! Are all the glues really food safe? I’ll have to get some of those for my husband. Thanks for sharing this incredible project at the Craftastic Monday Link Party at Sew Can Do. I’d LOVE to feature this if you could add the party to your party page!
Thank you, Cheryl! Yes, once the glue is cured, it is safe. It also has several layers of food-safe varnish over it, adding to the protection. That said, I would only use CA glue with cheese boards, as they generally don’t see heavy use with sharp knives.
Love this!!! Reminds me of those cool glass river tables that I adore. Brilliant
Thank you, Amy!
Thanks for a wonderfully detailed demonstration, full of practical tips on safety and technique. Thanks too for including the tries that didn’t work so well and then sticking to it all until it was a perfect object. (So much more than a cheese board!) I’m curious about seeing your jewellery now, too.
Thank you, Anne!
That is a beautiful cheese board!
Thank you! 🙂
Stunning project! Glad to find you via the party. Thanks for sharing at the Inspiration Spotlight Party @DearCreatives Pinned & shared.
Thank you, Theresa!
OMGosh! This is stunning! I generally read through all of the posts that are shared at Over the Moon before I choose which one will be my featured post for the week. But this week I don’t have to do that – THIS is my choice. Be sure to stop by the party on Sunday evening to get your badge. I am going to have to show this to my hubby (who will probably say, “Honey, there’s no way I can do that.” Absolutely gorgeous – thanks so much for sharing and we hope to see you next week.
Thank you so much, Shelley! 😀
Wow, I am amazed! Thank you for sharing your project with us at Friday Favorites!! Christine at Light and Savvy!
Thank you, Christine!
This is absolutely beautiful! Thank you for sharing this amazing piece of art at Link It Up Wednesday.
Thank you! 🙂
This is amazing and you explain it so well! I need a router 😀
Thank you, Angie!
I LOVE Love love it!! How does that router work for you? The one I currently have has died, so I am in the market!
Thank you, Mindi! I have three routers, and I love them all. The one I use for inlay work is a plunge router: http://amzn.to/2lga0nk
The one I use in my router table is a fixed-base router: http://amzn.to/2mClsLl
And the little one I use for trim and edge work is this one: http://amzn.to/2mCda6a
I don’t know if you’ve already seen, but I adore this project so much (even though I would never be able to do it myself) that I featured it at our Friday Favorites linky party 🙂 Check it out over here if you like: https://be-alice.blogspot.com/2017/02/friday-favorites-week-361.html
Have a lovely day, and stay as creative and productive as you are!
Best, Maisy
Hi Maisy, thank you so very much for the feature! Hope you had a great weekend!
oh my! This is fabulous! I can’t believe you made this!
Thank you, Angelina!
Wow!!!! It looks amazingly beautiful!!!! You are really talented. Thanks a lot for joining us at the Family Joy Blog Link up party. Pinned 🙂
Thank you, Sha!
I don’t know what part I like better, the gorgeous wood, or the beautiful inlay.
Just Stunning, in fact it is so amazingly beautiful that it qualifies as a work of art!
Thank you so much, Wendy! 😀
Absolutely Beautiful. I would not have the patients you have developed. After 20yrs of the Military and 3 theaters of violence, my patience level have been depleted.
Thank you, Richard, and above all, thank you for your service.
This is gorgeous. I love the tables with blue epoxy rivers, but I never thought about using turquoise for the rivers.
Thank you, Kathryn!
Really Awesome! Would epoxy have worked as well as the glue? Thanks for showing the routers in action, I’ve been on the fence abouting buying one, I think I am sold! I want to add decorative inlay to furniture I salvage – mainly dressers (large pieces) and drawers (small moveable pieces). Any suggestions?
Thanks!
Thank you, Clair! Epoxy wouldn’t be a good choice for inlay, as it is too thick to filter through all the layers of crushed stone. CA glue is the preferred method for inlay work. If you are going to buy a router for inlay work, I would recommend a plunge-base router, or a plunge-base/fixed-base combo router. I have three routers: a fixed-base that I use with a router table, a plunge-base that I use for inlay work, and a small trim router that I use mainly for edge work like round-overs and chamfering.
Here is the combo router: http://amzn.to/2pBbufZ
This is the small trim router: http://amzn.to/2ps067B
Good luck!
I am in love with this board! It is beyond beautiful, will definitely try to make one myself one day. Great idea and wonderful, clear explanations on top of that – thanks a lot for this post!
Thank you so much, Vera!
I’m a little late to the “Kudo’s” party – but – WELL DONE!!! Absolutely Beautiful!!!
As for all the hard work and millions of sheets of sanding paper you must go through, have you ever tried using a diamond grit sanding pad or grinder wheel? Diamond wheels and paper will make amazingly quick work of grinding down and smoothing stone! Just a thought!
Thank you, Heather! I haven’t tried diamond grit paper. Do you know if it’s made for 5 inch sanding discs?
This is awesome! Im an amateur woodworker myself, could you use casting resin instead of the glue?
Thank you! For the inlay, I use CA Glue because it is very thin, and it is able to seep into and around the tiny rock pieces and even the rock dust. I’m not sure resin would do that, since it is so thick and viscous. It is worth a try on a test piece, though. You never know!
Resin comes in different levels of viscosity, depending on the type of project. The kind they sell at Home Depot will work fine for your inlays… There are thicker ones, used for a doming effect on jewelry, but they don’t sell that one at HD…
Also, you could fill the rivers halfway with the resin, then add the turquoise, then top with resin, just to the tops of the rivers edges.
Rachel D
Hi Rachel, I like that embedded resin idea. Handan and I have been experimenting with epoxy resin lately. We’ll be showing off our first creations this Thursday 🙂
There are no words and your instructions are perfectionist Marvelous. Fabulous. Wonderful. I LOVE it. You are very talented. I saw a show on tv where a father and son made similar type cutting, cheese, etc, boards. They were all one of a kind and very much in demand and I think, I think, that the prices were extremely high if I remember correctly. Like $200 to $800, but they only used colored resin for the water look. YOURS is more fabulous. Wowzer. They also did wood inlay, but I like the “River Flowing Through It”.
Gail – thank you so much for your wonderful comment! That board was a lot of work, and comments like yours make it all worthwhile!
Excellent work & design ! Using the flow of the grain to compliment the wood, love the various hues of turquoise, and the wonderful texture the different sizes of grains & pebbles creates… Worth all that extra sanding, would not have gotten the same effects without it ! (interesting how projects evolve that way) Using superglue for the thin set – ingenious, I can imagine liking the smell, like gasoline… LOL ! I’m inspired for my own wood mosaic project now… Different in materials, but your work totally inspired me, thanks so much for sharing, it is gorgeous !
Hi Sharon – thank you so much! I’m happy to have inspired you. Please send pics of your mosaic project when you finish!
I’m loving this board and definitely want to make an attempt to recreate! How much raw turquoise should I expect to use for a board? I realize it will change depending on how much you route out but I’m looking for a place to start. Thanks so much!
Thank you, Holly! I bought my raw turquoise in 3000 carat (21 ounce) lots from Ebay, like the ones here: http://fave.co/2xQtgyU
The turquoise is mixed with chrysocolla and other ores, and it’s much cheaper than more pure ores of turquoise. Once you get some experience, you can splurge for the good stuff! Good luck with your project, and please email a picture when you’re done!
This is absolutely beautiful and very creative! I’m always looking for something unique. Thank you for the details. I’ve already purchased my stone and glue. Now to find the right piece of wood!
Thank you, Caroline! Please send photos of your completed project. We’d love to see it!
Awesome job!!! To make the sanding job a little easier, use sandpaper that has silicon carbide for the abrasive material on the paper. It’s found in the automotive departments in stores commonly used for auto body repair. Of course there are plenty of sites online to find it. You won’t tear through it but it should make a tedious job a little easier.
You’ve given my ideas….many thanks
Hi Michael, that is great advice, thank you! I will absolutely get some silicon carbide paper for my next inlay project.
I was wondering, it doesn’t show but it looks like you have a coating of resin on it…is that correct?
The reason I am asking is that your project was featured on Pro Marine Supplies as a DIY project with resin.
Hi Valerie, thank you for the heads-up! LOL, our posts end up in the strangest places sometimes 🙂 I did not use any resin. Just a lot of sanding and some polyurethane.
Nice job on this board. Just for your knowledge tourqoise is a 6 on the Mohs hardness scale while tool steel and carbide are around a 7. So theoretically you could use a router to flatten it. However, the torque of the spinning bit and the resultant heat will dislodge quite a bit of your inlay. So I use a simple card scraper. You can get it down nearly flush and save on sandpaper. To make it easier you can dye crystle Calcite which has a hardness of 3 and easily sand it without decreasing the height of the wood background.
You can buy Calcite and other materials including an awesome router base at https://www.easy-inlay.com. I found them on a web search and am pleased at their service. Enjoy!
Hi Greg, thanks for the information – I will check them out for my next inlay project!
Absolutely beautiful! I have not liked woodworking since ’73 when I had to take an art course of it in college for my occupational therapy degree. I did not need an art course; I needed instruction in basic tool use. I ran my hand with a brand new engagement ring into the belt sander! Nine bandaids later at the infirmary! The fiance was not pleased that I had scratched up a brand new ring! I can really appreciate all the work you put into that board!
Ouch! The belt sander is an uncompromising beast! I’ve also jammed a hand into one, and came back with half-nailed fingers!
This is amazing Work! If I were to attempt four boards how much rough stone would you recommend I Buy? How much did you use for this one?
Hi Brent, I don’t know exactly how much I used, as I had a few different types of ore on hand, which I crushed and sorted and used. They sell rough ore in 1000 carat lots on Ebay (about 1/2 pound). The ore I get isn’t very high grade, so it runs from $10-$20 per 1000 carats. There’s usually a lot of chrysocolla mixed in, but that’s okay, as it looks good, too. I’d start with 2000 carats, if I were you, just to give yourself a good amount to crush. You may want to be more rigorous in your sorting to just pick out the blue bits, or you may leave all the ore, like I did. I would also recommend not making your rivers as wide as mine. It was a real pain in the butt to get it sanded down! Best of luck on your project, and please send me some pics at greg@thenavagepatch.com when you’re done.
Hi, your cheeseboards are beautiful. I’m just a little confused with the end steps. Can you apply a food safe wax (ie Howard Butcher Block Conditioner, or maybe beeswax) and then apply the salad bowl finish for the shine wanted (with proper and adequate applications of course)?
Hi Lorie, you don’t want to apply oil or wax before the varnish. What I like to do is finish/seal the boards with varnish, and then use a walnut oil/beeswax mixture as monthly maintenance when the boards start looking a little dry. I describe the mixture and process in detail in this post: https://www.thenavagepatch.com/end-grain-cutting-board-tutorial/
Good luck!
Try the diamond sanding paper. Will cut your sanding time dramatically and even out the stones. Beautiful work
Thank you, Karin! I’ve heard of diamond sandpaper. I think it’s time to buy some!
Hey Greg. Beautiful work. Can you tell me approximately how much CA glue you used on this project? Thanks, you have inspired me!
Craig
Thank you, Craig! I can’t say for sure hoe much I used, but it’s not a lot. I buy Bob Smith’s CA glue in the big bottle to refill my small bottle. I used far less than a small bottle. Here’s the link for the glue: https://amzn.to/2NOA8Fu
Hi! I popped over to see this board after viewing the gorgeous console table you reposted this morning. Just lovely! And I learned some things too. About super glue,fumes and eyes. I would not have thought it could be so bad for eyes….and then sanding to boot. Good gravy! I understand why you used it,and appreciate your safety warnings. This is so beautiful,and I had wondered about safety with food,and you cleared that up also. Again another lovely project to be proud of. This also gave me more appreciation of artists work,and why it costs so much. ????
Thank you, Bernice! Oh yeah, everyone freaks about polyurethane without knowing what the hell they’re freaking about. It’s just plastic! Yes, the solvents that keep it a liquid are nasty as hell, but they evaporate in a couple of hours, and the rest cures through oxidation within a week. What you’re left with is simple polyurethane plastic! Now there are those who’ll claim that plastics are no good for the body, but my take is that we’re exposed to far worse on a daily basis just going for a walk outside.
Epic.
Thanks, Johnny!
It is a GORGEOUS cheese board! And you are right to be so proud of it! For DIYers like me, who are not so adept with, (or un-afraid of) power tools, there are quite a few faux turquoise techniques that can make a passable facsimile, such as polymer clay, beads and resin, or even melted plastic… I bet Handan could come up with a few more…
Also, THANK YOU for introducing me to the Salad Bowl food safe finish! I will definitely be adding that to my DIY arsenal!
You two are just awesome!
Rachel D
Thank you so much, Rachel! Yes, turquoise alternatives are certainly easier to work with, especially for big projects!
(2018) Still takes my breath away! Every time! I pinned it in my “Beauty Captured” board!
It takes my breath away every time I serve cheese on it and someone gets a little crazy with the brie knife, lol!
You have become a MASTER craftsman!
Constance, I could happily read your comments all day long! Thank you so much, though I fear “master” is a bit of a stretch. I do get lucky from time to time, though! 😀
This is gorgeous!!! You said you were selling it? Where would I find it listed for sale??
Thank you so much, Susan! I ended up keeping it 😀
That is the most gorgeous cheese board I have ever seen! I love the look of walnut and turquoise is a favorite stone/color of mine. I just discovered your blog and have been working through old posts. They are so funny as well as informative. Kudos and bravo!
Why thank you, Laurie! I’m so happy you discovered us, and I hope to hear from you again! 🙂
Such a cool project, I’ve been working on one of my own for the past month and just finished! A lot of fun and a really good introduction to wood working. Thanks for sharing!
Thank you, Maddie! I’d love to see your board. Send a pic to greg@thenavagepatch.com. Thanks!
Hi— My name is Harold, and I have some ideas for you regarding the grinding down, and smoothing of the turquoise. I am a Tile Contractor, and work a lot with stone. There are diamond products that I believe will let you not only grind it down quicker, and easier, but absolutely level with the wood. There are a lot of places to get this kind of equipment, but the ones I use are GRANQUARTZ, and BRAXTON BRAGG. These tools are not cheap, but you can do amazing things with them. I’m just a common construction guy in Colorado, and am not trying to be a smarty, but if you would want to give me a call, I would share what I know. (Been doing this stuff for about 45 yrs.)
(If I don’t recognize the number I might not answer, so leave message)
Hi Harold, thank you for taking the time to write. I just looked at GranQuartz and Braxton Bragg’s websites, and, WOW! I had no idea all that stuff existed. You are right about the price. I’d need to buy not only those grinding pads but the tool and air compressor as well. It’s good to know though that if I get myself involved with a project involving a lot of stone I’ll know where to go for the right tools and supplies!
Well done tutorial. Was not a boring read and the end product was stunning. Thank you for this lesson. I hope to be able to do this for Christmas gifts and can’t wait to try it. Thank you again. One question, would you consider dying, not staining, a cheese boarf? Have you ever tried it?
Hi Berry, I wouldn’t do either. There are so many beautiful hardwoods in so many colors to choose from that stain is unnecessary. Furthermore, I wouldn’t want those dye/stain pigments in something that would be used for food prep and presentation.
I’ve been looking for directions like this to make my tree trunk stepping stones! I’ve sanded each one as well as I Could & most of them have “soft” areas that are lower than the rest. This is where I will put the turquoise stones going with the grain of the wood. I found a big bag of turquoise stones at a thrift store & have been dying to use them! Thx for your great inspiration!
Oh good! I’m so happy you found inspiration here! Your project sounds amazing – please email me some pics when you are finished! 🙂
Truly a work of art; just FANtabulous!
Thank you, Cheryl!! 🙂
Absolutely stunning!
Thank you, Sherry! 🙂
Hi there I m just looking for some helpful advice. I have a framed with some flat stones in it. I want to pour in epoxy or something similar to your cutting board. Not sure what would be the best for this project. I have watched a lot of videos. I have scattered pieces not a full frame tho.
Hi Tangi, I do think epoxy would be the best choice for what you are describing. Be sure to watch videos of others doing similar projects so you can learn the correct way to do multiple pours. Good luck!
Hey there,
I’m currently following your recipe and it’s great, but i’m having some trouble with the glue. I bought the same one as you, but I forgot to buy the insta-set, so i’ve just been waiting a few hours between applications until my channels are full, however the glue does not seem to be filling the channels and is in fact getting soaked up quite a bit by the wood grain around my channels leaving dark, undesirable color. I’m hoping it’s only the surface layer and will disappear when I sand it down. However if not, i’m afraid I wasted a lot of time and an expensive piece of walnut. Do you have any thoughts on this?
Thank you
Tha
I’m so sorry for this late reply. The glue won’t penetrate deep enough into the wood that you won’t be able to sand it off when you get to that phase.
Would l love to see how you did this. Unfortunately I kept accidentally hitting a pop up ad! I know you bloggers are trying to make a buck, but it’s so freaking annoying!! You think your clicking a link for your video, instead you get to watch a commercial for Ryobi, or butt cream.
We all need a little butt cream now and then, don’t we? Too bad Ryobi doesn’t make one though, eh? And yes, you’re right, we do need to “make a buck.” Running a blog is a 365-day-a-year job with a ton of expenses. Without recouping our expenses through ads, this blog couldn’t exist. The alternative would be to charge money as some other blogs do, and that is something we have no intention of doing.
Gorgeous project. I think if I were to tackle this I’d put a thin layer of turquoise resin down first, add the stones so that NONE are proud of the surface, glue them down, then add a layer of clear or slightly tinted resin flush to the surface.
Hi Glenn, that is a great idea and much simpler than the method I used!