DIY Wallpaper Art
Wallpaper Art is a quick & easy DIY that can add a pop of color or interest to any room, and it’s a great use for leftover scraps of wallpaper!
You knew she was gonna use it somewhere, somehow, didn’t you?
My babes is not the type to waste. Ever.
So even though the two rolls of wallpaper she bought last summer weren’t going to be used for the originally-intended project (which was scrapped), you just knew she’d find a use for them.
Granted, I thought that use might be years off…
I’ve heard sailors whisper tales in hushed tones of a Turkish woman who knows the full inventory of her crowded basement and can tell you when, where and for how much each item was purchased. They say certain treasures have moldered in that cold and dark basement for years, marking time while fading from memory of those overhead.
Fading from all memory…except that of the Turk Who Lives Above.
The sailors tell that once a year on the brightest full moon, the woman will issue a decree to her manservant, ordering him down into the basement to bring up some forgotten trinket, whereupon the curly-haired Turk will incorporate it into the manservant’s latest crafting project.
And it almost came to pass that the wallpaper was shunted to the basement to be inventoried by the Turk and disremembered by Yours Forgetfully.
But then came my babes’ idea for a wallpaper backsplash in the laundry room, and those two rolls were thrust back in the limelight.
Why stop at a backsplash? She was on a roll!
My babes thought that wallpaper could be turned into art.
The idea was a little wacky, but those same sailors told me far stranger things happen at sea…
So. Wallpaper art. Why not?

She wanted to make it two ways: with old frames we found years ago at the Put and Take in Connecticut. (Yes, we moved those frames and countless others like them. Do you think if a dragon moves to a new cave, she just leaves her treasure behind? Your eyeballs would pop out and splash into your teacup, madam, if you saw how much crap “project supplies” we hauled from Connecticut to Georgia!)
Anyway, as I was saying, Handan wanted wallpaper art from old frames and from embroidery hoops.
But not just any embroidery hoops. She found these awesome faux-wood embroidery hoops made of a strong, flexible rubber that are perfect for this little project.
Let’s see how it’s done!
DIY Wallpaper Art
SUPPLIES LIST
- Old picture frames with glass
- Embroidery hoops – we have a 5-pack and a 4-pack
- Wallpaper scraps – we used this wallpaper
- Spray paint – for the picture frames, if needed
- X-Acto knife (I use Cricut’s TrueControl Knife)
- Logan Dual Point Driver (optional)
- Command Picture Hanging Strips
- Elephant picture hangers (you’ve been asking about them!)
Here are the frames we started with.

I’m sure they served someone well for many years, but their glory days had faded, and only my babes’ ever-searching eye saved them from an unceremonious interment in some smelly Connecticut landfill.
Though the frames were given a stay of execution, the art they held was not so lucky. Apologies to artists Glynda Turley and Dawna Darton – I really needed those frames! I removed the art and bade it farewell. The frames and glass were in great shape. The glass just needed a good cleaning, and the frames needed some fresh paint.

I used a combination of gold and champagne bronze spray paints, since our wallpaper pattern was blue. Nothing beats the blue/gold combo!

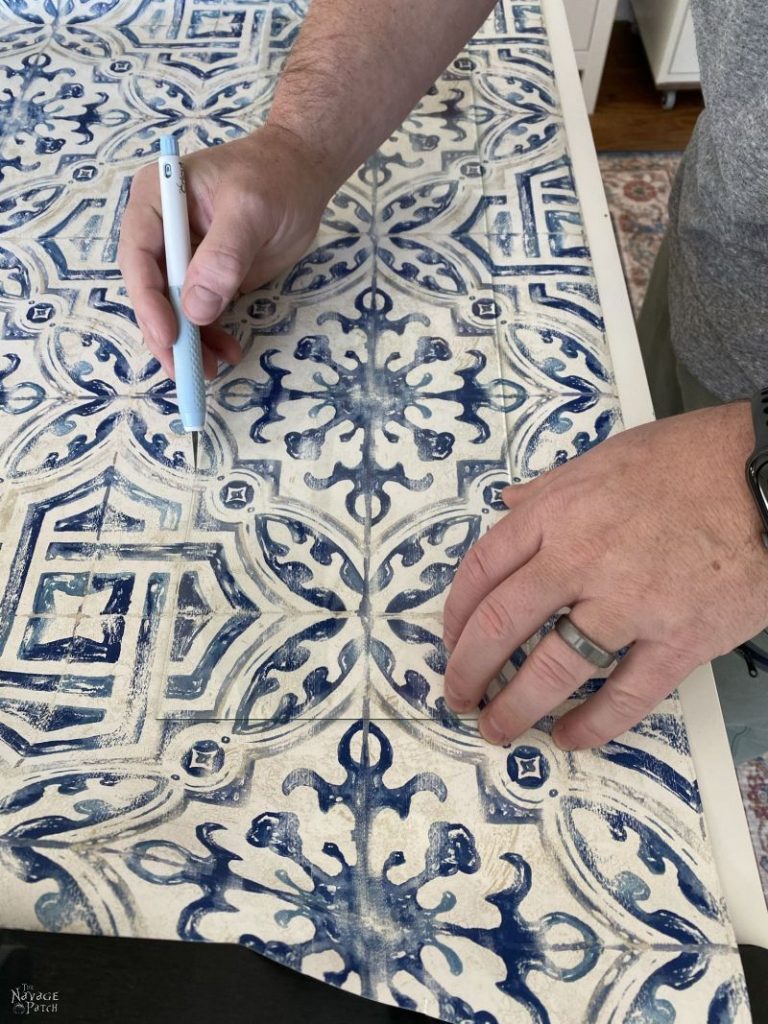
I used the frame’s glass to find the section of wallpaper that we wanted to make into art.


Then I used an X-Acto knife and cut around the glass.
After cleaning the glass, I placed it in the frame. As you can see, Handan already stuck some Command Picture Hanging Strips in the corners.

Then I placed my wallpaper art face-down onto the glass.

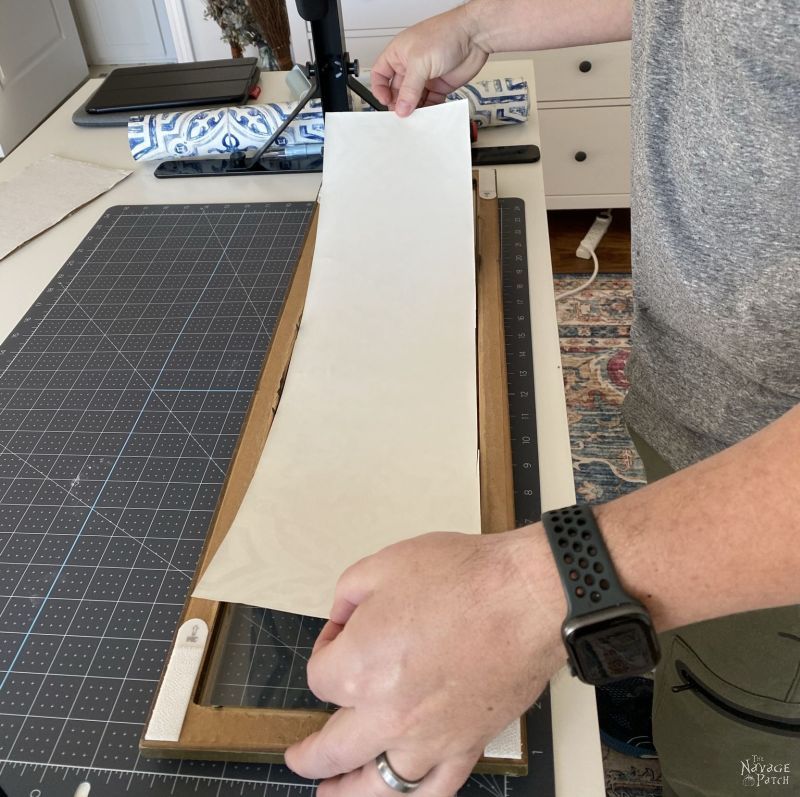
I had saved the original backing – easier than cutting a new one!
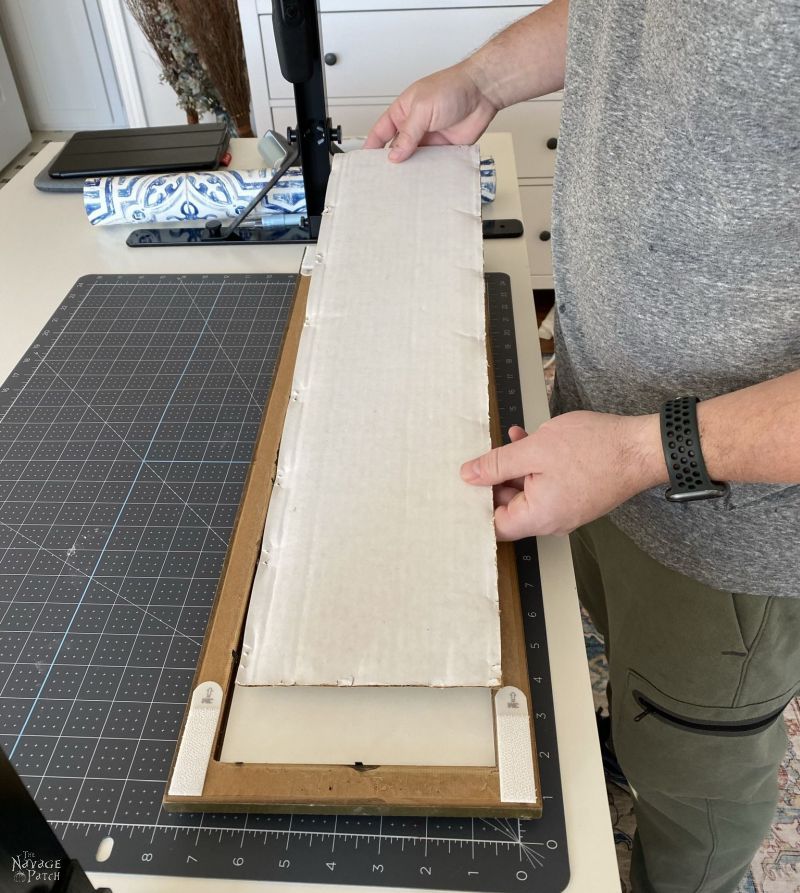
Finally, I used our Logan Dual Point Driver to secure the backing.

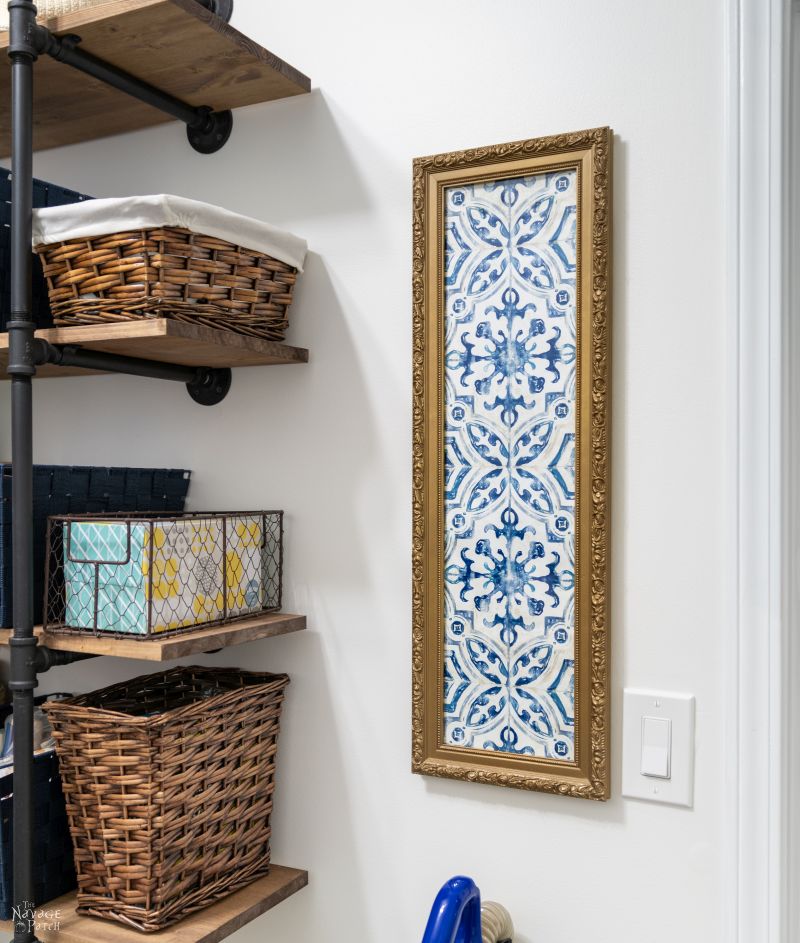
And here it is – easy DIY wallpaper art!

We have this one hanging in the craft room.


And the other one is in the laundry room.

Okay, now let’s have a look at the embroidery hoop wallpaper art. It’s so simple!
We bought this 5-pack of hoops (and this 4-pack).

Let’s start with this one.

I just rolled the rubber ring off…


Here I’ve placed the inner ring on top of the wallpaper to show you the design I want.
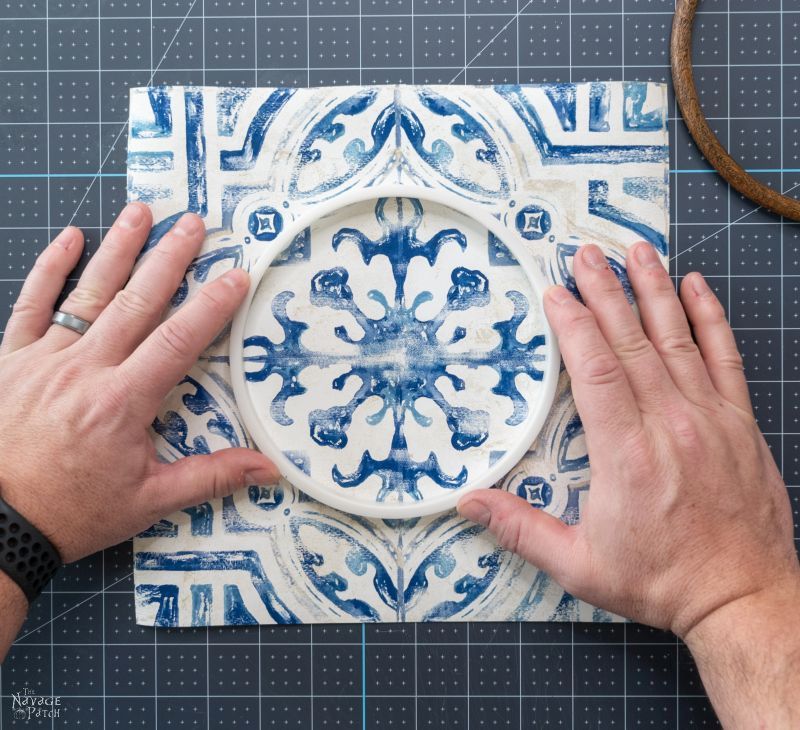
Next, I put that inner ring underneath the wallpaper and used my fingertips to move it around and feel if it was in the right location.

When I had the ring in the right spot, I placed the outer rubber ring on top…

…and pressed it into place. The rubber ring rolls over the inner ring until it is seated.


For the final step, I used my blade to trim away the excess.


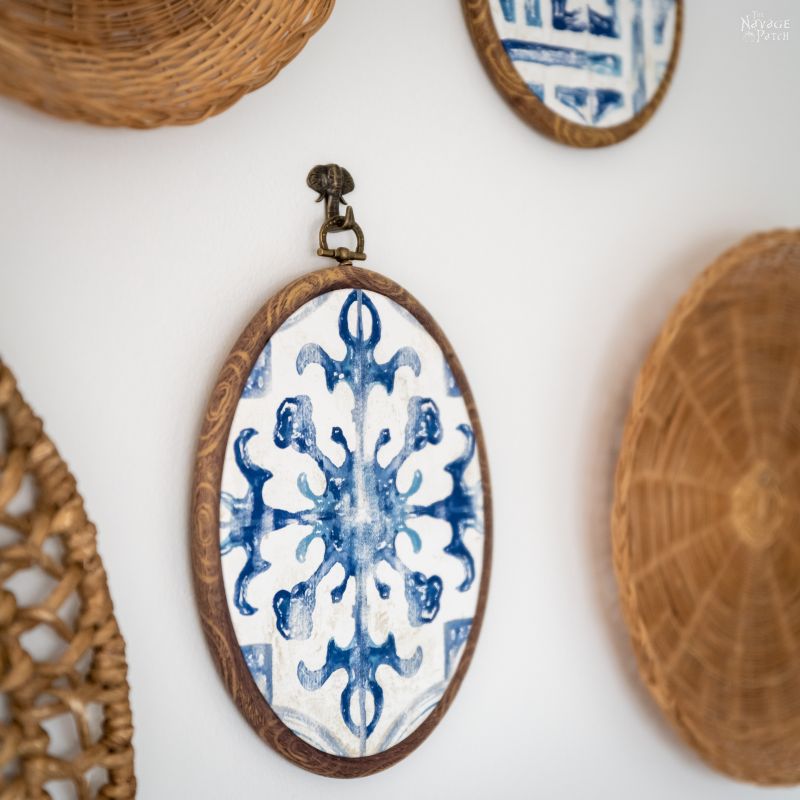
And here it is! Wallpaper art using an embroidery hoop.


If you’re wondering where we got those elephant picture hangers, you can find them here.

But hey, you don’t have to stop at wallpaper with these hoops! Got doilies? Here’s one Handan’s mother made.


It looks great!

And those rolls of wallpaper aren’t even close to finishing, but don’t worry, we’re cooking up something new to do with them…something altogether and entirely new.
Stay tuned!
We love it when you share our posts on Facebook and Pinterest!


Love this! Where did you get the little elephant picture hooks?
Thank you, Deborah! We got them here: https://amzn.to/3aVl4lR
I will update the post!
Where did you get those adorable elephant hangers?!!!
Here they are! https://amzn.to/3aVl4lR
Love the ideas (and the wallpaper). Have you tried transferring it to fabric so she can have pillows and window treatments? I’ll bet that pattern would make a nice valance and tie backs.
We have not tried that, Deborah, and you’re right, I think it would be awesome for tie backs! Thanks for the tip! 🙂
Wow, just love the wallpaper art. I am in the process of redoing my private bathroom, and I am going to use the idea for the walls. Thanks for the tips. Just love all your wonderful ideas and stories. You’re my favourite diy blog. Cheers
Thank you so much, Joanne! Have a fantastic day! 🙂
I read your blogs all of the time but decided now was the time to talk about how much I LOVE this project. I’ve been having a creative block and this will help me kick it in the right direction. 🙂
Awesome! Glad we could help kick your creativity into gear, Jordan!
I use leftover wallpaper on picture mat board (Ikea Ribba) for some of our framed photos. Works and looks great – and helps tie the look together.
I love the idea with using the doily! I have a pretty one made by a friend, and this is such a cool (and more modern) way to show it off. Definitely using this idea.
Cheers!
That’s a great idea about using wallpaper as a picture mat, Mo!
Hey Greg, Not loving the gold frames with the wall paper. Maybe a silver/gray would make them pop more? JMO. I have used paintable wall paper as the back ground in frames. I have lightly stained it. I used it for a paint by number picture I did as a kid.
I love the idea for using it as a photo mat! We’re not gold people when it comes to decor, except when paired with blue. Handan isn’t a fan of silver/blue, as she thinks it’s a bit too cold.
Hi Handan and Greg
I just love these ideas, especially the crochet doily! I’ve got some really old ones and they would look lovely framed! Thank you both ❤️❤️
Oh cool! Glad we could inspire you, Chrissie!
I love easy project like this that look so absolutely cool! Love how your wallpaper looks in both frames and in hoops. Your frame color choice is perfect. Where did you get those fabulous hoops!?!
Thank you, Kathryn! We linked to the hoops (two kinds) in the post! 🙂
Just saw the link for the hoops – sorry! Love your blog! The way you show step by step photos is so helpful!
Oh good! Glad you found them!
Holy Moly Greg!! LOVE these DIY’s with wallpaper! What could be EASIER than squishing in between an embroidery hoop!!!! I can’t wait to try!
Thanks so much to you & Handan, for sharing your creativity and humor!! Enjoy the day!!! Valerie
Thank you so much, Valerie! I know, right? It’s the easiest thing ever…which means I love it! 😀
Love this … very creative and resourceful! As always, thanks for sharing and making the tutorials so easy to follow.
Thank you, Debbie, it is our pleasure! 🙂
OMGoodness! Thank you! Love what you guys did here! In the process of revamping my MIL’s living room and she has doilies made by her Great Grandma. What a wonderful idea to display them instead of stashing them in an unseen plastic tub? PS…I thought for sure Handan would display the porcelain art printables in the laundry room.?.
Awesome! I’m glad to hear they’ll be displayed instead of stored! As for the porcelain art – I suggested it, but she had other plans already, lol!
Great job. I did almost the same thing but used peel and stick tiles that I used on my fireplace surround (just for the summer, since the heat would make them fall off). They were 12 inch by 12 inch blue decorative tiles. I used old picture frames and left the sticky paper on and just reassembled the frames. You two come up with the best ideas!! Thanks
Thanks, Mona! That’s a great idea to use peel & stick on a seasonal basis for the fireplace!
I have been displaying doilies like this for awhile and yours is killing me. Doilies are beautiful in their symmetry and this is framed off kilter. It takes a little work to get them centered because it will pull to one side or the other but then you get the beauty that was lovingly crocheted into it.
LOL! Don’t worry, Cindy – we just did that one to show an alternative to wallpaper! After Handan took that picture, we removed it from the hoop. Handan’s mother made those ages ago, and it would have needed trimming to fit properly in that hoop…something Handan definitely didn’t want to do! 🙂
Great projects. I bet those framed “tiles” would also look good as a “tray” on a coffee table with some candles, a plant, etc. I have seen doilies with larger “holes” framed and used as spider webs with a plastic spider for Halloween decor. The elephant hangers add such a classy touch (coming from someone who hung 5×7″ pix on (hidden) pearl headed pins today!
The tray is a great idea, Kathy! We did a Halloween project like that, too –> https://www.thenavagepatch.com/diy-halloween-wreath/
Always enjoy reading your posts and seeing the great projects you both come up! Thanks!
Thank you, MonaLisa! 🙂
HI,
I am starting to remodel my weekend getaway and fell in love with your laundry room wallpaper.
I am planning to paint the lower kitchen cabinets in the same color as your words titled “Wallpaper art” and trying to find a wallpaper that slightly matches that color which is more of a teal tone. On the web and even in some of your photos it looks like there is some of that teal tone in this wallpaper. but on others, it looks just blue. Can you tell me if this is ALL blue or is there a hint of teal in it?
Angelika
I am new to the Navage Patch, Thank you for all your fantastic ideas-it’s AWESOME!!
I was wondering if the gorgeous paper you used for the picture can be used to cover up tile, like for a backsplash in a kitchen?
I also have so many old frames, this is the PERFECT solution to make them new again!!
Thank you so much for your easy step by step directions. You make it such a treat to see what you two will come up with next!
Hi Deb, and welcome! My two concerns with covering tile with wallpaper are 1) will the wallpaper stick properly to the tile, especially considering it’s a humid environment (at least behind the stove), and 2) would the recessed grout lines show through the wallpaper? I suppose if you’re considering getting rid of the tile anyway, it couldn’t hurt to try! Let me know how it turns out if you try it.