New Craft Room
It’s been there for months, lurking in the shadows sunlight, biding time until we reveal it to the world.
You’ve been catching glimpses of it ever since our kitchen remodel reveal post.
But did you know, it’s already been given a mini-makeover, even though you haven’t yet been properly introduced?
Lucky you, madam. Today you get two reveals! The Original New Craft Room and The New Original Craft Room!
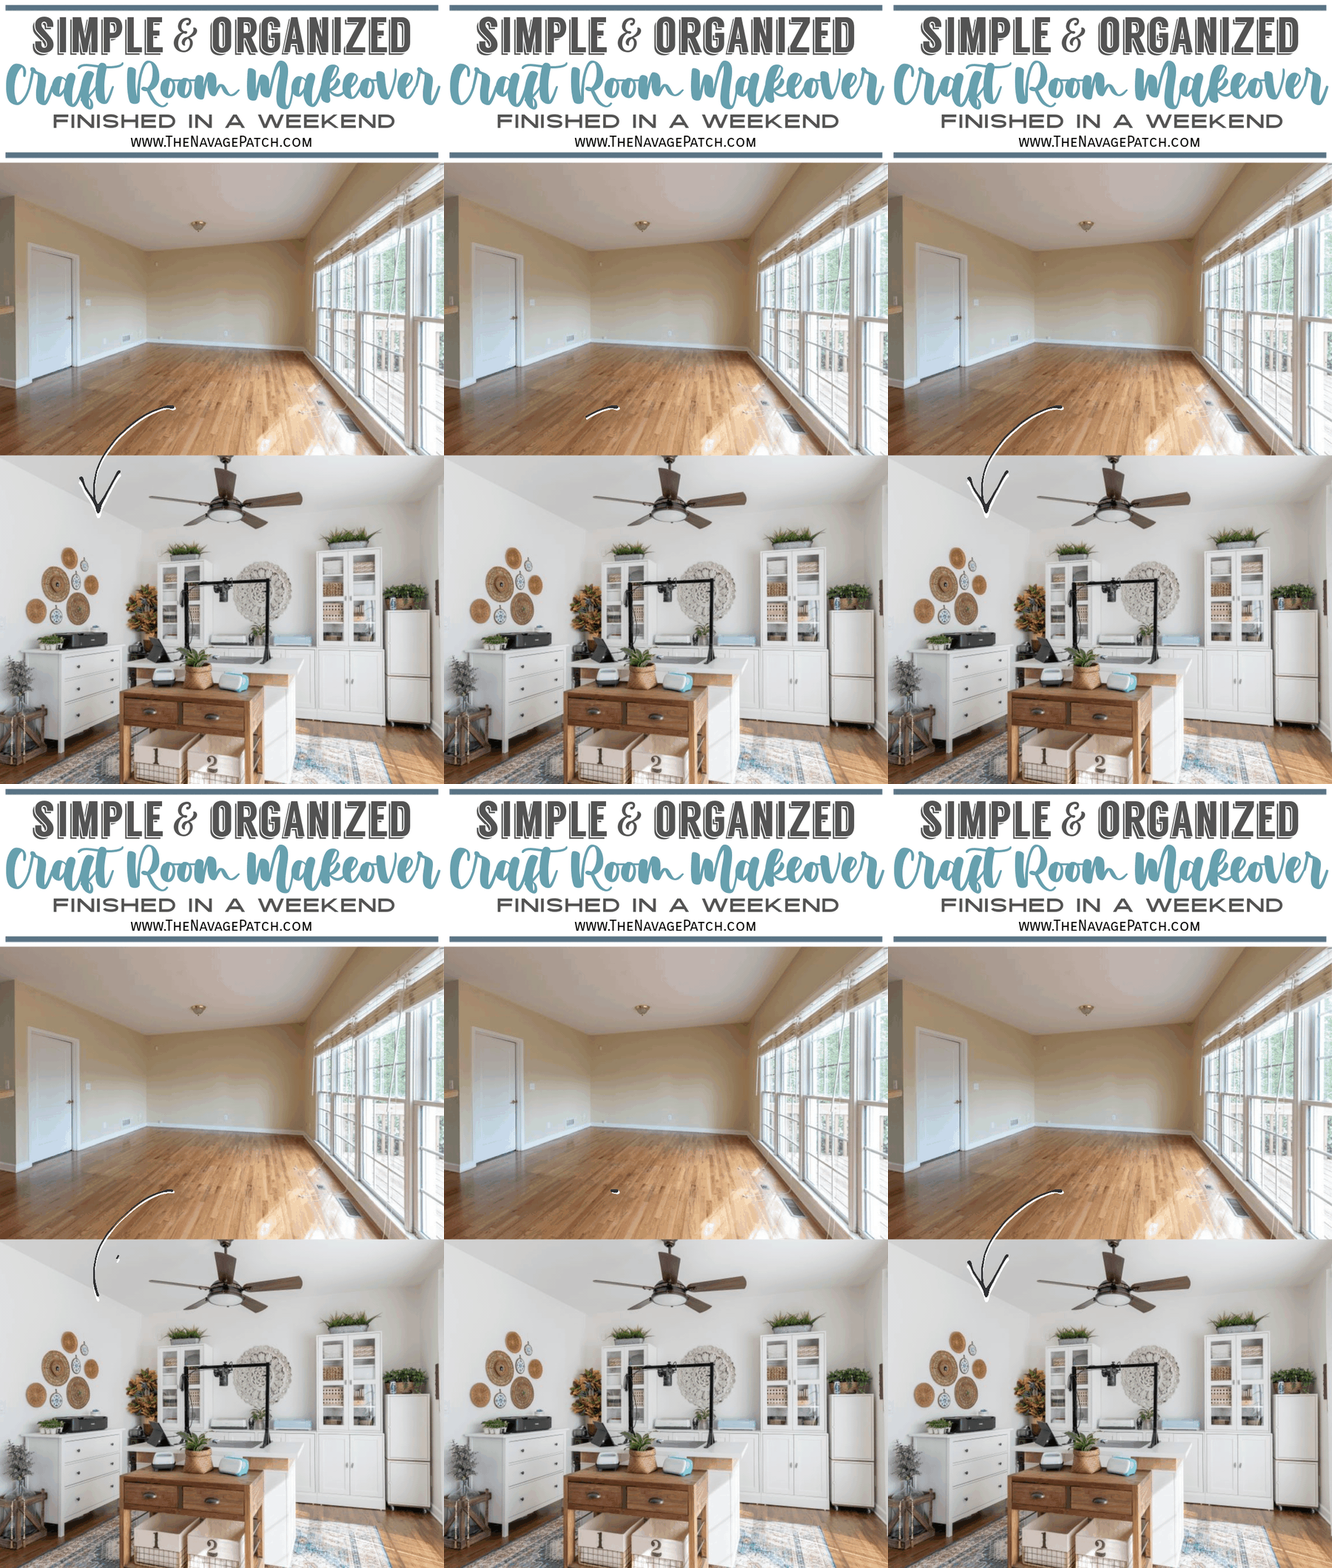
Because if there’s one certainty in this life (honestly, it’s a safer bet than death & taxes), it’s that my babes will change her mind!
When we first moved in here, we toyed with a few options for the craft room. For a while, the thought was we’d have it in the basement – in this room, to be precise:


That would have made one hell of a craft room!
But there was just one teensy little problem. Well, two, actually.
- We’d need to finish that room. That would take time and money, and it was no small task! To do it right, we’d need HVAC, plumbing, electricity, flooring, ceiling and lighting.
- It would be one thing to consider doing all that in an empty house. But the basement is far from empty. Here’s the current situation in that room:

Of course, had we taken that route, we’d still need a place to craft, so we had earmarked the space off the kitchen as a temporary craft room:


At some point last summer, as my new kitchen slowly transformed from dream to reality, it occurred to me that I’d rather have my craft room upstairs, in the world of light and the living. I’d had enough of dank, dark basements at the old house. I’ve become a creature of the light since moving down South.
I know my babes had grand plans for the space off the kitchen, but I just couldn’t shake the idea that my craft room should be connected to my kitchen! My job and my hobby, all in one interconnected space! My very own Jobby Lobby!
I had to tread carefully when suggesting this to Handan. Too many times I’ve come up with an idea I thought was ironclad, only to have my babes be the iceberg to my Titanic.
As I pleaded my case to Handan, I even invoked our readers (that means you, madam!)
“Think about it, my babes,” I said, “our readers pretty much all craft, and I’ll wager they all cook. So who wouldn’t want a kitchen that overlooked a craft room and a craft room that looked upon a kitchen?” Hell, I’d be green with envy if I saw a setup like that! Imagine the possibilities!
- Gnomes & minestrone (or Gnomey minestrone, if you’re the “min eh stroh nee” type)
- Cricut-in-a-biscuit
- Hot cross buns & glue guns
- Glitter fritters
It would be a delight for all the senses!
Handan was silent for a moment. I remained cautiously optimistic.
“Okay, my babes,” she said at last, “we’ll do it your way.”
*****
At that point, our cabinet guru San had already finished most of the kitchen installation, and we first considered buying more cabinets for him to install in the craft room. We knew we needed a ton of storage, and cabinets seemed the best route to achieve that. We certainly didn’t need KraftMaid-level cabinets, so we headed a few towns over to Norcross, Georgia and starting hitting all the cabinets stores on Jimmy Carter Boulevard – it’s like ground zero for cabinetry around here. We were so excited! It was going to be like candy shopping for grown-ups!
Jee. Zum. Crow.
What a stinking letdown!
Grungy shops.
Crappy display models.
Staff who didn’t know their product and clearly understood nothing of cabinetry.
Salesfolk who clearly thought they were God’s gift to cabinetry and spoke down their noses to customers.
And the prices!
Good lord, these cabinets didn’t even come assembled like our KraftMaid or even the inexpensive Hampton Bay stuff we got at Home Depot for the laundry room! Every cabinet in every store was RTA, Ready-to-Assemble. That’s sucker-speak for Rip Off.
Oh, you mean I get to pay you $6500 for one measly wall of cabinets (no countertop), and you’re giving me the honor of building them myself? Oh, you’re too kind! You spoil me!
Note the $6500 doesn’t include installation either. Rat finks.
Handan and I hightailed it out of Norcross while I gave the shops on Jimmy Carter Boulevard a rousing 21-middle-finger salute.
Poor Jimmy Carter. He deserves a better boulevard.
Back home, we came up with a new plan: IKEA.
They’ve been good to us over the years, and we hoped they could deliver one more time.
Handan went to their site and started calculating. An hour later and she had a shopping list. The next day, we drove to Atlanta, waited and hour in a sweltering line in the parking garage, masked-up and gasping for air in the humid summer air, and then finally got our turn to enter.
Back home, I put my best man on the job of building the cabinets we bought.

He had some help from my babes.

Together, they built my craft room furniture in an evening. Total cost: $1000
Take that, Norcrass!
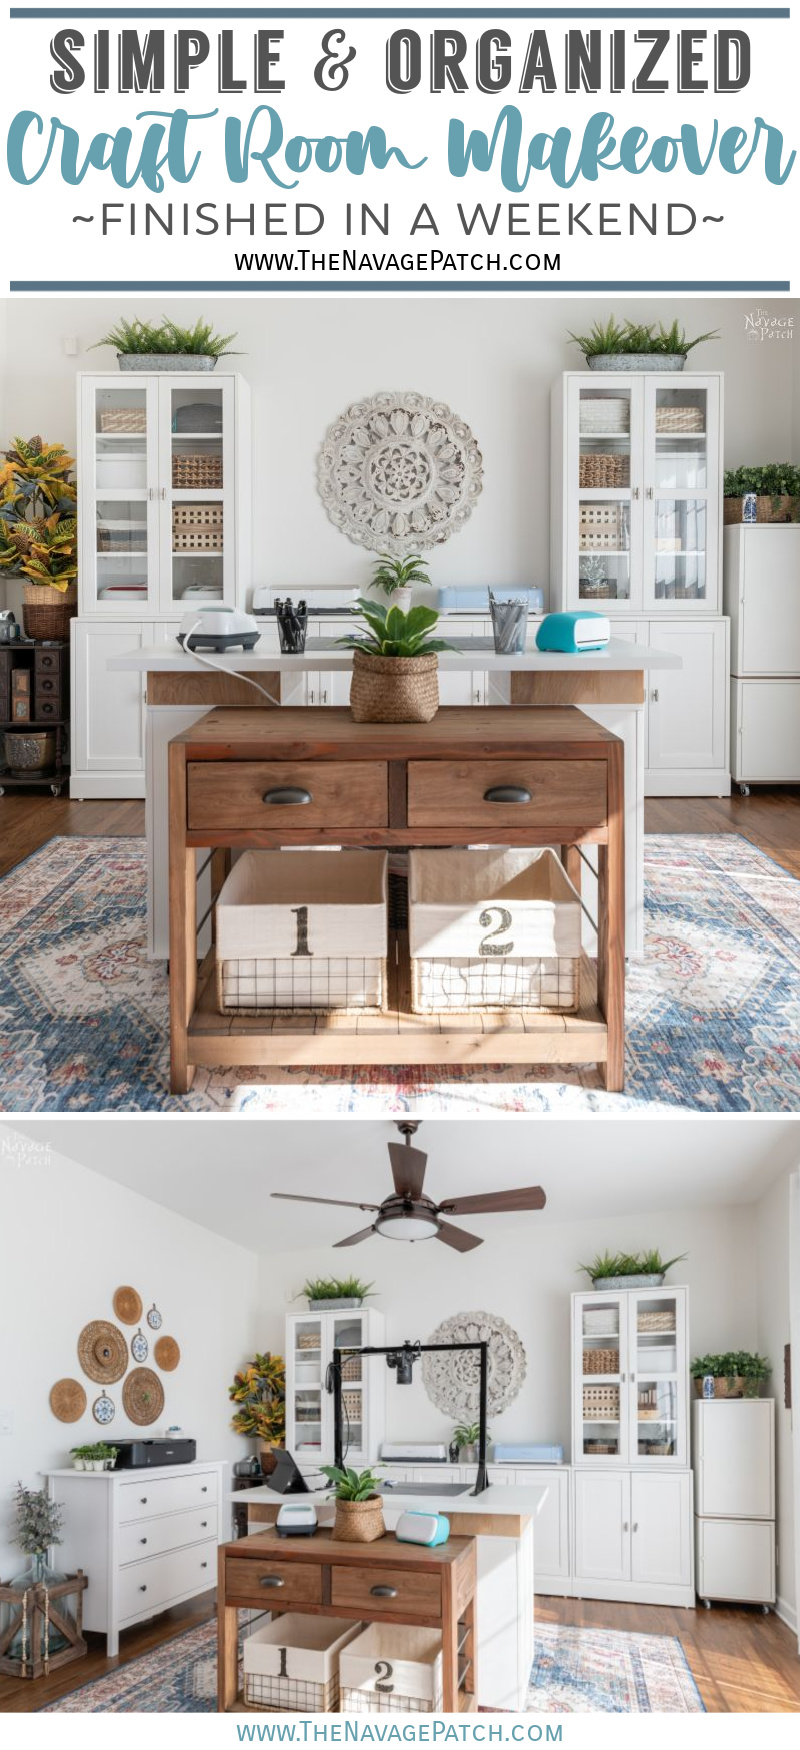
So here’s The Navage Patch New Craft Room, v2.0, aka The Original New Craft Room!


Our original printer stand was one of the two rustic console tables I built back in the old house. And you can see that Handan’s wallpaper art idea was already fully formed at that point! We knew back then that we wouldn’t be using it in the kitchen, and she probably had the idea to use it in the future laundry room (which hadn’t been built yet).
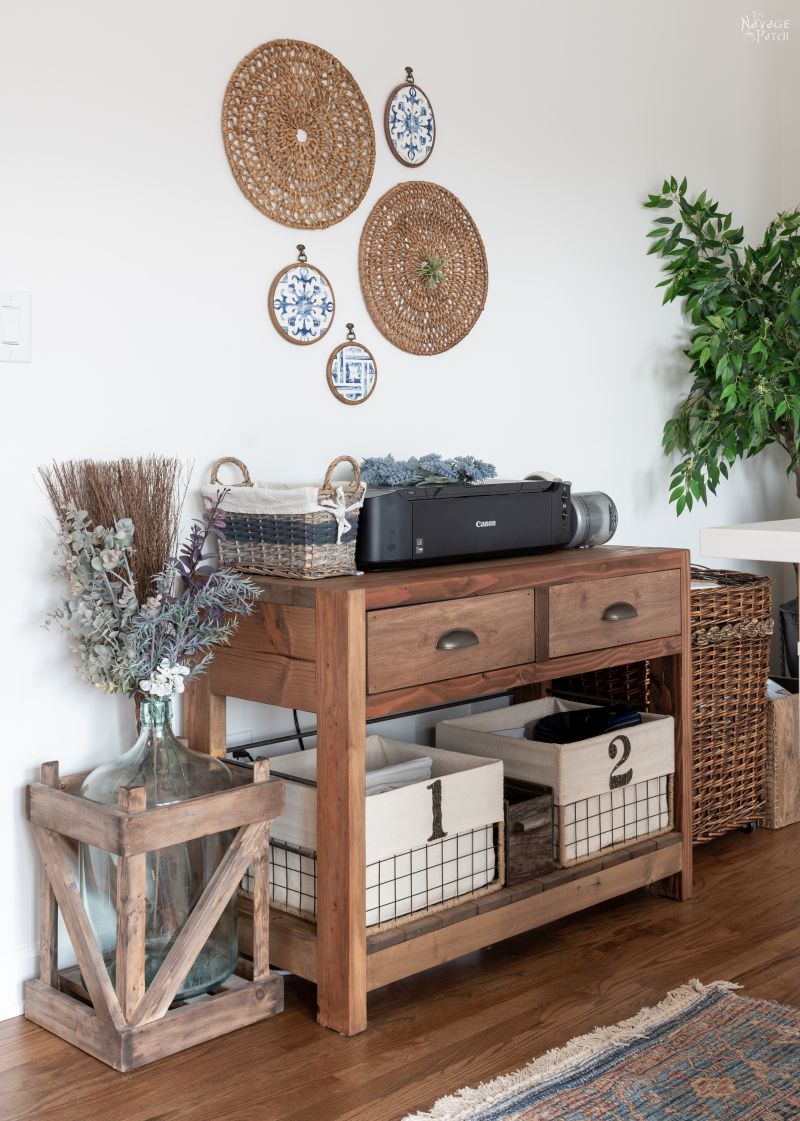
That laundry basket next to the console table was full of Dollar Tree supplies. The problem was that they weren’t easy to reach. And after a time, it was full, so we had bags of supplies on the floor. The Original New Craft Room was pretty badass, but it still didn’t have enough storage space for our crafting supplies.
The laundry room remodel would solve that issue once and for all.
And just after we finished the laundry room, my babes wanted to make a few changes in the Craft Room.
Back to IKEA we went.
I now introduce you to The New Original Craft Room, aka The Navage Patch New Craft Room v2.1!


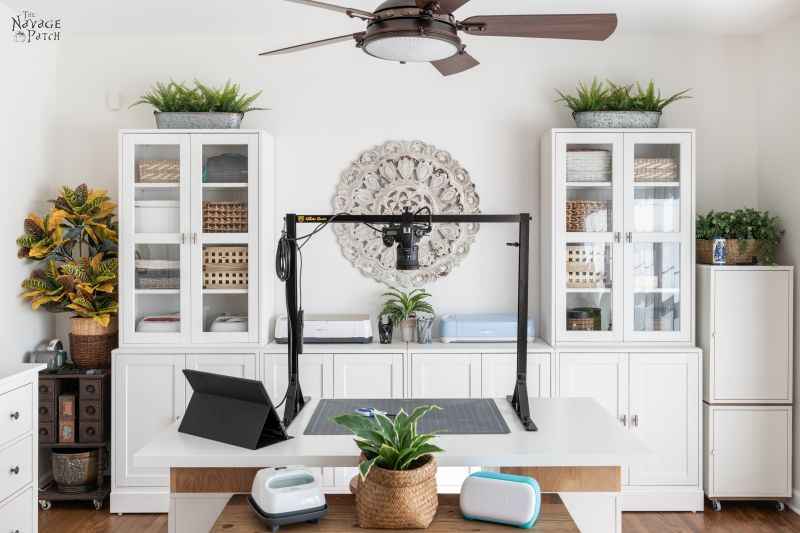
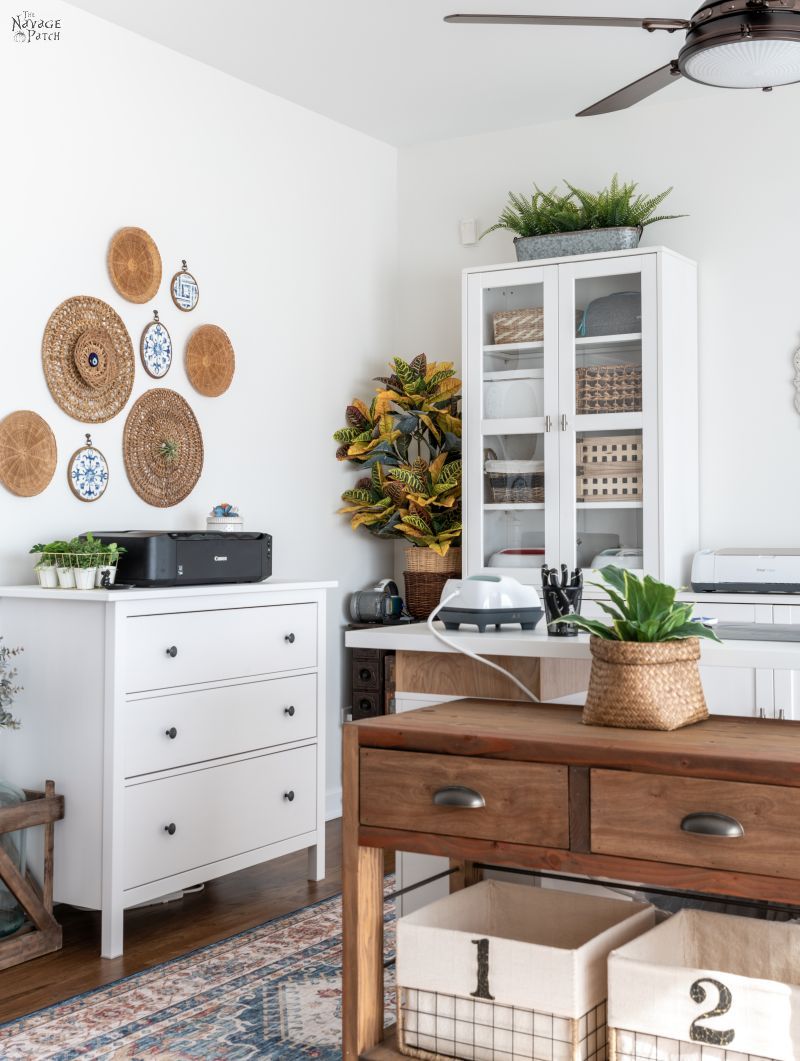
Let’s take a closer look. One of the first things we switched out was the rug. The original had a pretty thick and bumpy weave, and it made it difficult to roll the crafting table. The new rug is printed, like the one in the kitchen, and it is bigger than the old one.

The console table holding the printer didn’t offer much storage, so we replaced it with an IKEA HEMNES dresser.
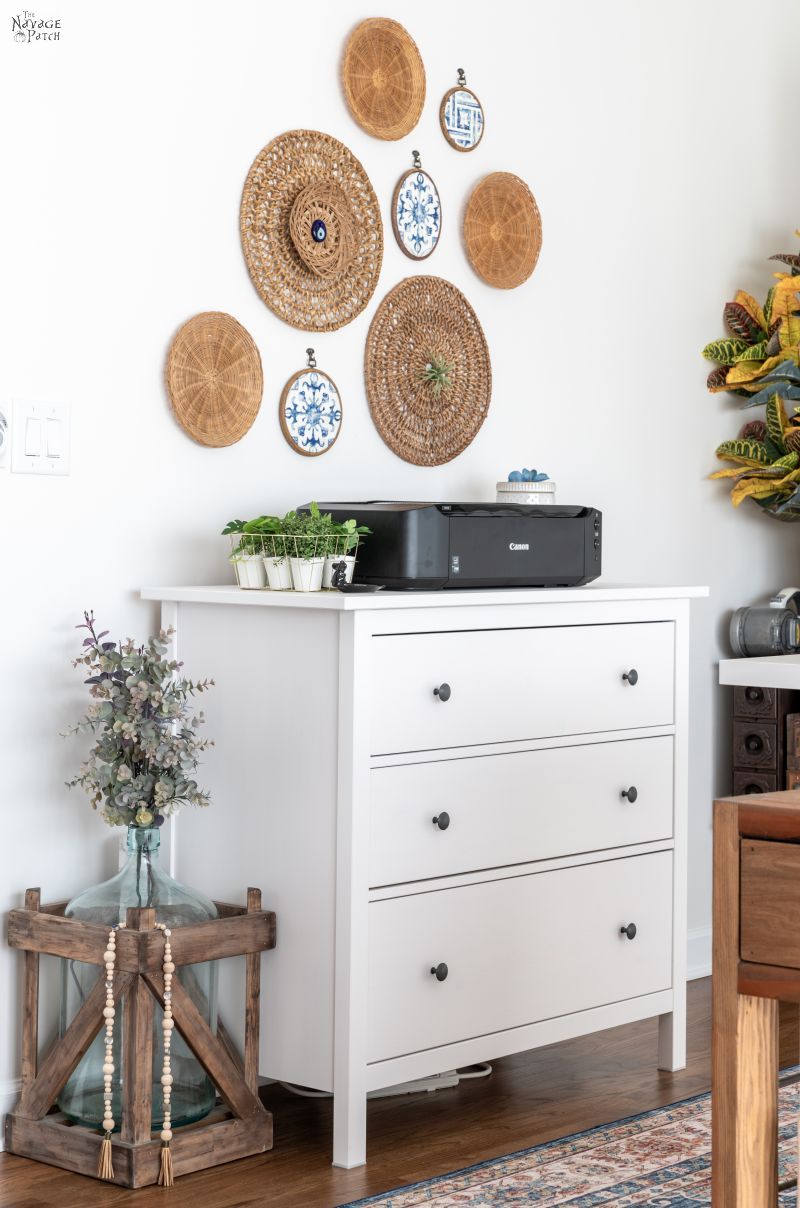
Our old DIY weathered wood carboy crate is still getting used, as is the DIY wood bead garland Handan made way back when.

We moved the console table in front of the craft table. It now serves as the Cricut Station. Whenever we have a Cricut project, we move whichever machine is needed to that table.
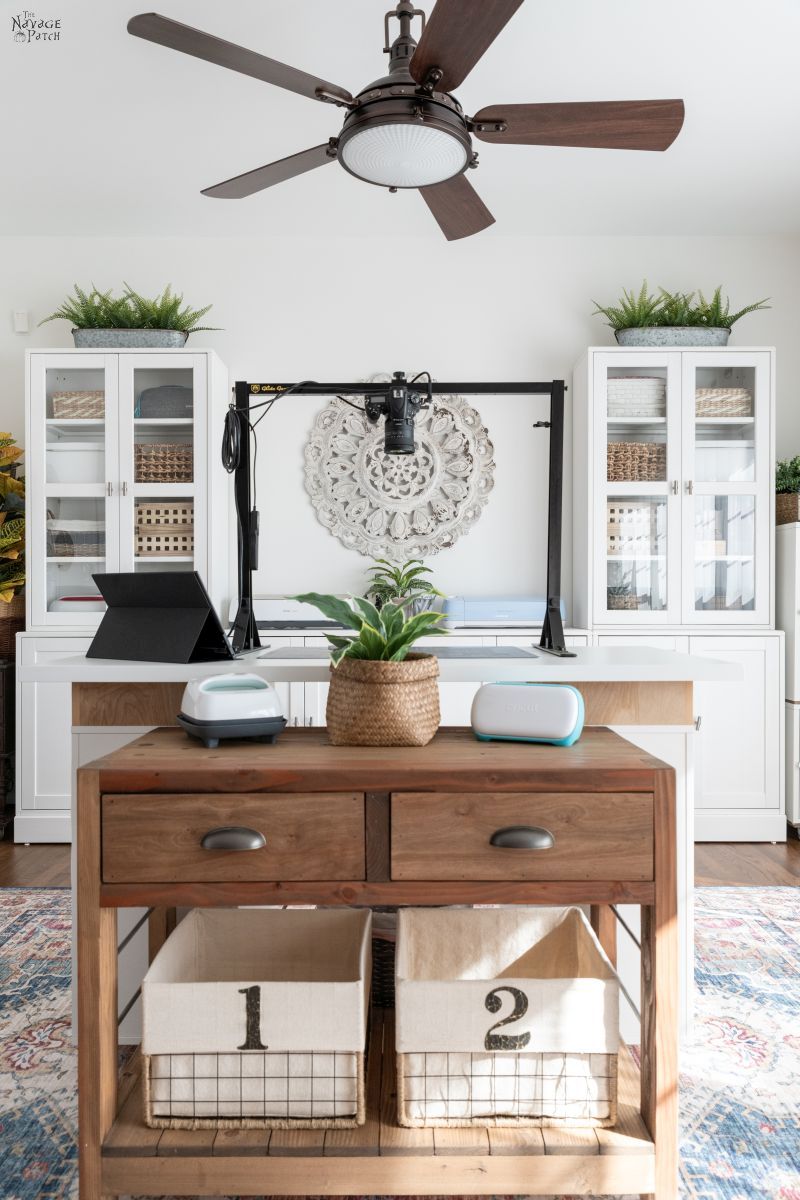
To power all the machines running on the craft table and console table, I mounted a power strip, as you can see in the pic below.

Under the HEMNES, you’ll see another power strip. Whenever I need power on the table, I pull that one out from under the dresser and plug the craft table’s power strip into it.

You can see in the picture above that the craft table is made from an IKEA countertop placed on top of two ALEX desk drawer units. The ALEX’s themselves (even with the casters I installed) were not tall enough for a comfortable crafting experience, so I used some scrap plywood to make risers.
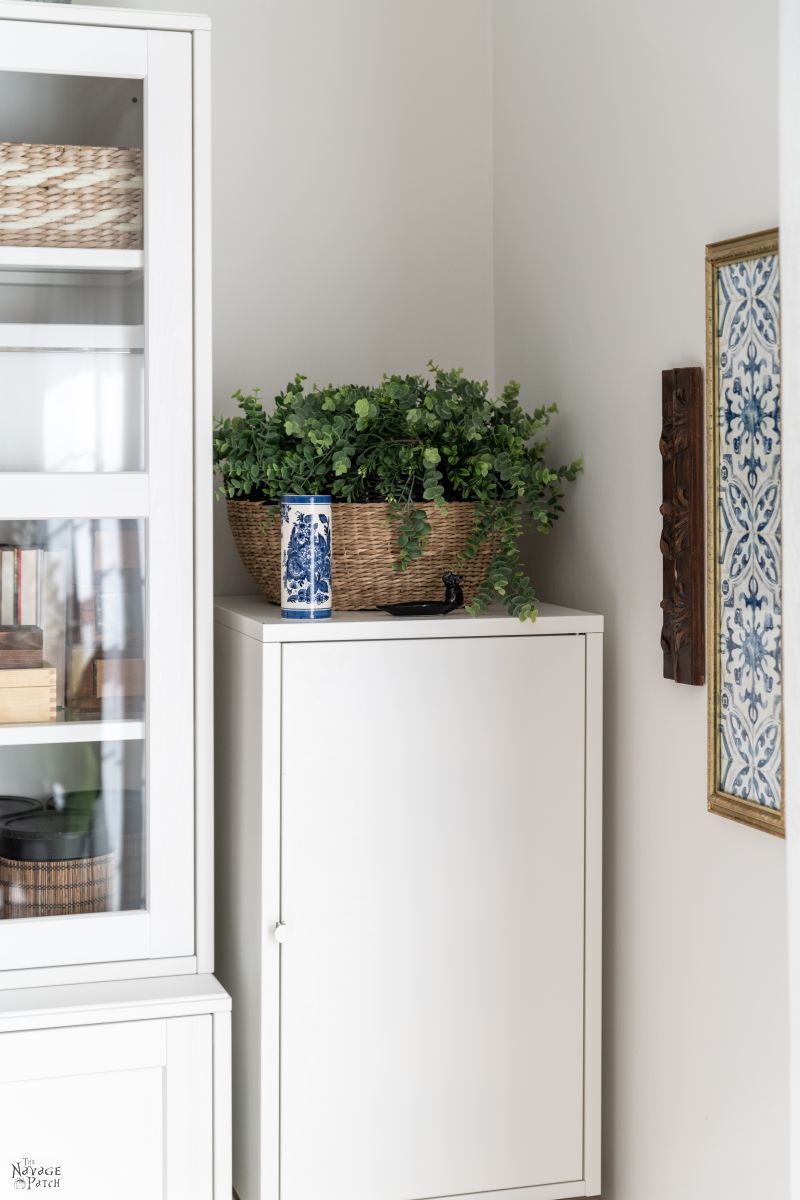
I love the look of these cabinets. Clean and functional, and the glass lets me see just exactly where Handan hid my stuff.

And since everyone loves looking into other people’s cabinets…

Over on the other side…

Those old boxes on the right side of the first shelf used to belong to my father’s father. My sister and I called him Pom Pom, and for some reason, he didn’t mind such a name. Some of them still have their original weathered and brittle paper labels.

One of those labels writes, “NAILS.” Another writes, “Roof NAILS MED LARGE.” But the one in the upper left is my favorite. As far as I can decipher, it writes, “DOLTS SMALL.” ?

Yes, I’m sure he meant to write, “BOLTS,” but sitting here some 80 years later, I’m having a laugh imagining him working out in his garage and shouting back towards the house, “Betty! Where are my damned dolts?! The little bastards must’ve gotten loose again!”
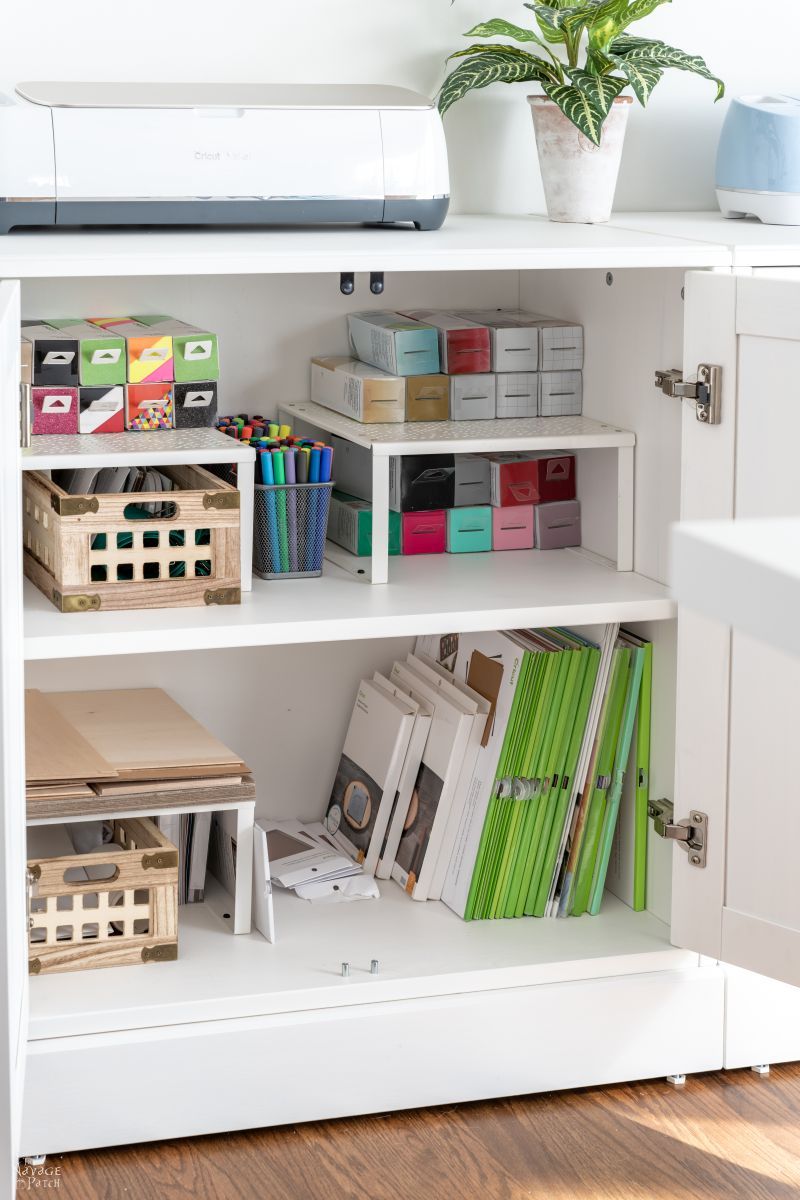
These IKEA metal storage cubes are cheap, easy to build (or so The Boy tells me), and they are the perfect place to store our Cricut vinyl and Infusible Ink.

Here’s a peek at some of the base cabinet storage. This one holds the vinyl and Infusible Ink for our Cricut Joy plus materials for the Maker, like leather and wood.
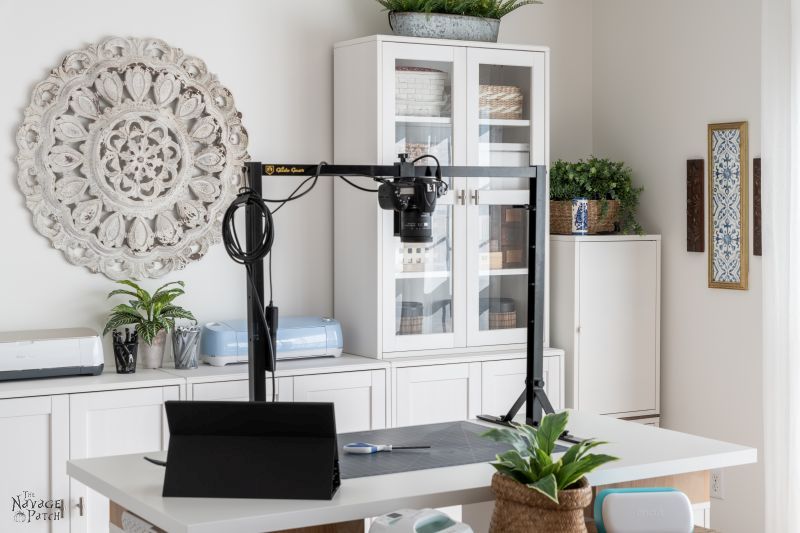
Here’s a look at the craft table with my camera setup. This is how I get those overhead shots and videos.

I have the camera hooked up to that portable monitor so I can see what the camera sees while I’m crafting. If I’m taking photos, I either ask Handan to work the remote shutter release, or I press the timer button the remote, and that gives me 5 seconds to pose before it takes a photo.

So far, it’s a joy to work in, and since it’s so close to the kitchen (the heart of the house), I can be crafting, cooking and listening to music while Handan works at the island.
It’s perfect.
And it’s exactly how I wanted it.
Source List
- IKEA HAVSTA cabinets
- IKEA HALLAN storage cubes
- IKEA ALEX drawer unit
- IKEA LINNMON tabletop
- IKEA HEMNES chest of drawers
- IKEA casters
- DIY rustic console table
- Kichler Hatteras Bay ceiling fan
- Upcycled antique sewing machine drawers
- Medallion printed area rug
- Nikon D750 DSLR camera
- Tamron wide angle lens
- Glide Gear overhead camera mount
- Portable monitor for photography
- Remote shutter release for camera
- Cricut Joy
- Cricut Maker
- Cricut Explore Air 2
- Cricut EasyPress
- Cricut self-healing mat
- Canon IP8720 printer
- Storage baskets
- DIY upcycled coffee can storage
- Galvanized planter buckets
- Faux ferns
- Faux plant
- DIY faux aged terra cotta pots
- Black & Decker hand vacuum
- Medallion wall decor
- DIY wallpaper art
- Rattan placemats
- Wicker paper plate holders
- Better Homes & Gardens modern farmhouse 3 piece storage jar
- DIY weathered wood carboy crate
- DIY wood bead garland
We love it when you share our posts on Facebook and Pinterest!






Beautiful workspace! I look forward to seeing more of your projects from this wonderful hub.
Thanks, neighbor!
Lovely craft room – you are an inspiration, and I love your blog. Reading your blog with your humor makes it a very enjoyable read. Thank you for your craft ideas and being able to use your VIP library.
Thank you , Mary Ann! I’m so happy you’re enjoying our blog! 🙂
Totally jelly over here. Beautiful dream of mine, to know exactly where everything is.
LOL, I know! Thankfully, I have a “Handan” to help me remember!! ?
Wow! It is so beautiful and classy. I love how you mix the wood and the white, the rustic and contemporary. Your craft room will be my inspiration for my sewing room which desperately needs a make-over.
Thank you so much, Kim! We’re happy to be an inspiration! 🙂
I am SO jealous! What an awesome room.
Thank you, Nancy! 🙂
Beautiful crafting area! And yes, I’m envious! But, I’m a messy crafter and would never, ever be able to keep it neat! Still – you two are the best and I continue to love reading about your adventures!
Thank you so much, Gail! For me, it is an effort to keep it clean. I’m a naturally messy person. But because this room is so “on display” compared to the old craft room, I’m compelled to keep it neat now!
What a beautiful craft room! All that storage! All that light! It must be a joy to work in, and right in the middle of everything. No need to walk upstairs or downstairs. I do think you need a few more cricut machines, though. 😉
LOL, you can never have enough Cricut machines, right? 🙂
I love it! It looks gorgeous and all that natural light coming it!!!!
My “craft room” is a built-in Formica counter in a alcove between the laundry/utility wall and bump out mini closet (it really hides the sewer pipe, but I store stuff in it too) in my dark and small basement rec room (the basement is finished). All my supplies are either in stacked plastic containers underneath it or in stackable bins with drawers on top of it.
Next year’s plan (hopefully) is to demo that counter and replace it with a Dreambox craft armoire https://www.createroom.com/products/dreambox?gclid=EAIaIQobChMI9Kewttjk7gIVDqGzCh0A1AMWEAQYASABEgIGEvD_BwE. Those IKEA cabinets though are the exact same ones and (same configuration) I plan on putting in against another basement wall to give me more storage and keeps those storage containers in the basement out of sight.
Thank you, Laurie! Ooooh, those Dreamboxes are super cool, and your plan for the same IKEA cabinets – great minds think alike!
You have so many great craft things – I envy you! Your basement looks like mine and I’ve been in the same 100 year old house for almost 50 years. I really enjoy getting your emails and watching you craft such marvelous things. Keep them coming. I AM SO ENVIOUS!!!
Thank you, Mary Ann! We’ll have many more crafts and projects to share, so don’t worry, they’ll keep coming! 🙂
O M G!!!! This is absolutely stunning, a crafter’s dream come true! It’s functional yet beautiful! I truly hope you create many more wonderful crafts in your new space. Enjoy!
Thank you so much, Melva! We certainly will! 🙂
Wow. You have motivated me to get moving today! I am so inspired. I love what you’ve done. I love reading your posts more than ever now knowing that you’re living in my old town. I may live in Washington State now but my heart will always, always be in Suwanee.
What a gorgeous dream room.
Awesome! I love it when we inspire! And our hearts are now in Suwanee, too – we love it here, Lori!
A craft room off the kitchen is my dream, too……only with a a door to shield inquiring, and perhaps judgmental, eyes from my (epic) crafting/sewing mess. You’re either a brave soul or exceptionally neat and tidy! It looks great and HAPPY CRAFTING!
I’m not neat and tidy by nature, Jan, but having this open room right off the kitchen will force me to be! 🙂
As I was scrolling down, looking at your beautiful room, I kept thinking, “I really wish he’d show us what’s inside the cabinets.” Ha! Thanks for reading my mind and sharing. Always looking for storage ideas.
LOL, glad to be of service!
Yay! The room turned out beautifully and I’ll definitely be borrowing (ok, stealing/copying cuz I won’t be giving them back) some of your ideas for my bonus room-future craft room-currently room with lots of things I’ve forgotten I even own. I wonder what you recommend for task lighting? Obviously your windows work during the day – they probably work at night too, just don’t let in much light ? – but all joking aside what kind of lighting is best for crafting? Which type of light bulbs would you suggest? I have no clue how to pick out light bulbs anymore, they have become a new language and I’m too old to learn a new lingo ? Thanks so much!
Thank you, Pam! Ok, for task lighting, there’s nothing better than photography bulbs! If you check out our laundry room reveal, the ceiling light we bought with photography bulbs would be perfect lighting for a craft room. There are links to the light and bulbs in that post. 🙂
Thanks a bunch!
Awww, Greg, I know you probably hear it all the time, but your posts always make me smile so big. Heck, I’m sure I’ve told you that a time or two myself in the comments. You’re just absolutely delightful and it really doesn’t matter what you’re writing about – I always smile and sometimes even laugh out loud as I read (and boy do we all need that these days). I even love the way you call us readers “Madam” – I wouldn’t let anyone else get away with calling me that! LOL!
Your new craft room V.2 is simply stunning. I love everything about it! Btw, I noticed that gorgeous medallion immediately – is that a DIY or something? I see there’s no link in the source list.
Can’t wait to see all the fun things you create in your new room!
Thank you so much, Deb! Your comment put a big smile on my face! I think we bought that medallion at HomeGoods a long time ago, so there was no way to link it!
Love your craft room! I love everything about it.
Thank you so much, Pam!
This is so gorgeous!! Not only so functional and beautiful as well. You’re a genius but I’m sure Handan tells you this everyday ??
Ha! I wish she told me that every day, lol! But all credit and glory go to Handan. She designed this craft room, the laundry room and the kitchen! She’s the genius around here!
Love what you’ve done with the place! I, too, have utilized IKEA cabinets in my craft/sewing room! I love them and they went together great and serve the purpose perfectly. I am really pleased with them and I know you will be too! Can’t wait to see some of the great projects we have in store from this great space!
Thanks, Angie! IKEA was my nemensis for many years, but I’m slowly warming up to them, especially now that I have a Baris to build them for me, lol!
Beautiful and super organized craft room! Can’t wait to see more projects and fun posts coming out of that room (and your head lol). Funny that my husband just got back from Suwanee just now after checking out some plots as we’re planning/dreaming of building a home again after we sold our lovely home in MI and moved to Alpharetta. Everytime you mention a good supplier/contractor/vendor, I book mark it lol. Continue to inspire us in every way. Enjoy your new jobby lobby LOL!
Oh, awesome! Yes, I’m happy to help! I have even more people that I haven’t mentioned on the blog, so please don’t hesitate to get in touch. I’m happy to share! 🙂
Love your kitchen and craft room! Was wondering what the dimensions of your craft room are, and imagining if I could fit your floor plan into my current empty craft room. It is an inspiration to see such talent and design from you both, really enjoy your posts!
Thank you so much, Deborah! Our craft room is just under 14 feet wide, and it’s either 9 or 12 feet deep, depending on which side of the laundry room door you measure up to.
Once again you have out done yourself. It’s organized and functional. I’m in the process of organizing my craft room. It’s in the basement of my in-law-suite, but I have 6 recessed lights so it’s pretty bright, and fairly big. 32′ long & 10′ & 14′ wide in certain areas. It has a seating area with a couch and 2 chairs. I’m seriously thinking about putting a wine frig in there LOL. I had looked at some of the storage furniture at Ikea before I read your blog. My question is did you have anchor the glass cabinets to the wall?
Thank you, Gail! Wow, you have a huge space to craft! As for anchoring the cabinets, though I felt it wasn’t necessary (they sit level and firm on their bases), we did it anyway on the off-chance there’s an earthquake or something crazy like that. They come with L-bracket, so anchoring them is not difficult.
Wow the room looks magnificent! What is the color of the paint on the walls?
Thank you, Raquel! The walls are Sherwin-Williams Bohemian Lace.
That room is A Mazing!!!!!!
Thanks, Maria! 🙂
Youguys did a killer job on the craft room.it looks really comfortable.I have my craft area just off the kitchen too, I like having a sink close by
It’s the best, Donna – the snacks are always close at hand! 🙂