
DIY Clock Makeover
This DIY Clock Makeover is a quick and easy DIY that can be done on the cheap! Use a colorful clock for a kid’s room or something more elegant for the house!
I’m a time dork.
I live and die by the tick of the clock.
For as long as I can remember, I’ve been this way.
One of my first time-related memories is of being on an airplane with my family flying from Hartford to Puerto Rico. I had just received my very first digital watch, and I thought it was the most amazing invention I’d ever beheld. It was a Seiko with a shiny metal band and a small square face.
I took endless pleasure in staring at its readout as the red digits climbed ever higher, pursuing some elusive future moment while relentlessly converting present into past with each passing number.
This was time itself, harnessed on my wrist!
I felt my family wasn’t fully appreciating the wonder and enormity of the situation, so to help them understand – to help them see the light – I announced the time loudly and frequently down to the second.
Of course, by the time I had relayed the exact time, it was already an entirely new time!
Thus, I felt obligated and compelled to announce this incredible and fascinating new time!
It was a long flight, and I had all the time in the world to share my time with everyone and anyone who would listen.
How lucky they were to have such a time-sensitive boy!
Oddly, they didn’t share my enthusiasm.
My sister scowled at me, and my parents seemed to become very interested in those stethoscope tubes that passed for earphones on airplanes in the very early 1980s.
My career as a professional time-cryer ended abruptly with a punch in the arm from Brace Face (aka my sister) and a “That’s enough!” from my father.
Fast forward to the present, and I find myself still playing time-cryer, only nowadays, I’m hollering the time so Handan won’t be late for work and Barish won’t sleep through school.
The more clocks, the merrier. That’s my motto!
So with Barish’s room makeover nearly complete, I wanted to sneak another clock in there, because at his age, he needs all the time-awareness he can get.
Case in point: on the day of this writing, I had to drive The Boy to school because he “accidentally closed his eyes” after turning off his alarm clock.
They accidentally opened again an hour later.
Anyway, we wanted The Boy to have a clock on the wall, but we also wanted it to have some style.
As usual, Handan gave me the idea. She wanted a DIY clock makeover done with a leather belt.
Handan found a simple and inexpensive clock on Amazon that would be perfect for this project.

We rifled through all the old belts in our house to see if we had any that would fit, but none was just right…none was perfect.
They looked good to me, mind you. But they weren’t cutting it for Handan. She had her vision, and it had to be just so.
So off to Goodwill we went in search of old leather belts.
We ended up buying 3 belts and an old purse with a nice leather strap.
Back home, it became immediately apparent which belt was the winner.

It was perfect!
The other two belts will be used at some point for something, and the purse strap has already been put to excellent use in a project I’ll be sharing in the next couple of weeks.
The first step in this simple DIY clock makeover was to remove the buckle from the belt. I started by cutting through the stitching with a utility knife.

Then I cut off the buckle with a pair of scissors.


I told Handan that cowboys pay top dollar for old belt buckles, so we’d better not throw it away.
“Really??” She said.
I just looked at her and raised an eyebrow.
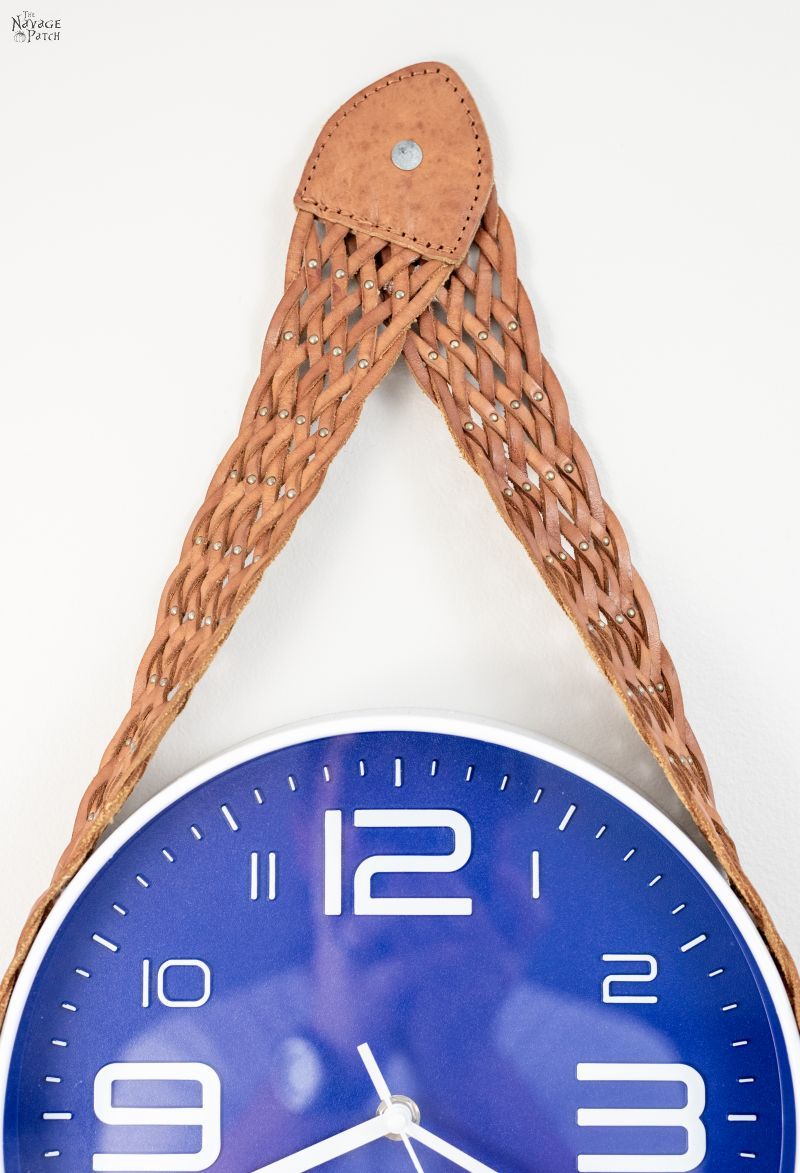
I found the midpoint of the belt and applied drops of hot glue to the crossing points of the leather braid.


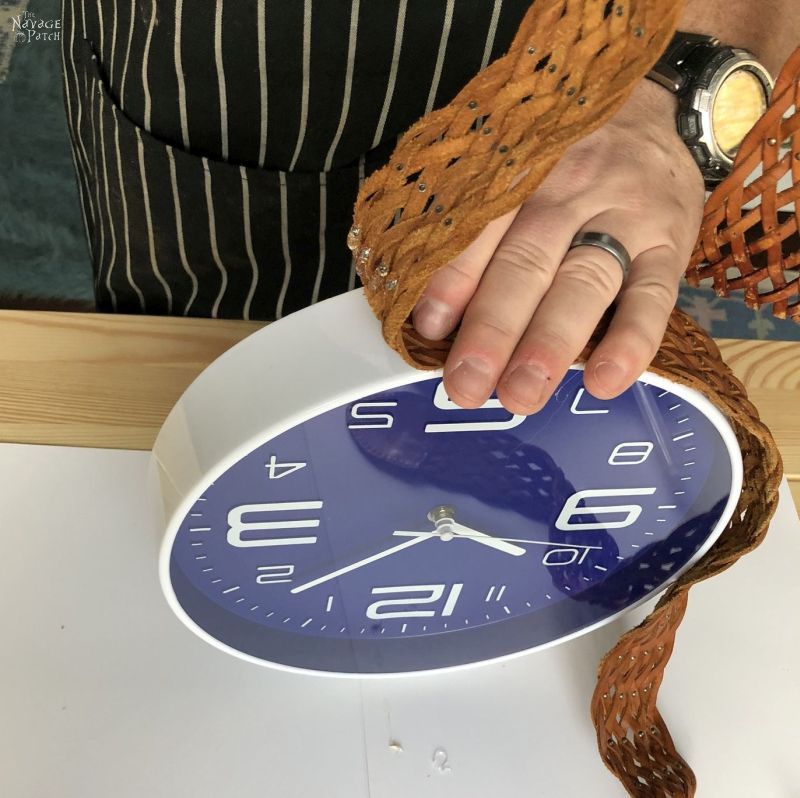
Then I stuck the glued part of the belt to the bottom of the clock.
See here, madam! All this gluing and sticking is complicated business. Are you sure you’re paying attention?

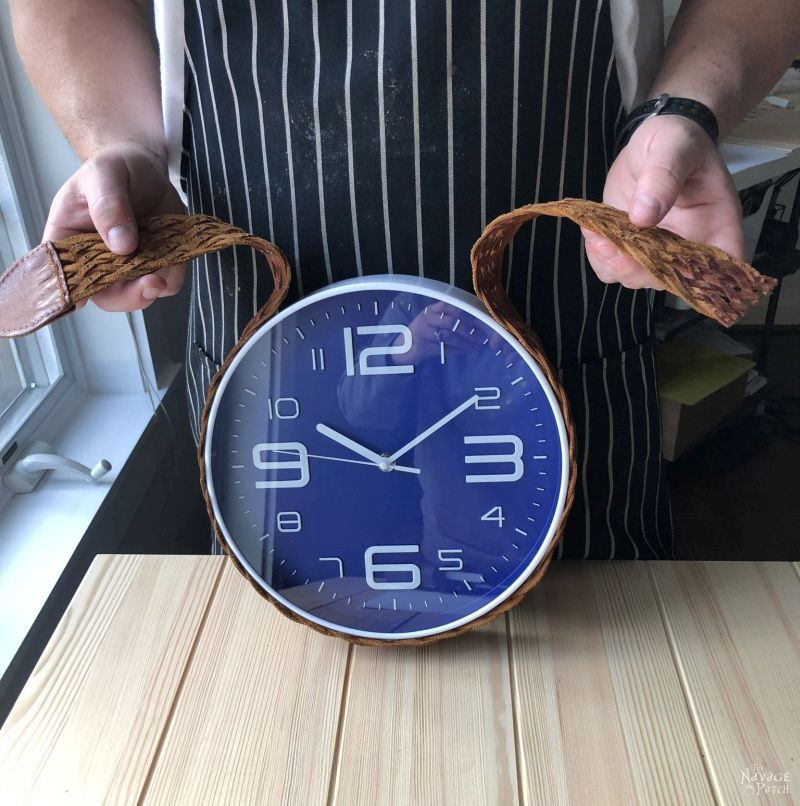
Good! I carried on gluing in the same manner on both sides every so often until the 10 o’clock and 2 o’clock positions.


The clock was well-seated in its braided leather belt harness.
And this is how it will hang on the wall.
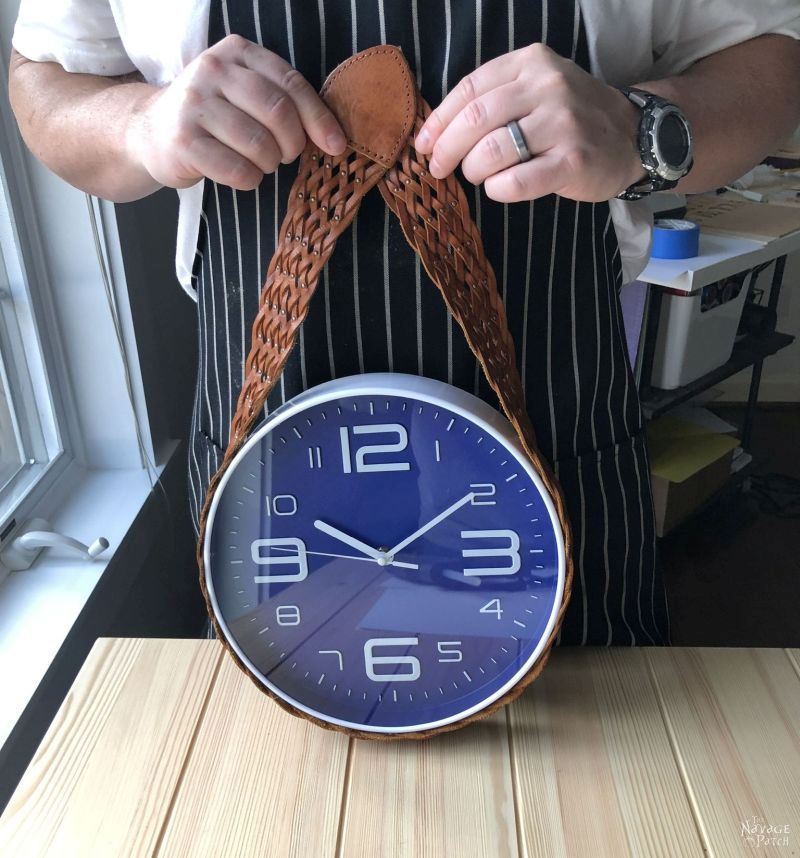
I applied more hot glue to one of the ends so I could complete the harness.

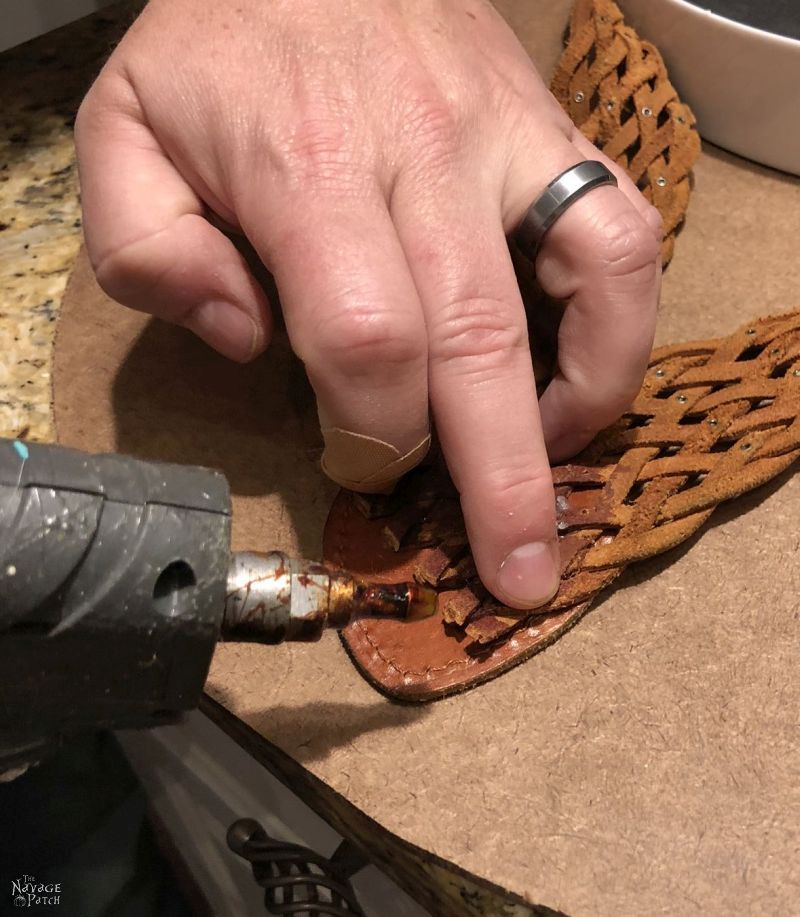
The final step was to drill a hole through which I’d insert a nail for hanging.

And with that, my clock makeover was finished! This was a quick project for his room makeover that we squeezed in between two much larger projects (another IKEA Kallax makeover and a DIY hamper build). His second room is coming along beautifully, and we can’t wait to show you the rest of the cool stuff we built for him!


We love it when you share our posts on Facebook and Pinterest!


That belt is definitely a winner–the studded braided design makes it more unique.
Thanks, Laurie! 🙂
I have a draw full of old belts and buckles I can’t possibly get rid of because don’t people know how expensive they are to buy?! A fancy buckle can set you back 50-60 dollars! So now family members give me their old belts. And in the drawer they go.
This is a nifty hack. (See, this is what I would call a hack. Taking two already made things and putting them together to recreate the look of something expensive or designer.) I love these clocks and mirrors and if I had any wall space left I would definitely put one up. That belt is definitely a winner.
What kind of buckles do you have? Whenever I think of belt buckles, I think of Texas and big honkin’ western belt buckles, lol!
I do have one big belt buckle! It has a pin lariat closure and I have NO idea what I would ever use it for but it’s so cool I hang onto it.
I think my favourite is an interlocking snake buckle. I wonder if I could find it. It might be in the shed and the shed is…out of commission? (Packed to the roof with junk)
Love this idea, the clock looks fabulous. Love the braided belt.
Thank you, Claire! 🙂