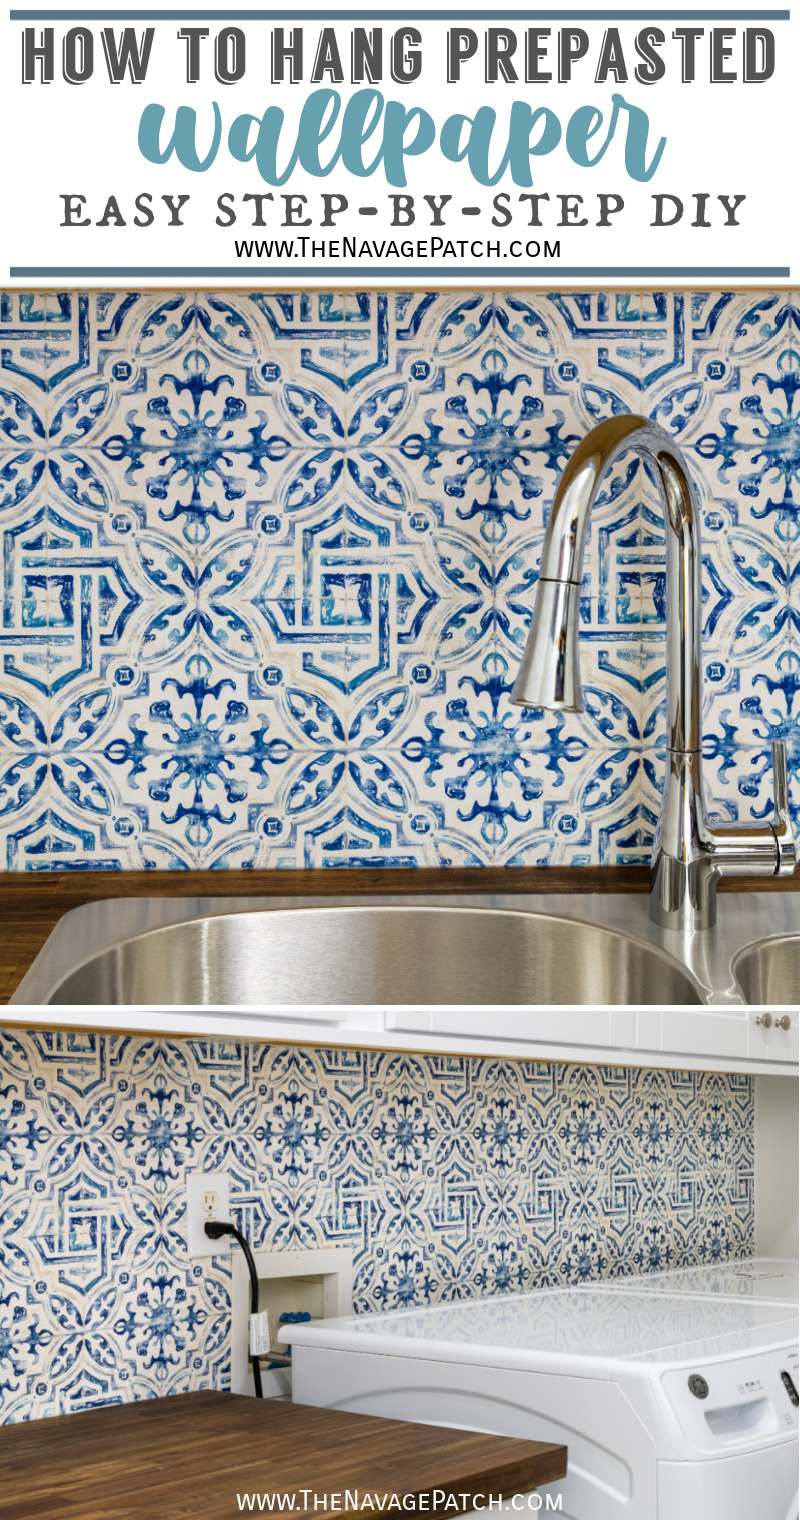
DIY Wallpaper Backsplash
A DIY Wallpaper Backsplash is an inexpensive, easy-to-install, and beautiful alternative to traditional tile, and it’s perfect for a laundry room!
So my babes had this idea…
Back when my new kitchen was still a grain of sand in Handan’s mind, not yet developed into the pearl it would become, she had this notion for a backsplash behind the stove.
It was a bold vision – grand, yet achievable….a little controversial, perhaps. I may have given her The Loon Look one or twice while she described it to me.
It went a little something like this: she wanted a faux brick border around the empty space between the cabinets on either side of the stove. Inside that border, she wanted to install a piece of plywood with a patterned wallpaper plastered on it. The wallpapered plywood would be removable and replaceable.
She even went so far as to order the bricks and the wallpaper.
But her idea never materialized. Instead, she found white glazed ceramic tiles, and our kitchen veered off in a different direction.
And that left us with a bunch of brick tile and two rolls of pasted wallpaper.
Now, my babes is nothing if not resourceful and….whatever the word is for “the opposite of wasteful.”
“Frugal,” I suppose.
“Thrifty,” if you please.
In short, everything I am not.
We are a zero-sum couple; I balance out all of her positives.
Anyway, if she couldn’t use those bricks for my kitchen, she was damn well going to use them somewhere. And sure enough, she did! You can read about where she used them here.
As for the pasted wallpaper, well it wasn’t looking good for those two rolls.
Oh, sure, she used the odd few pieces to make some really cool wall art for my new craft room, but that is an entirely different subject, and I’m not allowed to talk about that yet. You’ll have to wait until the doldrums of mid-February for that.
(Psssst! Hey, you! Yeah, YOU! You’ve already kinda seen the craft room, so if you wanted to see some pics…they are out there! But, I must tell you…it’s even better now!)
So yeah, it was looking like an extended stay in the basement gulag for those two rolls, but then my babes had an idea…
A new idea. Or rather, a new twist on her previous idea.
You see, our laundry room remodel was zipping right along, but there was something…missing.
Color.
I’d painted the walls white, the ceiling whiter, the cabinets are white (I’ve yet to “officially” tell you about them), the washer and dryer are white… The only color in the room are a few squares of blue on the floor, and the wood-tones of the industrial pipe shelves I made and the sink countertop (I haven’t officially told you about that yet, either).
It was white, and it was boring.
And so my babes had an idea.
By this time, the cabinets you don’t know about yet had been installed (by San). Handan grabbed a rolled of the forlorn and soon-to-be-forgotten wallpaper and held it vertically in the space between the upper and lower cabinets.
It was a perfect fit – even more perfect once the countertop would be in place.
She looked at me and I at her.
“It looks good, my babes!” I said.
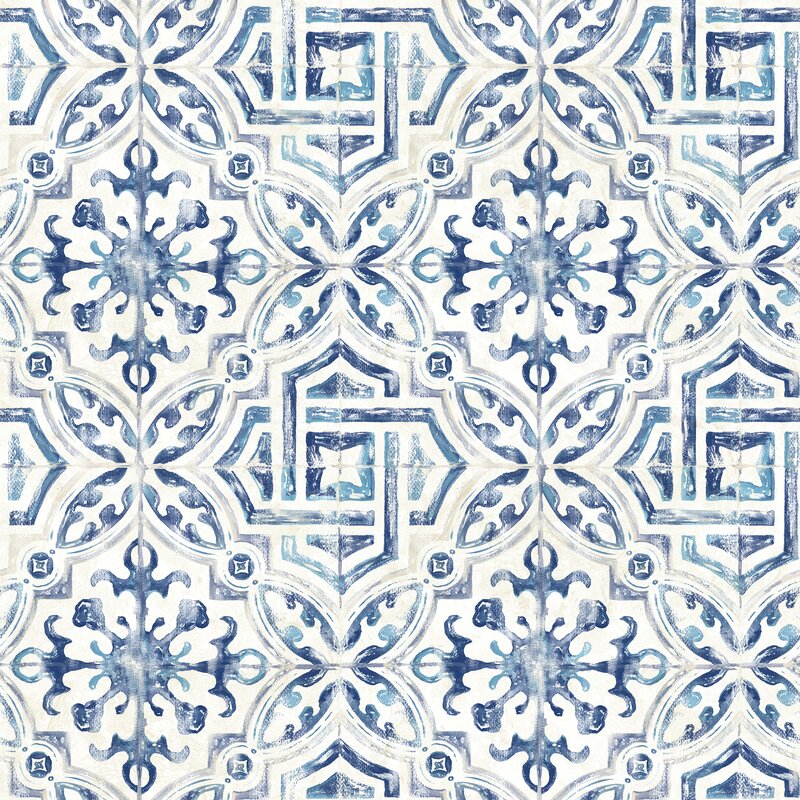
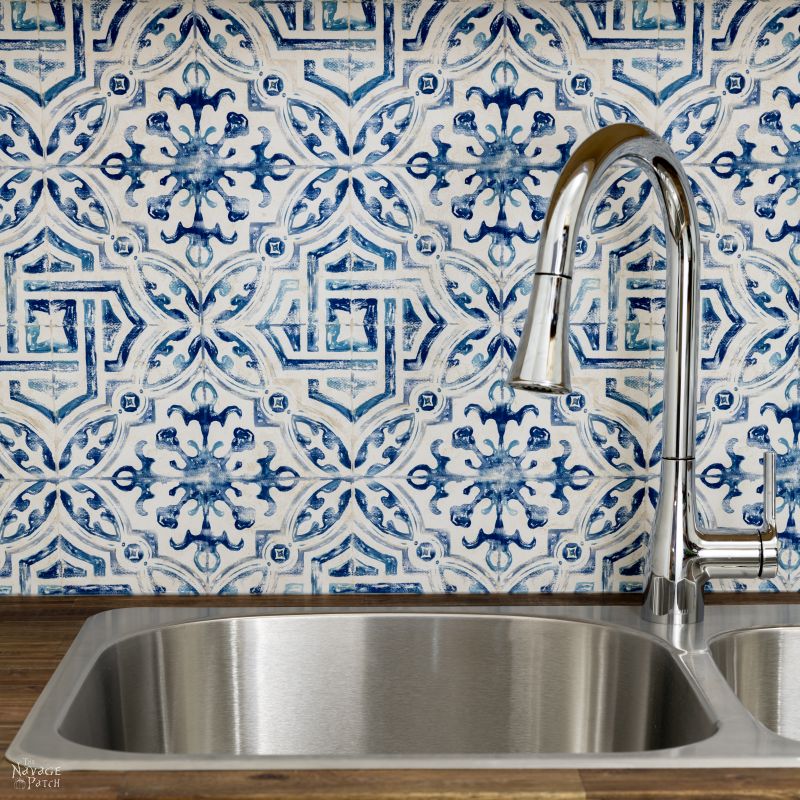
And it did. The blues complemented the floor, the whites shone like the cabinets, and there were areas of off white that matched the rest of the floor.
It was damn near perfect!
“Let’s do it.”
DIY Wallpaper Backsplash
SUPPLIES LIST
- Pre-pasted wallpaper – we used this stuff
- A wide sink or trough to submerge the wallpaper (I’m sure a big wet sponge would do the trick, too)
- A big wet sponge
- Plastic taping knife
- Utility knife
- A wife, husband, bf, gf, bff, friend, acquaintance, relative or child-of-useful-age to help
When I was small and of no practical use to the world, I remember when my parents wallpapered the foyer in the house I grew up in. It was the 1980s, and the wallpaper reflected perfectly the decade in which it was manufactured and hung.
It was metallic and shiny and festooned with big flowers, and it hangs this day, a bold testament to the best damn decade there ever was and likely ever will be.
But what I remember best is the process.
I remember the rickety folding work table they set up.
I remember the buckets and sponges and squeegees, the straight edges and knives, the ladders… and most of all, the mess!
Though I was only pint-sized, I vowed never to subject myself to such outsized misery.
It was a vow I’ve managed to keep.
Fortunately, wallpaper technology has advanced to the point where only the most sadomasochistic and self-loathing members of society need trouble themselves with unpasted wallpaper.
For the rest of us there is pre-pasted wallpaper (which I used for our wallpaper backsplash) and peel-and-stick wallpaper.
Bonus: our wallpaper can be removed with a tug.
That said, I still had a knot of dread festering in my core. Visions of shiny 80s wallpaper flashed before my eyes.
No matter what “they” say, I was pretty sure our wallpaper backsplash would cause a near-death experience for Yours Pastedly.
I’m delighted to report that it was one of the easiest projects we’ve ever done. So easy, in face, that I hesitate to call it a “project” at all!
Let’s take a look.
So here’s the wallpaper in question:
The instructions say to cut your piece 2 inches longer than the space you have to work with, so I measured the room and added two inches.
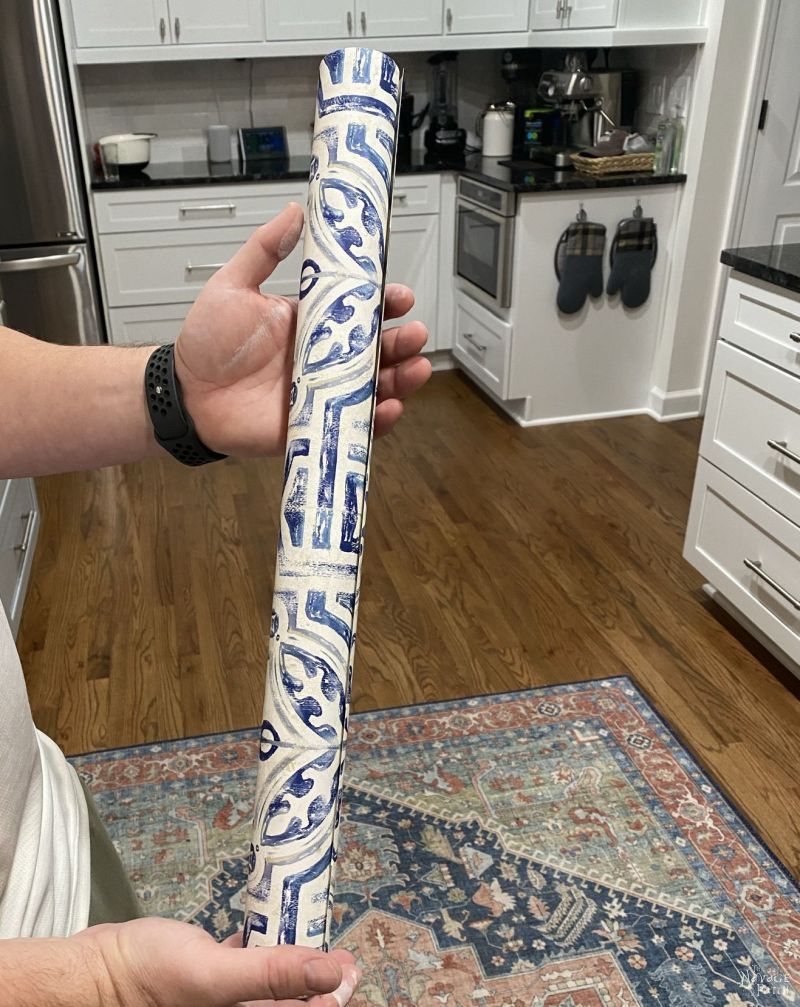
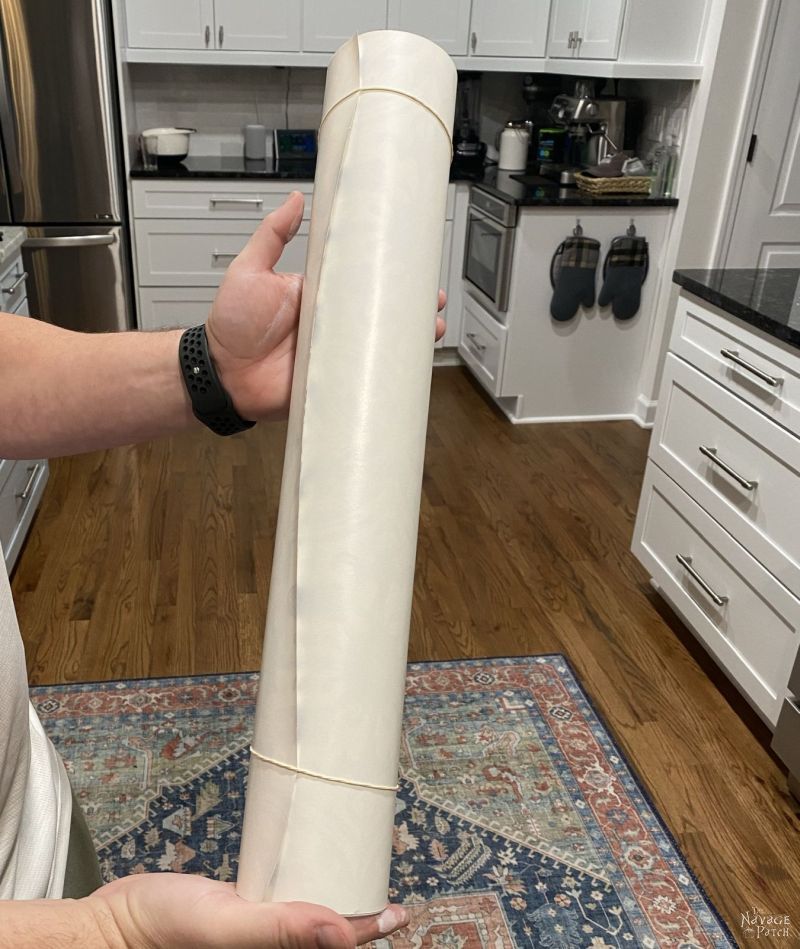
They go on to say that you should then re-roll the wallpaper pasted-side-out. Since this re-rolled orientation goes against all known laws of physics and nature, I needed to secure it with rubber bands to prevent an explosive unfurling event.
Next, the directions insist that you should submerge this dangerously backwards-rolled roll of pre-pasted wallpaper in a trough of water and keep it submerged for 5-10 seconds, making sure the water circulates through all of the rolled layers.
Morons, madam.
These directions were prepared by gibbering morons.
As I previously stated, when the roll is rolled backwards, the pressure upon each ring of the roll is so great that nothing can penetrate!
Still, I went into this job expecting “them” to be the experts, so….
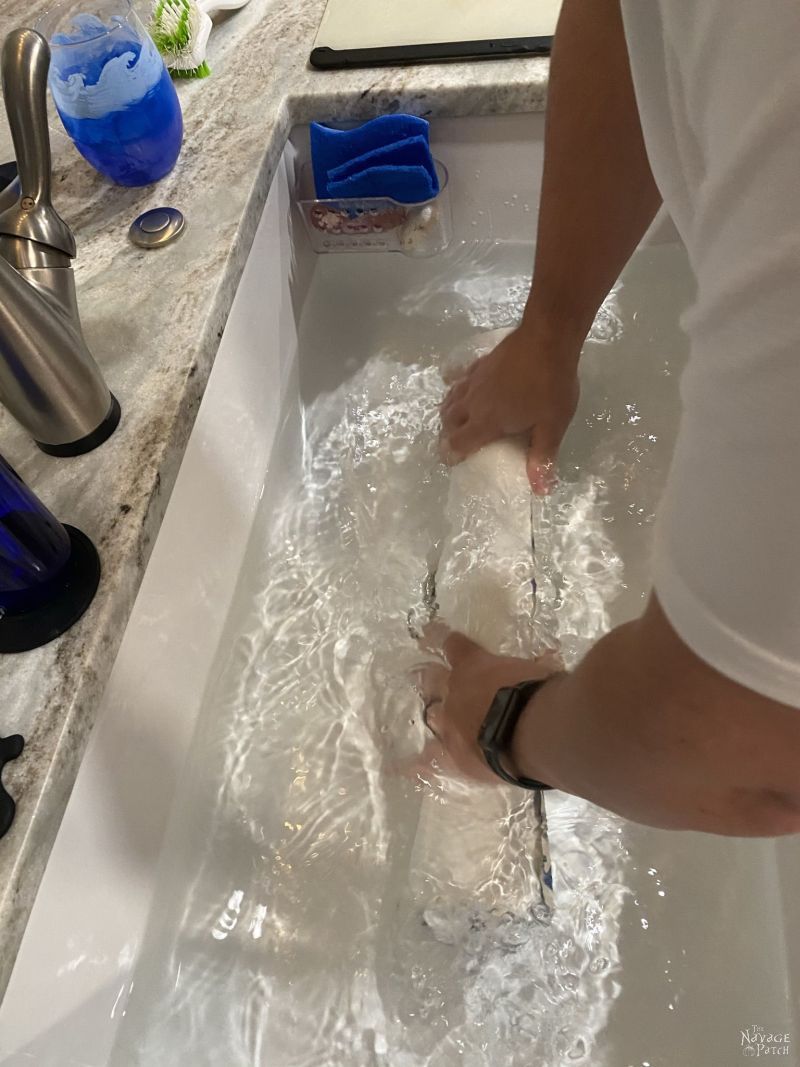
I tried to open the roll a bit as suggested to let the water flow between the layers, but I only managed to moisten the first foot or so.
So much for “their” expertise.
Since I only had seconds (according to “them”) with which to work underwater, I quickly unrolled the roll. Fortunately, the laws of physics and the natural world regained the upper hand, and the wallpaper returned to its preferred orientation immediately upon my unrolling.
Then, as quickly as I had restored order, I re-rolled it again in the backwards manner.
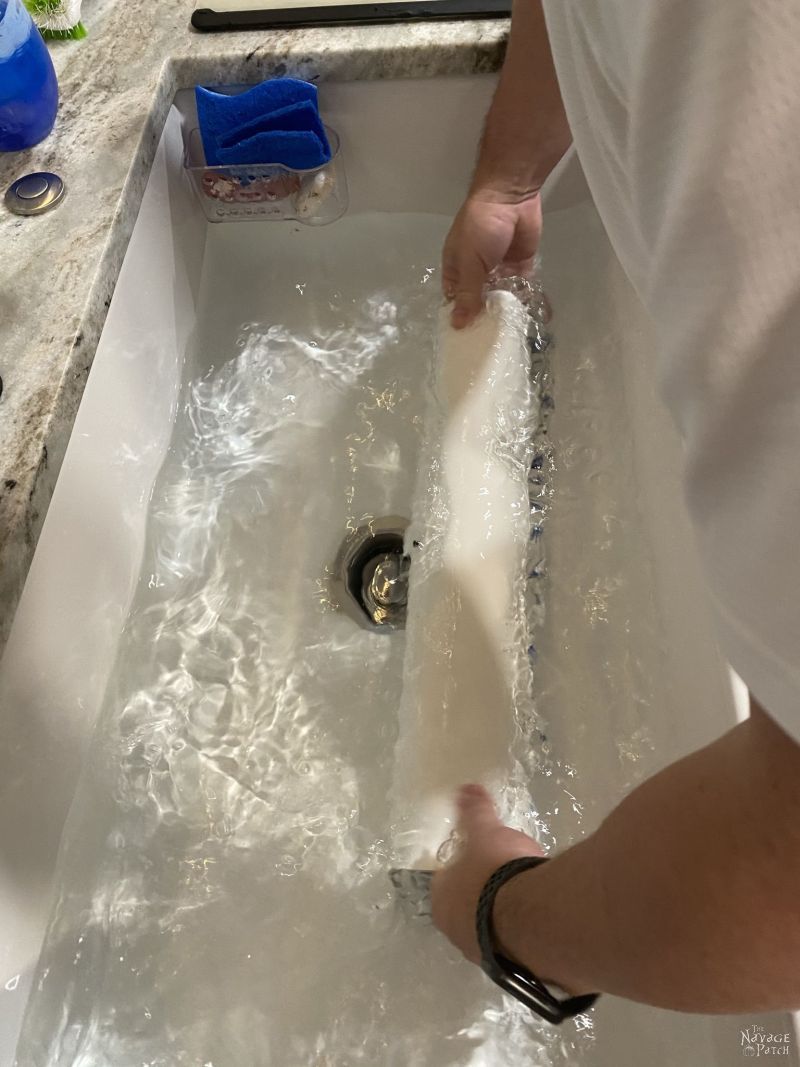
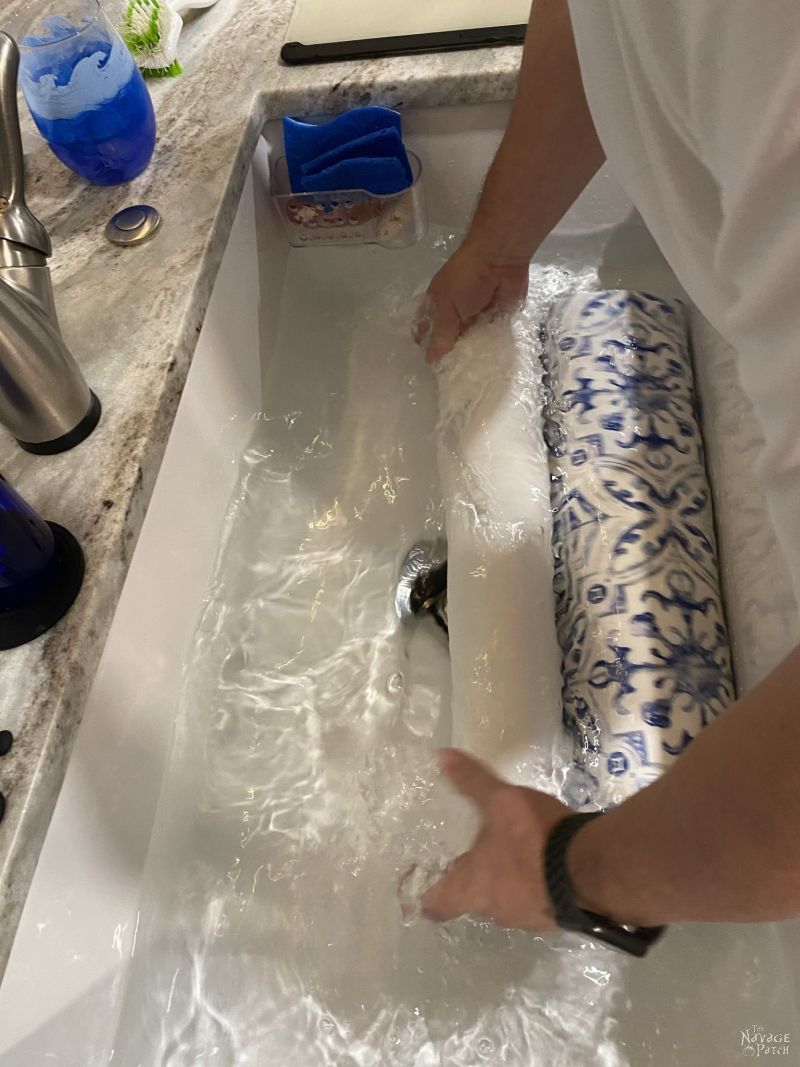
At this point, the Wallpaper Wizards suggested I should fold the sheet in on itself, pasted-side-to-pasted-side, starting from each end and having the ends meet in the middle.
They advised that I should continue to do so until the folded sheet was a manageable size.
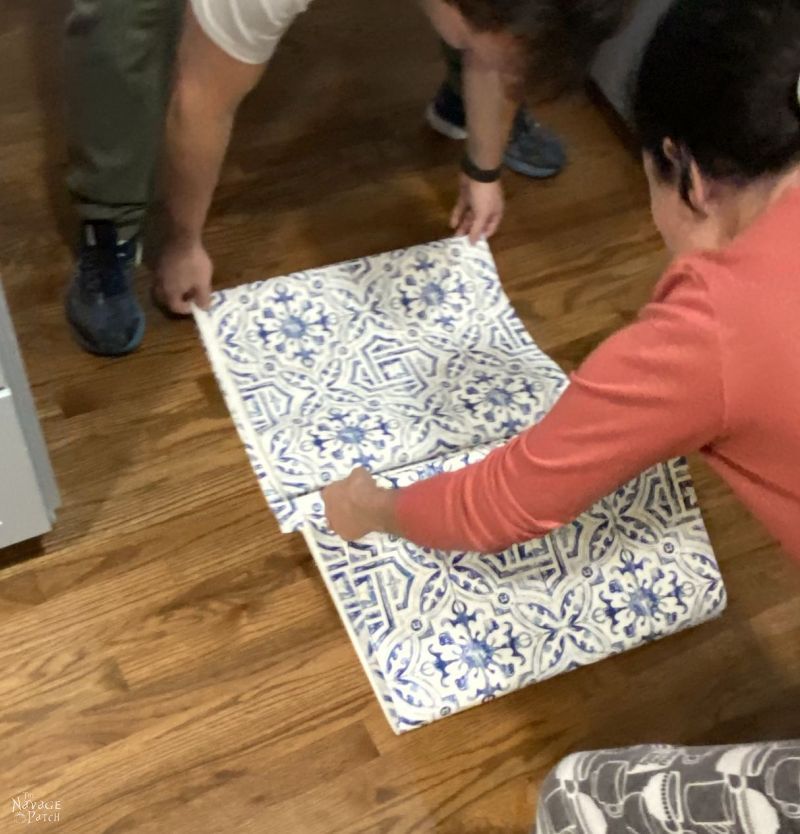
Note that this a process called “booking,” during which the folded wallpaper is allowed to rest for several minutes while the paste activates. For this particular brand, no booking time is required. This folding process is merely a convenient way to transport and apply the paper to the wall.
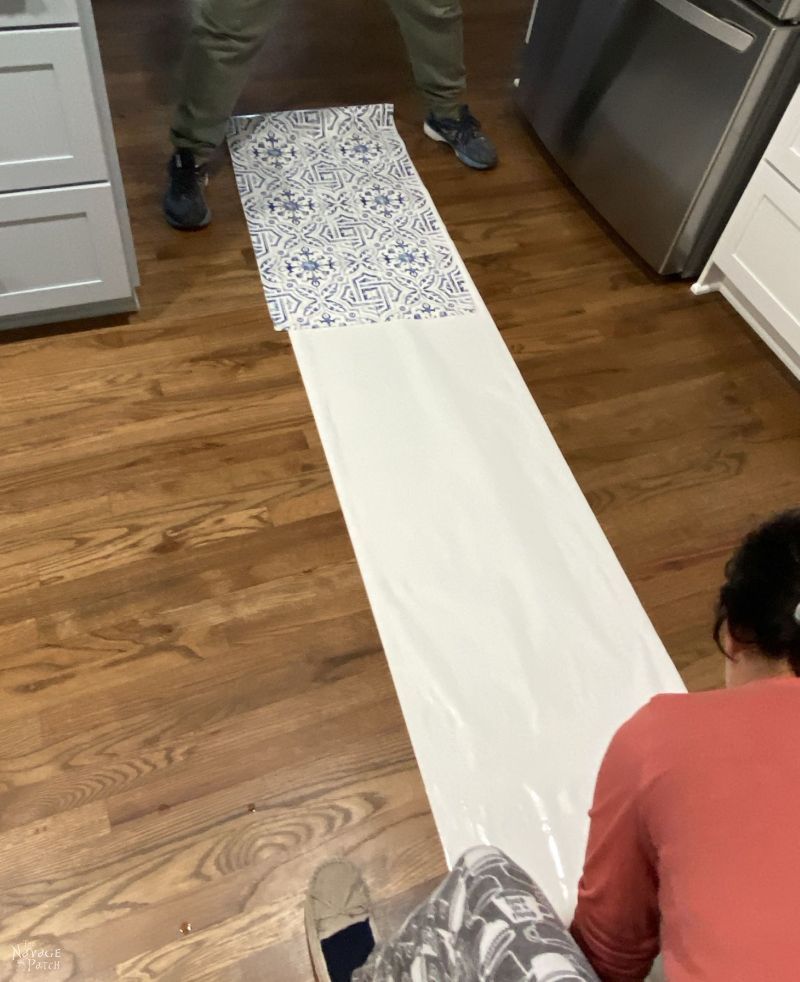
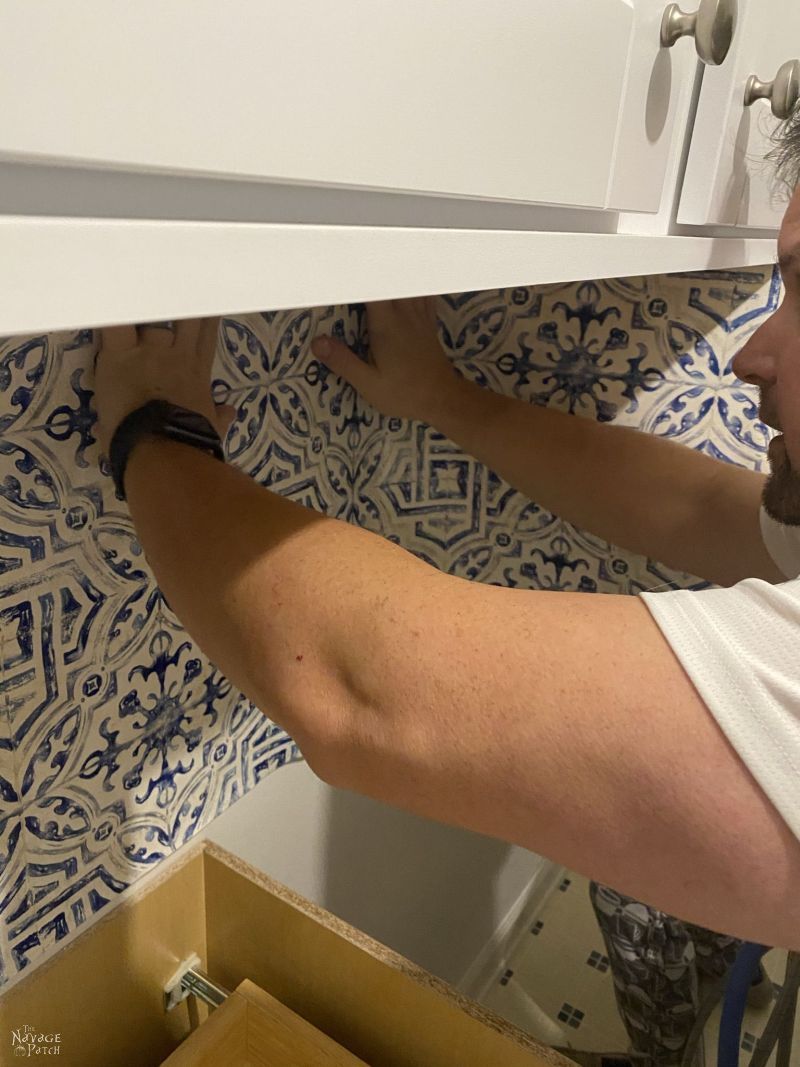
With my trusty babes by my side and The Boy pressed into service as Blog Photog, we dashed from the kitchen to the laundry room before too much goop dropped onto the floor and carpet.
Once inside the laundry room, it was a flurry of activity, as all my childhood wallpaper fears became manifest.
Sweat erupted from every pore on my face and head. I barked orders to Handan and Baris like a shell-shocked sergeant trying to regain command of his troops in the midst of a pitched battle. I was convinced the ordeal was about to go pear-shaped, and we’d end up with a sagging glop off blue-and-white goo dripping down the wall.
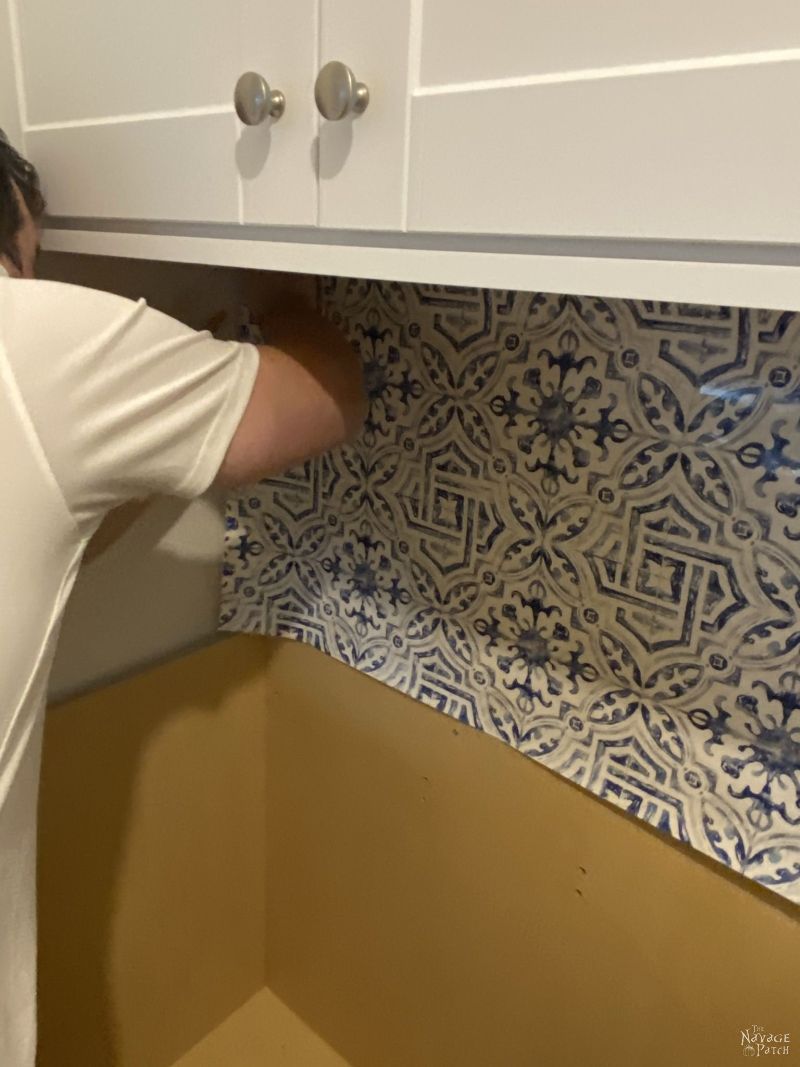
I waddle-ran to the wall, unfolded the paper, and slapped my end in place, making sure I left an inch beyond the corner. Handan held the rest of the folded wad and kept a minimum tension to keep it from sagging.
And then the most remarkable thing happened.
The wallpaper stuck to the wall!
I couldn’t believe it! Was it really this easy?
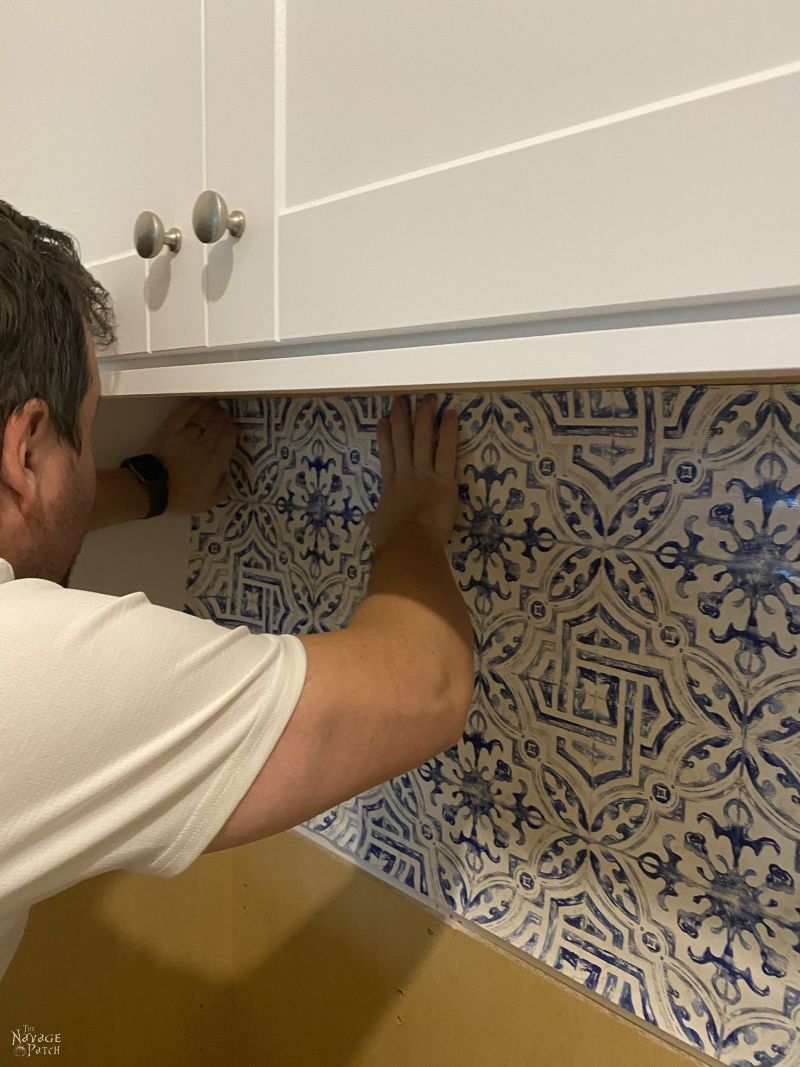
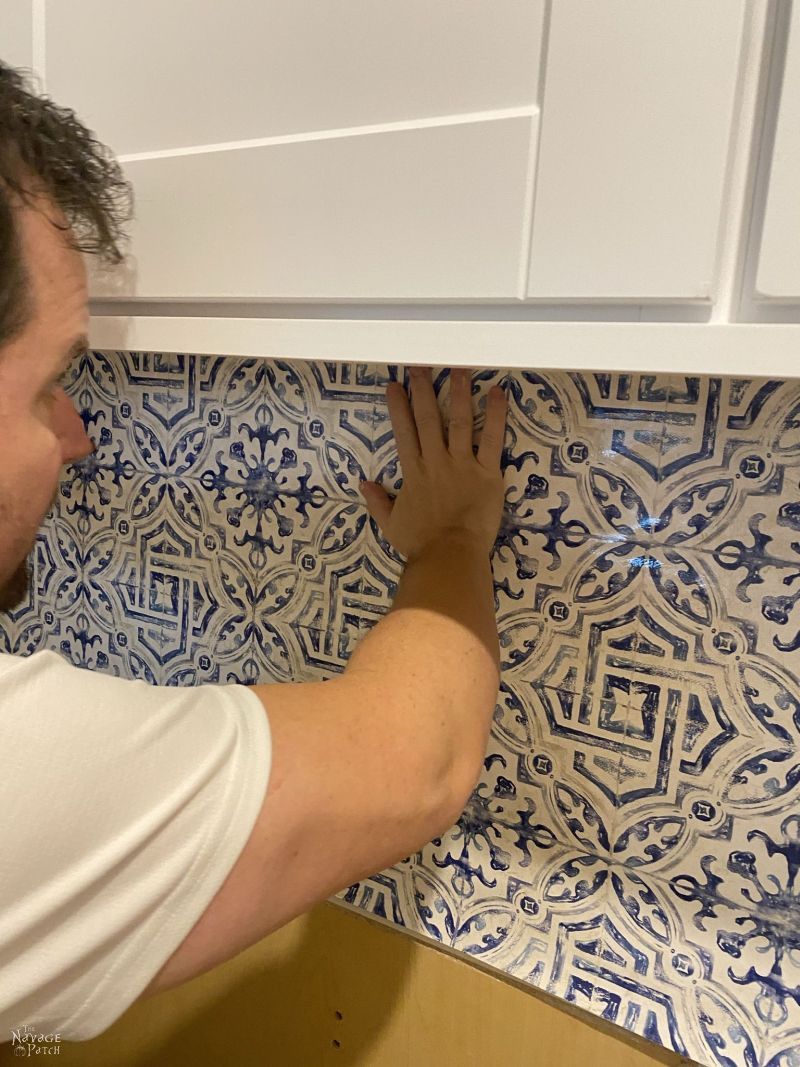
I line it up as best I could with the bottom edge of the upper cabinets. But even if I was off by a few millimeters (or more), I could just slide the whole strip up! It moved! And then it stayed!
This wasn’t wallpaper. This was a modern marvel!
With my babes’ help, I worked down the wall and had the whole strip mounted in about 2 minutes.
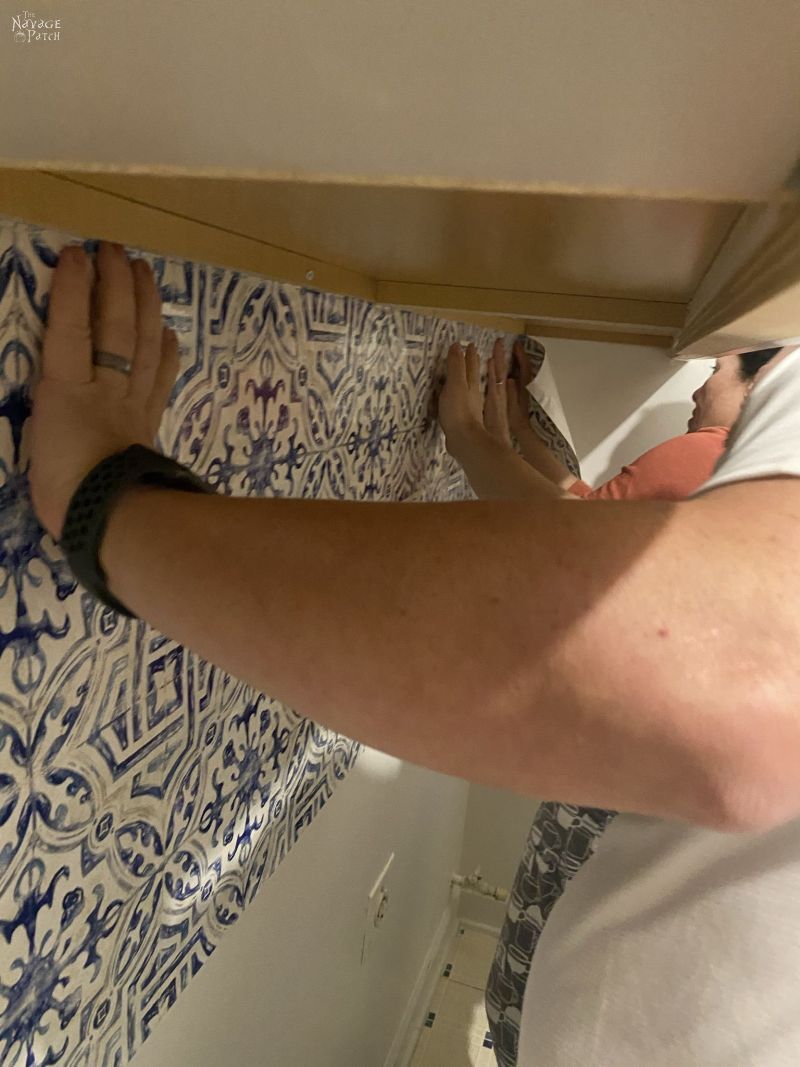
Once hung, I grabbed the plastic taping knife, and ran it all over the wallpaper, always finishing with a downward swipe. This served to help adhere the paper to the wall and to squeeze out any excess glue from beneath the wallpaper. After the taping knife, I ran the wet sponge over the same area to wipe off any excess glue on the surface. I worked from one side to the other until the strip was smooth and clean.

Using the taping knife as a straightedge, I cut the wallpaper at the corners.


Though I hadn’t yet cut the sink-hole, I put the countertop on to see how it looked.
Amazing!

The next day, San showed up to install the plumbing, faucet and sink, and our laundry room remodel was one step away from completion.
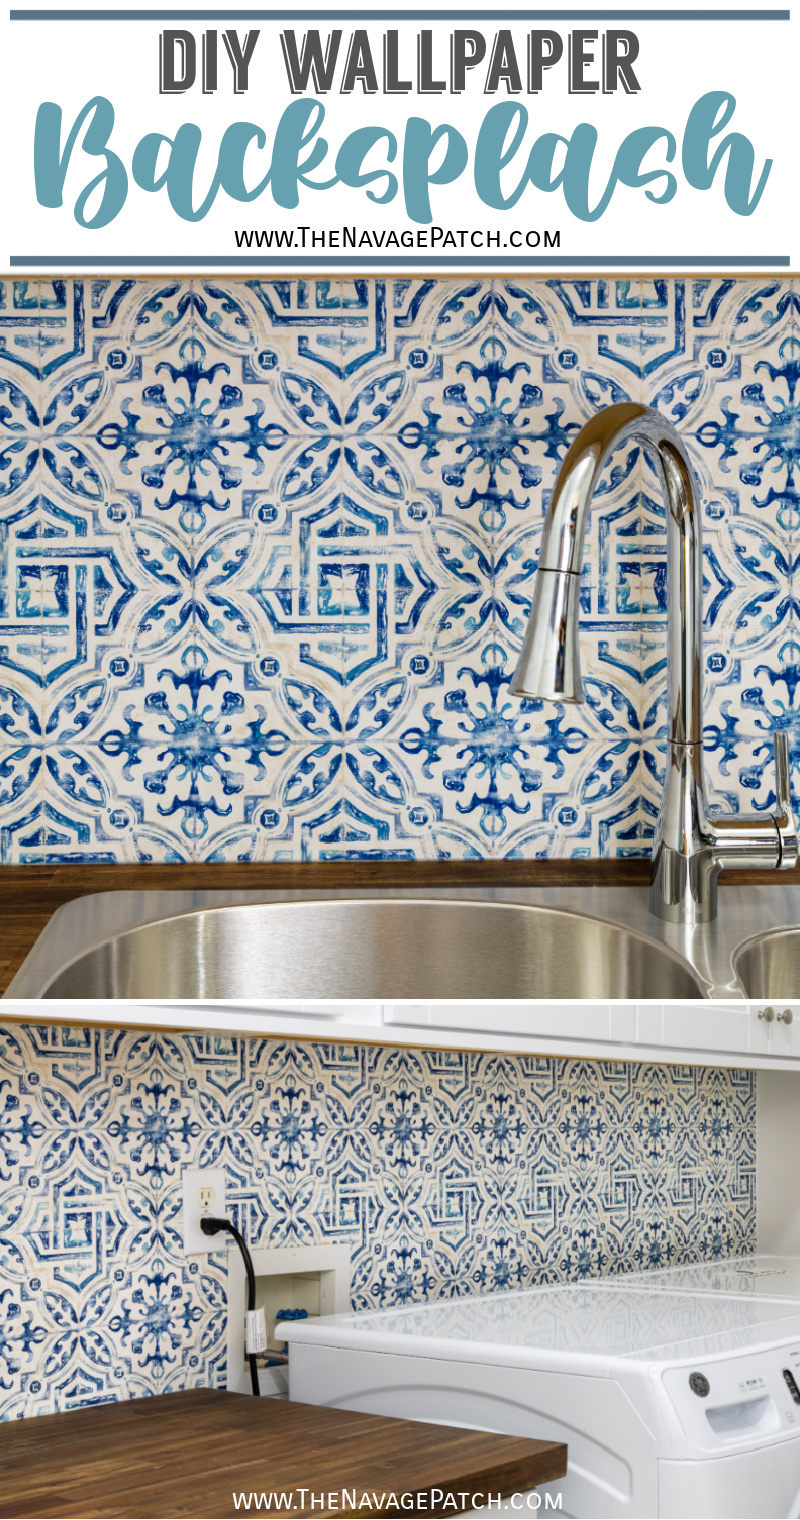
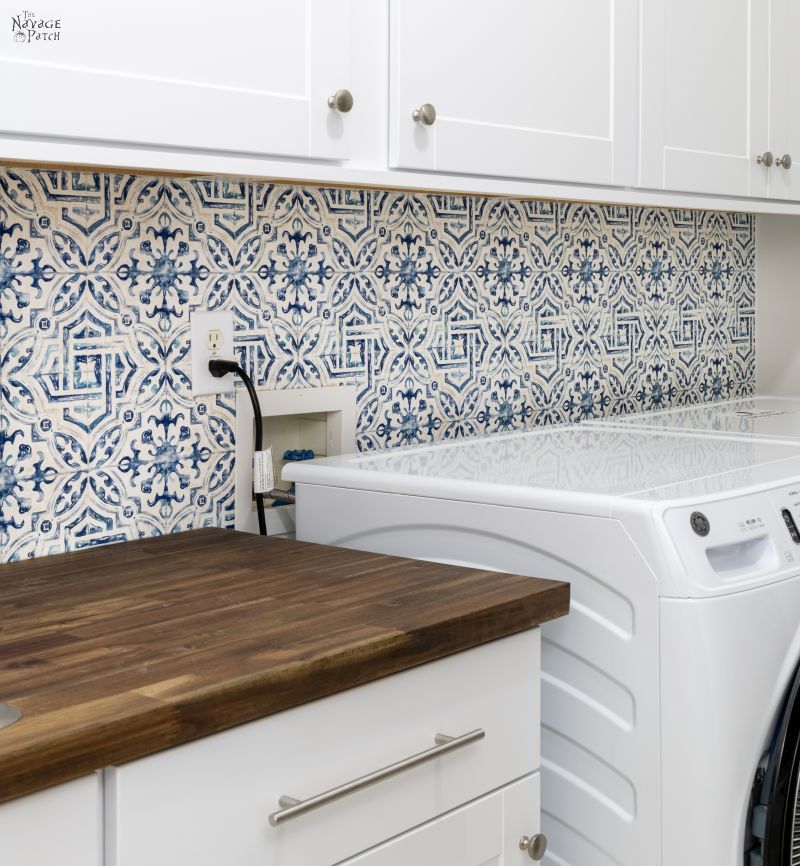
In my next post, I’ll talk about the cabinets, countertops and a cool medicine cabinet we found for the back of the door. Until then, here are some pics of our DIY wallpaper backsplash.

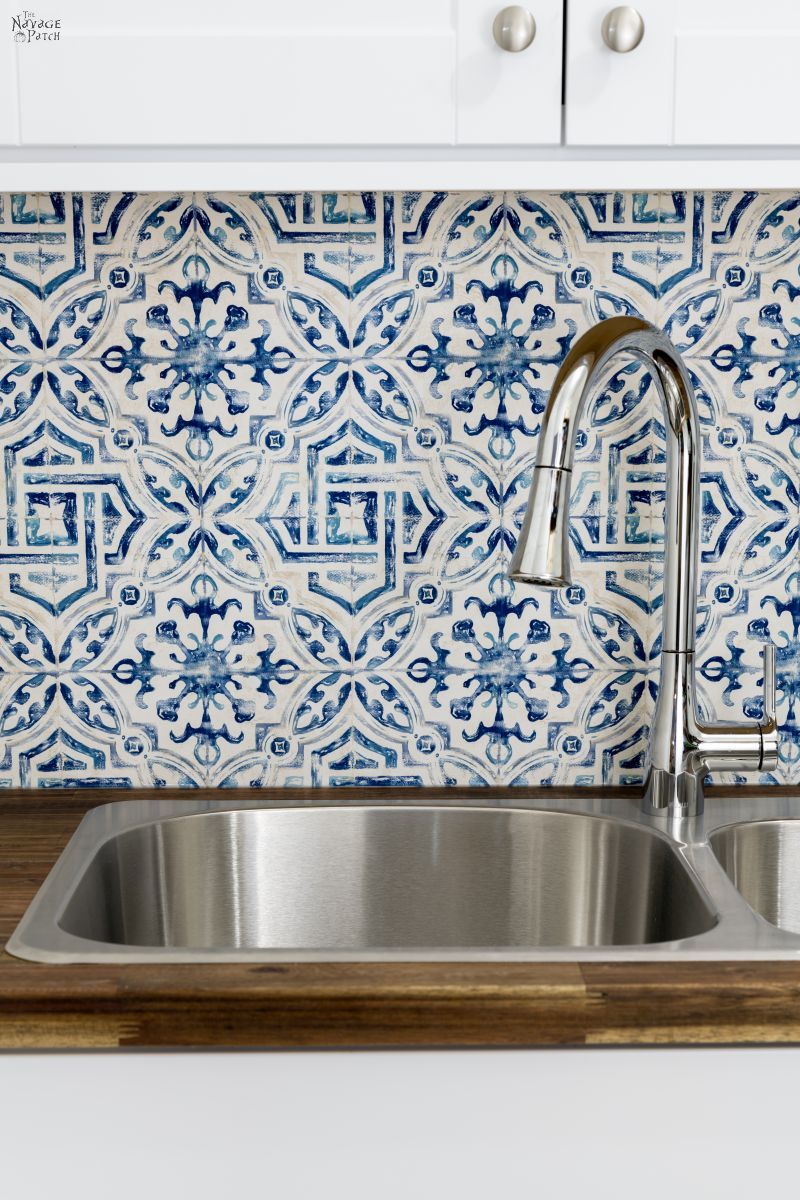
When we finished this little project and had a look at the results, we couldn’t believe the difference it made to the room!
So, what do you think? Is it something you might try?
Holy heck – we’re almost done with our laundry room remodel! Stay tuned!
We love it when you share our posts on Facebook and Pinterest!


I’ve wallpapered with both pre-pasted and unpasted paper and if you are doing multiple strips I found the unpasted was easier to deal with. When you have to apply the paste you don’t wet the paper so there is no shrinkage and therefore no visible seams (or at least, less visible seams). Of course I am by no means a pro so YRMV! I really like the paper you hung. It gives a nice pop of colour!
Wow, really? I never would have thought that, Giselle! Well, I’ll take your word for it, lol, as I hope there’s not much more wallpaper in my immediate future! 😀
Great job Greg & Handan! This really looks beautiful! Can’t wait to see it completed.
We second this Giselle! We have used both pasted and unpasted (as well as vinyl peel-n-stick) found for larger areas the unpasted works best. We use removable wallpaper paste so if we change our minds later the removal will be pretty easy. We wallpapered all of our closets and rolling the paste on the walls was much easier and less stressful. It’s kind of great how they have improved wallpapers over the years.
What?! I had no idea you could roll the paste on the wall no less removable paste. Game changer! Might have to hang some again! And that wallpaper, Greg, is beautiful!
Thank you, Susan! I second what you said to Mo!
Huh. I never considered the possibility of pasting the walls first! I guess that would make it much easier! Good to know, Mo!
Looks amazing, well done!
Thank you, Brenda!
Hi, nice job guys! Looks amazing!
Was wondering where did you buy wallpaper ? Thanks
Thank you, Mima! The paper we used is linked in the post! 🙂
Beautiful paper. I was hoping you would put some type of sealer over it so I could see how that works. But alas Greg, you let me down!
Sealer Schmealer, Carla, lol! Nah, this stuff doesn’t need it – at least not for a laundry room backsplash. The company does say not to use it in a shower stall, but it’s never going to get more than the odd splash from the sink in our laundry. 🙂
I’ve papered two bathrooms and one long hall. You make it look too easy! It wasn’t easy for me. I have removed the paper in one bathroom, and painted it. I still have the smaller, main bathroom to remove the wall paper and paint. I’m still deciding on the color to paint it.
Well, it was just one strip, Deborah, so I’m sure it was a much easier task than what you faced! We also have a small bathroom to de-paper. Haven’t yet figured out what will happen after that!
Awesome job! Love the pop of color, too. This is coming from a milk glass and cobalt glass lover! Please compliment Baris on his photos; made the process very clear.
Thank you, Kathy! I will certainly pass on your compliment – he’ll be thrilled to hear it! 🙂
Having been vehemently anti-wallpaper my entire life, I can’t believe I’m about to utter these words: That looks great, and I wonder where I can wallpaper in my home.
?
LOL, I know, right! And we still have 1 1/2 rolls of it, so we’re wondering the same thing!! 😀
The wallpaper is beautiful! I have to admire anyone that tackles wallpaper…I’d rather paint a thousand days than wallpaper! (If a day could be painted, that is)
I totally agree…well, I used to…this stuff is pretty darn easy to use! 🙂
Beautiful! You can’t go wrong with a blue and white color scheme. Though the pics of wetting and booking the wallpaper brought back memories–not good ones. LOL. Oh I hate that step of wallpapering. Inventive cussing always ensues.
But inventive cussing is a good thing, Laurie – and you have a parrot – so double bonus! 🙂
LOL Yeah and she was calling me the a word when I got home from work on Friday. I have no idea why. She also told me “I love you, girl” too so I’ll take the swearing as a term of endearment.
My life is incomplete without a parrot.
Wow! Beautiful paper and the perfect pop of color.
Thank you, Karen, we agree! 🙂
Love the wall paper color and design. Another job well done!
Thank you so much, Madeline! 🙂
Gorgeous!
Thanks, Janice!
Love the look! I may have to find something similar for my laundry room. I’m still waiting for the peg board I want for the other wall. I can wait on hubby or do it myself. If I do it myself it causes more dinnertime conversation, such as “are you sure you used a level” and “not sure those spacers are going to work”….you get the drift.
LOL, but if you don’t do it yourself…well, I guess it never gets done?? 😀
This looks fantastic! Can I ask where you got your faucet?
Someone once told me that the test of a relationship was wallpapering together. They told me this AFTER my boyfriend (now husband) and I wallpapered all the walls of a tiny bathroom together. First – we did it because the bathroom was in a basement suite we were renting and the walls were cheap paneling. The landlord’s fix to rotting walls in the bath was adding a shower curtain to that wall. We figured vinyl wallpaper couldn’t make it any worse (it made it immensely better even though it was a “challenge”). We’ve been married 37 years so I guess we passed the test – and I would bet that the wallpaper is still in that basement suite unless the walls rotting completely away.
LOL, that’s a great test, Chris! Cheers to you on 37 years AND managing to wallpaper a bathroom without breaking up! 🙂
I have used the peel and stick from Nu Wall Pop or something like that, so the paste wallpaper is kind of scary. But it is exactly what I am looking for in our laundry room that is as dull as a piece of burnt toast. I do believe it will be my spring project. Did you need two rolls for that small area you applied it to? Thanks.
Looks fantastic! I think it was meant to be for the laundry room all along!
That’s exactly what we said, Audra! Everything happens for a reason.
Love it! Great job! I am thinking about replacing wallpaper and I love this pattern.
Thanks, Trish – it’s a great pattern and color!
Wow! That looks remarkable! Love the contrast of the countertop to the wallpaper. I wonder if Handan will hang some of her Blue and White Porcelain Printables in the laundry room? ??? We shall soon see!
Thank you, Cindy Lee! We shall see about what she hangs in there – not even I know about that yet!
The Perfect cheerful colour addition for a laundry room! Good Job! My last paper Job in our “vintage” home was a heavy paintable paper- which after installation was primed and painted! Turned out nicely and moved this old berg into the current century- but my adult son- the cut, measure and brawn of the operation swears to NEVER EVER- paper again! This was prepasted and worked nicely- I think the magnitude of the project is what did my helper in! Oh well! At least he can write about it in his memoirs now… lol
I’m willing to give it another shot on a slightly larger project – we’ve got our eye on the guest bathroom. But more than that? I don’t think so! Kudos to your son for such a monumental undertaking!
Looks amazing and I sure like your writing style! Can’t wait to hear how the bathroom wallpaper removal goes!
Thank you, Darla! That bathroom project is on the horizon!
I love wallpaper and have wallpapered every room in my house at least once. We are now in the process of taking off very old wallpaper in our master bathroom. After three days of steaming, ripping and scrapping the wallpaper off, I have now been threatened with divorce if I ever bring wallpaper back in the house. But I still love the look of wallpaper and your laundry room looks amazing with the new wallpaper. Excellent job.
Hats of to you, Patti – that’s a lot of wallpapering! I foresee a little more in our future, too! 🙂
Yay!! So glad you kept the old flooring now!! It was all just meant to be! Looks great!!
Thank you, Julie – we agree! 🙂
Hi Greg,
I wallpapered my bathroom once. I vowed I would never do it again. It was prepasted paper, but the paper didn’t get all wet. It was a sticky mess. I slipped and slid because everything was wet but the paper. You did a great job, and I love the pattern. Now I see wallpaper is coming back in vogue, but I will not be decorating with it.
I can understand why, Marian! A bad experience like that is sure to put you off. I think we may use some in the guest bathroom, but that will probably be it for the wallpaper around here!
Gregg,
When did you cut the hole for the electrical outlet and the water hose box. Also, how did you measure it to fit correctly.
Sue Ward
Hi Sue, I first removed the outlet cover and the hose box cover, and then we papered over everything. Once the paper was up, I cut those holes out with a utility knife. Couldn’t be easier – no measuring needed!