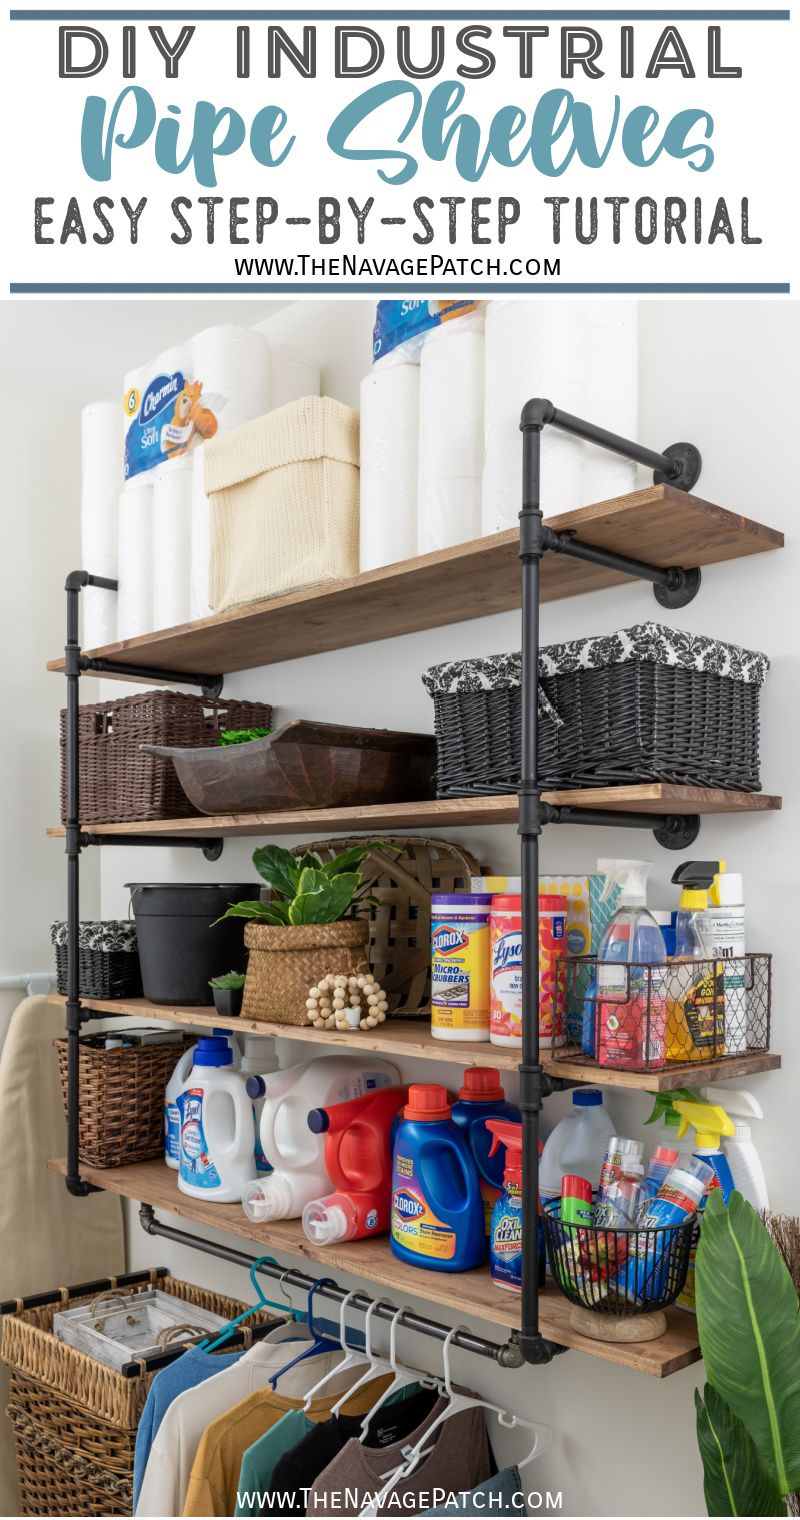
DIY Industrial Pipe Shelves
DIY Industrial Pipe Shelves are an easy weekend project that will give you an inexpensive and beautiful storage and display space.
My babes must have been a plumber in another life.
But not just any plumber – she must have been a gasfitter.
How else to explain her infatuation with black pipe?
Since we moved to America and started DIYing, she’s had black pipe on the brain. Oh, you only know the half of it! You’ve only seen a few of the projects – the ones we turned into blog posts.
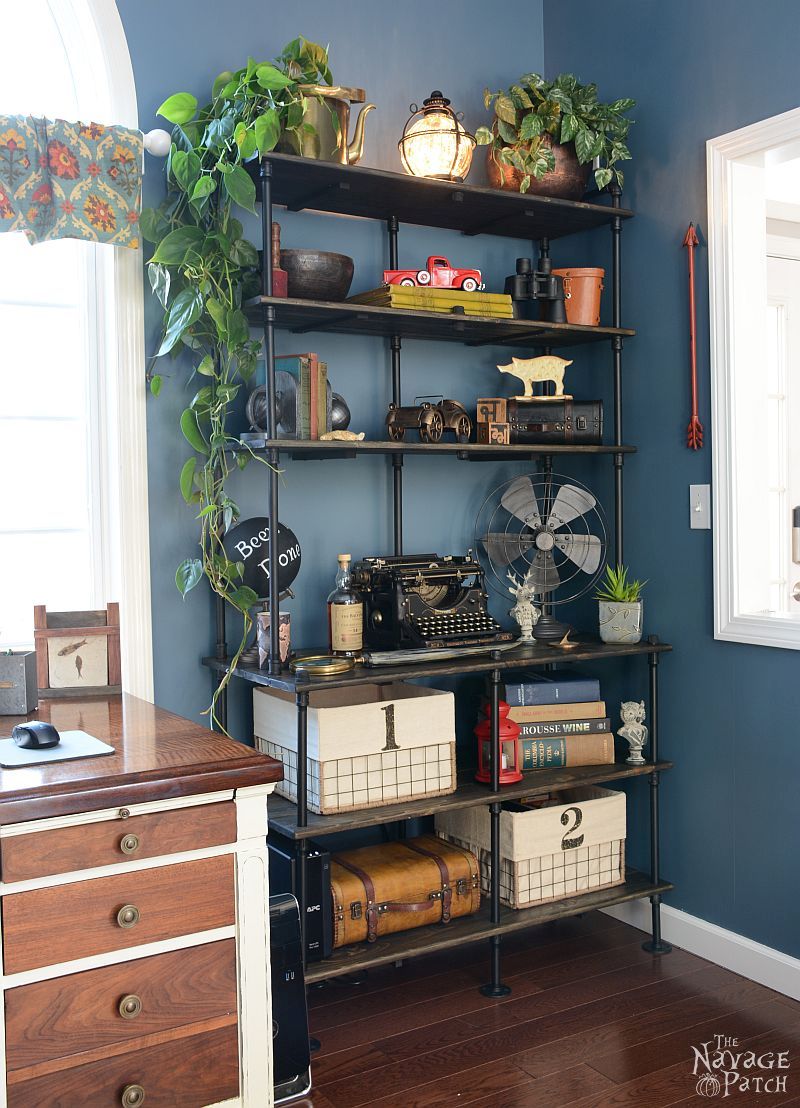
It all started with our black pipe bookcase way back in the olden days at our olden house – back when The Navage Patch Blog was still a wobbly toddler running aimlessly through Blogland with a stinky, poop-filled diaper.
The blog is older now, and we’ve ditched the diaper for dungarees, but I’m not sure I’ve figured out where I’m going, so I guess we’re still running aimlessly through Blogland. But we’re still here, and I’m thankful for that! 🙂
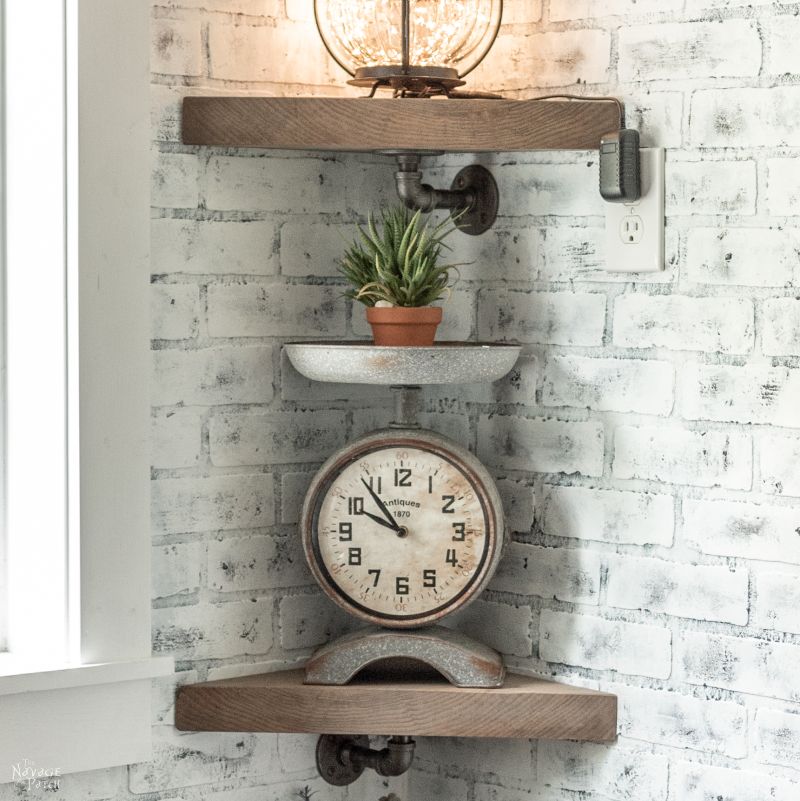
Anyway, a few years later, we showed you a more restrained black pipe shelf project. One simple pipe and a triangular slab of pine. Simplicity and elegance. Well, as elegant as a rough-hewn board plopped on a few chunks of iron can be, I suppose…
Now, what you may not have seen are the three (yes, three!) black pipe and pine rolling carts I made for my babes. They’ve popped up in the background of our posts over the years, like this one here – captured in a vintage photograph of our olden, pre-makeover dining room in the olden house in our olden Connecticut town.
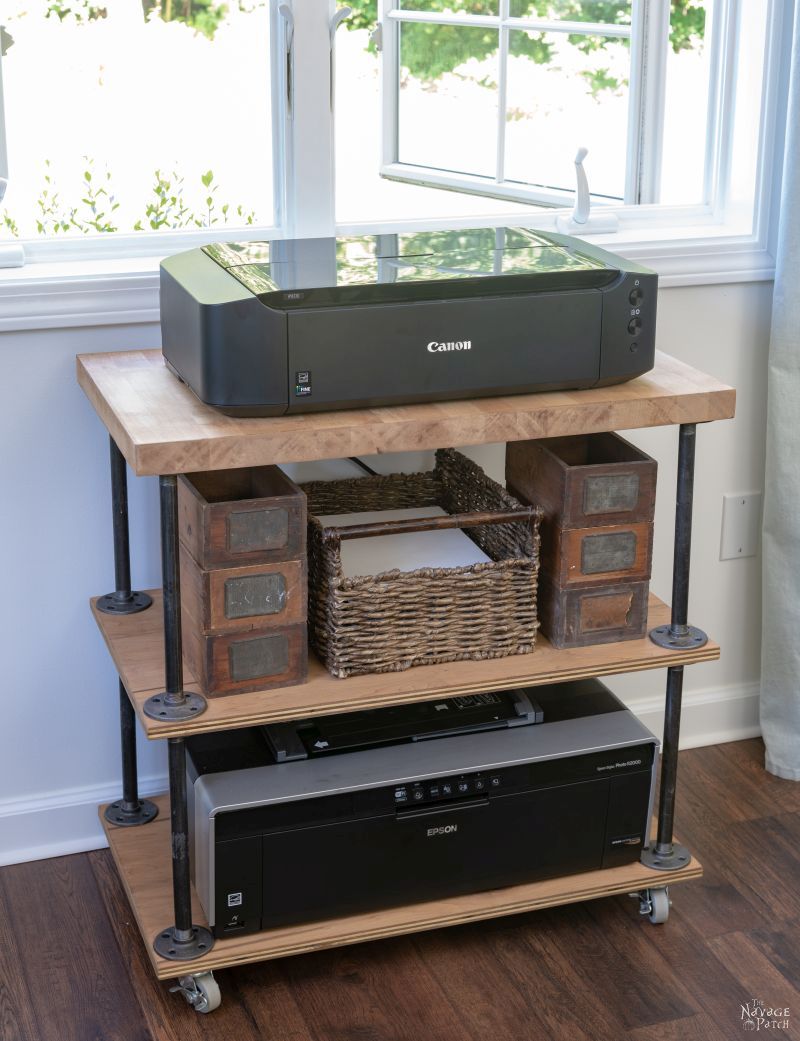
And then there was the black pipe and maple/plywood printer stand I built for my babes during our craft room makeover in The Navage Patch v1.0.
I think it’s safe to say that we now have enough black pipe in this house to supply a new subdivision with natural gas, because all the the projects I just showed you above were dismantled for our move to Georgia. You know, with the rate subdivisions spring up around here, I don’t think anyone would notice if I snuck off and built one myself on an open parcel of land. Although…
…the dead giveaway would be my subdivision would have houses with square rooms, and plumb walls, and, well…oh, it would be obvious it wasn’t built by one of the local hammer-swinging goon-squads around here!
So.
Three pine carts and one maple printer stand – dismantled.
Two pine corner shelves – dismantled,
One bookcase of pipe and pine – dismantled.
All of them sorted, boxed and hauled 1000 miles to a strange new land.
It was just a matter of time before my babes started to have southern black-pipe-dreams in our new southern home.
But the house filled up quickly with furniture. There was really only one room left…
Only one room with enough free wall real estate to make her ultimate DIY industrial black pipe shelves dream come true…
One room that was crying out for more storage space…
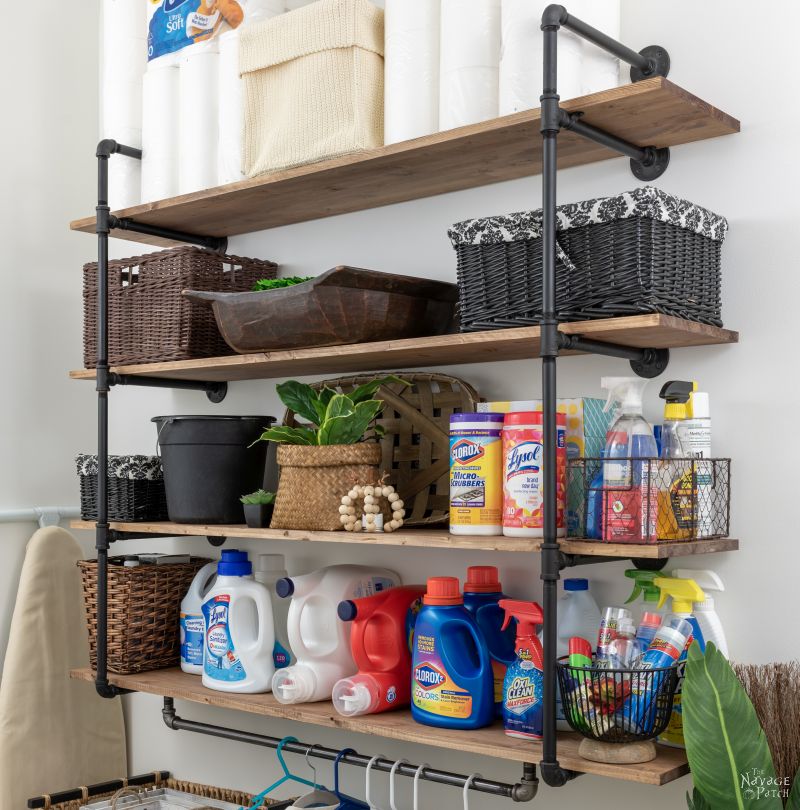
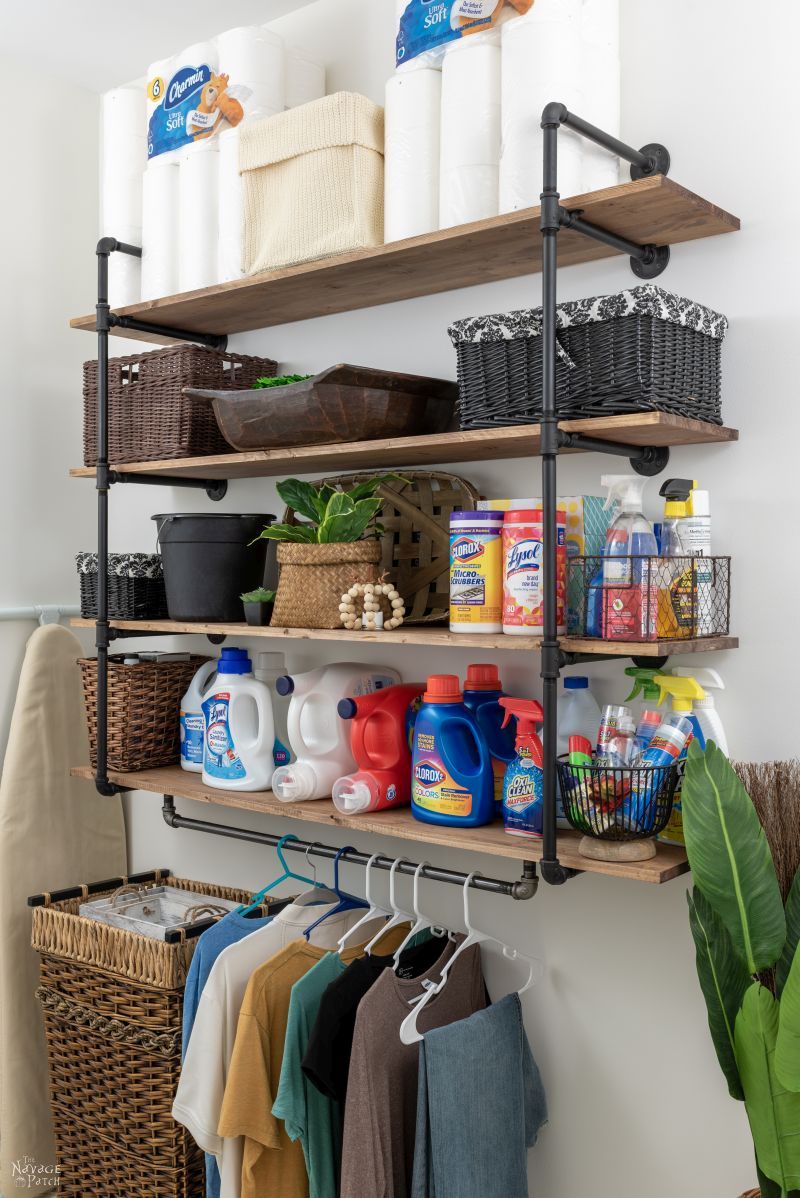
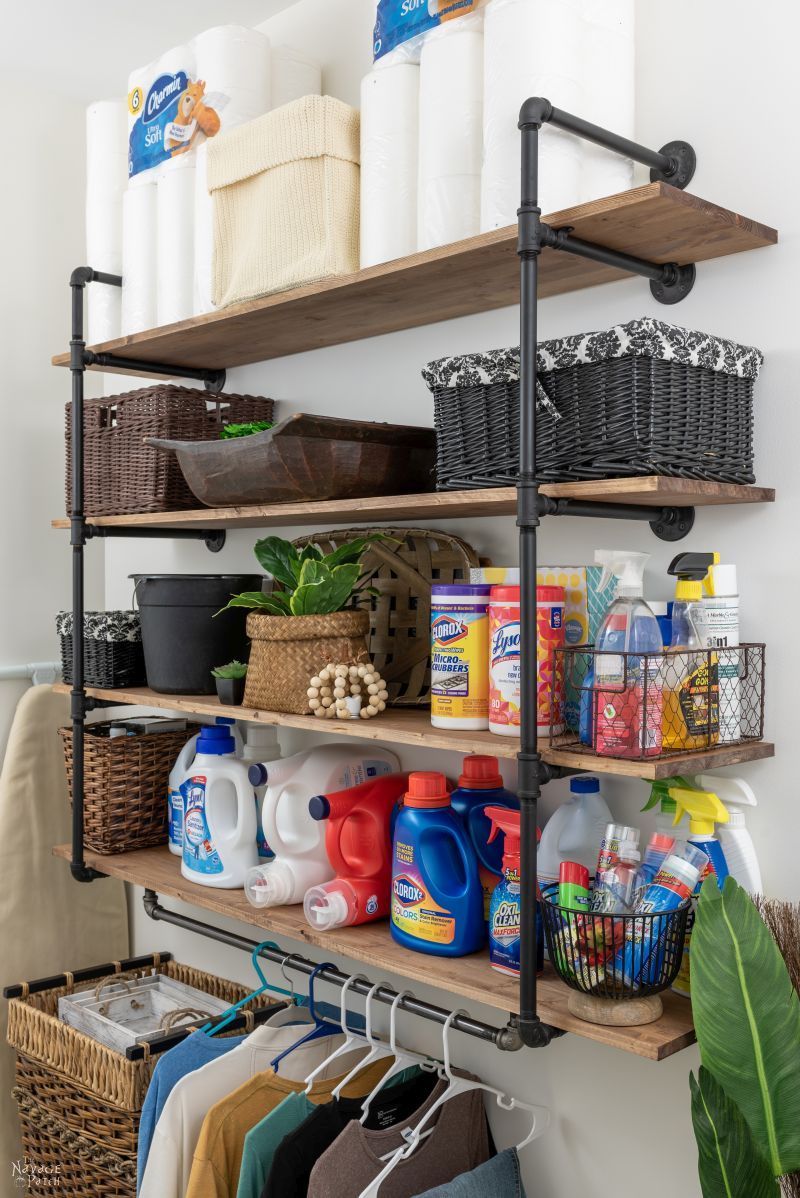
The laundry room.
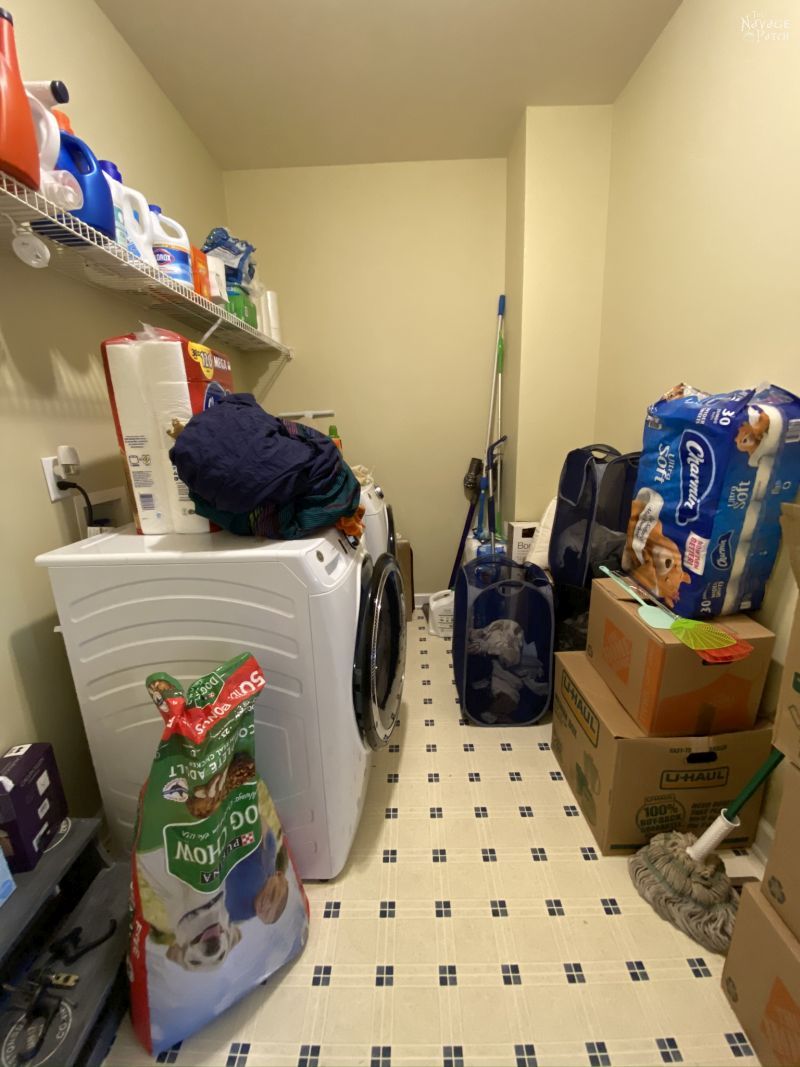
I had a whole wall to work with on the right side of the picture above – the one behind the pack of Charmin Ultra Soft. I’m more of an Ultra Strong man myself, but these are trying times, and one must do with what’s available. Better Ultra Soft than nuthin’!
DIY Industrial Pipe Shelves
SUPPLIES LIST
- (16) 1/2 inch x 12 inch black steel nipples (yes, they’re called nipples, not pipes, when they’re 12 inches and shorter)
- (2) 1/2 inch x 5 inch black steel nipples
- (2) 1/2 inch x 1 1/2 inch black steel nipples
- (1) 36 inch black steel pipe
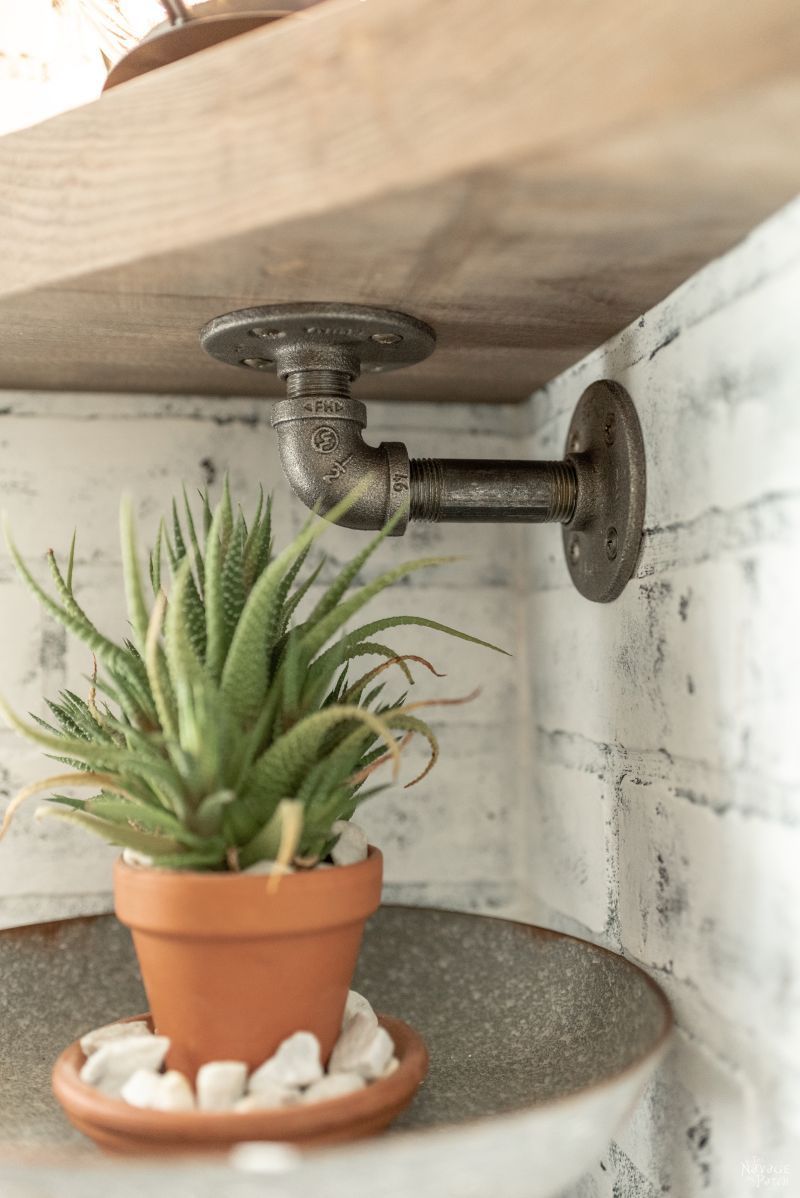
- (6) 1/2 inch black iron 90 degree elbows
- (6) 1/2 inch black iron tees
- (12) 1/2 inch black iron flanges
- (16) 1/2 inch conduit straps
- TSP cleaner
- Flat black spray paint
- (4) 12 inch x 6 feet edge-glued boards or (4) 12 inch x 6 feet pine boards (we used edge-glued, as they won’t warp as readily as 12-inch pine) – I’ve only found these at Lowe’s
- Pre-stain ( I use Varathane)
- Stain (we used Minwax Special Walnut)
- Black screws (I used 1 5/8 inch drywall screws)
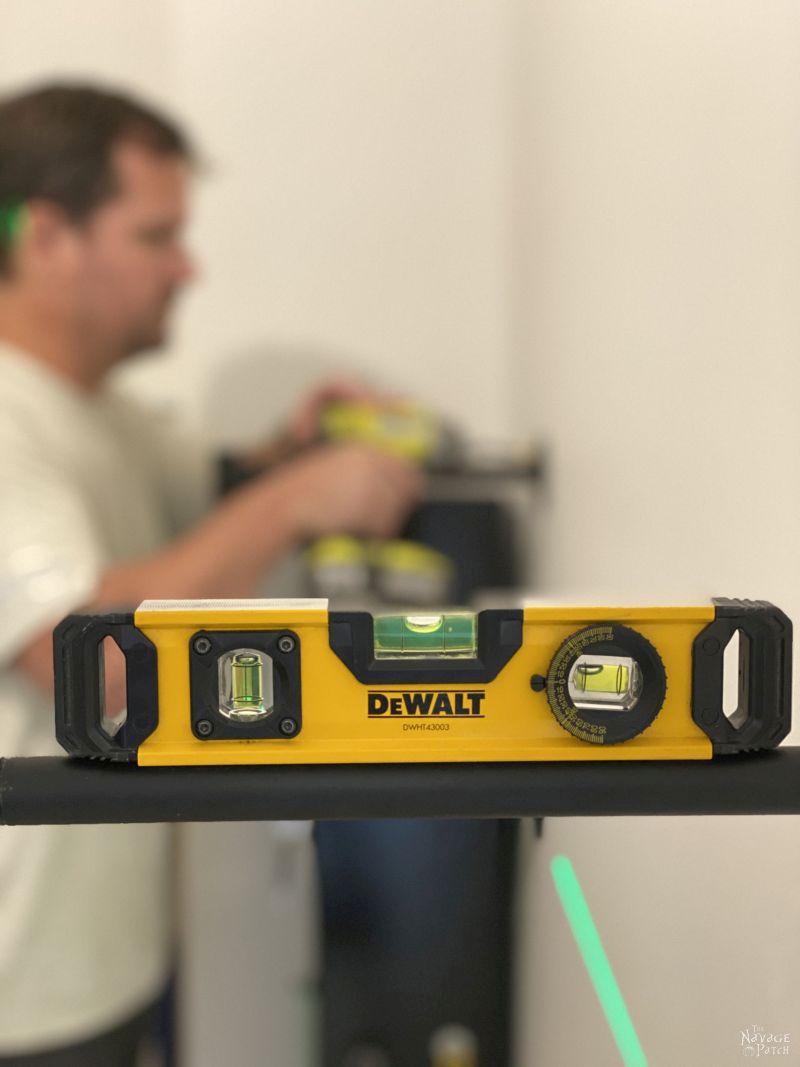
- Self-leveling laser level (so recommended!) or carpenter’s level
- Torpedo level
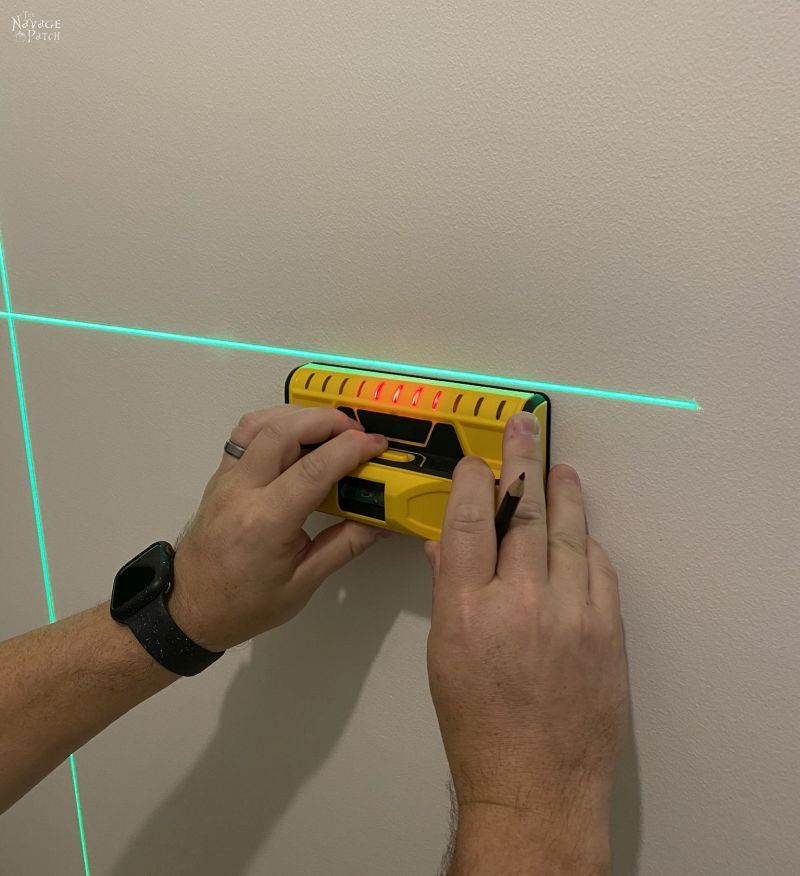
- Stud finder (this is the best one in the universe!)
A note about black pipe. We buy ours at Home Depot or Lowes. While they are not the cheapest, I’ve come to trust the quality. You can find black pipe on Amazon that is much cheaper than what is sold in stores, but I’ve read that the pipes are thin, not true steel or iron, and the the quality is iffy. I’m sure that stuff is fine for a small shelf that won’t carry much weight, but it’s not something I’ll ever buy. No sense taking a risk with shelving. That said, I’d love to hear if anyone has used it and what you think!
*Awesome Tool Alert!*
There were two tools I used for this project that made it so much easier and more enjoyable. They’ve come in handy countless times since I bought them last summer. The first is my self-leveling laser level. From installing shelves to hanging pictures to hanging curtain rods, this tool has saved me so much time and effort. It is by far my best tool purchase of the last few years.

While not as awe-inspiring as my laser level, my new Franklin stud finder has been a welcome addition in this new house, and it has reversed years of pent-up stud-finder-angst. The day before I bought this stud-seeking life-saver, I had turned one of our kitchen walls into swiss cheese trying to locate studs with not one, but two useless and frustrating, piece-of-crap Zircon stud finders. Never again! My new stud finder finds them every time and shows exactly where the entire stud is!

Okay, now let’s get on with our DIY Industrial Pipe Shelves!
We decided our shelves would be 5 feet long. This was a function not only of the wall length, but of the spacing and placement of the studs upon which these industrial shelves would hang.
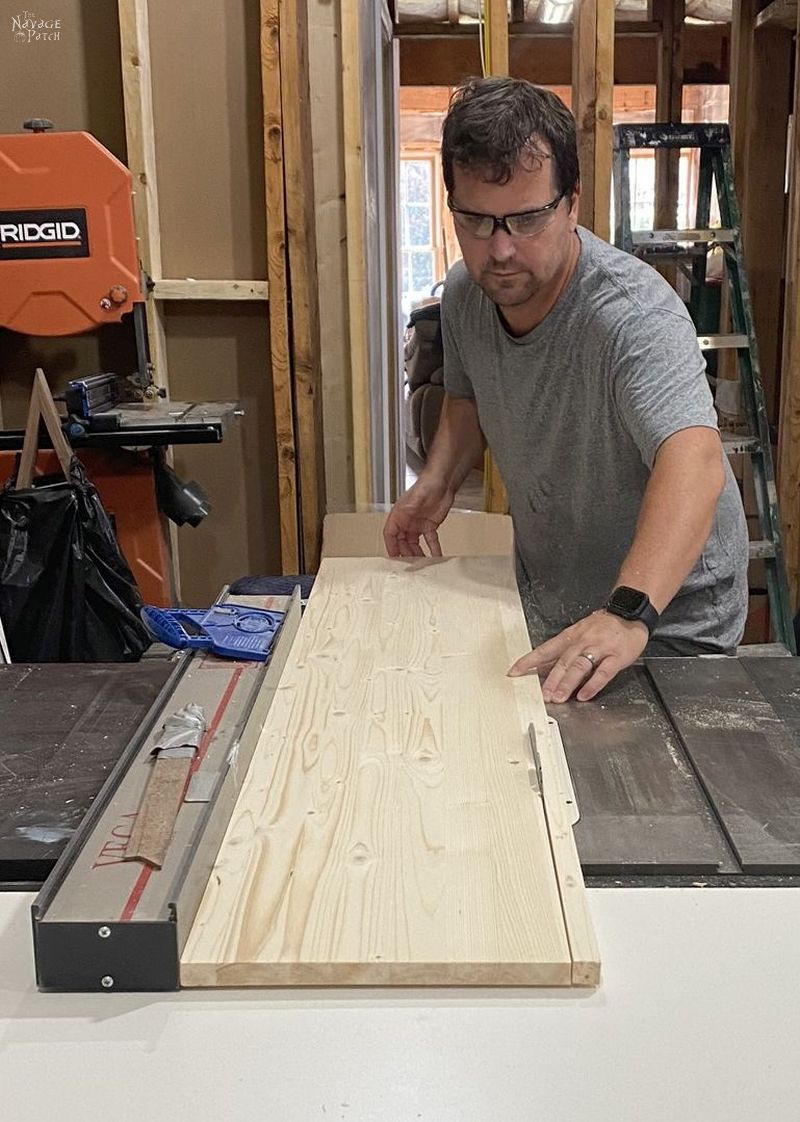
I took my 6-foot edge-glued boards downstairs and lopped off a foot from each…
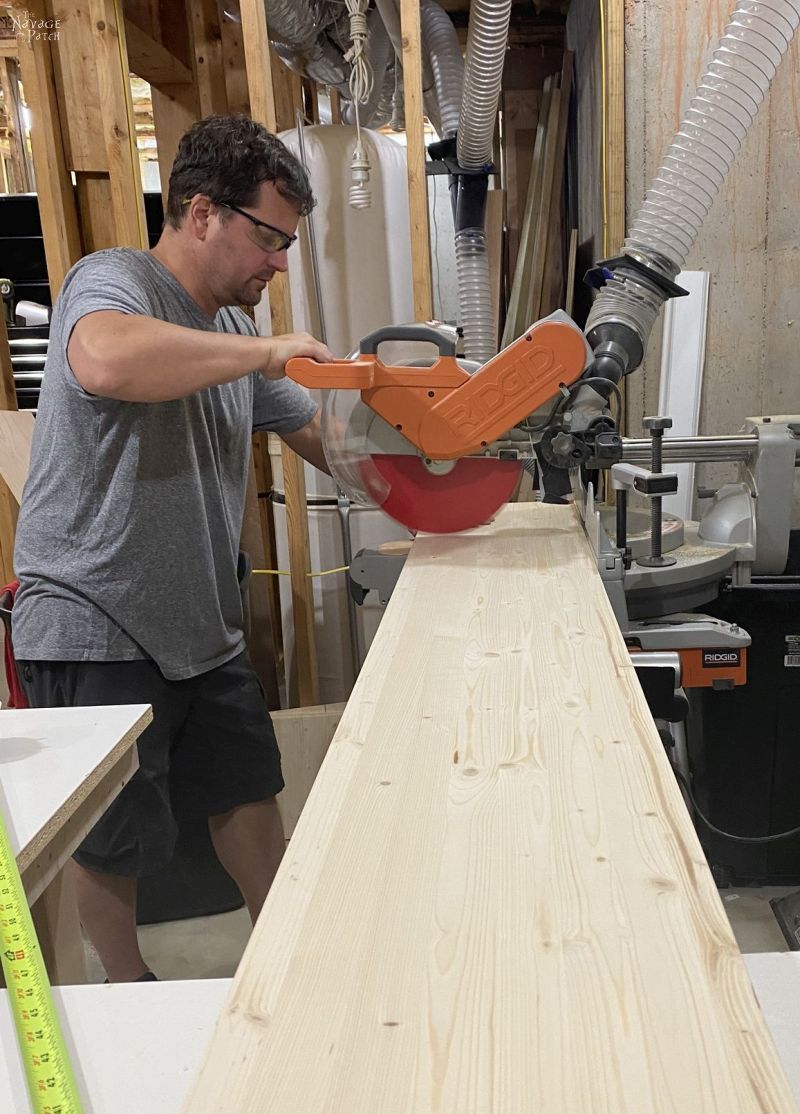
…while my babes snapped photos of…hey wait a minute…
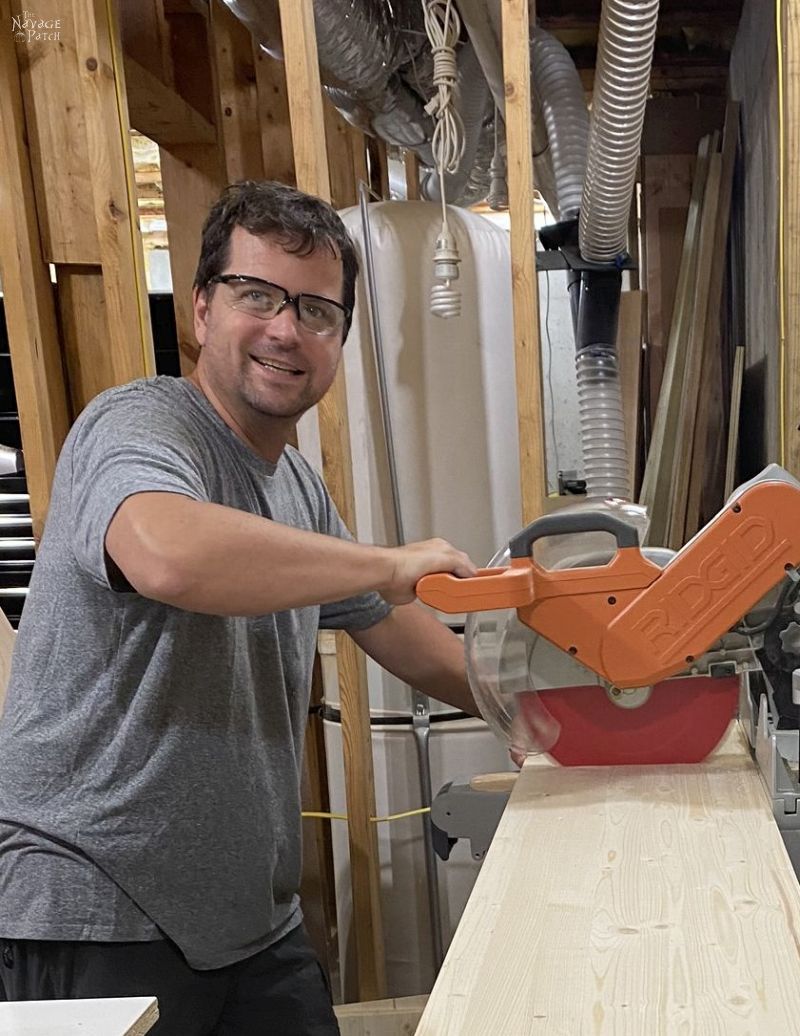
I know that face!
Ralphie!!

Even though I used 12-inch black pipes, once the fittings were screwed on, I found I had a little less than 12 inches of open space upon which to lay the boards, so I had to trim a little off the width. Edge-glued boards come true-to-size, meaning the dimensions listed are the actual dimensions of the board. Note, that if you use 12-inch pine boards, you wouldn’t need to do this step, because a 12-inch pine board is actually 11 3/4 inches wide.
Still, the added step of trimming some width is well worth it, because edge-glued boards are far more resistant to warping than a single piece of pine.
That said, if I were installing these Industrial Pipe Shelves in a living room or somewhere besides the laundry room, I’d go to a wood shop and buy some 2-inch-thick pine lumber like I used for the corner shelves in our old house. It’s more expensive, but it does look better.
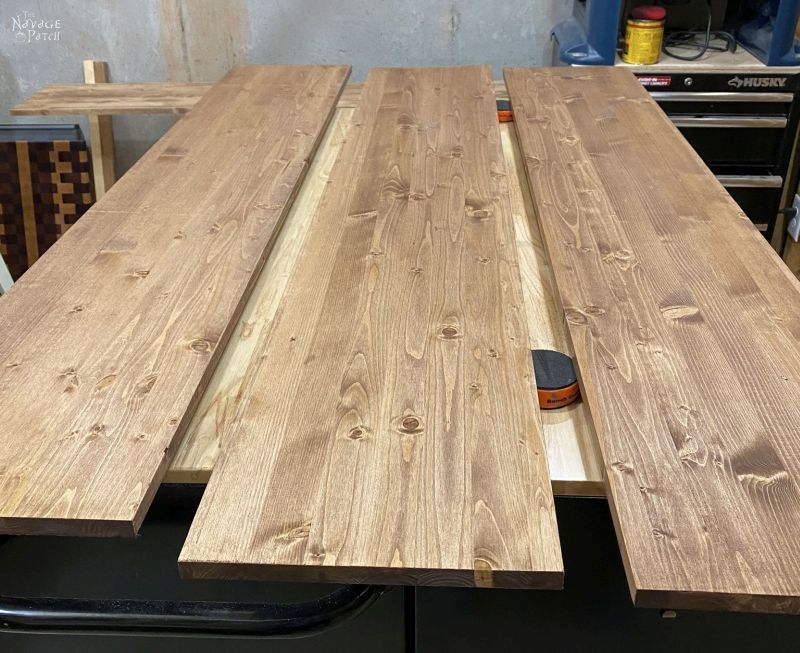
Once I had the boards all trimmed to size, I lightly sanded the edges and corners. Handan wanted these shelves stained with Minwax Special Walnut – no surprise there, as it’s by far her favorite color!
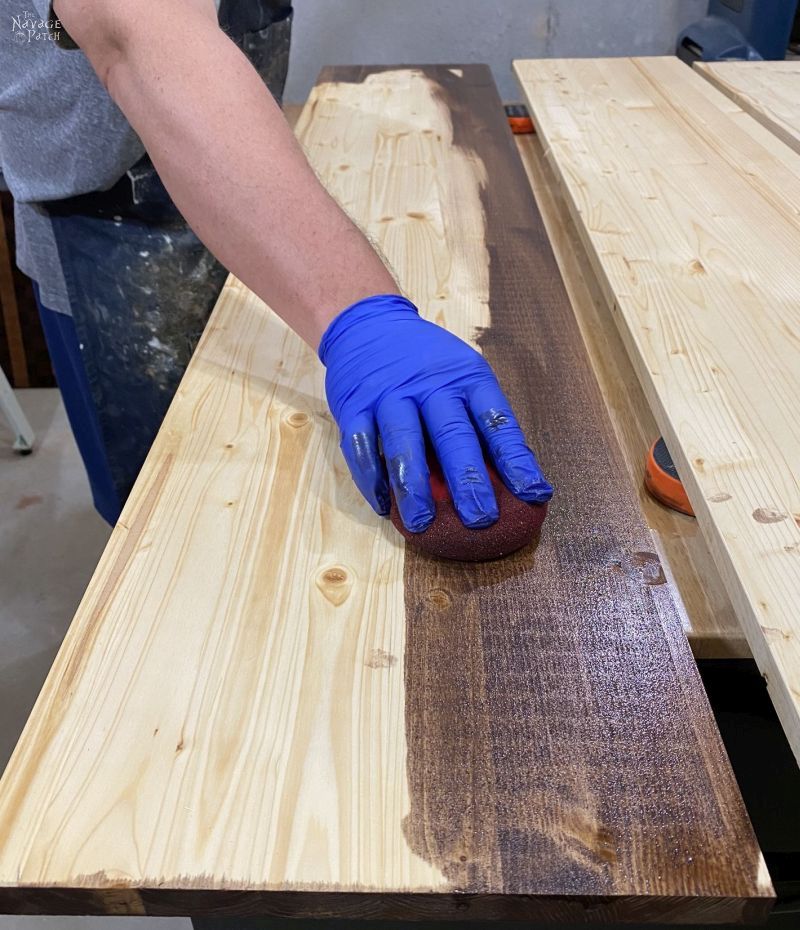
But first, a coat of pre-stain. When working with pine (and especially edge-glued pine), I use pre-stain wood conditioner to minimize blotching and to even out the color a bit. No pre-stain is perfect, but for general, all-around use, I like Varathane the best.
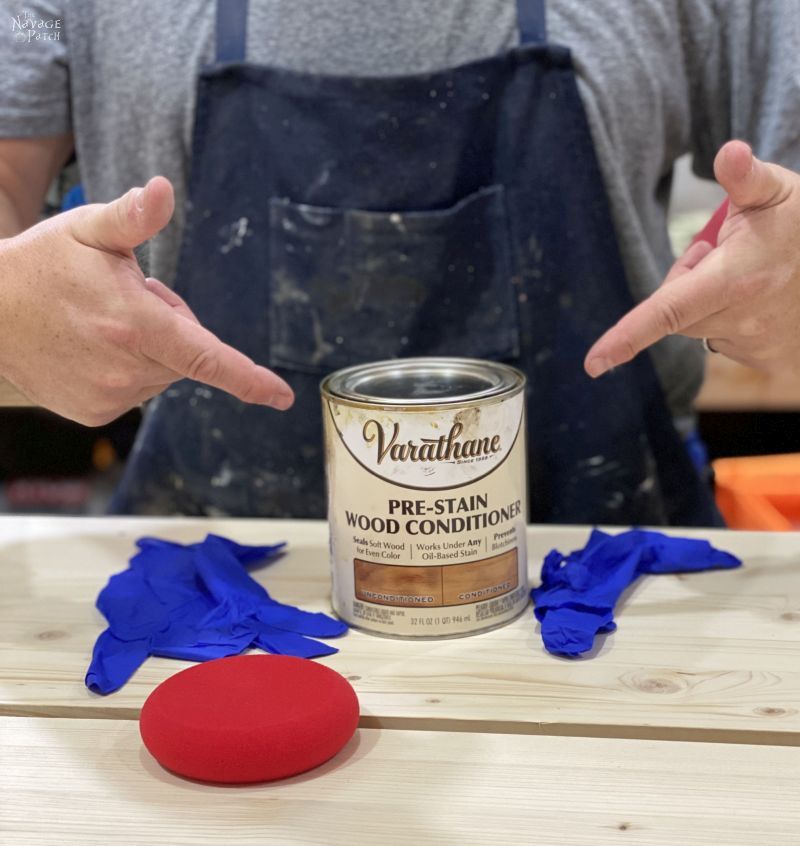
I have become a huge fan of these applicator pads my babes got for me. They work wonders for pre-stain, stain and wipe-on poly!
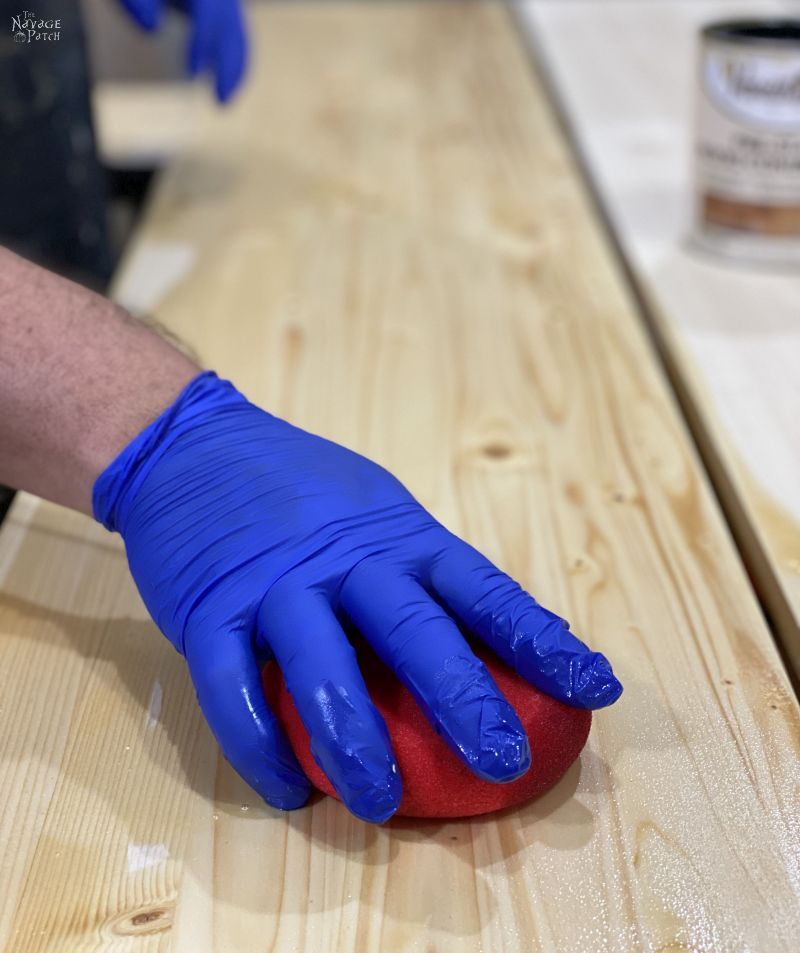
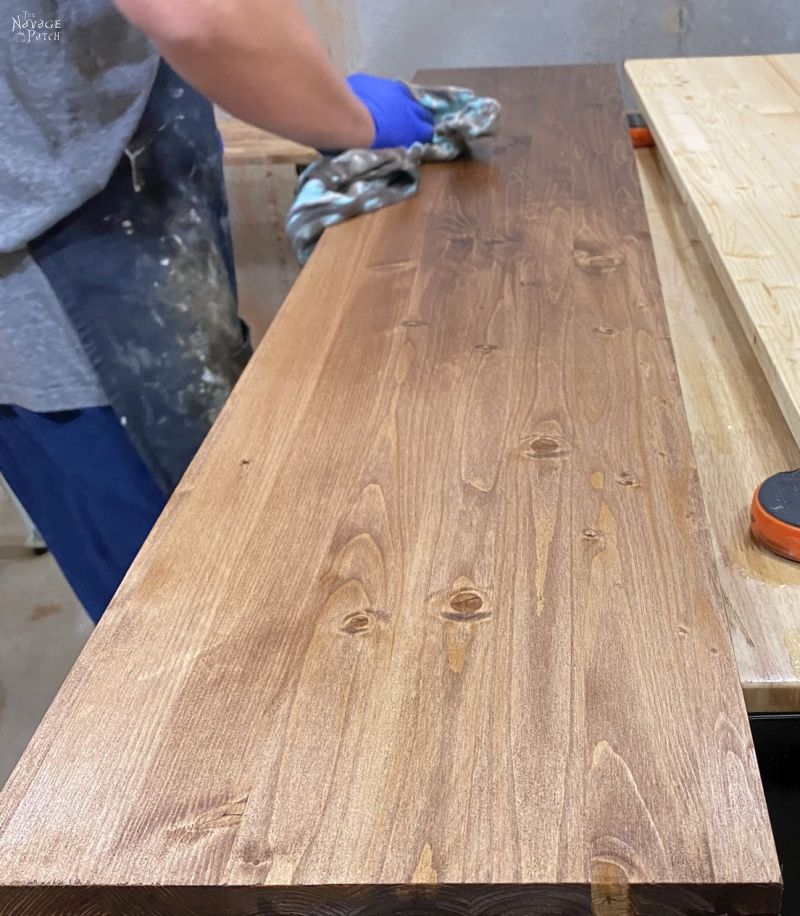
After 30 minutes, I applied a coat of Minwax Special Walnut.
While the boards dried in the basement, I took some of the steel nipples and fittings outside to paint black. Since I still had all of the pipe left over from our black pipe bookcase in the old house, I only needed to paint a few additional pieces.
I’ve read a few bloggers who express doubt about how well paint would adhere to these pipes, as they come with some industrial grease on them.
Well, yeah, if you just painted them the moment you brought them home from the store, obviously the paint wouldn’t stick very well. But a simple cleaning with TSP and warm water will get rid of every last molecule of grease and leave them perfectly ready for paint. Before the TSP, we first use Goo Gone or Goof Off to remove any label stickers.
Here are the pipes we painted for the old bookcase.
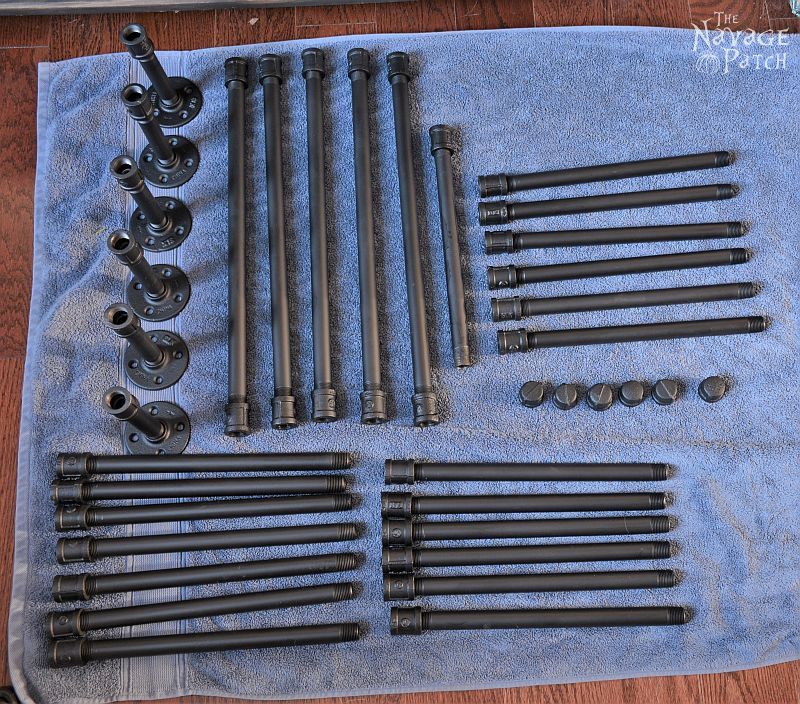
It’s been over 5 years, and they are all still perfectly black, even after dismantling the old bookcase, tossing the pipes in a box and carrying them down to Georgia.
After the newly-painted pipes and fittings had dried and cured for a day, Handan and I started to assemble the black pipe frame on the wall.
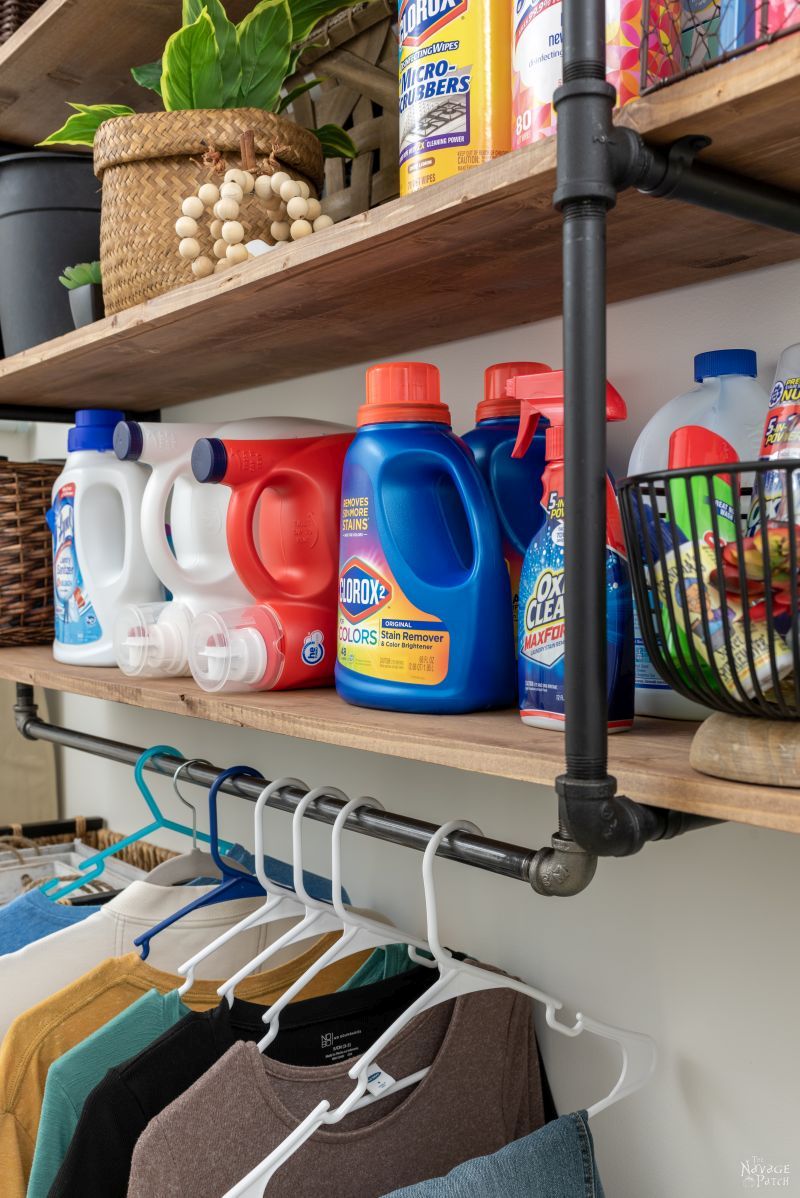
The completed industrial pipe shelves would be 4 feet from top to bottom, so we decided to start them 40 inches up from the floor. This gave us enough room to hang shirts underneath while still giving us plenty of storage room on the top shelf.
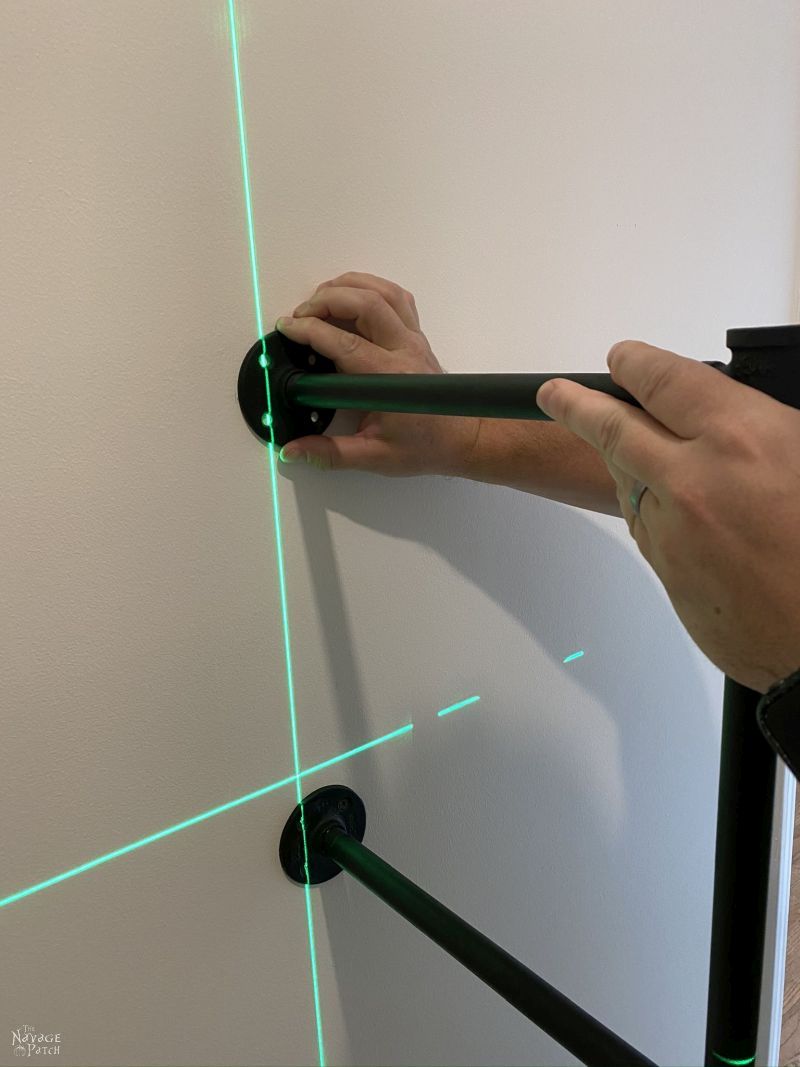
After measuring up 40 inches, I marked the wall with a pencil and then set the laser level across that point.
Next, I located the first stud. What I love most about this stud finder (besides its accuracy) is that the red lights show the thickness of the stud, so you can target the center with total confidence.
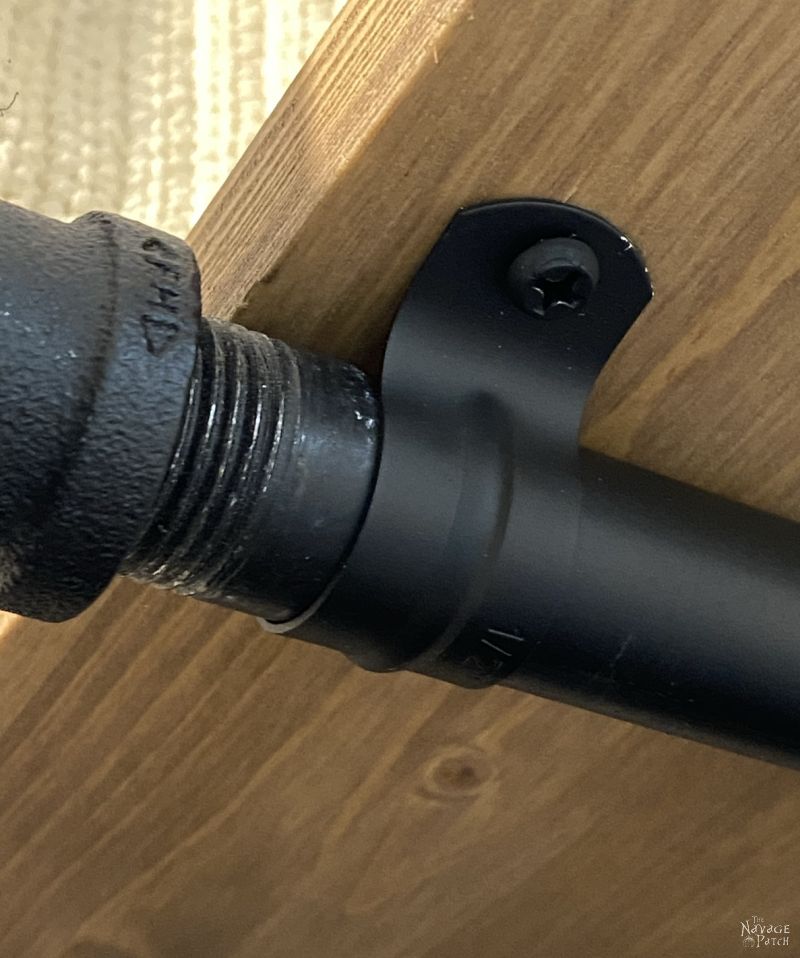
Now, there are two ways to attach these flanges to the wall, and both work equally well. Since the distance between screw points is longer than the thickness of a stud, only two screws per flange will be able to be driven into a stud. One option is to mount the flange to that the two mounting screws are at the 12 o’clock and 6 o’clock positions. The other two screw holes can be left empty, or you can screw two more into the drywall, just to give it a finished look.
But my babes is particular about how things look, so she wanted the screw holes to form a square, not a diamond. This meant that I had to line up one side along the centerline of the stud, drive two screws, and then drive the other two into drywall.
Just two ways to accomplish the same thing.

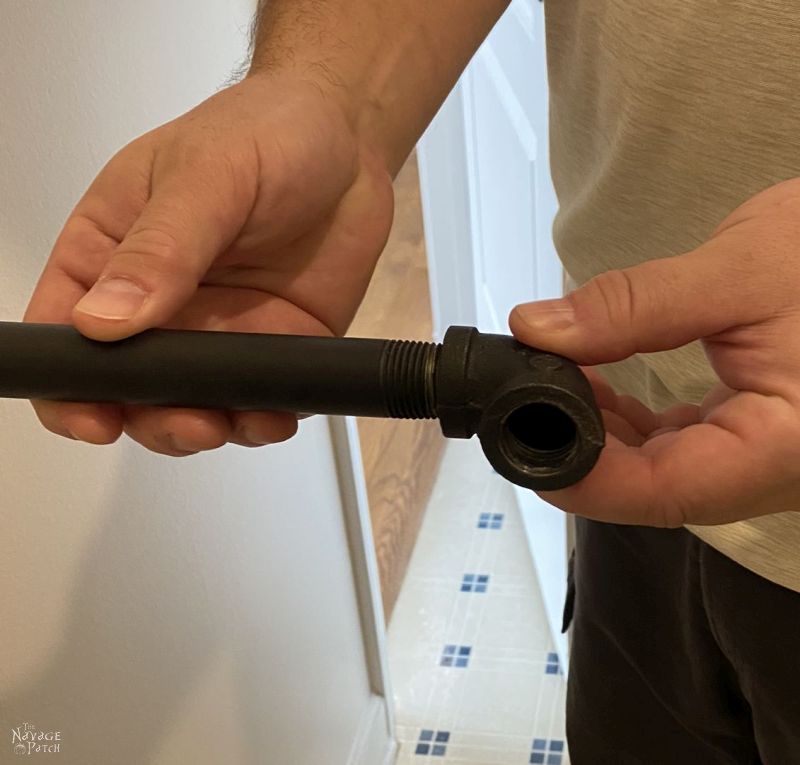
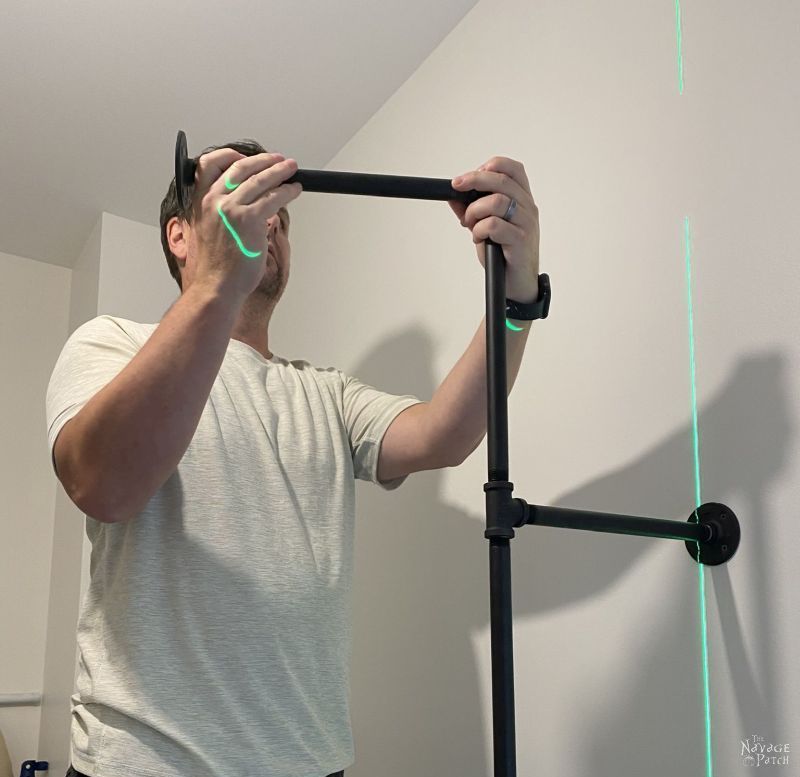
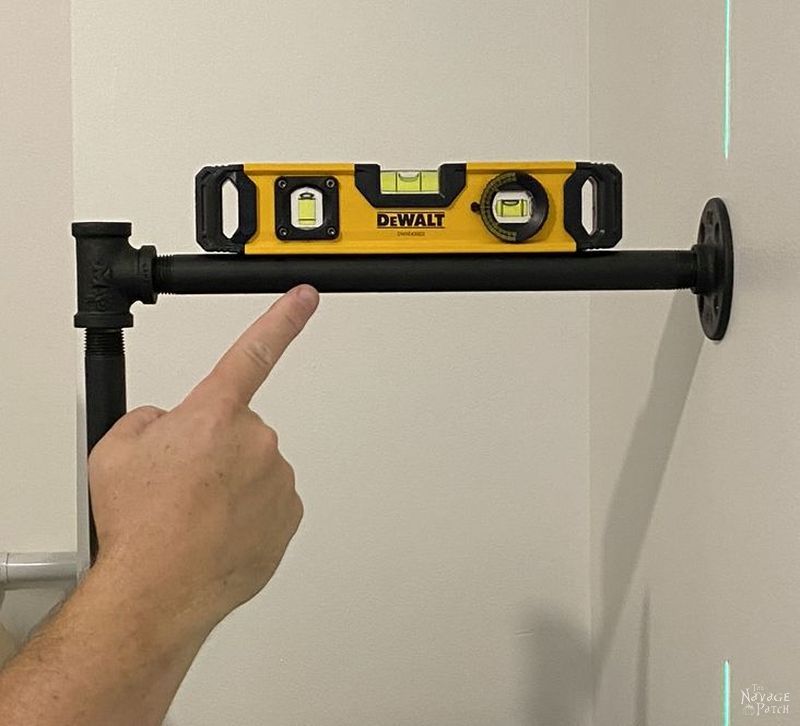
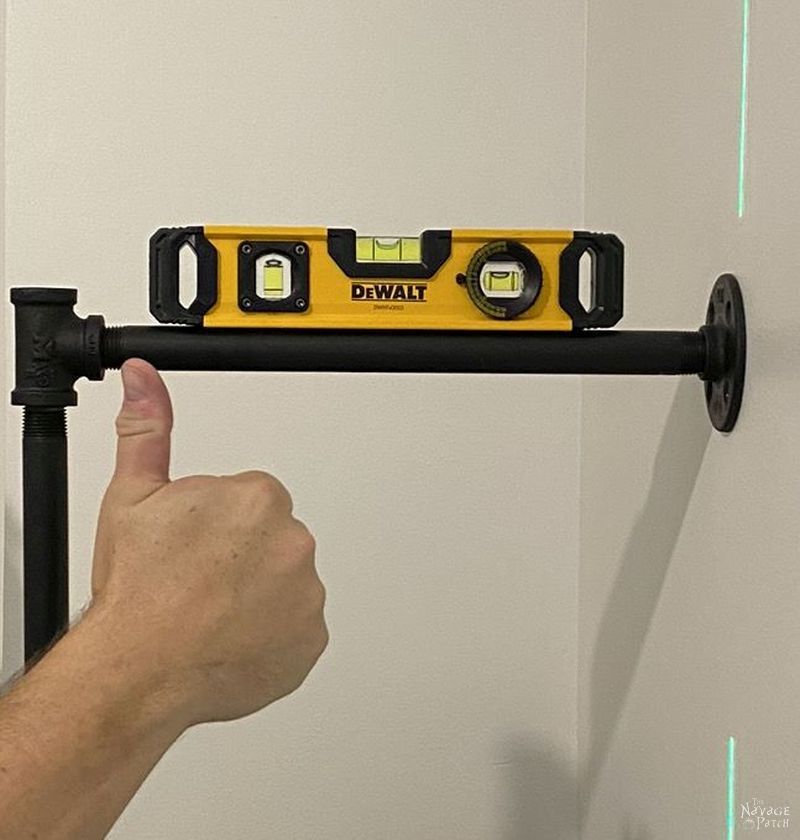
Once the flange was secured, I rotated the 12-inch nipple until it was level. Okay, look, I’m gonna start calling it a “pipe” now, okay? All this “nipple” talk is getting weird. So, yeah, most of these pipes don’t screw in perfectly level – the tend to wobble around the central axis as they’re screwed in. The trick is to use a torpedo level on each 12-inch piece to ensure it is level with the floor.
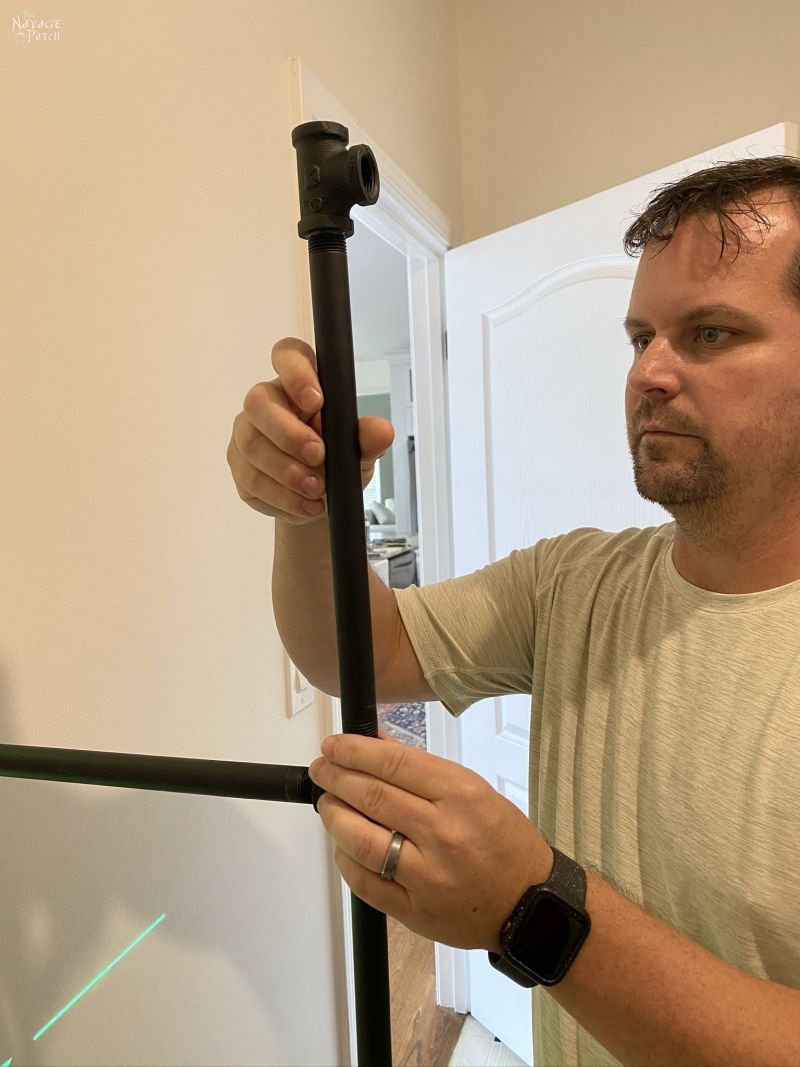
To the first 12-inch pipe, I screwed a 90-degree elbow.
To the elbow, I screwed another 12-inch pipe, followed by a Tee.
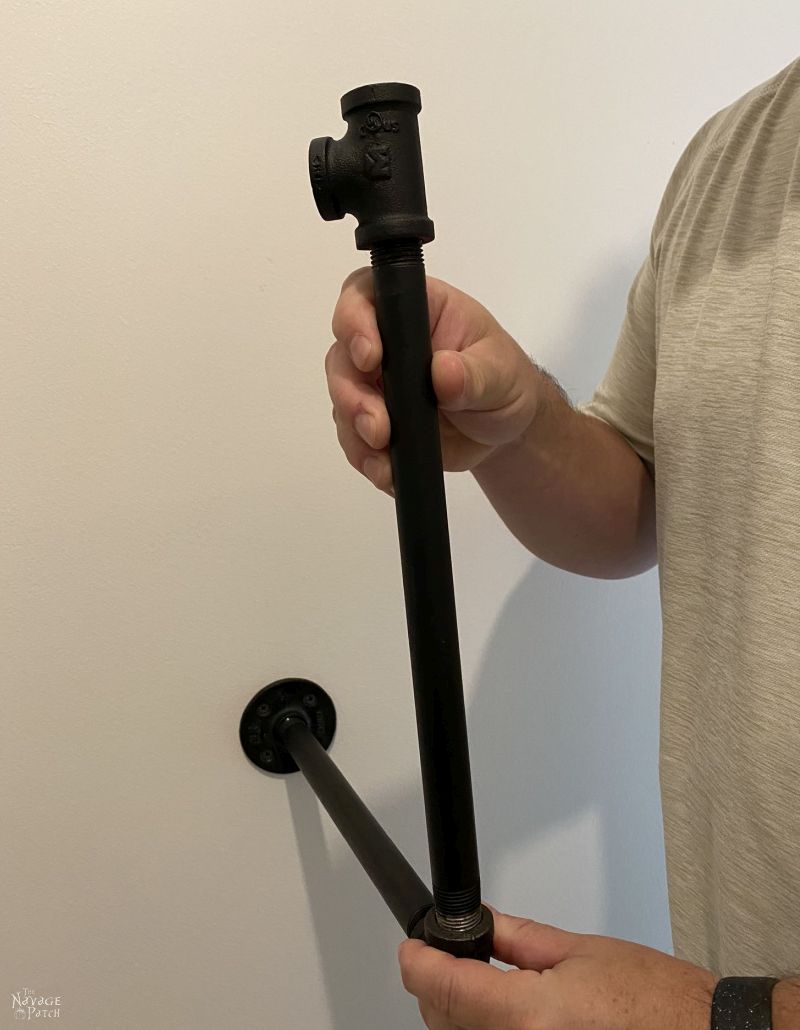
To the Tee, I screwed in another 12-inch pipe with flange already attached. I also reset the laser level so it was shooting a beam straight up the middle of the stud.
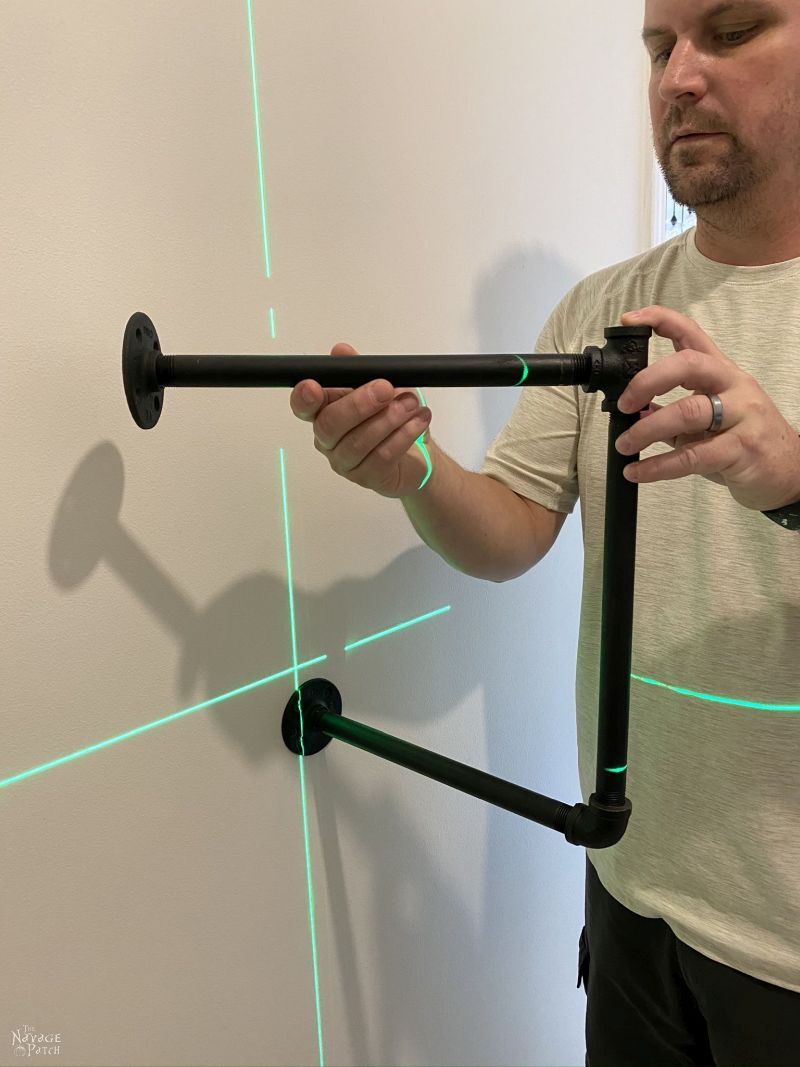
I rotated this onto the wall and twisted the pipe until it was level with the floor, and then I lined up the holes with the laser line.
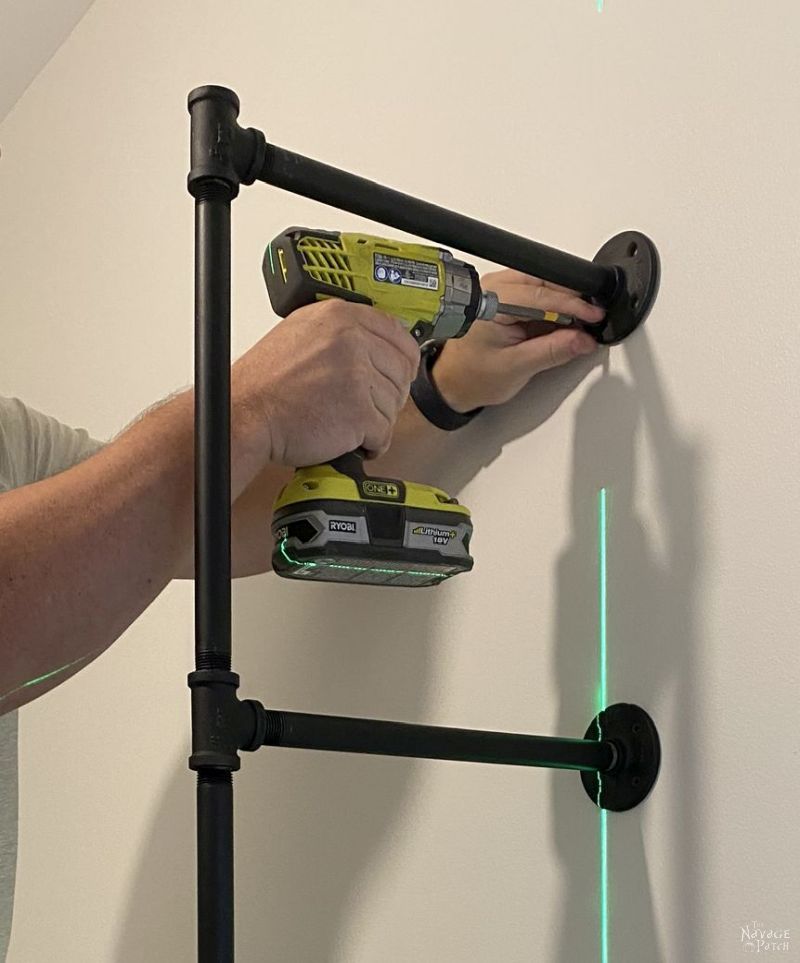
I secured the flange to the wall, while enjoying a light snack of drywall screws. Mmmmmm, screwy!

Does this laser beam make me look like a telemarketer?

I attached another Tee to a 12-inch pipe.

Then I screwed it onto the top of the Tee beneath it.
I added another 12-inch pipe with flange.

And then I rotated it onto the wall and screwed it in. As you can see, I moved my green headset to the other side of my face.
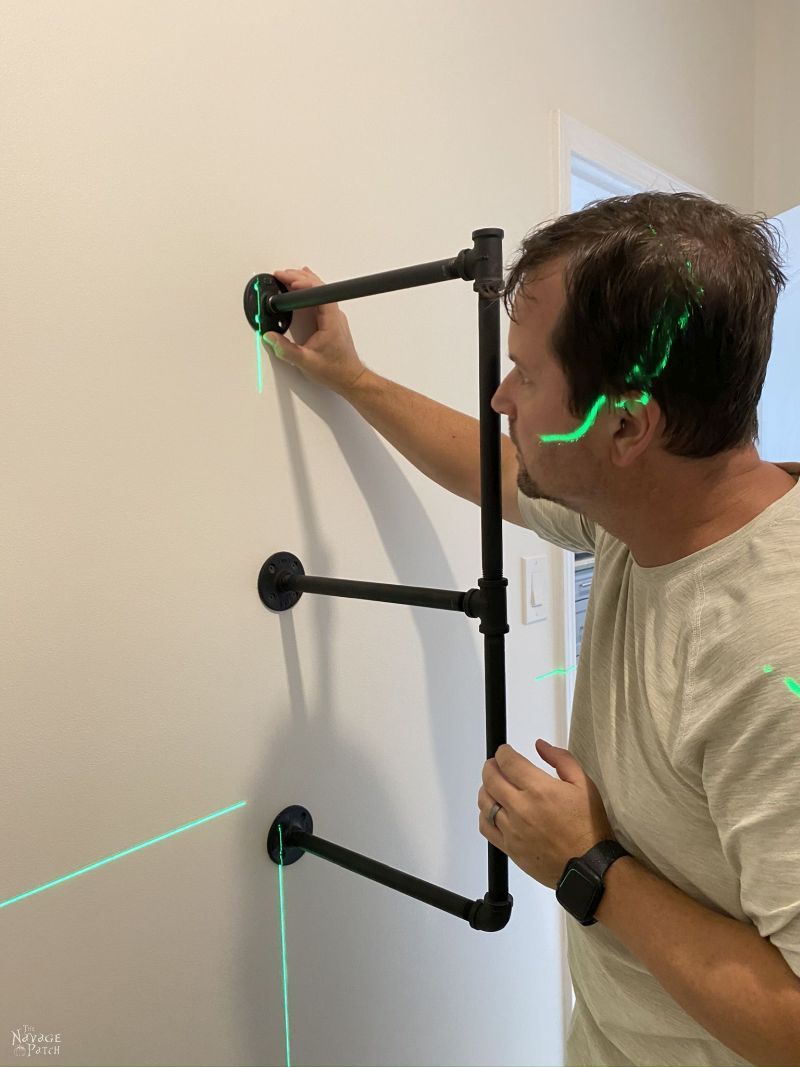
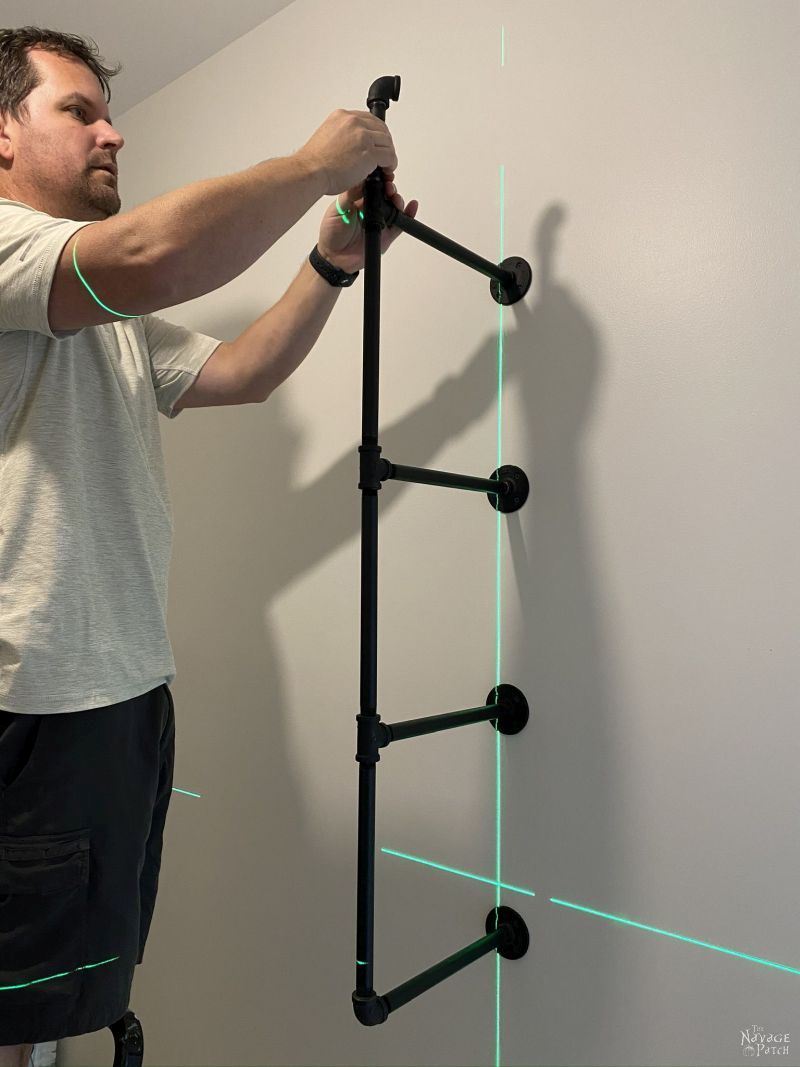
As before, I screwed on a 12-inch pipe, followed by a Tee, followed by another 12-inch pipe and flange.
Rotate and screw!
o_0
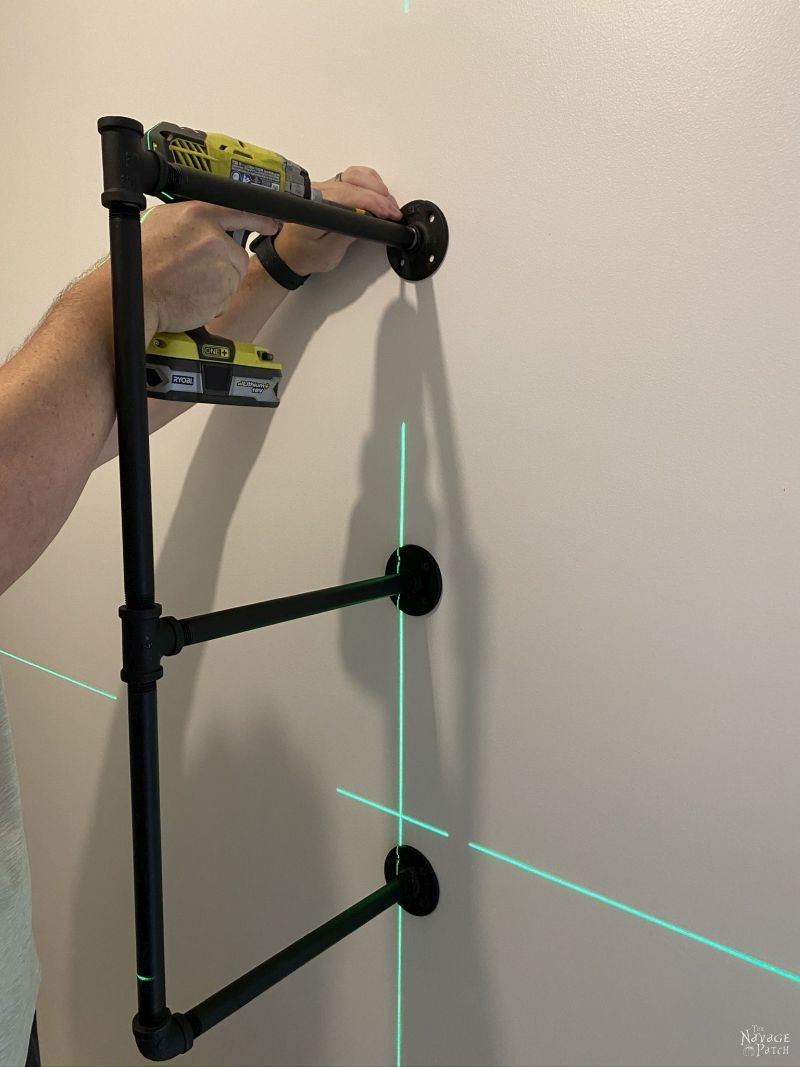
For the top, I followed the same pattern, but I used the 5-inch pipe topped with an elbow.

I attached the final 12-inch pipe and flange…
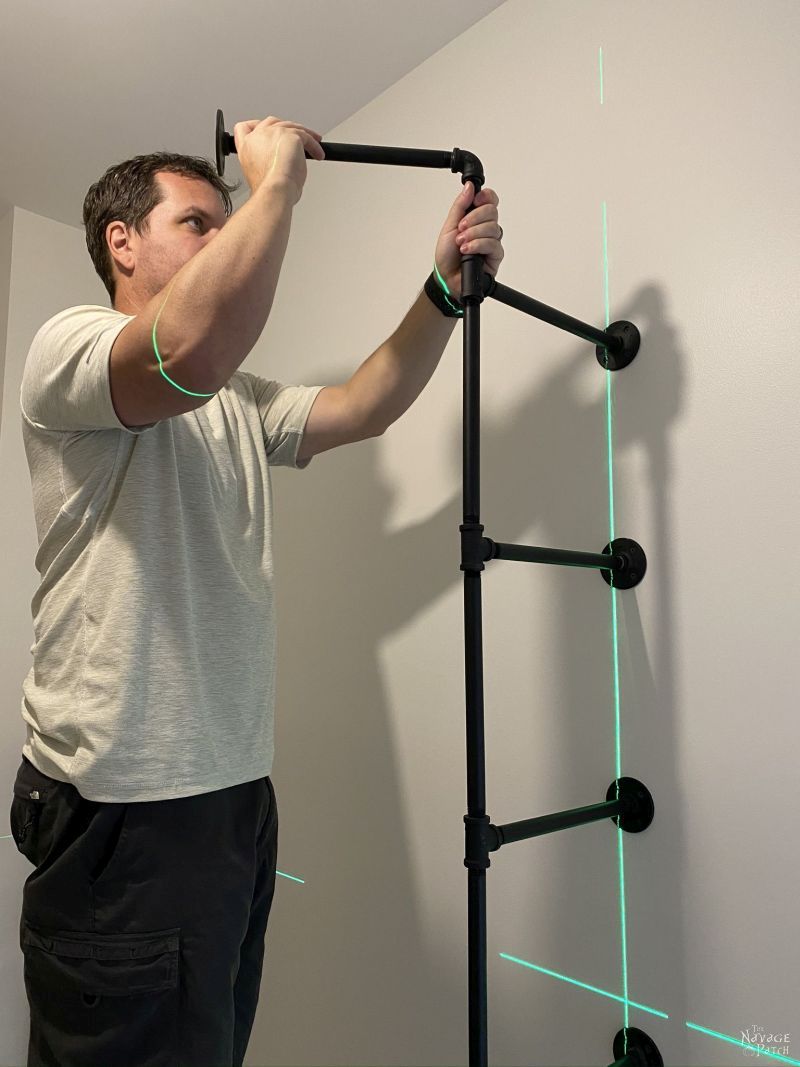
…then rotated and screwed! The key to a successful Rotate and Screw is to look menacingly at the flange before you screw it.

Perfectly level!
I moved down a couple of studs and repeated this whole process.
This is what you want.
Victory is mine!
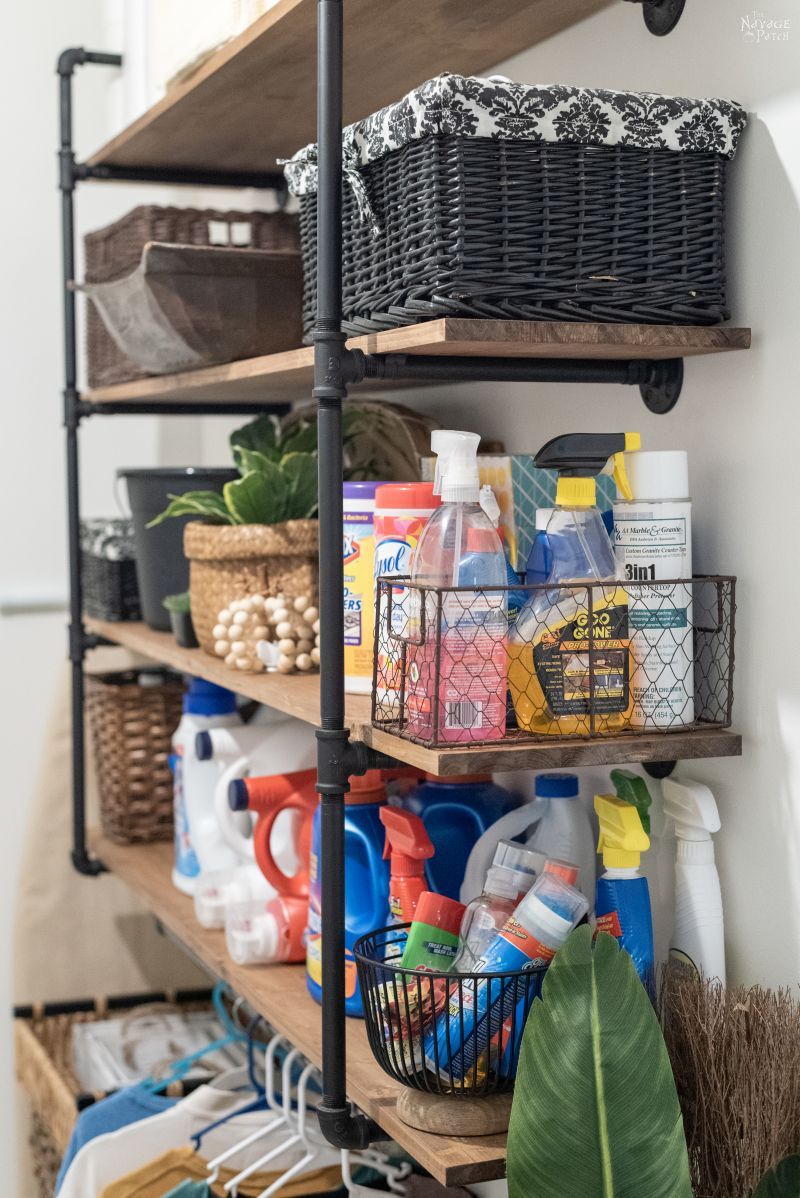
After placing the boards, I secured them with conduit straps.
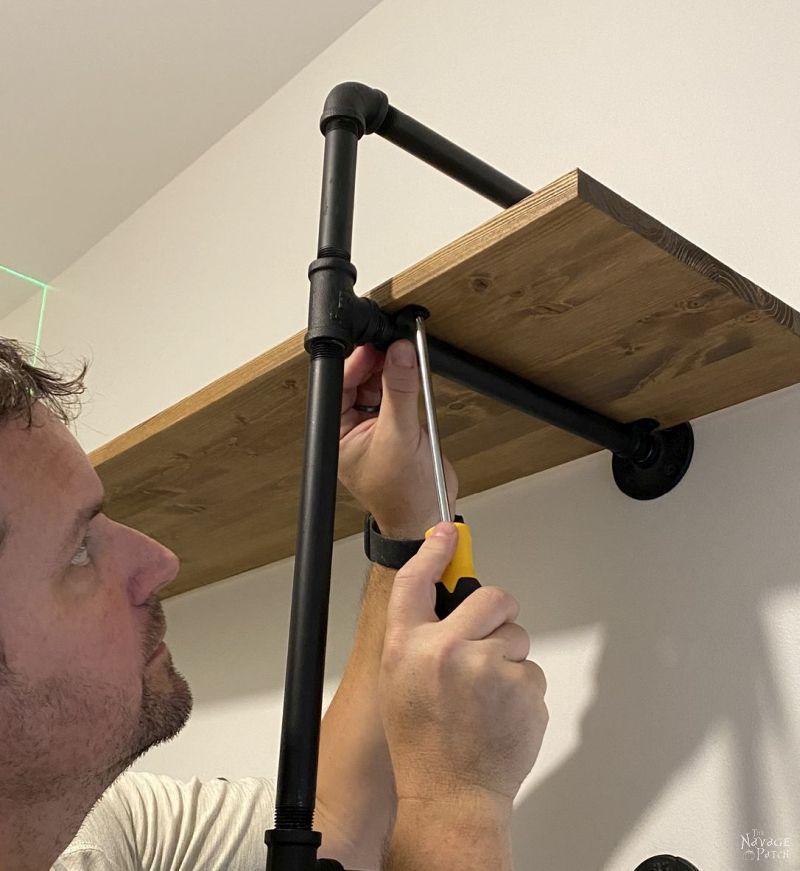
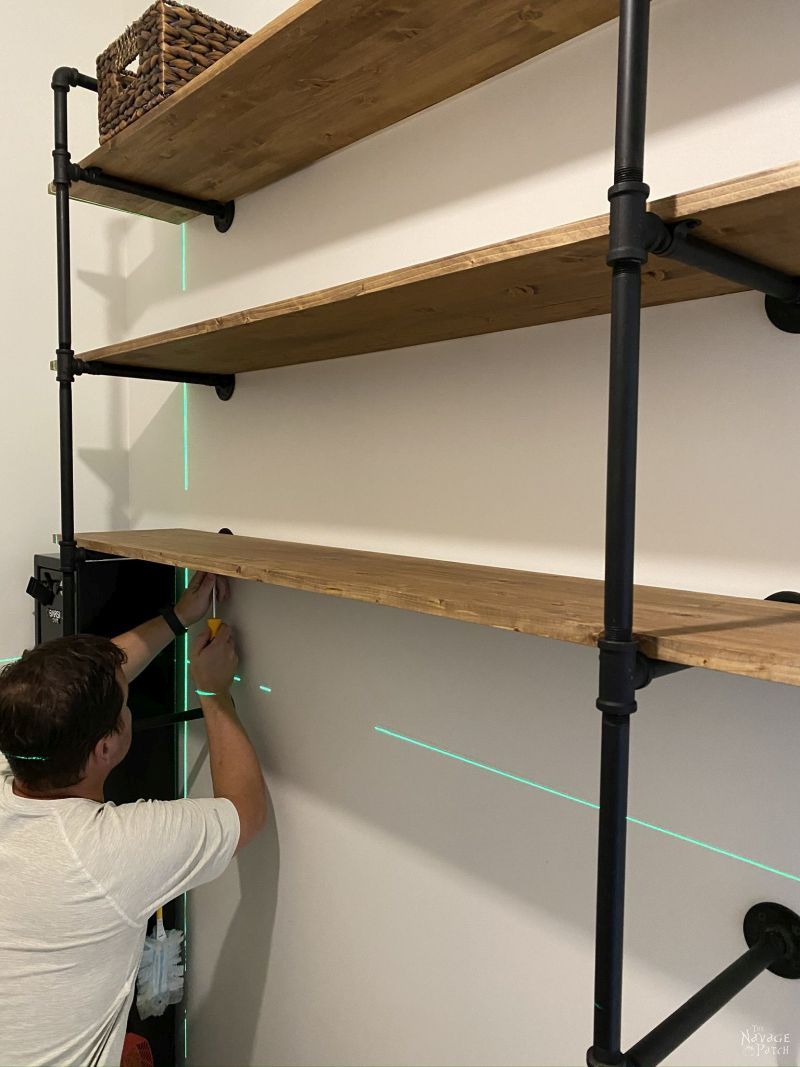
With 4 straps on each board, these pipe shelves are going nowhere!
And that’s that!
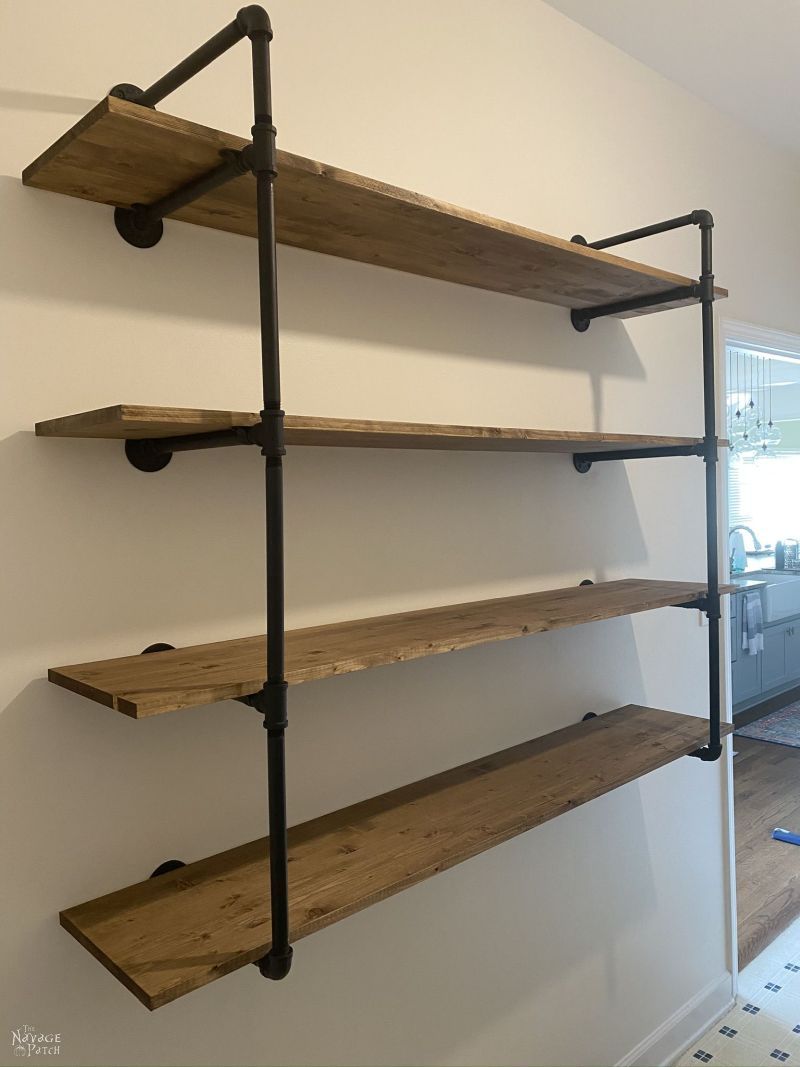
My babes’ DIY Industrial Pipe Shelves dream has become a reality! And with them, we’ve now increased the storage space in our laundry room by about 10,000%!
Oh! I almost forgot to tell you about the hanger pipe! As you can see, it was made with two flanges, two 1 1/2 inch nipples o_0 (sorry, couldn’t resist!), two elbows and one 36-inch pipe. I left this pipe unpainted since it would have a lot of hanger activity that would certainly scrape off any paint.

Of course, my babes wasted no time at all filling those shelves.
And I’m quite sure this will not be their final configuration.

My babes never met a shelf she didn’t want to rearrange…
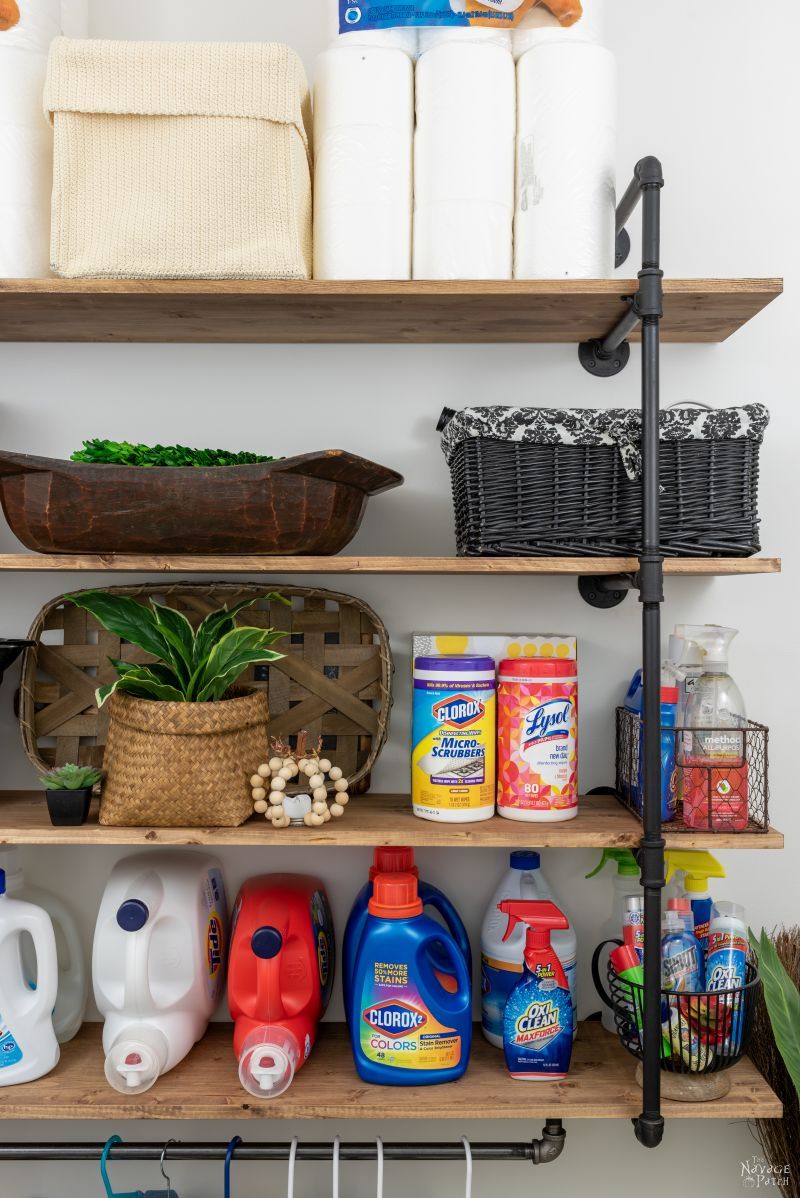
…even if she just finished arranging it!
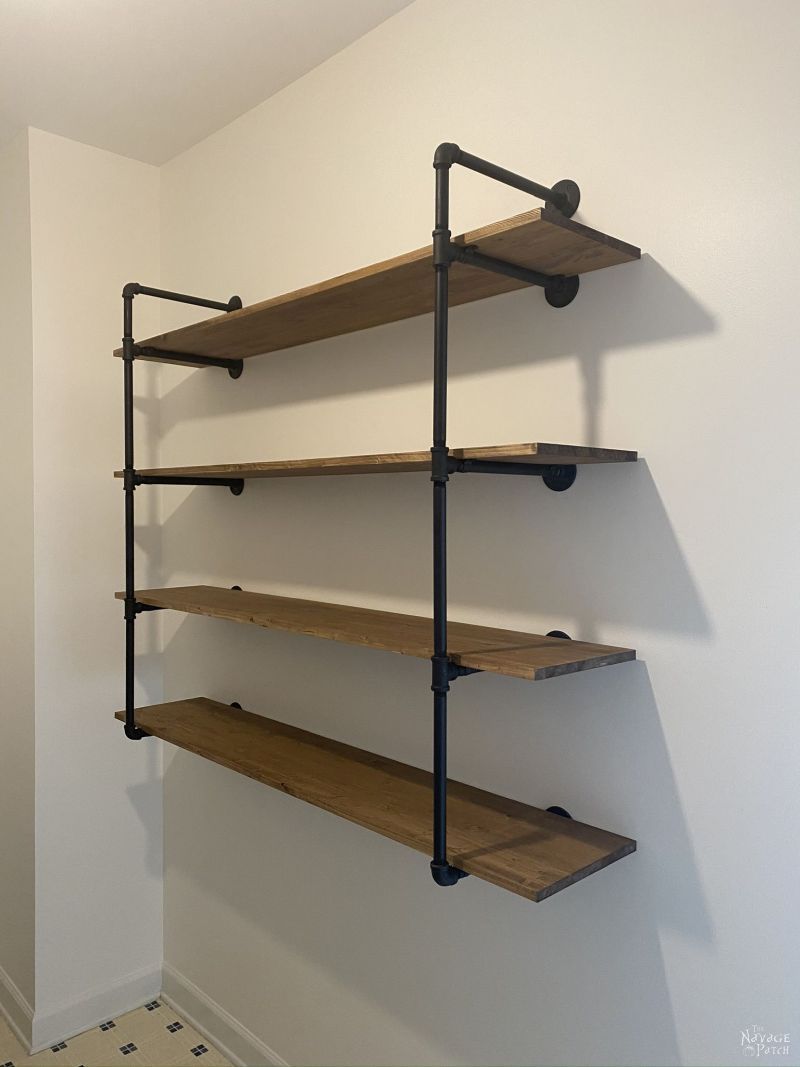
So what do you think of our Industrial Pipe Shelves?
I love them in the laundry room, but they’d look awesome anywhere, especially with nice, thick slabs of pine for shelves.
With these pipe shelves, our laundry room remodel is now well underway! Stay tuned for more!
We love it when you share our posts on Facebook and Pinterest!


Looks awesome! They make drying laundry and backstock look nice and organized. Based on your previous post, we were inspired to do two shelves with washed grey stain for my husband’s office to display model sailboats.
May have to rethink our laundry room…?
Thanks, Mo! Ooooh, model sailboats! When I free up some time (ha!), I’d love to build those. I used to do easy ones as a kid, but I’ve always been really impressed with the advanced models.
Awesome.
Thank you, Eveline! 🙂
Love your sense of humor!
Thank you, Carla! I’m always glad to hear that! 🙂
I’m designing my first ever laundry room for my new home so this post came at the perfect time.
I made a canopy for my bed using copper pipes (will be spraying it rose gold for new home) I like your shelves, bookshelves and trolley too – thanks for the inspiration 🙂
Oh good! Keep us posted on your progress! We wish you health, happiness and sanity during your lockdown! 🙂
WOW another AWESOME project completed! Your attention to details, workshop and toys aided you both to be accomplished pro DIY’ers!!! to include all the addy letters behind your sig blocks. I have followed and enjoyed ya’lls navage patch personal adventures, homes and ohana. Much Mahalos for allowing me enter, view and learn especially during this pandemic….alohas.
Thank you so much, my Hawaiian friend!
I love this! Will your wife lend you to do me some? LOL just kidding. I have a husband to do it, or a couple of sons. We don’t have a laundry room per say, but closet by the water heater. We do have a stackable washer/dryer, for more room. I’d love to have some kind of shelving in there. Also in my craft room. (I usually call it my crap room. Every piece of crap that we don’t know where to put goes in there.) I hope you both have an awesome day!
Thank you, Deborah! The beauty of these shelves is that you can make them as small or as big as you please!
Good Lord those look amazing!! Excellent idea Handan!! You guys make it look so easy!! I’ve been contemplating the idea of putting shelving like this in my bathroom for awhile now. The price for a small prefabbed 2 shelf shelf is ridiculous!! I’d have to sell one of my children first? Thanks for your plugs for the laser and stud finder. Just ordered them. You know what you could use? How about a RAK magnetic wristband with magnets (Amazon) so you don’t put your screws in your mouth!! ??? If I had your address, I’d send you one!
Thank you, Cindy Lee! LOL, you know what – I already have the wristband! I just forget to use it. Thanks for the reminder – I’ll grab it for the next project. 🙂
Great work and I love how the top shelf has ends to hold things on! And that laser level!
Thanks, Michelle! Oh, yeah…that laser level – it’s the best! 🙂
Good afternoon. Another wonderful project from the hilarious Navage Patch. Love your blog, printables and projects and have managed to make/print some and always find a tip or trick I can incorporate. My only beef is with the Gorilla Glue gun. Have used a small Surebonder for years now and loved it. But needed a smaller ended one, saw your recommendation and bought it. Sorry, but it was a piece of junk. When I could actually get some glue to come out it flowed like lava and couldn’t be stopped. Needless to say I am ordering a Surebonder mini this week. But beside that, Your blog is one of the best. Thank you.
Thank you, Barb! Glue guns are funny things, aren’t they? The issue you had with your Gorilla is identical to the one I had with one of my four Surebonders, lol! I just kept buying those things, because they’d either flow like a volcano, or the glue would melt internally and nothing would come out at all! Well, to each his or her own, I suppose! I’m happy that you’re happy with Surebonder, and I’m happy with my Gorilla. Have a great day! 🙂
Wow, Wow, Wow I love the industrial shelves. For two years I have been saying I was going to make the industrial pipe paper towel holder for the kitchen and a toilet paper holder I keep putting it off because I’m afraid I will mess it up but I think I will get the stuff and do it this winter. Love your blog and I also love your sense of humor. I actually laugh out loud.
Thank you, Barbara! Oh, you can totally make a TP holder and a PT holder! Easy Peasy! Glad I inspired you! 🙂
WOW!! I do love the pipe look, love the cart, I need something for the cricut I just got. I love your blog, and you sense of humor, got to have that with all the honey do’s you have. Thank you so much also for how detailed you get with your projects.
Stay safe and healthy in the new year
Thank you so much, Mary! Yep, humor makes everything better. You stay healthy as well! 🙂
Hi! Love your blog. We are currently remodeling our entire main floor (arg! It all started because I wanted a bigger closet in our bedroom, and here we are 2 years later remodeling the entire main floor!) We are designing a shelf unit and your post came at just right time. I had not considered painting the pile before. But the painted pipe on your blog it looks so much better than our raw pipe! Maybe I missed it on the blog but could you tell me what paint you used?
Most blogs are like reading a manual, love the humor in yours!
Marcy, from rural Kansas
Ha! I totally understand, Marcy! Our DIY adventures, and ultimately, this blog started because I tried to replace a faucet in our master bath. That led to a new vanity, painting the bathroom walls, then painting the whole house…and the rest is history! As for the black pipe, we use basic Painter’s Touch flat black from Rustoleum. Can’t beat it! It’s $5 on Amazon (linked), or $4 in Home Depot. Good luck! 🙂
Hi there! I LOVE this project! Could you tell me an approximate cost of the steel piping & elbows? Maybe I missed it somewhere, just curious all in all how much this cost to build?
Thanks so much
Fan from Alberta!!
Thank you, Laura! The pipe will cost about $183 if you buy them all individually. You can find them bundled sometimes, and that can save you some money. I just checked on the boards, and it looks like Lowe’s no longer carries edge-glued boards in the size I used. If you were to use four 1x12x6ft pine boards, that would cost either $56 or $68, depending on which grade of pine you choose. Good luck!
Greg,
You did an amazing job! I like your two best friends (tools). They made tough jobs a lot easier. We are going to get them. Thank you for making this job seem like even I could do it; of course with the assistance of my wonderful husband. Stay humorous!!!!!!!!!!
Thank you, Marian! You are going to love those two tools!! 🙂
The Shelf looks awesome. I have also use pipe for numerous items around our house. TP holder in both bathrooms, towel bars, shelves and robe hooks in both bathrooms. And a rolling cart for the pool deck. I just need to install some in my “She Project Shed” for paper towels and roll of brown paper painters stuff. And thanks for the shout out for Lowes… (I work there! )
Thank you, Sara! Lowe’s was our go-to place in 2020 – far more than Home Depot. My only gripe now is that it seems you guys won’t be carrying all the sizes of edge-glued board anymore. Other than that – we love it! 🙂
I hope that you will be making some more of the free printable for the dollar store signs that were about 4×4. I bought a bunch and now I want to have them for other holidays. I would love it if you will make more print offs!
Hi Diane – we certainly will be, so keep them handy! 🙂
I absolutely love this, functional and really kick ass to look at are a great combo! Thank you for sharing the stud finder, I’m putting that on the running list of gift ideas I keep throughout the year for my husband. He’s hated every single one we’ve ever tried and while it’s not something we use often, when you need it you need it and you don’t want to feel like smashing it with a hammer. lol
Thank you, April! Oh, he’ll love this stud finder, guaranteed! Everywhere I’ve used it, it’s worked flawlessly. If you guys have one of those crappy Zircons, I know he’s feeling the pain!