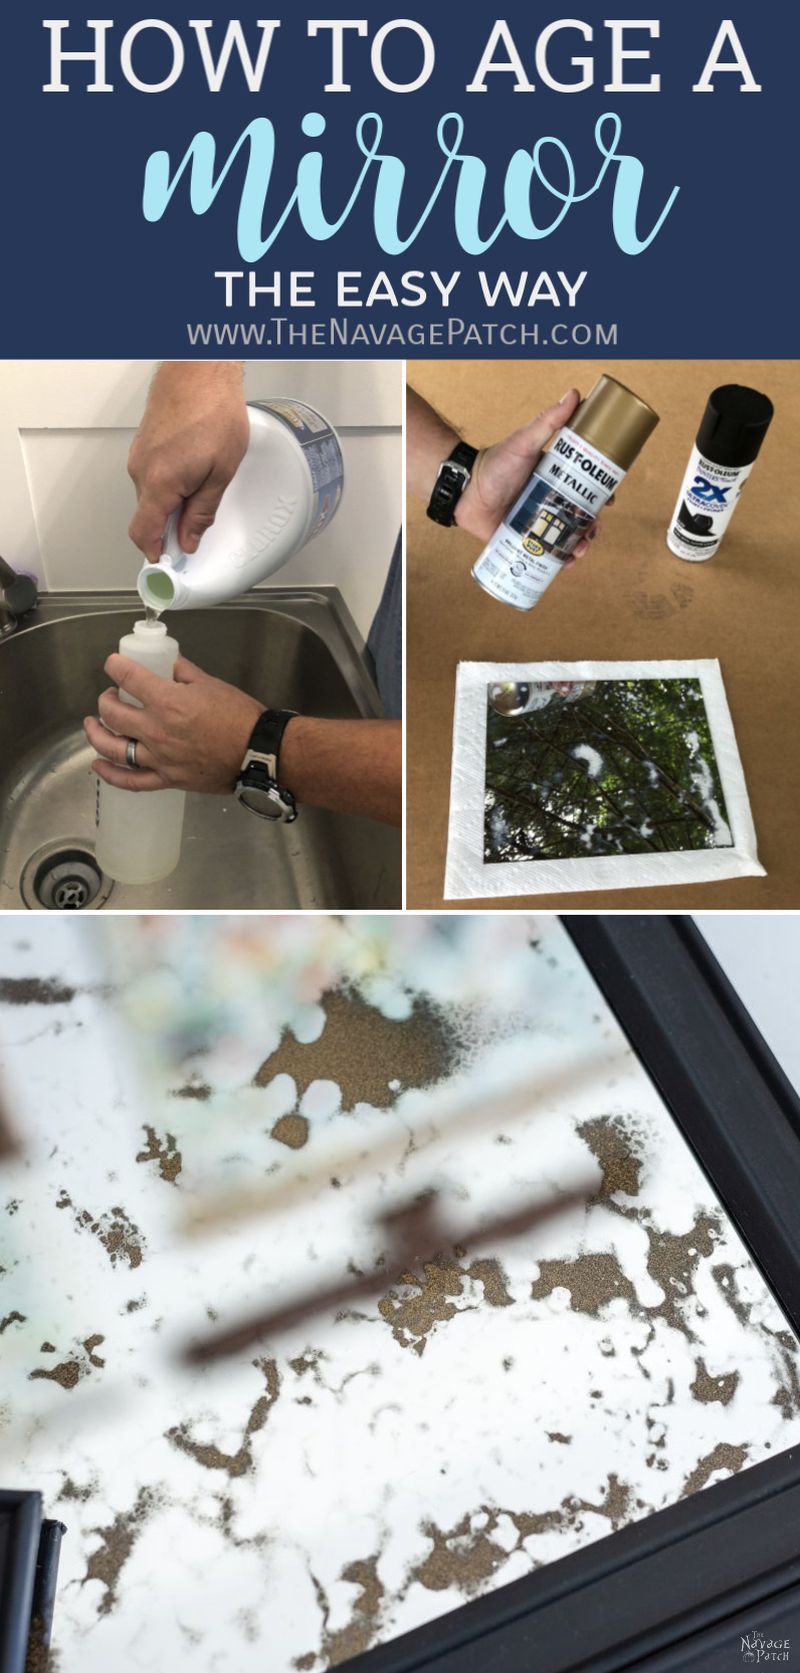
How to Antique a Mirror
We’ll show you how to antique a mirror in the easiest way without scratches! This is a great way to turn dollar store mirrors into vintage lookalikes!
Remember back in the Long Long Ago when new things were prized and held sacred?
You went to a furniture store and bought new furniture because it was, well, new, and that’s what you wanted!
But somewhere along the windy, bumpy, and pothole-strewn road we call life, new things became totally square.
Only weirdos and freaks wanted, blech, new furniture!
Old became the new new.
And the older the better!
Shabby Chic became a thing, and suddenly the race was on to see who could embrace this new Hobo Haute Couture to the fullest.
Rodeo Drive was replaced by the Roadside Drive-by.
And secondhand store owners everywhere let out a tremendous whoop of joy as penny-pinching DIYers picked over their offerings in search of old furniture pieces they could hide under a layer of distressed chalk paint.
Distressed became the pumpkin spice of the DIY world.
Everything was distressed to the bejesus and back again!
Folks would spend hours of their precious time to paint something only to sand half off half of the paint right afterward!
It was madness.
It is madness!
But hey, even I eventually cottoned to the rehab/refurb/repurp movement – my babes and I are building a business around it!
There was one thing that seemed safe from the lunacy, though.
One thing seemed untouched by the FOB (Fake-Old Brigade).
Mirrors.
Beautiful, pristine and spotless mirrors.
Ahhhh, there’s nothing like a perfect mirror to put a spring in your step and remind you that everything is awesome and so are you!
Right?
And if you ever came across a worn out mirror in a beautiful frame, you could always pop over to your local glass shop and have a new mirror made!
Right?
Well, not so much, apparently.
Handan has recently informed me that nasty old mirrors are now en vogue.
Yep, gone are the days of flawless reflections.
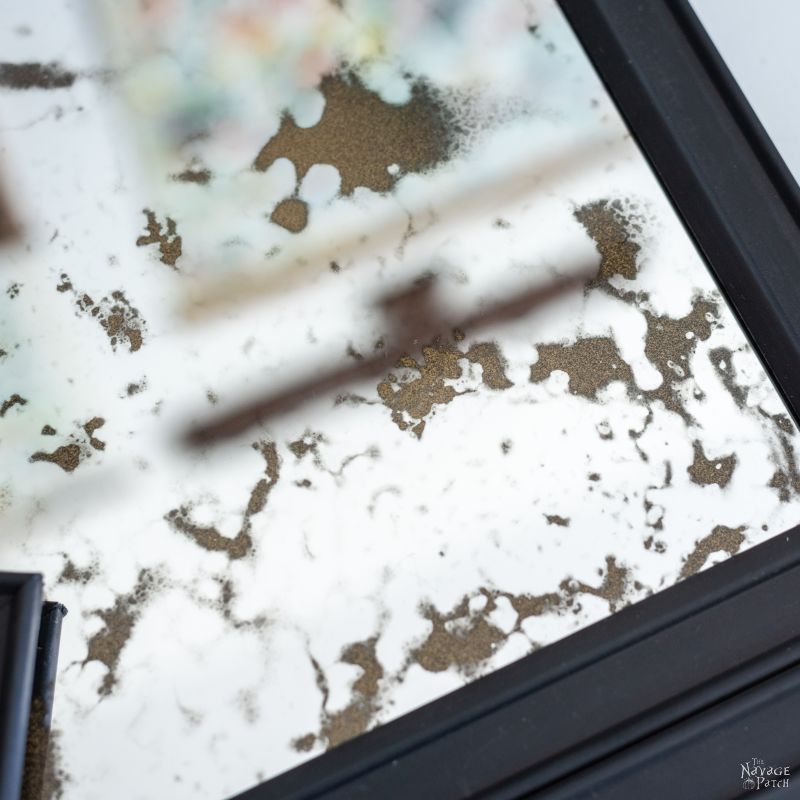
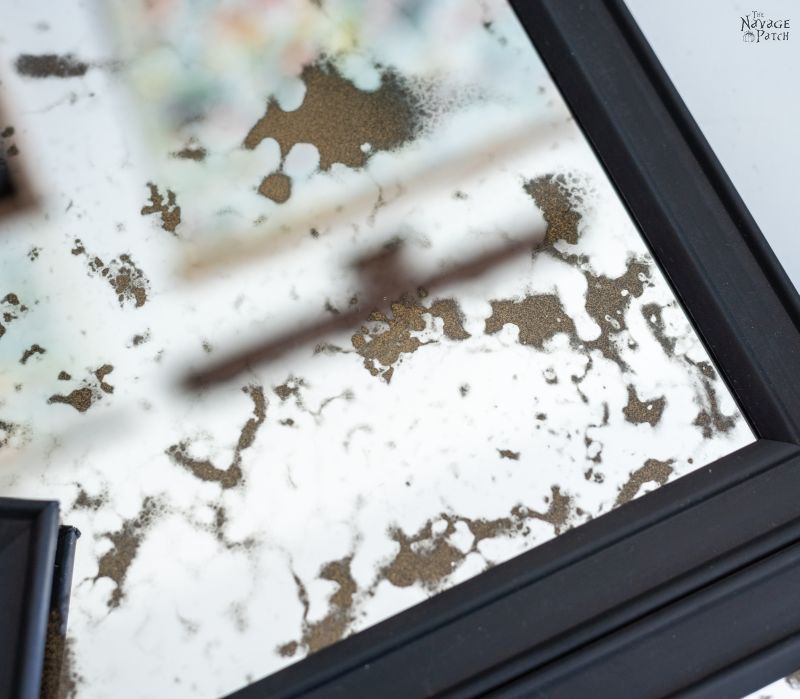
These are the days of black spots and gold spots and otherwise worn-through and worn-away silvered backing on mirrors.
Hey, look, I don’t decide what’s in fashion. I mean, what do I know, right?
Yeah, we all know the answer to that – I know nuthin’!
But I have a wife who knows everything.
And she’s telling me that antiqued mirrors are hot right now.
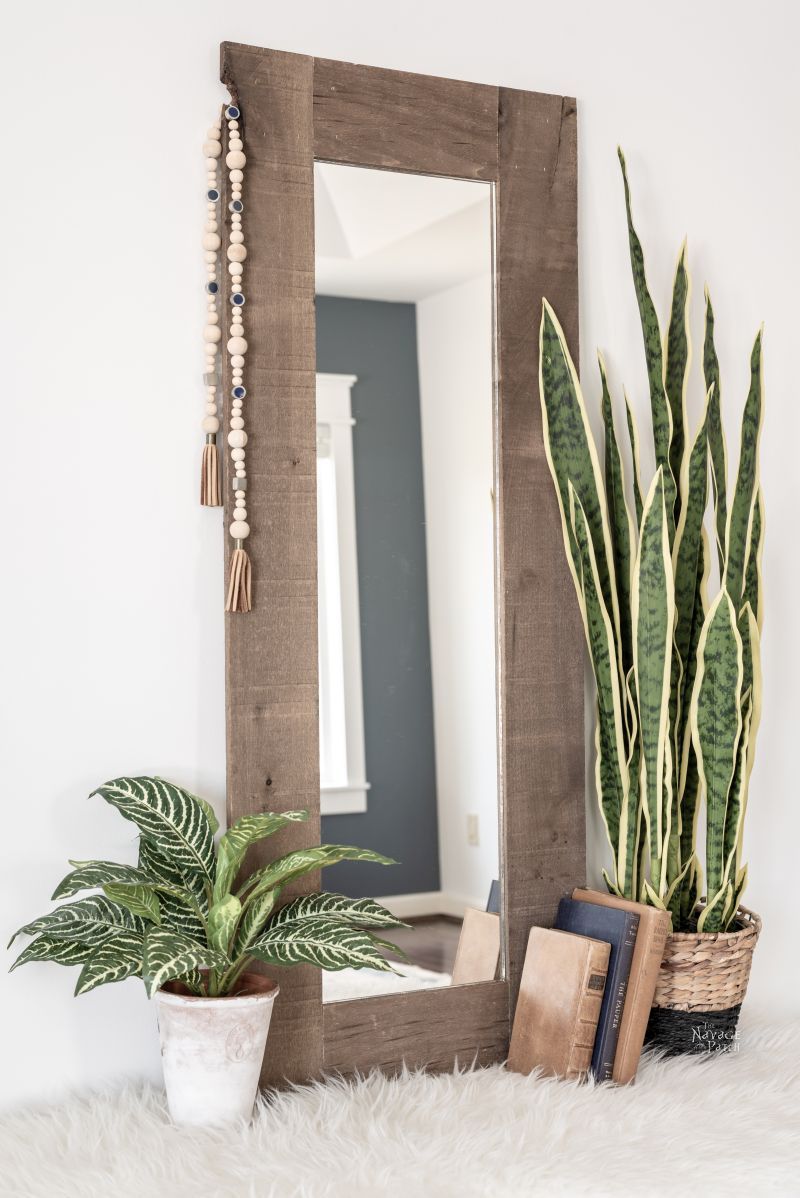
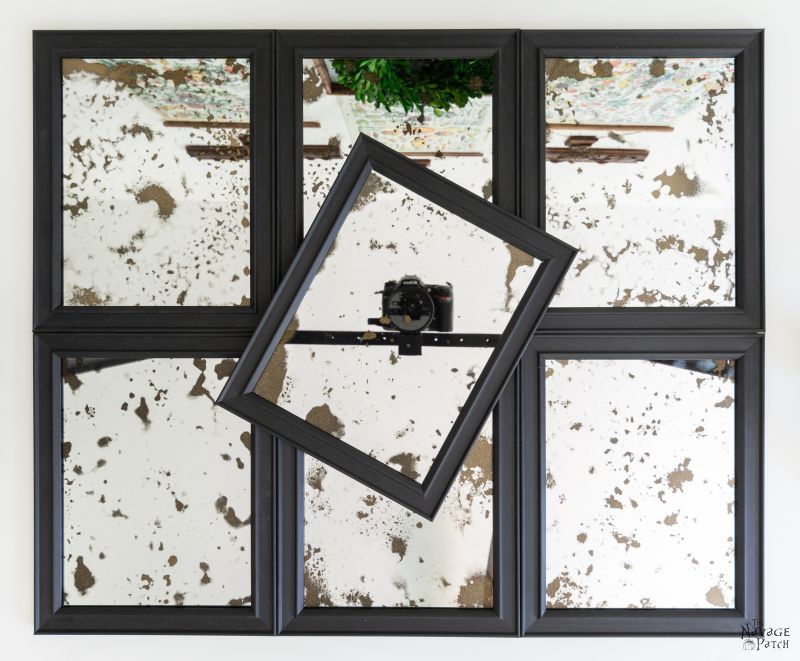
But if you don’t own or can’t find an actual old mirror, well don’t worry madam, because I’m going to show you how to antique a mirror to make it look like it just warped in from the 18th century!
Better still – our method gives the most authentic look of all the antiqued mirrors we’ve seen.
And the best part?
Our method eliminates the scratches that plague all other mirror antiquing methods!
Yep, my babes cracked the code!
So enough of my yapping. Let’s get to it, so you can get back to shabby-chicifying all your old crap!
DIY Antique Mirror
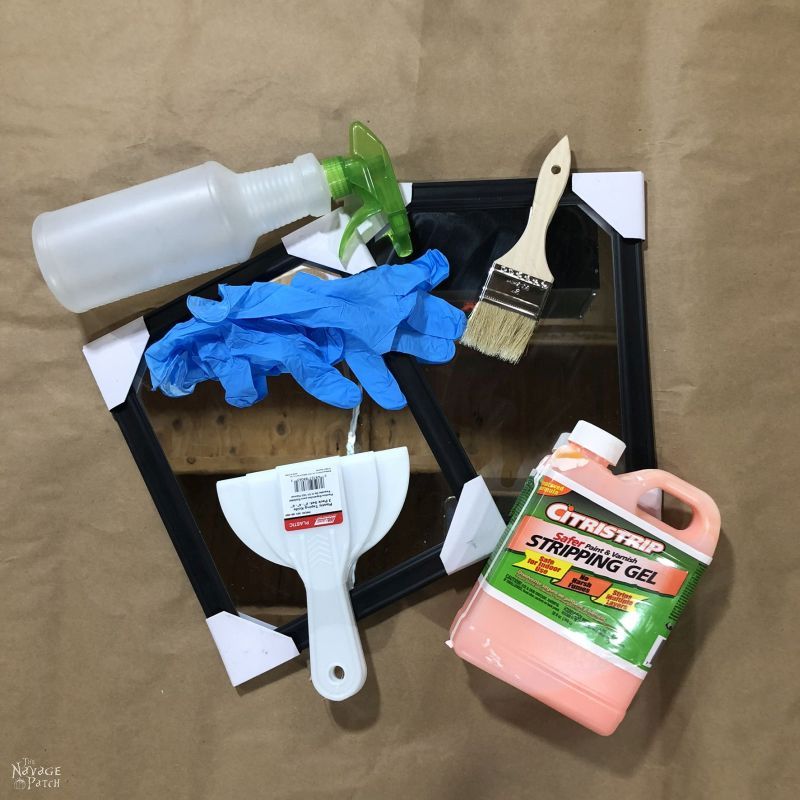
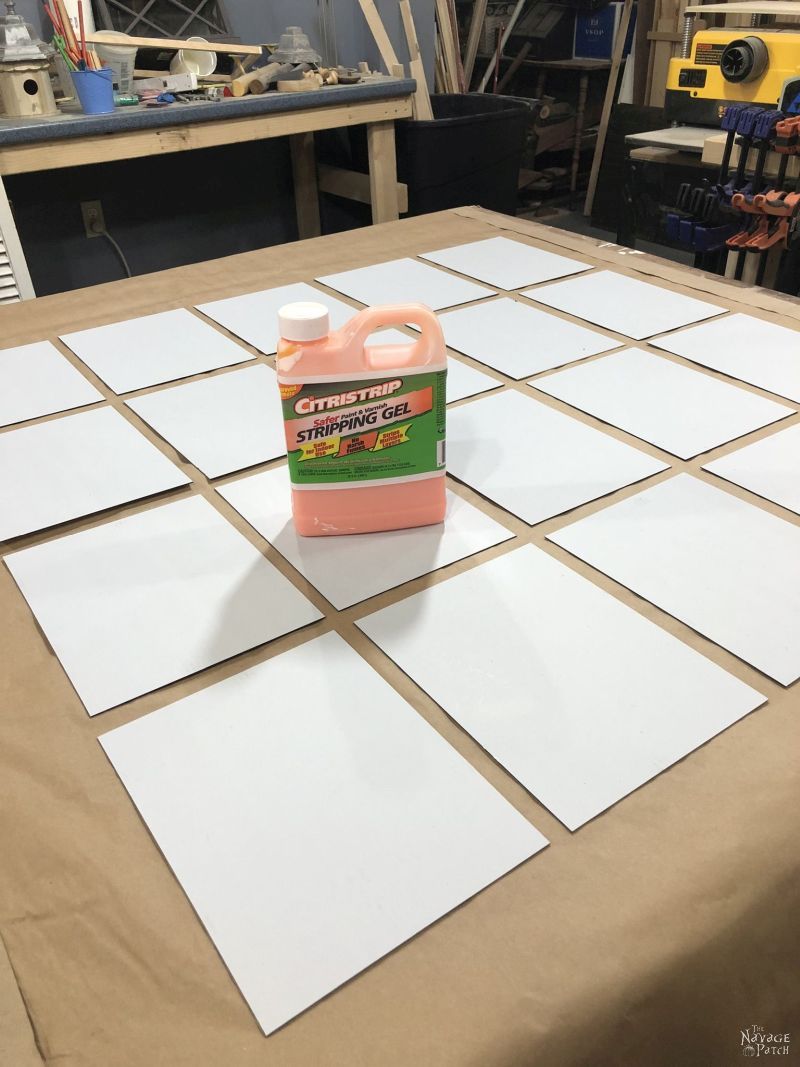
- Mirror (we used 8 x 10 dollar store mirrors)
- Citristrip stripping gel
- Chip brush
- Nitrile gloves
- Plastic taping knife
- Bleach
- Spray bottle
- Organic solvent respirator (highly recommended)
- Paper towels
- Glass cleaner
- Metallic Champagne Bronze spray paint
- Flat Black spray paint
How to Antique a Mirror
Step 1 – Prep your work area
Citristrip can get messy, so you’ll want to lay some plastic sheeting or several layers of paper on your work surface. We used several large sheets of brown paper that our movers had given us 6 years ago. Handan had them squirreled away all this time just waiting for the chance to put them to use!
Step 2 – Lay the mirrors
Lay your mirror or mirrors face down on your covered work area.
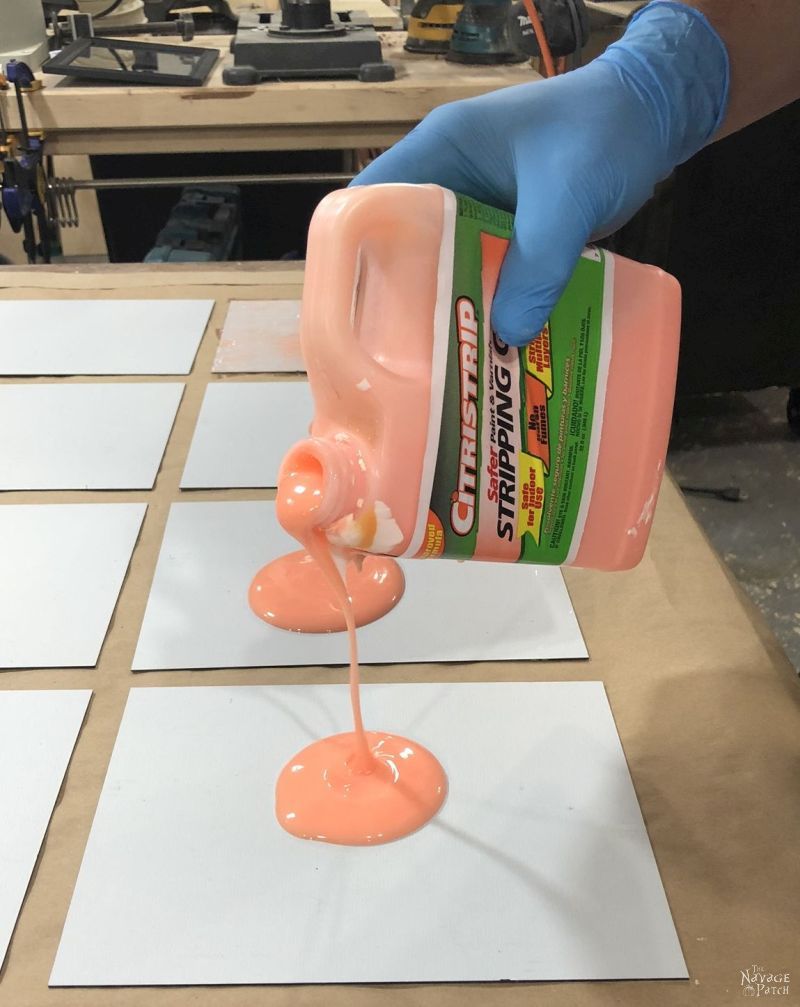
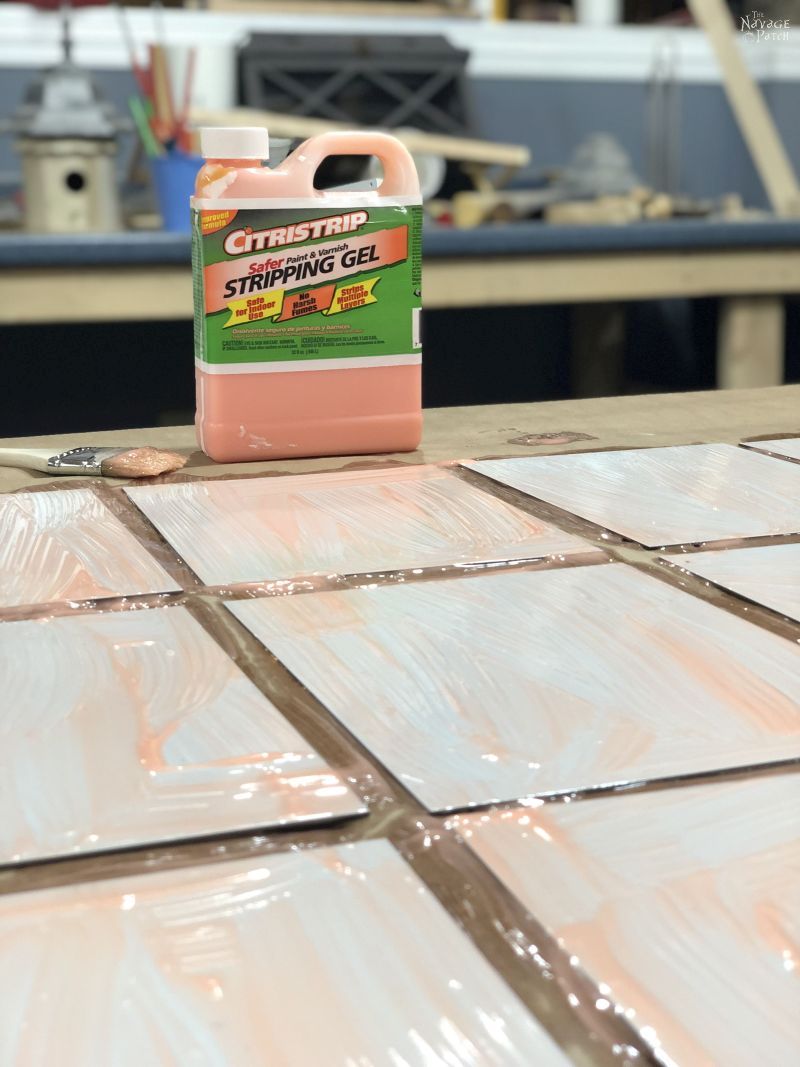
Step 3 – Apply the stripping gel
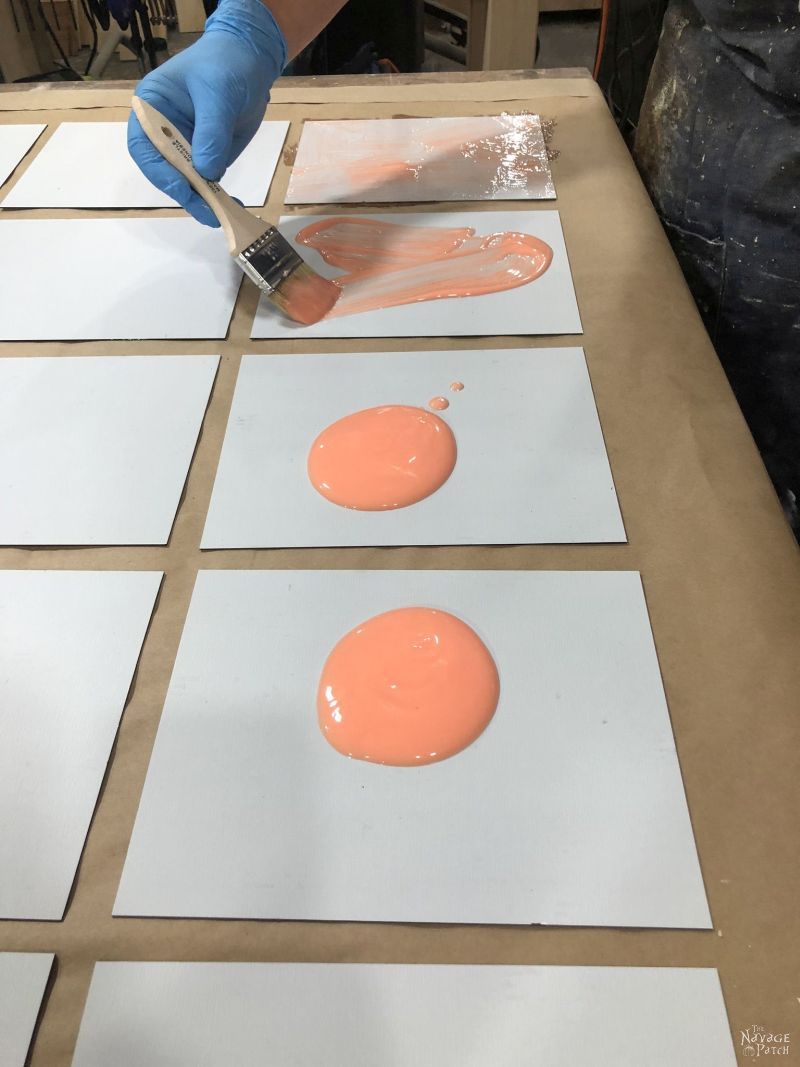
Pour a blob of Citristrip on the back of each mirror. A blob is slightly more than a dollop, but much less than a glop.
Brush the stripping gel all over the mirror backs.
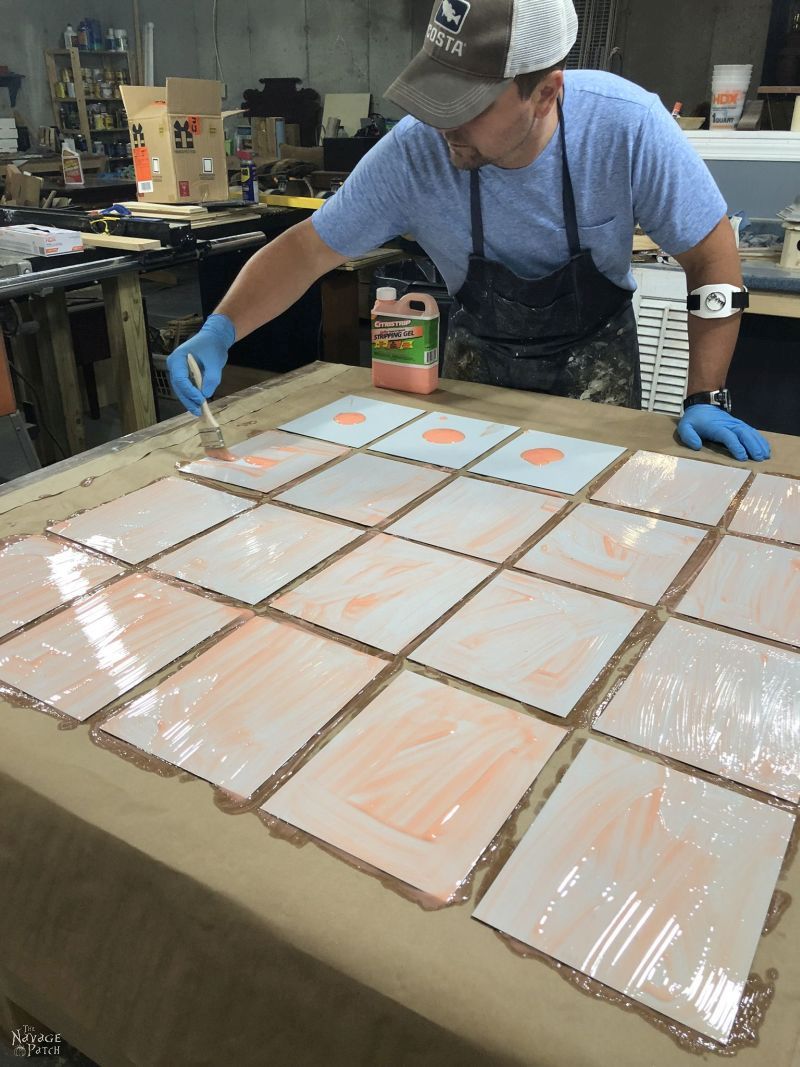
Let the Citristrip work its magic for at least 30 minutes. Others will tell you not to wait too long or the gel will eat through the mirrored coating.
They are entirely full of crap. Depending on your mirror’s coating, anything from 30 minutes to 1 hour is great.
For Dollar Store mirrors 30 minutes is a perfect amount of time, but you’re golden even if 40 or 50 minutes pass.
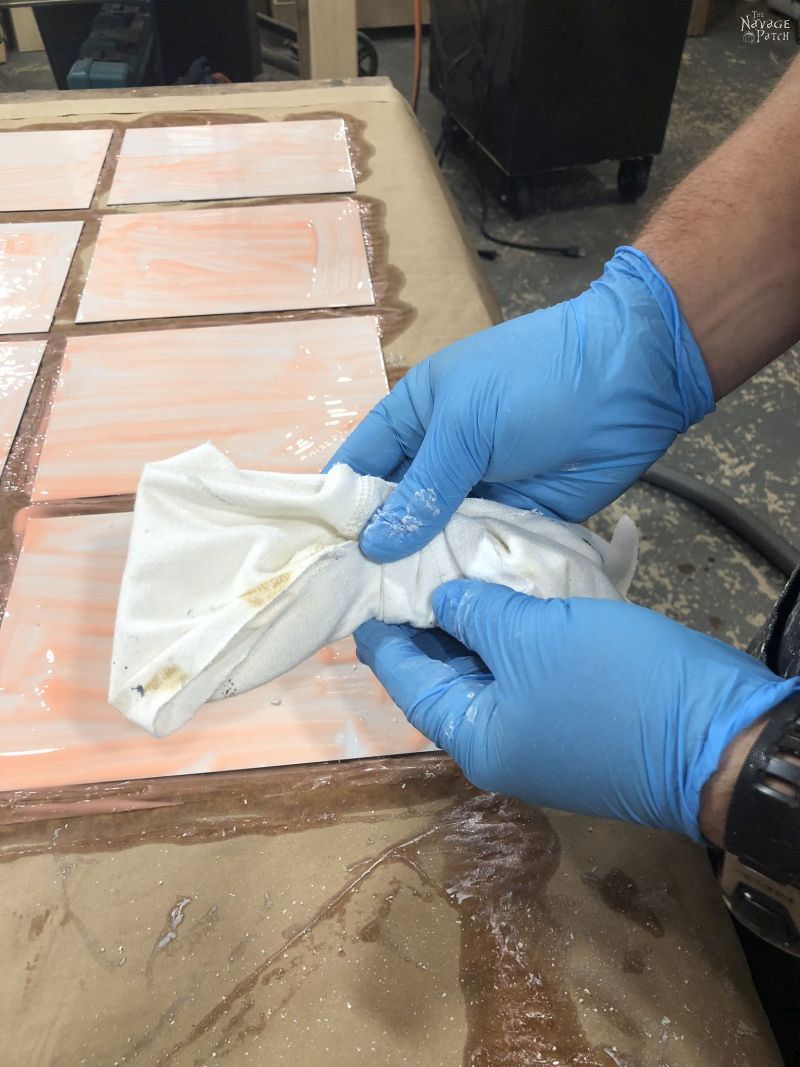
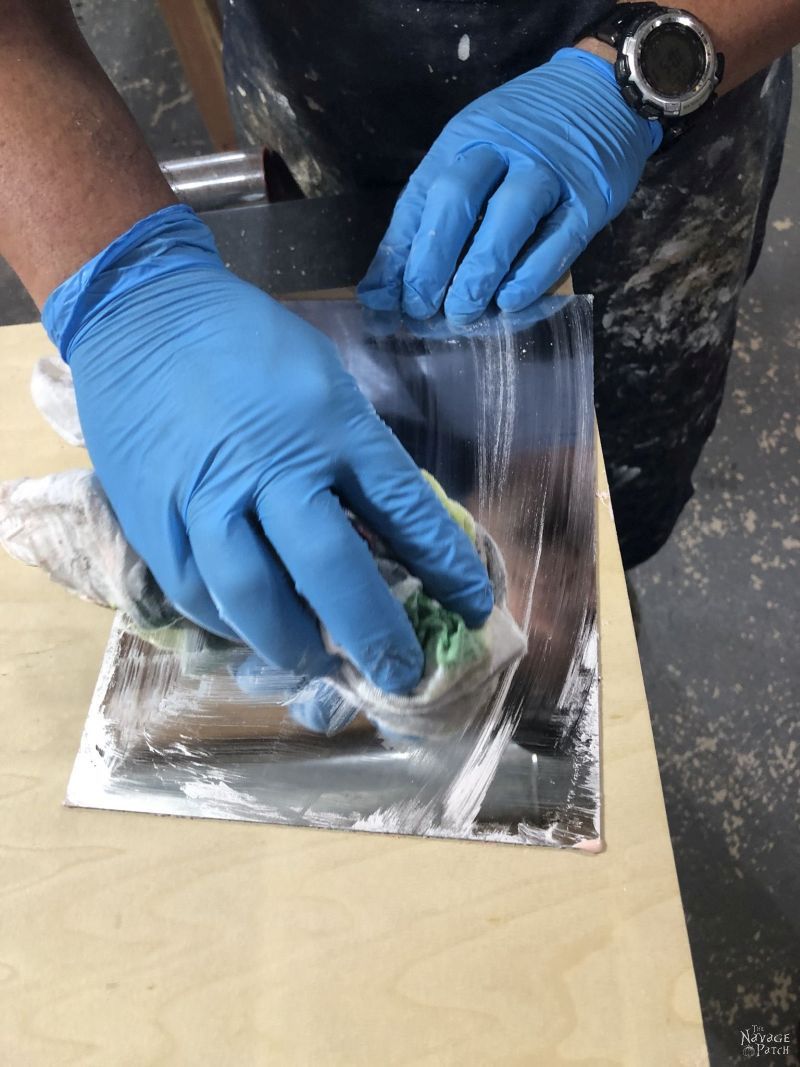
Step 4 – Scrape the mirror
Take your 4 inch plastic taping knife, and wrap a rag around it. These mirrors scratch easily, so you want to be as gentle as possible.
This is the key to a non-scratched mirror! Don’t skip the rag!
30 minutes + plastic knife + rag = perfectly scratch-free mirror.
Using medium pressure, scrape the backing off of your mirrors. Note that most of these plastic taping knives have a beveled edge, so there is a right side and wrong side for scraping. If you use the wrong side, you’ll still get the backing off, but the scraping will take much longer.
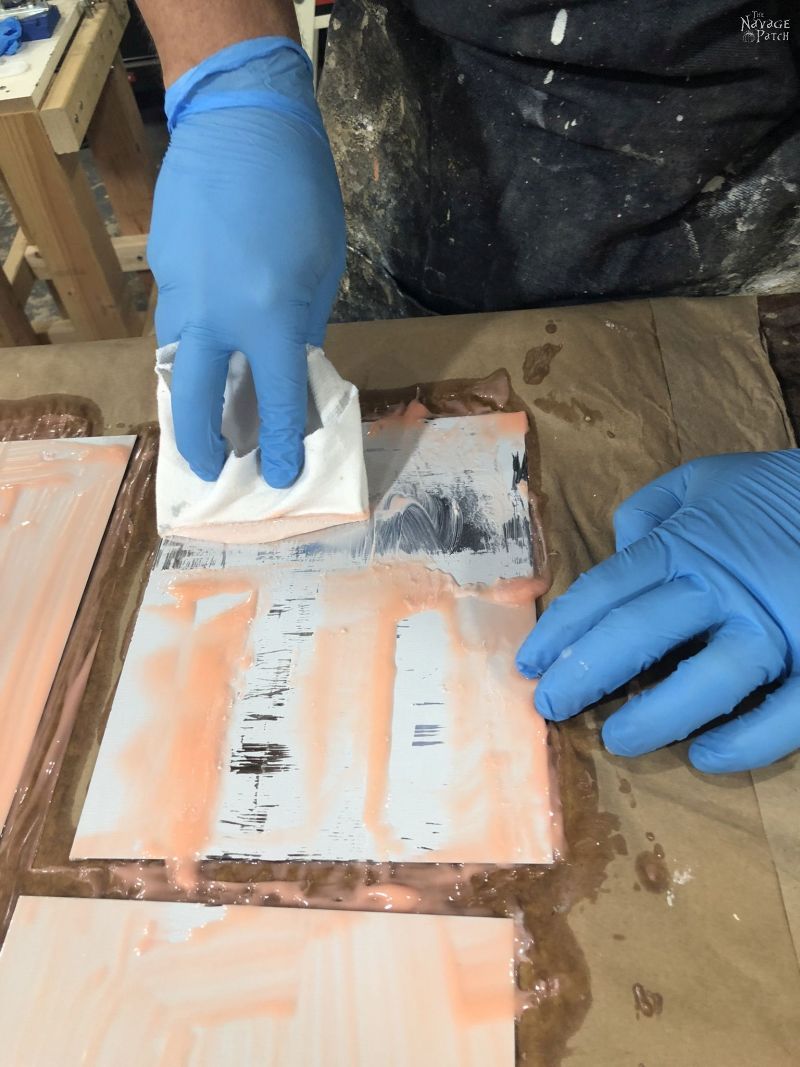
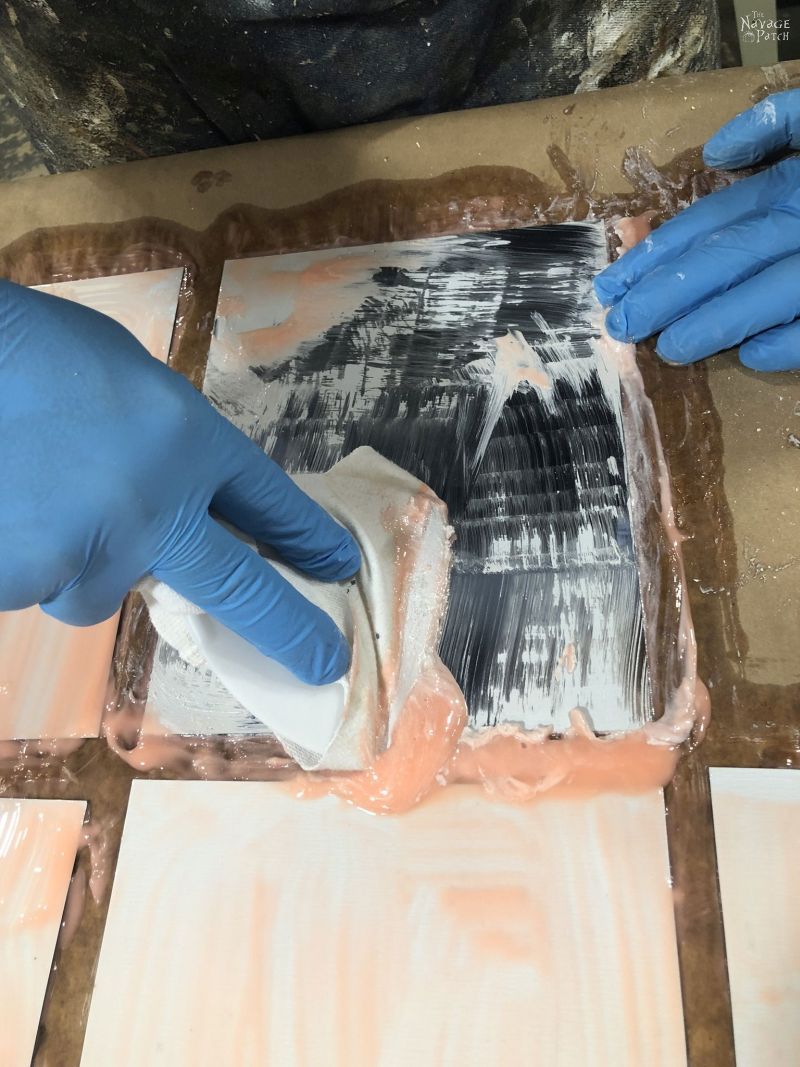
After each mirror, shift the rag so a clean section is against the blade, otherwise you’ll wear through the rag and you’ll risk scratching the mirror.
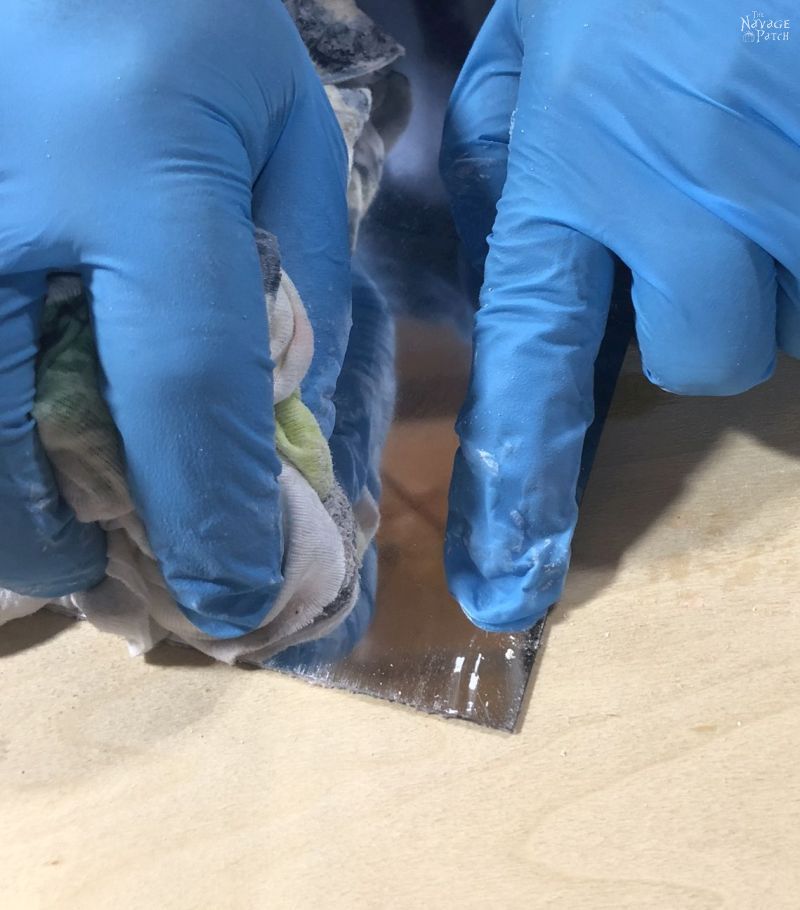
Once you’ve cleared off the majority of the backing, wipe off the rest of the Citristrip with a clean rag.
This is also an important step. Once you’ve scraped the backing off, you want to get that stripping gel off of there.
Tip: leave a tiny bit of backing on each mirror. This will make it easy to identify the back of the mirror after you wash it. You’ll need to know front from back in later steps.
Step 5 – Wash the mirrors
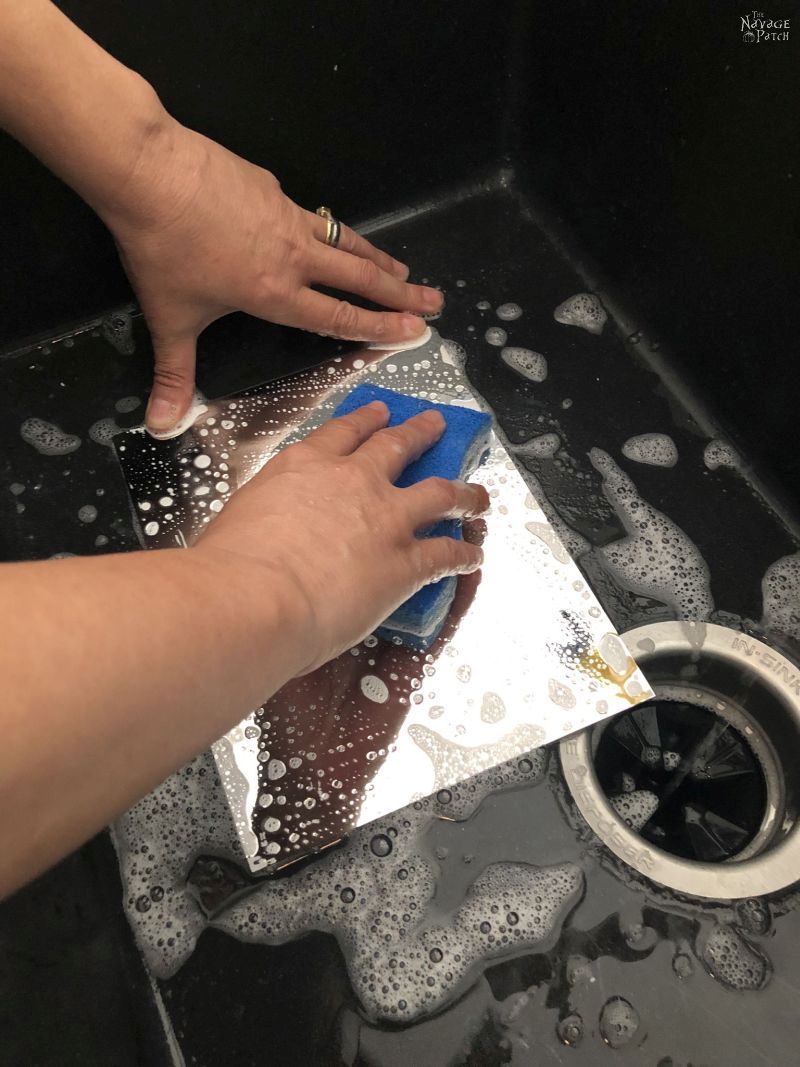
This step is important. Not only does this remove any last traces of stripping gel, but the mirror antiquing process won’t work well if the mirror back is dirty or has some Citristrip still on it.
Experience talking here.
Step 6 – Prepare your bleach solution
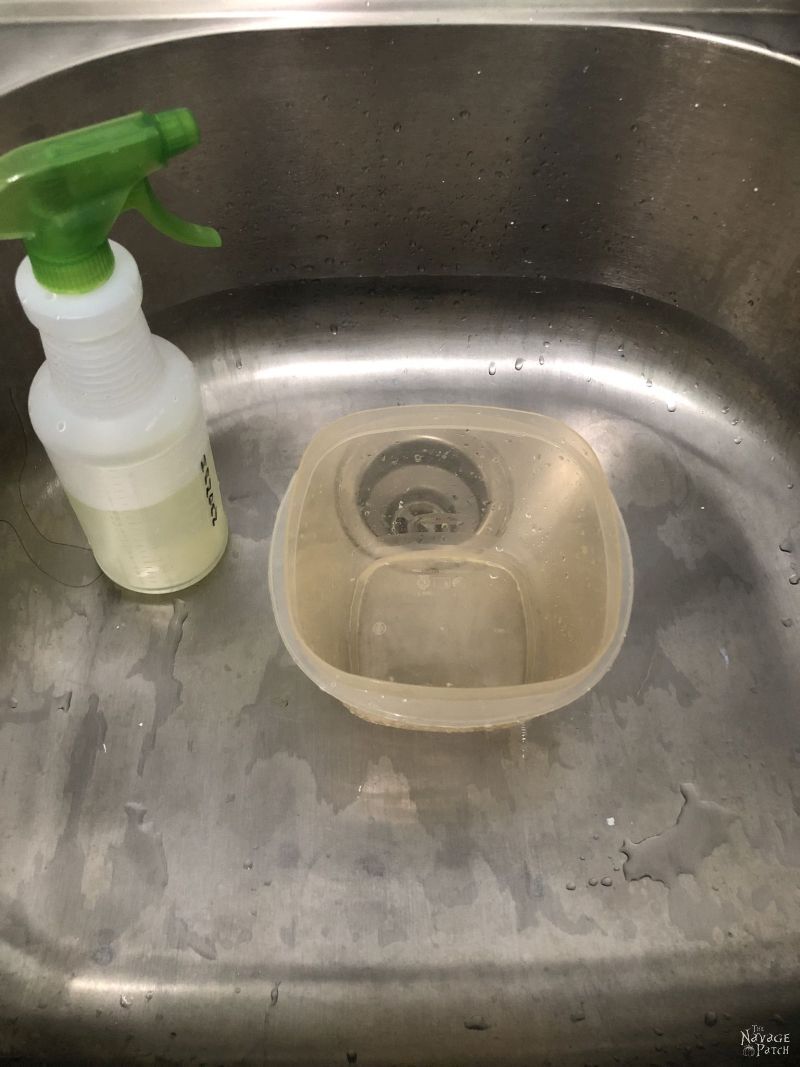
You can antique your mirror with any solution of 50% bleach and 50% water or stronger. We used 100% bleach, as it gives the quickest results. Pour your desired mix into a spray bottle.
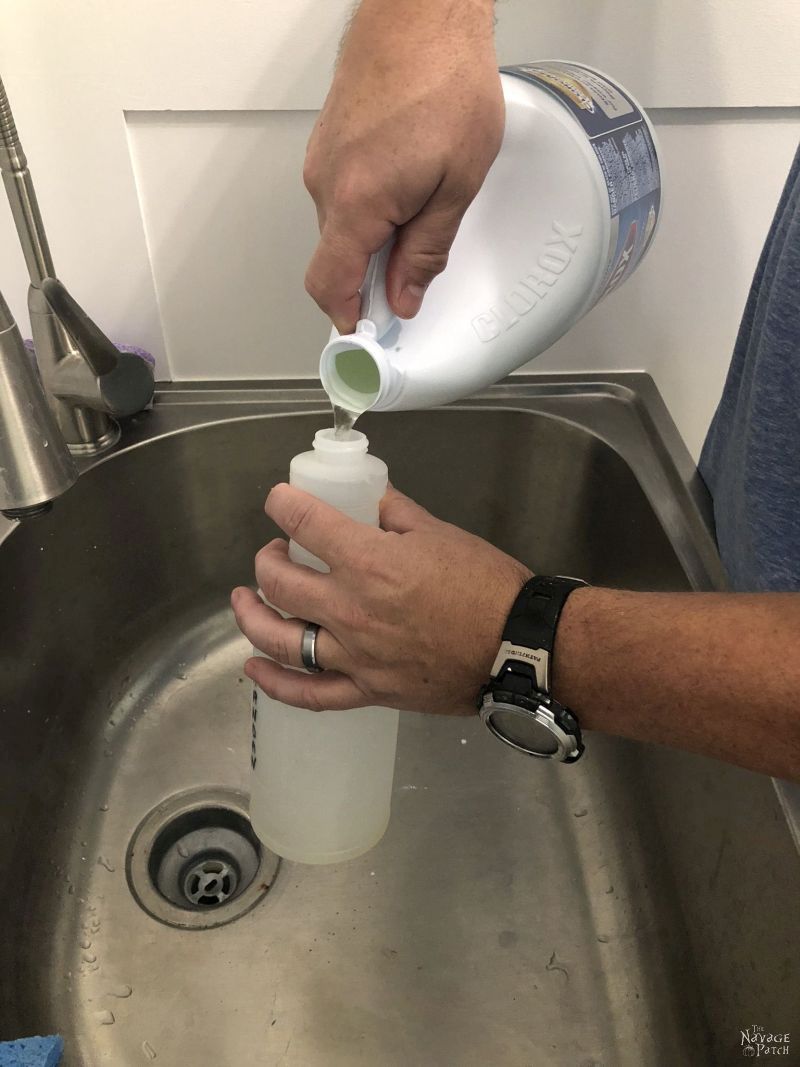
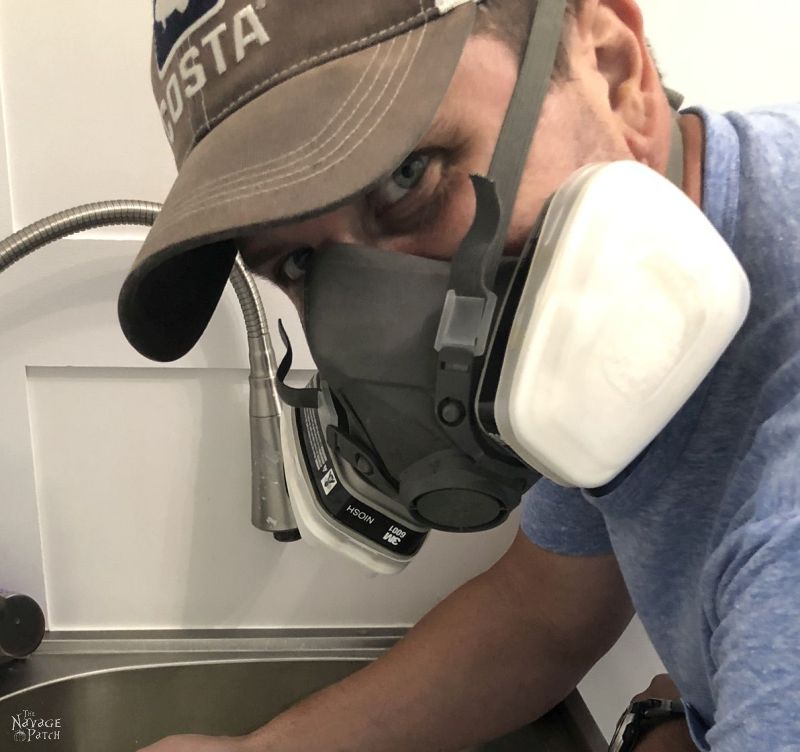
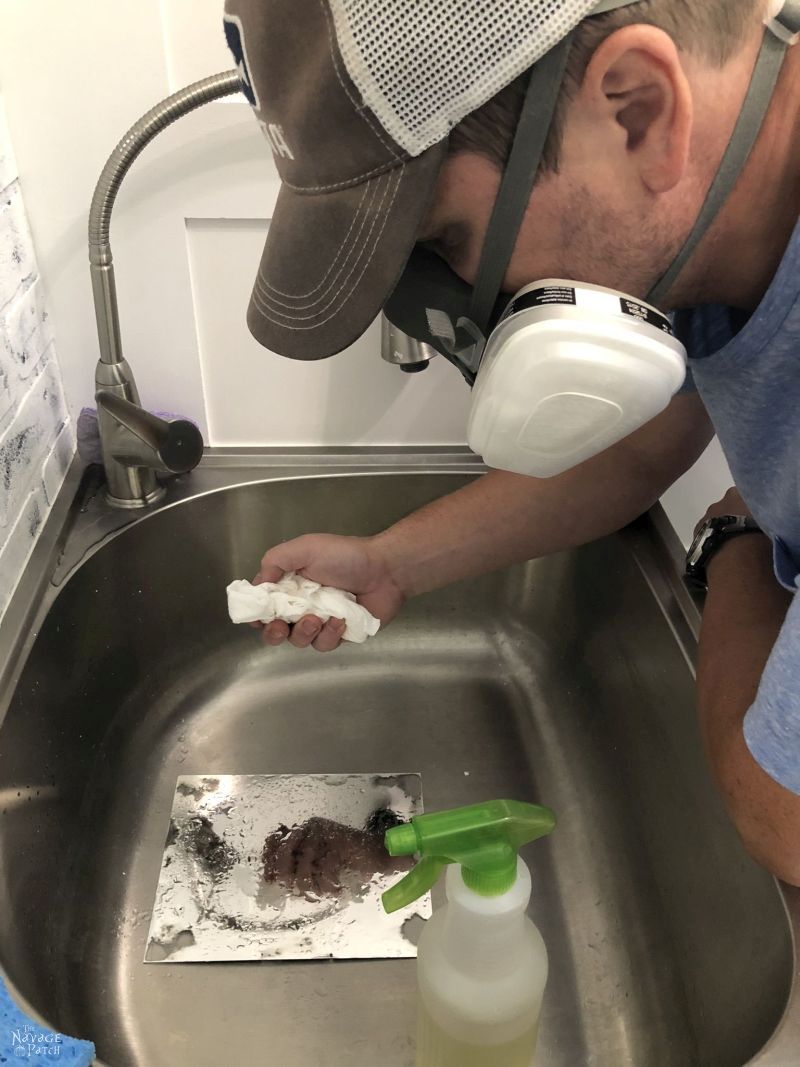
If you’re doing this project indoors, and if you’re sensitive to bleach fumes like I am, you may want to consider wearing an organic solvent respirator. There’s no way I could have antiqued so many mirrors without this life-saver on! You may also want to wear nitrile gloves for this step. But bleach only irritates my lungs, not my skin, so I went gloveless.
Step 7 – Spray bleach on the mirror
I did this project in our utility sink, the bottom of which is pretty low. I found my back started hurting after a few mirrors, so to ease my job a bit, I put a Tupperware container in the sink and then put the mirrors on the container. This small step relieved a ton of strain on my back.
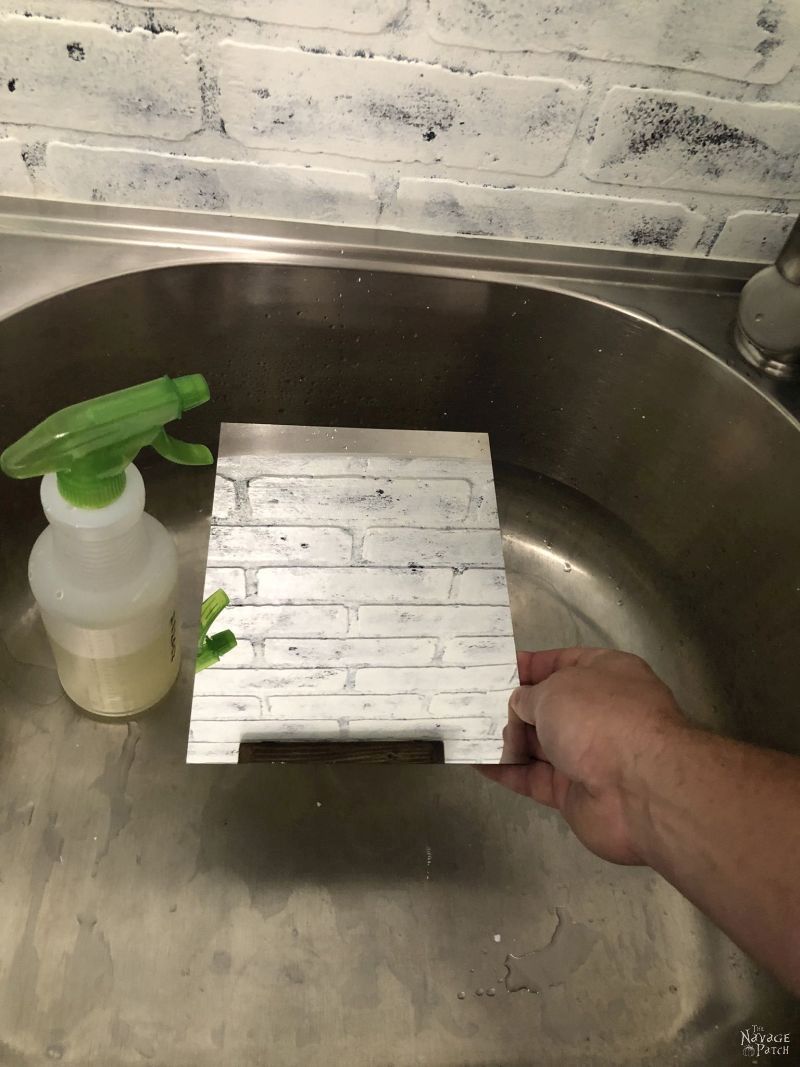
Spray the mirror (remember, you’re doing this antiquing process on the back of the mirror).
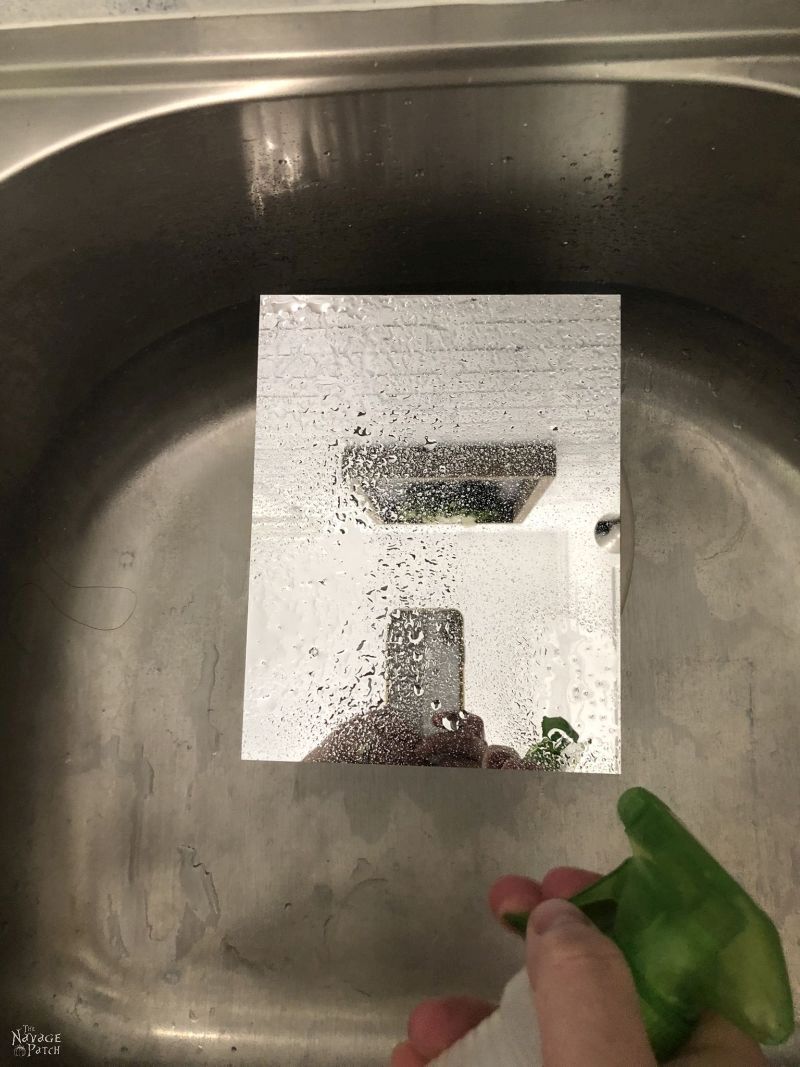
You can play around with where you spray the bleach, but most mirrors tend to age from the edges and corners, so you may want to concentrate your spray there. I mixed things up since I antiqued so many mirrors.
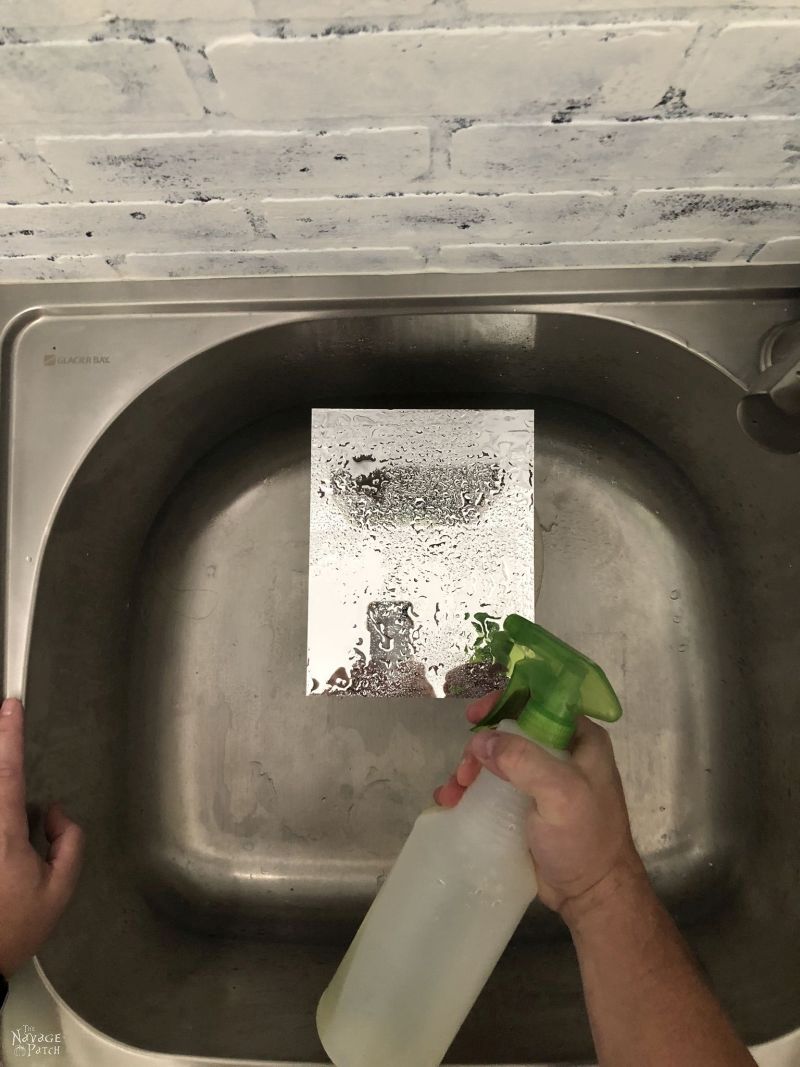
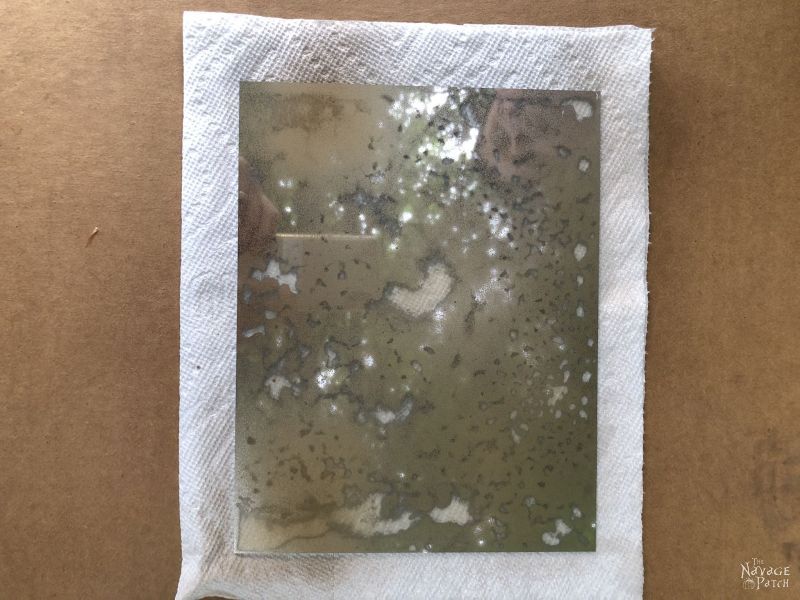
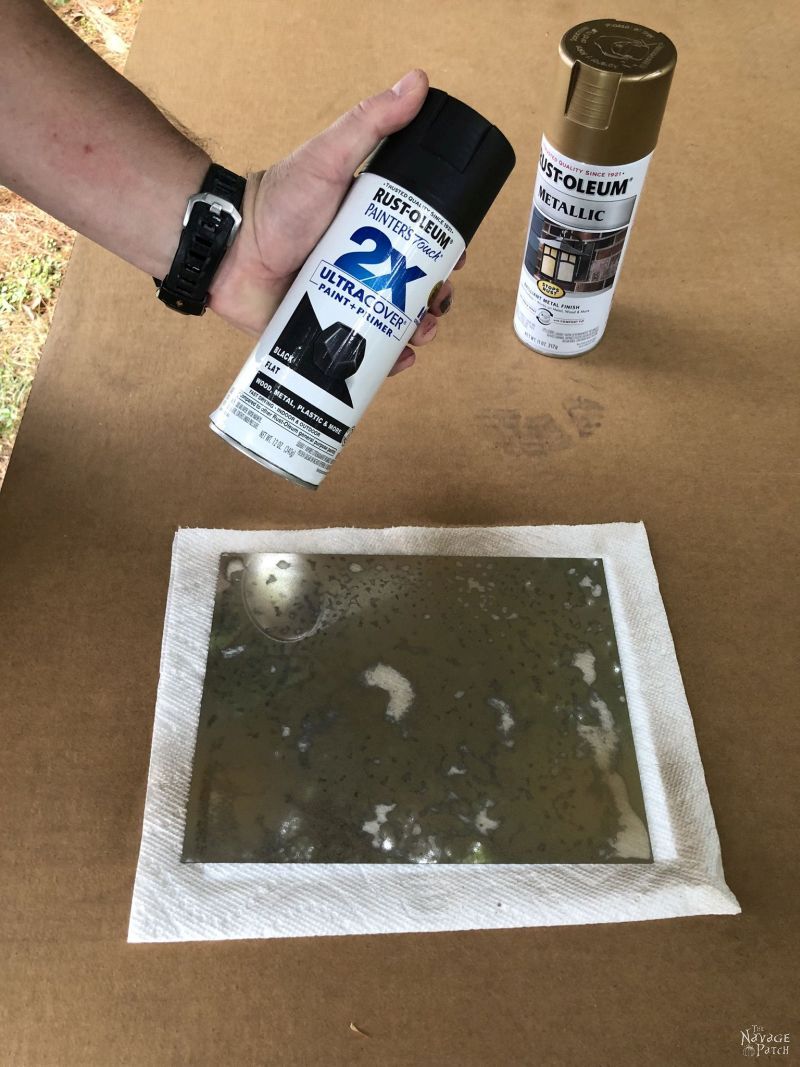
Step 8 – Let the bleach work
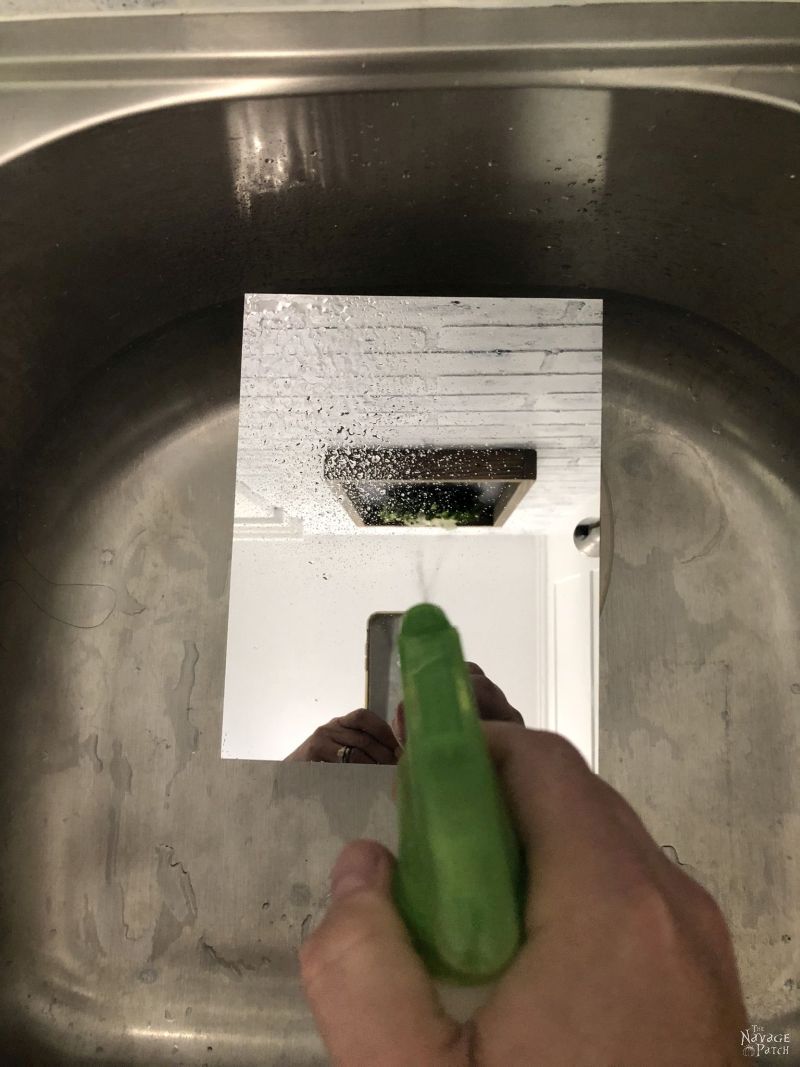
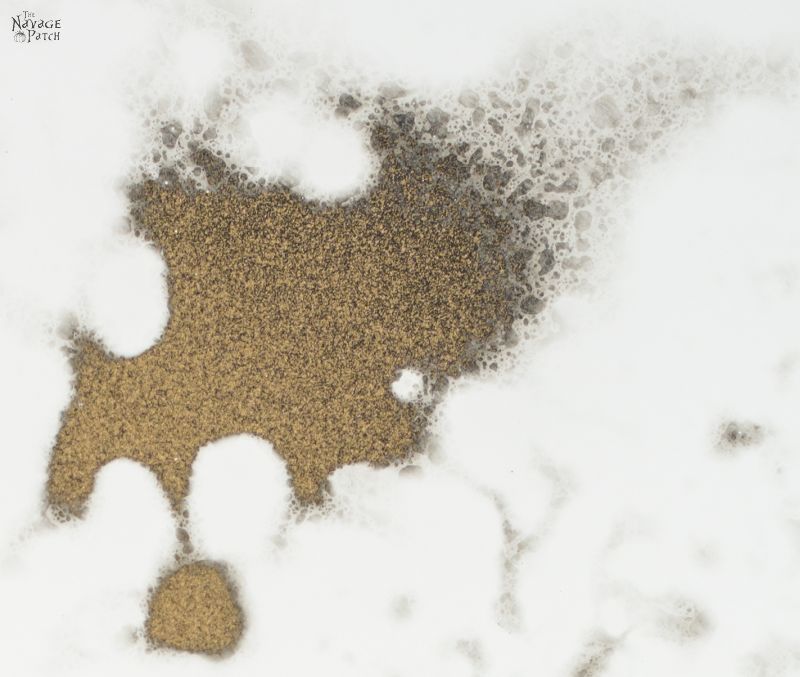
Very soon, you’ll notice areas turning dark. Here’s where you can get creative. In spots, you can let the bleach dissolve the reflective coating completely. In other spots, you can blot the bleach with a paper towel when it has only darkened an area. Experiment with this process. It’s always different and it is fascinating to watch!
My favorite technique is to spray the whole mirror and then wait for some areas to start dissolving. Before the process gets too far along, I cover the whole mirror with a paper towel and wipe off the bleach.

I then spray it all again and watch how the antiquing is progressing.
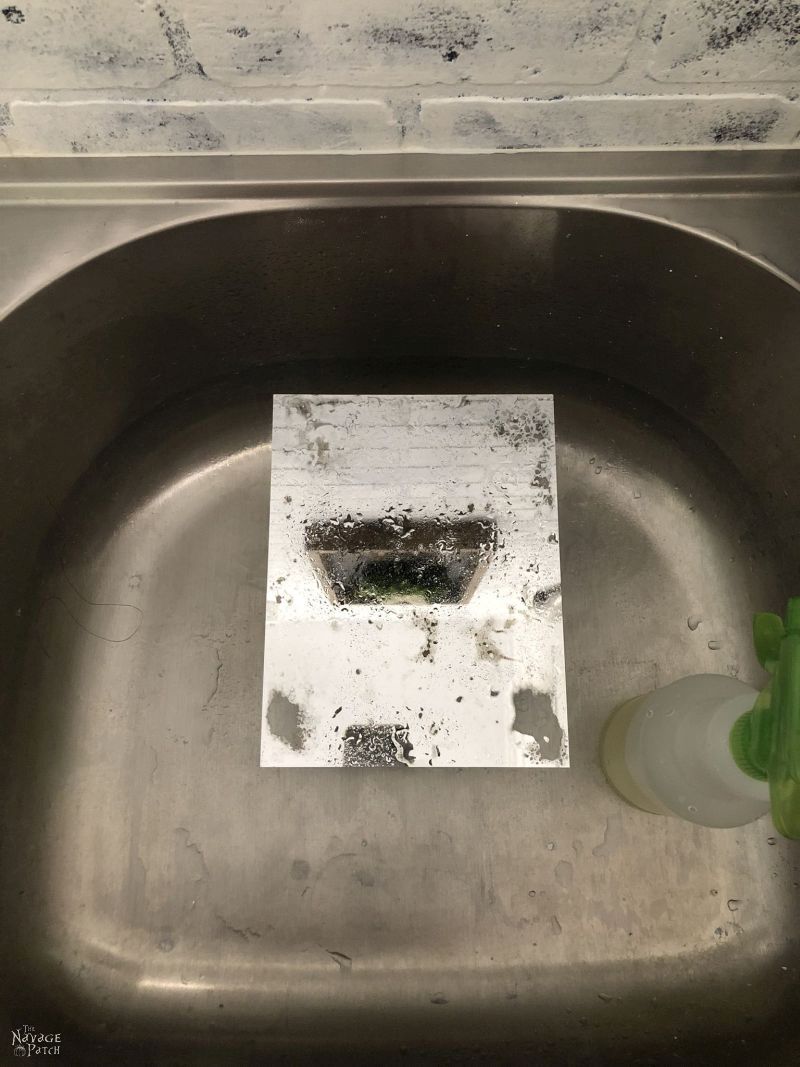
To stop an area from dissolving any further, just blot with a paper towel.
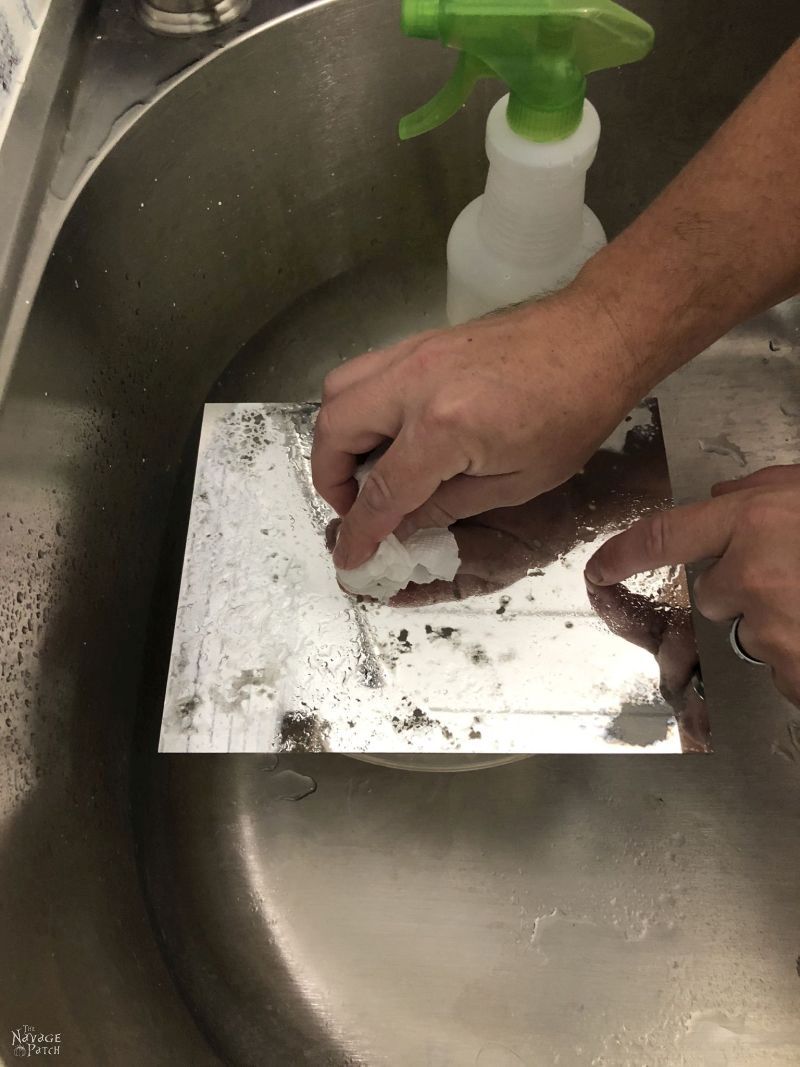
Watch and blot. Watch and blot. Watch and blot.
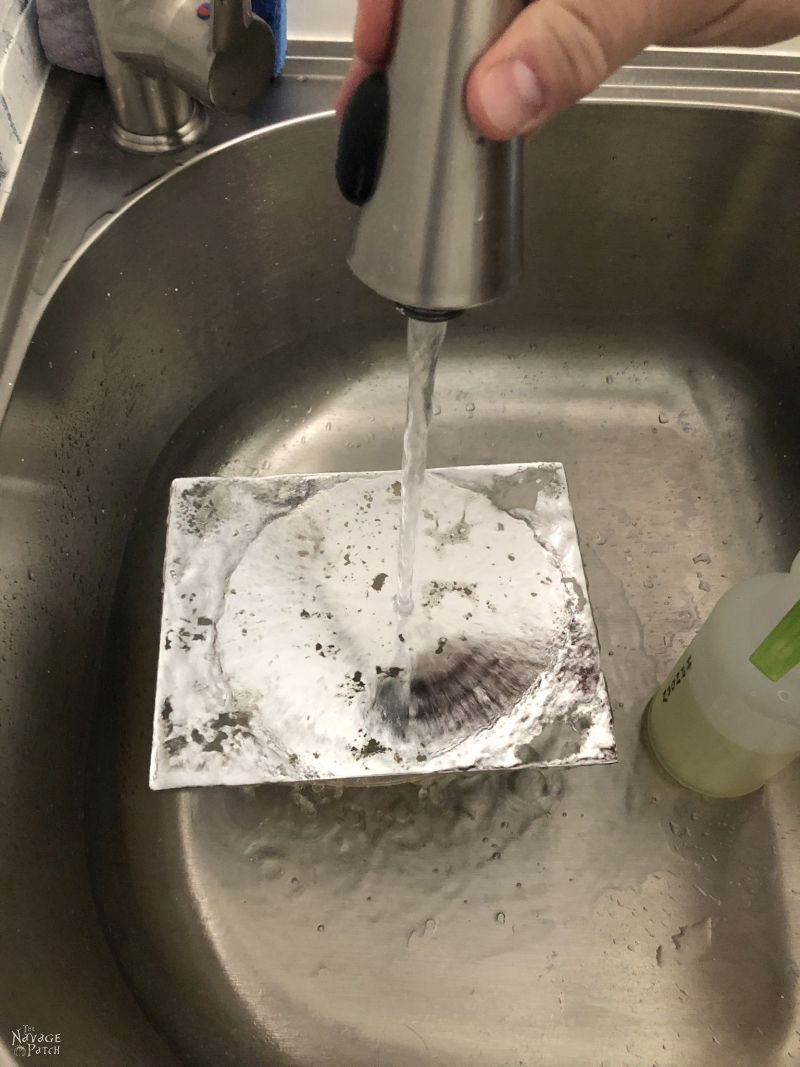
Step 9 – Rinse
When you’re satisfied with the result, rinse the bleach off with water.
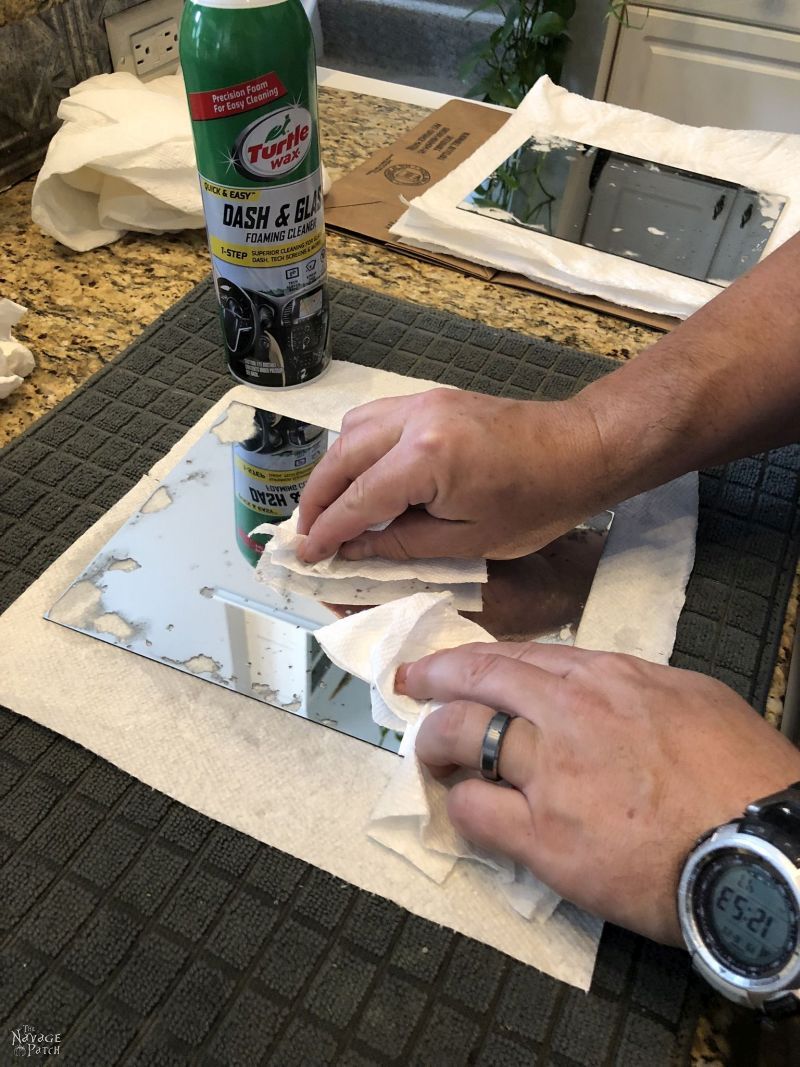
Step 10 – Clean the mirror back
Use glass cleaner to clean the back of the mirror before painting.
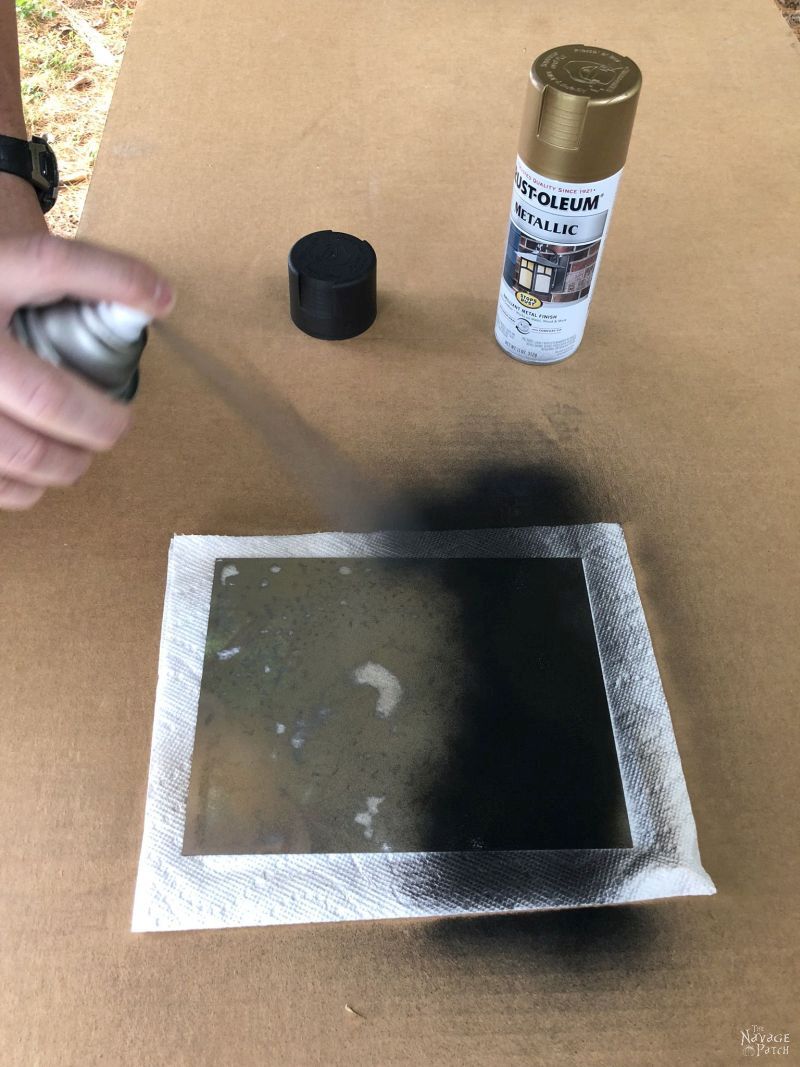
Step 11 – Painting
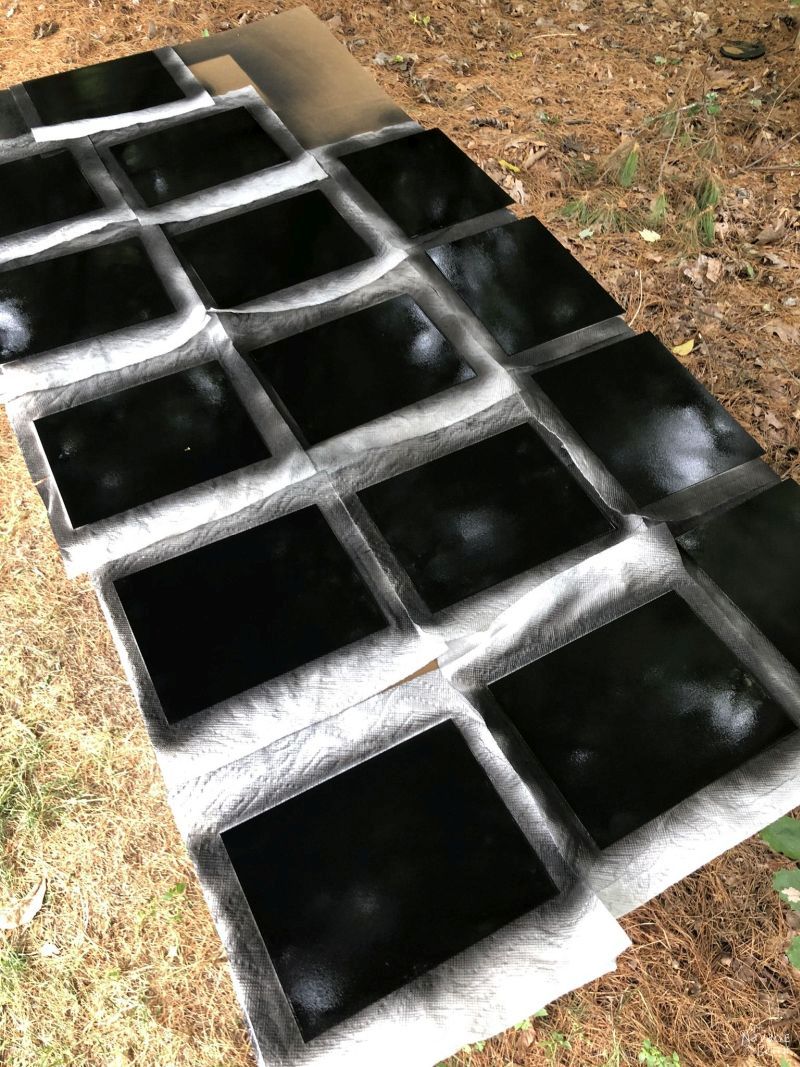
Bring your mirrors outside and set them on a work surface with the backs facing up.
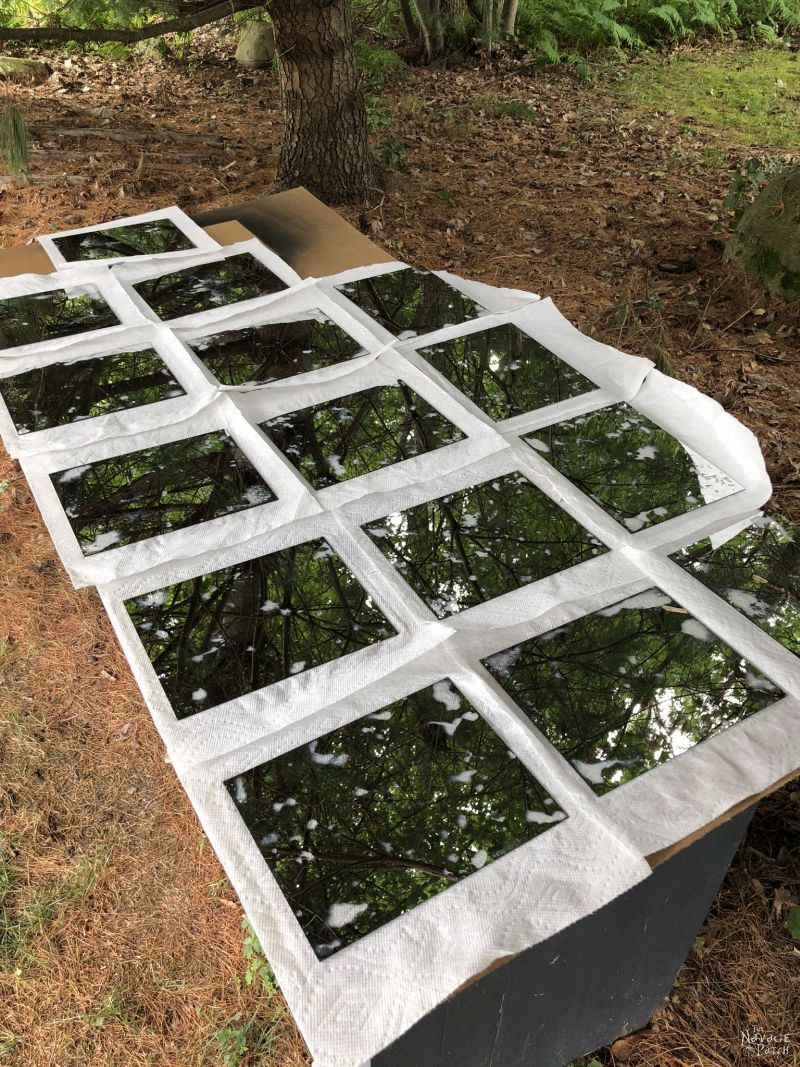
Painting is a two step process.
First you’ll want to spray very lightly with Metallic Champagne Bronze. We tried a few different colors for this step, and this one was the clear winner.
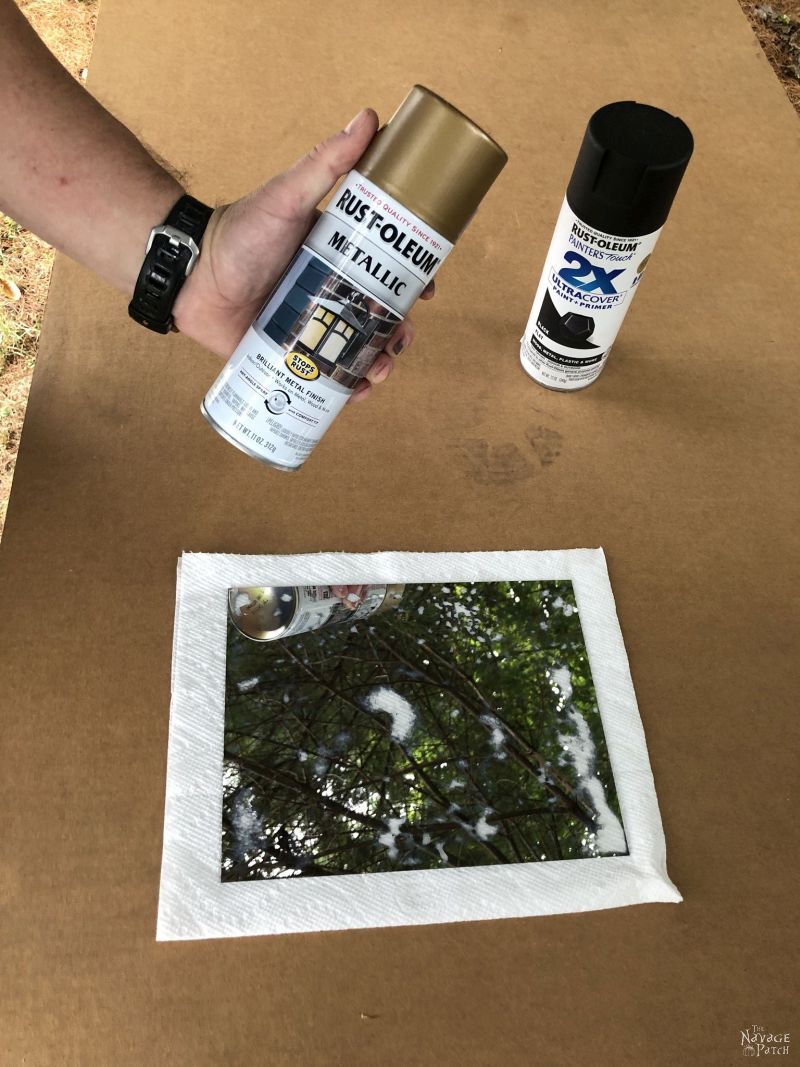
Very lightly.
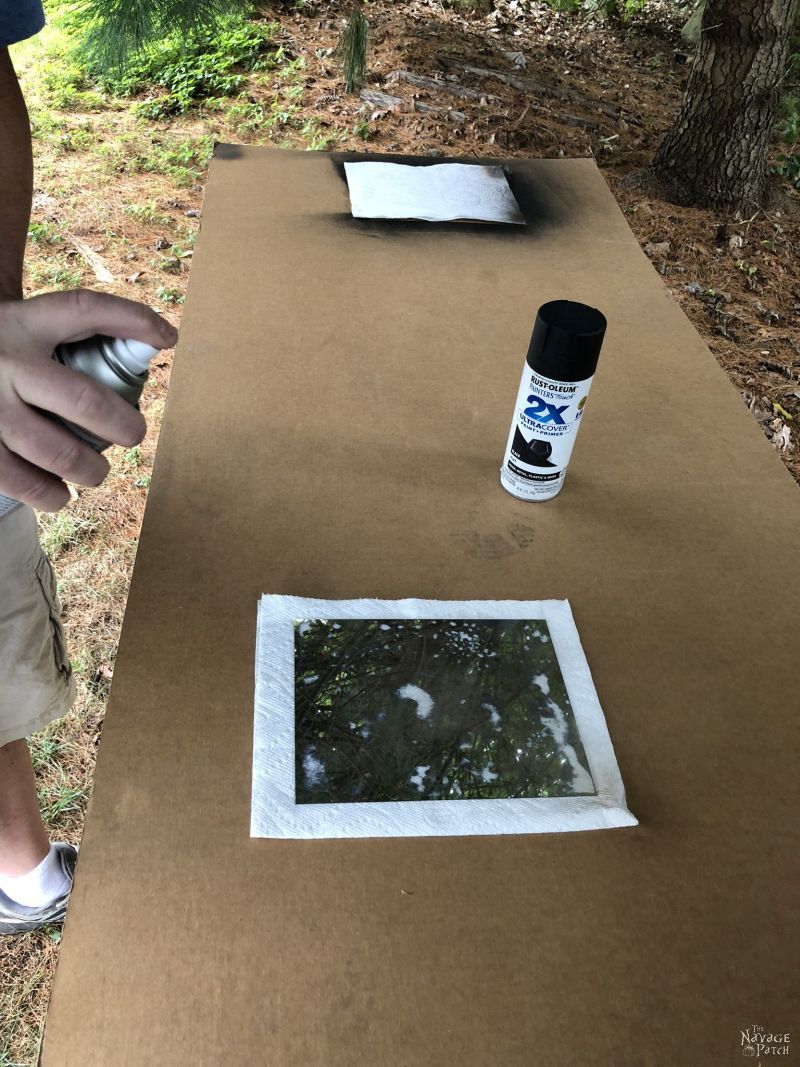
Like you-can-still-totally-see-through-the-glass lightly. The mirror below was actually the most heavily sprayed with bronze.
Once you’ve given all the mirrors a light mist of bronze, fully spray the backs with flat black.
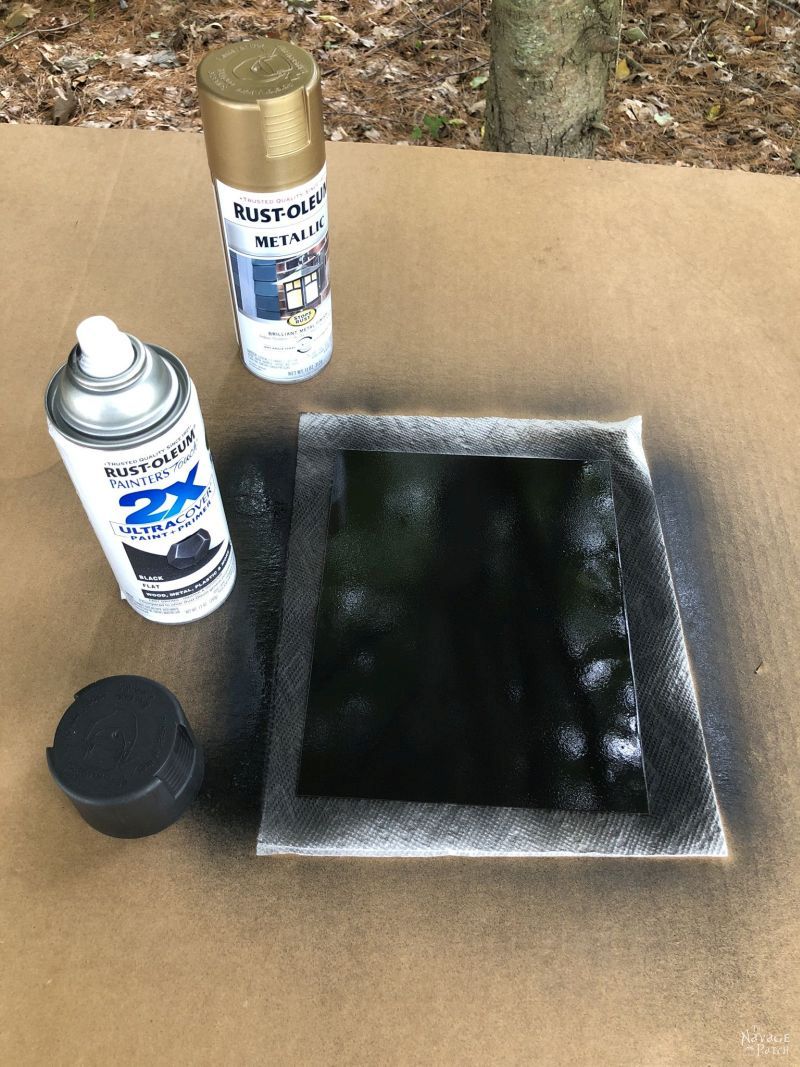
Step 12 – Clean and reframe your antiqued mirror
When the black paint has dried, you can clean the mirror’s face and then put it back in its frame.


So you may be saying to yourself, “Well that was cool! Now I know how to antique a mirror!”
To which I would nod my head and say, “I know, right? It’s totally awesome!”
But now you may be asking, “So why did you antique so many mirrors? What are you going to do with them all?”
To which I would wink at you and say, “Well that’s the big secret isn’t it, madam! You’ll just have to wait a little while to find out!”
Hehehehehe…
We love it when you share our posts on Facebook and Pinterest!


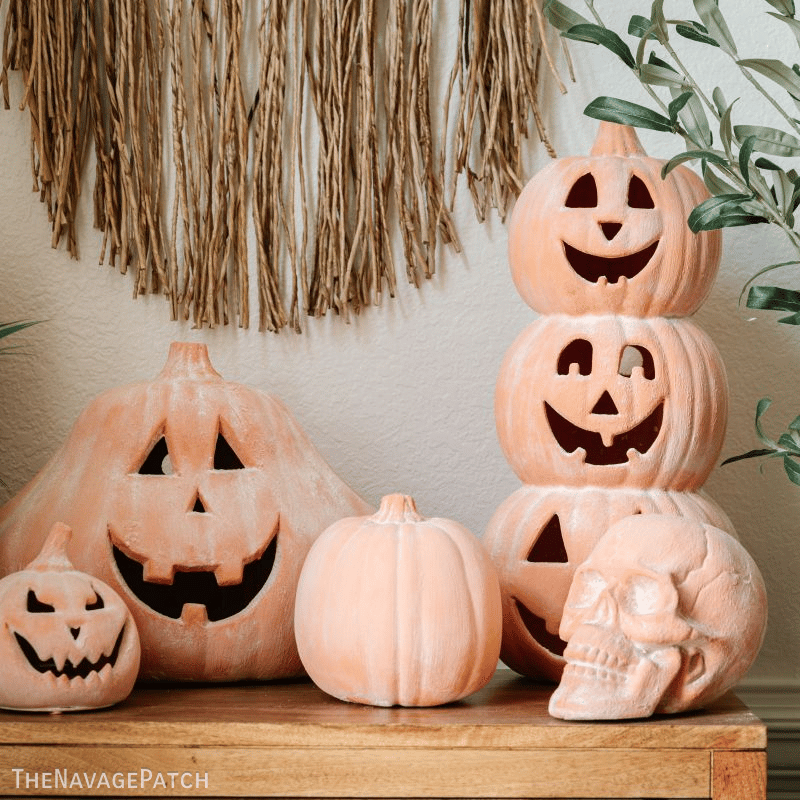
Awesome technique! I sense a Halloween project coming on perhaps?? Whatever it turns out to be, I can’t wait to see it 🙂
Thank you, Sara! Coming soon! 🙂
That’s so smart! It would be wonderful for a Halloween prop right above a table adorned with apothecary bottles made with your labels!
It would indeed, Tracey! 🙂
I love it. I watched it being done with vinegar and water and some other stuff on Fixer Upper once, but this way seems a whole lot easier. Thanks for always giving a step by step tutorial, some of us really need the broken down version. 😉 Handan comes up with the best ideas!! 🙂
Yep, our way is not only easier, but it’s the only way I’ve seen that doesn’t end up a scratched mess! And yes, Handan is a genius! 🙂
Interesting idea! I have used Looking Glass Paint on glass to make mirrors, but this is another way to create the old mirror look. Thanks!
You’re welcome, Dana! 🙂
I luv this…I paid “pretty big bucks” for a full wall antiques mirror…it arrived & couldn’t detect antique…back it shipped…second arrived…same deal…hubs wore out. Shoulda gone with something like this…franki
Maybe you could buy it one more time and DIY the antiquing, eh?
I’ll be waiting for the ‘reveal’!!
Just safety warning. Be careful in your choice of a glass cleaner. NO Ammonia!!!!. Don’t want that anywhere near the bleach process. Chlorine gas and all.
Good advice, Craig!
Fantastic instructions. Nice and clear. I feel like I could give it a go, especially now that I know the difference between a blob, a dollop and a glop.
LOLOL! Go for it, Deborah! 🙂
I’m having trouble getting the bleach/water mixture to get enough of the mirrored backing off as I’d like for my project… any idea why there are certain spots of the mirror that just won’t dab off? Thanks!!
Hi Laura, I’m not sure why it happens. When I couldn’t get as much off as I liked, I rinsed the mirror and did a second coat. Have you tried more than one coat? Also, we used 100% bleach, instead of a watered down mix. Last, did you wash your mirrors first to make sure there was no citristrip left on them?
Have you encountered the issue that the bleach solution (I actually used just straight bleach) worked in some areas of the mirror but not nearly enough as I wanted it to… Is there any other way to get the mirrored backing off other than the bleach method? Not sure why it was so stubborn on the majority of it!
Yes, we noticed it would sometimes work in great blobs in some areas and barely anything in others. On stubborn panels that didn’t bleach through the first time, I rinsed the panel off with water and did it again. The second time would do the trick. Did you use Dollar Tree mirrors?
So I used the Home Depot mirrors, which I’m assuming might be better quality than the dollar stores. For my practice mirror I followed your instructions but it took FOREVER to get the backing off. Scraped and scraped…and putting the rag on the scraper made it even harder.
I had 15 squares to do, so I put the stripper on again and figured I’d leave it on overnight….after reading the container instructions (what a concept), which said to put plastic wrap on top…I figured, what the heck. I put plastic garbage bags over the stripper on the back of mirrors, gently squishing it down. In about 45 minutes, I slowly peeled back the plastic to see how it was doing….and to my AMAZEMENT, the protective backing AND the copper backing literally PEELED OFF WITH THE PLASTIC WITHOUT ANY SCRAPING AT ALL!! And zero scratches!
It took less than a 2 minutes to reveal the silver backing in all its glory for all 15 mirror squares!
Oh wow! Score one for the instructions! Thank you for the tip, Victoria – that’s going to be a real time saver!
That was a lot of work for minimal effect, not to mention breathing bleach all day. I used full strength bleach several times, barely took anything off.
I’m sorry it didn’t work for you, Annette. It worked like a charm on our Dollar Tree mirrors. As for the fumes, I clearly state that an organic solvent respirator should be used when working with full-strength bleach.
I tried this project and after using the stripper and getting the backing off I was basically left with a piece of glass- I continued in case it worked out anyway- now I have a piece of black glass – no mirror at all. What did I do wrong?
Oh no! It sounds like you stripped off the mirror coating as well as the backing. Did you use Dollar Tree mirrors? If you can give me some more info, I may be able to help you out. How long did you leave the stripper on? Did you scrape it gently with a rag-covered plastic knife?
The mirrors I used were in the house went we bought it, kinda tacky wavy mirrors that were on a wall- I saved them because I thought- hmmm maybe something will come up! The mirrors have only a flat grey backing. I live in Canada so I had to buy Citrustrip through Amazon, I scraped it and the grey stuff and some rusty coloured stuff came off too- I followed all of your instructions, any idea what I could do differently? I have three “practice” mirrors left- I’m practicing for a making my own backsplash 🙂 I hope.
I got the backing off easily but I coated in bleach 3 times and nothing came off – could I try using another solution?
Hi Lucie, can you send me a picture of the back of your mirror so I can have a look? greg@thenavagepatch.com
Thanks!
Hi! I have a mirror that I want to do this to but I’m not sure I’ll be able to get the backing off. Why is it a necessary step? Couldn’t I just age the front of the mirror?
Hi Joseph, I’m not sure how you’d age the front, as it’s just glass. Old mirrors get that aged look because the mirrored backing does, in fact, start to come off in certain areas. All we’ve done is speed up the process with bleach and then add a little bronze and black paint for more of the aged look.
Came for the DIY, stayed for the story: absolutely love your writing style, it brings a lot of fun and personality into DIY project research! Also, your techniques, keen eye, and measurements (dallop, blob, glop) are fantastic! One of the very, very few (and there are many that try to claim it) I’ve seen that can legitimately say, “turn dollar store items into expensive-looking decor”!
Hi Cassie, thank you so much for your lovely comment! We’re in the middle of a move right now, so my posting has been sporadic, but expect much more soon! 🙂
This is exactly what I was looking for! Thanks for taking the time to post this!
Glad to hear it – good luck!
Hi
I really wanted to read this post but you had so many ads and pop ups I couldn’t even get to the top of the post. I understand they make you money, but please consider audience usability as well. I know you won’t publish this for everyone so I just hope you see this in your own comments to reconsider your ad placements.
I used a 50/50 water/bleach mix, but it reacted so strongly that when I washed off the liquid, the reflecting layer was simply washed off as well! What went wrong??
Hi Chris, the bleach is meant to dissolve the reflecting layer, so you’re all good!
Thanks Greg, but too much of a good thing is not always desireable. You need to be able to stop the dissolvent process, which in my case (with a highly diluted water-mix), was way too effective. When I rinsed the first mirror, not only did the dissolvent-mix come off, but also large parts of the reflecting layer as well. Subsequently, the trick was to just let everything dry out by itself, spray on the paint and let that dry out as well.
…a word of caution: as my mirrors will be fixed onto the backsplash in the kitchen, I used double-coated tape to fix it. Unfortunately, as the dissolvent process did not complete properly, the tape caused the paint and the reflective layer to come off, leaving an ugly see-through gap in the mirror!!
I am planning on using liquid nails or some sort of adhesive to glue the mirrored tiles to my wall. Does anyone have experience with this? Will this “show through” my mirrors and ruin them? Is there some sort of sealant to use over the spray paint? Any suggestions are appreciated. I’m planning on use 8×8” mirrors for a tile backsplash. Thanks!
Shanli
I have a ton of experience with it, Shanli – you’re good to go! No need for sealant, and the liquid nails will not show through the black paint. Good luck and have fun! 🙂
Thank you so much!
I have another question. Do I need to specifically use liquid nails “mirror adhesive”?
Hi Shanli, I used regular construction adhesive. The mirrors are lightweight, so that special mirror adhesive is not needed!
Hey, Greg! What type of liquid nails have you used? Did you use the kind specific for mirrors? Thanks!
Hi Greg,
So I have an antique mirror that I wanted to antique. When I stripped it, I took everything off down to clear glass. I tried to fix it by re-creating a mirror with mirrors, spray paint, and then start again. It was very difficult and it really didn’t turn out how I wanted it. What should I do at this point? Dawn
Yowza, that’s a doozy, Dawn! Okay, I would start by removing the mirror effect with either acetone or stripper. Get yourself back to a clean piece of glass. Then spray the back of the glass with water in such a manner that the watered areas will be equivalent of the antiqued areas. Then while the water is on the back, spray the entire back with mirror spray paint. Leave the paint to dry a bit on the glass, and then gently mop up the water/paint with paper towels. You can repeat this process if the mirror effect is not as strong as you’d like. When you’re happy with the look, be sure to put a black backing on the mirror. Or, you can follow my method of lightly spraying with champagne bronze and then following it up with full coverage of flat black. Good luck!