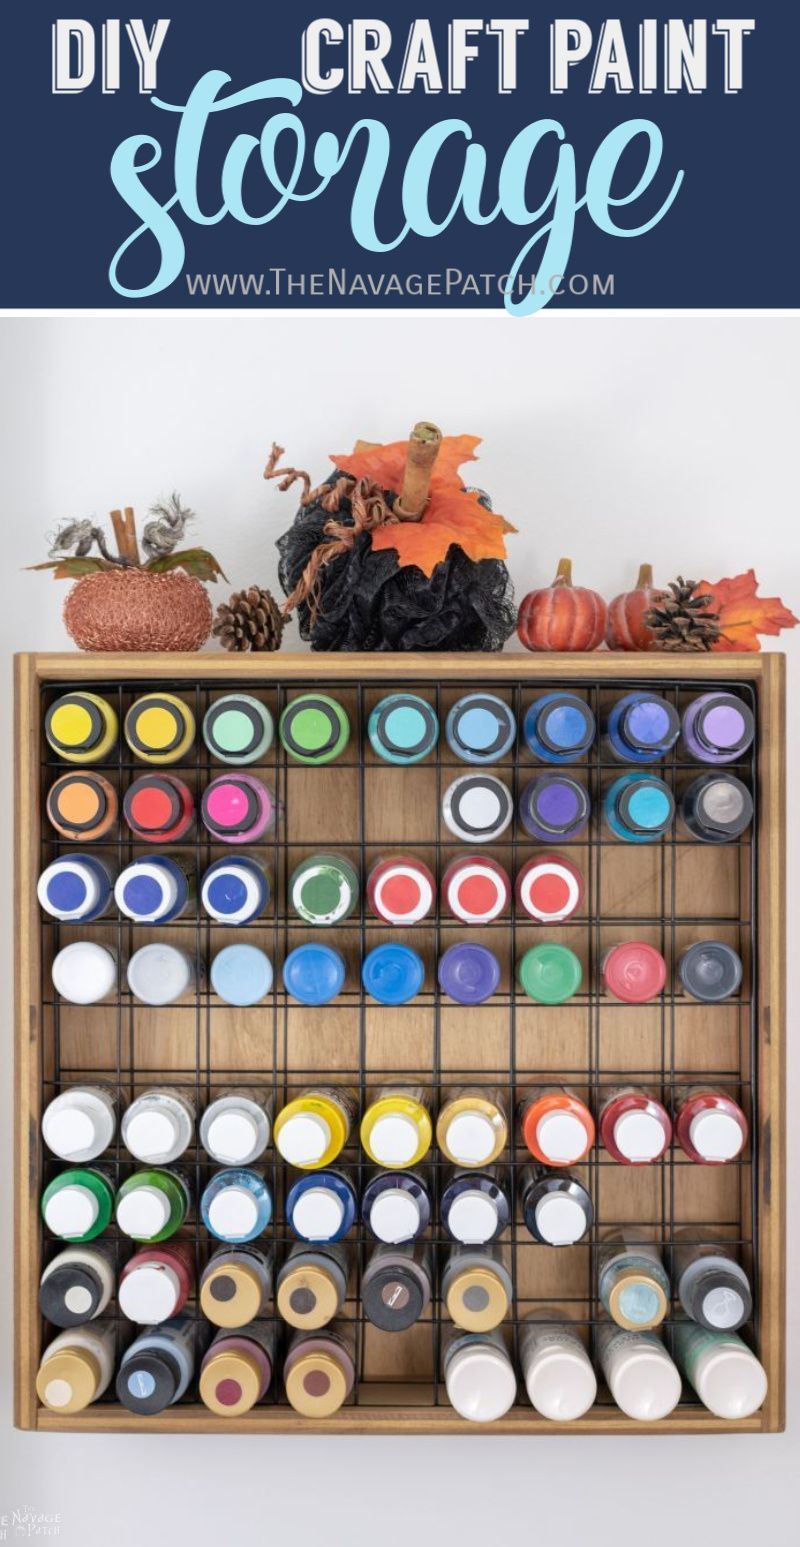
DIY Craft Paint Storage Rack
Our DIY Craft Paint Storage Rack is a simple and inexpensive solution to cluttered and disorganized craft paint bottles. Why buy when you can DIY?
In the dark days before our Craft Room Makeover, Handan had no less than 6 regions of our home which stored some combination of crafting supplies, future projects, broken bits and bobs from old furniture and generally a bunch of crap that looked like, well, crap, to me, but treasure to her.
The big stuff was, and is, easy to find.
If I needed an old chair, I’d just go to the towering and teetering Old Chair Structure that grows from the basement floor like a gnarled oak and reaches up into the ceiling joists.
Likewise, if I needed to find some sort of ornate wooden doohickey from an antique piece of furniture that was sacrificed for parts, I’d go to the nether regions of our basement and root around in the several old dressers that house those parts.
But if I needed something smaller and more mundane, like say craft paint, well then that would complicate things.
Because those dastardly little bottles have a bad habit of squirreling themselves away in little congregations all over the house.
There was a small band of outlaw bottles in the craft storage room. They were safe from discovery, as that room was booby trapped and unnavigable.
Several hopefuls kept themselves near at hand in Handan’s crafting nook behind the sofa in the living room. Those were the go-to bottles, half empty and full of pride.
The reserve forces were hunkered down in the basement craft storage room. They felt safe and secure among the gallon cans of wall paint.
One or two rebellious bottles found their way into the garage storage cabinet where they were promptly forgotten.
And I’m also complicit in the Great Craft Paint Diaspora. On those occasions I’d need some craft paint while building something in my workshop, I’d steal a bottle or two, and 9 times out of 10, I’d forget to return it to whatever hidey-hole I found it in. In time, the bottles of craft paint in my area would get covered with scrap wood and project plans, and they’d be forgotten as well.
We had enough craft paint to paint a house, but good luck finding it all!
And that is exactly why we embarked upon our craft room makeover.
Well, not exactly, but it was certainly part of the reason.
Along with all of the other cool storage solutions we implemented in the room, like the West Elm inspired storage towers and the antique sewing machine drawer storage cart and the DIY craft table, we also needed wrangle up all of our craft paint and get them organized in one place.
Sure we could have gone out and blown some money on this:
But, c’mon!
$45??
For something I can make with scrap wood and the wire racks that seem to be haunting every corner of the basement?
Of course I’m going to DIY it!
Years ago, Handan bought this wire shelf storage cube contraption at a tag sale:
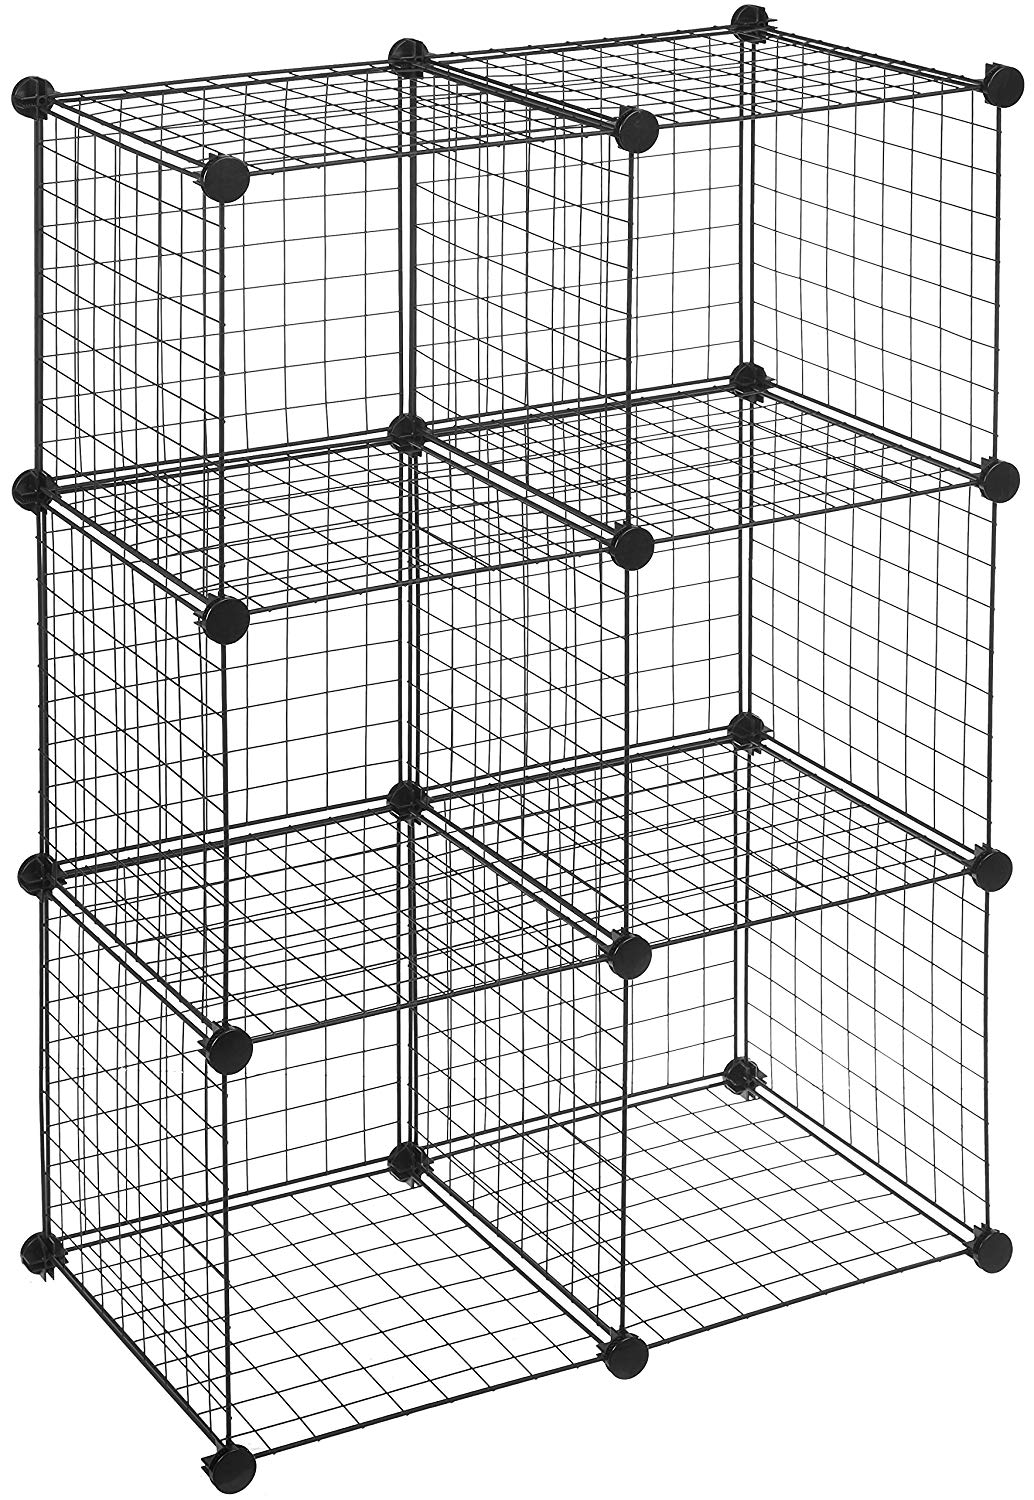
She paid $5 for it, and it wasn’t assembled as in the picture above.
But how hard could it be, right?
It was merely a collection of wire racks and plastic corner pieces!
Well, madam, let me tell you something. Those racks and connectors were forged in the very bowels of Hell!
There can be no other purpose of this product than to torture and torment those foolish enough to try to build it!
It looks so simple!
It looks like a child could build it! Blindfolded!
But I assure you, madam, that this wire monstrosity can reduce a team of MIT-trained engineers into a gibbering gaggle of lunatics!
It’s the Devil’s work, plain and simple!
Somehow, Handan and I managed to build the infernal storage cube shown above, but it nearly cost us our souls!
For years it sat up in The Boy’s room, holding his toys and knickknacks, but eventually we removed it, disassembled it and gave some of its parts a new purpose.
You may remember seeing the cube storage baskets Handan built in our DIY industrial bookcase post.
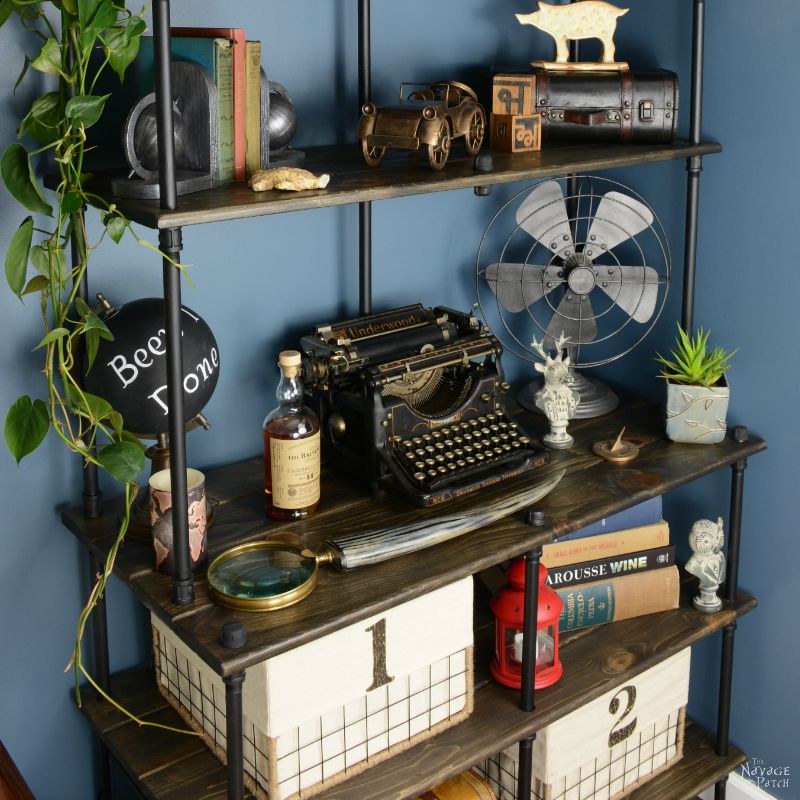
More recently, you may have spotted them in our DIY rustic console table.
But that still left a bunch of those wire shelves, and they’ve been spreading out around the house and basement ever since.
It was time to put a couple of them to good use!
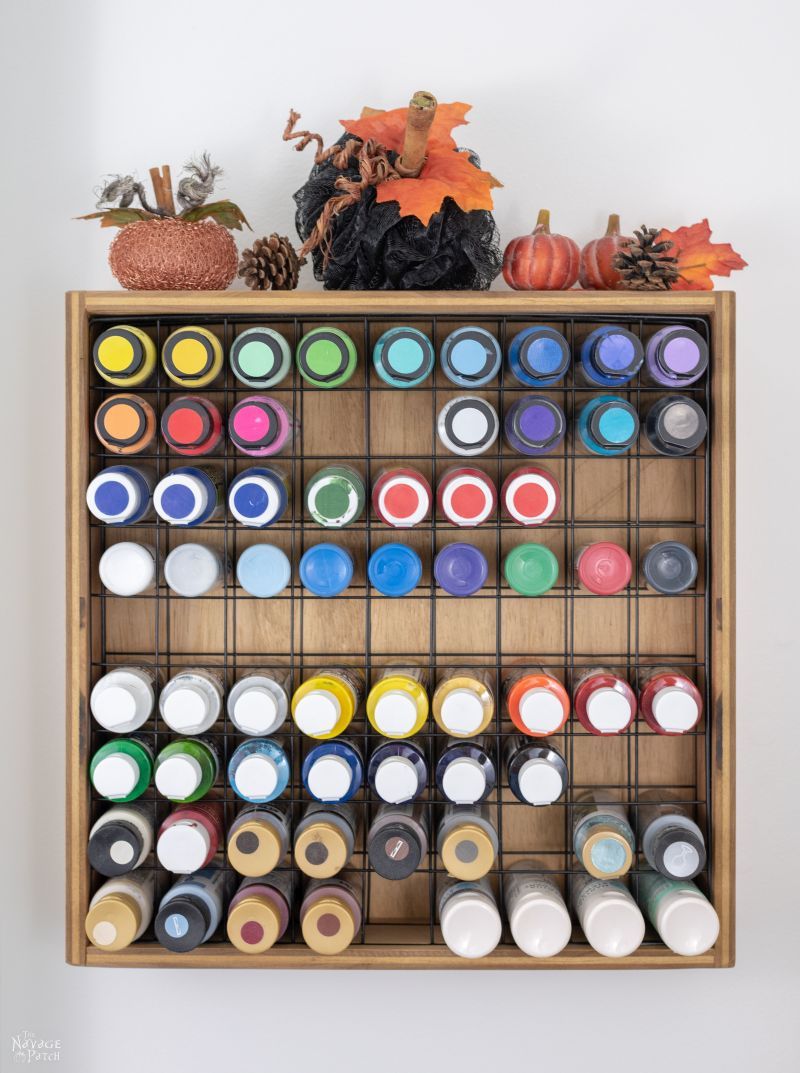
DIY Craft Paint Storage Rack
- Scrap 1/2 inch plywood or 1 x 4 pine lumber (I used plywood)
- 1/4 inch plywood (or you can use 1/2 inch if that’s what you have)
- Wire storage shelves (we got ours at a tag sale, but Amazon sells them too)
- Table saw (optional)
- 1/4 inch square dowel (if you don’t have a table saw)
- Wood glue
- Brad nailer
- Random orbit sander or hand sandpaper
- Stain (I used Minwax Golden Oak)
DIY Craft Paint Storage Rack Tutorial
Okay, since I built this thing on the fly, I’m going to show you the way I did it, and the way you should probably do it.
There’s nothing wrong with my way, but there’s also a simpler way.
And if you don’t have a table saw, I’ll also explain how you can still make this DIY craft paint storage rack.
The idea is simple:
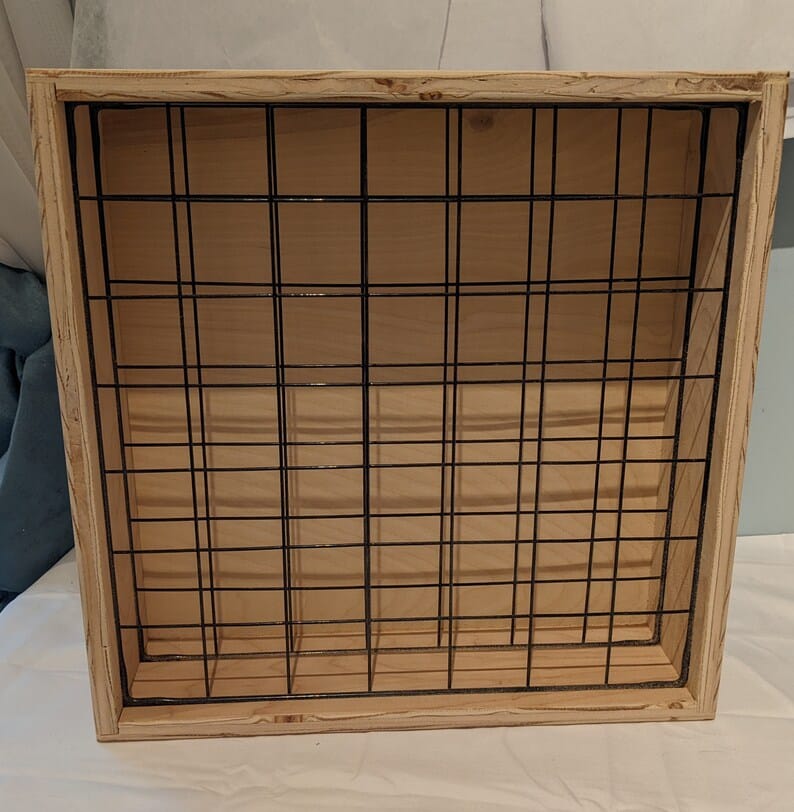
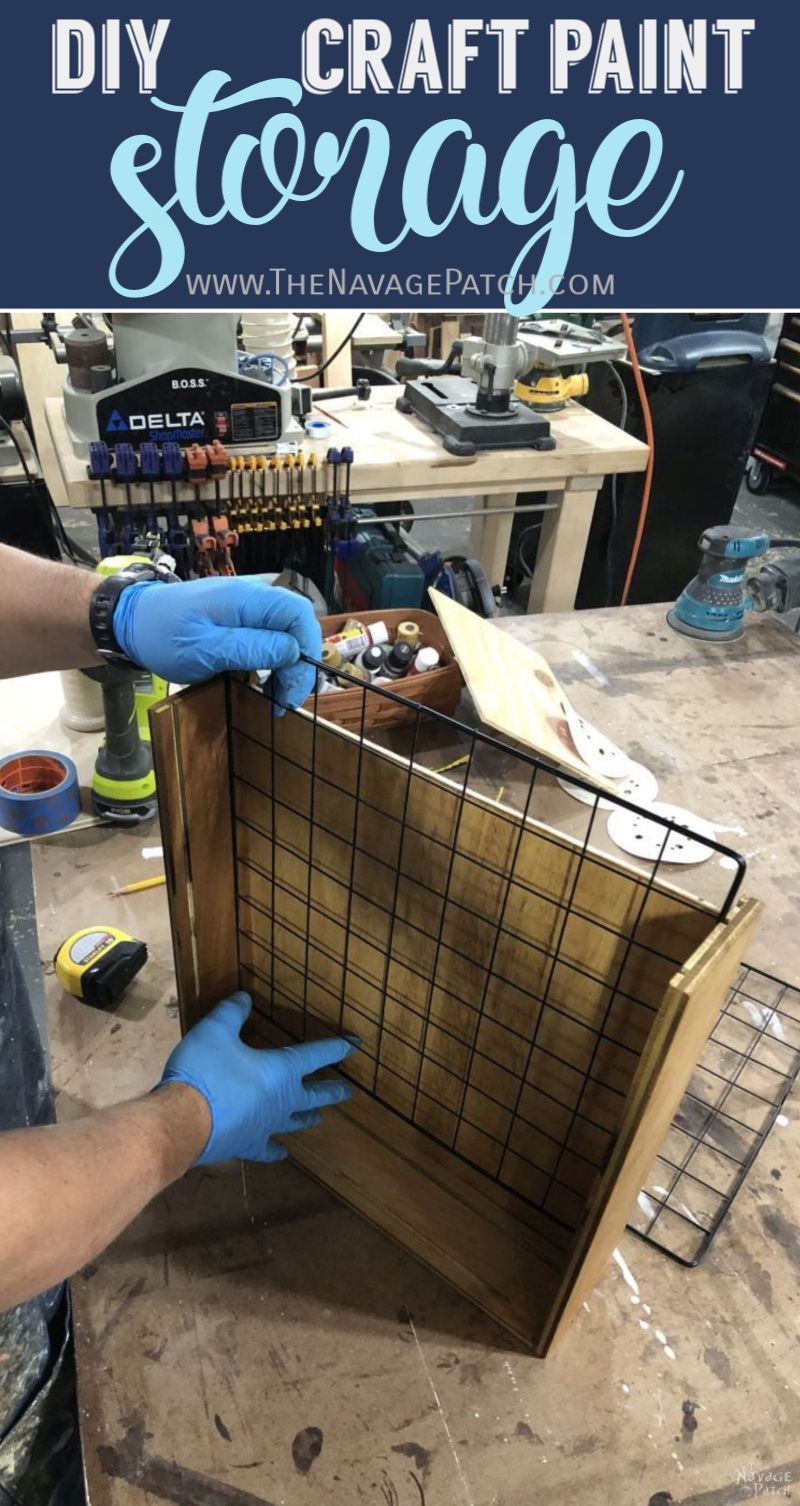
Make a wooden frame with grooves to hold the wire racks and 1/4 plywood backing in place.
Here’s what I was working with.
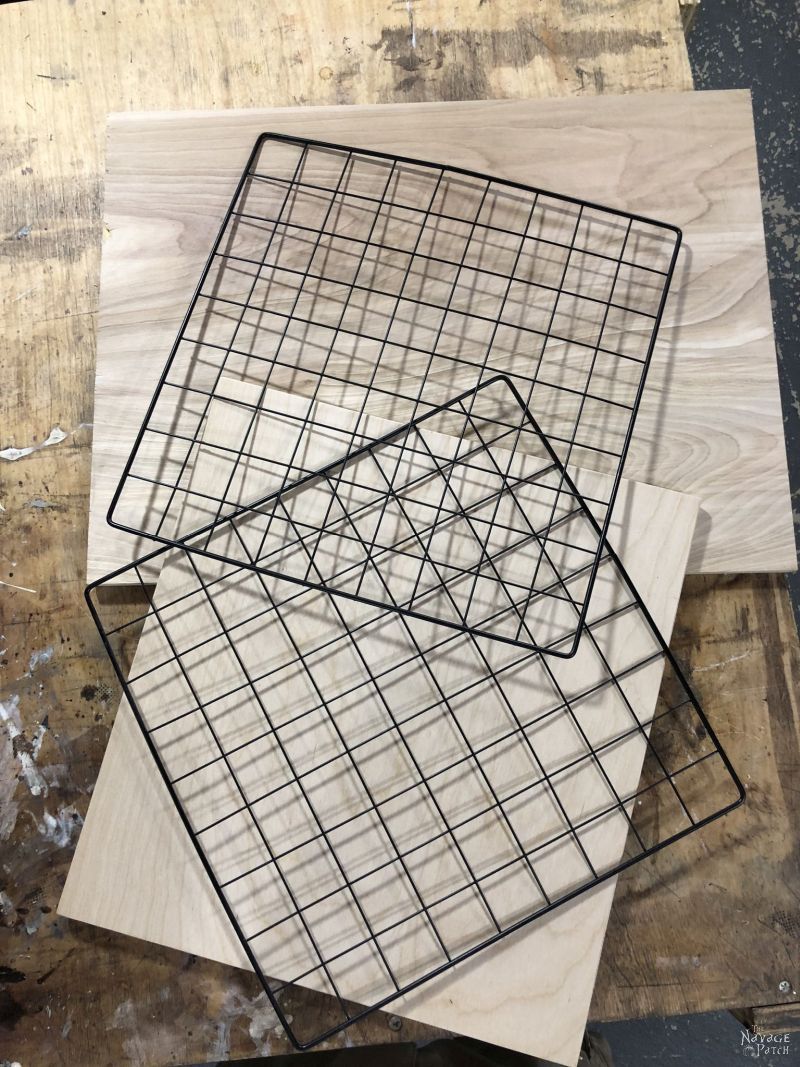
There are two tricky things about those racks:
- They are not square. They are slightly wider than they are tall. Or taller than they are wide, if you prefer.
- They are not square. They bulge in the middle. Kinda like me!
I took my measurements based their widest part and built accordingly. Maybe your racks are square. That would be nice, wouldn’t it. Perhaps that was why their intended purpose (the storage cube) was so infuriatingly difficult to achieve. Maybe if the damn things were actually square…
Anyway, no sense traveling back down that road!
I cut my plywood pieces to 3 1/2 inches wide. If you’re using 1 x 4 pine, then you won’t need to do this step. Cutting plywood is a pleasure since I bought a saw blade suited for the task! No more tear-out!
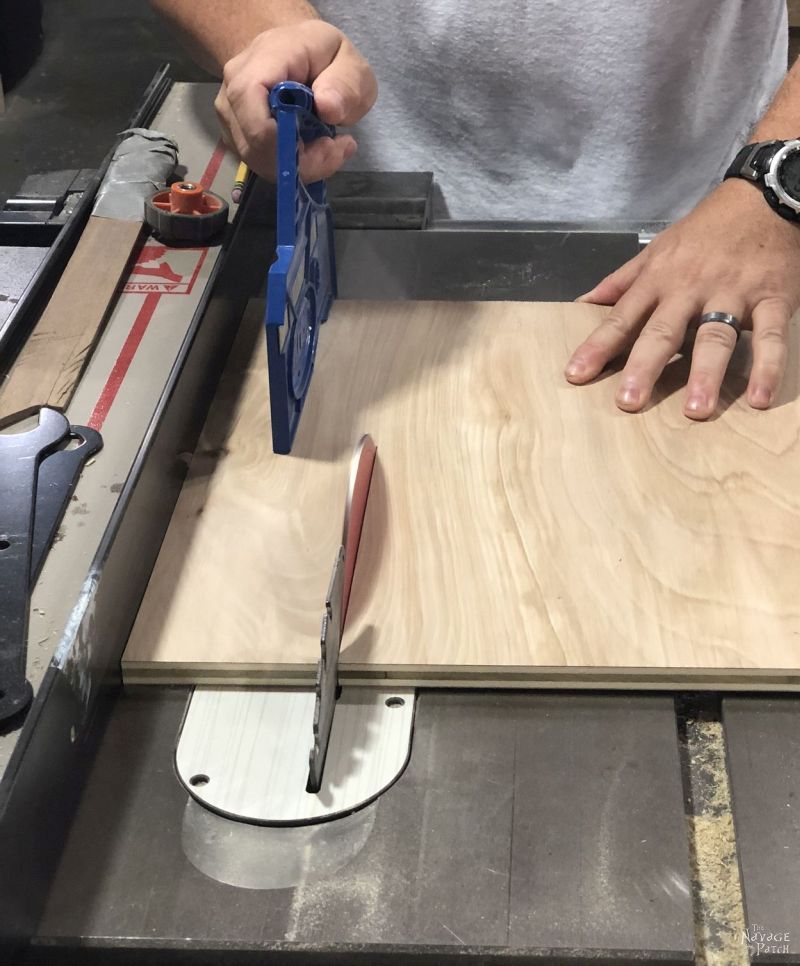
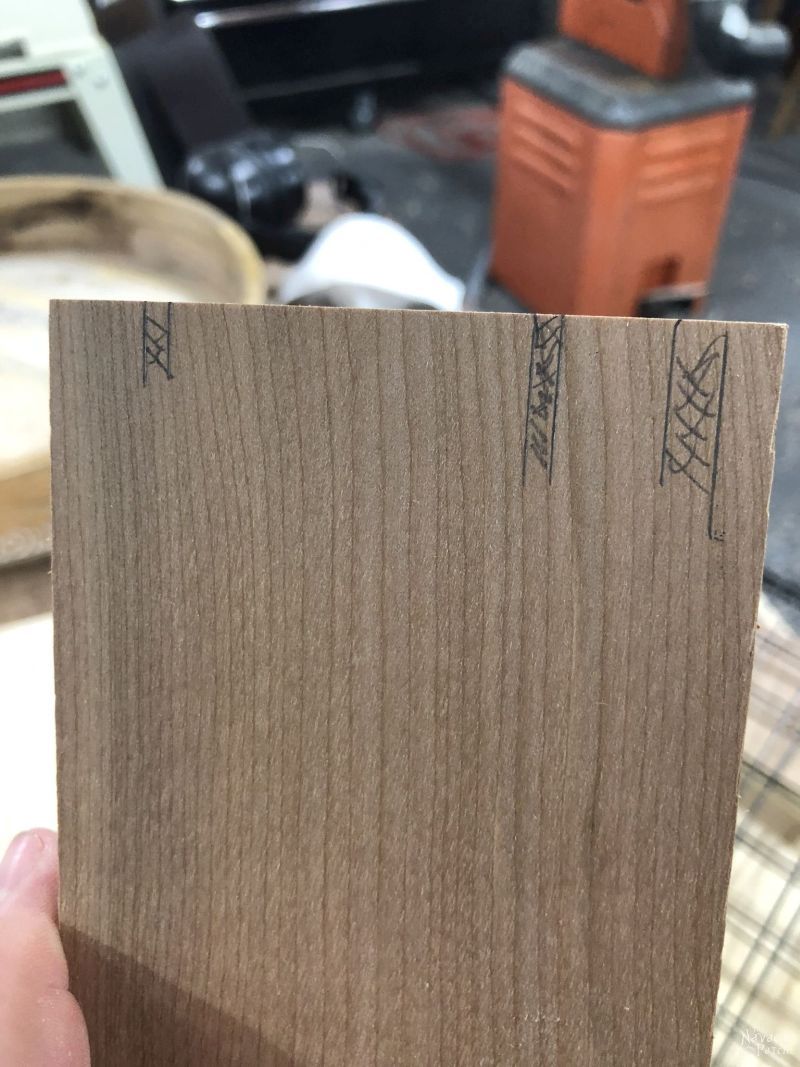
I then trimmed two pieces to 14 7/8 inches (the sides) and two pieces to 13 13/16 inches (top and bottom). These measurements took into account the fact that the wire racks and the backing piece would be embedded 1/8 inch into the frame all around.
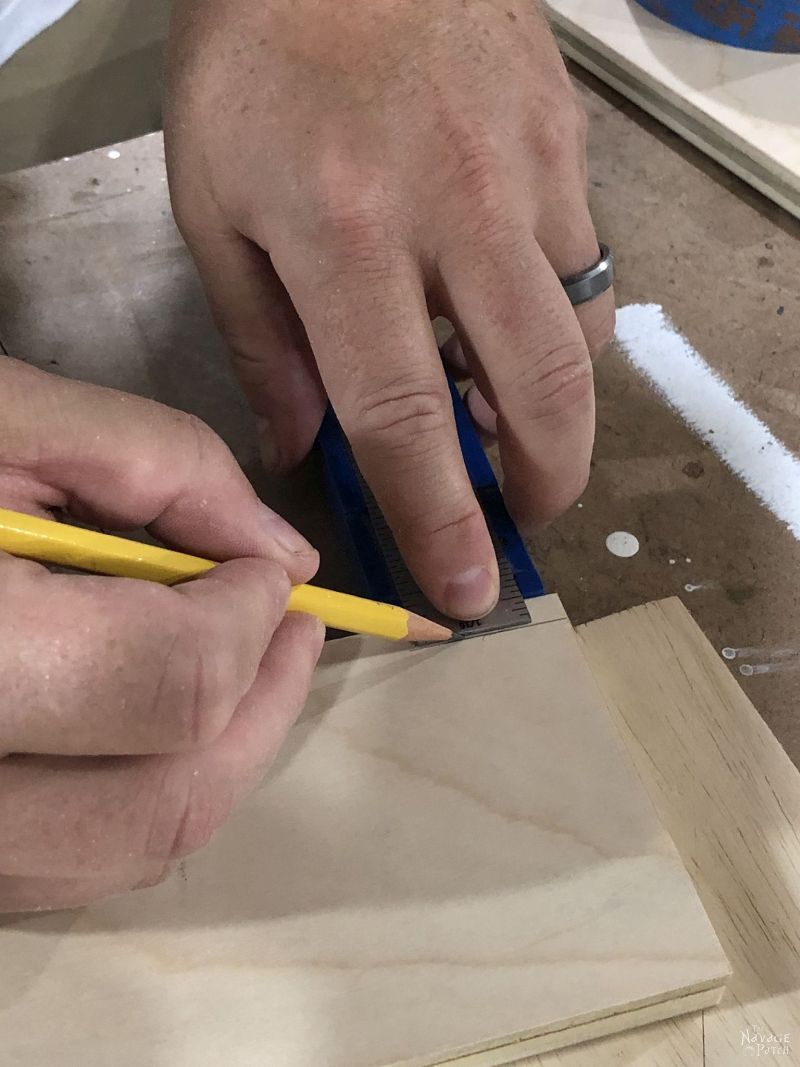
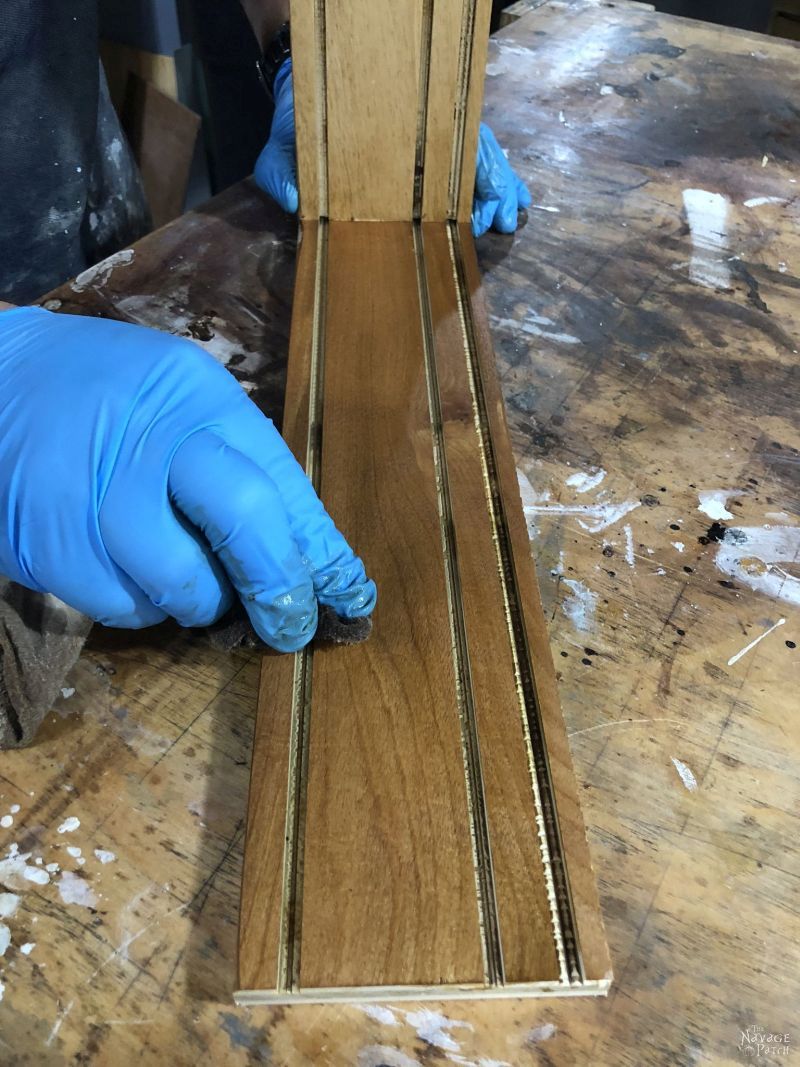
My plan was to cut 1/8-inch-deep grooves in all 4 pieces for the backing and the two wire shelves. I marked the pieces where the grooves would be cut.
The grooves for the wire shelves would need to be just under 3/16 inch wide and the backing groove would be 1/4 inch wide.
I set my table saw blade so that it only protruded 1/8 inch.

Then I ran my boards over the blade at the places I had marked.
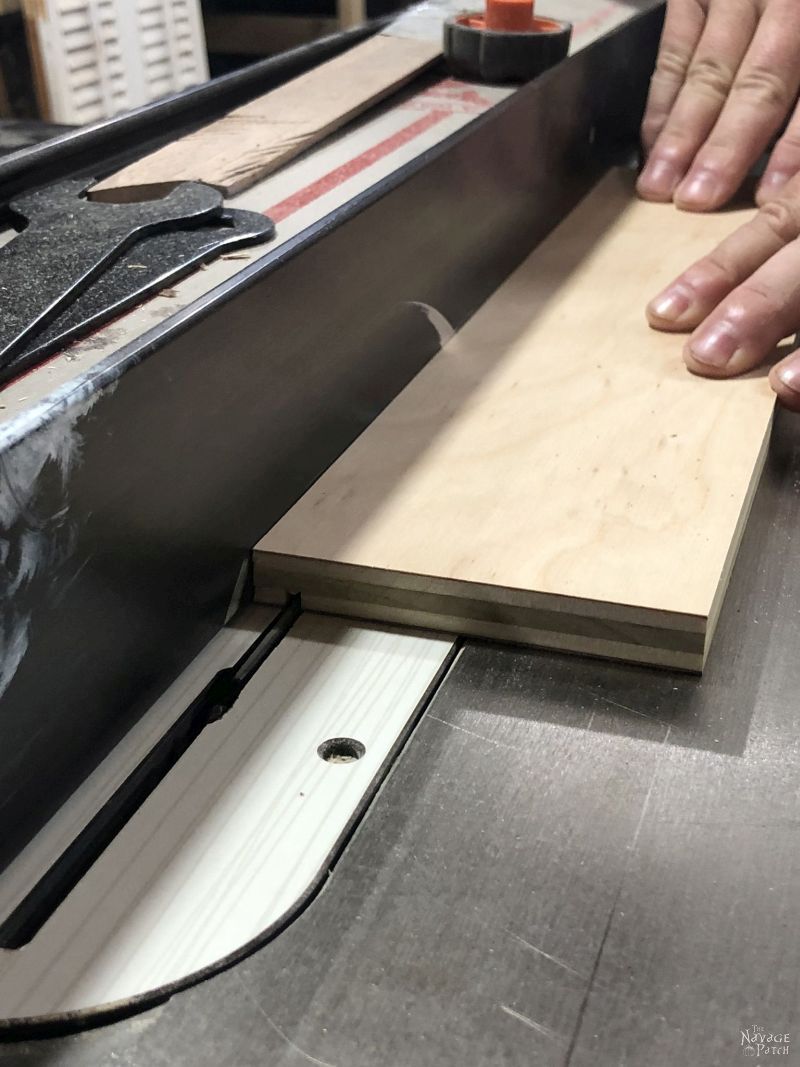
This is the 1/4 inch groove for the backing piece.
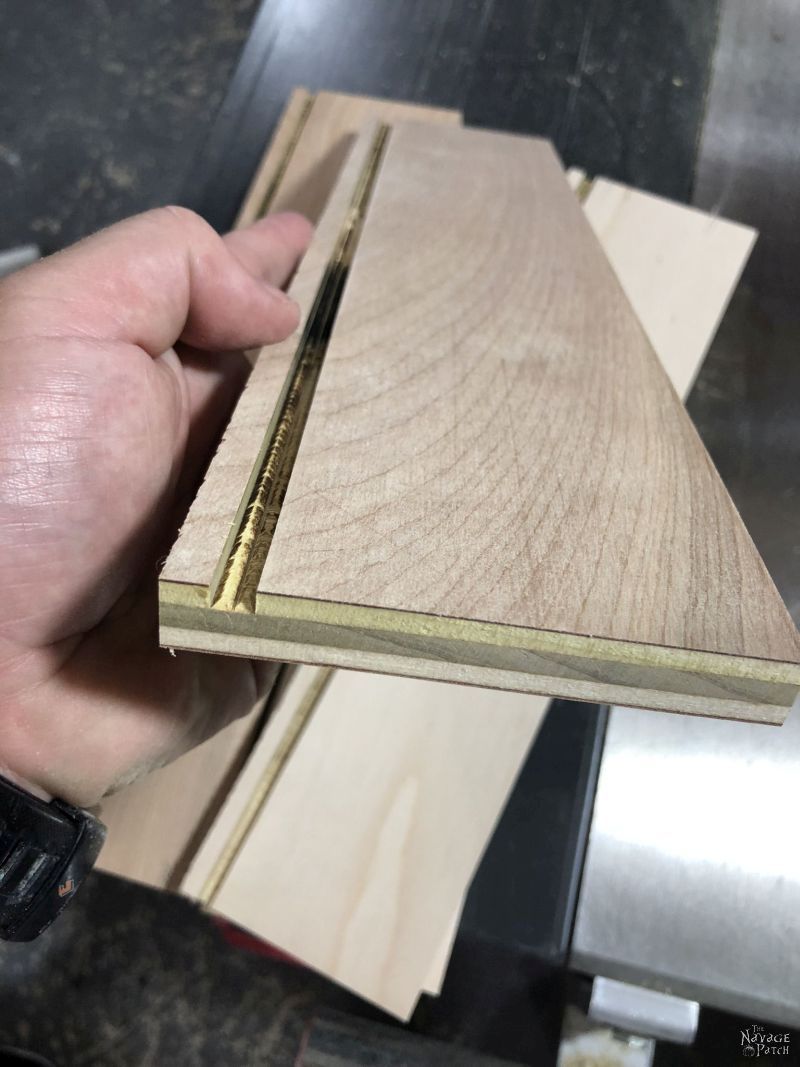
Here are all the grooves.

Now, if I were to build another, I’d only cut grooves on the top and bottom. That would be sufficient to hold the racks in place.
And if you don’t have a table saw – no problem! Instead of cutting grooves into the sides, top and bottom, you can simply glue two strips of 1/4 inch square doweling to make a raised groove. You would have to adjust the lengths of your side, top and bottom pieces to accommodate this change. If you were only to put the dowels on the sides, which would be more than enough, you’d just make the sides, top and bottom 1/4 inch longer than I did.
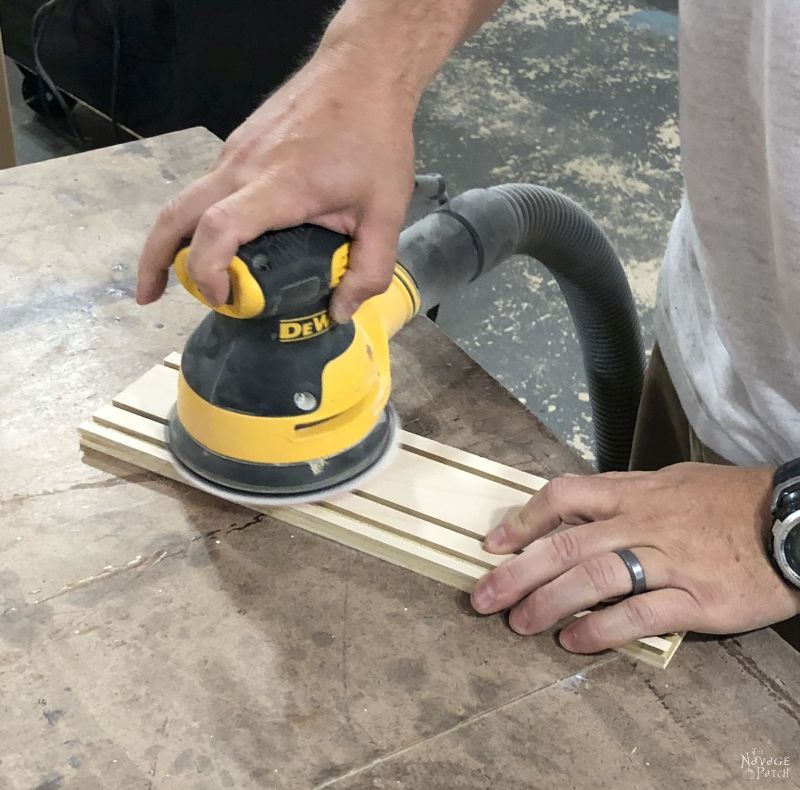
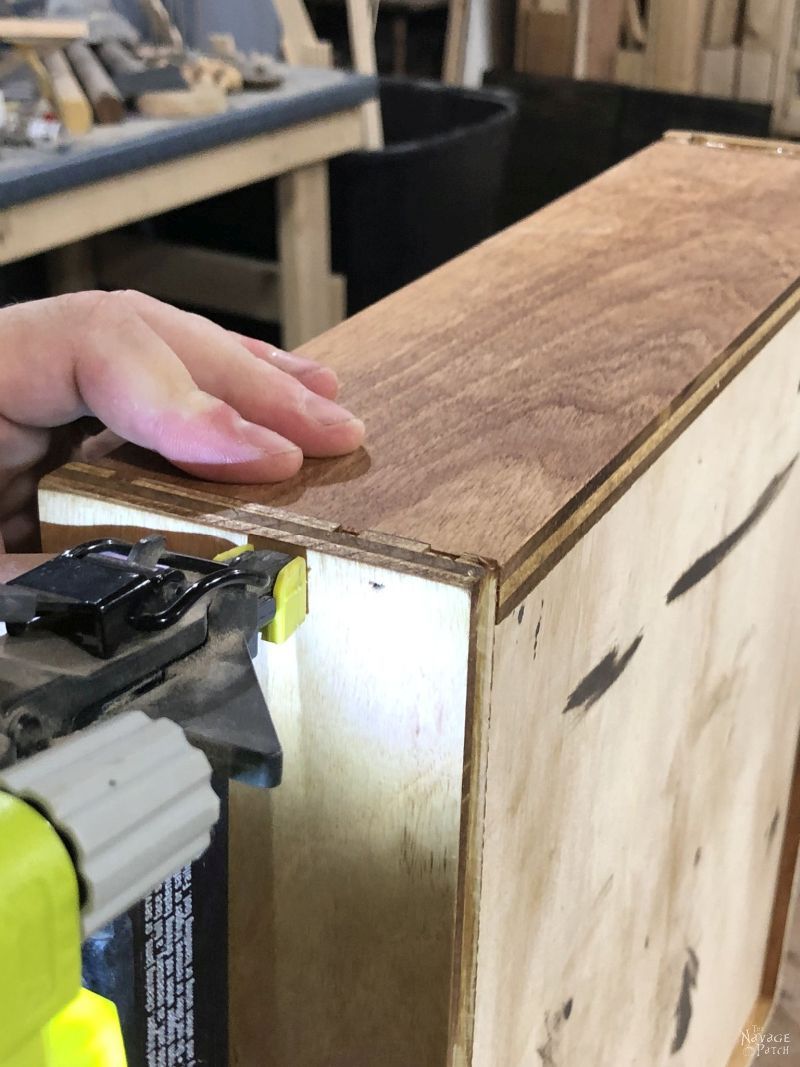
Before assembly, I gave the inner surfaces a quick sanding with a 150 grit disc on a random orbit sander.
I then glued and brad nailed the sides to the bottom piece.
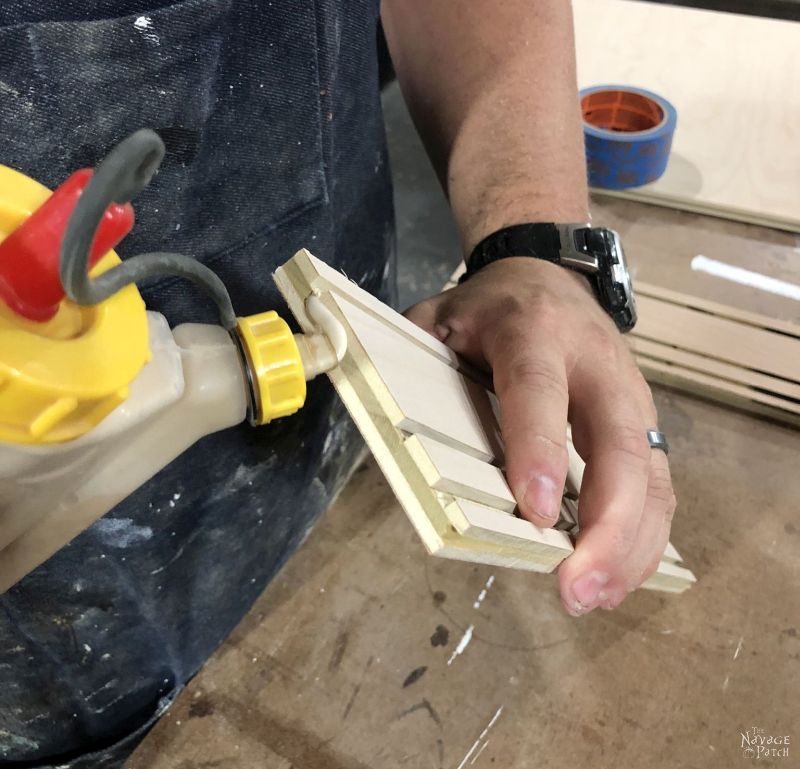
Before inserting the wire racks and backing, I carefully sanded everything with a random orbit sander.

Then I stained the pieces with Minwax Golden Oak so it would match my DIY industrial storage towers.
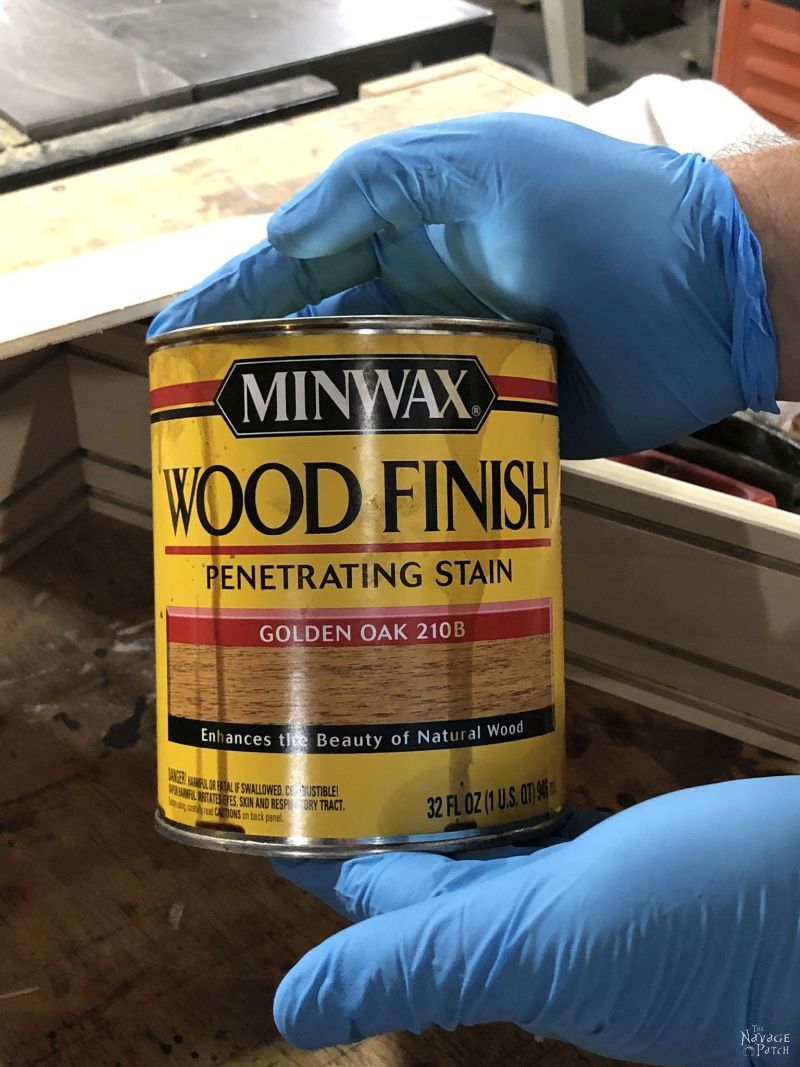
I love this stain on birch plywood!
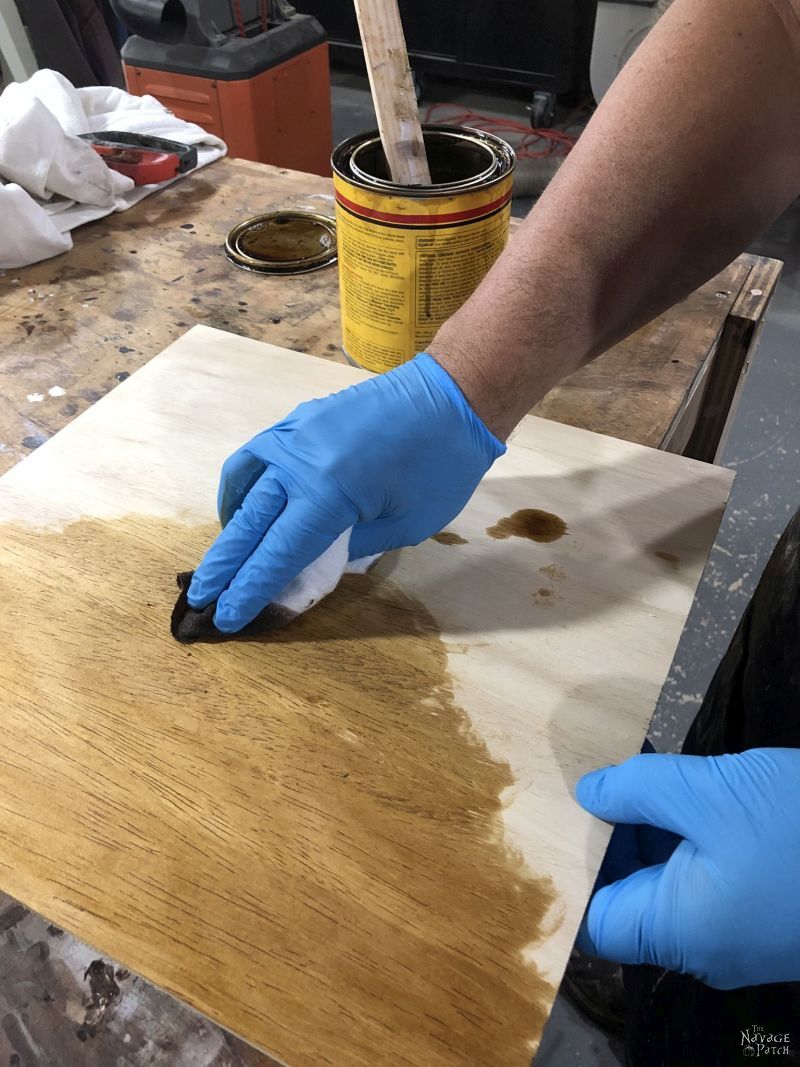
I wiped the excess stain and continued building.
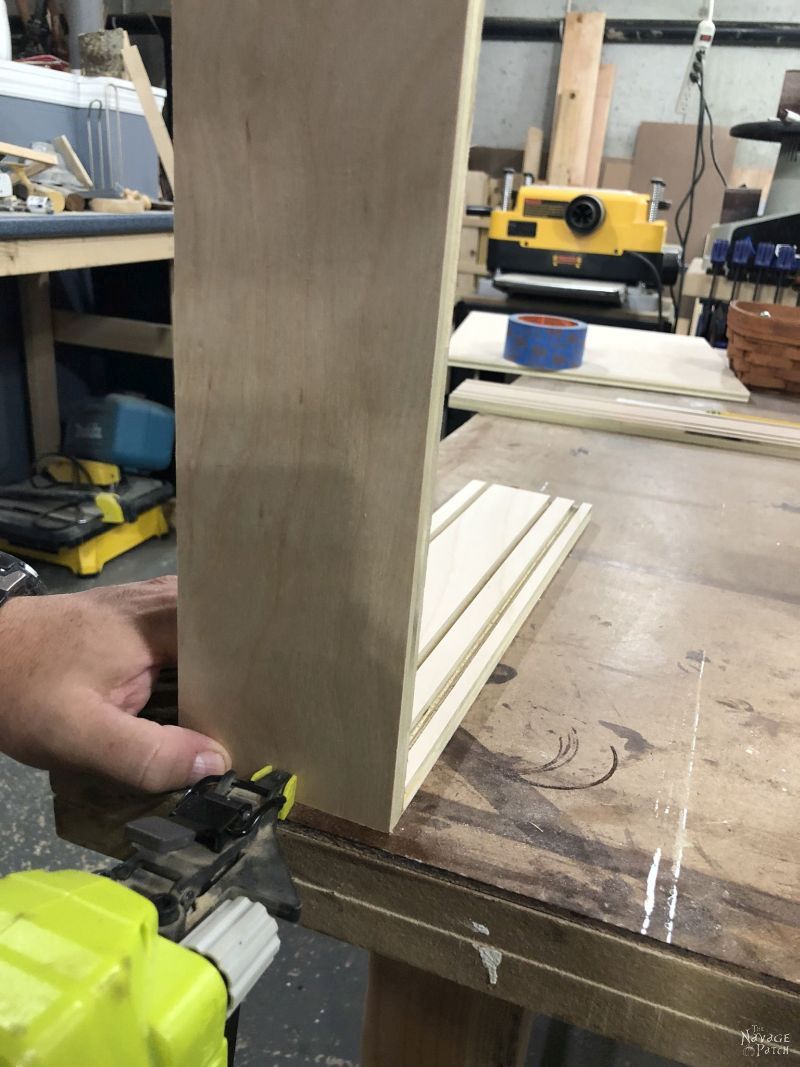
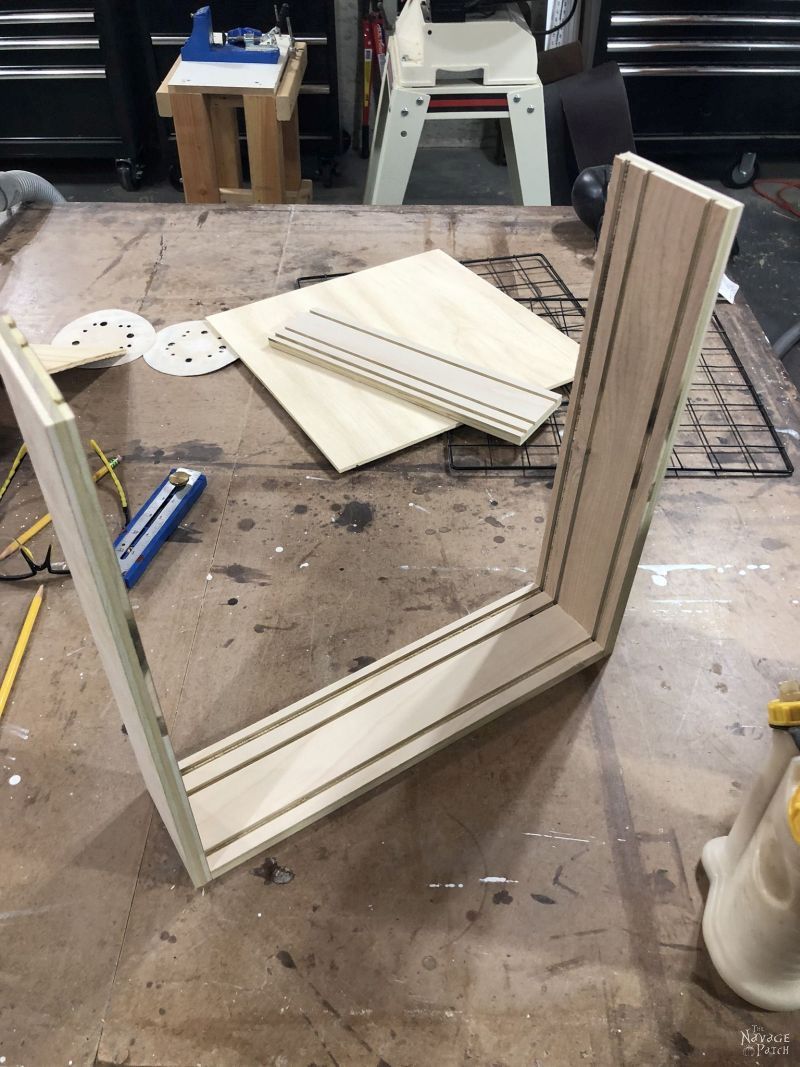
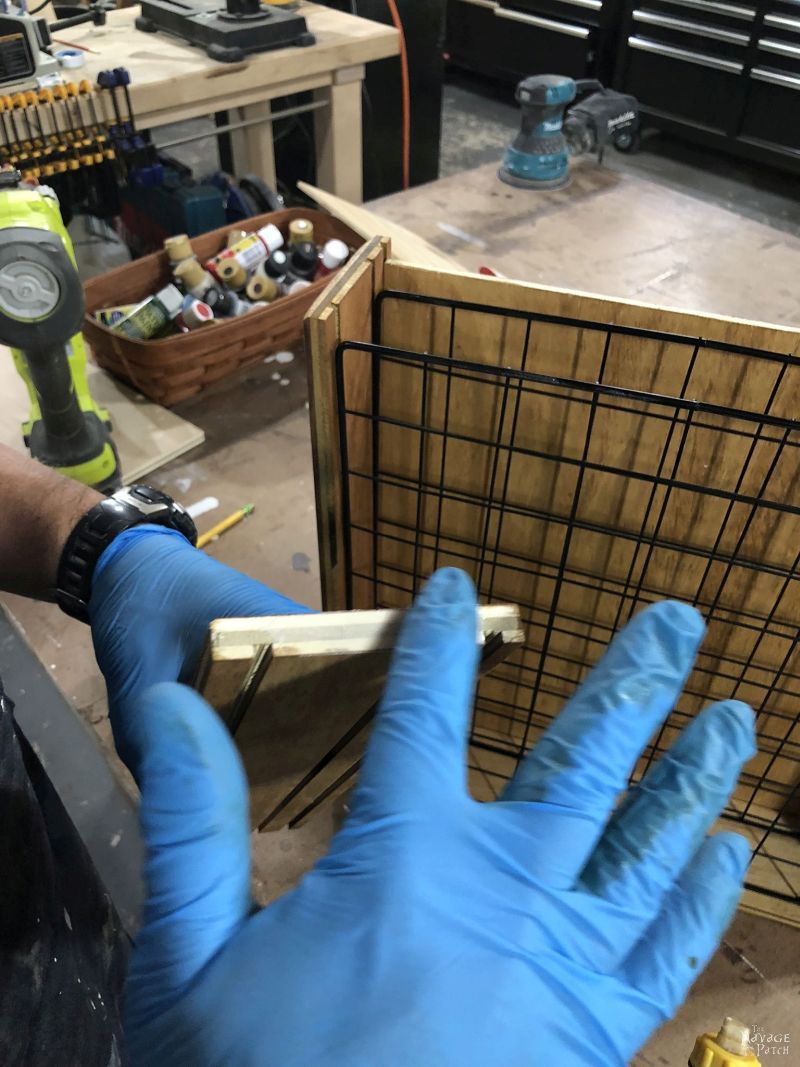
First, I slid the backing into its place.

Next, I slid the wire shelves into place.

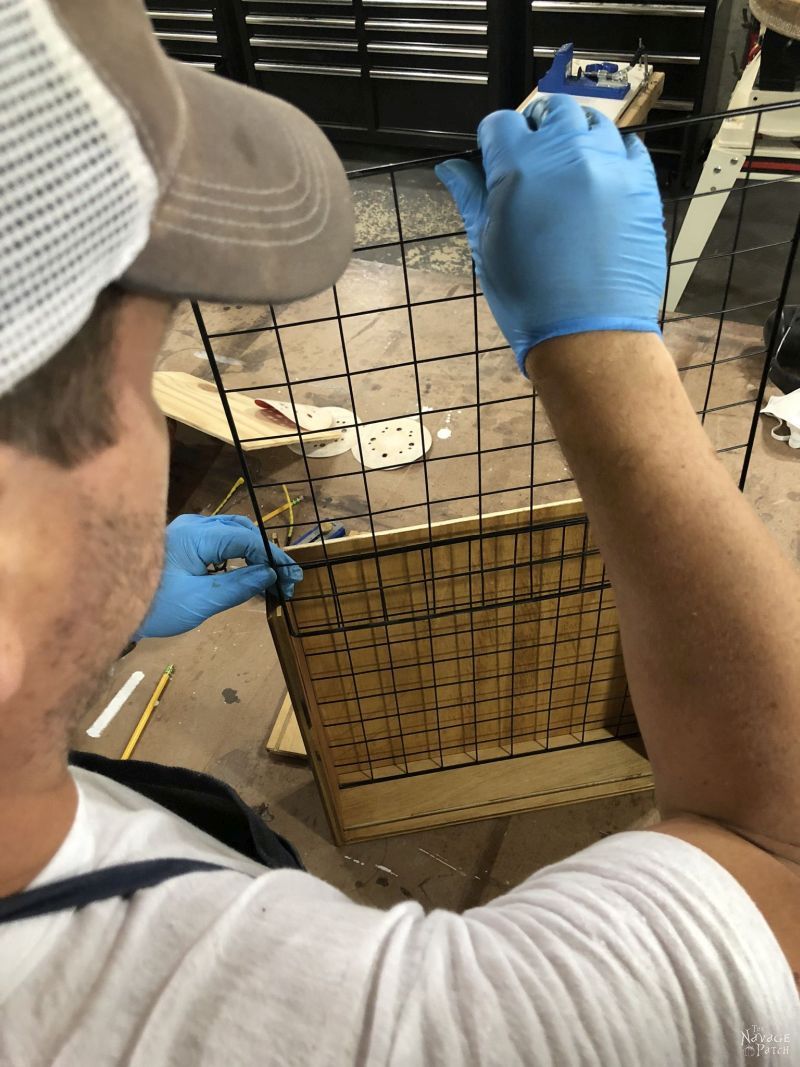
And finally, I glued and brad nailed the top piece in place.
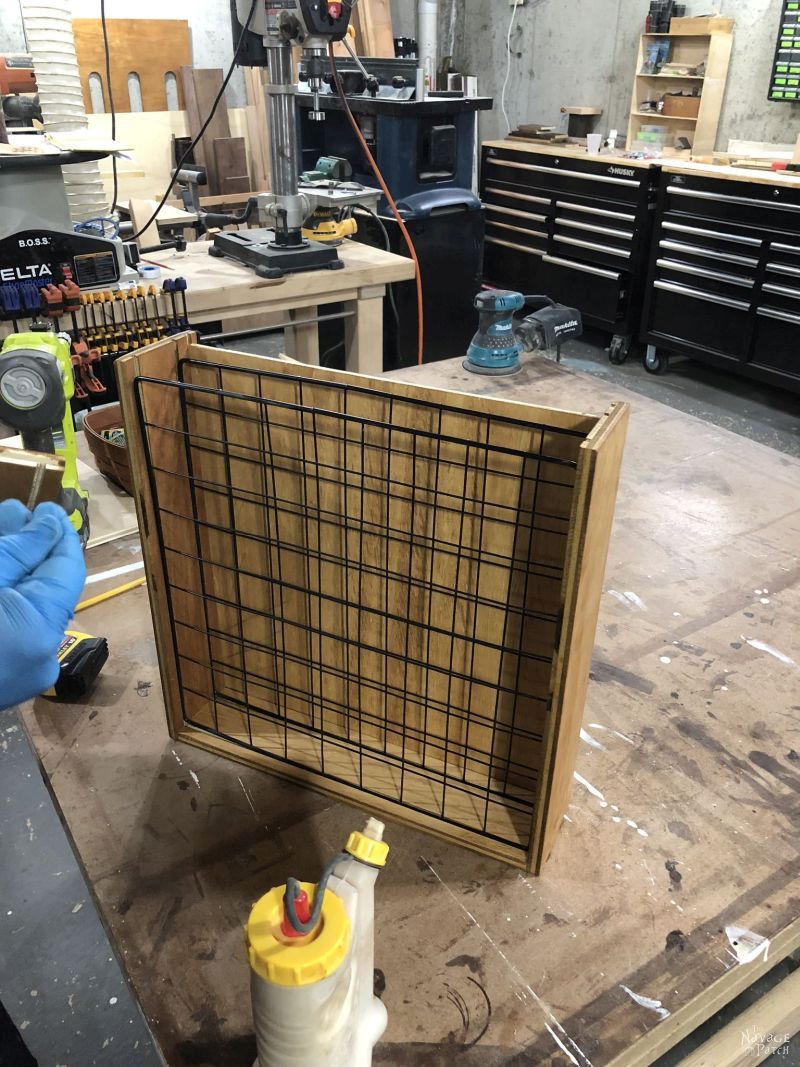
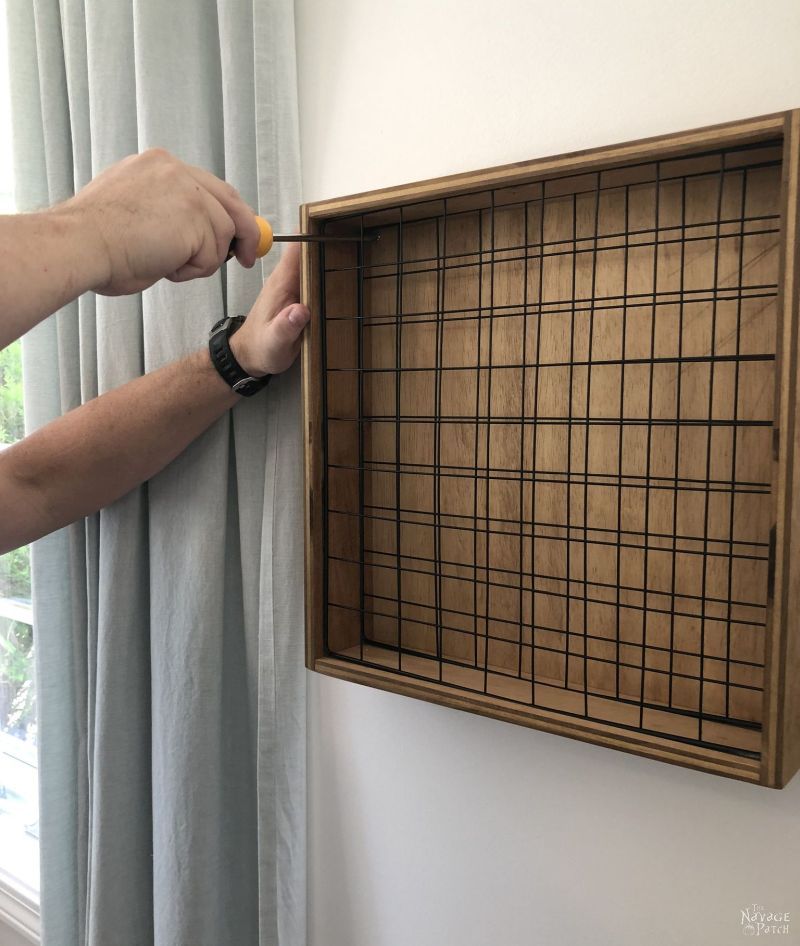
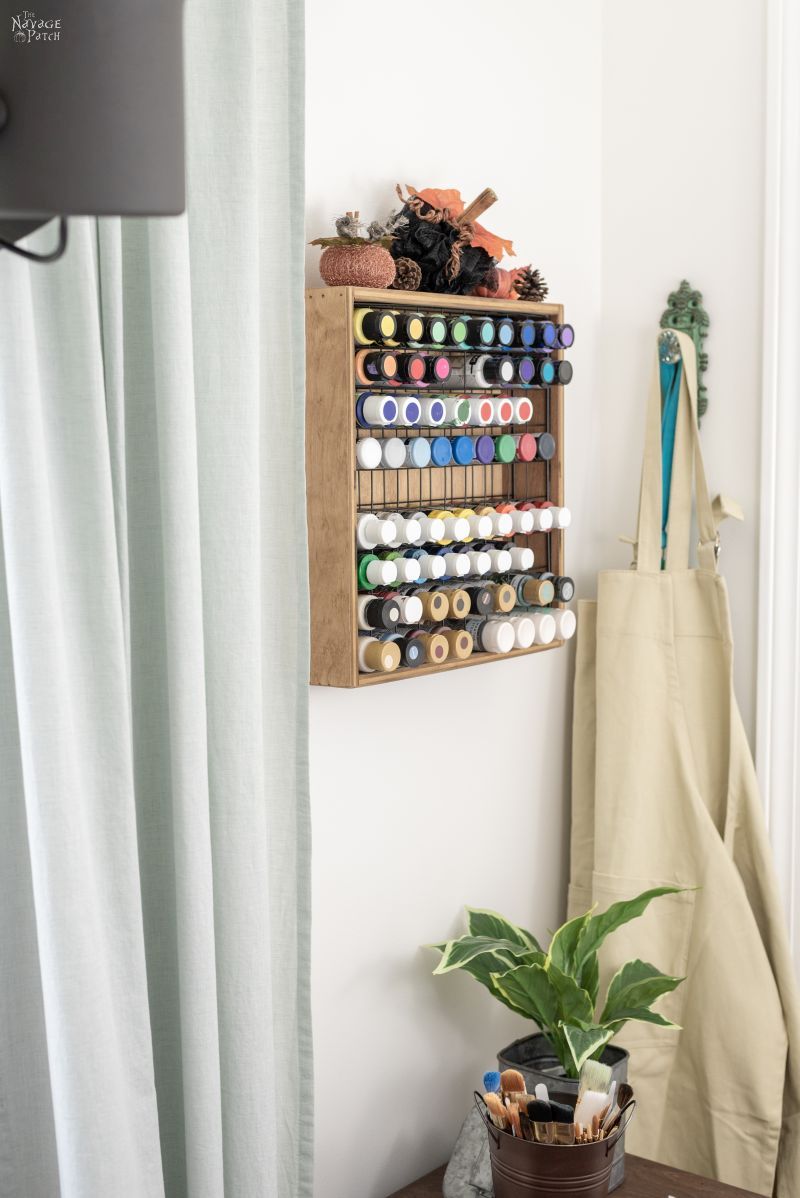
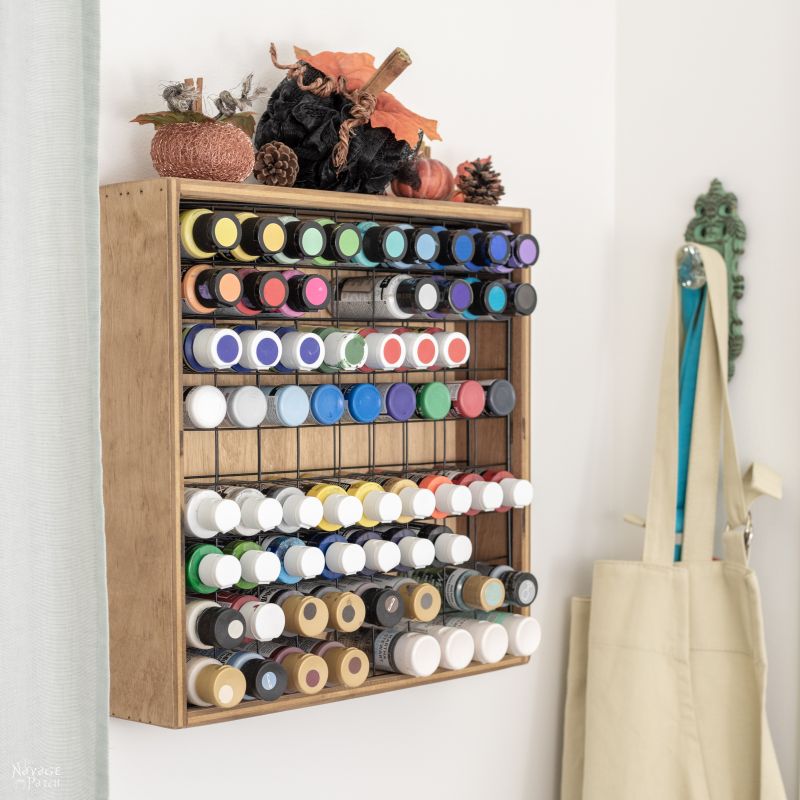
I let the stain dry overnight, and then I hung it in the craft room by two screws through the two upper corners.
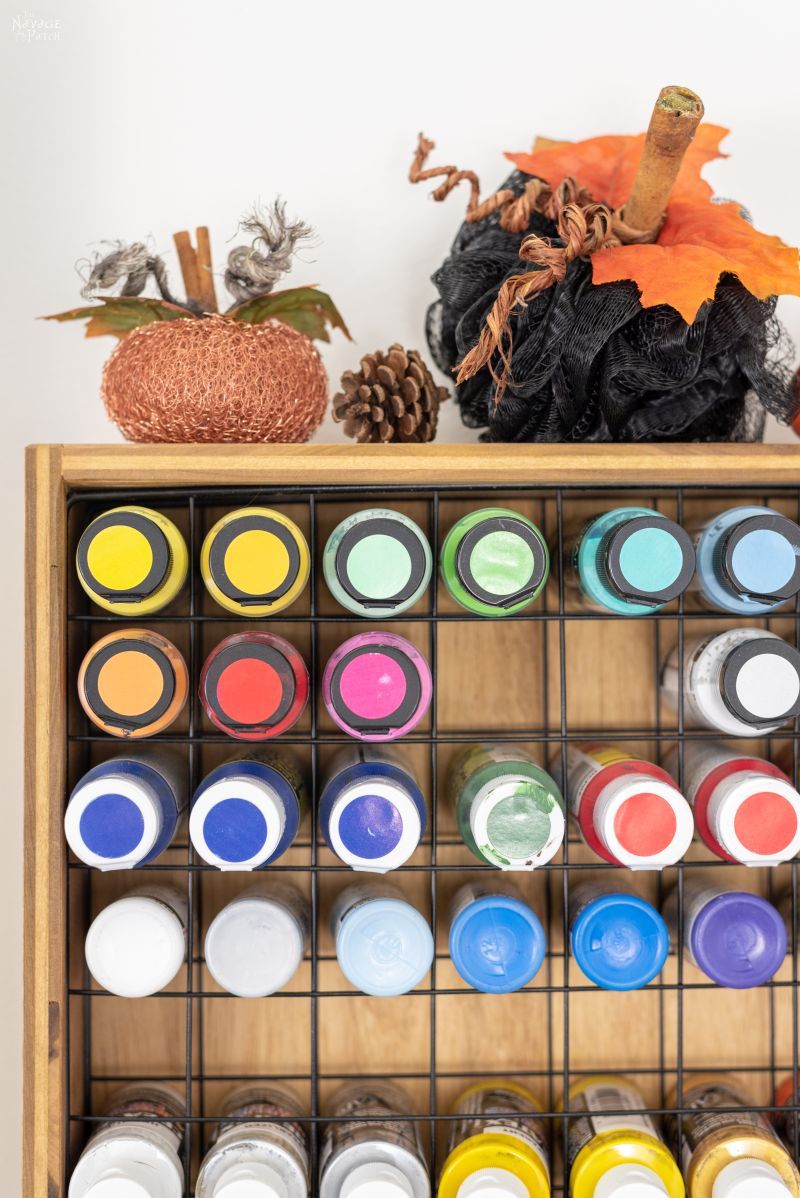
You can see in the picture below how unsquare the rack is!
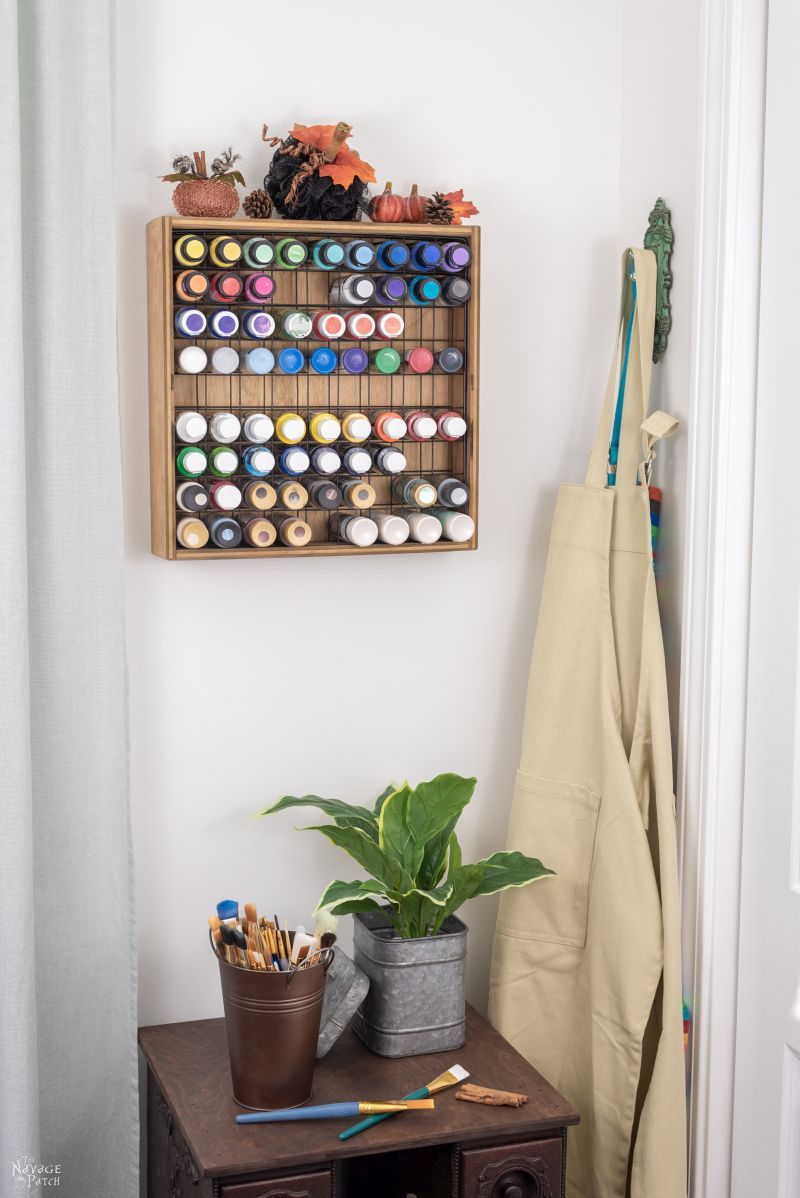
Once our DIY craft paint storage rack was hung, we scoured all the craft paint hidey-holes and rounded them all up!
We love it when you share our posts on Facebook and Pinterest!


Not that’s a handy dandy! This post made me snort my coffee though. You are too funny. “Great Craft Paint Diaspora” My house has only a slight migration problem with the craft paint bottles, but let’s not talk about jewelry findings and embroidery floss. Those little buggers run off to all points on the compass and have multiple hiding places (at least until I get to my craft nook remodel.)
LOL, everyone has their own particular wandering tool or supply I guess! 😀
Oh Greg, you are AMAZING!!!!! I give you an A++ for this project.
Handan, I love all of the “goodies” you find here and there, for later use!!
Thank you, Laura! Handan comes up with great ideas, doesn’t she? 🙂
Thanks so much for these fabulous instructions, and especially for including the idea of using a dowel instead of table saw grooves! You do an amazing job of explaining exactly how to do a project (and I laugh through your entire post). Appreciate all you and Handan do for this blog.
Thank you so much, Dyan! Comments like yours keep us going, so thank you for that! 🙂
I love this idea! I need storage for paints as well as rolls of vinyl. I will use wider boards and store rolled vinyl. Thank you for the inspiration!
Oh, that’s a great idea, Marti! Kudos! 🙂
I started with a double rowed spice rack which grew to 3 spice racks, then one of those $20 spinner racks. Scored another one (still empty) at a church yard sale for $3 as fabric paint needs organization, too. I have been known to go buy another bottle of black paint rather than search for the 2 I already have!
LOL, I’m totally with you on the buy-another-instead-of-looking thing! I’m guilty of that all the time, and it drives Handan nuts! 😀
Looks handy! I agree with the wire racks..grrrr.
How long did this take you?. I scrolled through construction ,maybe I missed it. But it does look like a bit of work?
How soon before all those empty spots are filled and you need to make another one? ???
Hi Bernice, it didn’t take too long, and I did it the hardest way possible. There are so many ways to make the project even easier! Whichever way it’s built it is way better than spending $50 on one! 🙂
This is a great idea Greg and Handan! You guys make everything look so simple 🙂 Btw that link you have to the ready-made craft paint organizer for $47 is now $52!
That’s too funny! Maybe some folks clicked over and bought one, so they raised the price to accommodate the high demand, lol! 😀
It’s now $65.
This is amazing! I really could use one of these for my paints. Would make it so much easier to see what I have when looking for a color. But I think you make it look so much easier then it probably is to make. 🙂
Thank you, Linda! Nahhh, it’s pretty easy to make! 🙂
Hi,
I love this idea, I’m going to build a few, but I’m wondering if you think it needs the backer board to stiffen it up? Would thicker timber make it strong enough and French cleat on top horizontal to attach to wall? Love your ingenuity and humour, keep up the great work! Jeanine from Australia
Hi Jeanine, it doesn’t really need the backer board – I just put it there for looks. With thicker lumber, it would be more than strong enough! 🙂
What a fabulous Upcycle!
Thanks, Maria! 🙂
Love Love Love this!!
Thank you, Susan! 🙂
Sooo, I just made my own version of this. I have to say it wasn’t nearly as much fun as I’d hoped but the end result has finally corralled all those pesky little bottles of paint gremlins loved to hide all loved my house. I don’t have the array of power tools you do so I did it my nearly powertool-less way.
I bought a 1×4 and had it cut into pieces to make 2 of these at Lowe’s. I also had a piece of scrap plywood cut to size for the back. To my wood purchase I added some screws, wood glue, small nails to attach the back and those little U shaped nail things.
I assembled my wood into a frame, painted it, added leftover wallpaper to the back & attached the back then used those little U shaped nails to secure the wire grid. I found I could also store my bottles of Ranger alcohol inks in the leftover spaces in one of them. Great solution!! Thanks for the idea!
Oh great! I’m happy it worked out for you, Zoe! Those little bottles can become overwhelming if not properly stored! 🙂
I had a friend make me 2 of these. I painted them white. Best storage for paint bottles. Love tgem.
Awesome! So happy to hear it, Jody! 🙂
Ok maybe it’s me. How do you copy this pattern without wasting multiple pages of paper. Why all the pages with one sentence on them. Otherwise the plan is great.
Thank you