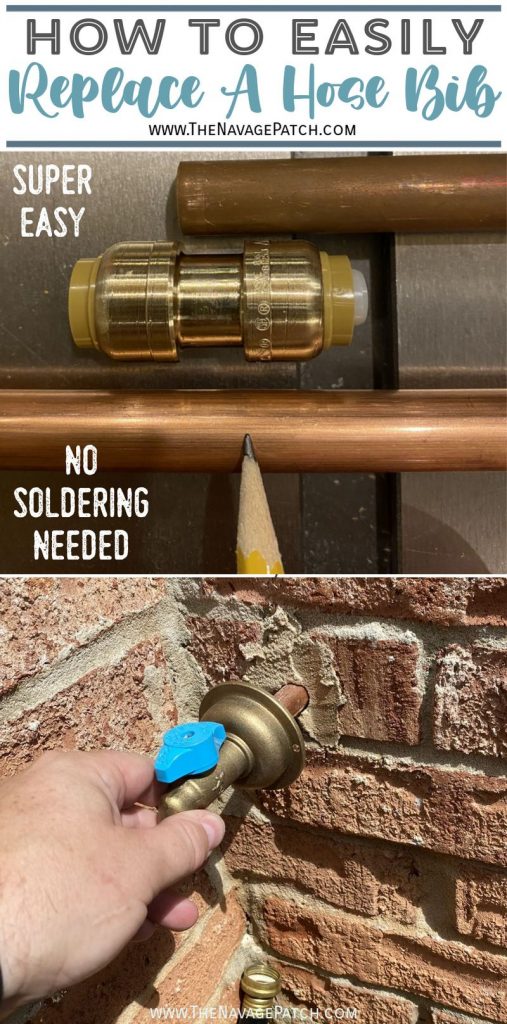
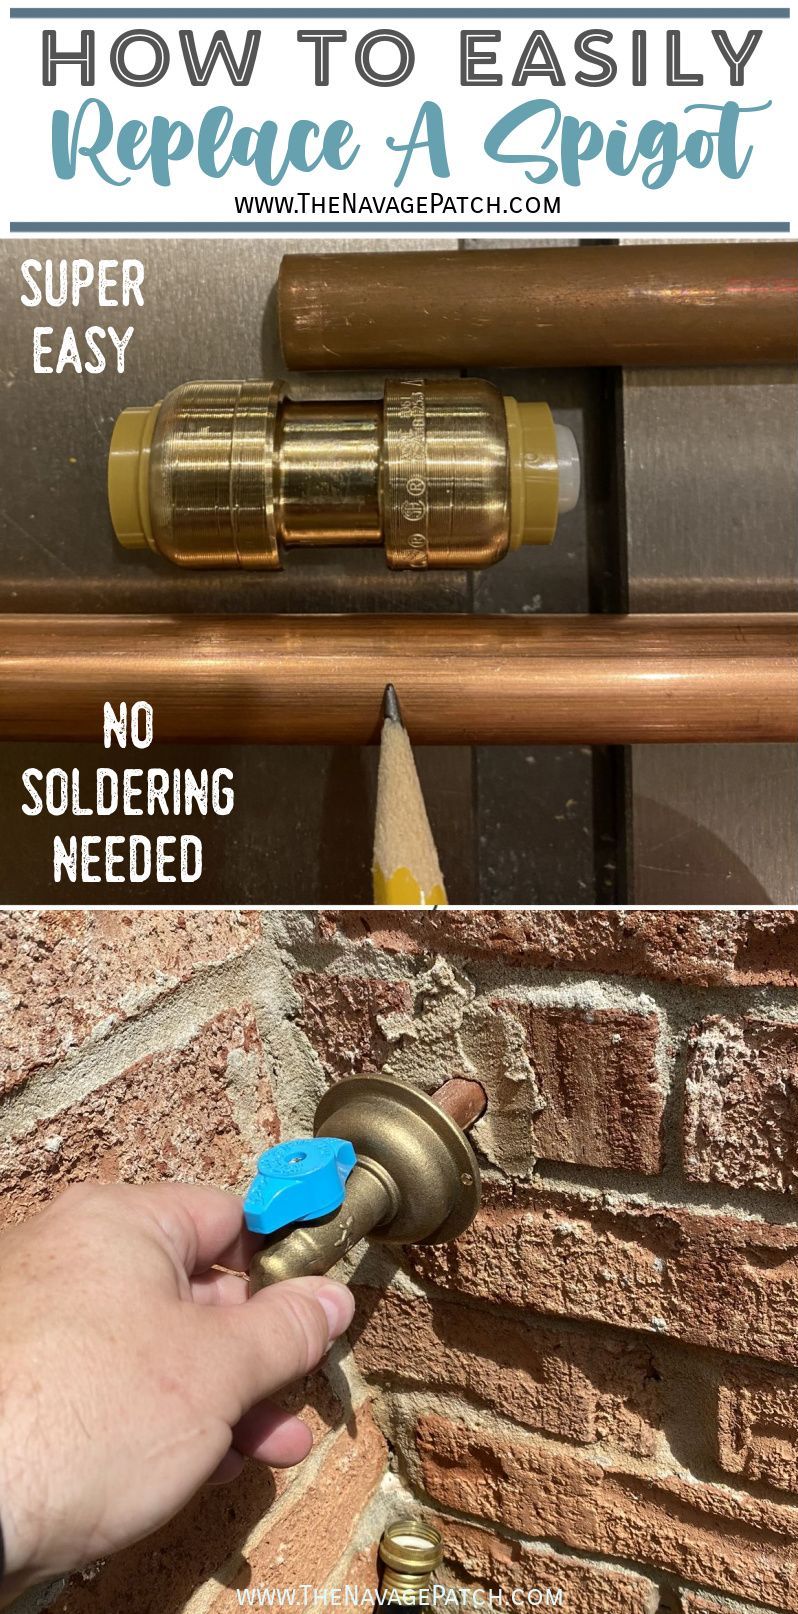
How to Replace a Hose Bib
Learn how to replace a hose bib the easy way. No soldering or fancy tools needed, and no need to pay someone to do it for you!
Did my hose bib survive the winter? Let’s turn it on and find out!
It’s one of the classic Rites of Spring along with will my lawnmower start?, what new species of weed is this?, and how much dog poop survived the winter and is waiting to be scooped?
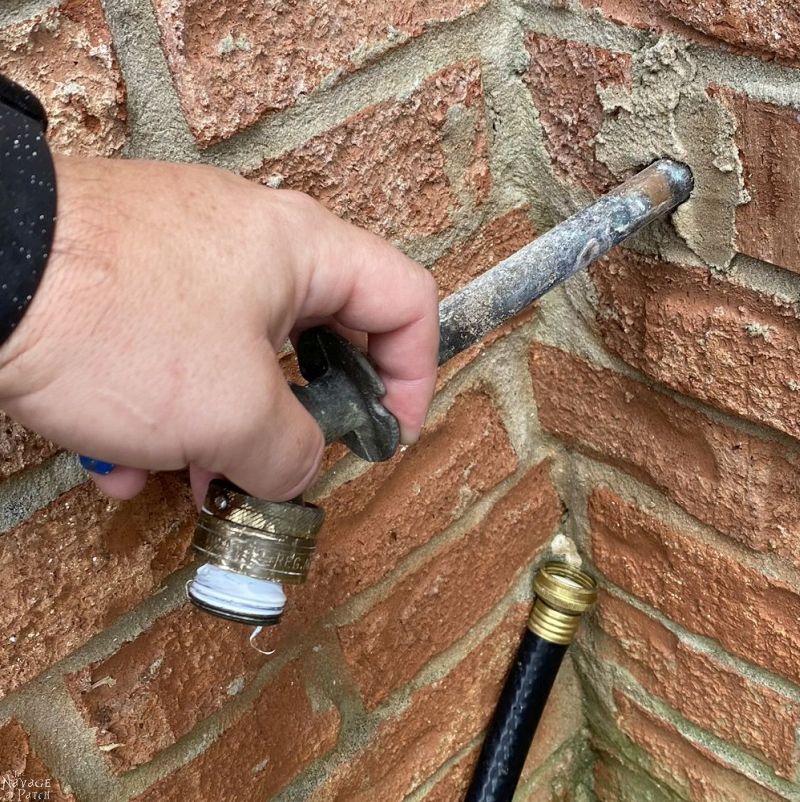
When we moved into this house in late spring of 2020, I had the pleasure of meeting this unruly and ill-tempered hose bib. Its old-timey blue handle was spackled with white paint or possibly bird shit. I considered either option equally likely. The spigot jutted from the house as if eager to escape its cramped quarters in a lonely corner of the front garden. But worst of all, at some point, someone had welded (or in some other way, made permanent) the gold-ish attachment to the main bib which served no purpose (as far as I could tell) other than spraying and soaking the hapless schlub tasked with turning on the spigot. This schlub learned his lesson the hard way after hooking up my hose and naively thinking I’d soon be watering my plants. The moment I twisted the blue wheel of misfortune, I was violently sprayed about the head, neck and chest with a cool, chlorinated blast of nourishing city water.
I closed the spigot (in itself a creaky and precarious proposition) and tried removing the mysterious golden protuberance with my middle-aged and weakening hands.
No dice.
I tried again with vice-grip pliers. Surely the unwelcome hose-bib parasite would yield to the mighty power of hardened steel!
Nothing doing.
It really had been welded on! I let out a stream of sailor talk and threw my head back so I could bellow to the clouds.
Why? Why do people do stupid things like this? Why??

I wiped the bleach-scented water from my face and stormed away muttering indelicate phrases while my eye twitched with fury.
Spray me in the face, will you? I mumbled.
Welded, are you? I grumbled.
We’ll see about THAT! I promised.
I ran to my car and hightailed it to Home Depot. Fixing was off the table. This called for a full-on hose bib replacement.
How to Replace a Hose Bib
(Note: it’s actually spelled “bibb,” but since I’m not only writing this tutorial for you, dear TNP reader, but also for the wandering searchers of Google, I’m spelling it the way it’s most-commonly searched. In fact, according to my search-engine sources, basically no one on earth searches for “hose bibb.”)
When I was younger and dumber, I once paid someone more than I care to admit to replace a hose bib that was all loosey-goosey outside the house. What a complicated affair it was with all the soldering! I filed the experience away and vowed that if I ever needed to replace another hose bib, I’d do it myself, and I’d find a better way.
And so I did. Have you heard of SharkBite? These are the guys who figured out a way to make plumbing easy.
Here’s all it needed.
Supplies to replace a hose bib
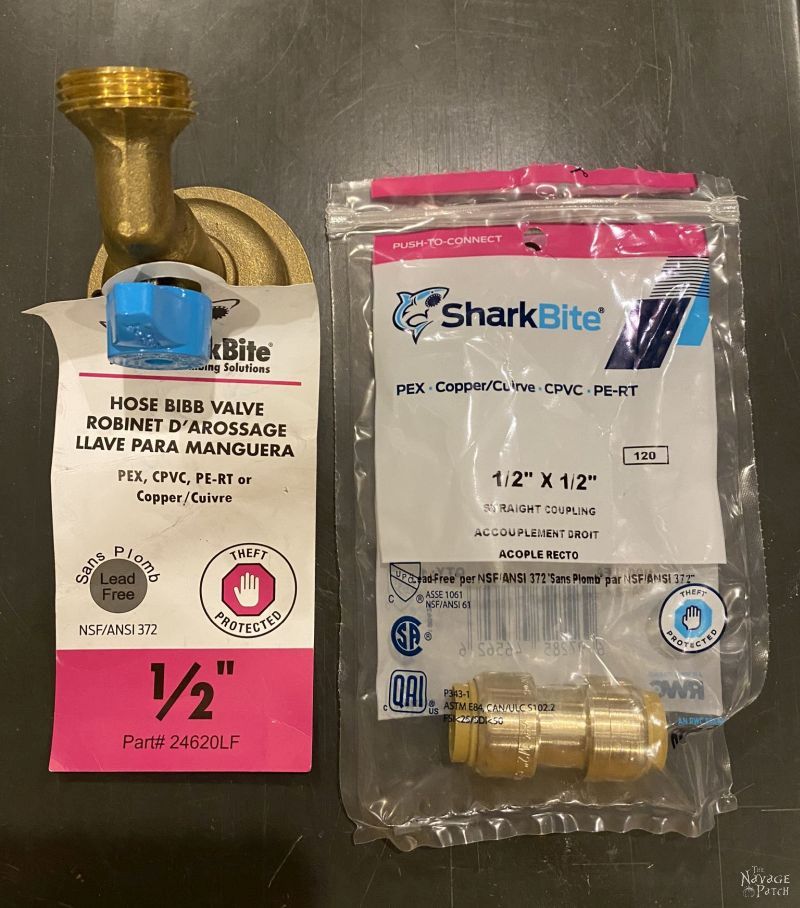
- 2-foot length of 1/2″ copper pipe (you may need more or less, but Home Depot sells 2-foot lengths for under $6. You may also have 3/4 inch pipe, so verify before purchasing.)
- 1/2 inch SharkBite hose bib (I’m a big fan of 1/4-turn spigots as opposed to the turn-and-turn-and-turn variety of yesteryear, but if you like wrist workouts, by all means, buy the old-timey type.)
- 1/2 inch x 1/2 inch SharkBite straight coupling
- Mini pipe cutter
- Outdoor caulk (optional)
Since this particular spigot was in the front of the house, I had to climb up on a ladder in the basement to access its entry point into the house. When I replace the backyard hose spigot later this spring, it’ll be a much easier affair, since the basement is walk-out back there.
Anyway, before doing anything, I turned off the water to this spigot. Every outdoor spigot has a shut-off valve somewhere just inside the house. It should go without saying that you shut it off before starting a job like this. Then again, I’m sure American hospital beds are peppered with dingbats who embarked upon electrical repairs without first de-energizing the work site.
*sigh*
So, in the interest of keeping yourself dry and warm, please turn off the water to the spigot before attempting to replace a hose bib.
Anyway, I cut the pipe about halfway between the joist and the 90-degree elbow. These mini pipe cutters are amazing for this sort of work. Just make sure you don’t cut off a section longer than the replacement pipe you bought.

With the pipe cut, I would be able to remove the old spigot.
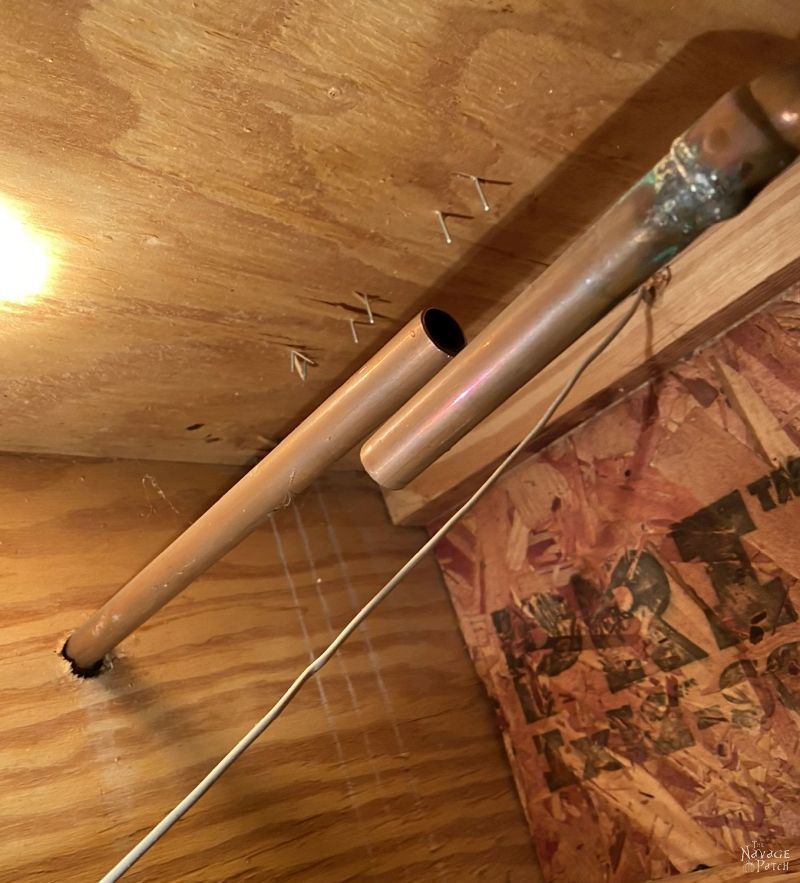
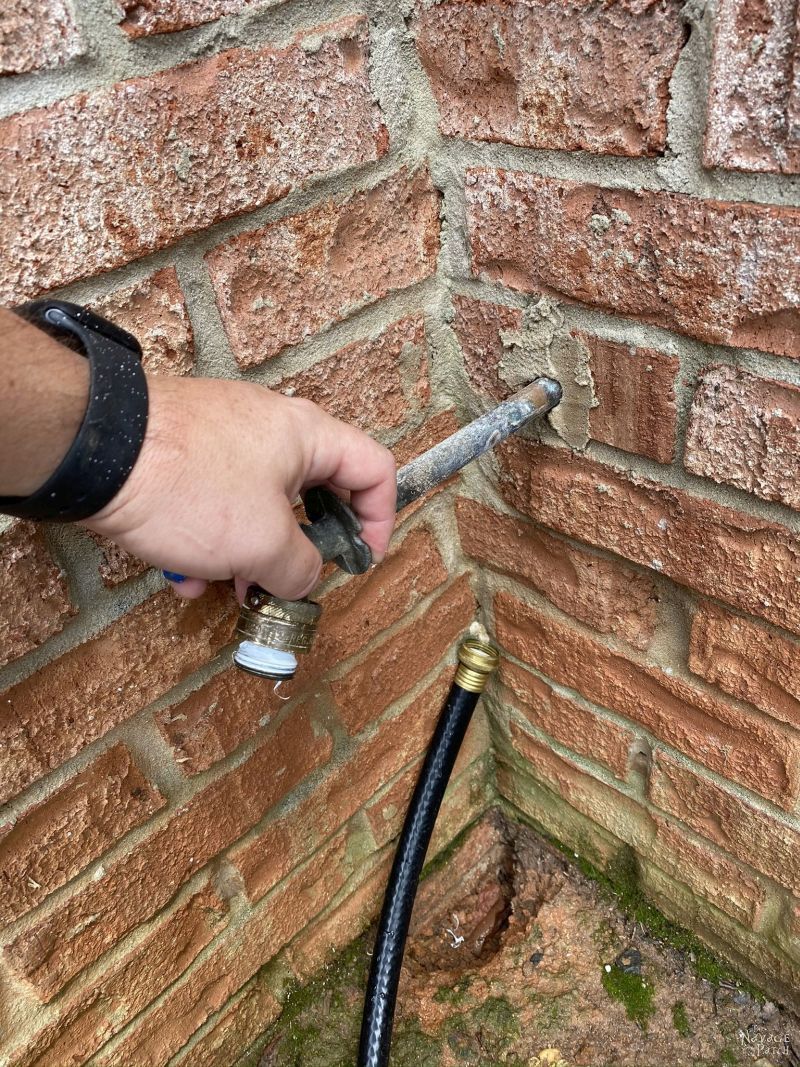
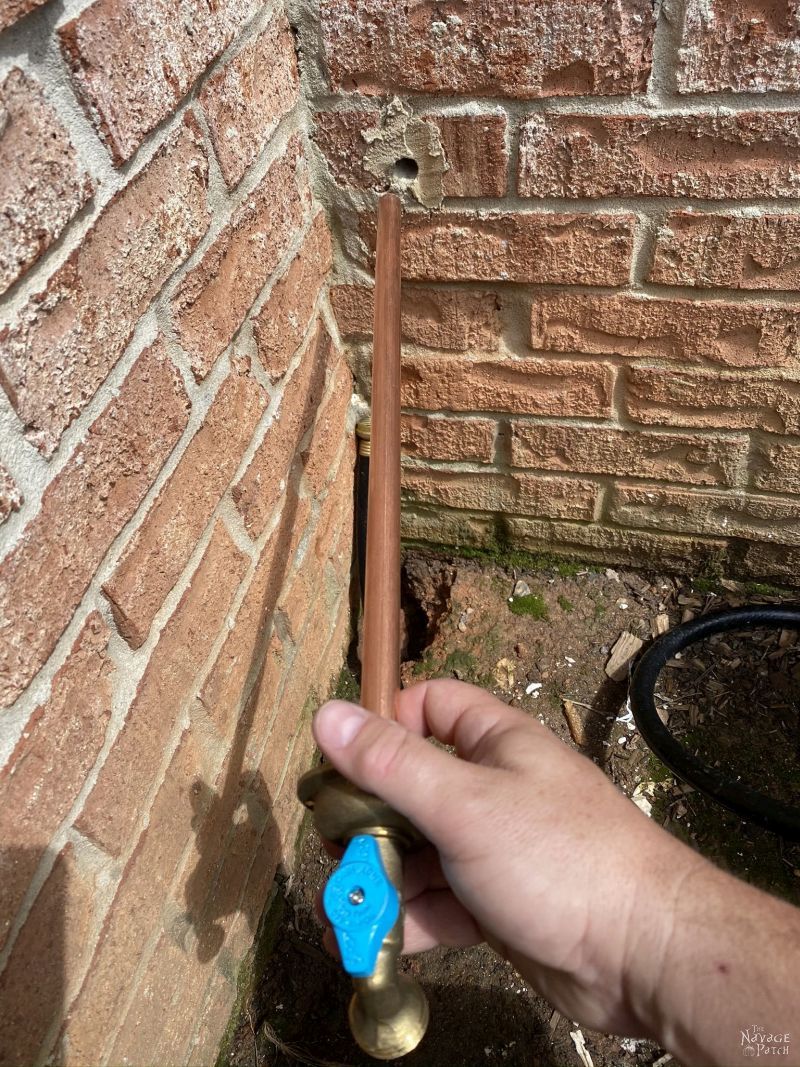
Back outside, I simply pulled the old hose bib and pipe out from the hole.
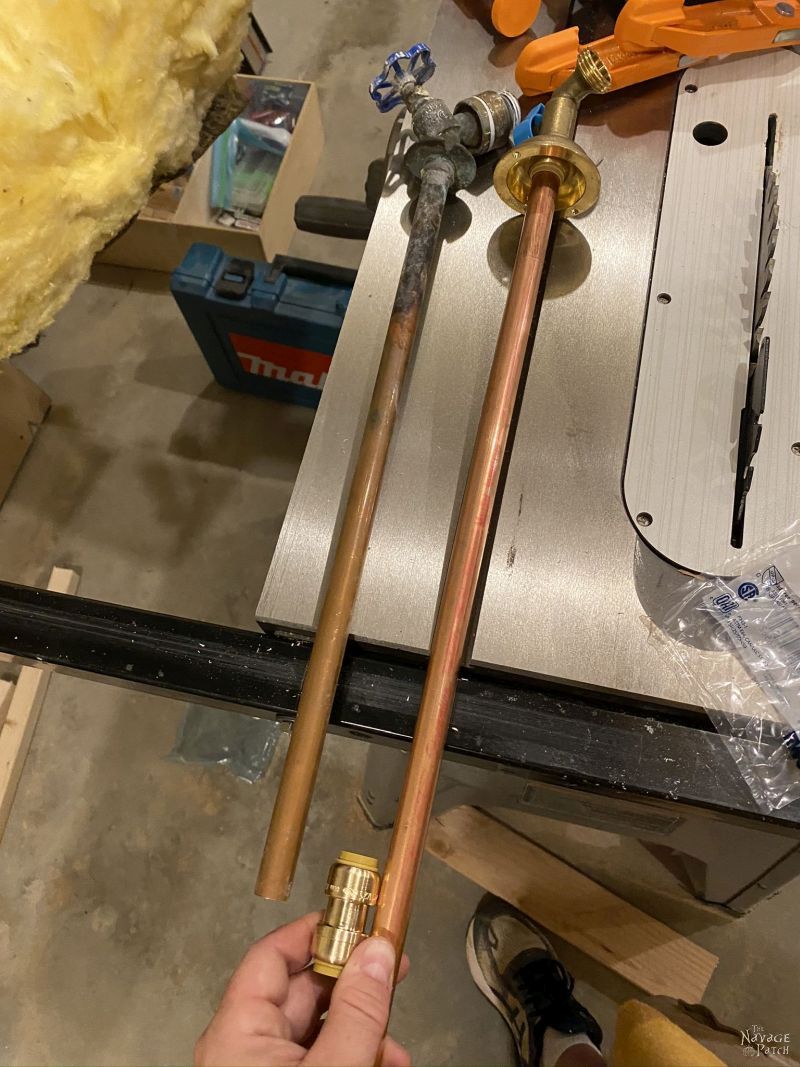
I laid the two pipes on the only work surface I had at the time (remember, this was just after we moved in, and I didn’t have any sort of workbench yet).

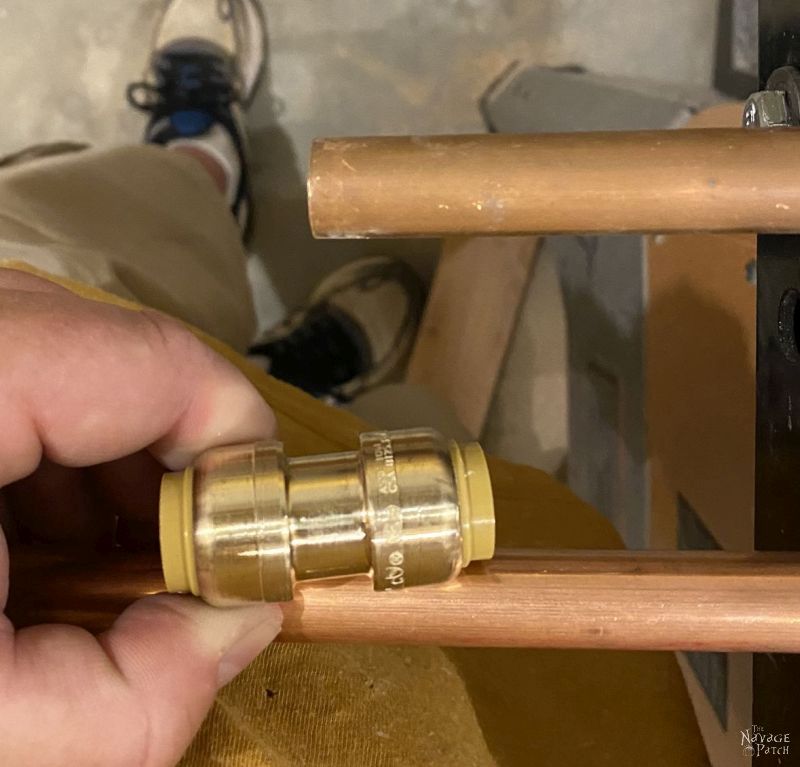
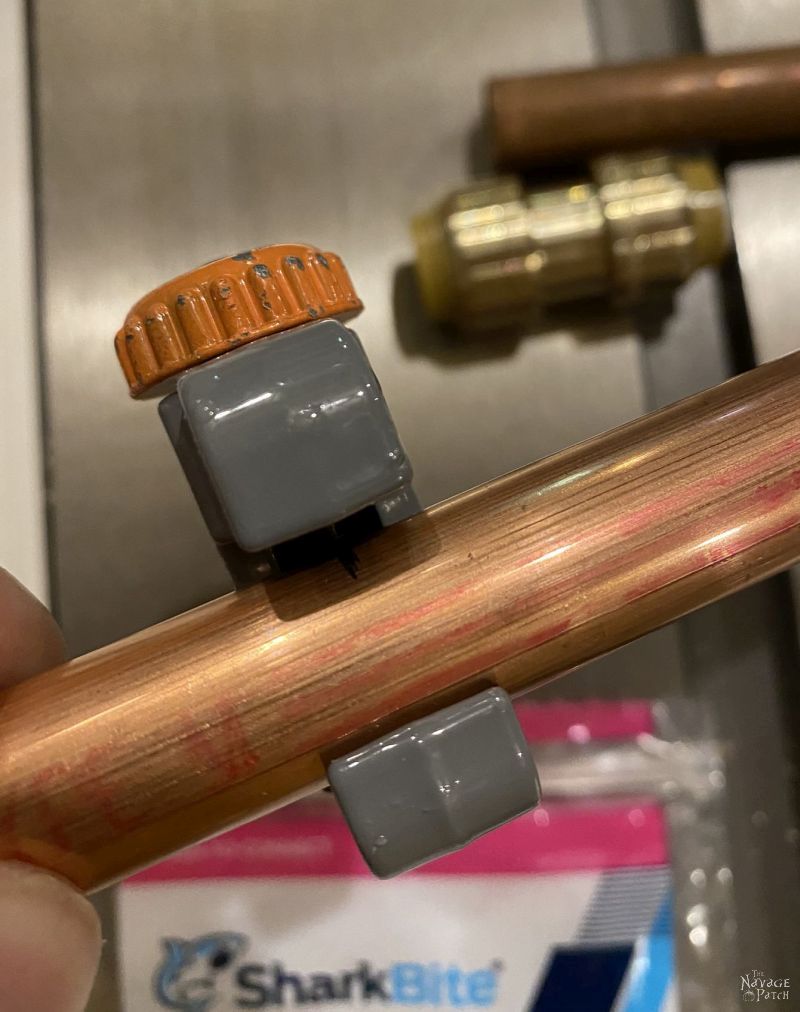
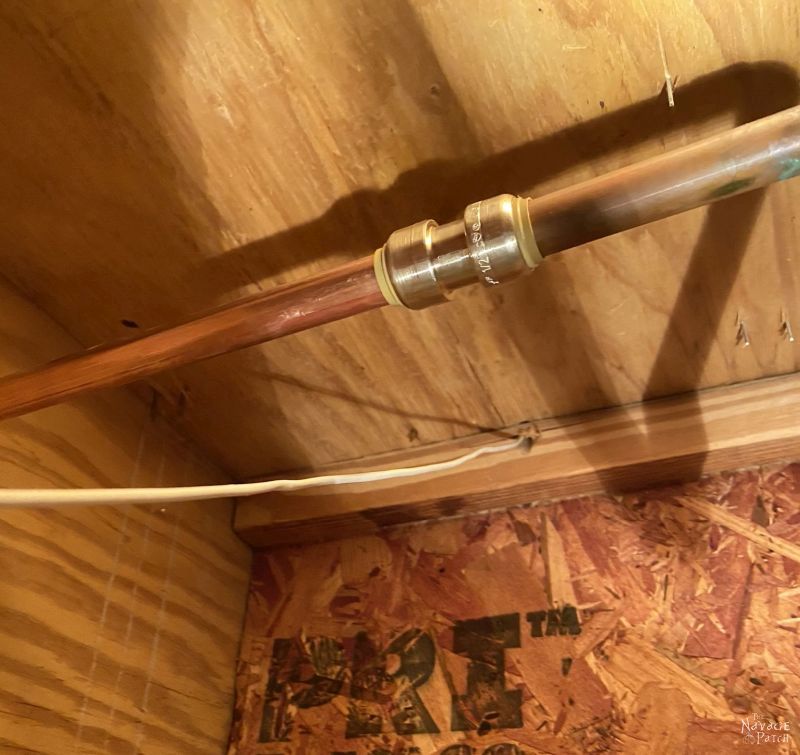
To one end of the new pipe, I attached the new hose bib. SharkBite makes it so easy. All that’s needed to connect the two components is pushing them together.
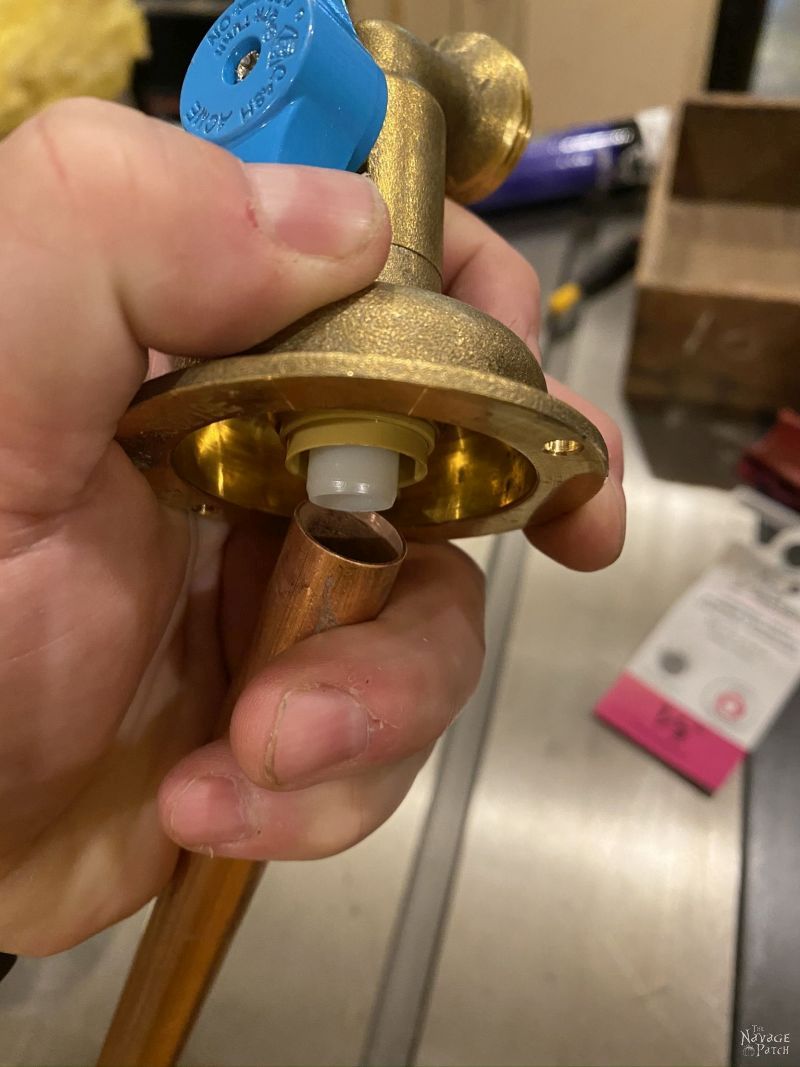
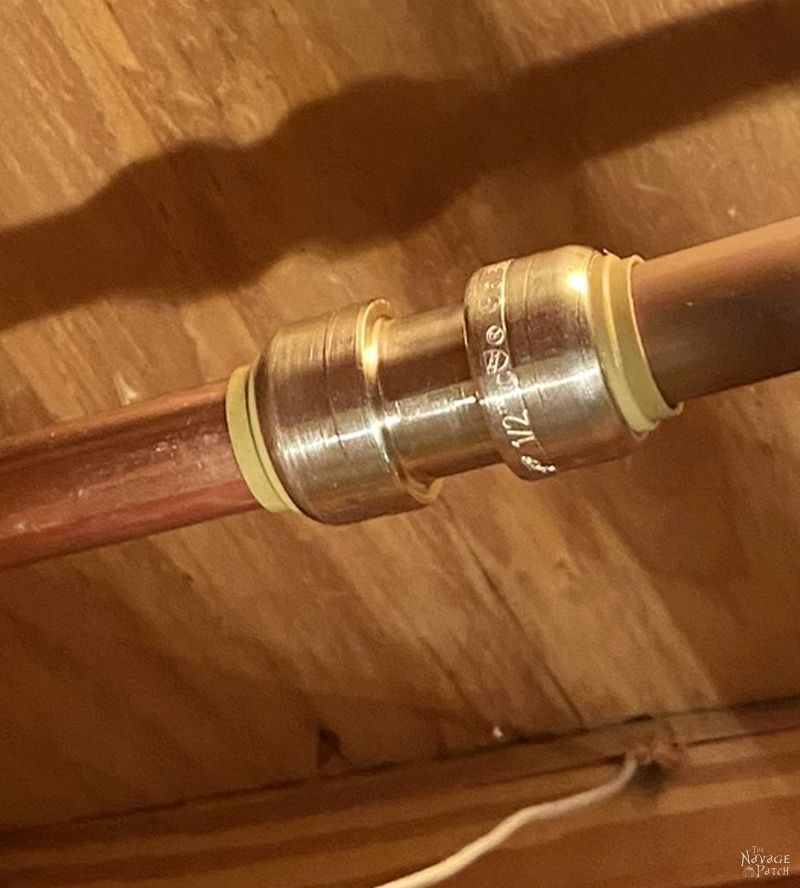
The straight coupling would connect the new pipe to the existing water pipe.
I lined up the old and new hose bibs so I could measure the pipe at the back end.
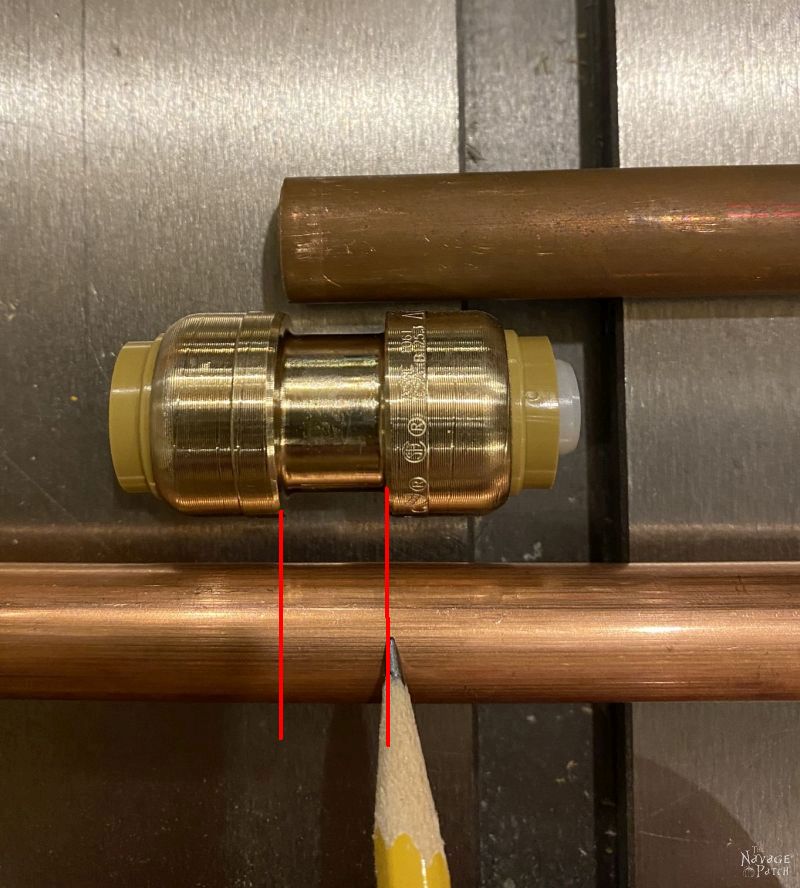
The coupling would add about 1/2 inch (because of the middle part shown by the red lines) to the overall length if I cut the new pipe to the same length as the old.
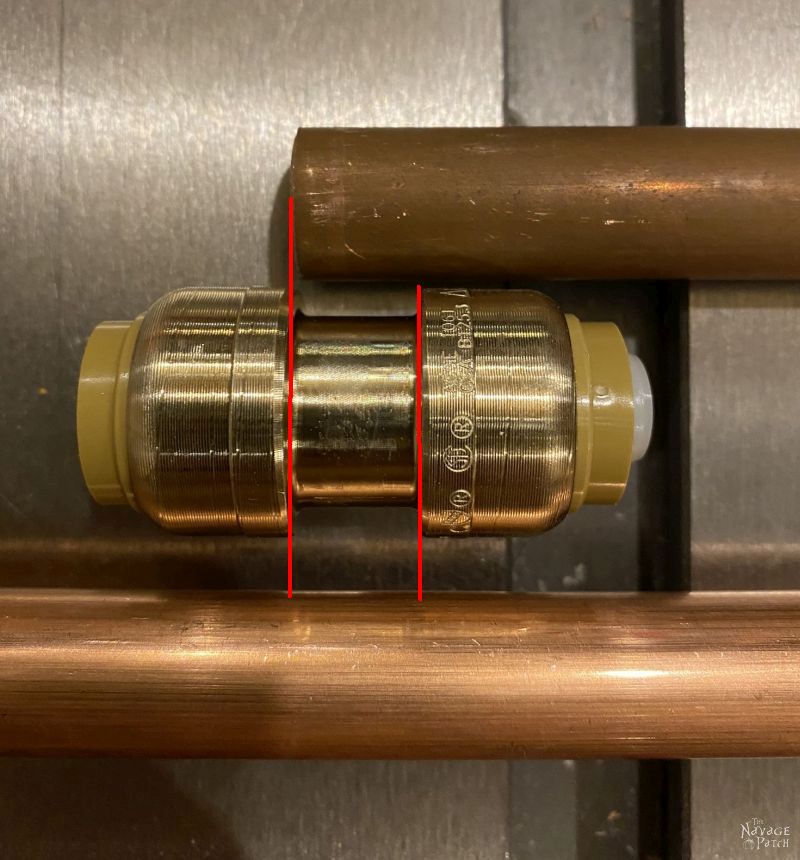
So I accounted for this by cutting the new pipe 1/2 inch shorter than the old one.
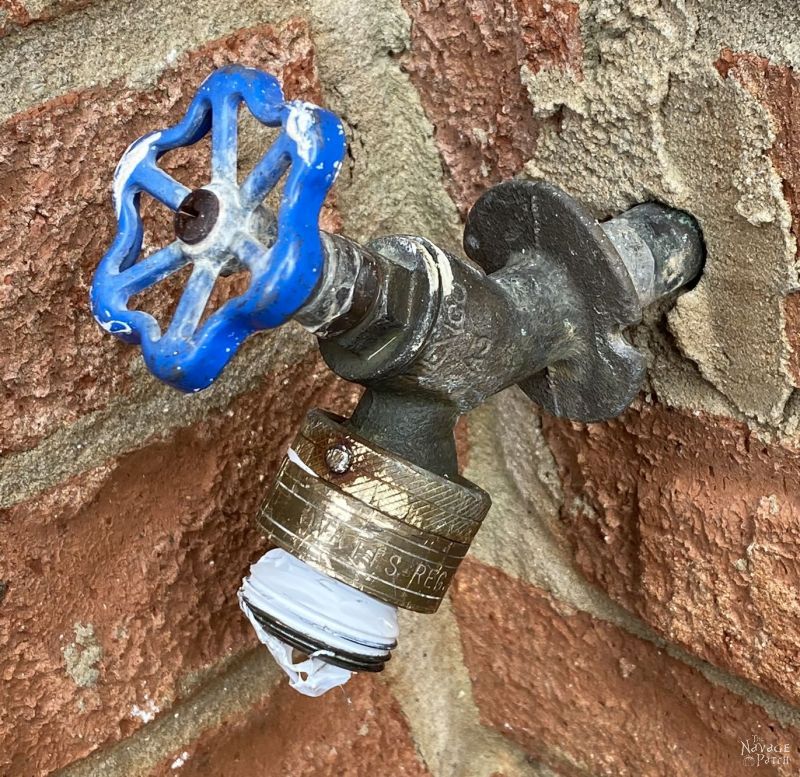
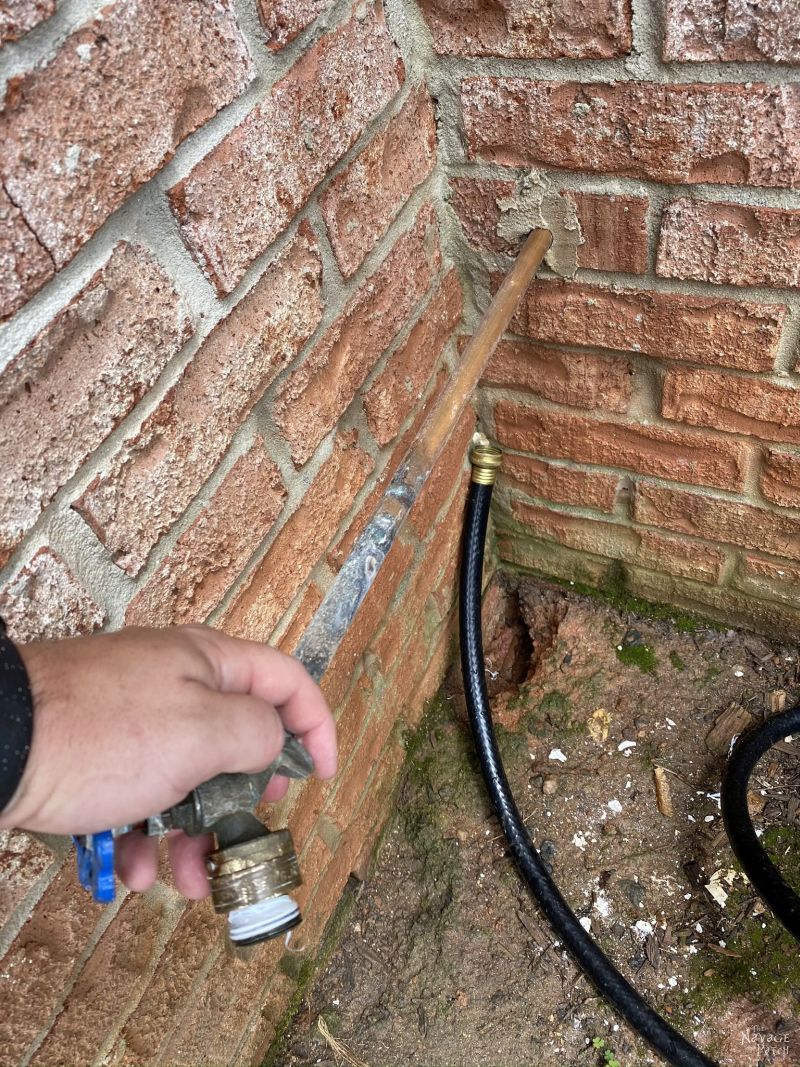
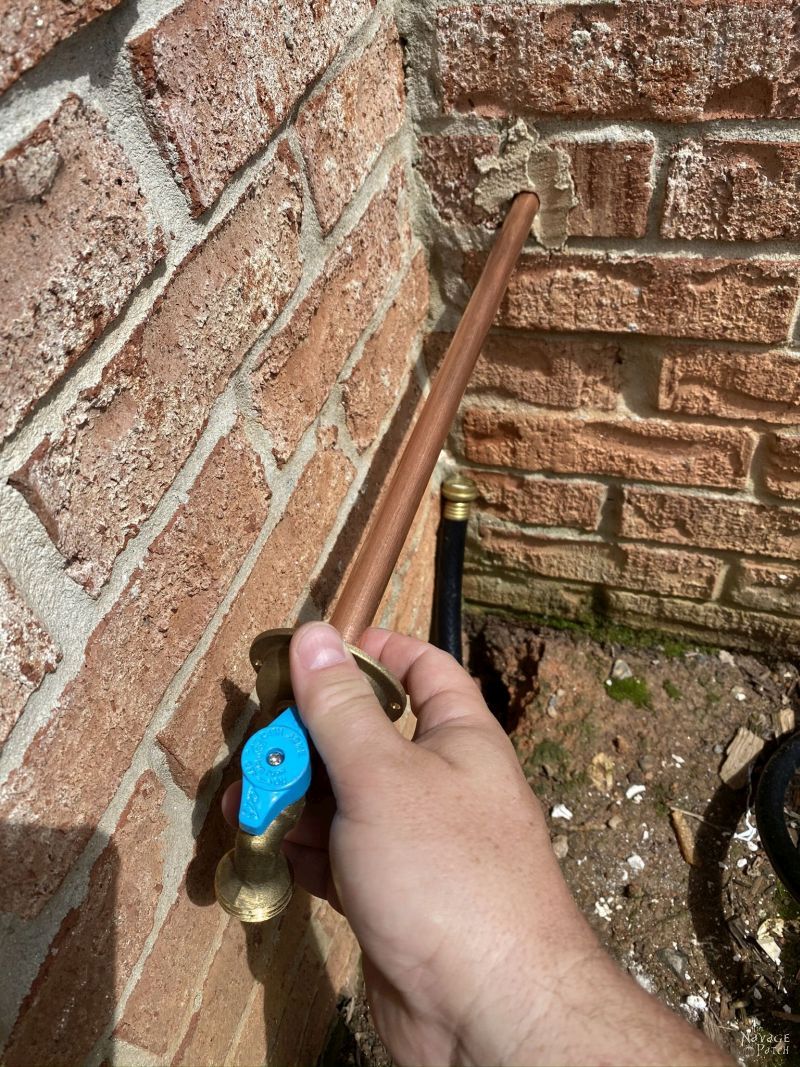
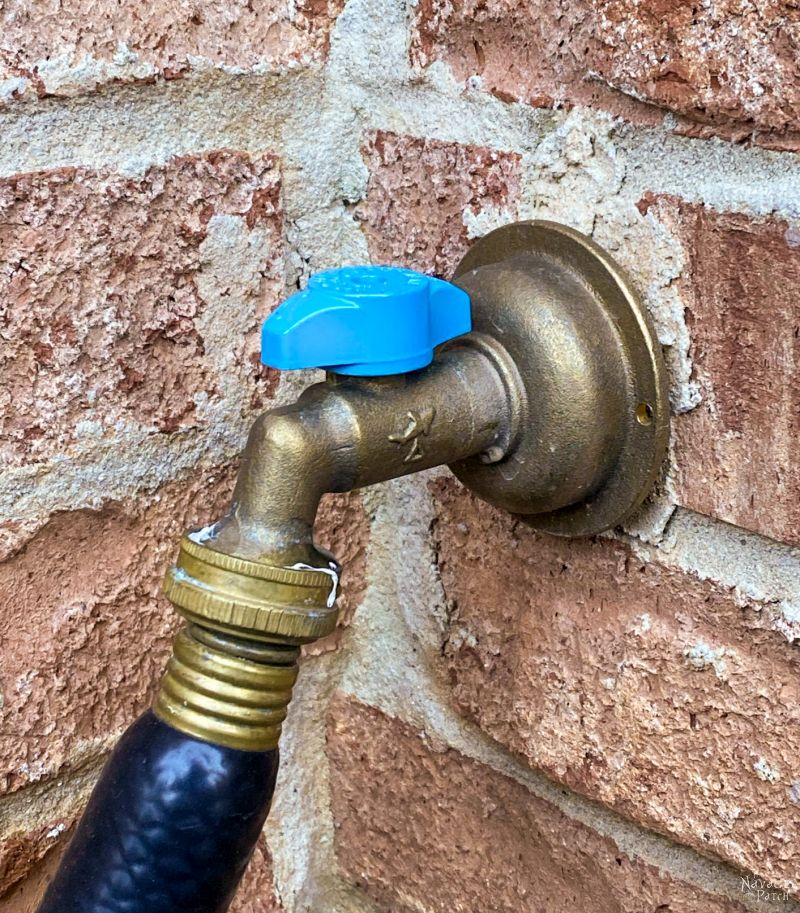
Back outside, I inserted the new pipe and hose bib back into its hole.

Then back inside for the final step of connecting the new pipe to the existing pipe with the straight coupling.
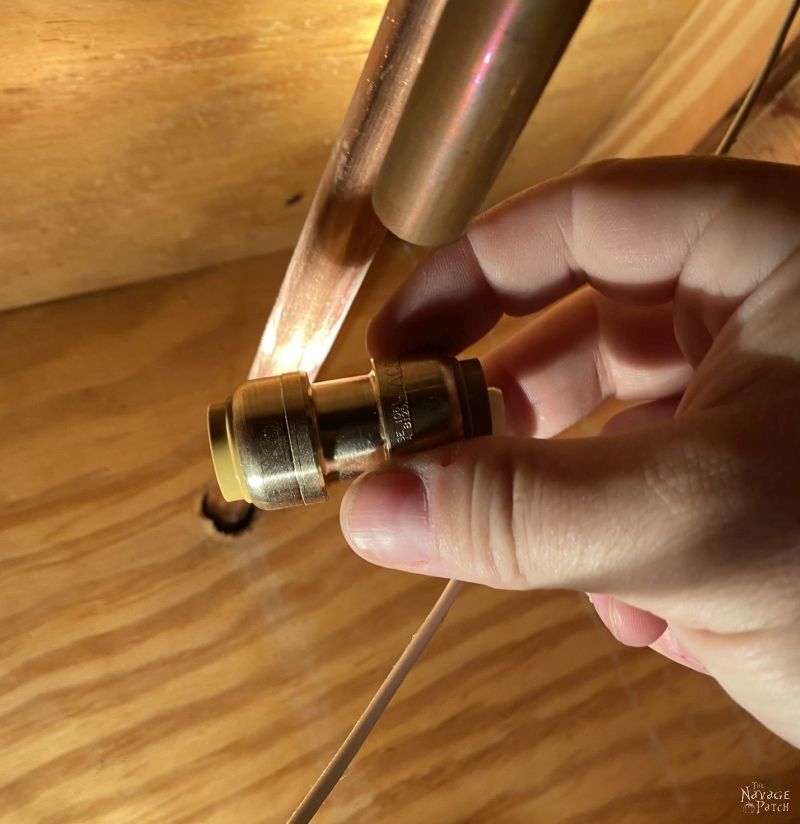
Couldn’t be easier! All told, this was about a 15 minute fix, and most of that time was figuring out how I was going to proceed. I’m sure I can do the back spigot in 5 minutes.
There’s really no need to hire a plumber or handyman for a job like this. As long as you have access to where the pipe enters the house, you can replace a hose bib yourself. This ranks among the easiest of home DIYs, but it’s one that many people might think is beyond their skill set because they see soldered copper pipes.
There are a few options on the outside at this point. There are screw holes to secure the hose bib to your siding. Because we have brick cladding, I decided against screws. Too many holes in one brick might cause it to crack. I did, however, put a ring of outdoor caulk around the hole that leads inside the house. Though it was already a snug fit, and there was no evidence of prior water leaks or insect incursions, best not to take a chance. Caulk secured the spigot, but I can still easily remove or replace it if I need to in the future.
We love it when you share our posts on Facebook and Pinterest!


I love posts like this! When my husband tells me, “We can’t do that. We will need to hire someone,” I run for my iPad, shouting over my shoulder, “Oh, yes we can—Greg says so!” I’m making a DIYer of him slowly, but surely!
LOLOLOL! I love this comment, Rebecca! 😀
Good for you. He’ll feel so much more confident with each successful project.
SharkBite is simply magic!
I am also using lots of PEX tubing now, especially where there is a chance of freezing (I am in Maine) because it won’t burst.
This is a great tutorial! We have a leaky spigot leaking into our foundation. At the moment, we have renters in our house, so I’ve asked them to please keep the faucet turned off from the shut-off in the basement.
We’re moving home this summer after almost 7 years of living abroad, and I have a long list of home projects! Your tutorials have been so helpful, and this is one I can add to the list of conquering myself. Thanks!
Oh good! It’s so easy, Tammy. And to think of all the hundreds of wasted dollars people are paying to handymen and plumbers to fix such things!
New ad is covering 1/4 of your text and I cannot read your blog.
Thank you for letting me know, Kim. There is an ongoing issue between Google and our ad provider. This should have been sorted by now. I’m so very sorry. I will be immediately following up with our ad people.
I so agree with Rebecca’s post above. This is why I read The Navage Patch. Except I’m single and HATE to be at the mercy of an “expert”. I too have paid a small fortune in the past to have a hose bib replaced. But never again. Thanks Greg!
You are so very welcome, Carla! I’m so happy you guys liked this post! 🙂
We actually recently replaced ours with the same thing! LOL. The original always leaked too. We had added a quick-release/change tip thinking that would make hose removable and replacement easy. Ha. It would blast off the hose every time I turned the spigot on. My poor neighbors got a preview of how inventive I could get with the F-bomb when I was trying to use the hose one day. (They had the misfortune of pulling into their driveway across the street as I was yelling at the hose.) Hubby fixed it and I like this knob so much better than the round one.
Great minds think alike, Laurie! 😀
That funky gold thing welded onto the end is actually an anti-siphon valve–required by code here. We just built and the plumber told me there is a little set screw inside that the inspectors break off so that the homeowner’s can’t remove said valve. Truly a pain in the you know what.
Jeezum Crow, is there any part of life the government won’t stick its nose into? I just Googled it, and right you are, Dionne. I also noticed that almost all of the Google entries are either about fixing a broken one or getting rid of the infernal thing altogether. The consensus: it’s a terrible device! Good riddance to bad policy!
We use those anti siphon valves (also called vacuum breakers, I think) at our homes in Arizona and Texas. They keep water from flowing back into the pipes (if you have anything yucky in your hoses, you’ll be glad of that). The ‘welding’ is possibly from the fitting corroded into place. I had a plumber tell me to periodically unfasten hoses and fittings so that wouldn’t occur. I haven’t been very good at that 🙂 That said, I have a leaky hose bibb that I was going to look up how to replace, so your post is perfectly timed, thanks for showing us this!
I’m glad you found it useful, Patty! Good luck changing yours, and thank you for explaining what that silly thing was used for!
Vacuum breakers are required by national laws to help keep water supplies potable unless the spigot has one built in. And the reason they get stuck is the set screw. It breaks off or gets corroded in place. Usually the former. You have to drill out the set screw to remove them. Not hard, just a bit fiddly. Drill out the screw (being careful not to go too far and damage the bib), take off the vacuum breaker, put on a new one and move on. The spraying stops. It happens when they get old and the valve inside fails. So yeah. Just get a new one. Seven dollar repair. And then just don’t put the set screw in. Or replace it with a better one. Easy peasy.
I need to replace mine and was dreading the plumber scheduling! Can totally do this. Hubby replaced the bibbs once already and so I know it can be done – I’m up to the task myself!!
Awesome! Good luck, Laura! 🙂
Greg, I will never have a need to replace a hose bibb, but I read your tutorial because I LOVE your writing style! You are so funny and very clear with your explanations. Hannan is great too. I’ve been following you for some time now and had to finally write. God bless you both and keep up with the great humor and sharing your creativity!
Thank you so much, Donna! Our blessings to you and your family as well.
Thanks, Greg!! Beautiful timing – perfect, in fact. The freeze we had last month ruptured the 6 inch pipe for our outside spigot, which had been leaking, and in need of replacement anyway. I knew it was a ‘me-do-it!’ fix, but was still a little nervous. But, I have chickens and goats that need water, and hauling buckets is NOT my idea of working smart. Now, I feel confident in doing it, myself. W00t!
Awesome! Happy to inspire, Carla. Good luck! 🙂
So I’m reading this posting thinking to myself “but it’s just a little solder”. My dad taught me to solder pipes a long time ago and the other day when we had a bib go bad, I was out in the dark with my sandpaper, propane torch, flux, and lead free solder. It’s a little slower, but one thing that bugs me about Sharkbites (and Pex) is that all the fittings are inside the pipe, which reduces the volume that flows through it. So a 3/4″ pipe is effectively reduced to 1/2″. (I may be bitter about a whole house replumb for my dad that I paid for. When they were done, I started crying because I felt like I paid thousands of dollars for the plumbers to ruin the house. We had more pressure and flow when we had a constant leak. I am now resolved to replumb the house myself with rigid copper and solder fittings). Anyway, should you ever decide to embark upon that route, it is super easy. You can even shoot me an email and I’d be happy to help/offer advice.
If you have the means and method to solder, by all means, Rachel! There’s no denying the volume restriction of SharkBite, but for a quick hose bibb fix with two connections, I have not noticed any appreciable drop in pressure. The following chart is taken from Sharkbite’s engineering specs. I’ve only included the chart for 1/2 inch fittings, as that’s what I used. Since I’m not a engineer, I can’t say from that chart whether a 1/2 inch SharkBite fitting effectively turns the pipe into a 3/8 inch, but I’m thinking it’s not quite that severe. But again, I don’t know for sure. That said, I wouldn’t do a whole house with SharkBite. I’ve only used the fittings for sinks and this hose bibb. If I were to plumb a house, I would buy soldering tools and learn how to use them. Thank you for bringing up the flow and pressure reduction – it’s an important point that people should know about before going hog wild and re-plumbing a whole house with SB!


Oooh, That’s a great chart! Thanks for finding and sharing.
Also, I feel like my first comment tone came out poorly and wanted to apologize. I was going for a tone of me realizing that I was raised differently so things that I wouldn’t think about normally, it’s cool to see how others do it differently.
I will say, your method requires a lot less sanding of copper. I hate sanding pipe.
Anyway, thanks for responding to me 😀 It’s so much fun to read your blog (you help me get through my day job) and gives me inspiration and determination to do my own stuff.
No apologies necessary, Rachel! You are correct that solder is the better way to go, if you either know how to solder or don’t mind paying someone who does. SharkBite has its place in DIY plumbing, but only for limited fixes. Certainly not something you’d want everywhere, unless, I guess, someone with a better understanding of fluid dynamics than I designed the plumbing system from step 1 to be SharkBite. Sanding copper? Man, I was actually considering learning to solder until I read that part, lol! 🙂
I just ripped out a whole bunch of old copper from our basement and put in a manifold (2 actually). I ripped out two hose bibbs both of which had split copper from freezing. There is no pressure loss of any significance as the PEX is less friction and flow is just as good as with 1/2 copper. Where there was copper not easily taken out (into bathroom) I used a sharkebite with very good results. I will put in tomorrow a front hose bib using a pex sillcock directly run to the manifold inside. I was going to use a long frost free but since it will go short to the manifold I will just turn the valve of in the winter and leave the tap open. That saves me the cost of a sharkbite and the frost free spigot (saving $30 about).
The post is superb and very helpful Greg. I encourage anyone to follow your approach or similar. I would suggest getting a pex angle valve at lowes (https://www.lowes.ca/product/shut-off-valves/12-in-x34-in-dia-brass-pex-barb-x-male-thread-sillcock-angle-valve-802863) then run a bit of pex into the inside sharkbite instead of the copper. So easy these days! Thanks again.
Wow, that is a serious undertaking, Dara. My hat’s off to you!
I swear by SharkBite. It’s the easiest plumbing things you could ever ask for. It’s so easy to work with.
Agreed, Ellen!
Absolutely. Combined with brass crimped PEX fixtures it is the best solution. I use the PEX/crimp where possible as it is much much less expensive and so easy. Sharks where connecting to copper is super as you don’t have to drain out completely either. For me it was about adding shut off valves for the various parts of the house. Dara
Now, what garden hose is actually kink free? I’m tired of buying a new one every year or so because they all kink and I’m of an age it’s time to get unkinky.
This is the best kink-free, lightweight hose I’ve found so far, Cheryl. I have 3 of them (though in this new house, I only have two outdoor spigots!)
The piece welded on prevents backflow, keeping water and dirt etc from returning back towards the plumbing system when it turns off. So it did serve a healthy purpose, but I have zero clue why it would be tack welded on lol. But yeah, if you looked at the bottom of the fitting you should have seen little holes around the base to allow the water to escape. If any is being vacuumed back towards the spigot.