Laundry Chute Makeover
First things first: I lied.
A little.
Well, not so much an outright lie, but a lie of omission.
And it’s really less of a lie than it is a fib.
A little fib. A harmless fib.
Because here’s the thing – I told you in our Laundry Room Remodel Plan post that I had painted the walls already.
Well, that’s not a lie – you can clearly see they are painted.
But what I didn’t tell you…what I omitted…was that the laundry chute makeover was already done.
(Otherwise, why would I bother painting the walls first?)
I just wanted to clear the air, in case any of you Astute Astrids, Detail Debbies and Noticing Nancies notice that the walls are still yellow in the process photographs. How could that be if we only just started the laundry chute makeover, yet I already told you I painted the walls?
The resulting scandal would be entirely too…well, scandalous! Tongues would wag, madam! Tongues would wag!
And since I’ve now lashed myself to the Altar of Truth, I may as well ‘fess up once more.
I had help. Professional help.
I’ve done my fair share of drywall installation in the past few years, but it remains my least favorite DIY activity. So when our tile guys were here putting the finishing touches on the kitchen, we hired them to drywall the old-door hole, inside the chute and out.
(I really don’t like drywalling.)
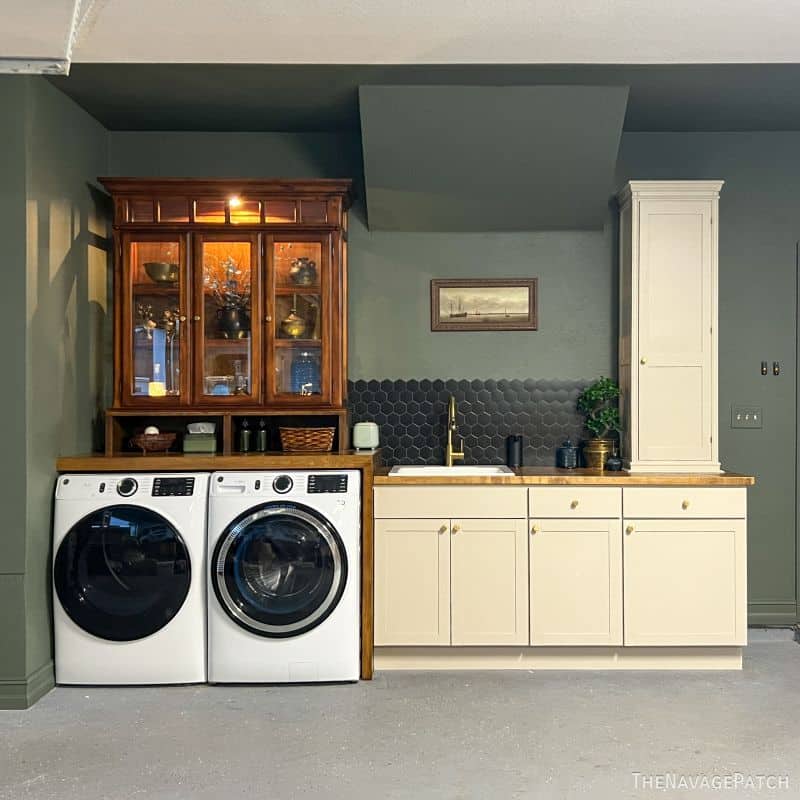
Besides, I have a totally legit excuse! At that time, I was totally busy building the dog feeding station/beverage bar/seasonal display area. You know, this one:
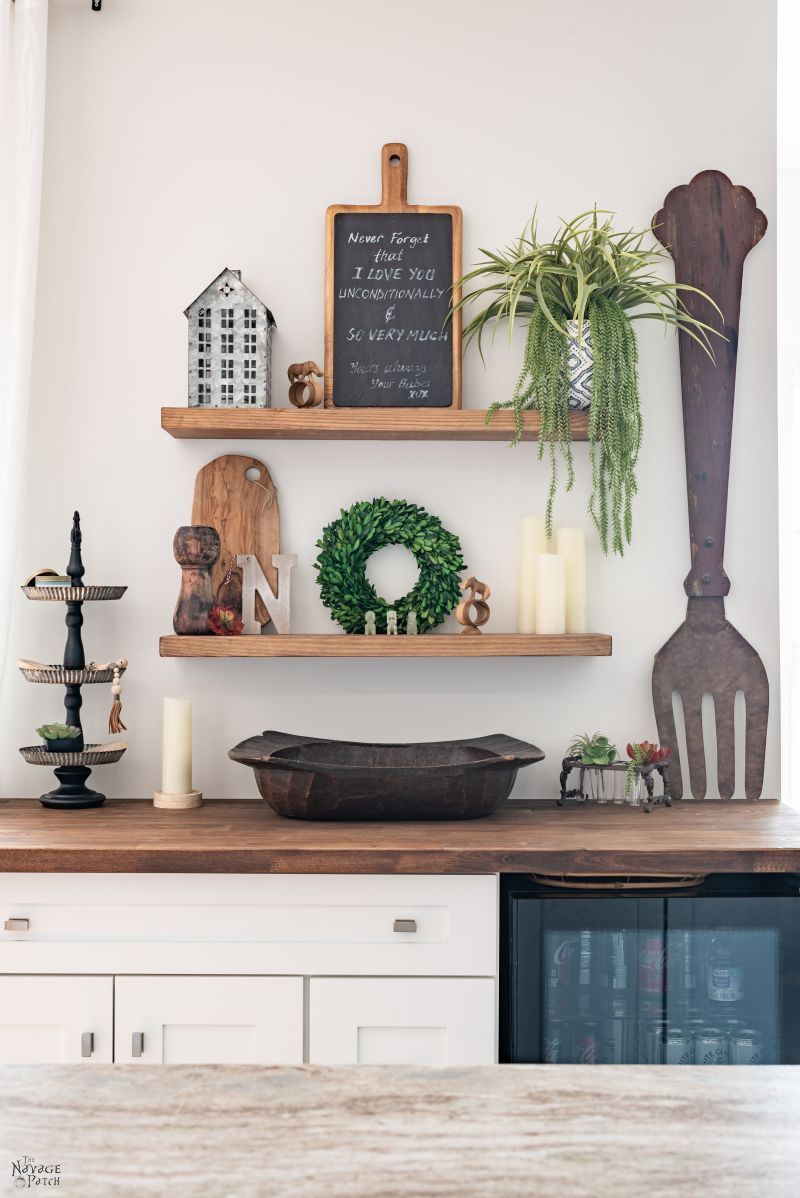
I already showed you how I built the Floating Shelves, and soon I’ll show you how I built the rest.
So to sum up: I’m a Little Fibber, but I’m also well-stocked with totally legit excuses!
Another thing – the laundry chute is in a tight corner, and it’s not the easiest place to get a decent photo, so cut me some slack in the photography department, will ya?
Good. Now let’s a have a look!
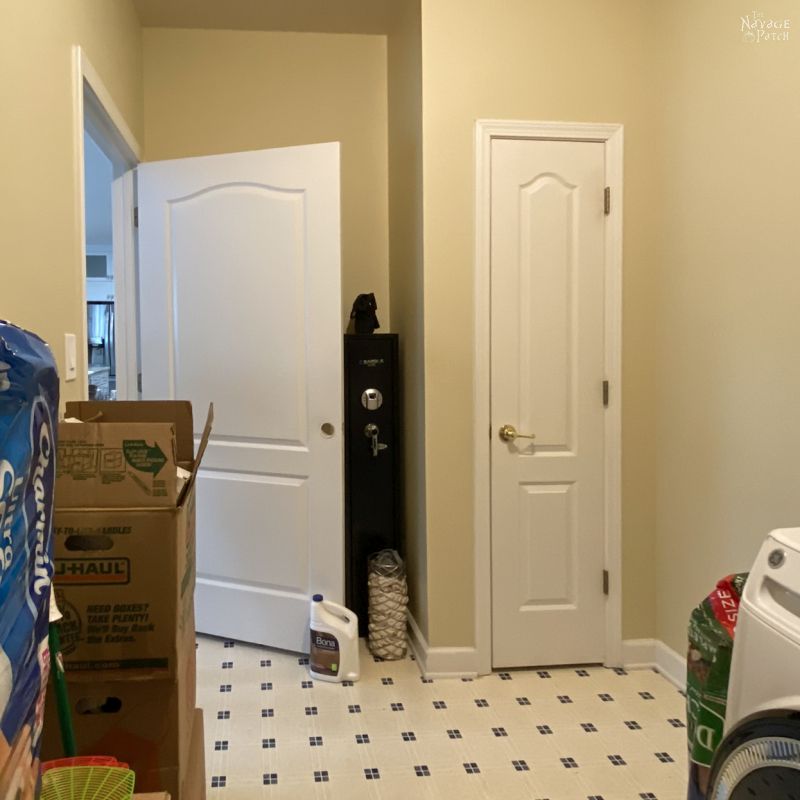
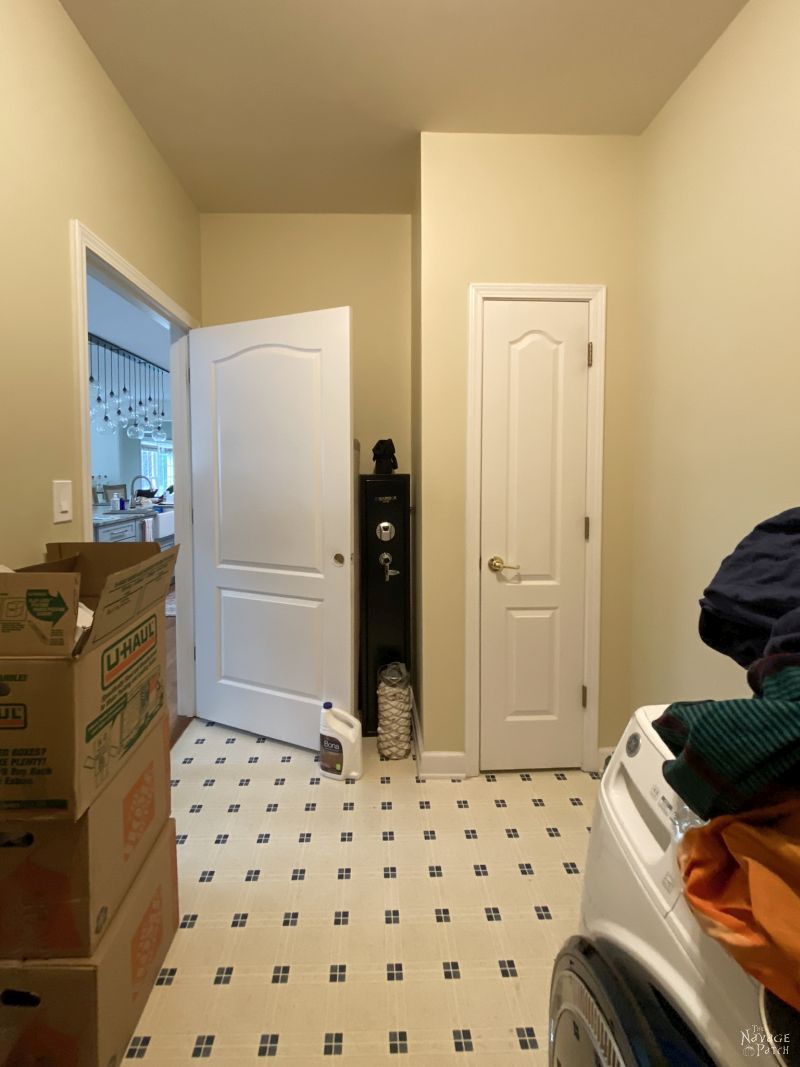
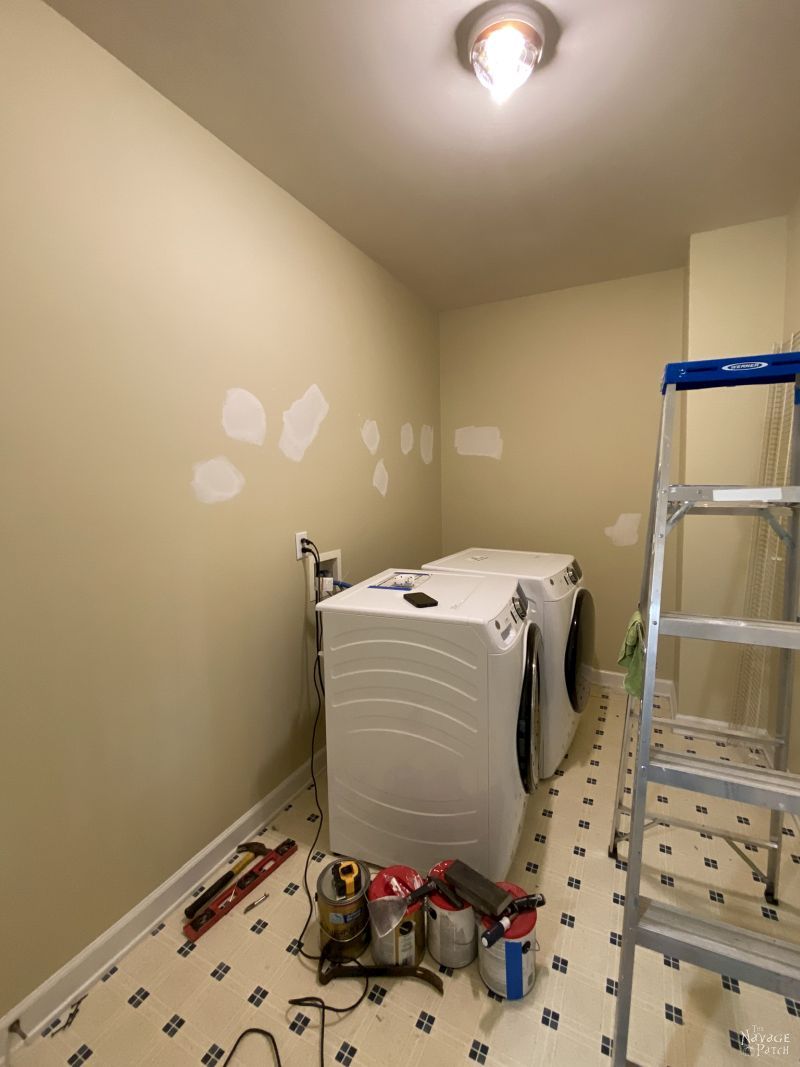
Remember, this is more or less how we started:
I’m not the most experienced Suds Buddy, but I can’t imagine this is the most efficient design for a laundry chute.
The inside looked just like that of a closet – namely there was a small space and the same linoleum floor. So all of Handan’s smelly socks and all of my rose-scented unmentionables ended up in a big, commingled pile on the floor.
The floor, madam.
What good is this monstrosity of laundry chute if I’m still bending over and snapping my Calvin Kleins towards the washing machine like an NFL center?
At my age, I’m actively looking to minimize the time spent bending over.
On a side (but related) note: do you remember what age you were when tying a shoe became a strenuous activity?
Anyway, I’d rather carry a full hamper downstairs instead of bending over and pawing through a big, stinky pile like a dog digging for bones in the yard.
So the plan was to move the door around the corner and put in a shelf. My back was feeling better already!
Here’s the inside of the laundry chute. As you can see it is about the same size as a mid-range Manhattan apartment. I briefly considered renting it out to a Millenial or two, but I wasn’t sure if they’d be okay with the persistent rain of socks and underwear.

Progress. Look at all that wall space we opened up!

If I thought the old door was narrow, the new opening made it look like the gates to Buckingham Palace.
We were constrained by the two existing studs, and unfortunately, there’s not a door sold in America for such a narrow opening.
Not a problem – it just meant I’d have to DIY one.
And since Handan wanted that shelf in there, we decided I’d be making two doors.

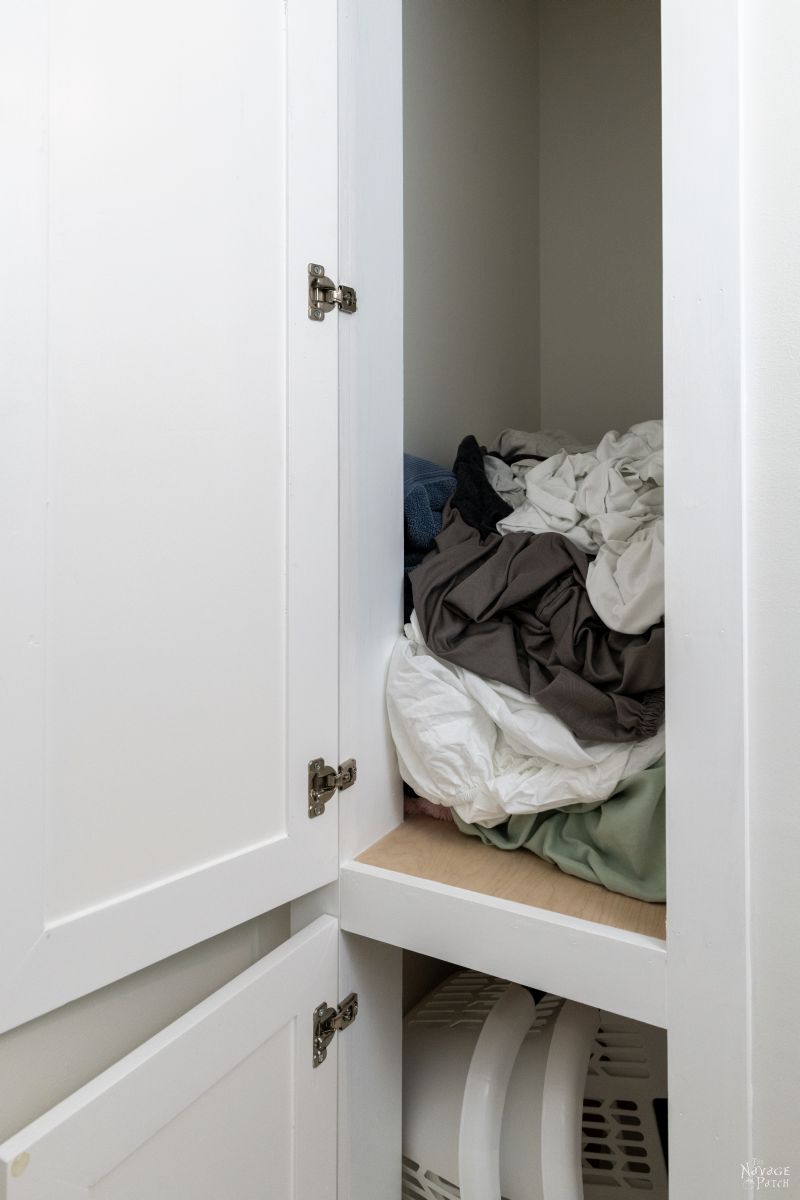
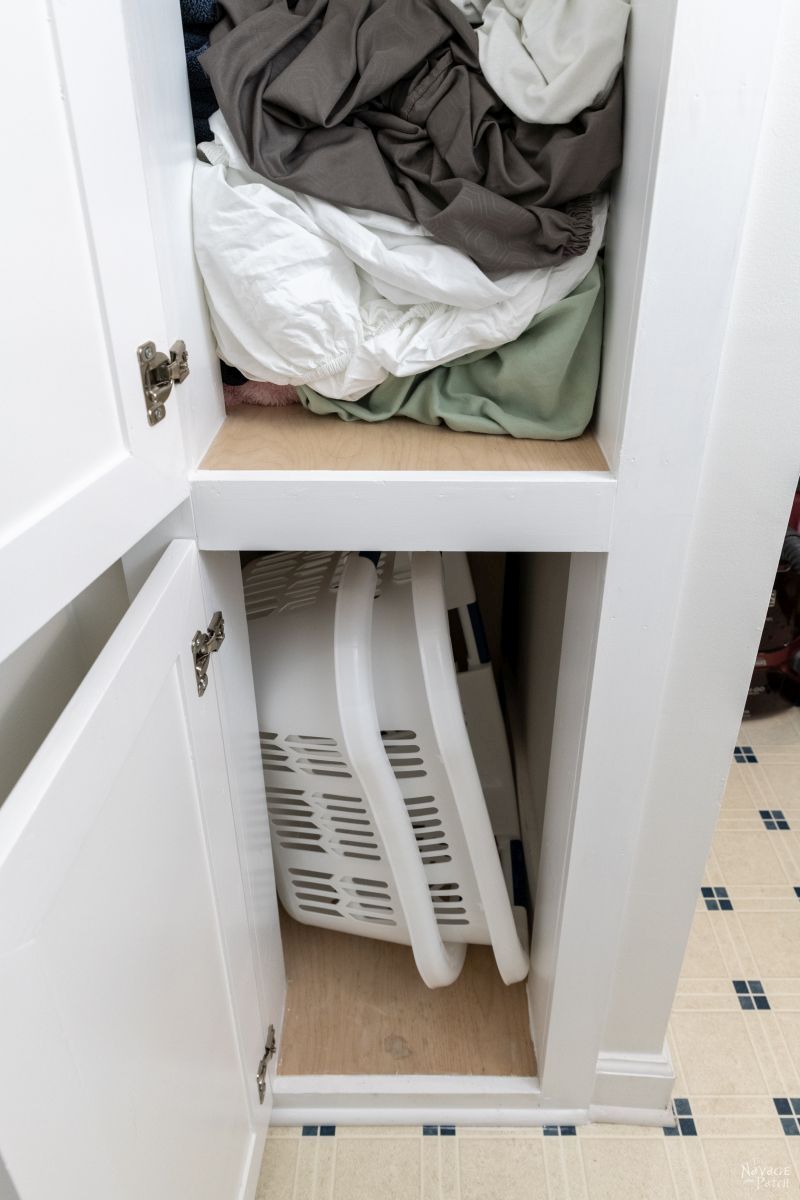
Here we are with the linoleum and baseboard removed. From here, I took over and built a plywood base – pretty much identical to the first shelf of a base cabinet. I then built a shelf about 3 feet up from the base. This would be the new dirty laundry depository.

I apologize for the lack of pictures. I was involved in the work, and Handan was on a non-stop parade of Zoom meetings that day.
After building the shelves, I turned my attention to the walls. I removed the wire shelf that came with the house, repaired any holes I found and then painted them with Sherwin Williams Bohemian Lace.
When I built the doors, Handan had some free time, so she was able catch some action shots.
I used primed 1×3 lumber to build the face frame around the new openings and the doors.

I routed the inner edges of the door pieces so I could insert a 1/4 inch MDF panel (not shown in the pictures below).
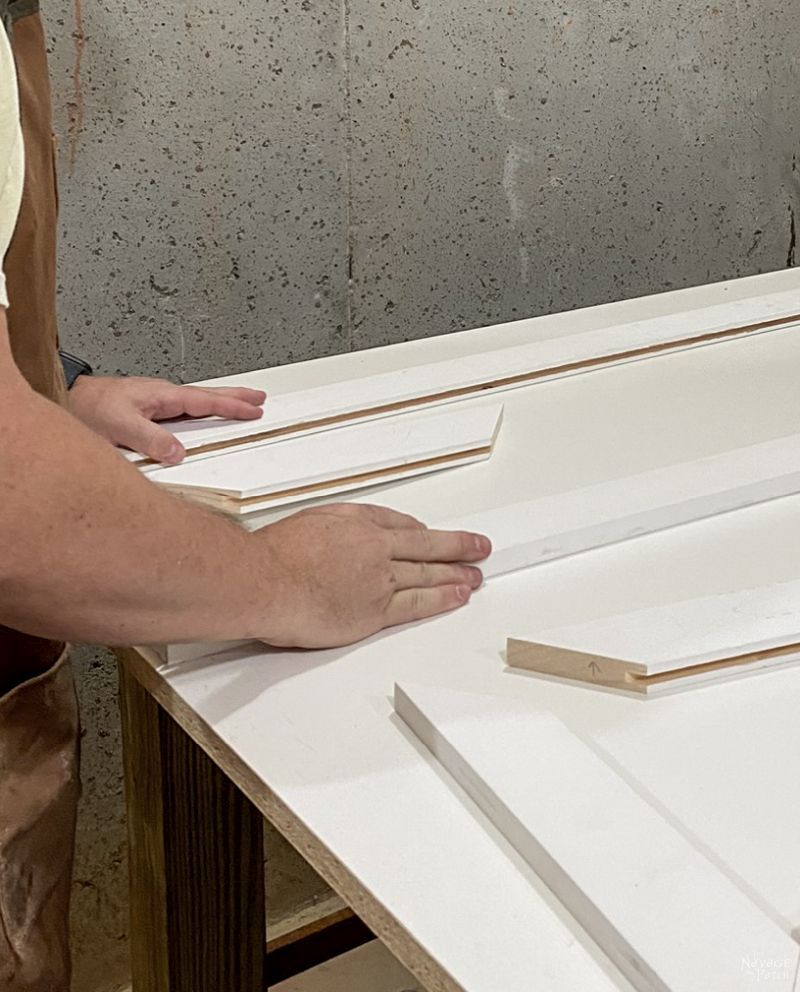

Once the doors were glued and brad nailed, I used my Kreg concealed hinge jig to cut holes for the hinges, and then I took them outside to paint.
Back inside, I used the same paint on the face frame.
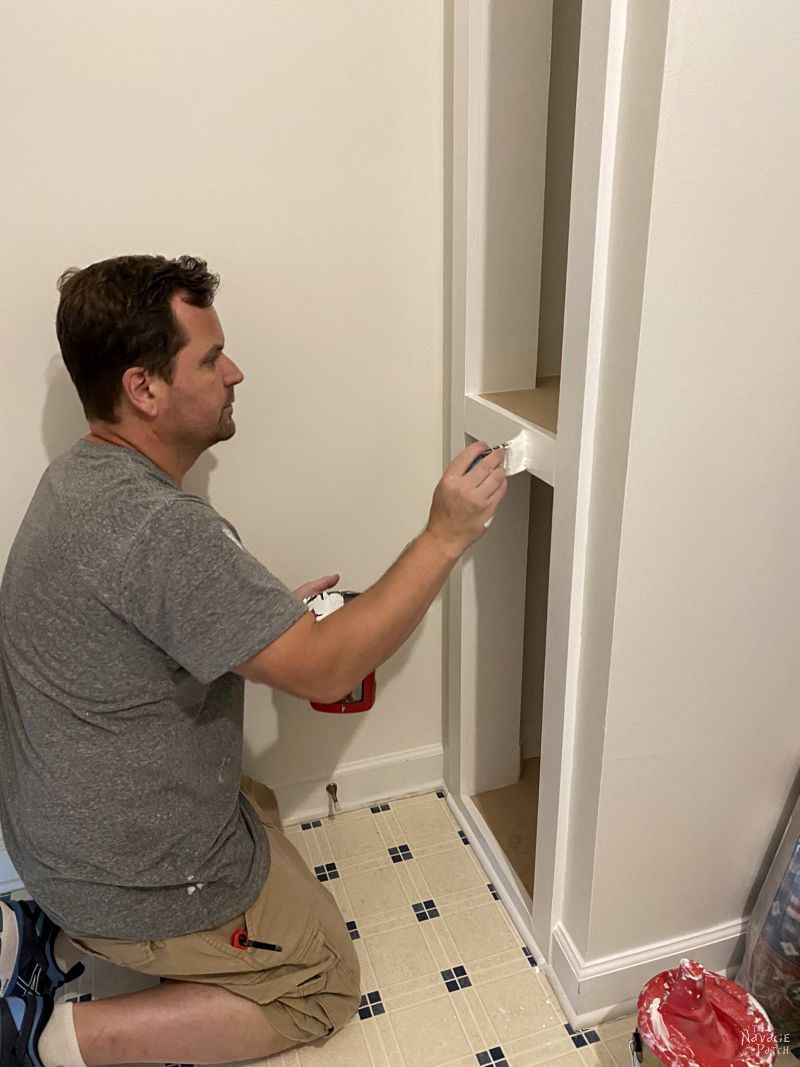
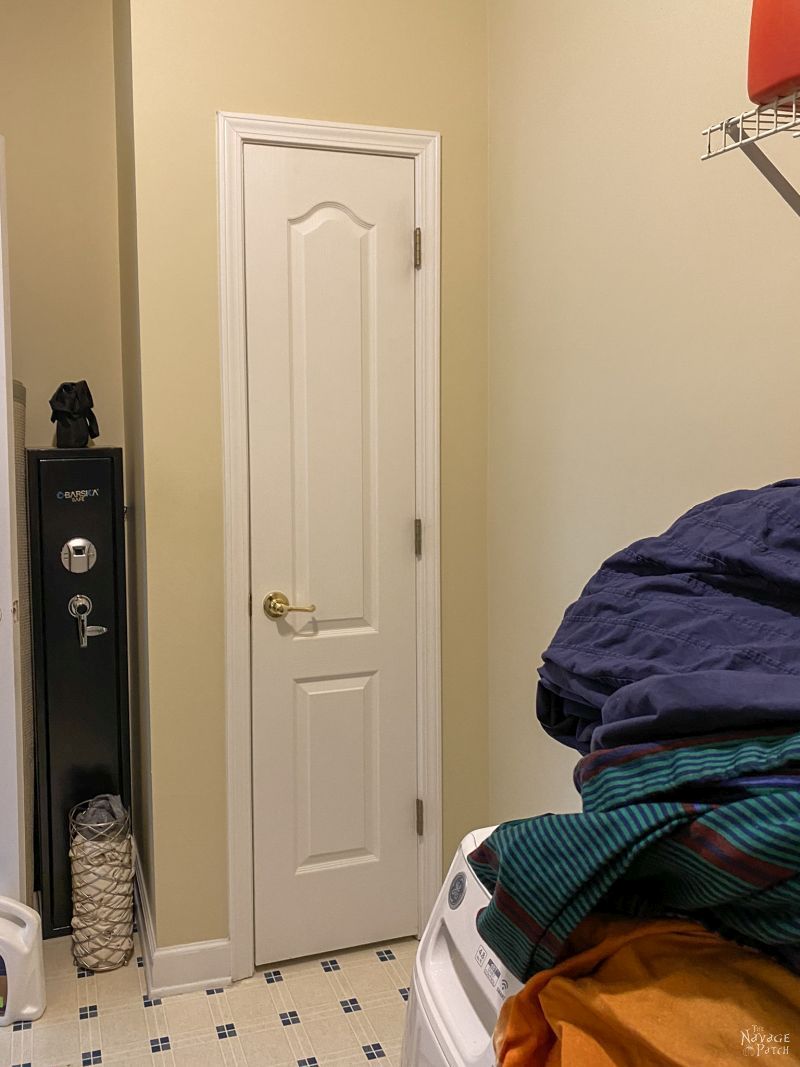
I hung the doors without any hardware. Handan wanted a clean look, and I agree that it looks better that way.
And that was that for this little laundry chute makeover. This was the first step in our laundry room remodel, and it has opened up that back wall so we can put cabinets and a utility sink there.
Like I said earlier, it was tough to photograph this area, but you’ll get the gist. More pics to come as we make progress!
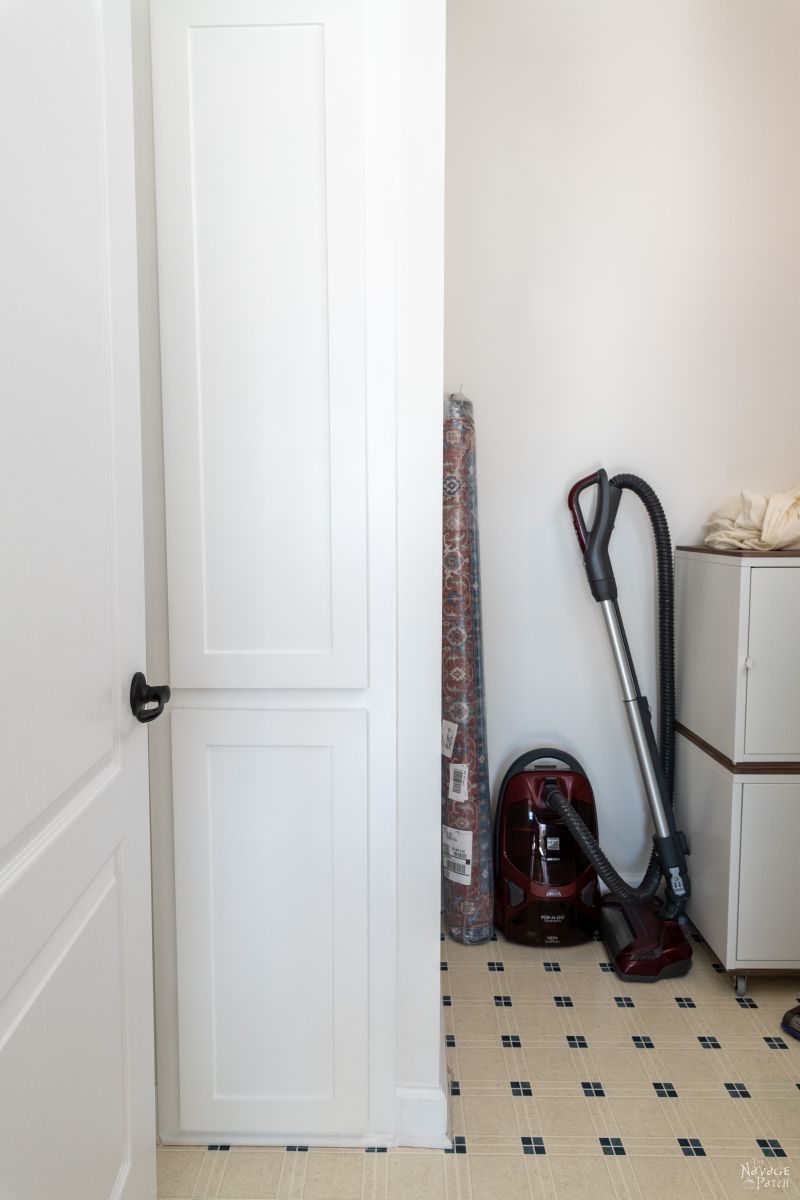


It’s a little tight with the door open, and I needed to have it open to get this picture. With the laundry room door closed, there’s plenty of room to maneuver.
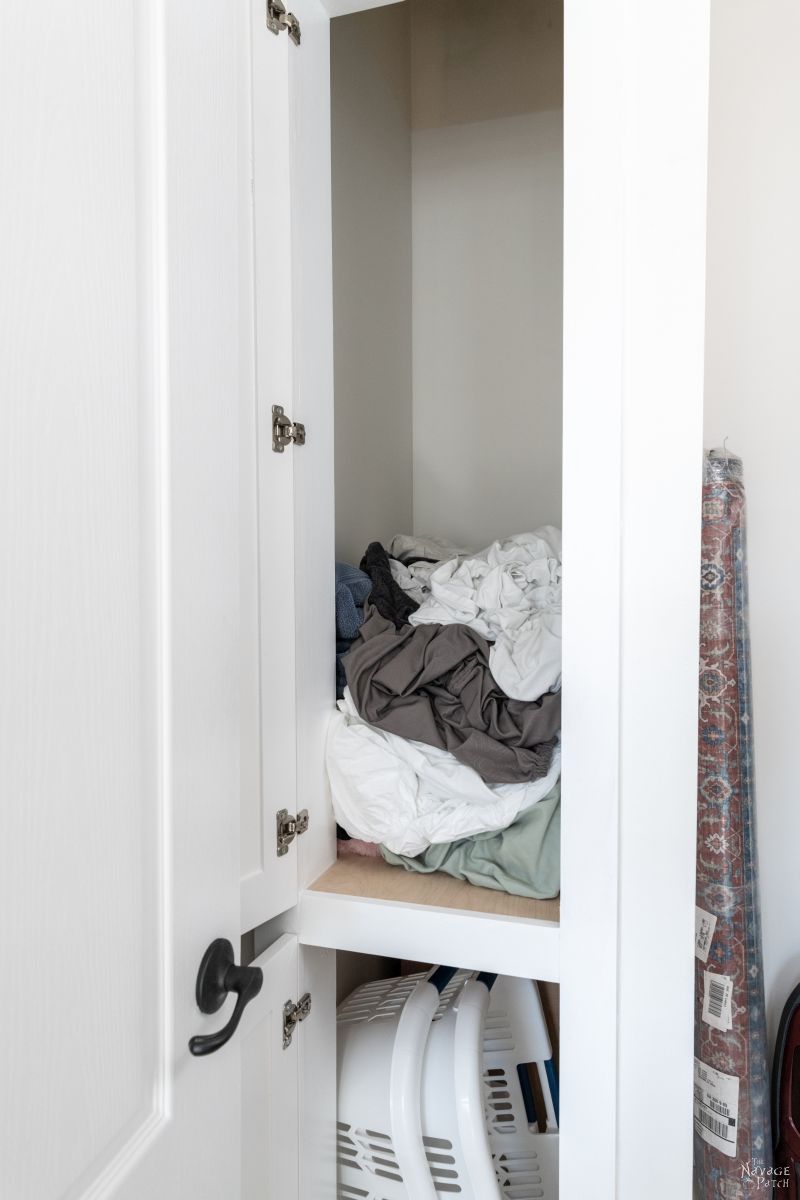
Ahhh, now that pile of stinkies is at the perfect height to grab and chuck into a basket!
I use the two baskets stored below to sort whites and colors, and then I kick the baskets over towards the machines. It may not pass the Social Media Snobbery Test, but it sure works for me!
Stay tuned for the shelves I’m building. I’ll have that post out next week for you!


I always thought a laundry shute should be a must in a 2 story house… Unless of course your laundry room is upstairs.
I, personally would have the dirty clothes fall into a basket. Pull the basket out and sort at the washer… But to each their own
You are quite the craftsman and with Hadan by your side providing ideas NP2 is well on its way to be an amazing space!
We thought about doing it that way, Margie, but decided to move it up 3 feet to get the extra storage space. It’s a deep space, and we’ve stored more stuff behind the baskets.
We have a laundry chute in our house but it looks a little iffy. Perhaps I should another look and see if we can put it to use. Yours look wonderful and I would like to stop hauling full hampers down two flights of stairs.
Two flights??? Yikes! Yeah, I’d press that chute into service! 🙂
“I hate unicorns!”
“I love me some drywall!”
What do these statements have in common? No one has ever uttered them ?
The chute turned out awesome! I am a big fan of more storage and utilizing wasted space. Great job!!
Oh, I’m sure there are a few wackos out there who love nothing more than a bucket full of sheetrock mud and a lung full of drywall dust, lol!
Looks good! I like the hidden hinges! And anything that saves the back plus gives extra storage is a bonus, so props to you on the redesign!
We have a laundry chute also, but, alas, it doesn’t come with it’s own neat closet to house the dirty unmentionables! It is merely a hole in the ceiling of the room where the clothes fall straight down into a hamper we place under it (or sometimes get hung on the top of the laudry room door when it is open!) Even with the odd door overlap, it is still much better than not having a laundry chute at all!
Thank you, Audra! Hey, a chute is a cute, right? Anything to save those up and downs on the stairs, lol!
I read a comment on HomeTalk that said laundry chutes could no longer be installed in houses because if there is a fire it can cause it to spread faster. Not sure if this is true or not but I definitely wish I could put one in my house! I think the shelf is a great idea. As someone with a bad back, I am all for bending and carrying less! Lol!
Oh, good grief! May as well ban stoves and electricity – I hear they start fires! LOL, what a world! My parents have a wheeled laundry basket – makes it much easier to go up and down the stairs. That might be a solution for homes in which a chute isn’t possible. Happy New Year, Giselle!
Great way to utilize unused real estate! I can hardly wait to see the finished project! They ALL have been nothing short of me exhibiting oohs and aahs! I can just envision some really unique hardware on those doors! It’s hard for me to understand the purpose of a laundry chute because the clean ones can’t go back up!?. I’ve always thought a dumbwaiter would be better! That way you could get laundry taken care of AND a sandwich! Ever seen the King Of Queens episode and the house Doug bought???At least you don’t have to worry about Barish experimenting with food or toys! This happens at my daughter’s house with her 6 children, all under the age of 10??! P.S. On the fib thing….a little taradiddle here and there never hurt anyone. At least you came clean and your sin has been washed away! See what I did there?
I love the dumbwaiter idea, Cindy! That chute is certainly big enough. I’d just have figure out where to put a motor! 🙂
Another great job. I have an idea. Instead of sorting into 2 baskets, how about one of those carts that have cloth liners and 2 or 3 sections. I think if might be about the right height for your shelf and then you could just wheel it over to the washer. I believe in energy conservation–especially when it is MY energy! I’m the person that bought medium colored towels, i.e., light blue, so if I need a few more whites, they go in the whites. If I need a few more colors to make a load, they go in the colors! My poor single basket cart is 30+ years old and the wheels don’t work well anymore! I have a clothesline in front of a hot air vent in the cellar; in a Maine winter, stuff dries in 1.5 days! Does Handan need one of those wallmounted extending racks to dry delicates? Just thinking….I know you could make one easily.
I do like the cart idea, Kathy, but there won’t be much room left to store once everything is installed in there. For now, I think we’ll be sticking with baskets, but Handan may come around to the cart idea. I’m the laundry guy, so baskets are okay for now! As for a rack – I’ll leave that one up to Handan!
For Greg: “I only do what the voices in my wife’s head tell her to tell me to do.” For Handan: Keep him busy gurrrl!
LOLOLOL! Oh, she will, Cynthia…she will! 😀