DIY In-Wall First Aid Cabinet
Next it was time to make the face frame. I cut a few 1 1/2 inch strips of ship lap to size, then mitered the corners to 45 degrees.
Do you feel it? A tugging at the back of your brain? Bah, just ignore it! Let’s carry on!
I glued the pieces into a frame using this handy right angle frame clamp.

Have you figured it out yet? No? Well, it’s probably not important…let’s move on!

I brought the completed face frame over to the cabinet. A perfect fit. Oh, what a smart lad you are! Oh, what a….SH!T!!
In my drawer-and-frame-making fervor, I forgot to make the cabinet longer to fit into the newer, bigger hole in the wall! Oh, what a dummy you are!
*Ahem*
I thought that it might be a good time to make the extension for the cabinet. I started cutting and gluing and brad-nailing.


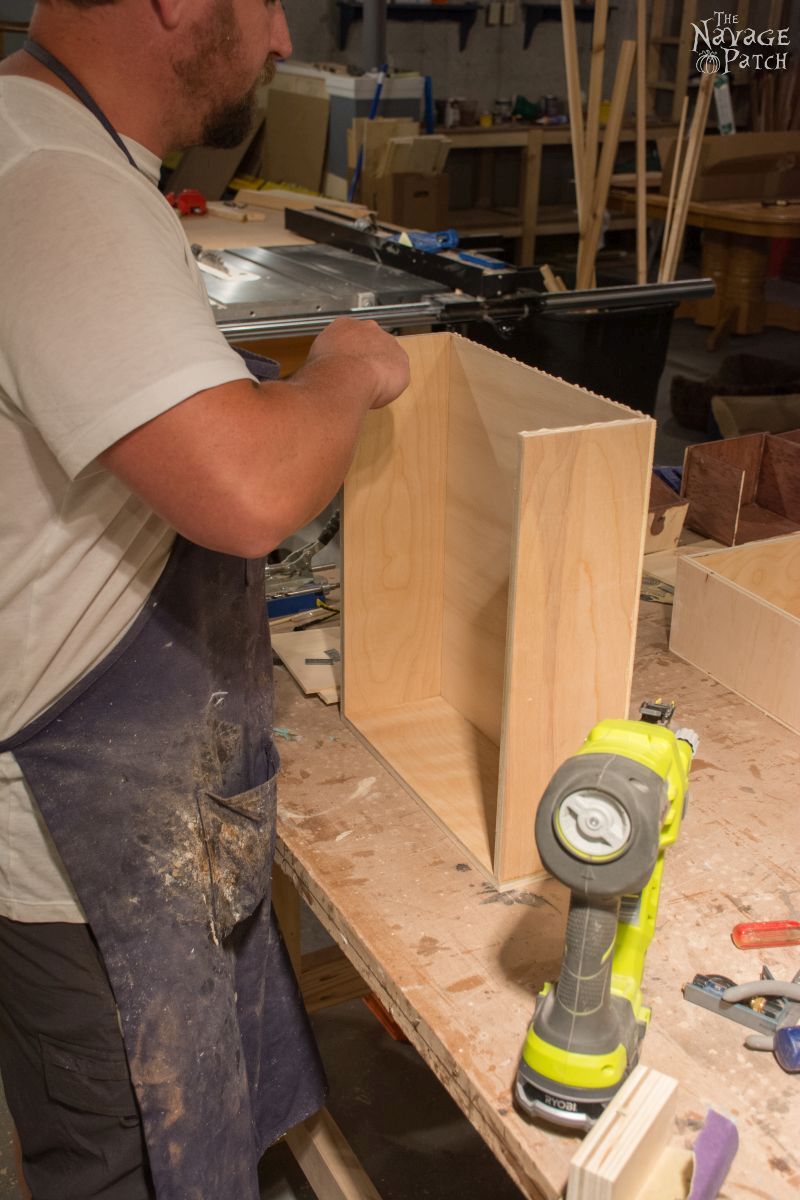
I had to break apart my face frame and make two longer pieces for the sides. Once that was done, I put a bead of glue all around the cabinet.

I then attached the face frame and brad-nailed it in place.

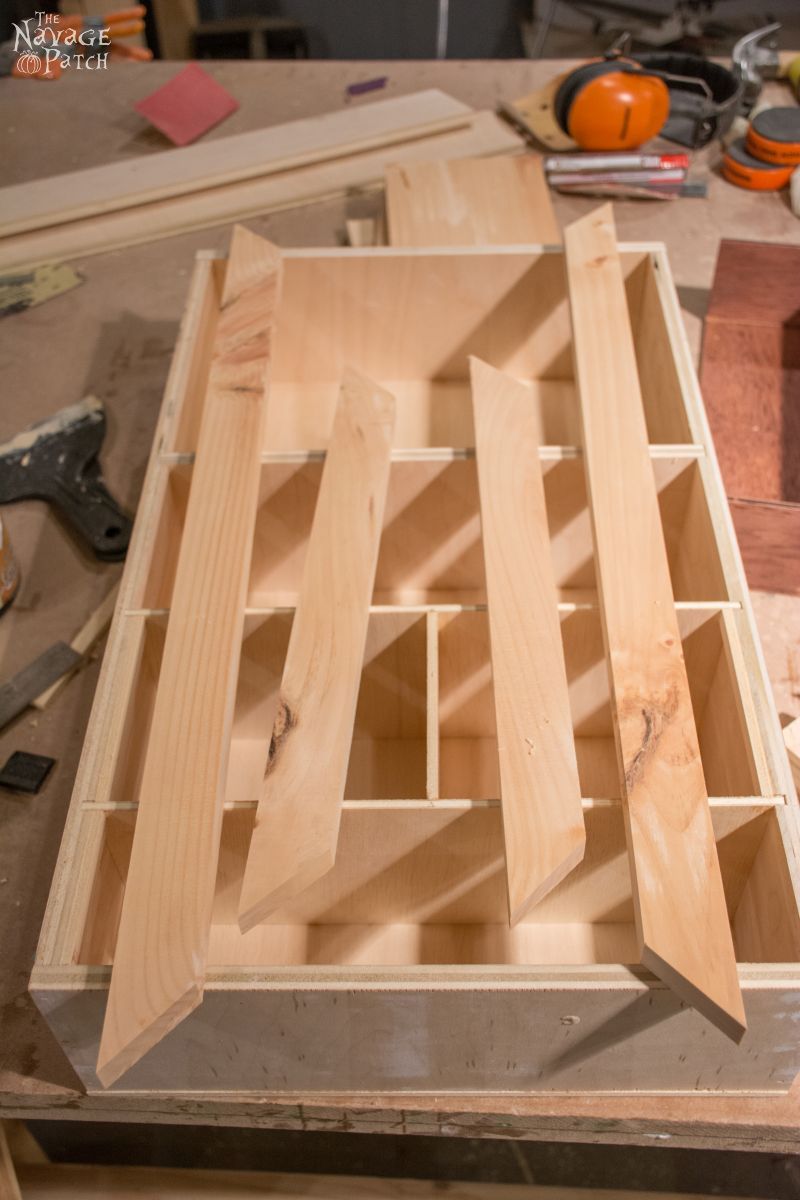
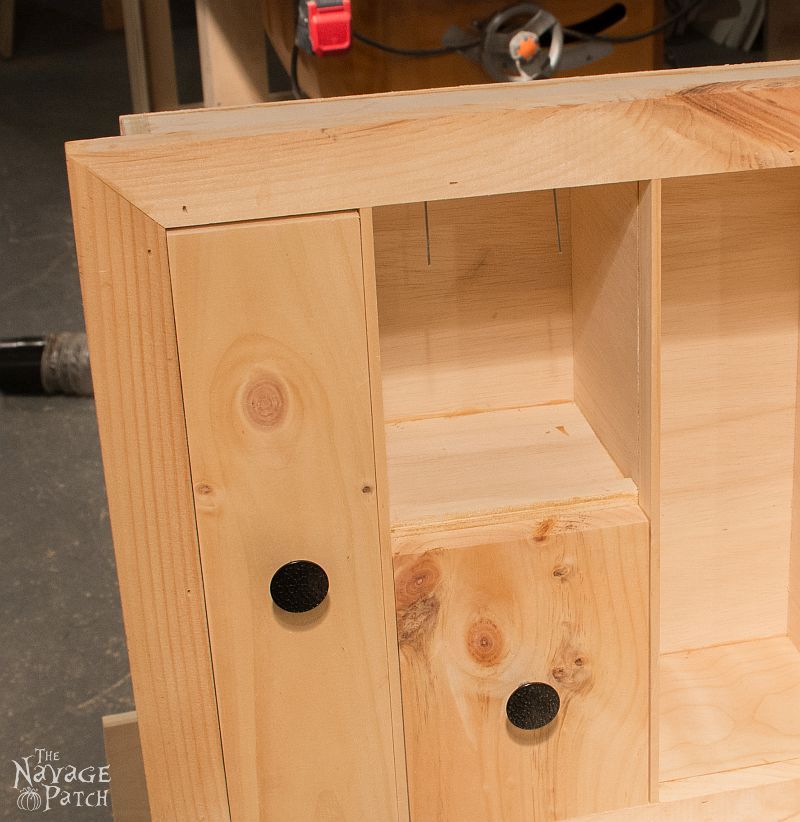
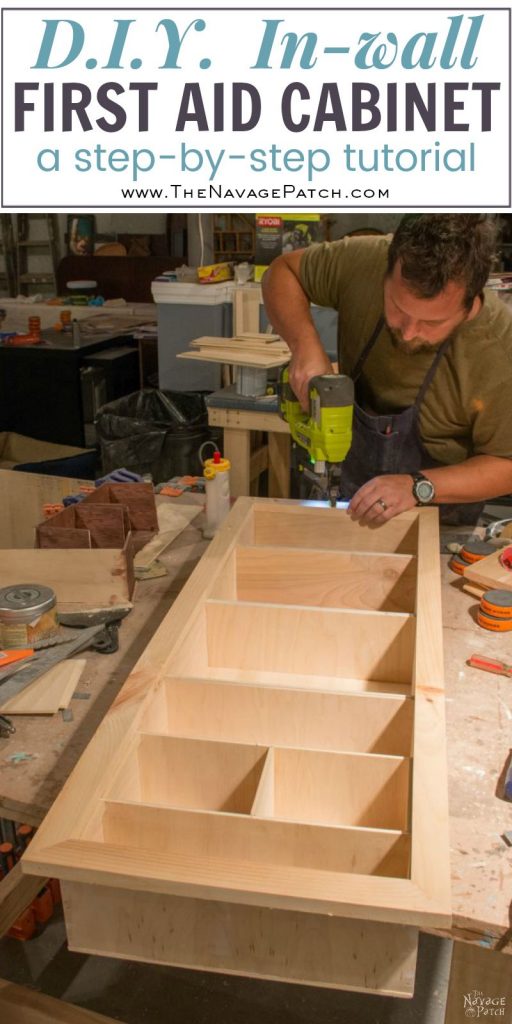
I glued this doohickey and another just like it just above each of the drawer-holes. The top one separates the doors from the drawers, and the bottom one separates the top drawers from the bottom drawer.

I had planned the doors to fit inside the original cabinet. After I lengthened it, the drawers no longer fit, and I didn’t have any more ship lap big enough to fill the space. Since there was only a few inches of space that the drawers didn’t cover, I cut a strip of wood the width of the uncovered space and glued it to the top of the cabinet.


Next up were the drawer faces. I cut pieces of ship lap to the sizes I needed and drilled holes for hardware.

I then glued them onto the drawers. I attached the hardware to make them easier to work with. Then I tried to figure out how to glue the last stop-blocks into their places while the drawers were in the drawer-holes. It was a disaster. I was stumped and ready to give up when an idea broke through the cobwebs, cotton candy and calcium deposits around my brain: instead of stop blocks, I would shoot a couple of long brad nails through the cabinet from the outside to the inside.

I then trimmed the nails so only about 1/4 inch was protruding. Next I lightly hammered the brad nails backwards until the were flush with the inside of the cabinet. Once they were flush, I was able to insert the drawer. I then re-hammered the brad nails from the back until they were again in their places acting as stop-blocks. It worked brilliantly.
So the drawers were done!


Next I put the doors into their places and attached the hardware.


I decided not to stain it. After consulting with Handan, we both agreed that a blackwashing would look best. Blackwash is what I call my aging solution. I make it by filling a quart-sized Mason jar with apple cider vinegar, to which I add one pillow of 0000 steel wool. I cover this and let it sit for 4-7 days, giving it a shake every now and then. I then add one heaping tablespoon of loose-leaf black tea. I cover the jar, give it a good shake, and let it steep for 30 minutes. Then I strain out the tea and whatever bits may be left of the steel wool using a fine mesh strainer. To use, I brush it on the wood using a cheap chip brush and let it work its magic over the next hour.

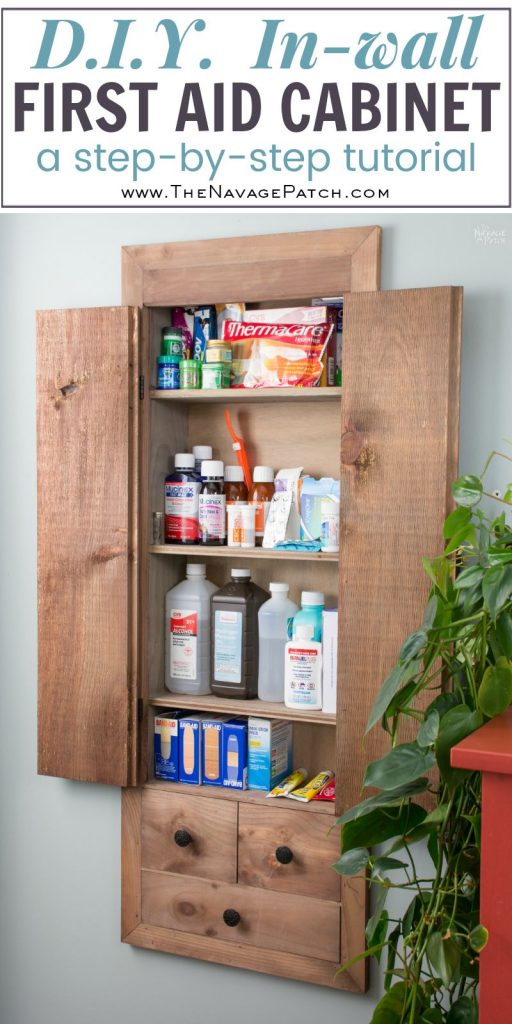
When it was dry, I carried it upstairs and installed it into the hole-in-the-wall. I secured it with 4 screws, 2 on each side going into the studs.

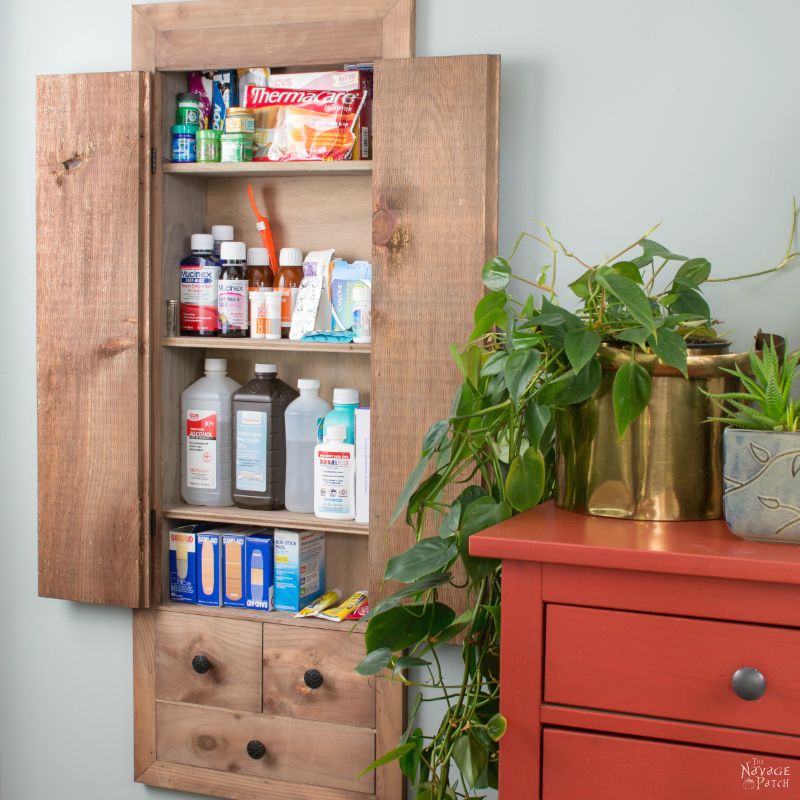
And this time, everything fits!

Some closeups of the hardware.


There is no space to take pictures from other angles, so this is the best I could do for the “after” pics!

One more thing – After I had installed this and crowed to Handan about the project finally finishing, she asked, “So did you put a protective coating on it?” She was talking about brushing it with a coat of flat varnish to protect the wood.
GAAAAAAHHHHHHHHH!!!!! What the hell is wrong with me?!?
“Ummmmm…no. I totally forgot. It never even crossed my mind!” I said.
“Don’t worry,” she said. “I’ll do it for you.”
And she did.
Thanks for reading – I know it was a long one!
We love it when you share our posts on Facebook and Pinterest!


For a Dummy you sure are smart! I love the cabinet. If you ever run out of projects I have a whole house full! Lol!
Hi Giselle! Run out of projects? HA! You’ve never met Handan… 🙂
Cool cabinet but I added a central vac to my home and you couldn’t take it from my cold dead hands! Crazy suction, no dust, no noise, and no dragging a cannister or pushing an upright.
LOL, a lot of people tell me that, Darlene! That wall will be demolished in the future when we renovate my kitchen. At that point, we’ll relocate the central vac pipe just in case I change my mind 😉
Love the twists and turns you take us down in the tale of The Little Cabinet That Could! Clever idea and looks great. Still swooning over your basement workshop.
Thank you, Marie! Yes, I love my workshop…but I really should clean it more often!
Yeah, right! We all know that is never gonna happen unless I get to it 😉
I’ve always wanted to do a “between the studs” project! It’s such wasted space.
Finding the pipe must have been awful, I’m so glad it wasn’t needed and you could work around it.
thank you for sharing your fabulous tutotial at Talk of the Town.
gail
Thank you, Gail! Yeah, my first thought was, Handan’s gonna kill me! Fortunately it all worked out!
What a great idea, and funny story! We have a central vac (was here when we moved in) but I could live without it. Your finished product is just perfect! Thanks for sharing at Vintage Charm! xoKathleen
Thank you, Kathleen!
What a great idea! Thanks for linking up with us at The DIY Collective! Please come back and party with us next Thursday! xoxo! -Cassie @ Little Red Window
Thank you, Cassie!
Oh man that pipe, it is amazing what you find when you open a wall!! This is just beautiful, I have always wanted to do this just like Gail. Amazing job and hilarious read!!
Thank you, Mindi!
Pinning this, a very smart idea and a funny read!
Thank you!
Love this project!
Thank you, Marie!
Small between the studs cabinets like this could be so useful all over the house, and this one is perfect! thanks for sharing on craft schooling Sunday!
Thank you, Sara!
I LOVE IT!!! I do think in some areas you made it a little harder on yourself than you had to (And I’m not talking about the obvious areas… LOL!!!). That being said, are you also thinking that you should’ve made it just a little bit bigger? It appears that everything just barely fit!!! Also, I too have been dying to do this in many areas of my home…. I think it just makes sense to make use of that space!!! I’m just “gun shy” when it comes to actually chopping a hole in my wall!!! Even with a stud finder, you’re nit guaranteed not to “run into” something!!! I also like that you show all through the project, and especially the “unexpected anomalies” that happen when you’re doing a project!!!! Thank You!!!
Thank you!
This was great! I enjoyed reading about the project ALMOST more than the project. Y’all sound like me and my Honey when we work on projects. And we “fix” projects with a similar “on the fly” type remedy like you.
What an awesome project. I am walking around looking at all the beautiful storage I could add. Thanks for sharing your smart storage solution and your adventures getting it done!
Thank you, Christine! Yup, mistakes come fast and furious around here, but there’s no better way to learn than by screwing something up! 🙂
I had a laugh at the phantom pipe! How funny! I love the built in you created. Looks like its always been there.
Thank you, Audra! It’s always something when I do a project!
Great use of space! This sounds like my husband and I when we work on projects. Thank you for sharing at Ravenwould!
Thank you, Kileen!
Love your cabinet. Greg, you crack me up. I love reading your take on your ahem, adventures. And might I say, Handan is a saint! 🙂 Thanks for sharing at the #ThisIsHowWeRoll Link Party.
Thank you, Susan! She must be a saint for putting up with me for the past seven years! 🙂
Awesome job – and what a great idea! I have to admit that I LOLed at the “poop pipe” – we have those same weirdo, nonsensical things in our home too, that leave us scratching our head. This is a great idea and turned out beautifully!
Thanks for sharing for I DIYed that!
Thanks, Jen! 🙂
LOL Greg, I’m so glad everything fit in the end. The whole searching for studs thing has always fascinated me. We don’t build houses like that in South Africa so I could never understand what people were on about. Now I finally get it (I think). Pretty neat way to make use of “wasted” space in the wall. P.S Where did the microwave disappear too 😉
Yeah, Handan is the same way. Everything in Turkey is built of concrete. She thinks our houses are weird and flimsy, lol!
Greg when the earth is a shakin; it better be concrete that’s holding everything together. Having grown up in NY I can never get used to the earthquakes. The cabinet was a smart idea in a very clever space.
Can I ask what color by red is? Looking for singing similar to paint my daughters bed frame.
Thanks!