DIY Rustic Console Table (& Free Plans!)
This DIY Rustic Console Table is easy to build with our free plans, and it looks fantastic! A little rustic, a little industrial and all beauty!
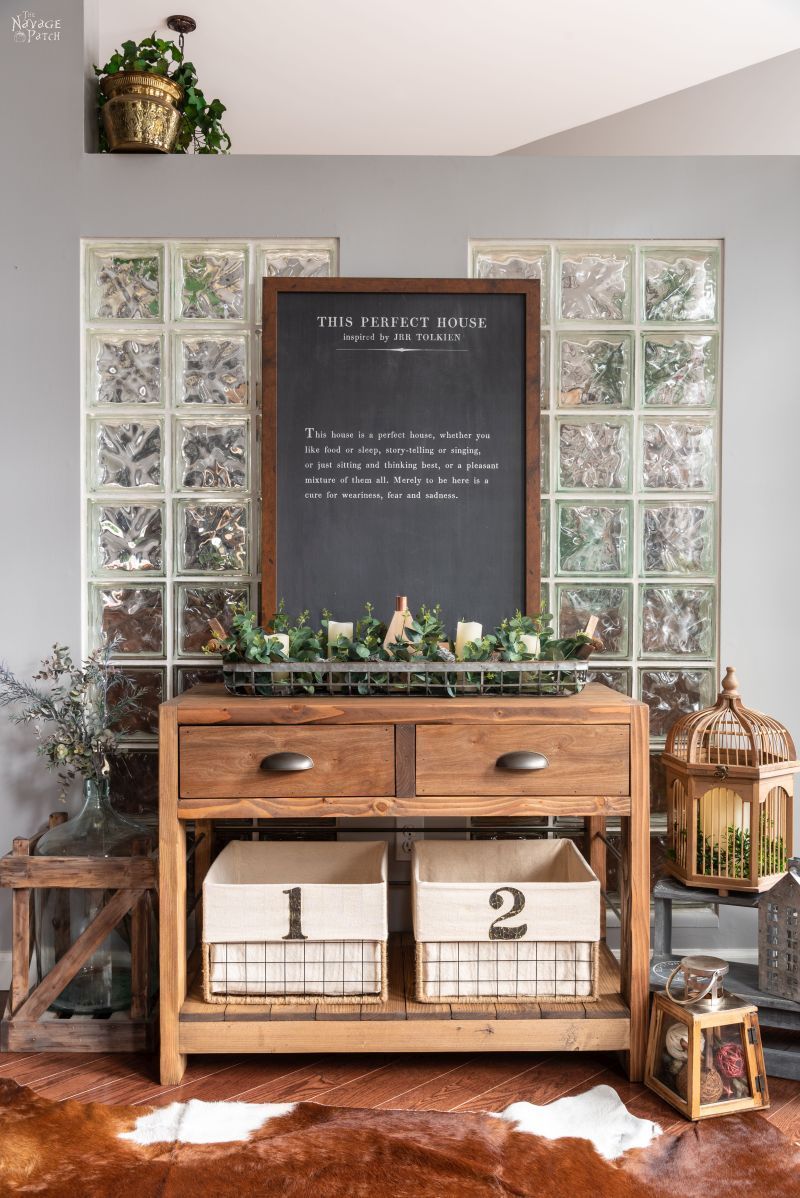
This project was born the moment we brought three little gerbils home from the pet store and placed them in a glass terrarium. Within a month, three had become nine thanks to a randy male gerbil at the pet store who had his way with one of our females just before we bought them.
You can read all about our furry little tribe here, or better yet, just watch the video below.
When three had become nine, we bought another terrarium to accommodate our bigger family. All that glass took up a whole lot of real estate, and we didn’t have a proper place to put them, so they lived temporarily on top of my grandmother’s old harvest table. But their food and supplies littered the floor around the table, and the whole area was a hot mess.
Handan wasn’t having it.
She had a better plan.
And as is (almost) always the case, the plan involved me, a bunch of lumber and some power tools.
Look, I’m not complaining here. Power tools and sawdust are a refreshing change from loop yarn and embroidery hoops!
I’m man enough to embrace my inner Gertrude from time to time, but my inner Paul Bunyan needs time in the sun, too!
So, Handan had a plan. She wanted me to make two identical rustic console tables.
No, scratch that. She changed her mind.
She wanted me to make two identical industrial console tables.
No, wait.
“Hey babes, maybe you should make them…” She started, but I knew where this was going.
“No! I already made a farmhouse console table! You see any pigs and chickens around here?” I said.
Farmhouse shmarmhouse.
“You want rustic? You want industrial? I’ll give you both at once! I’ll build you the best damn DIY rustic-industrial console tables your Turkish eyes have ever seen!” I said, without the first foggiest idea what the hell I was talking about. I’ve become somewhat of a master at talking out of my butt.
Handan just smiled, apparently satisfied with my bold proclamation.
Now I had to follow through.
Crap.
I ran to my computer and opened Sketchup. I’m not an artist nor a designer nor an architect. Without Sketchup, I’d be lost.
I banged around for an afternoon and came up with a design I thought would work pretty well.
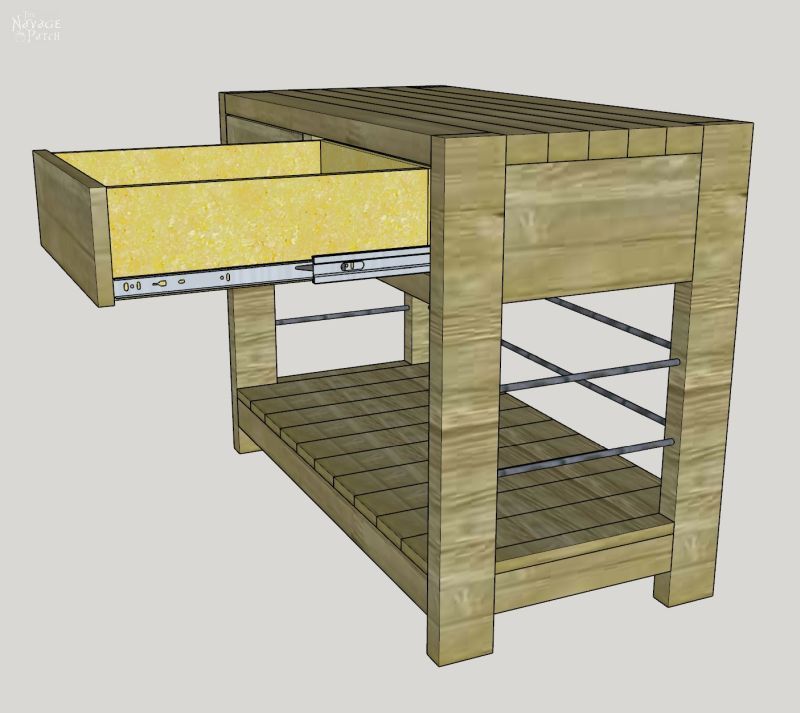
I’d make it from Home Depot lumber, so that would satisfy the “rustic” in DIY rustic console table.
And I’d add those snappy steel rods, and that would satisfy the “industrial” in DIY industrial console table.
There’d be plenty of storage below for all the gerbil-related paraphernalia plus drawers for little stuff. Handan had already earmarked two drawers for battery storage.
Let’s take a look at how it’s made.
DIY Rustic Console Table
A note about the pine lumber I used. We all know that a 2 x 4 board has actual dimensions of 1.5 inches (thickness) x 3.5 inches (width). However, with lumber from Home Depot or Lowe’s, there can be variations of up to 1/4 inch on the width. Also, the boards are heavily rounded on their edges. I wanted my boards to have exact dimensions and be square, not rounded. So if my design called for a piece of 2 x 4, I bought a 2 x 6 (which is actually 1.5 inches x 5.5 inches) and trimmed it down to 1.5 x 3.5. This cost me a little more, but it was well worth it in the end. In the supply list, I will list the dimensions of the wood as bought and trimmed. If you want to make this DIY industrial console table, you are free to use the rounded lumber as sold – just factor in the smaller size – or you may buy the boards as listed and trim them down. Your choice. The exception to this were the boards I used for the shelf. They are 1 x 4 pine boards (actual dimensions are 3/4 inch x 3 1/2 inches), and I used them as is.
Materials and Cut Sheet
- (1) 2 x 10 x 8 pine board – trim to 7 1/4 inches wide and cut into (1) 35 inch piece with three pocket holes drilled into one side of each end and (2) 12 1/2 inch pieces with three pocket holes drilled into one side of each end
- With the leftover from the board above – trim width to 5 3/4 inches and cut (1) 18 inch piece with two pocket holes drilled into one side of one end
- (3) 2 x 6 x 8 pine board – trim to 3 1/2 inches wide and cut into (4) 29 1/2 inch pieces and (3) 35 inch pieces with two pocket holes drilled into one side of each end
- (5) 2 x 4 x 8 pine boards – trim to 2 1/2 inches and cut into (5) 38 inch pieces, (2) 35 inch pieces with two pocket holes drilled into one side of each end and (2) 12 1/2 inch pieces with two pocket holes drilled into one side of each end
- (3) 1 x 4 x 8 pine boards – cut into (10) 19 1/2 inch pieces and (2) 12 1/2 inch x 1 1/2 inch pieces (you’ll need to trim the width for those last two)
- (1) sheet of 1/2 inch birch, poplar or maple plywood (good quality) – cut into (2) 16 1/2 inch x 5 1/2 inch pieces, (4) 16 1/2 inch x 5 1/4 inch pieces, (2) 15 1/2 inch x 5 1/4 inch pieces, and (2) 16 1/2 inch x 14 1/2 inch pieces
- (4) 3/8 inch diameter x 4-foot-long steel dowel – cut into (2) 35 3/4 inch pieces and (4) 13 1/4 inch pieces
- Kreg Jig and screws
- Brad nailer
- (2) pairs of 12-16 inch drawer slides (I used 12 inch)
- (2) drawer pulls of your choice
- Pre-stain conditioner (I used a product by Charles Neil)
- Wood stain of your choice (I used Minwax Special Walnut)
- Wipe on polyurethane (I used satin finish)
- Drill
DIY Console Table Plans and Build
Let’s start with some dimensions.
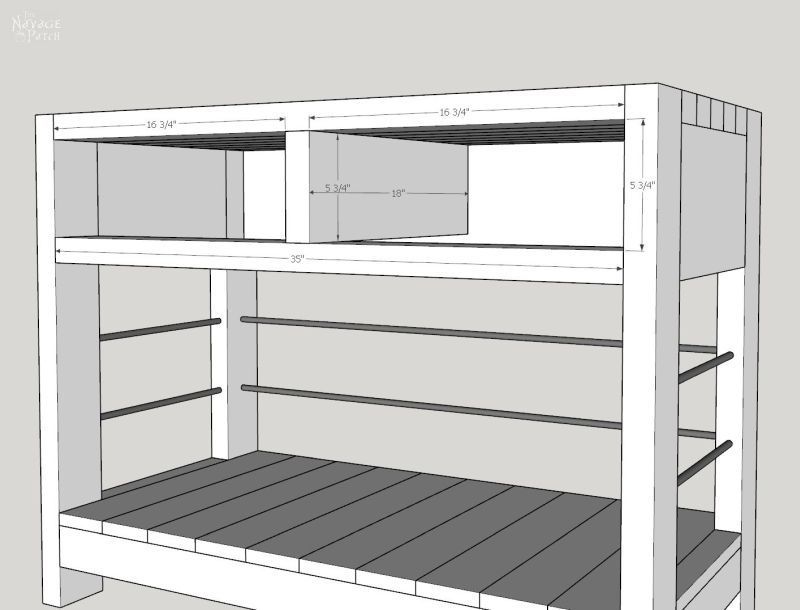
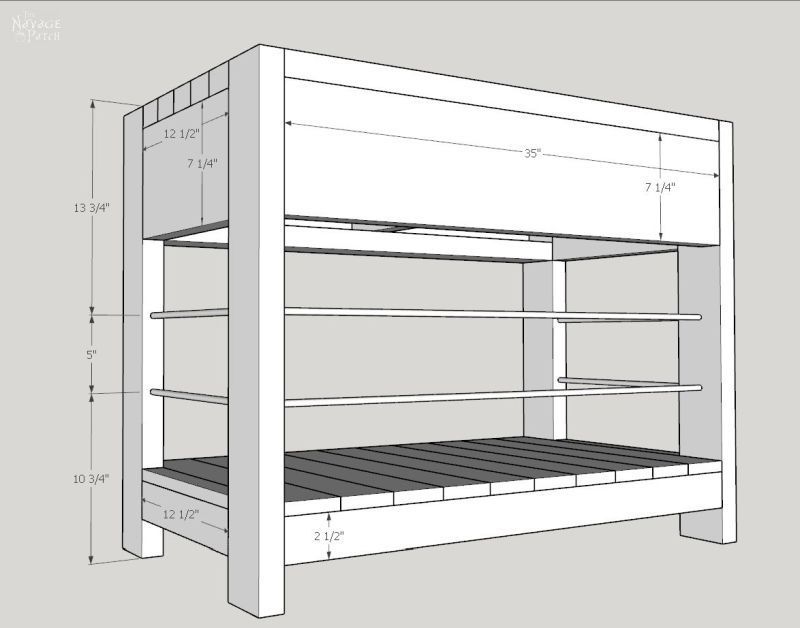
This is exciting isn’t it?
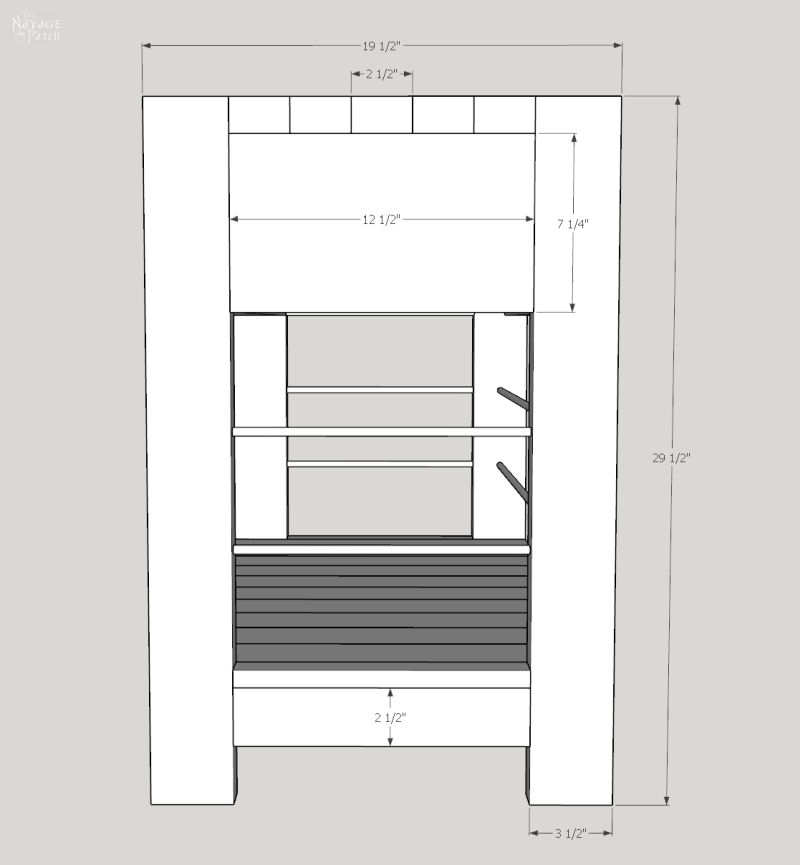
It’s like reading actuarial tables…
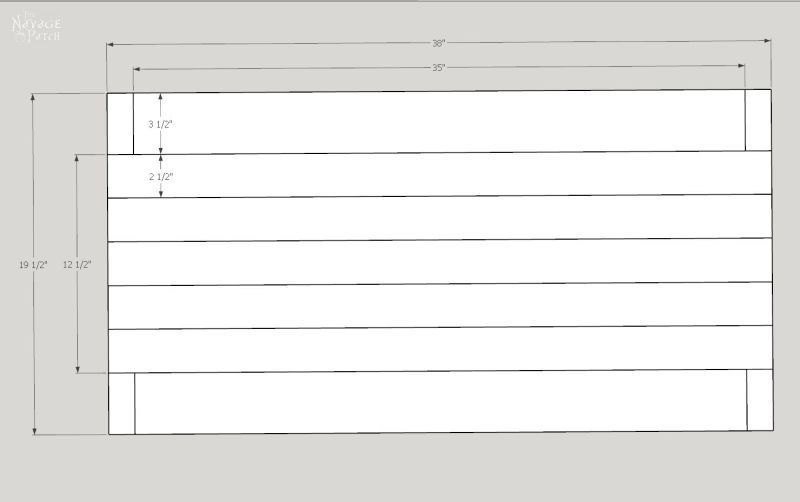
Oooh, look at all those fractions!
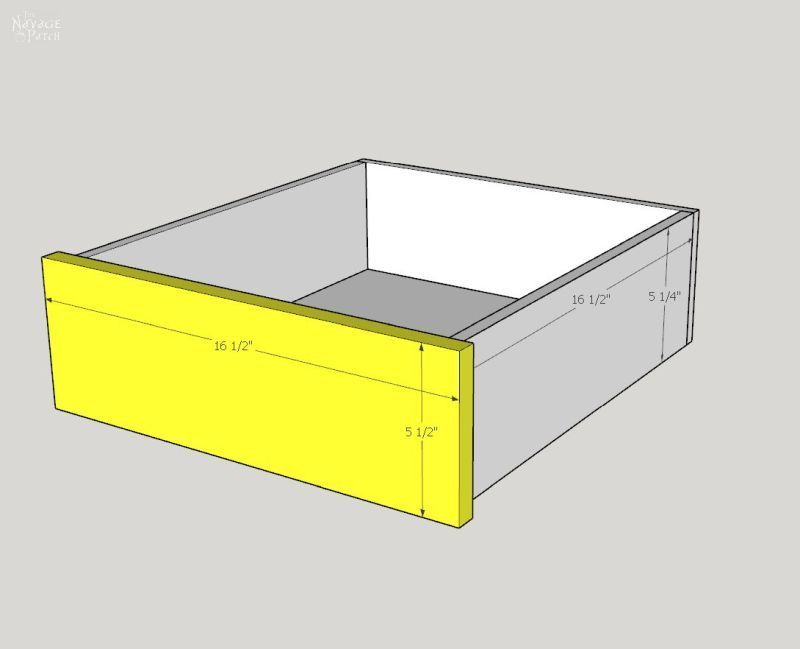
Well, that’s a fine-looking bottom you have there!
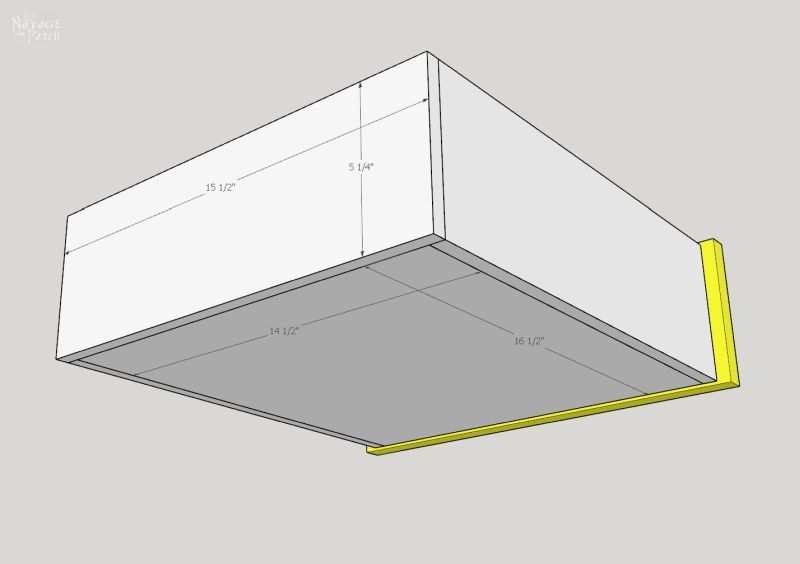
Step 1 – Drill Pocket Holes
Using a Kreg Jig, I drilled pocket holes as listed in the cut sheet above. I didn’t take pictures because drilling pocket holes is mind-numbing work that’s best done while daydreaming of Bora Bora.1
1Don’t daydream while woodworking. You’ll hurt yourself or shoot your eye out or lose a finger!
Step 2 – Drill Dowel Holes
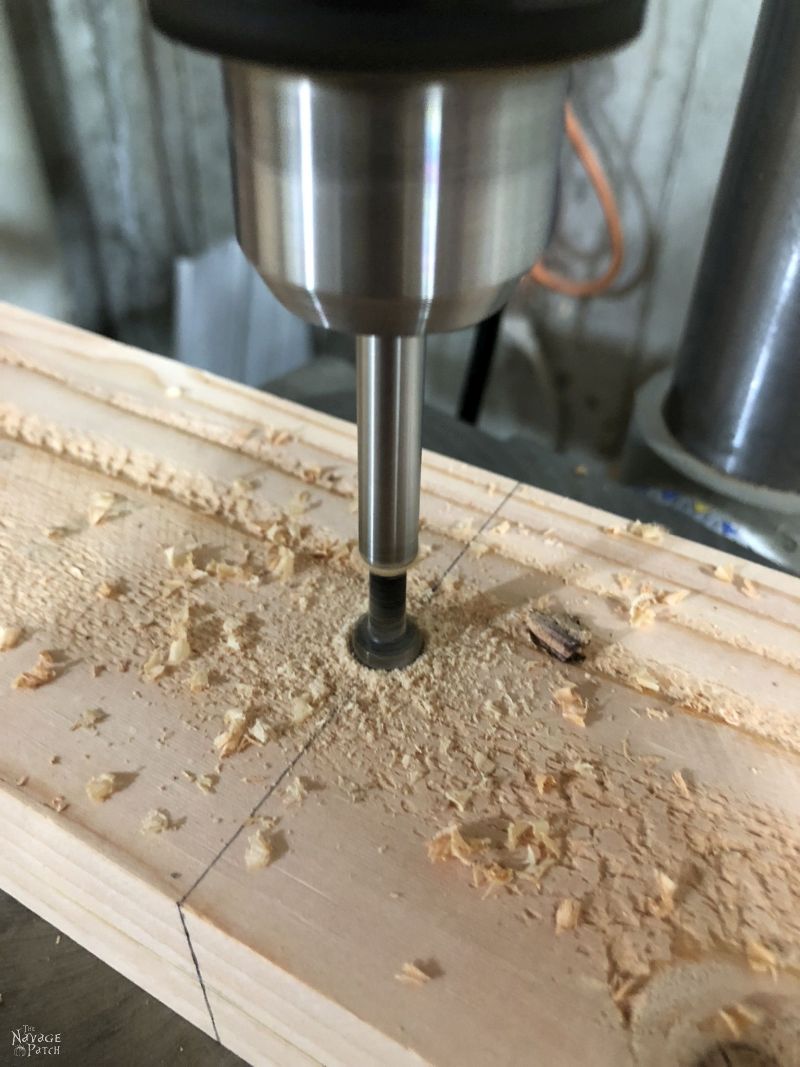
Using a 3/8 inch Forstner bit (though any 3/8 inch bit would work), I drilled dowel holes in the four leg pieces (3 1/2 x 29 1/2) as shown in the second dimension picture above to a depth of 1/2 inch.
Step 3 – Insert dowels into legs
I stood the four legs on the table and first inserted the short dowels.
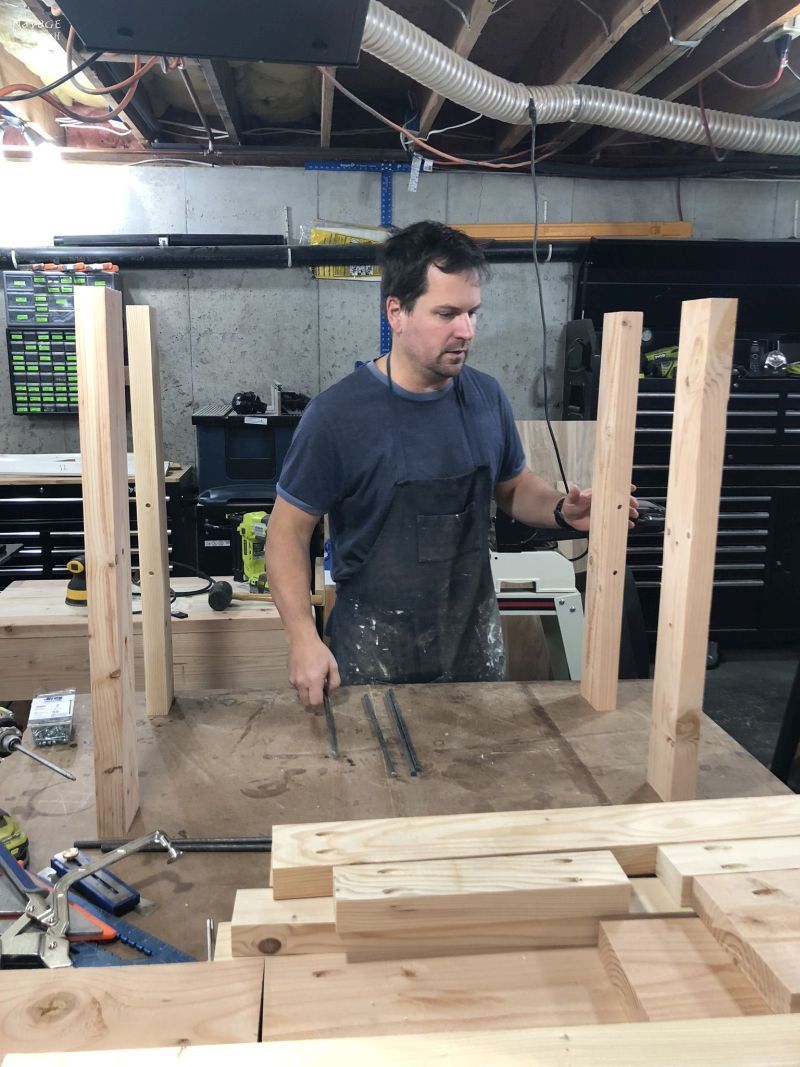
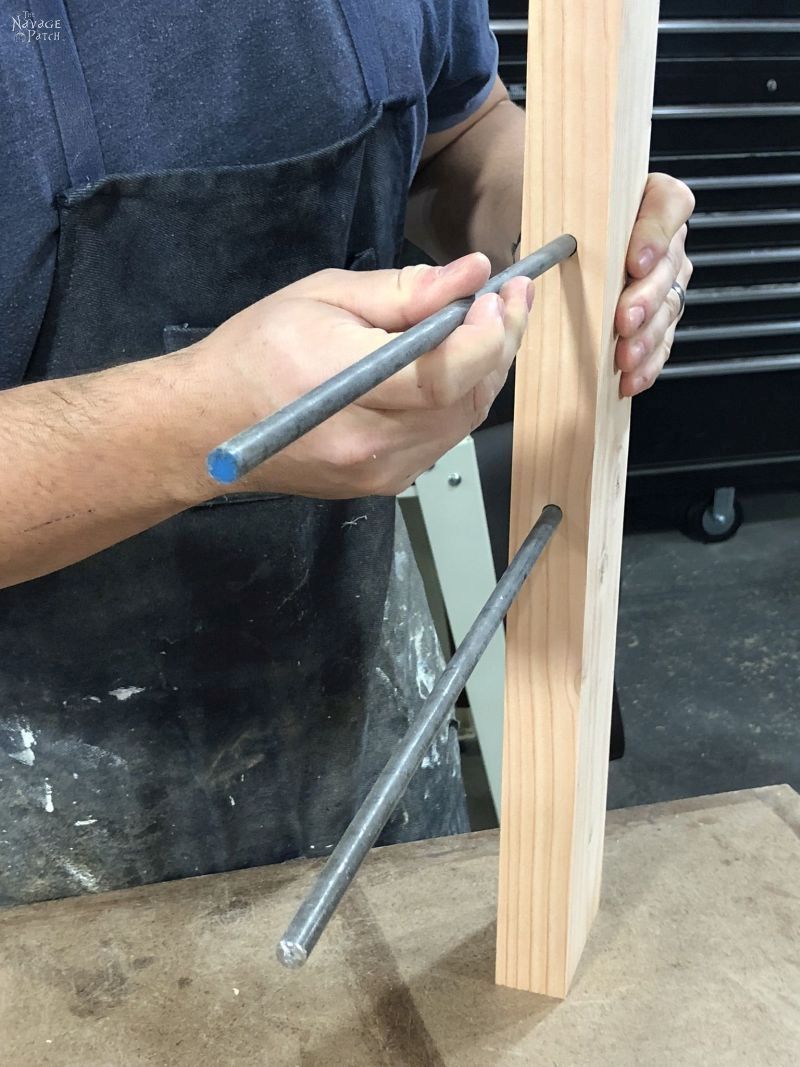
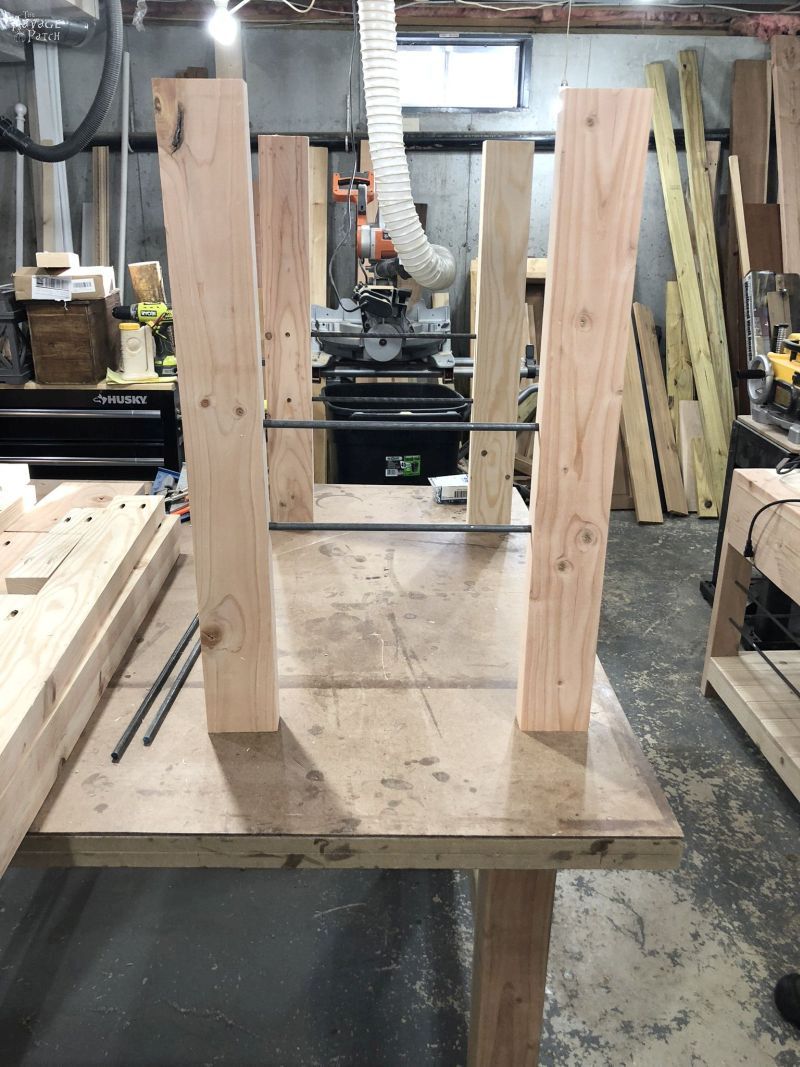
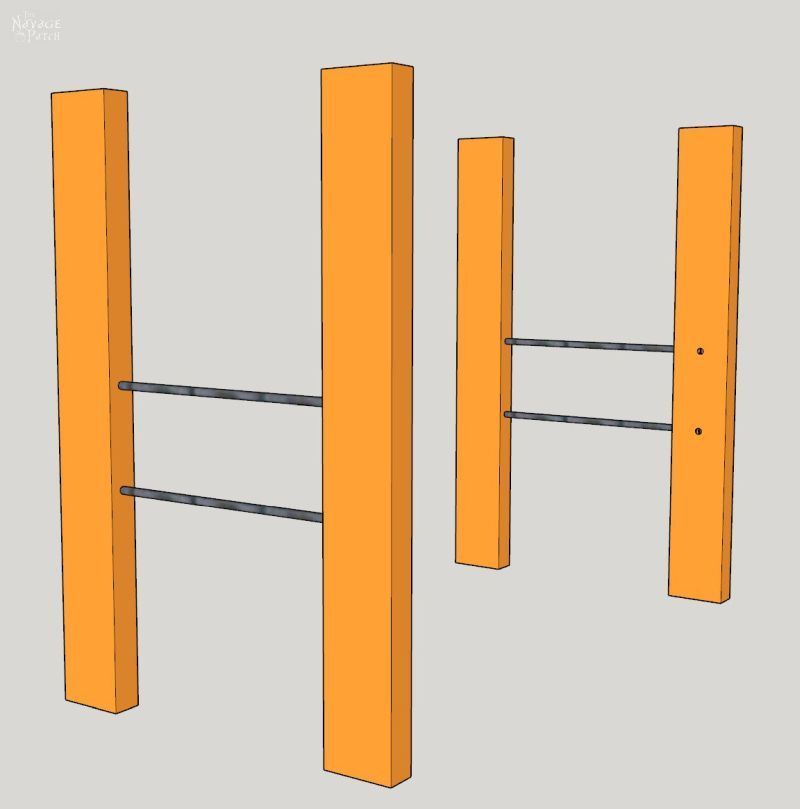
With Handan’s help, I inserted the long dowels. I built one of these tables totally alone, so it is possible, but you can expect a lot of dropped dowels, angry muttering and swearing like a sailor.
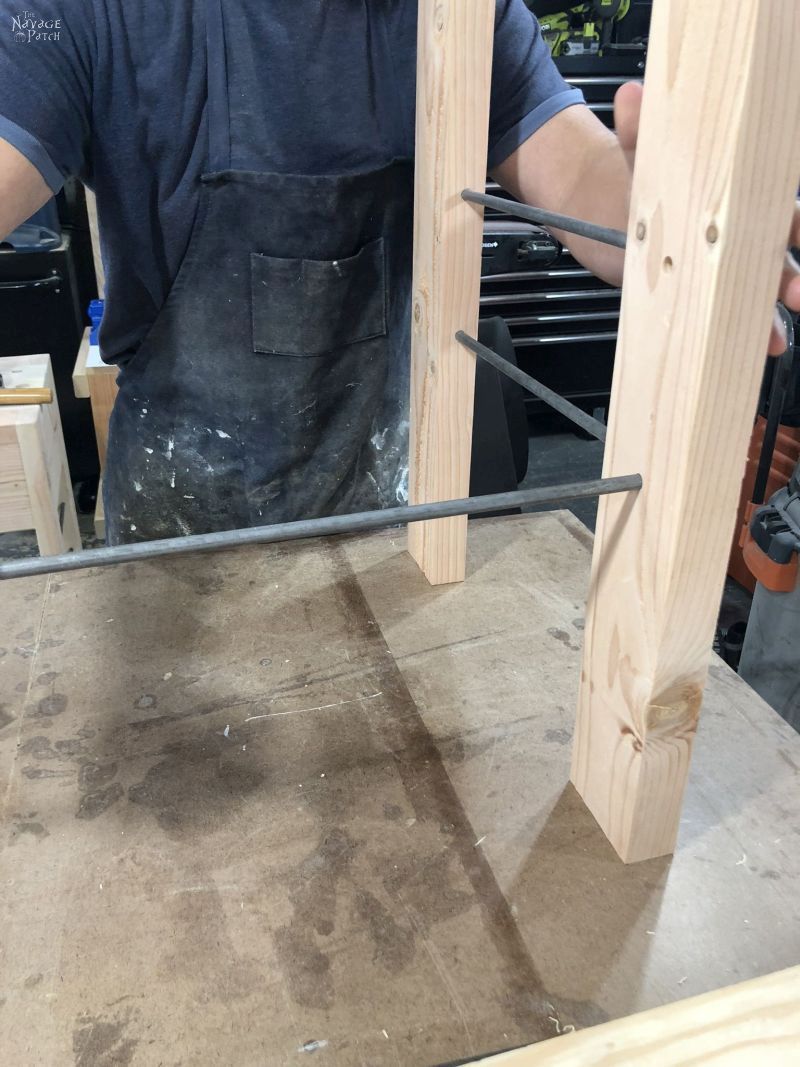
This gets us here:
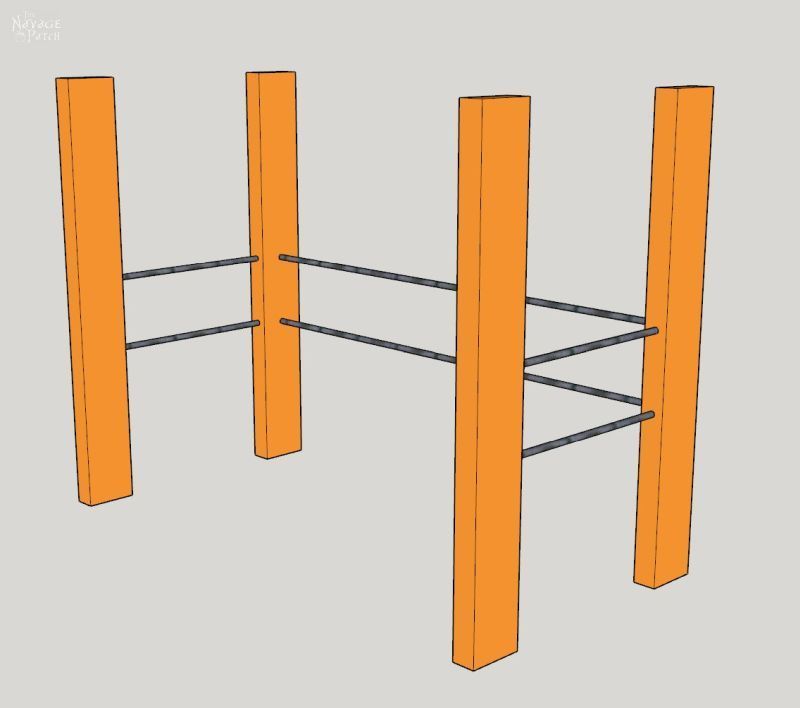
Step 4 – Attach Shelf Support Rails
The shelf support rails are the (2) 2 1/2 x 35 inch pieces and (2) 2 1/2 x 12 1/2 inch pieces. I made two 2 1/2 inch spacer blocks since the shelf support rails sit 2 1/2 inches up from the floor.
Jeezum Crow, I just read the paragraph above and nearly barfed a “2.” If you can follow those 2 sentences, then you’re too smart to do any less than 2 things at once. Touché!
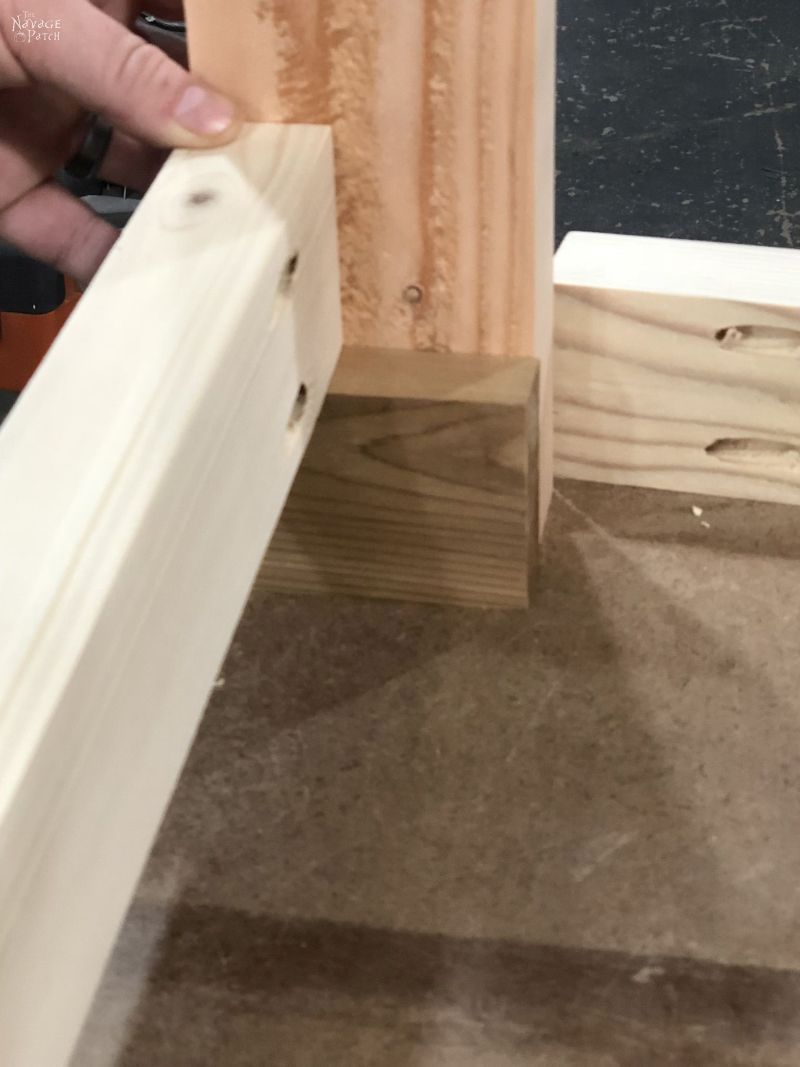
I lined up the shelf support rails one at a time, clamped them in place and then secured them with pocket screws.
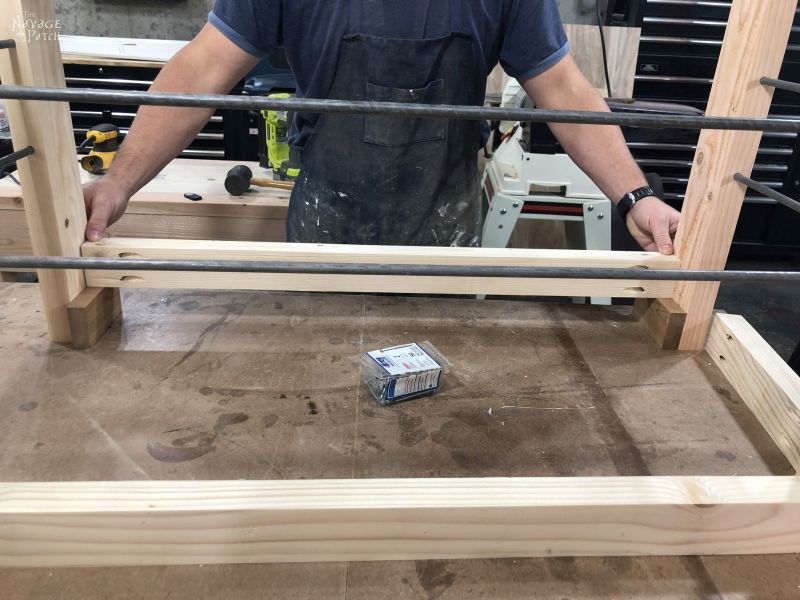
The clamps were Handan’s idea. I built the first one alone and without them. Seriously, how did I survive without this woman?
Answer: barely.
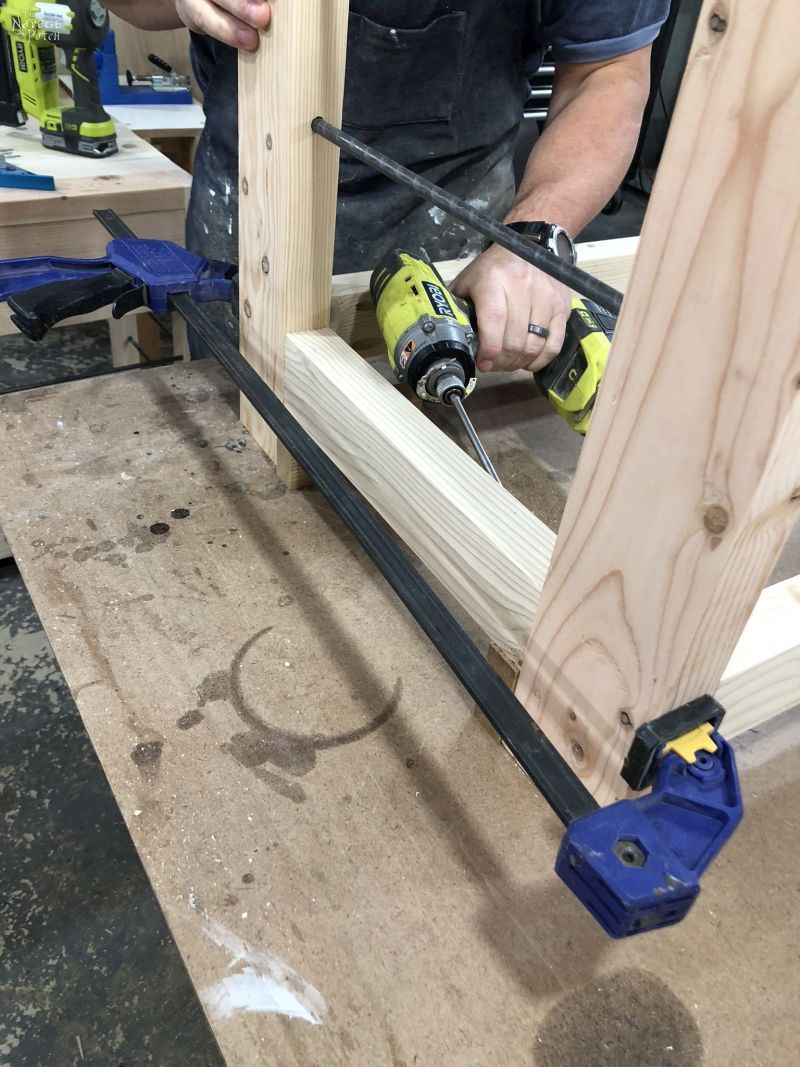
I’ve spared you the pain and suffering of looking at my face with a well-placed piece of pine. You’re welcome.
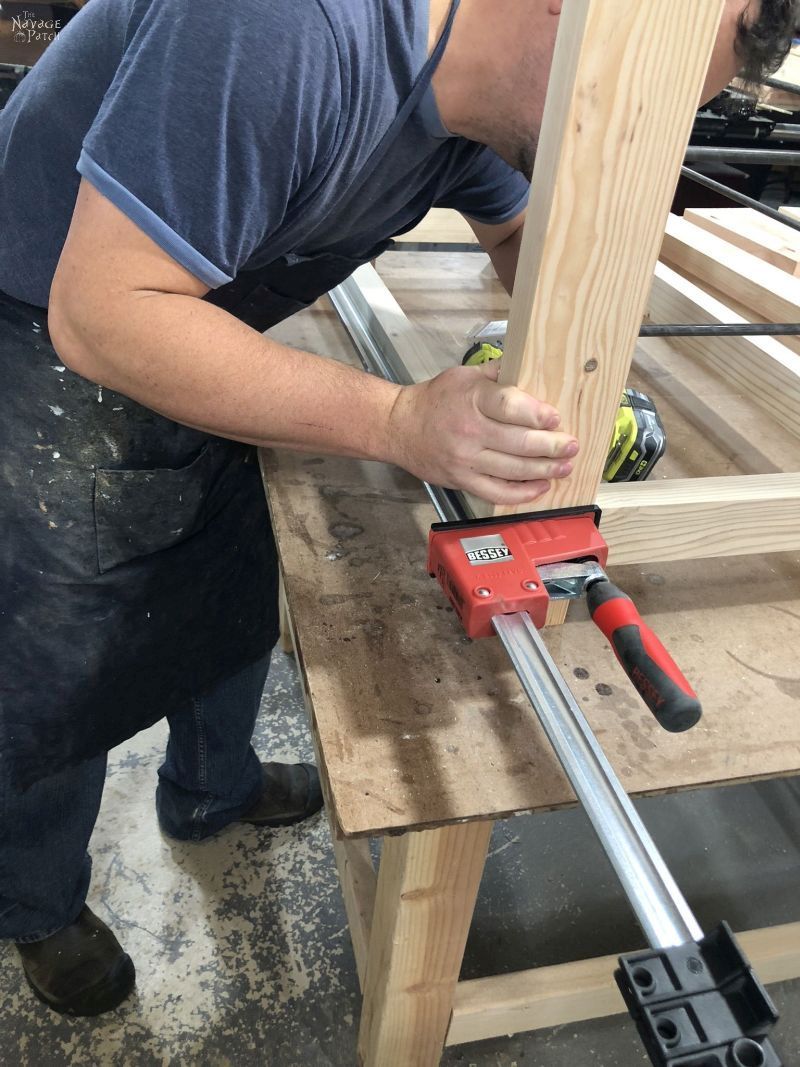
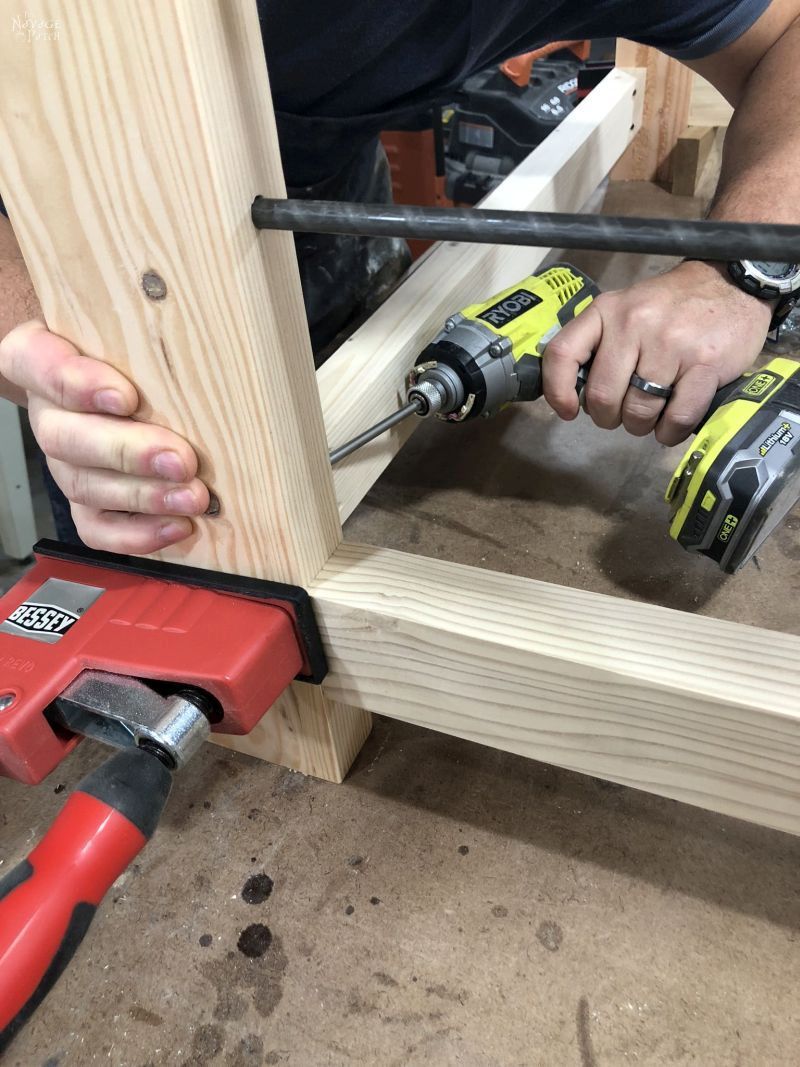
This gets us here: it’s starting to look like a playpen!
Oh, wait. That’s not what I’m building…
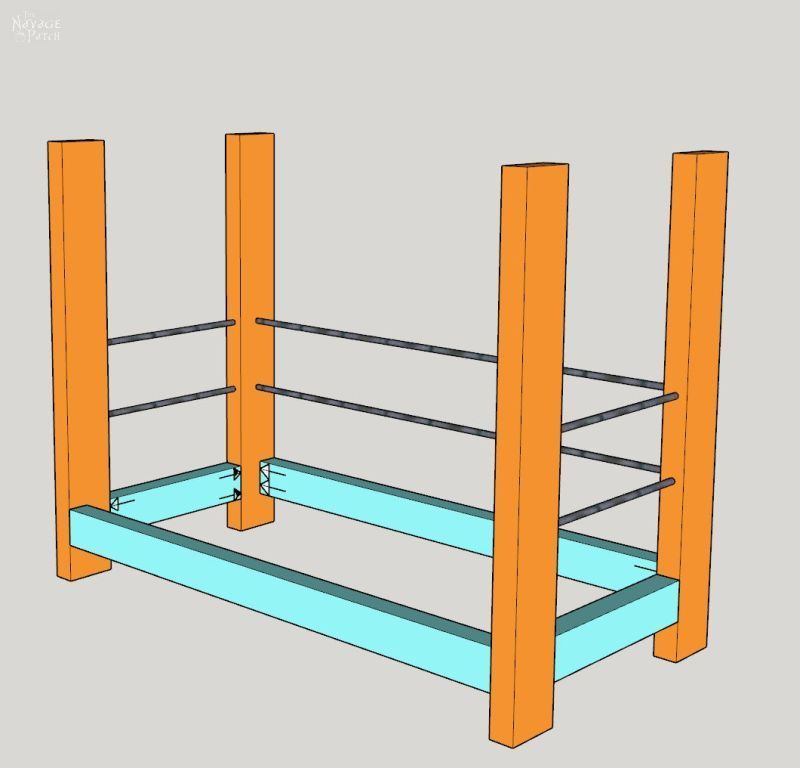
Step 5 – Attach Top Support Rails
I flipped the unit over to attach the top support rails.
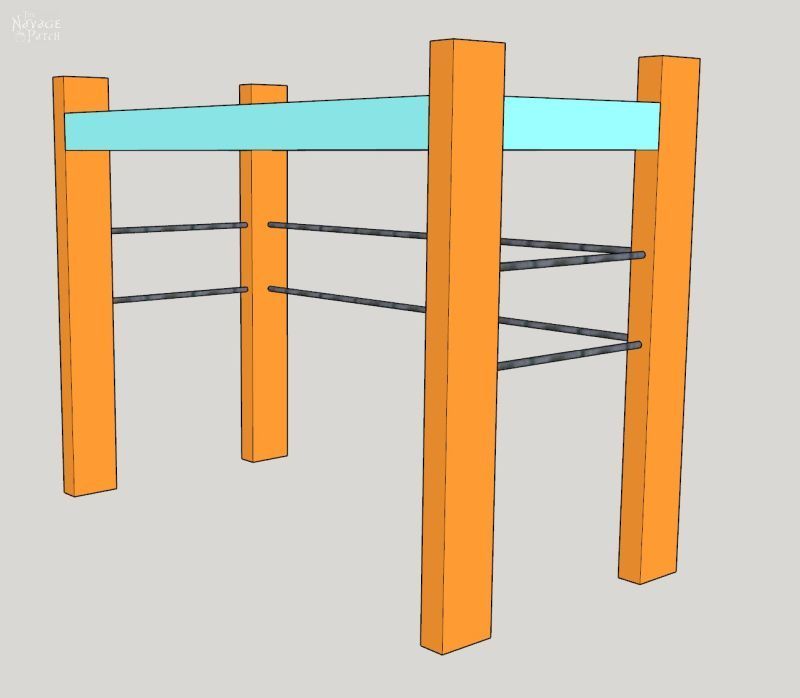
I attached (2) 3 1/2 inch x 35 inch pieces to the front and back of the console. As with the shelf support rails, I used clamps to secure the piece before inserting the pocket screws.
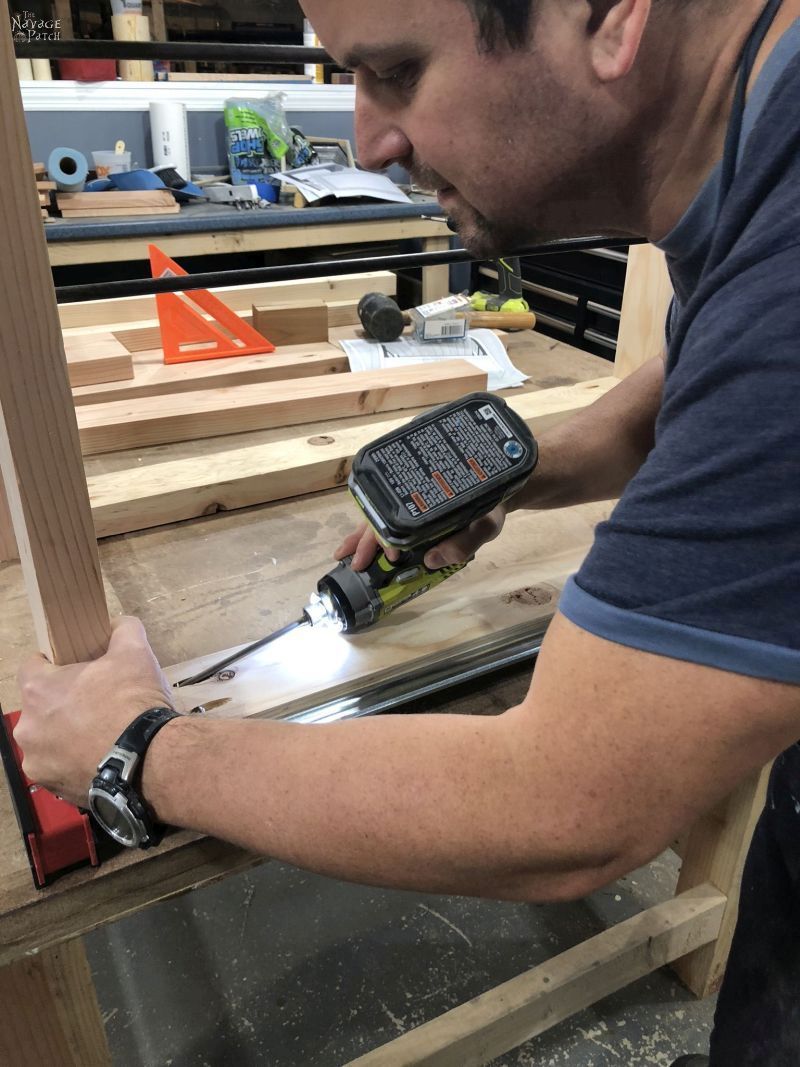
This gets us here:
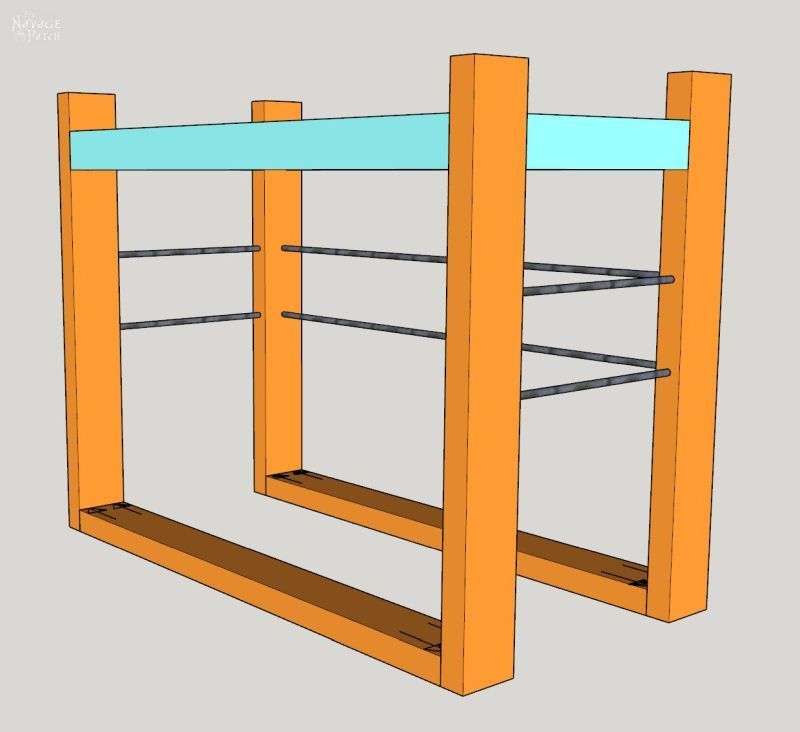
Step 6 – Add Side Panels
I next attached the two 12 1/2 inch x 7 1/4 inch side panels with pocket screws. I first laid down two 2 1/2 x 38 inch pieces underneath the side panels to raise them up 1 1/2 inches, and then I used two clamps to keep the piece firmly in place while securing it with pocket screws.
This gets us here:
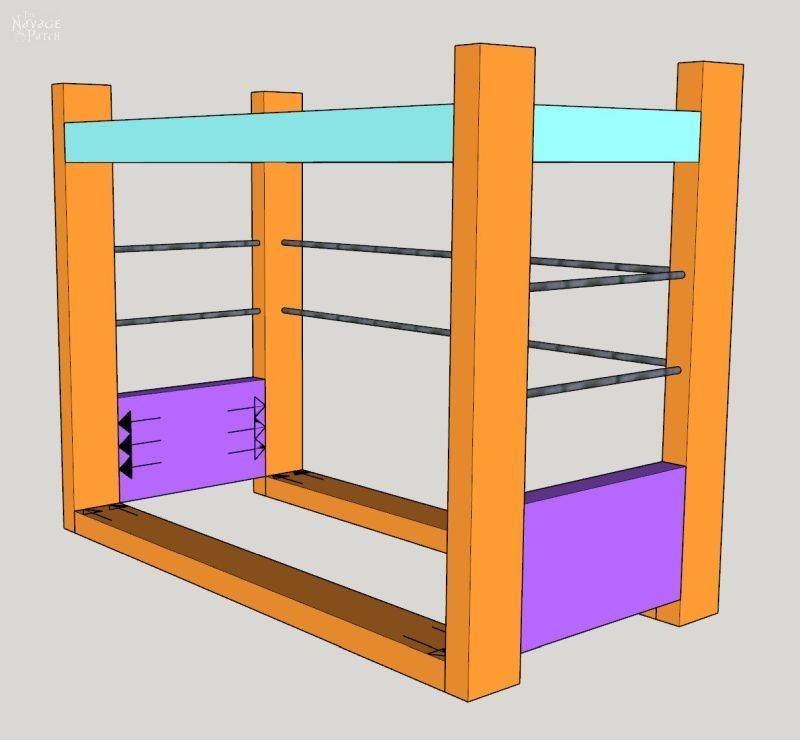
Step 7 – Add Back Panel
I attached the back panel in the same manner as the side panels. My measurements and cuts were precise, but I needed a rubber mallet to get the back panel seated nicely.
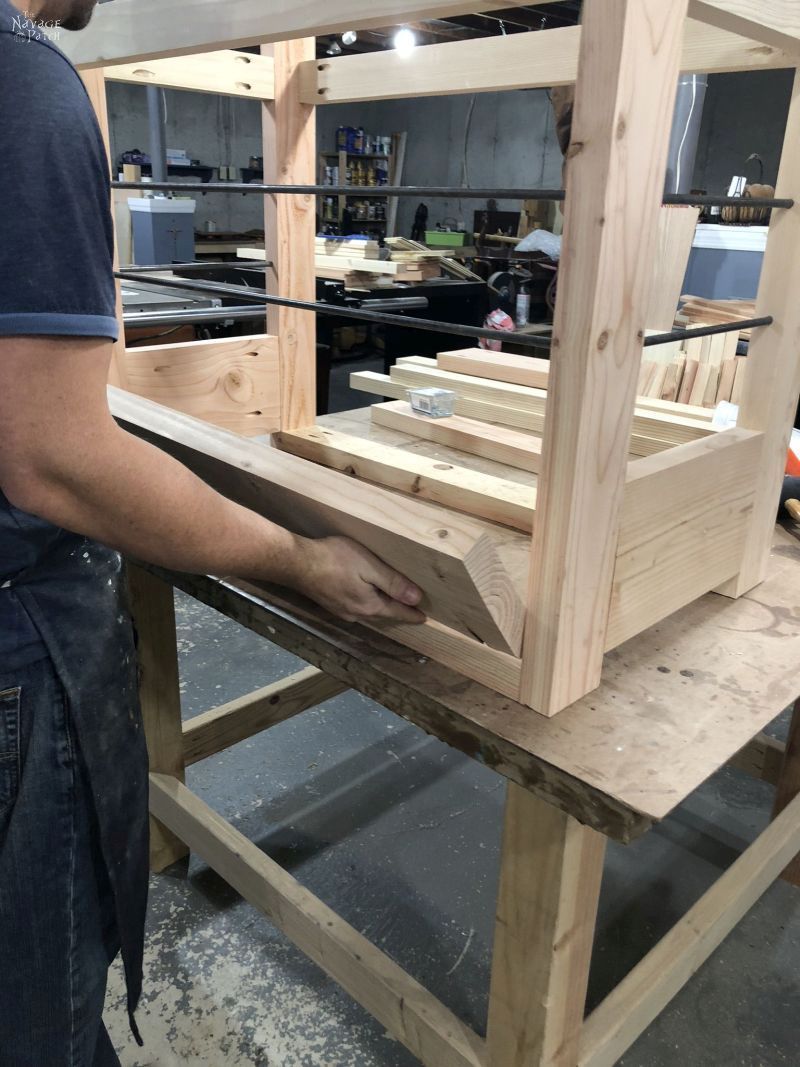
Everything’s better after a wicked beating by a rubber mallet.
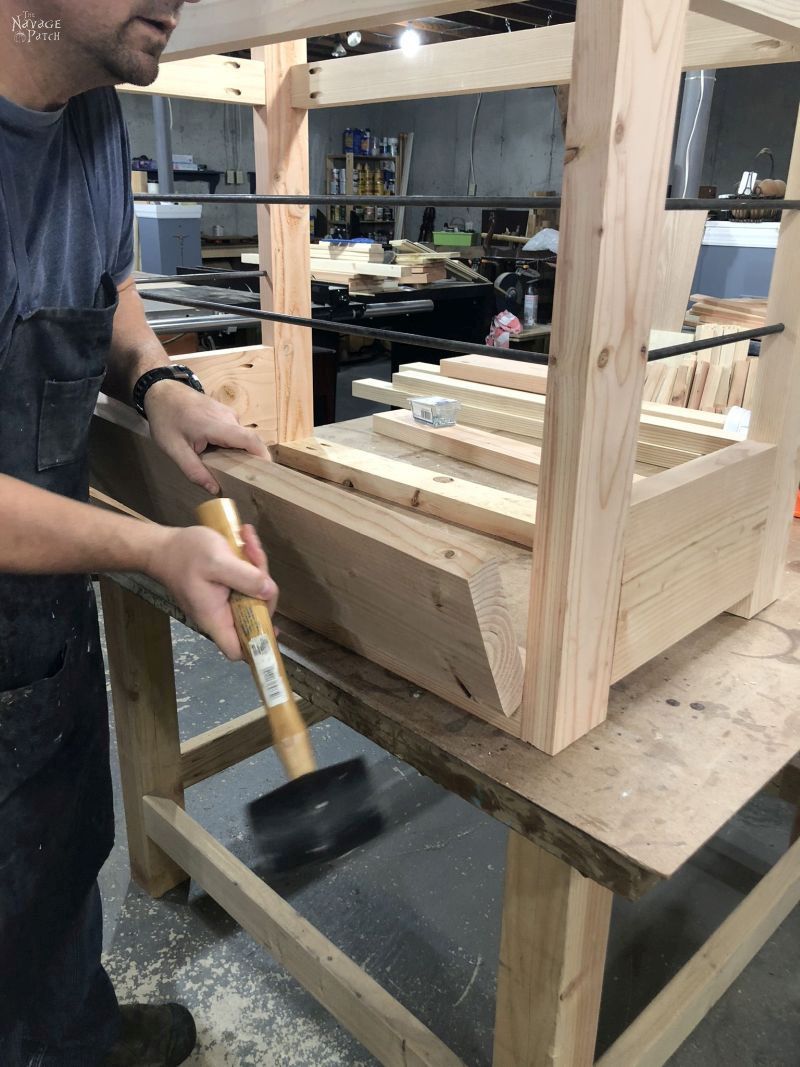
Though it was a snug fit, I still clamped the piece before attaching it with pocket screws. Why? Because I tried to take a shortcut by not clamping it, and the stupid piece moved. I should point out that by not clamping it, I was going against the advice of my wife. There’s a lesson in there somewhere.
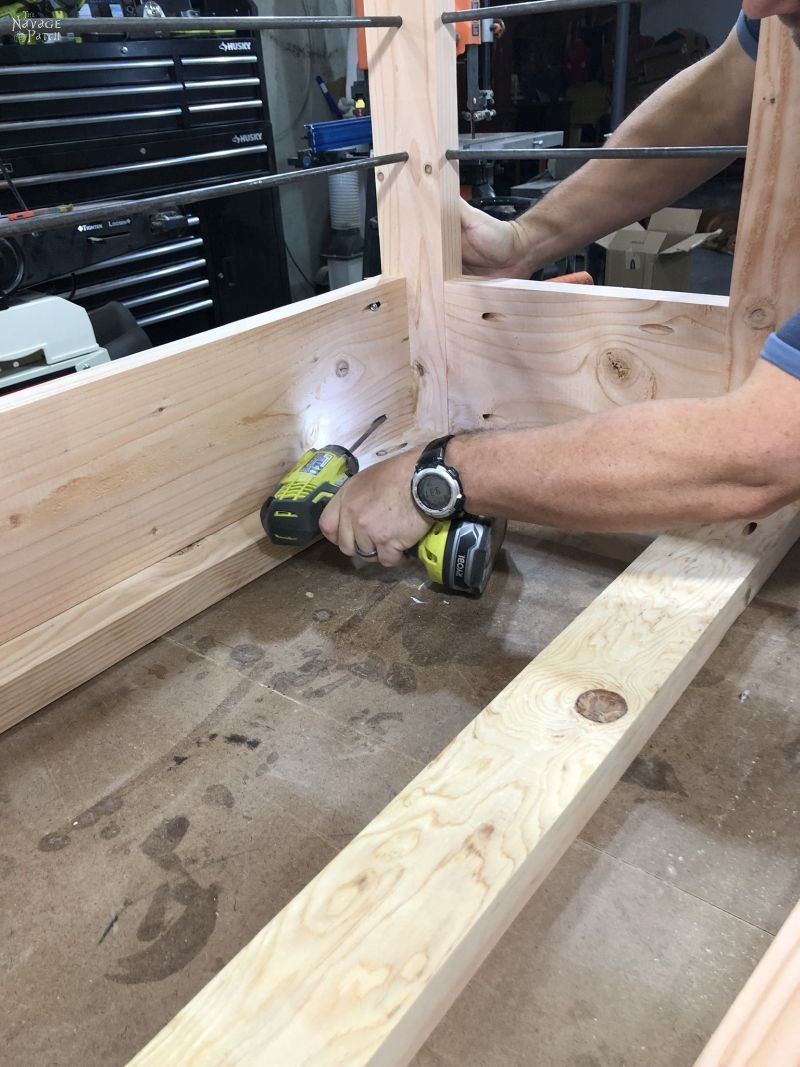
This gets us here:
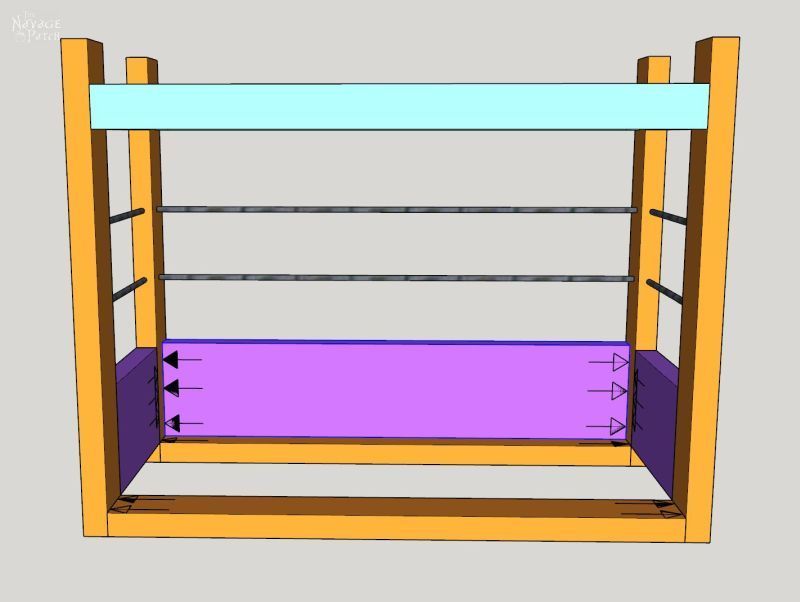
Step 8 – Add Center Drawer Divider
Before installing the 5 3/4 inch x 18 inch center drawer divider, I first marked the midpoint on the back panel and on the bottom of the front top support rail. Since the divider is 1 1/2 inches thick, I then marked 3/4 inch to the left and right of my center marks.
I placed the center drawer divider in between the lines, clamped it in place and secured it with pocket screws.
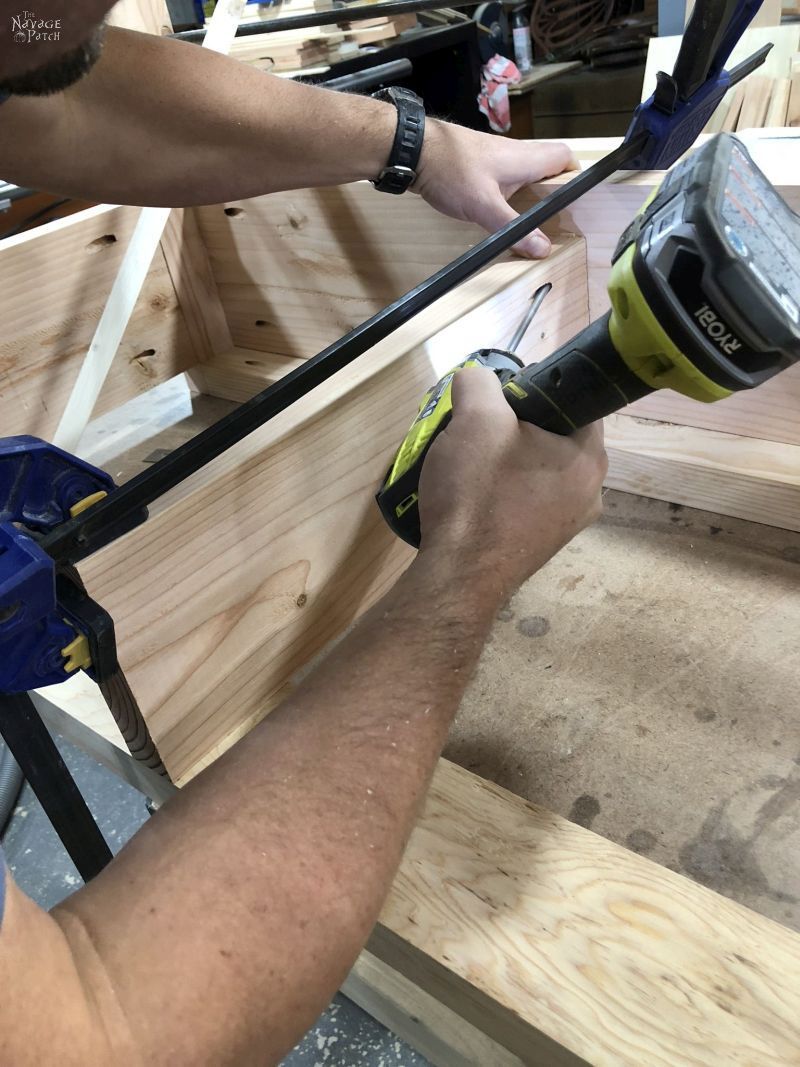
This gets us here:
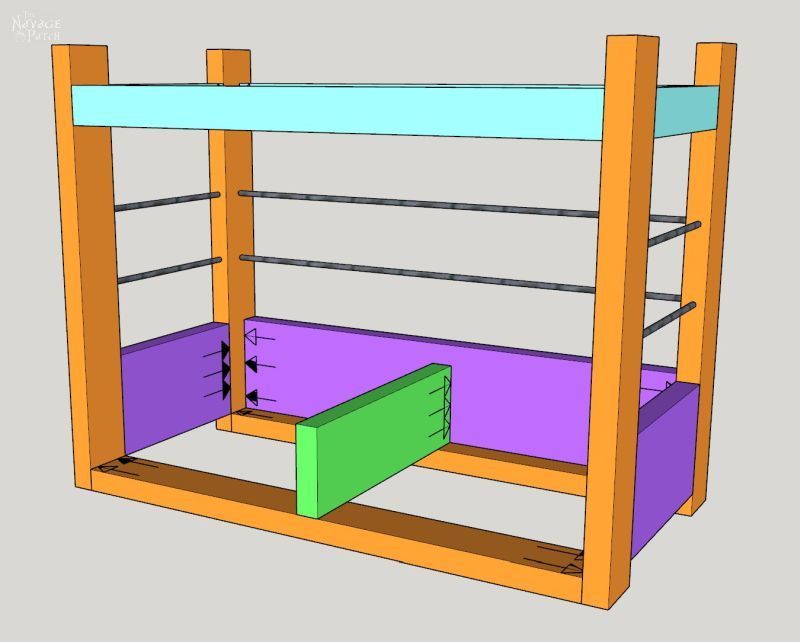
Step 9 – Add Bottom Drawer Frame
I laid the last 3 1/2 inch x 35 inch piece on the center drawer support and lined up all the edges. I then clamped it in place and secured the ends with pocket screws.
I also drove two standard wood screws (countersunk) through the middle of the bottom drawer frame and into the center drawer divider.
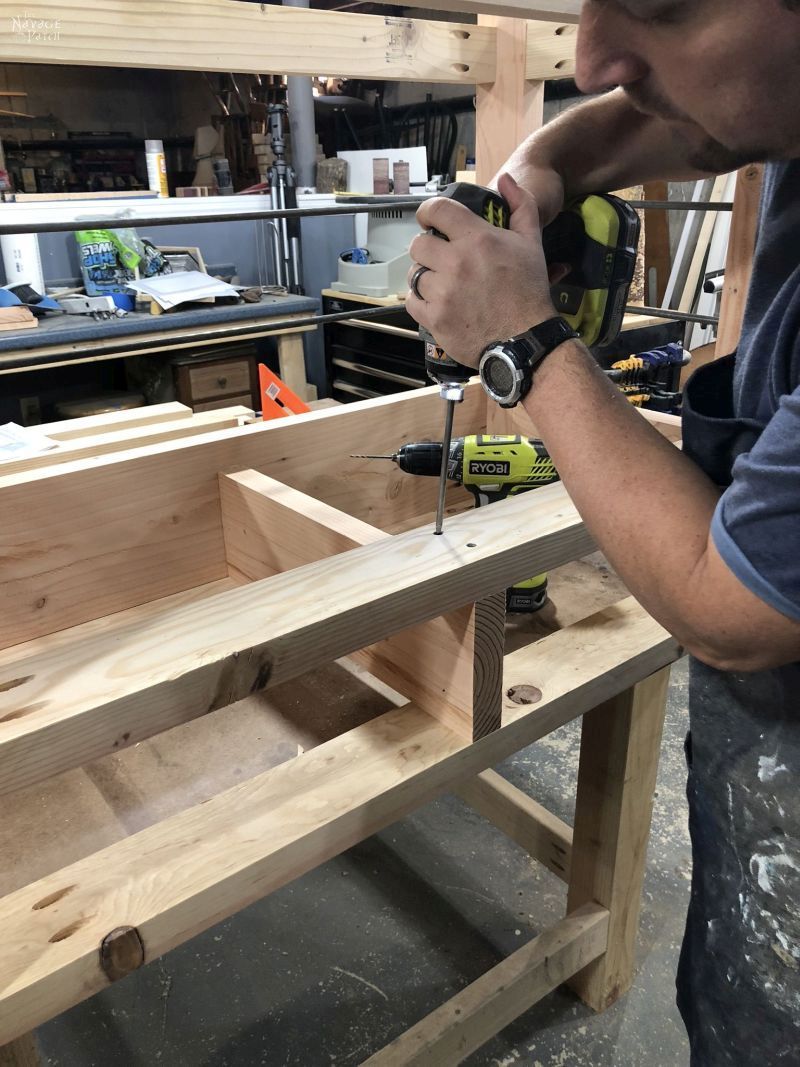
This gets us here:
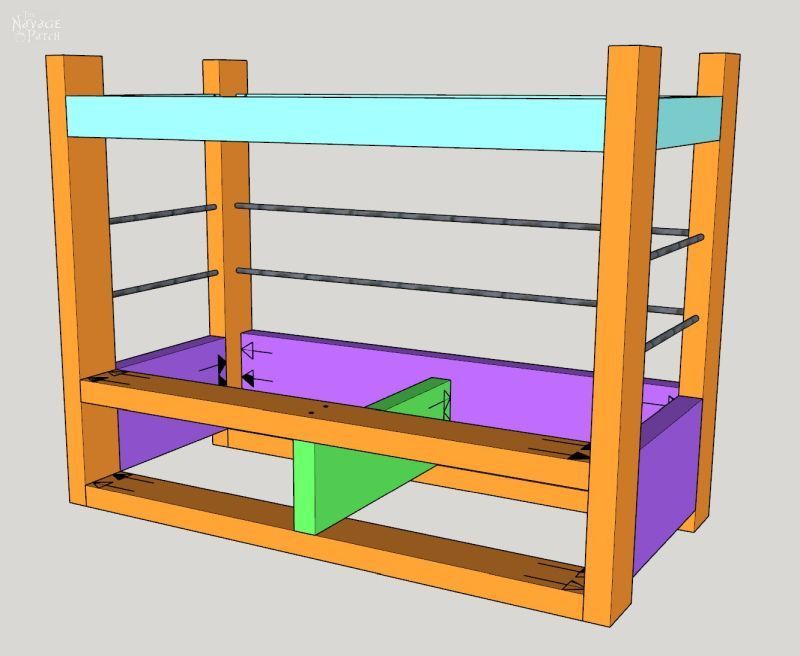
Step 10 – Install Drawer Slides
I installed the four drawer slides. Please note: it has since been brought to my attention that not all drawer slides are created equal – meaning that some brands are thicker than others. I have based all of my measurements off of the ones I used. They are linked in the materials list, and I will link to them again here. If you plan to use slides by a different brand, you may need to alter the plans accordingly. First I situated them 5/8 inch back from the front of the drawer frame. That’s 1/2 inch for the thickness of the plywood drawer face plus 1/8 inch for the drawer slide piece that attaches to the drawer.
I used to be terrified of installing drawer slides. Now I eat them for breakfast.
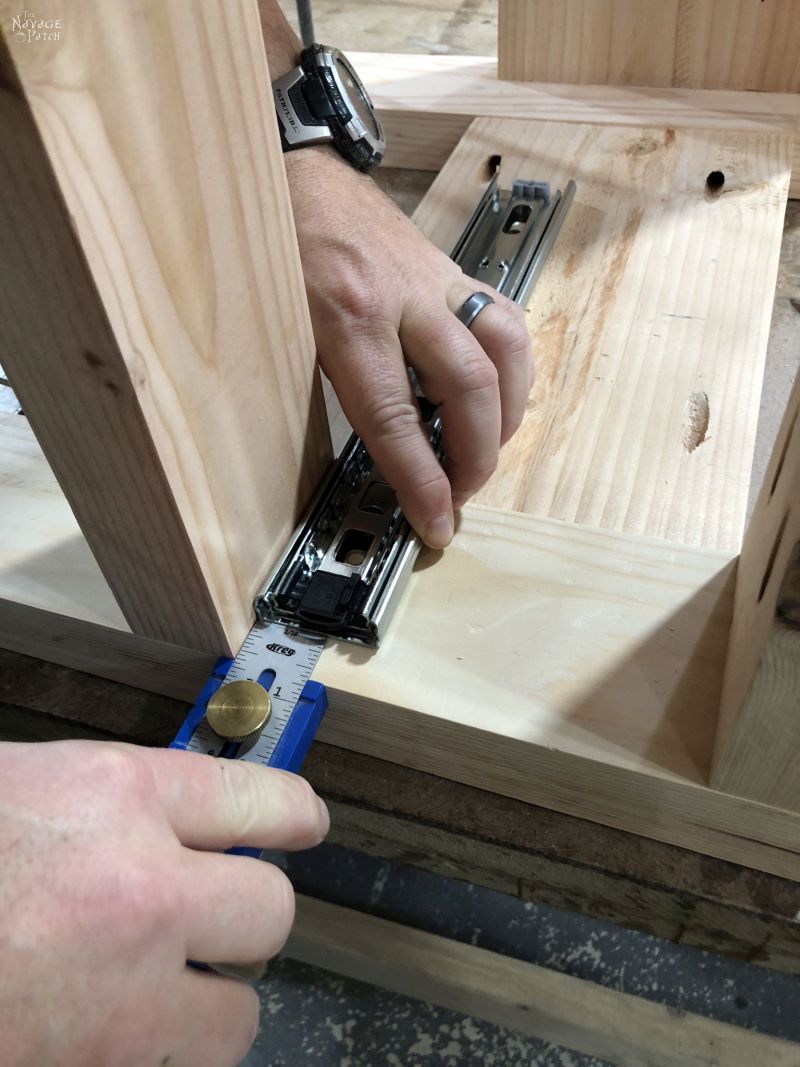
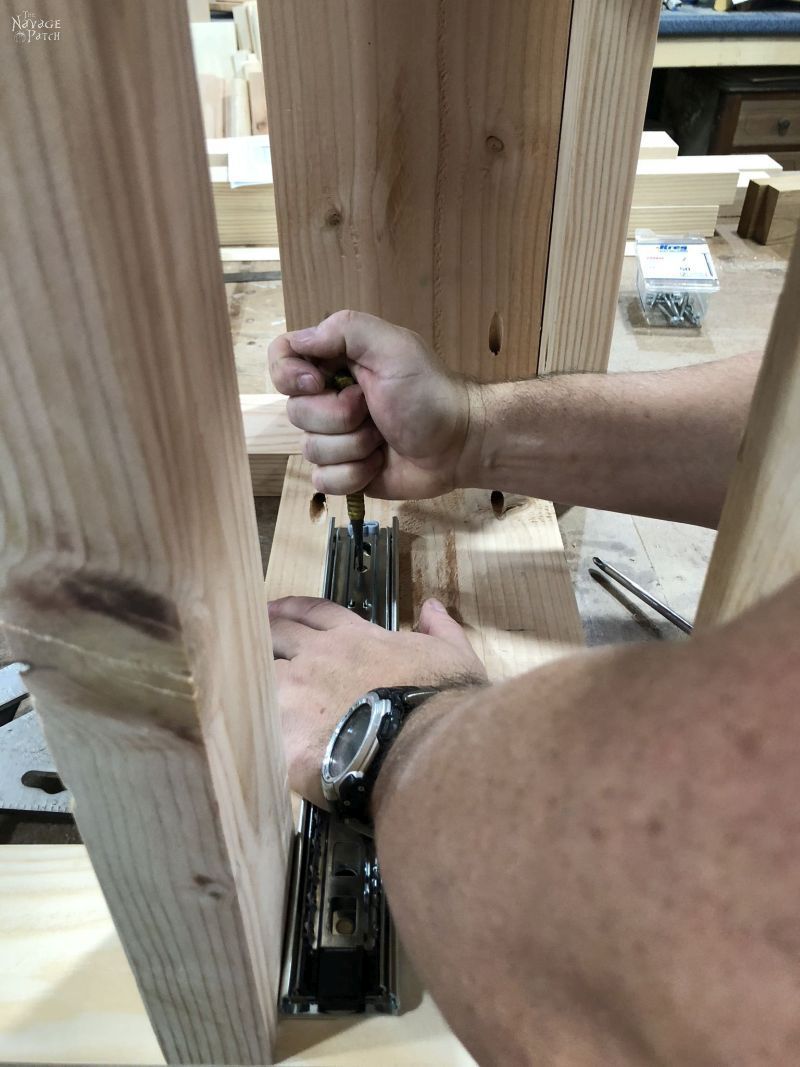
I used a punch to mark the screw holes.
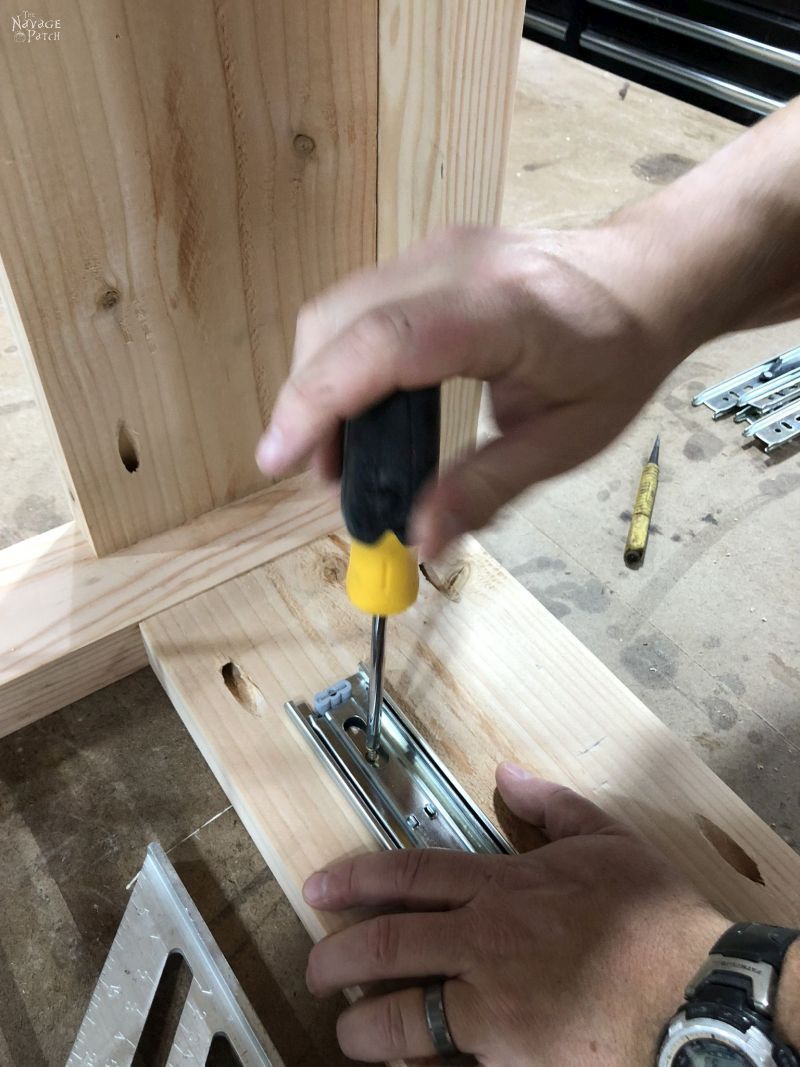
And then I screwed the slides in place.
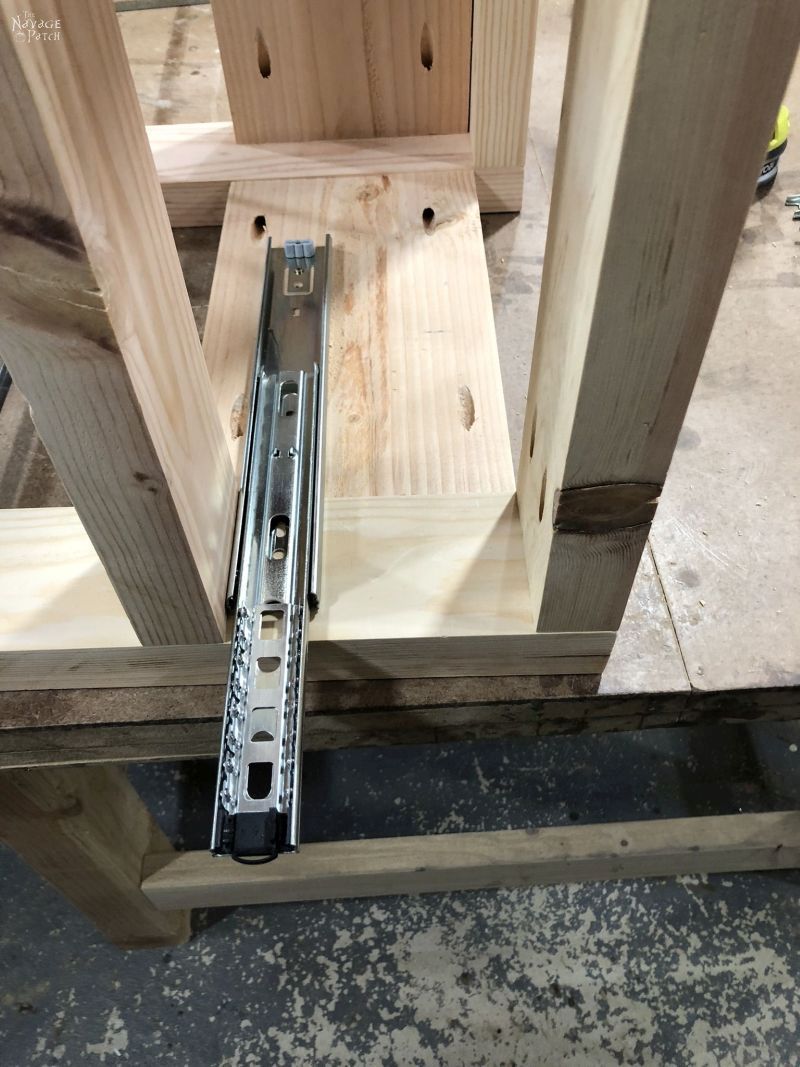
Step 11 – Add the Shelf
I flipped my DIY rustic console table back over so it stood right-side up.
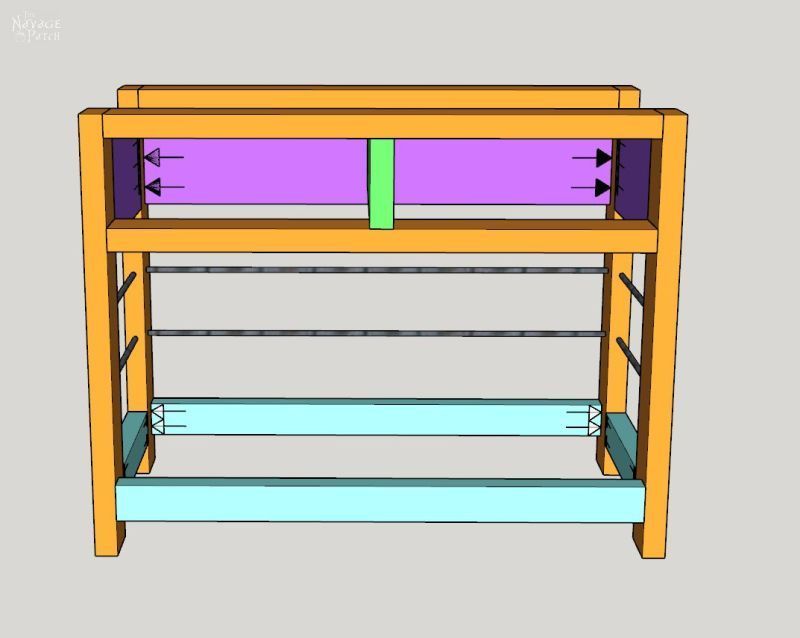
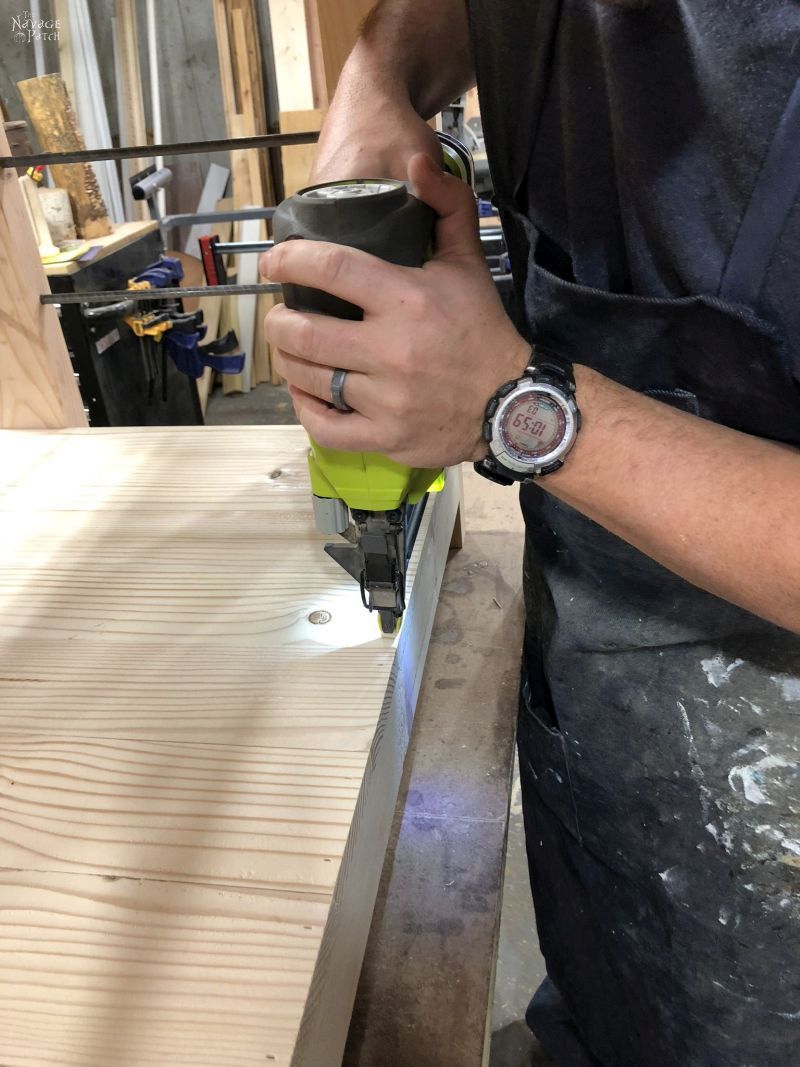
I then laid the 3/4 inch thick shelf pieces on the shelf support rails and secured them with brad nails.
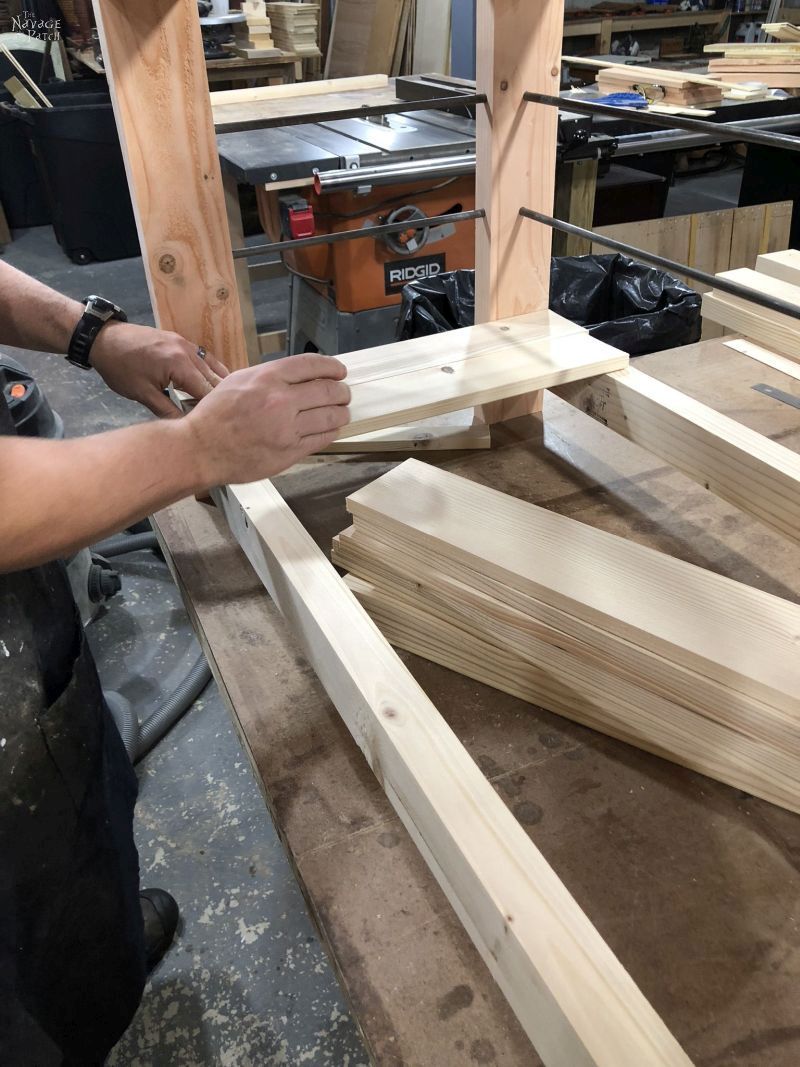
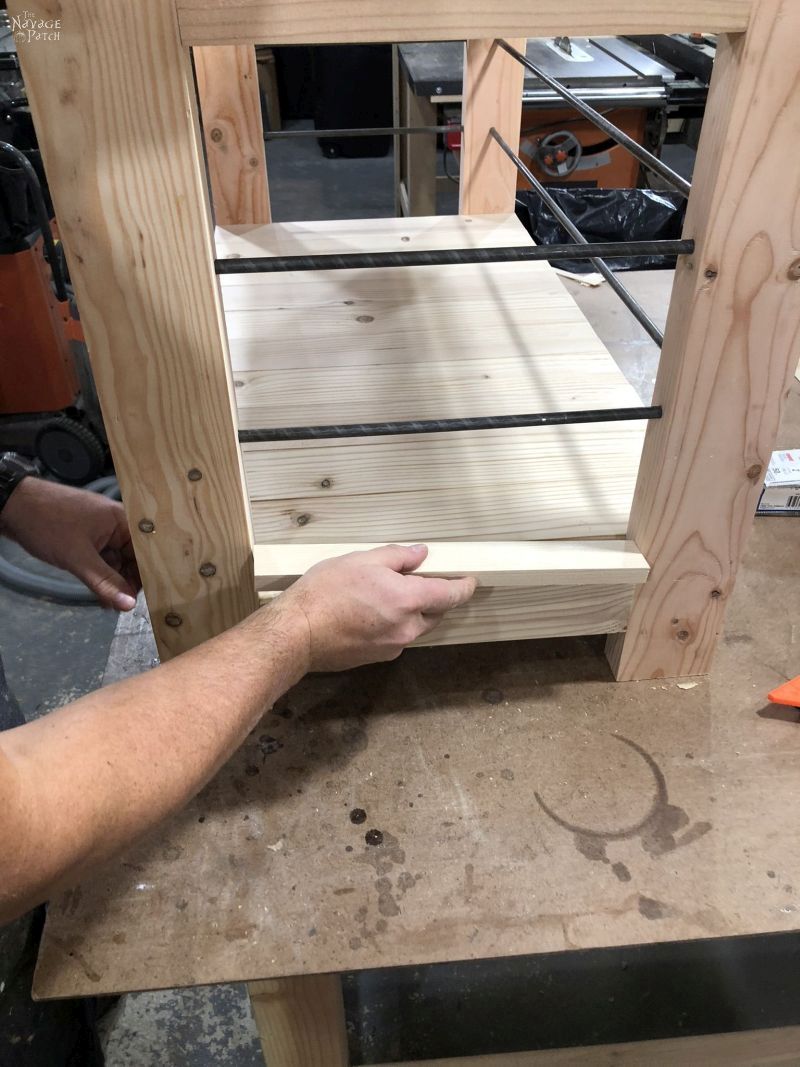
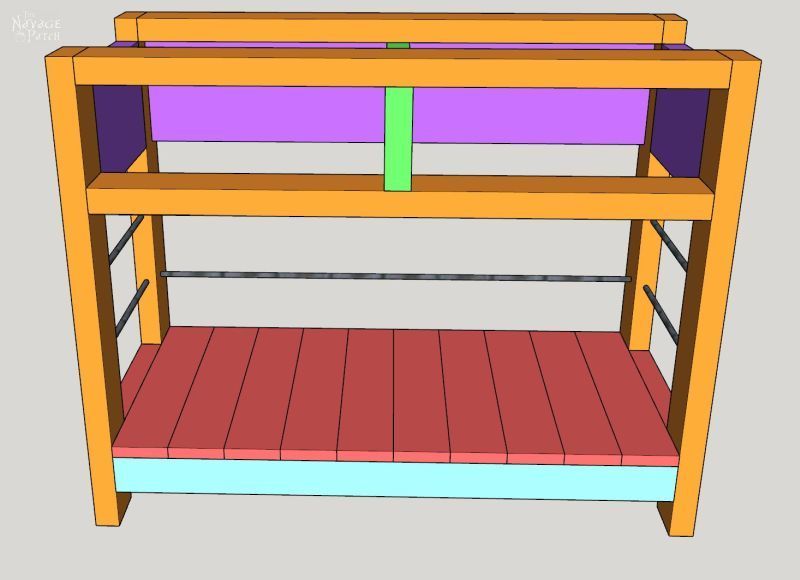
This gets us here:
Step 12 – Add Top
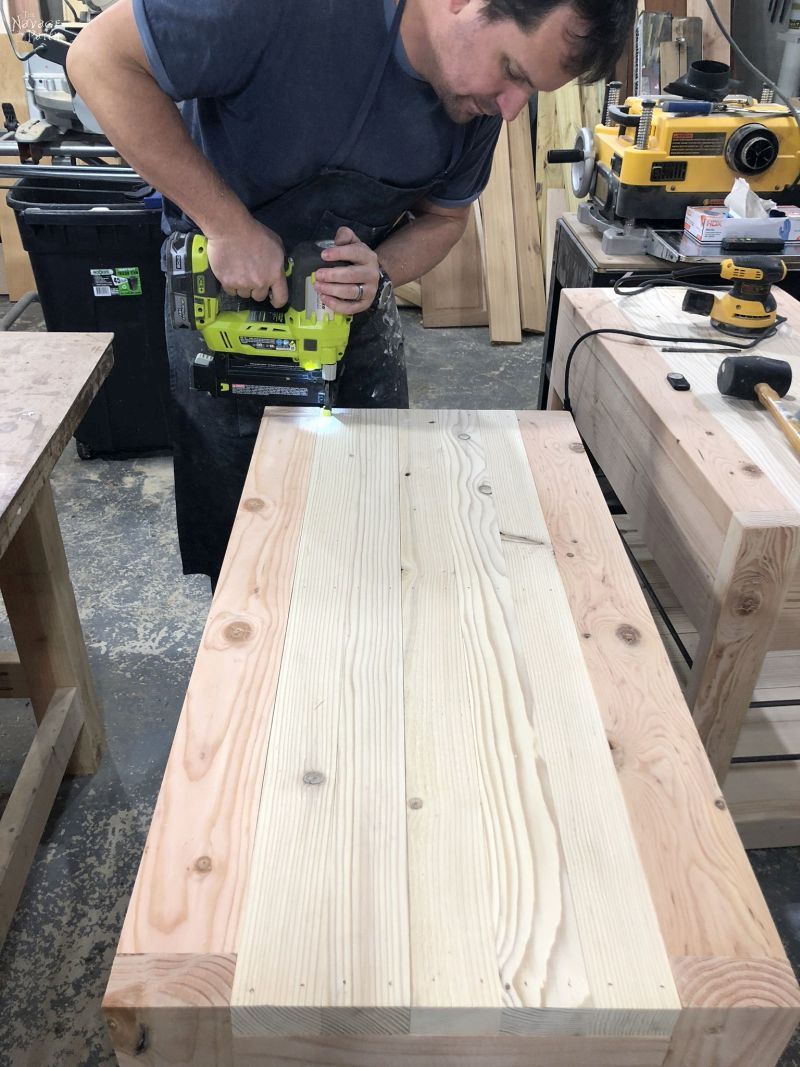
I laid the top boards, aligned them and secured them with brad nails on both ends and in the center. I didn’t want to use glue in case I ever want or need to replace them.
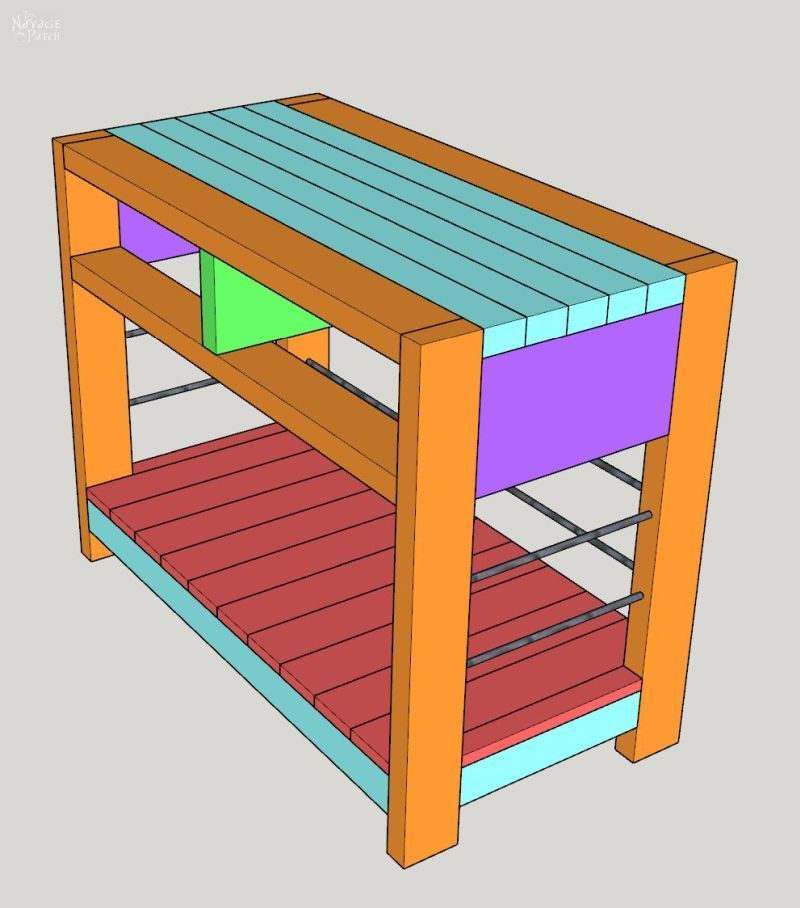
This gets us here. Those colors are hot! Maybe I should have painted the thing!
Step 13 – Assemble Drawers for the DIY Rustic Console Table
Using glue and brad nails, I built the drawers.
I attached a side to the bottom as shown below.
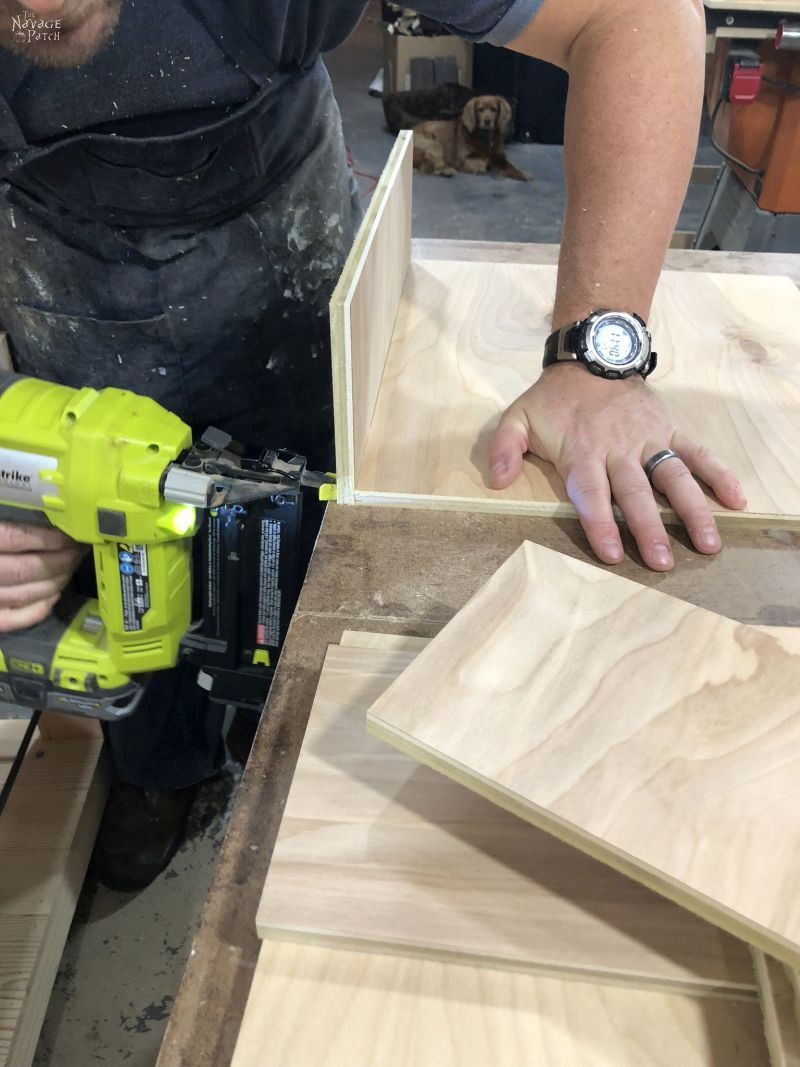
I then attached the other side.
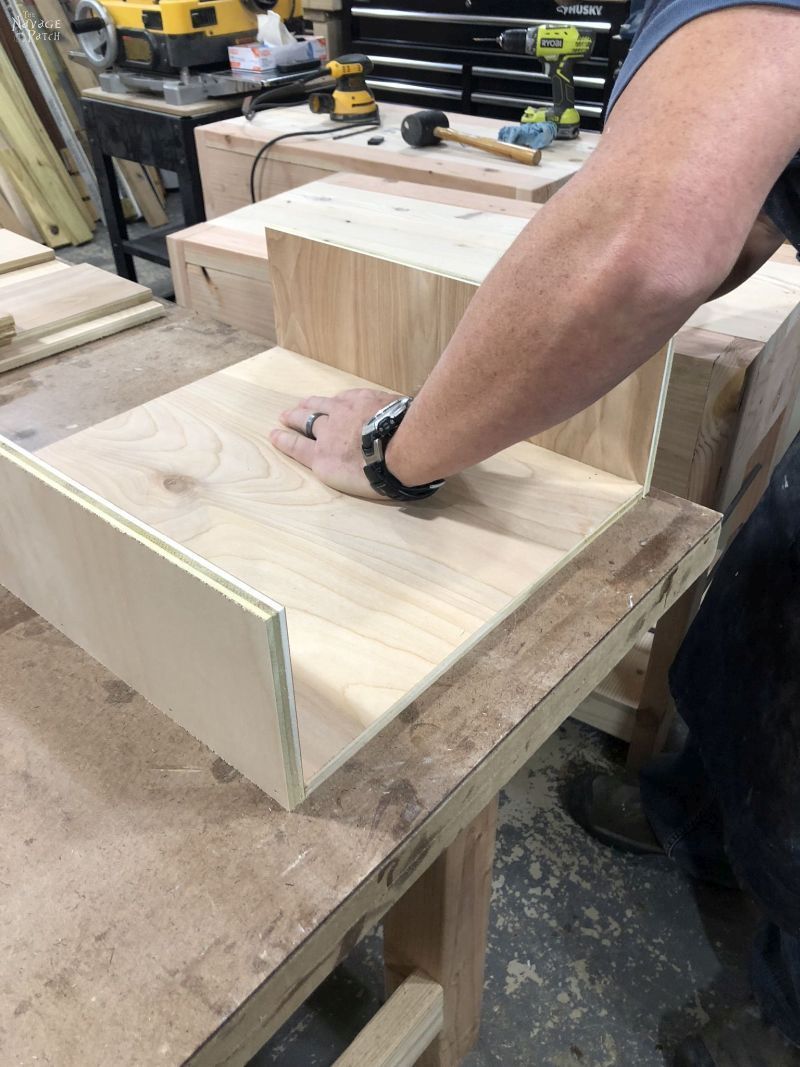
Then I attached the back.
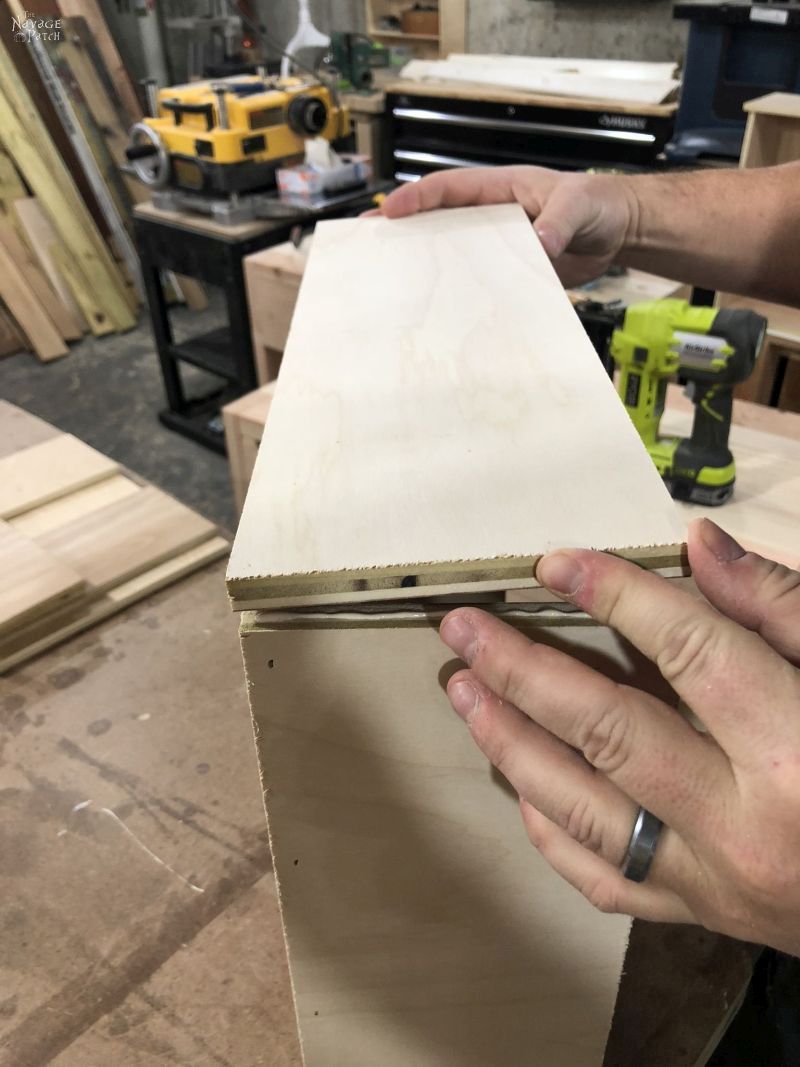
At this point, I attached the drawer slides to the drawers so I could slide them into their places to make sure everything was lined up and installed correctly before attaching the drawer front. I know it’s hard to believe, but I’ve been known to make a mistake or two.
Sometimes they go unnoticed until almost the end of the project, and then I realize I’ve wasted days of my life and I have to go back a dozen steps because of some stupid mis-measurement.
What’s that? It’s not hard to believe? Well, thanks for the vote of confidence!
Yeesh, tough crowd!
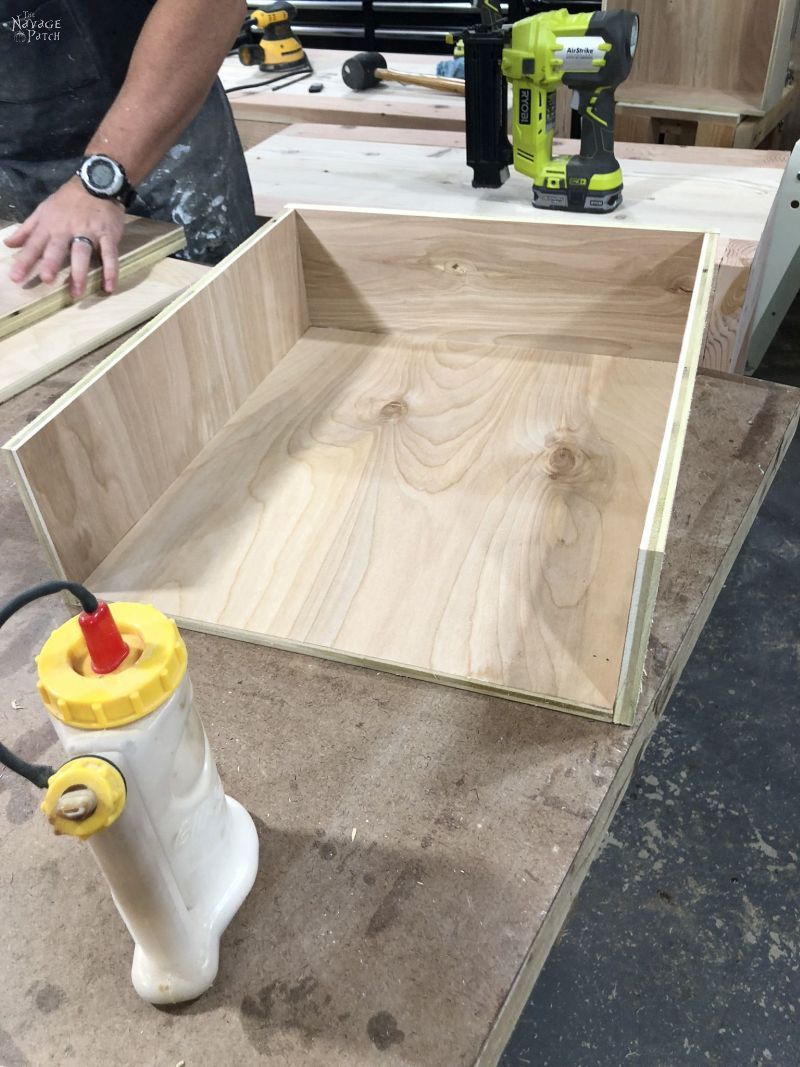
Since the drawer face is wider than the drawer width, I measured to get it placed with equal overhang to each side.
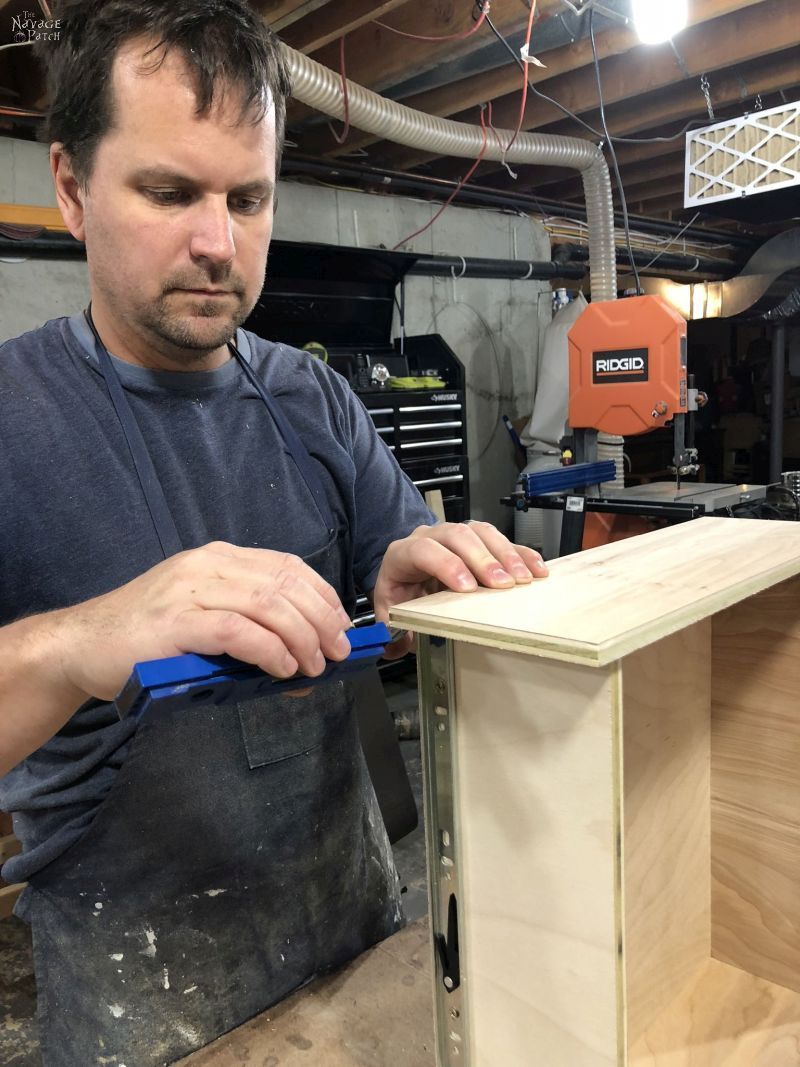
And this was the point where Handan saw fit to take a picture of my bedhead and call me a cockatiel.
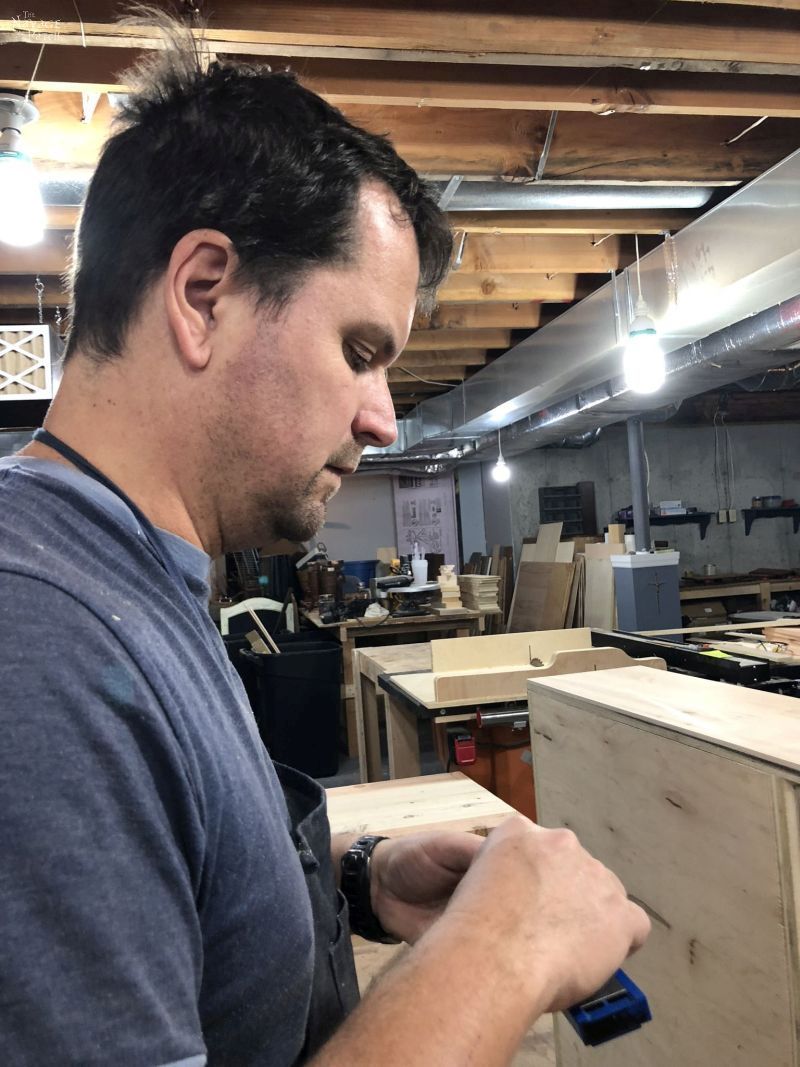
Is there a resemblance? You decide.

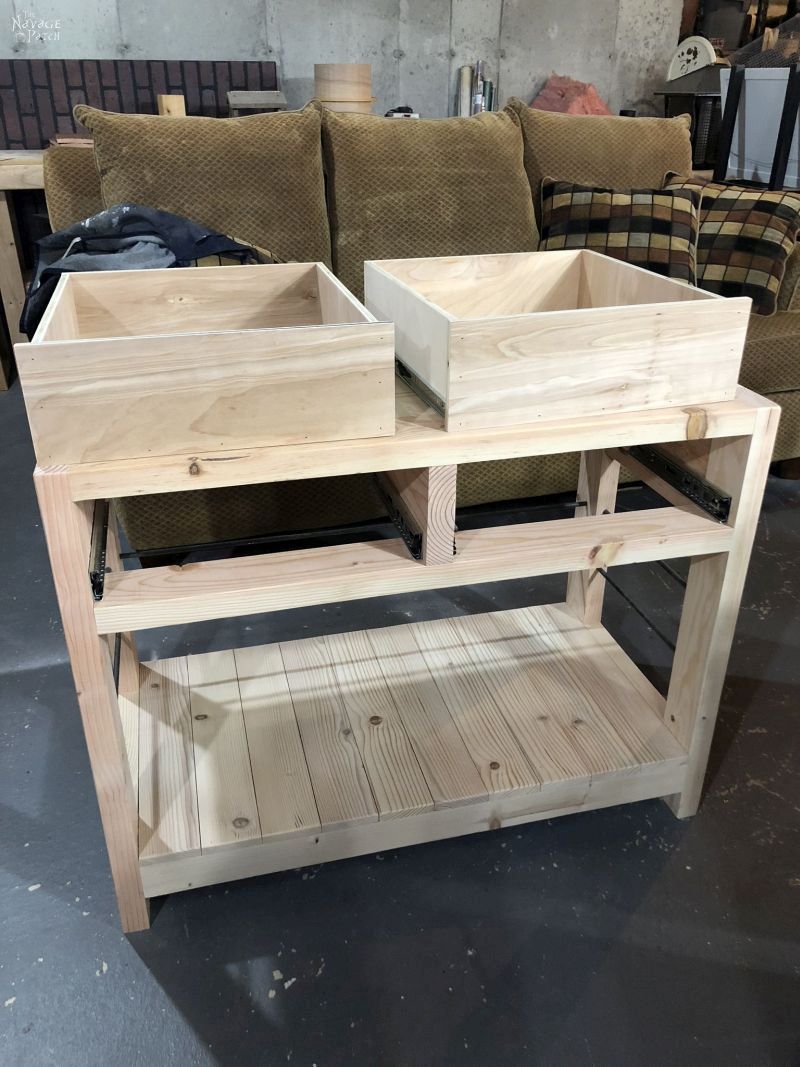
With the drawers built, I was here:
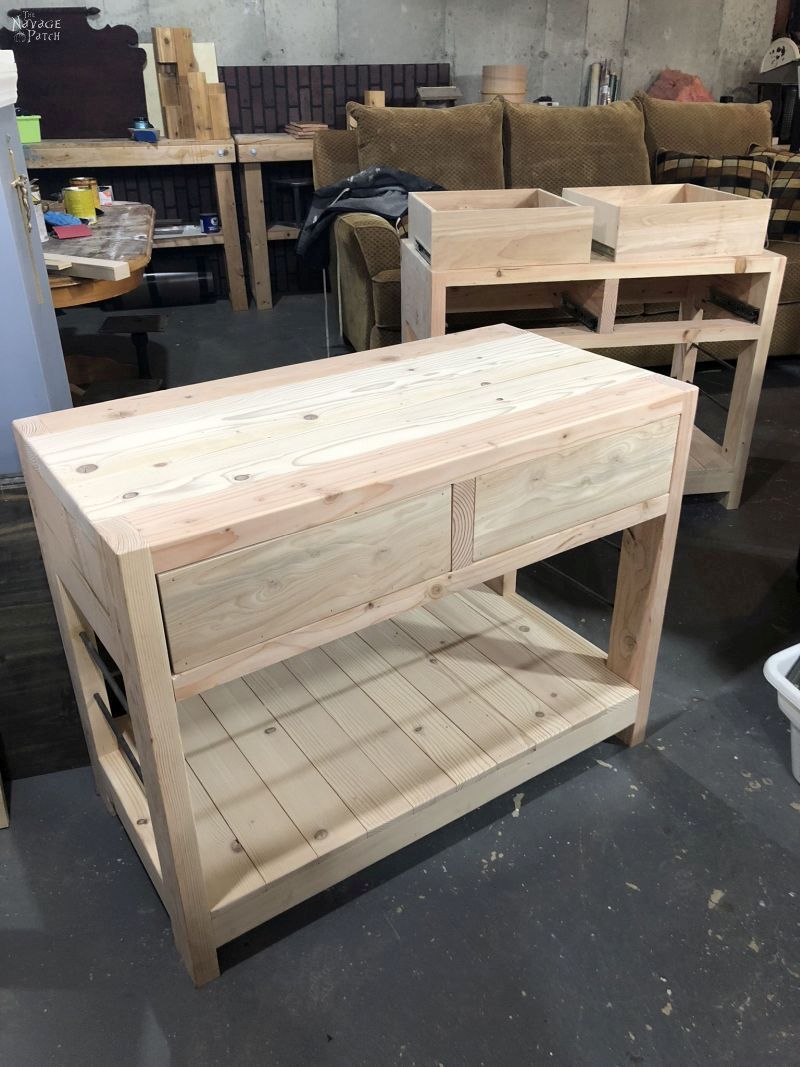
And with the drawers installed:
Step 14 – Pre-Stain, Stain and Seal
I had a lot of different wood going on here – a couple different colors of pine and some birch plywood. Getting it all stained properly would be a problem. If I just threw some stain at it and called it a day, it would look like a blotchy mess. A pre-stain conditioner was a must. I normally use Varathane Pre-Stain Conditioner, but I had recently bought a new product I used on an antique school desk I was restoring for a friend. The wood used for that desk was so prone to blotching when stained that even Varathane’s pre-stain did nothing. I scoured the web for another alternative and found the answer to my prayers from Marc Spagnuolo over at The Wood Whisperer. He had been contacted by a veteran woodworker name Charles Neil who had developed a product he swore was better than any other pre-stain conditioner out there. Marc was dubious but gave it a shot. Long story short – he was floored by how well it worked.
That was good enough for me. I’ve come to trust Marc, so if he says this stuff is the best, you can bet your butt it is. I hopped over to Charles Neil’s website and ordered some for myself. It was pricey for the amount, but if it worked, it would be worth it.
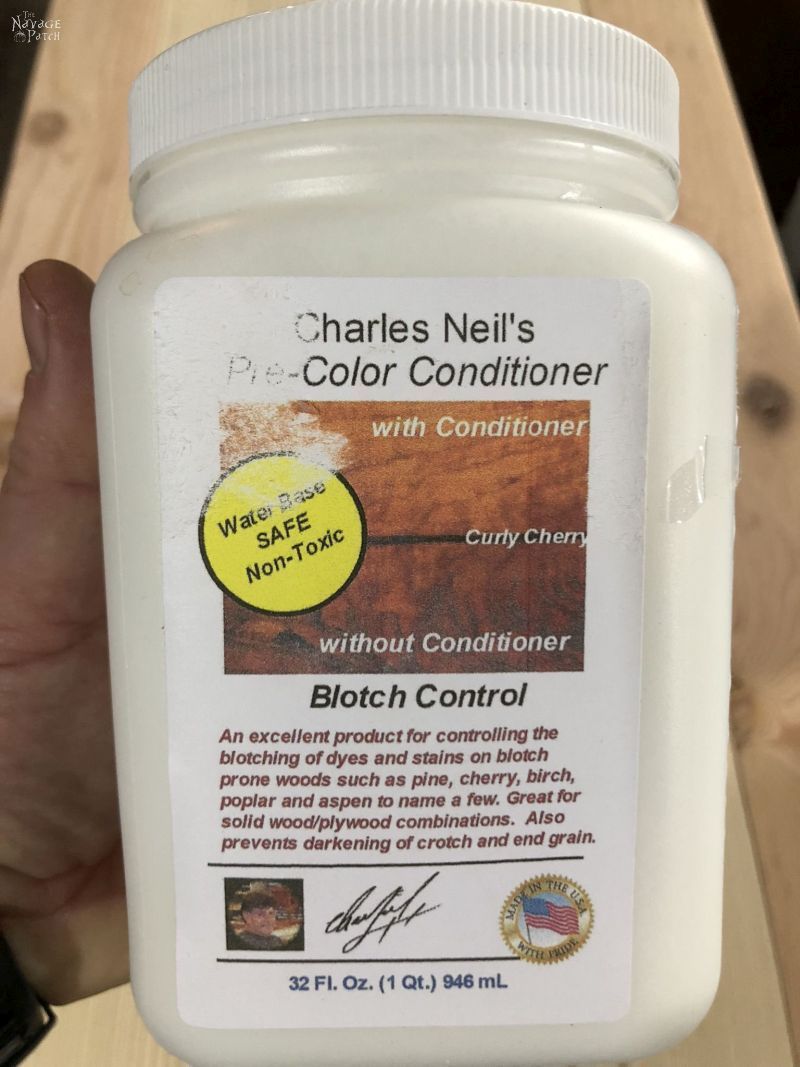
Spoiler alert – it worked a miracle on that old desk.
I applied the conditioner all over my two DIY industrial console tables, wiped off the excess and then let them sit overnight.
The next day, I stained them with Minwax Special Walnut – easily the brightest star in the Minwax universe.
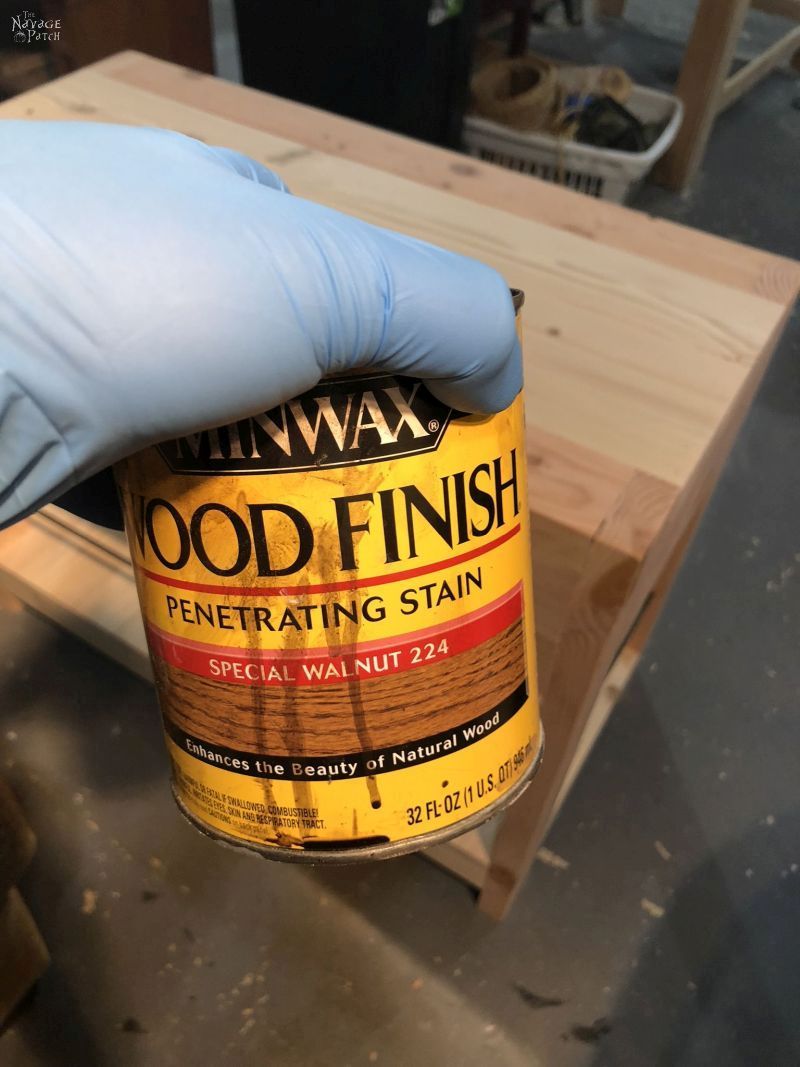
When the stain had dried for a couple of days, I applied four coats of satin wipe-on polyurethane.
Step 15 – Install Drawer Pulls
The last step was to install drawer pulls, and then my DIY console tables were finished and ready for action.
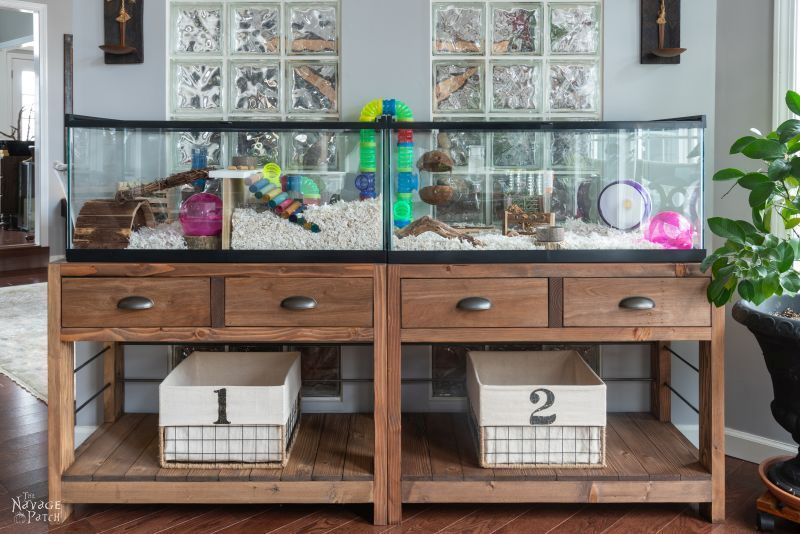
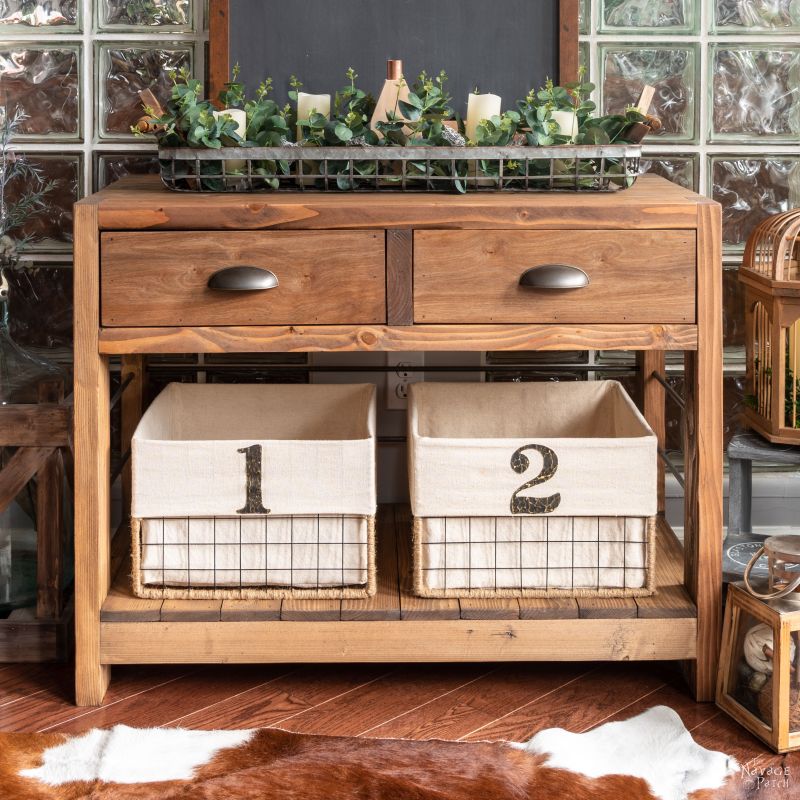
Though I made two industrial console tables to hold our precious little jerkballs gerbils, we first brought one upstairs and staged it all nice and pretty for you. Why? Because bloggers are full of baloney! Never forget that! If you need a refresher course on how full of crap we all are, check out a behind the scenes look at The Navage Patch.

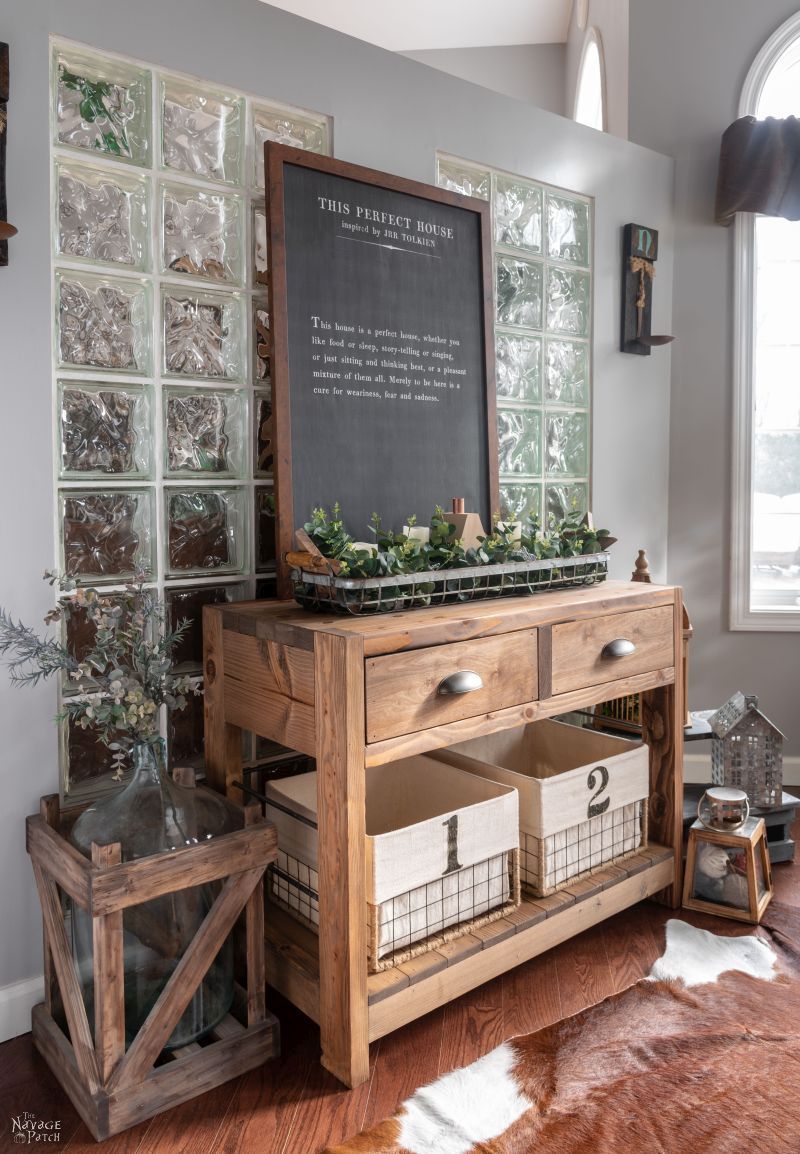
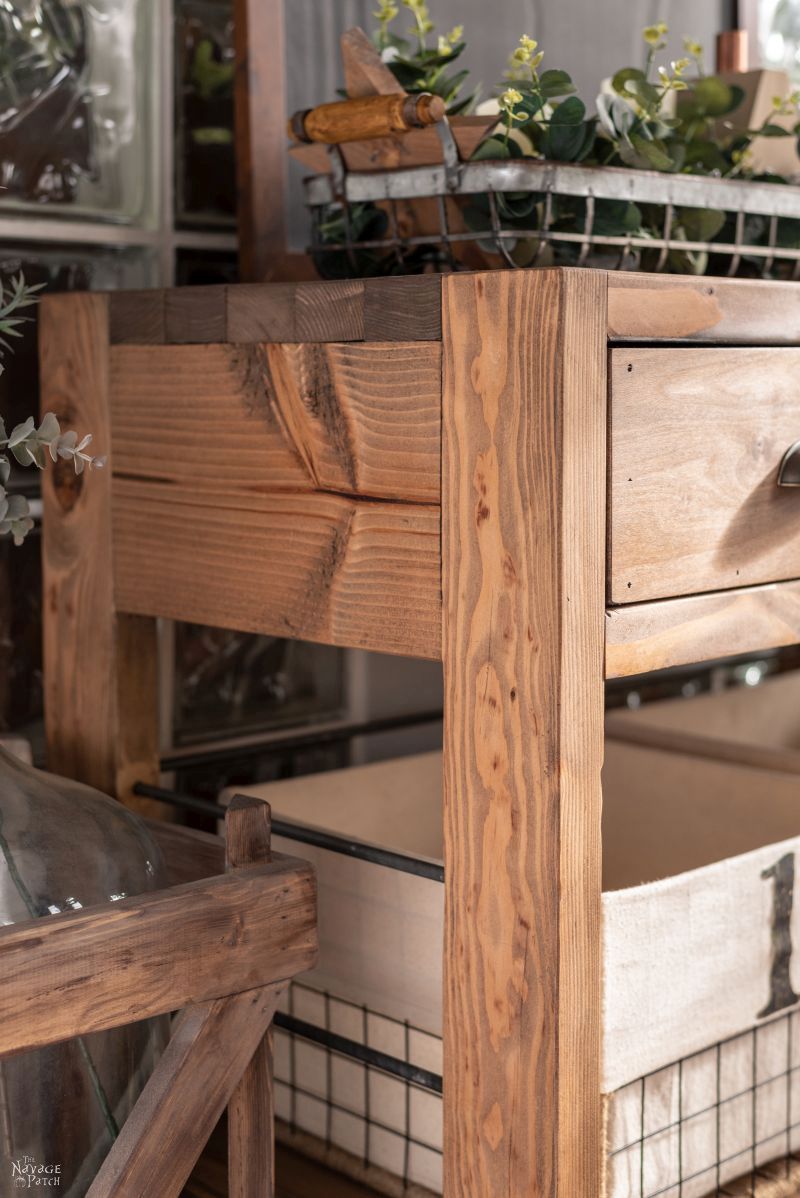


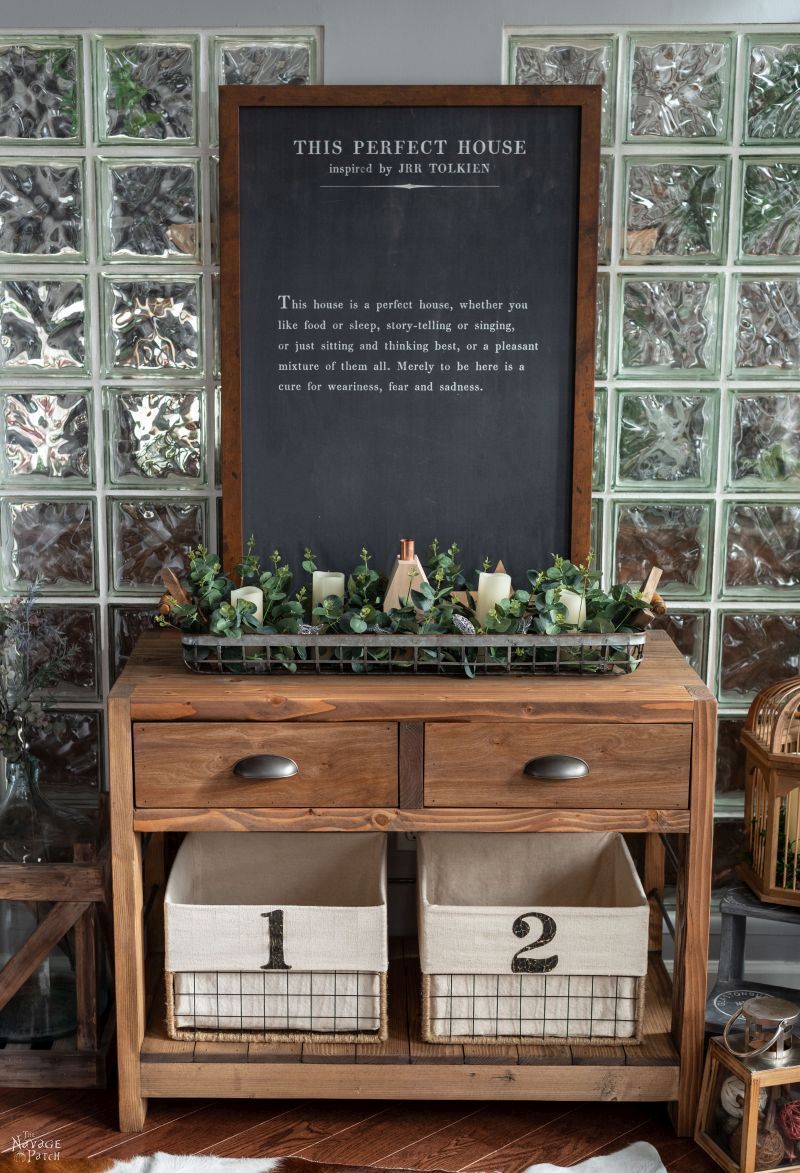
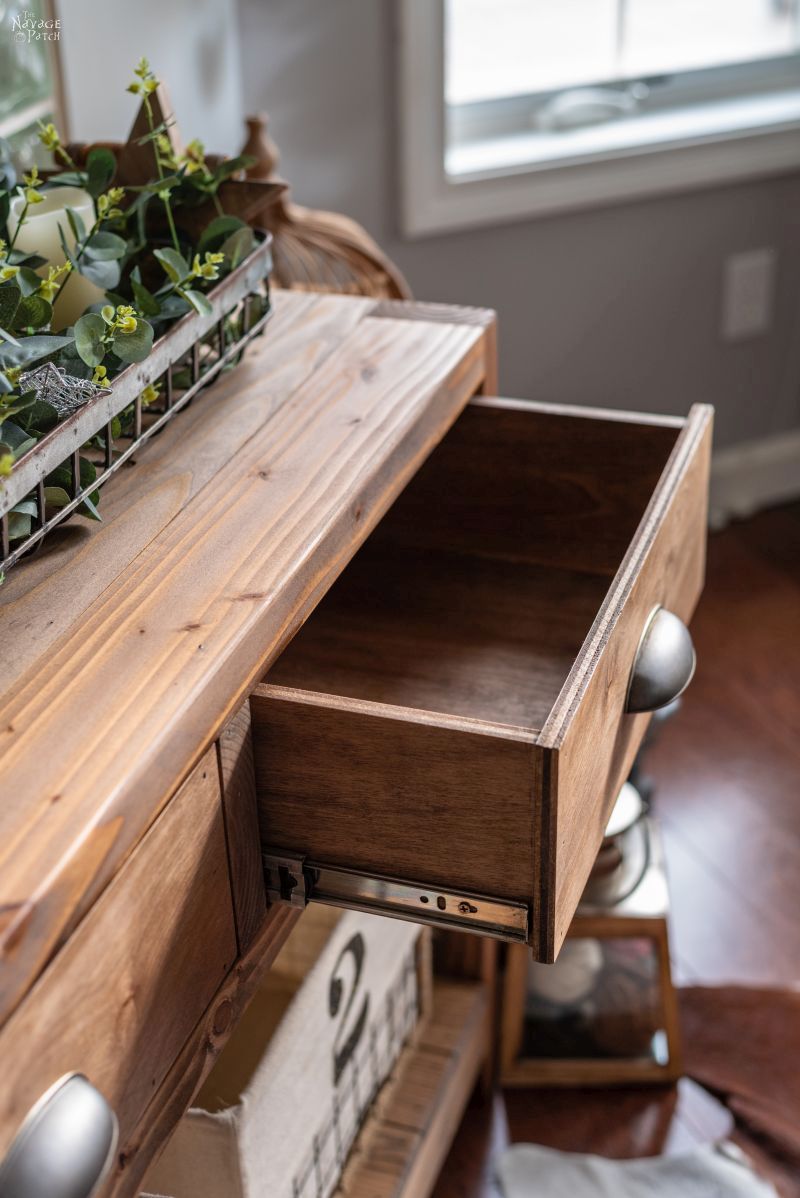
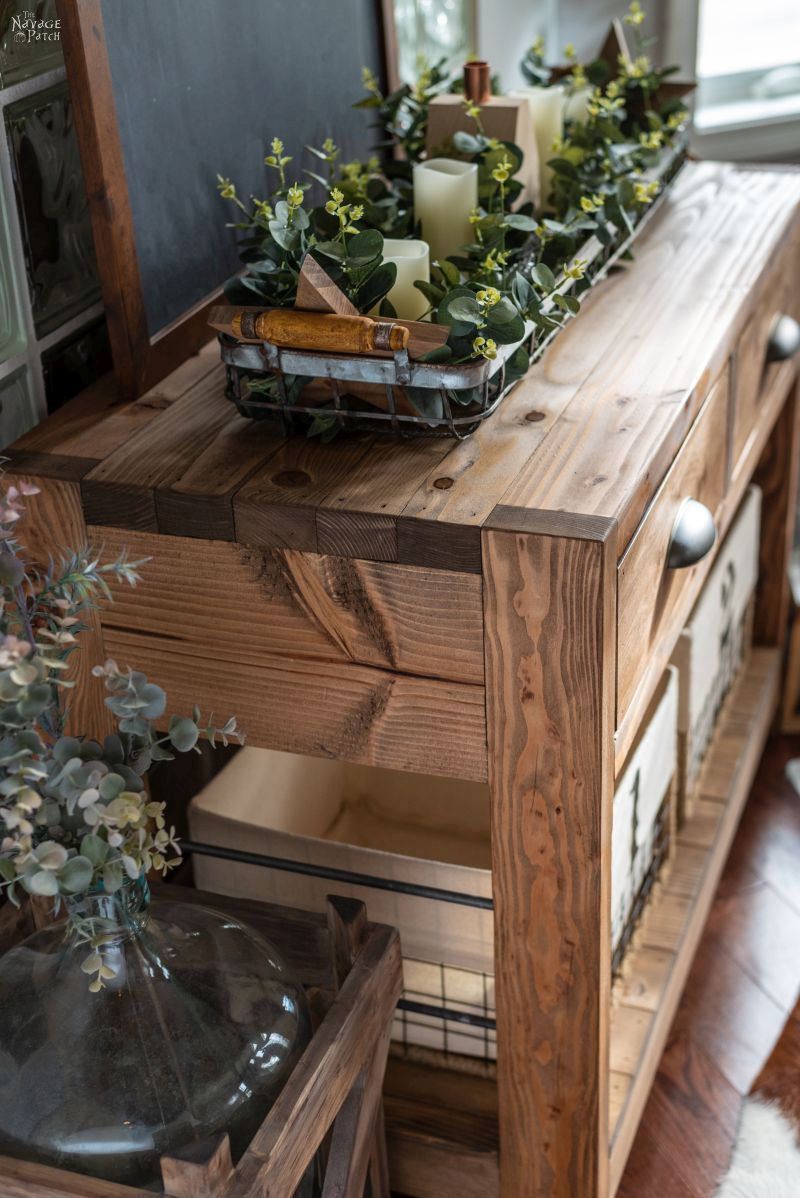
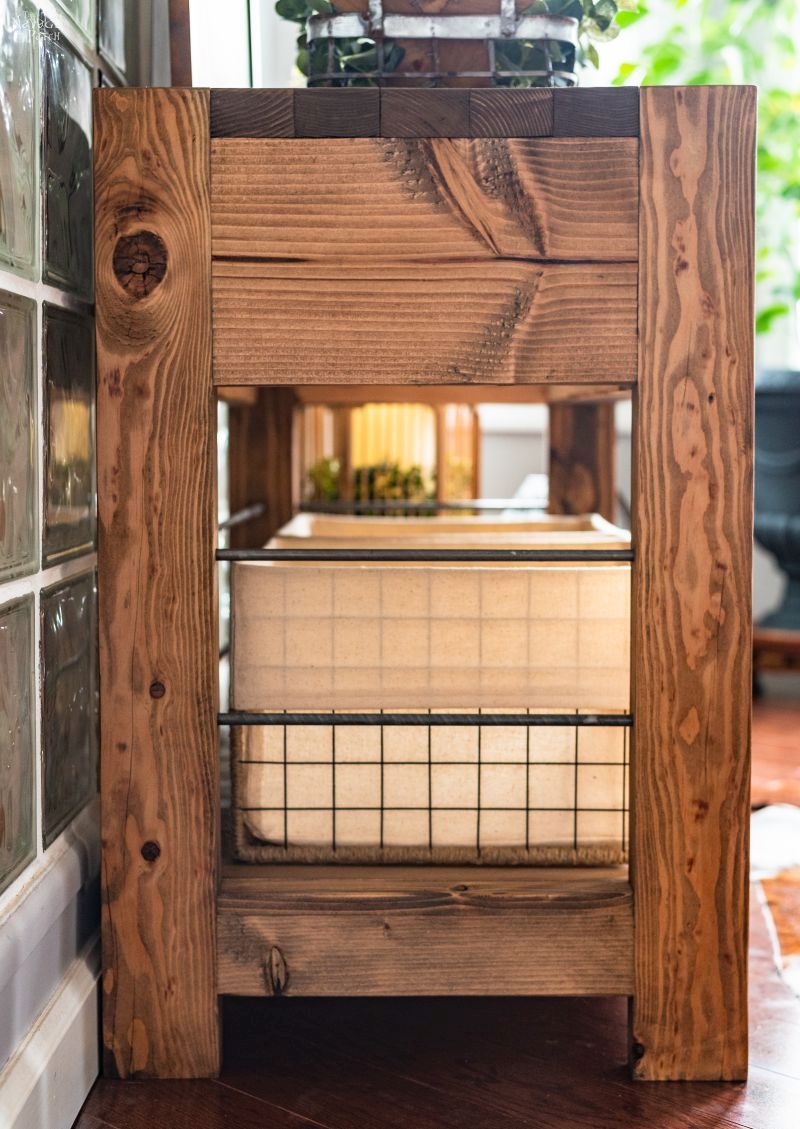
Okay, now that you’ve ogled the phony-baloney photos, let’s have a gander at the reality.
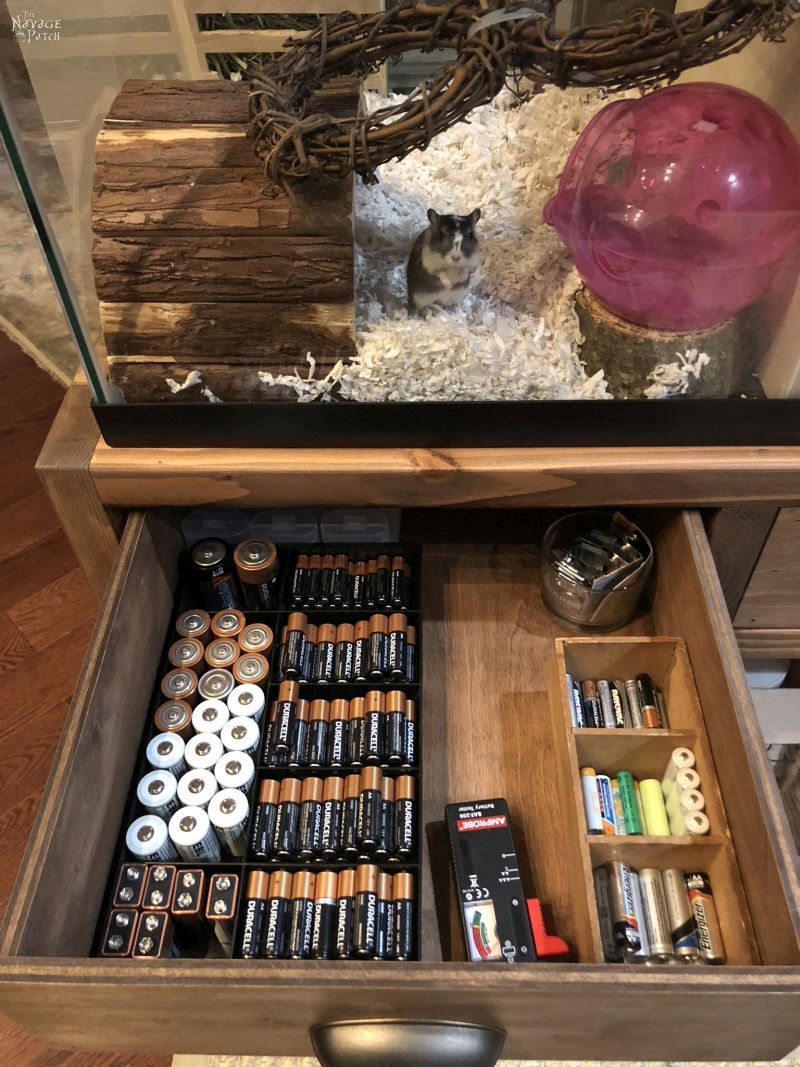
Oh, and here’s the battery drawer. Pretty neat, huh? Spotty keeps watch over the stash and demands payment in sunflower seeds for each battery taken.
We love it when you share our posts on Facebook and Pinterest!





I have to say that I feel I could make a table like this with the great tutorial you posted. I would like to come and play in your workshop…it’s so much bigger and better equipped than mine. Thanks for the detailed plans and visuals.
You’re very welcome, Ellen! I hope you do make one for yourself!
My husband and I just made this table. The cut list and directions were great and easy to follow. The only issue I had was with the drawers. The plans didn’t specify a which drawer slides were used. We bought different slides and that, in turn, made the drawer measurements not work, the size of the bottom was short 1/4” and the height of the sides of the drawer are too tall by 1/4”. Luckily we have more plywood but it was still frustrating. More clarification on that part of the build would have been helpful! I love your blog and enjoy reading and laughing as I go.
Hi Erin, I’m so sorry for the confusion about the slides, but I do link to the ones I used in the Material and Cut Sheet list. I will edit the post to make sure it’s clear. Thanks for the heads-up! 🙂
I’ll pay more attention to the links. They link to Amazon and I just went to our local hardware store to get the supplies. Not your fault by any means. Now I know and will now be eating slides for breakfast myself.
LOL, good luck! 🙂
Love it! My kind of furniture! I want a piece just like this to use as a bathroom vanity with sink. I know the drawers would get in the way but I suppose there would be a way around that, just have to figure out how to do it. Thanks for the great tutorial.
That’s a great idea! You could leave the drawers out and just use false faces on the front!
Omg!!!!! You are an A1 furniture maker. You don’t even need to go to a store and buy furniture. You and Handan are a great team together.
Thank you so much, Cheryl! But, shhhhhhh! or I’ll never get a break, lol! 🙂
Your gerbils have the most wonderful habitat!! However, I’m lusting after that wire basket that was on the staged console table!! Since I actually live on a farm, I figure one like it will work for me! Don’t tell Handan that Sugar Gliders are awesome too and they will actually “fly” to you from the tops of curtains and furniture…as well as being just darn adorable!! Perhaps your “farm” is to be populated with animals that fit in your hand!!?? Love your tables and wish I had your awesome shop! Thanks for the link to The Wood Whisperer and the Conditioner by Charles Neil. I’m still waiting for you to try UnicornSPiT!
LOL, Handan read your comment, immediately Googled them and spent the next 30 minutes watching sugar glider videos! I think I know what our next pet will be! 🙂 We bought that long basket at Hobby Lobby. I’m not sure if they still carry that exact basket, but I’m sure they have something similar.
Oh, I forgot to add that I have tried Unicorn spit! https://www.thenavagepatch.com/unicorn-spit-side-table-makeover/
I hate to admit this but I do not like gerbils or hamsters etc., I have a rodent phobia almost to the point of insanity lol, but these tables are freaking awesome, so I broke my upper right are on 9/16, the my lower left leg at the ankle on 12/20, and at 4am 1/01 broke my freaking wrist in 2 places, people at the er kept asking over and over why I kept falling so much and I finally said I had no freaking idea because if I knew why I would quit doing it geeze xx
Okay this is getting ridiculous. We’re going to have to wrap you in bubble wrap! We hope you heal soon, Chris, and hey, the year can only get better, right! 🙂
OMG I want one. I am not that talented to build my own. This is just what I was looking for to put in my entryway.
I may have missed it, but approximately what was the cost of this table.
Thanks for sharing.
Hi Dee, one table costs about $150, a third of which is the 4 foot by 8 foot birch plywood. If you have good plywood lying around, you can get the cost down to about $100 (not including prestain or stain)
Happy New Year! I just wanted to say I love your blog- the projects are great and the humor makes me always read all the way through. So while I learned about pre-stain conditioner ( thank you !) it was the cockatiel and the jerkballs that made my morning chuckle. Keep up the great blogs!
Thank you so much, Kelly, and Happy New Year to you! 🙂
I don’t trust Spotty. I see him there with his little paws rubbing gleefully together as he exacts his price. Look at the face… All he needs is a cigar and a tumblr of bourbon and he could be a real mafia don. Yeah, I’m watching him…
BUT! We’re here for tables! And they are gorgeous, once again. The two styles really are blended perfectly with just the right accents like the metal bars and hardware and the slatted tops. The colour in the end was beautiful. That wax really did a fantastic job.
And honestly I was with you on the instructions right up until the draw slides. I just can’t seem to figure out how to measure the whole deal properly. I can install them fine, can build a drawer, but have no idea what to make the whole lot size-wise. In fact, I couldn’t even figure out if the IKEA ones available would fit my cupboard anywhere. Though I do have a very legitimate excuse for being so hopeless as I have dyscalculia. Did you watch or read some tutorials or has it been all trial and error over the years?
LOL, yeah Spotty looks the part! Regarding the drawer slides, It’s just been trial and error with an emphasis on error! One of the first things I built for this house (back when I had no idea what the hell I was doing) was a wooden enclosure around our washer and dryer with two pull-out drying racks. That was my first time installing drawer slides. I measure and measure and measured and hoped for the best. Somehow, it all worked out, and those drying racks survived until our laundry room renovation.
Who’s a pretty boy then? Hee hee couldn’t resit, spotty is lovely. Now to the console table, well what can i say that hasn’t already been said by your other fans? Nothing it’s another of your fantastic creations, i love it.
Awww, thank you, Catherine! 🙂
Okay, I just went down the wormhole that is your blog and I love your projects and humor! I’m a novice DIYer and just bought my first house. I’ve been terrified to commit to any one project because I’m scared of choosing the wrong stain or paint colors to make a cohesive look in my house. With stains in particular how do you choose a color for a piece? I see you like to use special walnut a lot but I also see that it looks different on all of your projects. On the consoles it looks like a more natural light warm color but when you put a layer of it on your vintage buffet top makeover it looked much darker and not uniform. How many layers did you use on each project and what accounts for the difference in color? Have you done (or would do) a post about all things stain?
Okay, Tiffany, first of all, congratulations on your first house! Second, don’t worry! This is our first house, too! There is almost nothing you can do to your house that isn’t easily reversed, fixed or changed, so don’t stress too much about screwing it all up. We’ve painted this house about 3 times in the 5+ years we’ve been here. It’s not the most fun job in the world, but it’s easy enough to change paint. If you’re building furniture and are wondering about stain colors – almost all of them go together, and if you choose neutrals for your walls, any stain or wood look is going to work just fine. Regarding the Special Walnut, you have a very good eye! The reason it looks uniform but lighter on the consoles is because I first used a pre-stain wood conditioner. Pine is very prone to blotchy stain if not treated first. But avoiding blotches comes with the small cost of the stain appearing a bit lighter. On the buffet, we were going for a different look. I started with Special Walnut, and you can see from the pictures that it was very blotchy and contrasty after that coat. But that was okay, because the plan was then to hit it with a weathered gray stain and then finally streak it with (dark) kona stain. This gives an aged look to the wood. I’ve been thinking about doing a staining post for about a year now, and your comment just pushed me over the edge. There’s a lot you can do with stain – just takes a little practice and the willingness to jump in and try!
Thanks, Greg! Your words are very helpful. I will definitely look forward to a staining post!
Could you pls tell me where you got the picture/quote from Tolkien that you have in styled pic? Love how it all turned out btw!!
Hi Terri, you’re in luck! Tolkien’s book page art is one of the free printables we share. Here is where you can find it: https://www.thenavagepatch.com/diy-oversize-book-page-wall-art/
Just made this and with your instructions it turned out awesome. I am 65 (female) and recently retired and decided to try woodworking. I’ve made small things from pallets but this is first actual piece of furniture. I was wondering if you could tell me where the baskets were purchased? I have only been able to find smaller ones. Would you ever consider a easier version of the Wood Wisperer’s jewelry box with hidden drawer? I would love to make something like that but his is far to complicated for a beginner.
I’m so happy to hear this, Nancy! Those baskets were made by Handan a few years back from some old wire shelving and a canvas tarp. Please send me some pics of your console – I’d love to see it! greg@thenavagepatch.com
I LOVE this table! We have never built anything with wood, but I am tempted to go but a krig a ma jig and staple thing to make this! Super novice question….what type/how many screws? And how do you trim the wood down, a saw and hope the line is straight? Thank you for the beautiful, inspirational piece!
Hi Tracie, there are special screws sold for the Kreg system. The thickness of the wood determines the length of the screw. As for how many – I’m not sure, as I didn’t count them. I used a miter saw to cut my boards.
Thank you so much! Hopefully we can figure it out and build our tool supply for more than just this project. *fingers crossed!*
I am between days one and two on this project, I am having a blast! The satisfaction I had when finally getting the dreaded steel dowels in place was similar to the day I was married. Thank you so much for the plans!
Sincerely,
A very tired and happy amateur home woodworker.
Awesome! So happy to hear that! Please send pics when done to greg@thenavagepatch.com
How do I get the printable plans for the rustic table? I have looked everywhere. Thank you
Hi Cheryl, unfortunately I don’t have separate printable plans for the table – they are included in the blog post.
Hi! I was wondering if you remember about how long did it take you from start to finish for this piece?
Oh boy, Tina, that’s a tough one. I made them so long ago, plus I know I worked on them in fits and starts over and extended period. It’s not the quickest project – there’s a lot of measuring and cutting of both wood and metal, plus time for sanding, pre-staining, staining and polyurethane. If you were to work on it every day, it would probably take a week at least, factoring in dry time for the stain and poly.
Thank you for getting back to me, when I get a chance to try it I will let you know how long it takes me!
Hi Tina, I remember it took Greg 8 days to make two console tables. The hardest part was installing the rods as he needed two extra hands to hold the pieces together and making the drawers as it was his second time making a drawer from scratch 🙂
I love how this turned out! It looks rustic and kinda farmhousey (is that a word??), but it looks modern. This one is def on my to-do list :-). Do you recall where you got your baskets?
As always, really enjoy reading yall’s blog … very intertaining!
Hi Shirley, “farmhousey” is indeed a word – I use it all the time! We made those baskets from these wire grid storage shelves and some canvas.
Looks great. Where are the numerical baskets underneath from?
Handan made those from some old wire cube baskets and canvas!
Can this be made with just one drawer?
I would think so, Becky!
Thank you so much for sharing your plans! I made two at the same time, and they turned out pretty good if I do say so myself. These were only the second project I’ve done, so I appreciated the detail you gave!