DIY Wall-to-Wall Floating Desk
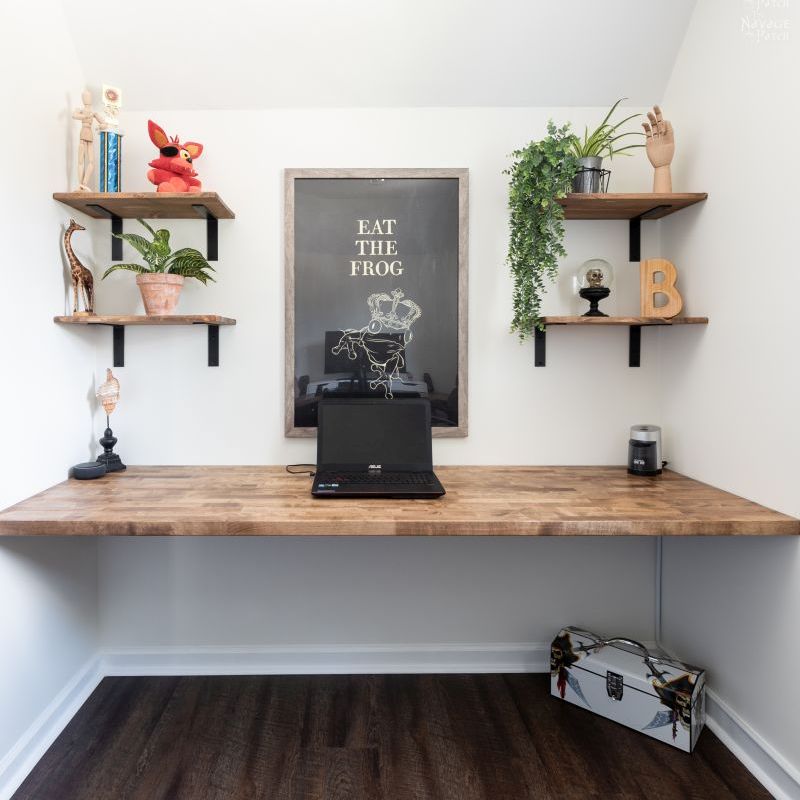
A DIY Wall-to-Wall Floating Desk made with a butcher block countertop is a sturdy and attractive work/study solution for small spaces.

It’s good to have the gang back together.
When we all reunited in our new Georgia home last month, it had been 119 days since Handan had seen her son. She had felt that separation for every hour of those days, especially the days when I was also in Connecticut.
When we pulled into the driveway, the dogs jumped out of the car whimpering with joy, tails wagging fiercely. Baris stepped out, and Handan burst into tears.
She ran to The Boy and wrapped him in her arms.
The dogs jumped and howled and peed.
Handan babbled at Baris in Turkish – a steady stream of prayers and greetings and well-wishes.
The Boy hugged her back, looked around his new surroundings, turned to me and asked his favorite question.
“So, what’s for dinner?”

Handan was thrilled to have her baby back at her side.
I took a more pragmatic view of the situation: I had my helper back!
But first things first. I booked The Boy an appointment at Roosters to have his hair cut. It had been been 151 days since his last visit, and he was starting to look like a New Zealand lamb that had escaped the farmer’s shears.
Up in Connecticut, everything was still shut down when we left, so I had no choice but to watch that hair grow and grow and grow.
On his second day in Georgia, a great weight was lifted from his head.
Freshly shorn, he was ready to help his dear old dad.
Our first order of business was to set up his study room. There is a small walk-in closet in one of the bedrooms – the room that is now his TV lounge. We turned it into his study room. I’ll post about that closet-to-study makeover next, but today I wanted to share with you a really simple and (relatively) cheap DIY wall-to-wall floating desk.
In this case, the “wall-to-wall” part makes this a patented “Simple Stupid” Navage Patch DIY.
First, a word about desks.
Since 2013, we’ve bought or built, refinished or restored no fewer than twelve desks.
From the very big and extremely heavy, to the incredibly ornate and amazingly useless, to the clean and simple, we’ve done it all.

And here’s the thing about desks: they’re all expensive.
“But what about this $100 executive desk from Walmart??” You may be asking.
Well, it’s $100 because it is made from cheap particle board, and it will disintegrate the moment you want to move it to a new location.
Learned that lesson with Baris’s Connecticut desk when I tried to pack it up for this move, and that was a $400 desk!
Even when building a desk from scratch, the materials alone really add up. Sure you can save a lot by building a pine desk, but pine is softer than a bank manager’s hands and will scratch and gouge if you look at it too hard. Once you start building with hardwoods, the cost skyrockets.
We pondered these facts when planning Baris’s new study room.
Because here’s the thing: we wouldn’t be building/buying just one desk. Nope. Our little Woobums was going to have two desks – one workspace for studying and writing and one playspace for computer games and programming.
Ahhhhh, to be an only child!
So Handan did her usual top-to-bottom scouring of the internet to find something we could buy.
And then she did her mental gymnastics to figure out material costs (and labor hours) involved in a from-scratch DIY.
After crunching the numbers, she declared that we would be making Baris’s two wall-to-wall desks with unfinished butcher block countertops from Home Depot.

Now, the one you see pictured above is made from birch, and it costs $219 for an 8ft x 2ft x 1.5 inch slab. Lemme tell you – this thing is heavy! It is a well-constructed countertop, and that $219 price tag is actually awesome considering that something similar from IKEA is more expensive.
One desk – the one on which his gaming/programming computer would sit – would be made just like the desk I made for my old office. In fact, the two IKEA ALEX drawers that I used for my old office desk are now up in Baris’s study. Lucky dog. I loved those drawer units!
Anyway, his wall-to-wall gaming and programming desk would be “built” by simply dropping the butcher block countertop on top of the drawer units.
His other desk would be the DIY floating desk. Pretty nifty!
By the way, before this project, I’d never heard of a “floating desk” before. Floating shelves, yes. Desk, no. My babes tells me they’re all the rage these days, and if you don’t have one, you may as well lock yourself in a closet and slap yourself repeatedly with a wet noodle.
Well. I don’t have a kitchen at the moment, so I’m all outta wet noodles. I guess I better get building!
Okay, so if you haven’t figured it out already, the reason I’m just babbling away here is because this build is just so ridiculously simple. Besides the butcher block countertops, the only other materials we needed were a 2 x 4, a couple of small pieces of 2 x 2 (you could also use 2 x 4), some stain, some wipe-on poly and screws.
Let’s have a look.
DIY Floating Wall-to-Wall Desk
Preparing the Desktops
The butcher block countertops we bought were 8 feet long, but Baris’s study was only about 80 inches wall-to-wall.
Correction: one side was 80 inches, the other side was 79 1/2 inches.
Man, I really would love to hang out for a few days in a subdivision as it’s being built. I’d be fascinated just to watch the workers as they build unsquare house after unsquare house.
Where’s the pride in one’s work?
GAH! It drives me nuts!
I’d ask each worker, “how do you sleep at night?!?”
I wonder if they slept in unsquare beds in unsquare houses on crooked streets.
Anyway, I enlisted The Boy’s help. The butcher block countertops were heavy, and I needed his muscle to help me move them up on sawhorses. Once situated, we measured and cut them to size. Since most of my tools were still packed up (and some not here yet), I used a spare oak floor plank as a saw guide. Hey, whatever works, right?

Though the countertops (soon to be desktops) were pretty smooth, I wanted them more smooth, so I sanded them with 150 grit followed by 220 grit using a random orbit sander.
The next step was staining. Now, for a uniform color, you’d be wise to apply a pre-stain first.
I, madam, am not wise. You should know that by now!
Still, unwise as I am, in this case, we wanted a more rustic and unrefined look (like yours truly!), so I skipped the pre-stain and went straight for the Minwax Special Walnut.

You all know by now how good Handan is at discovering cool and useful products.
Remember her trick to paint french doors in the easiest way ever?

And her discovery of how to finish raw wood without changing its color?
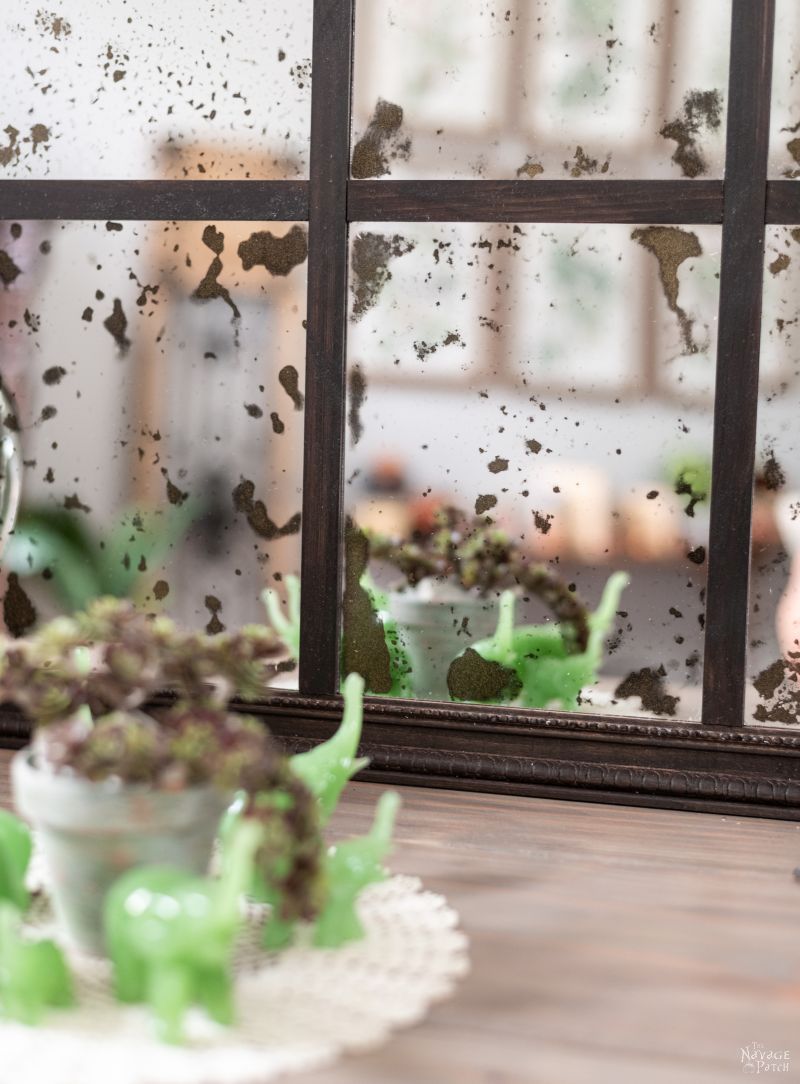
Or her super-easy method of antiquing a mirror?
Well, she did it again with this DIY floating desk project!
Stain can be a tricky thing when working with big pieces. You want to get it on your project piece as quickly and evenly as possible.
Staining a piece as big as these butcher block countertops would be grueling work if done by the old rag-on, rag-off method.
Normally, I’d skip the rag and go straight to the brush – it’s much quicker for large surfaces. But the big downside to applying stain with a brush is the mess. Stain is a non-viscous liquid, and it tends to splatter everywhere whenever the bristles flicker.
Handan found a better way.
And she found it not only for stain, but also for polyurethane. These foam applicator pads are marketed for automotive polish, but hey, DIY is all about working with what you’ve got or finding new ways of doing old things. By the way, last I checked, the ones I used pictured below are unavailable. Here are essentially the same ones in yellow.

These applicator pads made staining a breeze. I finished each countertop in about a minute.

The next day, I applied wipe-on polyurethane with the applicator pads. I poured the poly right onto the wood and then wiped it in and smoothed it out with the pad.

Wow, I thought those pads made the stain easy, but they really work wonders on polyurethane! A desk that size might have taken 15 minutes applying wipe-on poly in the traditional manner, but the pads brought that seal time down to about 2 minutes per slab. They’re a real time-saver for large poly projects!
The next day, I sanded the desk with a 2000 grit disc in my random orbit sander. This got rid of all the tiny bumps that poly leaves behind. I then wiped the desk down with a rag soaked in mineral spirits to remove the fine white sanding dust.
After that, Baris and I carried the two desktops up to his bedroom.
Building the Wall-to-Wall Floating Desk
We first assembled Baris’s computer desk. I already told you how easy that was – we just plopped the desktop on the drawer units and called it a masterpiece.
The other desk required just a bit of work, however.
The plan was simple: attach a 2 x 4 cut to 80 inches to the long wall and two smaller pieces of 2 x 2 to the adjacent walls. The desk has a depth of 24 inches, and we wanted all the support pieces hidden, so we cut the 2 x 2 pieces to 18 inches.
Now, with a desk this heavy, it is imperative that the supports be screwed into studs. Drywall anchors won’t cut it for this one.
While we were at Home Depot buying the wood, Handan remembered about the studs and said, “We need to buy a stud finder, my babes. I don’t think yours has arrived yet.”
Oh, c’mon, you know what I said next!
How could I not? If she’s gonna serve up meatballs like that, I’m gonna swing at ’em!
“No need, my babes!” I said. “I’m right here!” I flashed my biggest cheese-eating grin and flexed my fat-encrusted muscles.
She just smirked at me and pulled a stud finder from the shelf. “Keep looking, my babes,” she said and slapped the stud finder onto my chest.
“Ouch! That’s cold, woman!” I called after her as she strode towards the checkout line.
Back in Baris’s study, I handed him the stud finder, showed him how it works, and then we marked where I’d be securing the 2 x 4.
We wanted this desk to be the same height as the other – 29 inches – so we marked the wall at 27.5 inches to account for the 1.5-inch thickness of the desk.
Next, I held the 2 x 4 against the will and transferred the stud marks to the board. I then drilled through the middle of the board at each marking. This would make it much easier to install.
With a level placed on the 2 x 4, Baris held it against the wall while I drove in the first screw. I used 2 1/2 inch deck screws, as their heads don’t strip as easy as phillips heads do.
Checking the level again, I drove the second screw. After that, Baris let go, and I drove the rest of the screws. Since both The Boy and I were busy (and Handan was doing some other task), we all forgot to take pictures of the 2 x 4 installation. It happens a lot – especially during critical parts of our projects, lol!
Anyway, Handan remembered the camera while I was installing one of the shorter side supports.

After screwing in the two side supports, we carefully lowered the desktop in place. It is heavy enough that I felt there was no need to attach the desktop to the supports, but you could certainly do so underneath the desk with angle brackets.
Here’s a better look underneath it all.

And here’s the other side. Notice anything weird?

Yep, after all of our calculations and corrections to mitigate the effects of an unsquare room, it turns out ‘Ol Doofus-head here picked a warped 2 x 4. I played around with the side support a bit and got it perfectly stable. It just looks a little wonky from below. But the desk is perfectly level in both side-to-side and front-to-back. That’s the important part!
Once the two desktops were in place, Handan sprung into action, climbing under the desks and attaching power cords, routing computer cables hither and yon with her cable management system and generally squeezing her body into all the shapes and spaces that my worn-out husk could never dream of.
I think he’s got enough floor space under that sturdy wooden desk. What do you think?

Here’s Baris’s gaming/programming desk sitting proudly on two IKEA ALEX drawer units. Plenty of room on top of the desk for his gaming needs.

Turning around in this very tiny room, here’s his DIY floating desk. I think it’s so much better for this room than a traditional desk.

I think the two desks are a perfect use of the available space in here. He’s got plenty of drawer storage on one side and tons of desk space on the other.

It’s a good thing he’s not totally into clothes, or this room may have needed to remain a closet. As it is, all of his wearables fit nicely in his dresser and in his small bedroom closet.

Plenty of space up top for his office supplies…of which there are suspicious few…

You’re getting a sneak peak at his study, but it’s kinda hard to hide the rest, lol! I think we’ve created a great work environment for him. Let’s hope he uses it wisely!

“How do you like your new study?” I said to The Boy.
He cast his eye around the room.
“It’s good,” he said in typical teen detail. “Hey, Dad,” he continued, “what’s for dinner?”
Yep, it’s good to have the gang back together.
We love it when you share our posts on Facebook and Pinterest!

What a beautiful family you are and another fabulous project, you can’t beat wood hate that awful chipboard. What a brilliant study area love the wall to wall desk.
Thank you, Catherine! After seeing how badly Baris’s old desk crumbled after only a year of use, there was no way we were going the particle board/MDF route again!
Love both desks! You did a great job! I’d love to have the butcher block in my kitchen.
Thanks, Debbie! At $220 per 8-foot birch slab, it’s surprisingly affordable! If you want to upgrade to maple, which is quite a bit harder, your price will double, but it’s still a great price for beautiful and durable countertops!
Yes I wish now I had opted for butcher block!
There was a time in our old house, Bernice, that I was considering making my own butcher block countertops from scratch. What a waste of time, effort and money that would have been! They’ve become remarkably affordable these days, as companies have figured out how to jump on the the trendwagon for cheap.
What’s for dinner? LOL Typical teen. Getting that first post-quarantine haircut felt so good to me. I bet Barish’s head felt so much lighter and cooler in the heat. The mini study looks so good. Can’t wait to see the rest of the reveals. (especially that kitchen!)
BTW, my hubby cracks the same joke whenever I say I have to go get my stud finder. He gets the same snark back.
LOL, we just can’t resist it! At least for Handan, it’s still relatively new. They don’t have studs in Turkey (because every house is made of concrete).
Glad your family is now back together and safe in this day and time. Boy is a lucky feller to have such a handy dad! You can tell y’all are a good family. Have to tell you, you are pretty funny and talented. Love you blog, welcome to the South from here in Texas. Love those desks!
Thank you, Linda! I’m a lucky guy to have such a family! We love living in the South – one of these days, once we’re good and settled, we’ll take a drive to Texas. I know Handan’s been dying to see the Lone Star State since before she met me. When she was working overseas, almost all the Americans she worked with, regardless of what country, were from Texas, lol!
Great job on the desks. You are a brave man, working barefeet sawing butcherblock. BTW, you are also the luckiest to have a basement in the South. One of the things I miss the most about the North. Looking forward to all your new projects. Glad your family is together again!
LOL, that’s why I had Baris holding the end piece! I did warn him that my toes were in grave danger, so he really needed to keep a good grip on it. I’d make a terrible OSHA poster boy, lol!
I’m wondering how you got the bulky plugs down, and if you just fed them south before installing the top, what happens if you want to change or add electrical things in the future?
Hi Sarah, since we didn’t secure the slab to the supports, we just nudged it away from the wall, fed the cord and nudged it back. Easy! 🙂
Wow, wow, WOW! I love both desks. I’m ready to drag my unsuspecting husband off to the HD and grab some of these counter tops and get to replacing some of those horrible particle board things we have. Great use of the small space too! Happy your family is reunited-I know how I miss my guys when they’re off at college. Stay safe and thanks for another wonderful build idea.
Thank you, Karen! They really do make fantastic desks – I hope you get one or two – you’ll love them!
So glad you are all back together again. Family is precious. Love the idea of using the butcher block counter top for the desks. Awesome idea. Thanks for sharing your ideas and your lives with us.
Blessings to you.
Thank you so much, Dorothy! It is always my honor and my pleasure to share our lives and adventures with you and everyone else. 🙂
Great job on both desk!!!! Did you make the shelves from your excess from the desk? Welcome to the South from Arkansas!
Thank you, Doris! I’ll be talking about those shelves in my closet-to-study makeover post. Stay tuned! 🙂
Love it!
Thanks, Connie! 🙂
These look great! I did something similar in my laundry room / home office with an Ikea desktop. The contractor sadly affixed the countertop to a file drawer on one end and a small shelf unit on the other, but didn’t allow space for cords. You were smart NOT to attach the countertop! I know that we could cut a hole in the countertop to drop the cords in, but for now I’m just draping them along the back side of the counter.
Thanks for sharing!
Thank you, Ellen! It’s incredible how often cords become an “Oh Sh!t” afterthought when building desks like these, lol! 😀
Another great project done by thinking outside the box! Love following your blog and all the family bits you share. Wishing you and your family many happy years of love and memories in your new home!
Thank you so much, Debbie! I love sharing our adventures with you all! 🙂
Such a handsome boy!!! I’m really happy for your fam being back together that’s great. Oh and the desk looks great..
Why thank you, Laurie! Oh, wait…you’re talking about Baris. 😀
So nice to see such big smiles on the family! The desks are both wonderful!
Thank you so much, Tracy! 🙂
LOL!!!! You’re so hilarious about the unsquare homes built today. I have to agree it drives me a bit nuts too, and I don’t even try to build stuff. I’m assuming that the HD butcher block counter is actually all wood, whereas the IKEA evidently is particle board with a veneer top? Also, I’ve noticed this before reading other blogs (from different parts of the country) when checking out products on HD, that their price is different when I look for it in my area. Case in point: that butcher block countertop is $269 in Phoenix. Which makes it more expensive that the IKEA one, but then again, if it’s ALL WOOD, it seems a bargain in comparison. The desk is gorgeous.
Oh yeah, it’s all wood! For the price, you really can’t beat it! It’s amazing that things are priced differently depending on the town. It really pays to check online before buying big ticket items. 🙂
Great project! I had a couple of questions that I’d love to get your thoughts on. . .
How sturdy is the desk? My office is about 74″ wide and I’m wondering whether there’s any vertical bending when the surface is loaded.
I’m also considering adding a couple of angled supports on the back wall . With 2 kids, a printer and a couple of laptops, I want to make sure the cleat doesn’t pull out. What are your thoughts after living with the desk?
Hi Joe, the desk is sturdy, no question about it. That butcher block doesn’t bend or bow at all. That said, we don’t have a huge load on it – only a laptop – so I can’t say with absolute certainty that it wouldn’t bend under a heavy load. The cleats are screwed into studs, so they’re not budging, but with two kids, you might want to screw the desk into the cleats or use a bracket as you suggested. We left ours free floating to make it easier to feed cables, but for extra security, you could drive a couple of screws from underneath to lock it in place. Overall, the desk is working brilliantly. Our son is using every day, all day, now that his school has gone virtual for the next month.
I am about to start this project in our new house for our teenage sons’ desk. Our space is 10 feet long wall-to-wall. They all have laptops and I don’t expect them to sit on it or wrestle on it but I’m sure they will splay their books all over it and lean on it with their elbows and heads. I really don’t want to put a file cabinet underneath it as support. I want to use the 2x4s. I’m not worried about sagging or it coming/flipping off. I’m worried that the 2×4 bracing/frame won’t hold it….it’s very heavy. Do you think as long as it’s screwing into the studs it will be fine? Thoughts?
Hi Megan, as long as you screw the supports into studs with long screws (I used 2 1/2, but you could go to 3 1/2 for a little extra comfort), and as long as you have supports on 3 walls, you’ll be perfectly fine. I’d also highly recommend two tools I didn’t have when doing this project but have now. They are indispensable for this sort of project:
Franklin Stud Finder – the best I’ve ever used, and
a Self-Leveling Laser Level – I don’t know how I lived without it!
Good luck with your desk!
How is this holding up? I’m wanting to build a floating desk of similar proportions (8″ longer haha) and my boyfriend is convinced it will start to bow in the middle if there’s no leg/ground support in the middle/front.
Hi Jordyn, it’s still as good and straight as the day I installed it. That butcher block countertop will not bow – at least not in the length I have and you’re talking about.
Why the hell did I have to read a freaking BOOK just to learn this? I’m sorry but this was really long for no good reason.
If I have to explain it to you, you just don’t get it. This website might be more your speed.
Because content creators deserve to be paid for their efforts, and scrolling is an easy way to pay them without forking over any money at all!
Thanks for the assist, Brittany! 🙂
I want to do something similar, and the width will only be 6 feet. But I only have two walls of support (back and right side). What would you suggest for supporting the open side on the left adequately?
Hi Paul, I’d put a leg (either wood or metal – your choice) on the left corner, otherwise you won’t have adequate support on that side. Good luck with it!
Makes sense. Thanks! Seen any cool ideas for legs – either a different wood design, or something besides metal pipe?
Really enjoyed reading about your project and intend to use it as inspiration for my own install. Have you considered drilling 2″ hole to pass cables underneath rather than behind the desk? This will keep the desk flush with the wall and organize all the cables through one pass through.
Thanks for a great post !
George
Thank you, George. Yes, adding a cord hole is a great idea! Good luck with your build!
This floating desk project looks amazing! The step-by-step instructions are so clear and easy to follow. I appreciate the tip about using plywood for affordability without sacrificing sturdiness. Can’t wait to give it a try in my home office!
I just love the color of your stain that you used! It’s gorgeous. But I have learned the hard way that not all brands are equal. Home Depot didn’t have Minwax, so I got their alternative brand Behr in “Special Walnut”, thinking it’d be a replica of Minwax’s. Absolutely not, epic fail. Looked like I slathered the butcher block in chocolate paint. Hideous! Oh well, I will sand it down at some point when I have the energy to deal with it 😉
Oh man! The color “Special Walnut” is in no way universal! It ranges from brown to almost orange with some brands!
👋🏻 from Australia. Love your work guys! Many handy tips and was a great read 😊
Thank you Serdar!