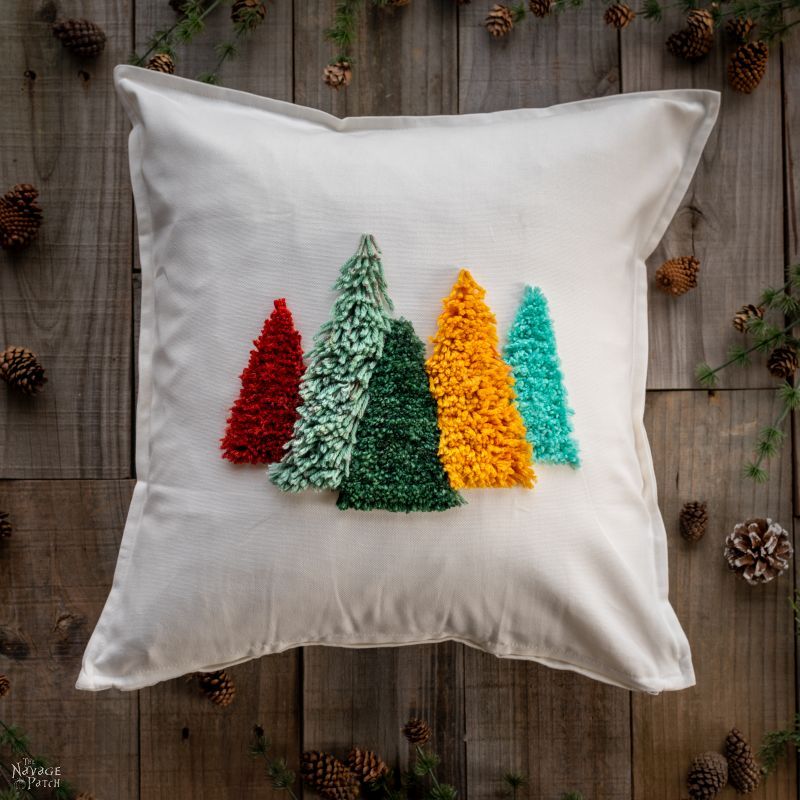
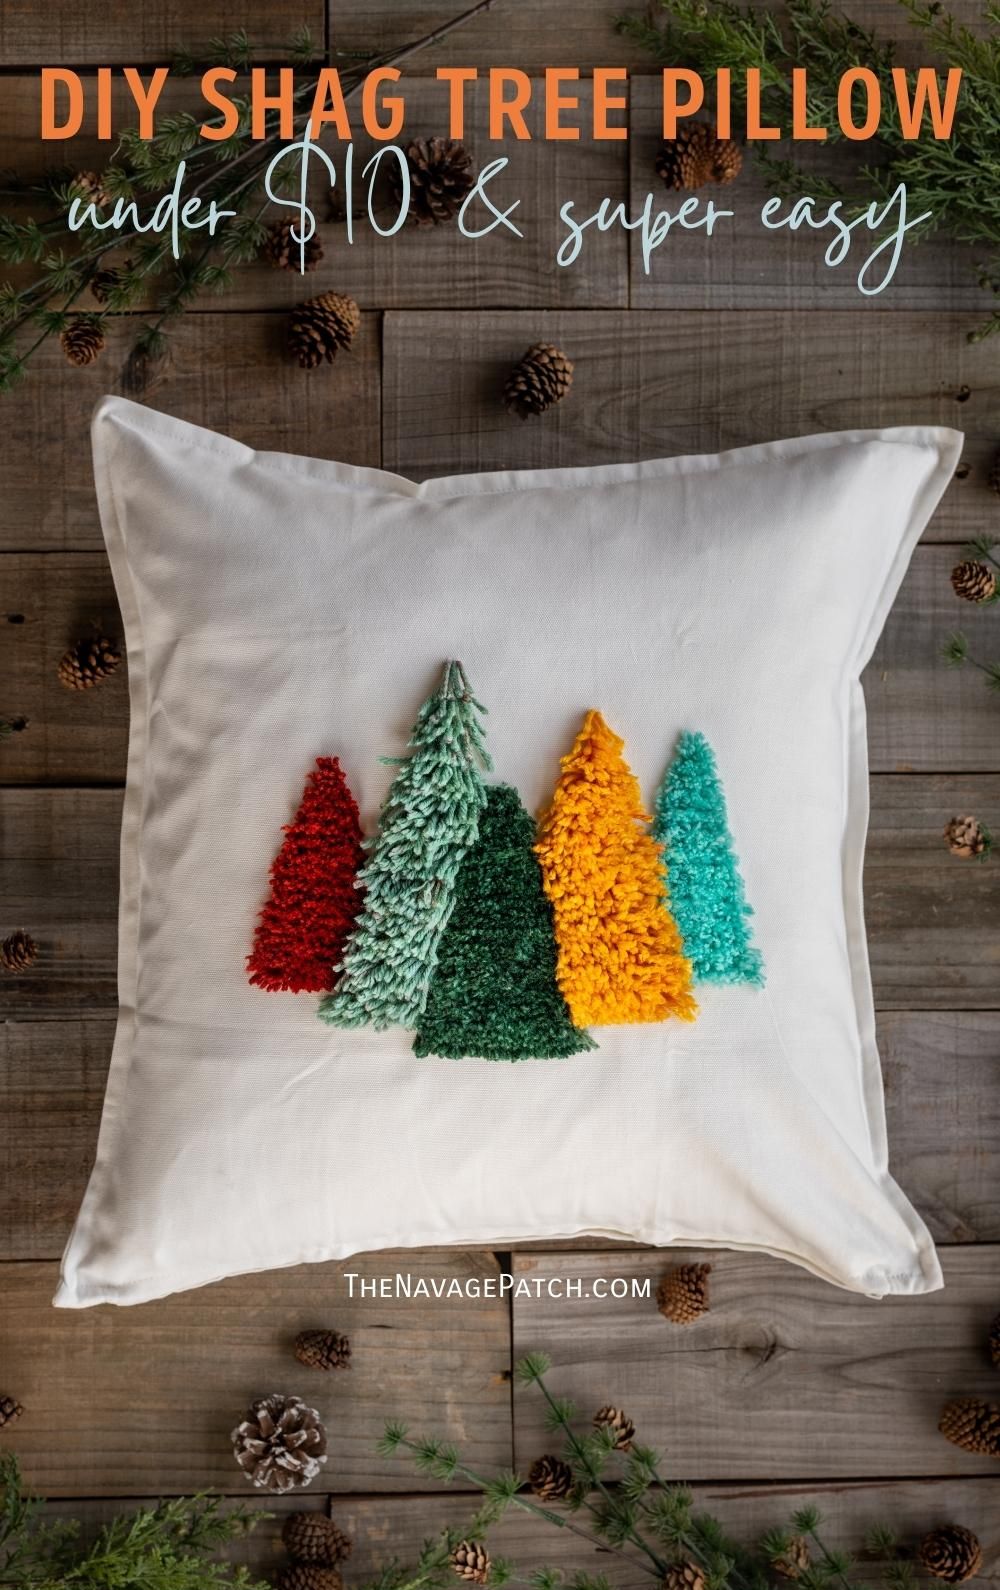
DIY Shag Tree Pillow
This beautiful shag tree pillow was inspired by a colorful yarn tree pillow sold at World Market. But why buy when you can DIY for less?
You snooze, you lose.
It’s a core tenet of our society and one that is instilled into every child when they are still of playground age.
Maybe my babes missed that day on the jungle gym, because when she saw the following pillow at World Market…

…She thought it would be okay to leave it and buy it at a later date.
Understand this: she loved the pillow. Loved it! And $30 is not unreasonable for such a handsome bit of lumbar fluffery. So why didn’t she buy it?
Well, apparently, in her logistic-and-logic-driven brain, that pillow didn’t have a storage spot in our cramped apartment.
Seriously.
She snoozed because she couldn’t work out a place to put the damn thing when the holidays passed and the decorations went back into hibernation.
Have I mentioned my dearest wife’s brain and my brain are entirely different species?
Anyway, somehow her brain must have reconciled the storage conundrum because she recently announced to herself (I was within earshot), “You know what? To heck with the storage space, I want that pillow,” whereupon she pulled up World Market’s website…
…Only to find the pillow in question to be out of stock.
Out of stock with no definitive in-stock date!
You snooze, you lose, madam. It’s a song as old as time.
But to borrow another well-worn phrase, necessity is the mother of invention. I guess the two kinda go hand-in-hand, don’t they?
You snooze–>you lose–>you need–>you invent.
And that’s precisely what we did.
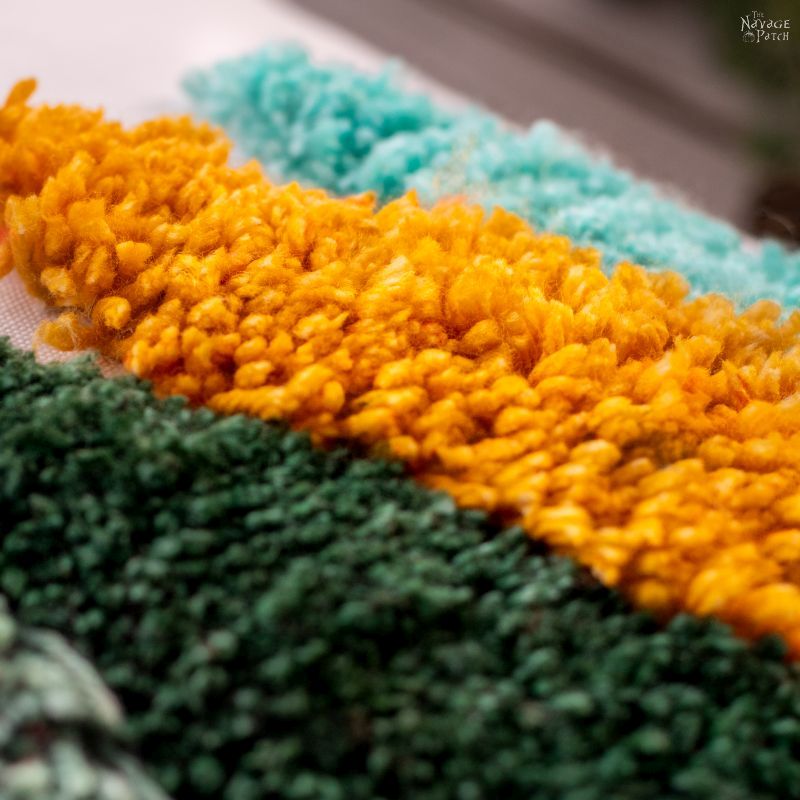
A quick look at that World Market pillow was all we needed to see those trees were made from colorful yarn. And making them shaggy entails the same general principle as making pom poms. Did you know that I’m a board-certified pom pom master? It’s true.

Anyway, the idea is simple: make loops, secure one end, cut. In this case, I’d make loops around a popsicle stick or something similar, glue one side to the pillow cover and then cut the loops.
It’ll be easier to show you, so let’s cut the jabber-jawing and make a shag tree pillow!
DIY Shag Tree Pillows
SUPPLIES LIST
Affiliate links are provided below. Full disclosure here.
- 20×20 Throw pillow cover – we used a Gurli from IKEA
- Assorted colors of yarn – we used Red Heart O’Go and one from Dollar Tree
- Craft sticks (popsicle sticks/stirrers/tongue depressors) in 3 widths
- Hot glue gun
- Small sharp scissors
- Tree template printout (download at end of post)

Most of the yarn I used came from this skein of Red Heart O’Go. The blue I used is from a different color scheme O’Go, and the red is from a skein I bought at Dollar Tree. Oddly enough, they have a pretty good yarn selection!

These are the three sizes of craft sticks I used. I used the smallest to get the tight carpet feel and the other two for a more loosey-goosey-floppy carpet feel

This is the template Handan made for me to help build the trees easier. You can download it at the end of the post.
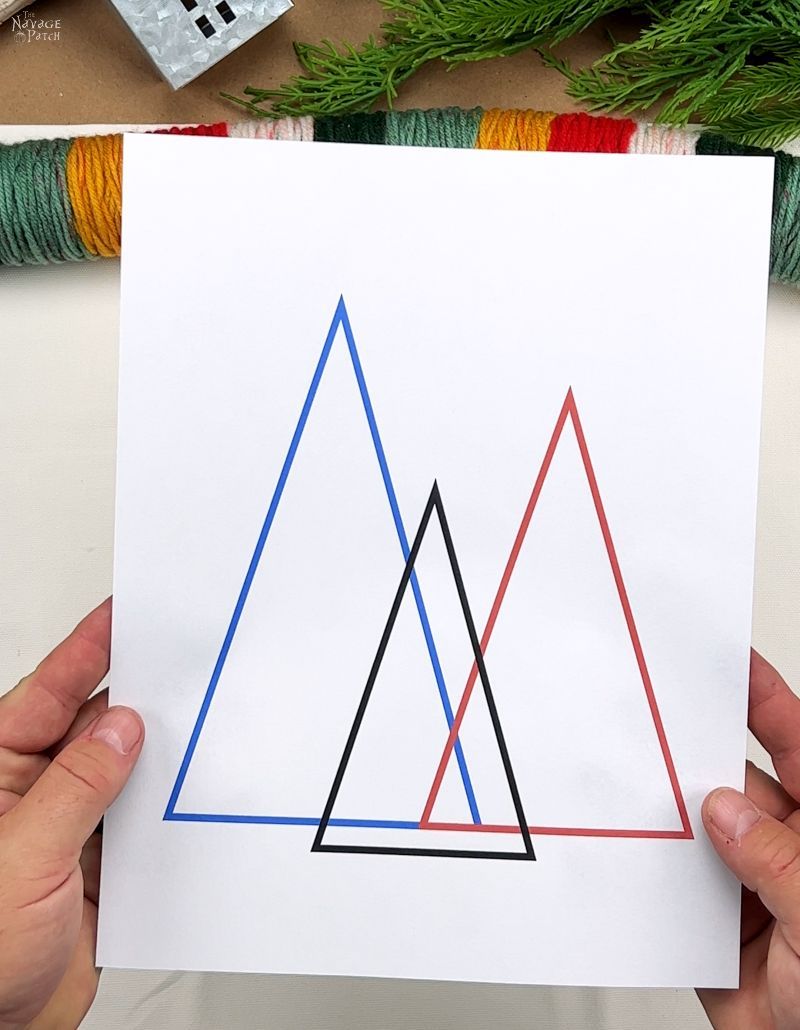
I inserted the template into the pillow cover and centered it. Without this template, this would have been a much harder project!

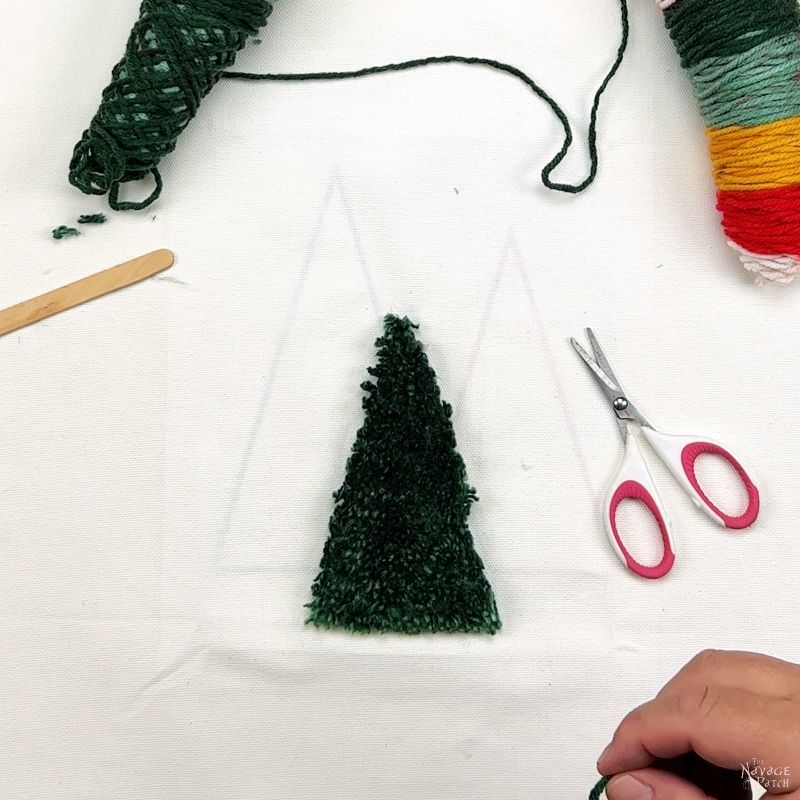
Okay, here’s where you’ll have to make a choice. Since I went into this project blindly, I chose to start with a tight shag tree right in the middle. According to the template, that middle tree is the closest to the viewer. This means that the two trees flanking it are supposed to be “behind” it if it were real life. So by choosing the tight shag up front, it made it a little harder to make the longer shag ones look like they are actually behind the front one. If I had to do it over again, I’d make the front tree with longer loops. In the end either will look just as good. It’s just something I noticed that I would change if I were to make another shag tree pillow.
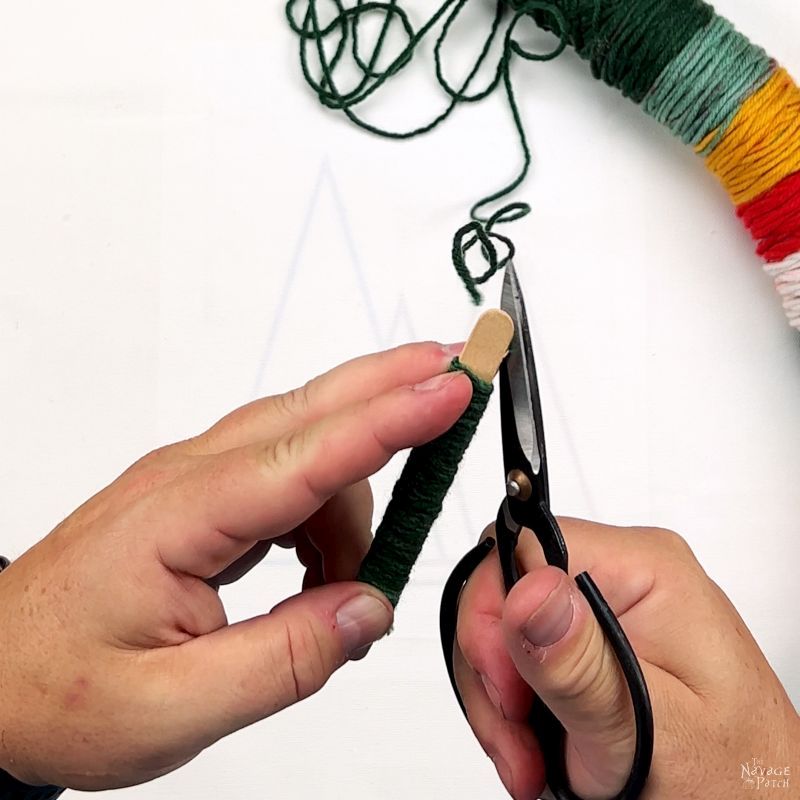
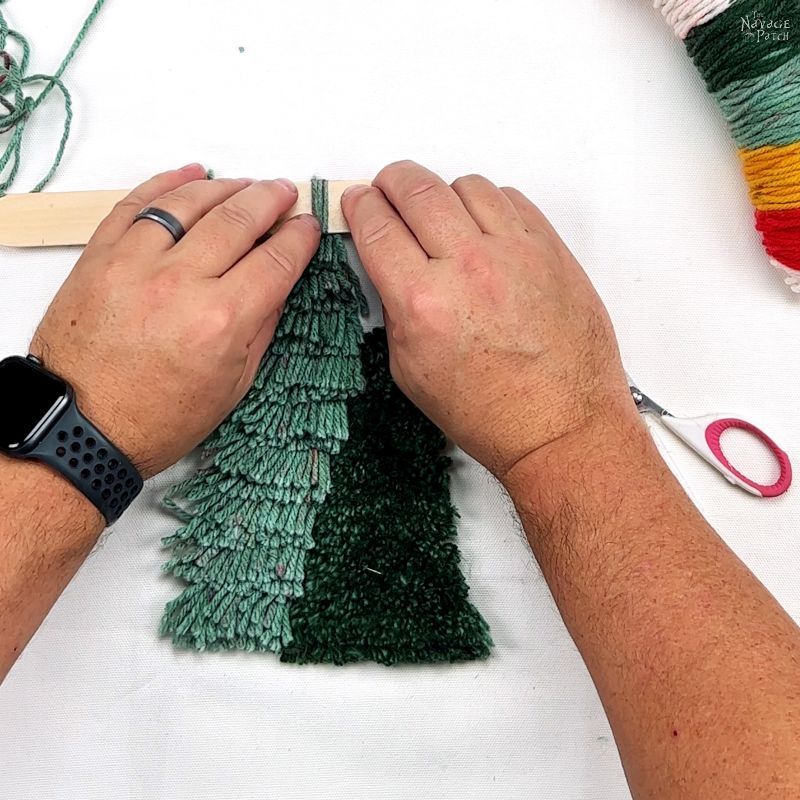
I started by wrapping yarn around the craft stick – not too tight, or it would be hard to cut.

Every so often, I compressed the loops I had just wrapped.

When I’d wrapped the length of the base of the middle tree, I cut the yarn. In later wrappings, I left both ends longer, as that made it easier to work with, and then I trimmed the ends after gluing.
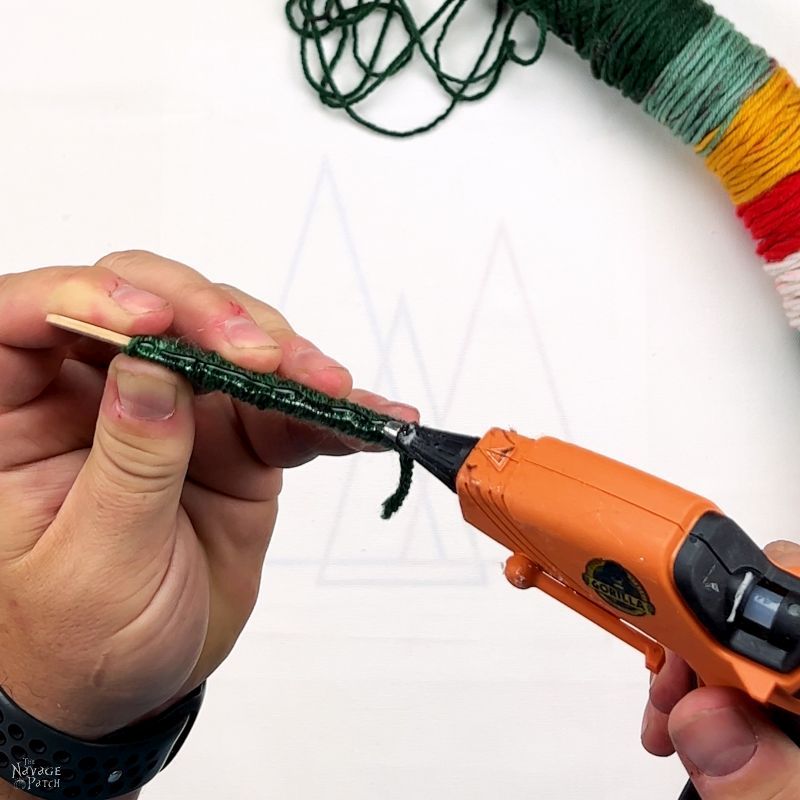
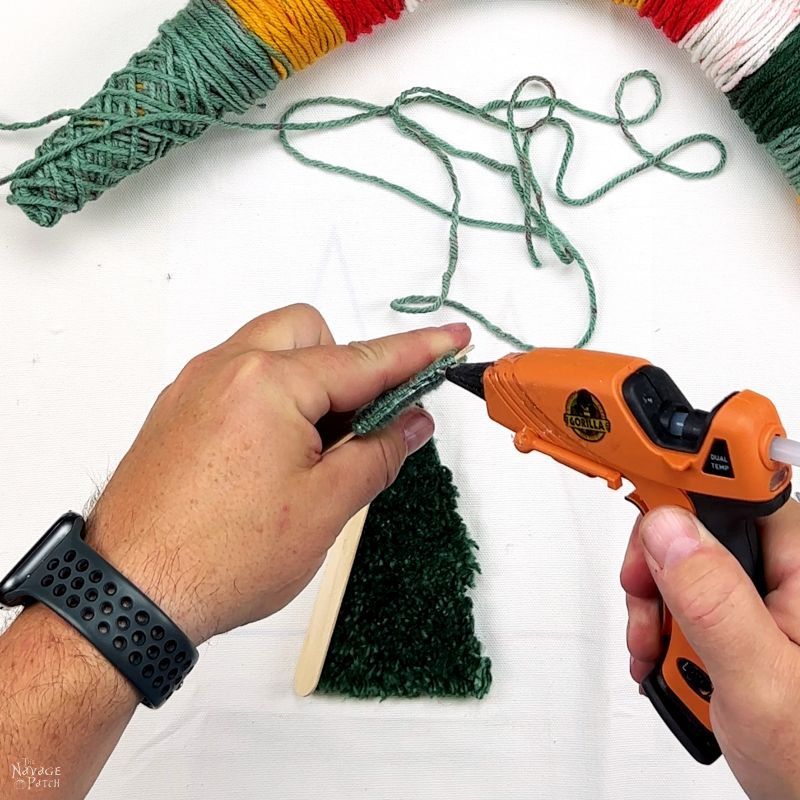
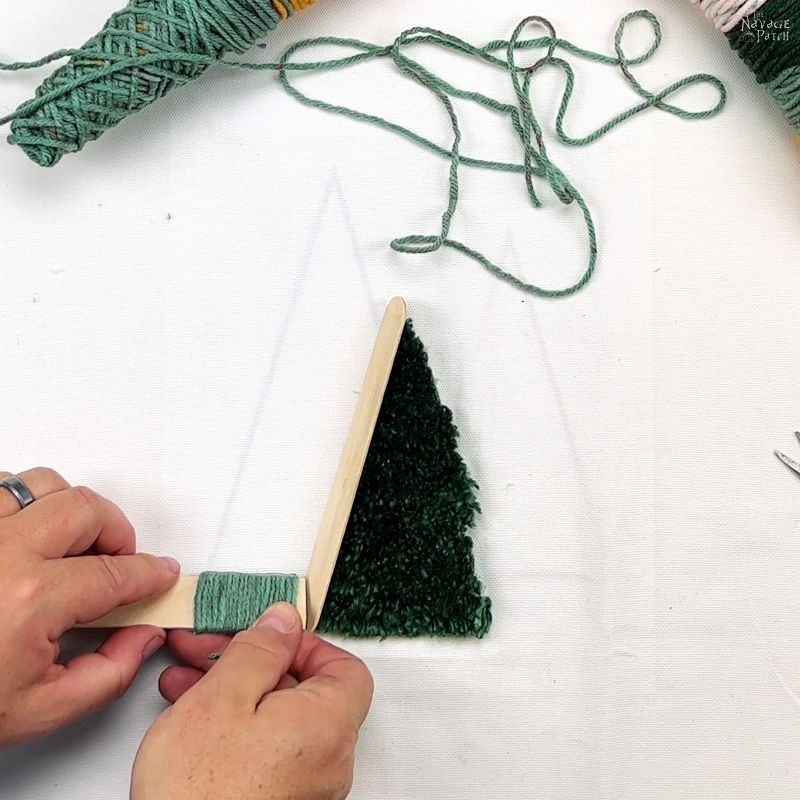
Next, I put a line of hot glue down one edge. Note that both ends of the yarn are pointing away from the glued edge.
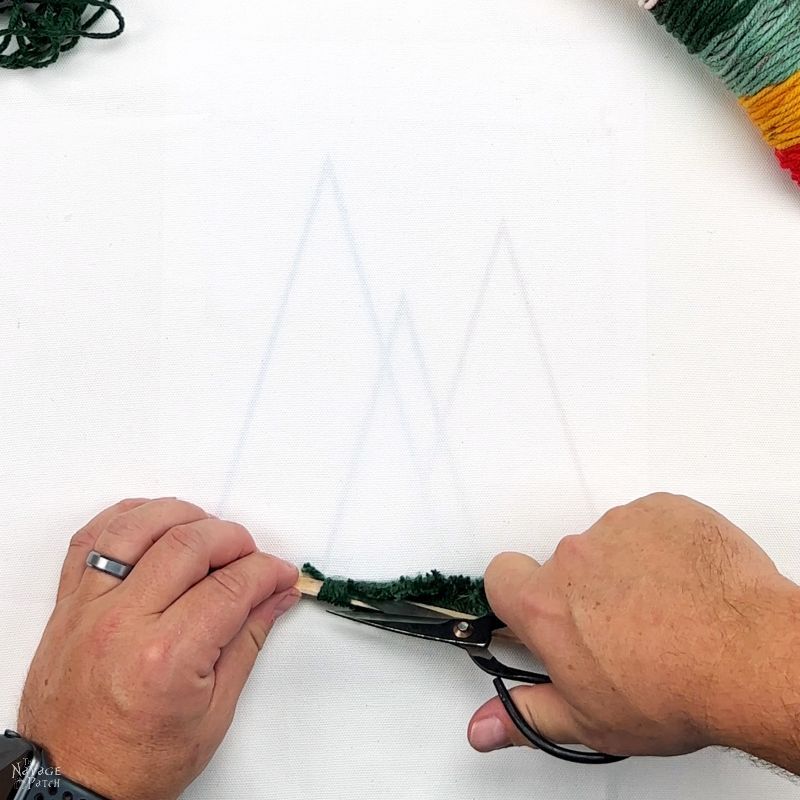
Then I placed the glued edge on the pillow cover along the baseline of the middle tree.


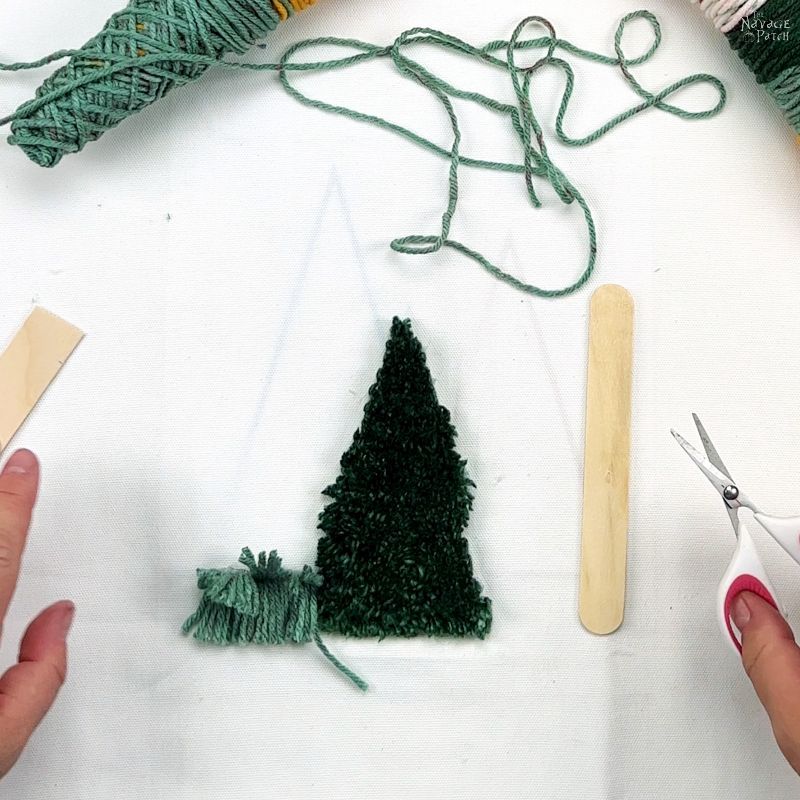
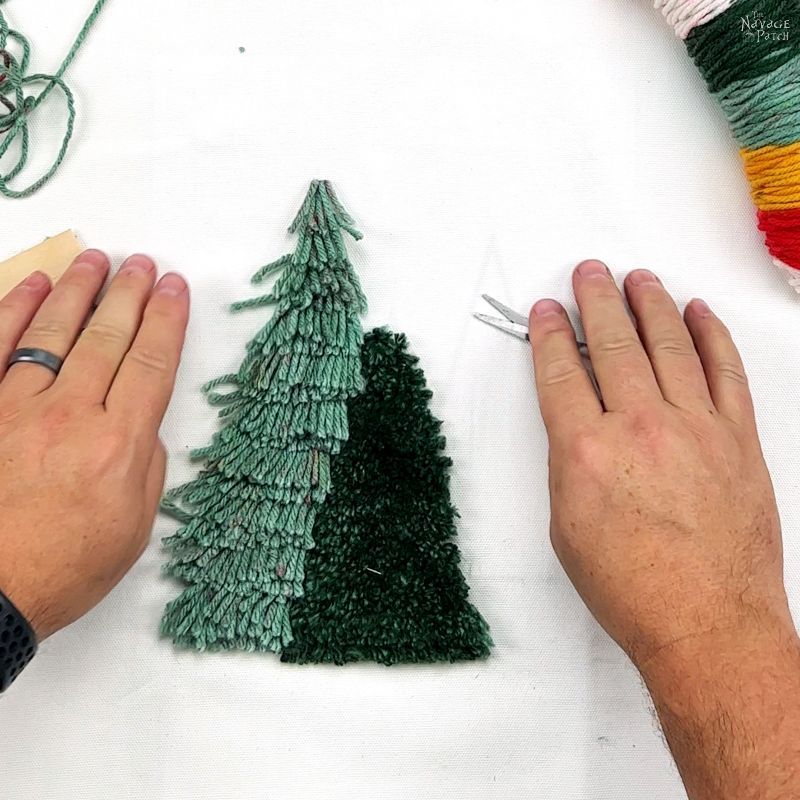
After letting the glue set for a few seconds, I cut the loops with small scissors. I only used the scissors pictured below for a few loops before moving on to a smaller and sharper pair.
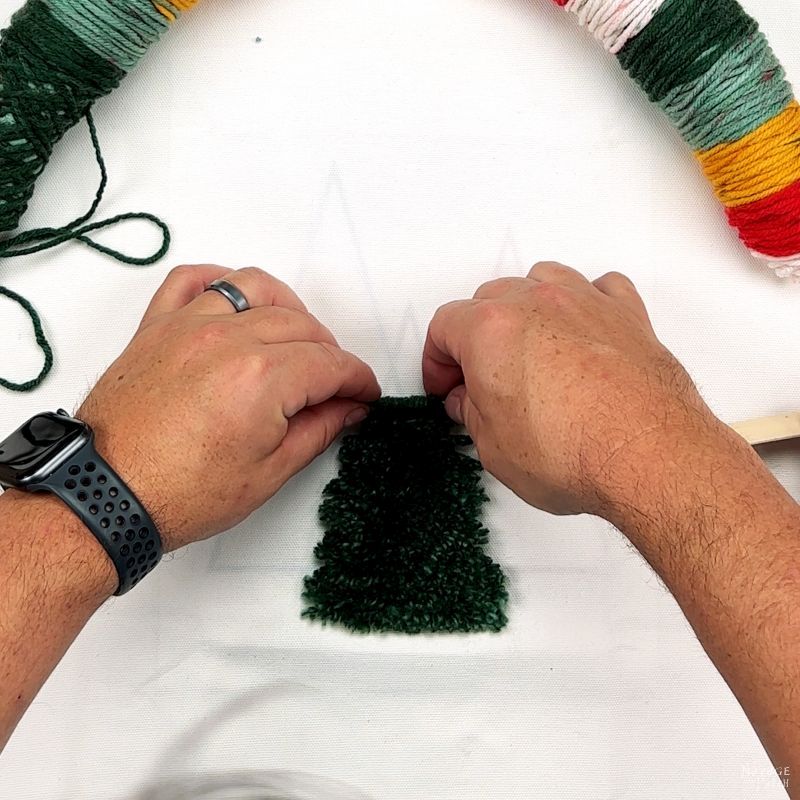
One row done, several more to go.

Skipping ahead several rows now…(because the process is the same).

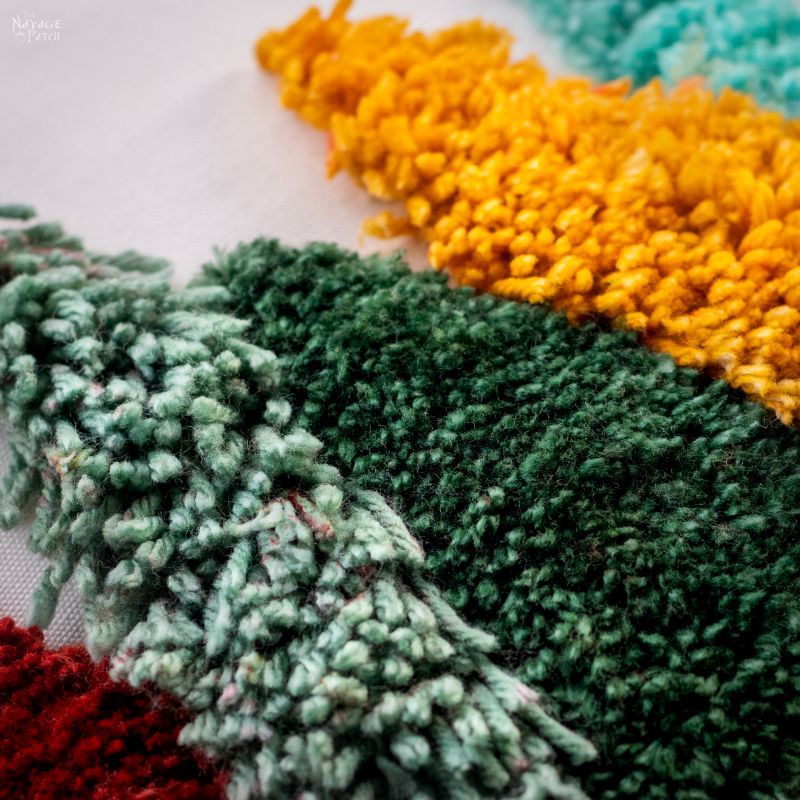
It’s a little hard to see from the photos, but I’m leaving about 1/8 inch (maybe 3/16) between each row. The closer you make the rows, the tighter and denser the shag tree will be. Anything in the 1/8-1/4 inch range should be fine.
New scissors, much better time!

Near the top now, and I’m making much smaller wraps.


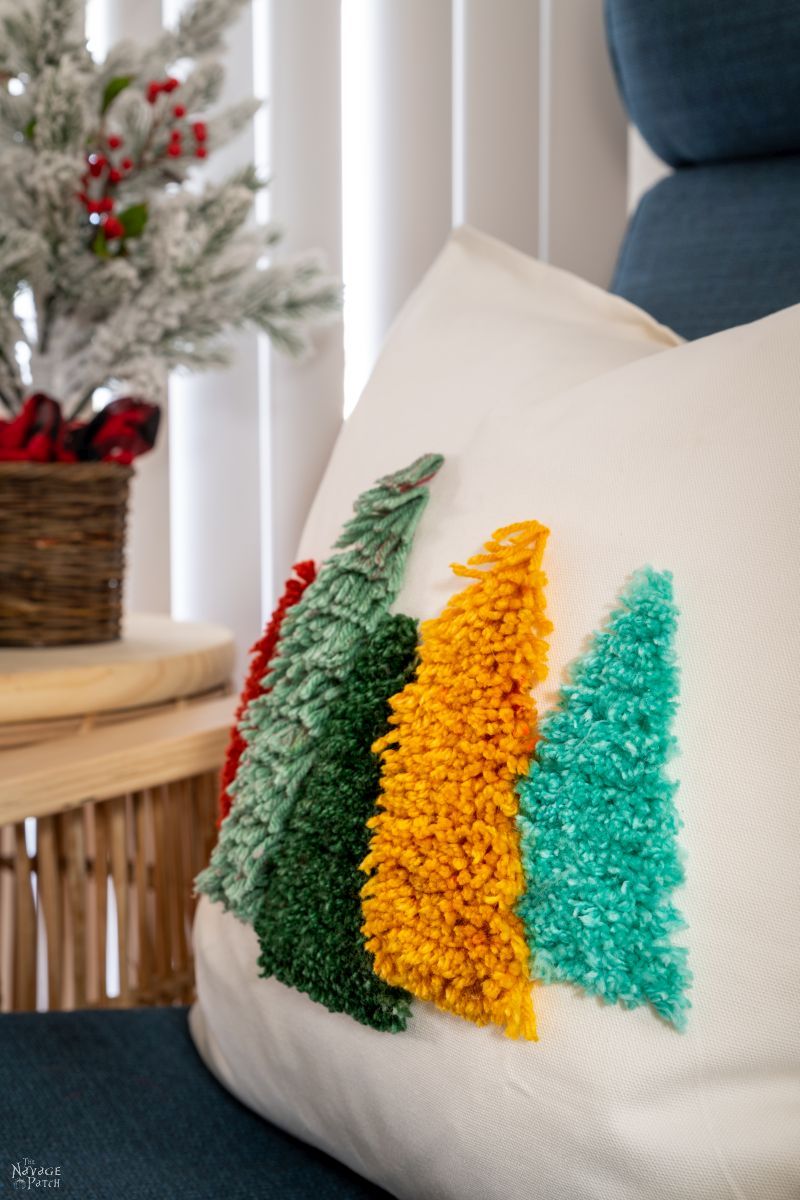
And that completed the first tree. It feels exactly like a carpet!
For the big tree on the left, I used the biggest craft stick. To make it easier to place the loops on the pillow cover, I squared one end of the stick.

I used the same wrapping techniques – just with bigger loops on the bigger stick.

When I had the length needed, I ran an line of hot glue down the edge.
Unlike with the first tree, for which I glued the yarn with the craft stick edge-up, for this tree, I glue the yarn onto the pillow cover with the craft stick angled downward, as shown in the picture below. This would allow the yarn (the “branches”) to fall downward more naturally instead of sticking up off the pillow.
I cut the loops the same as I did for the first tree.

One row done, a few more to go.
Fast forward to halfway up.

For this tree, I used the middle-sized craft stick as a spacer between rows.

And jump to the end of the second yarn tree. For the second-to-last row, I wrapped four times.

Then two wraps for the final row.

After trimming the ends, the second tree was finished.
For the third tree, I switched yellow yarn and I used the middle craft stick for wrapping. For spacing, I used the small craft stick.
The technique is exactly the same as for the second tree.

Make sure the shag falls downward…


And the rest should be old hat by now. At least it’s old hat for me since I made the dang thing! I guess it’s still new hat to you!


The final snip.

Three trees do not a forest make.
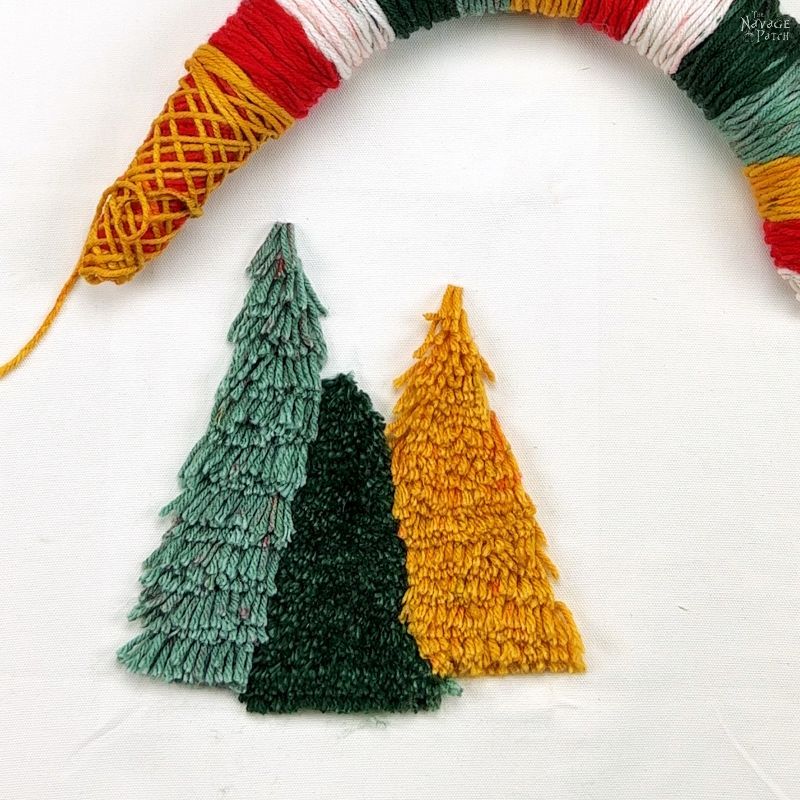
But they’re a good start.
I made two more small trees by repositioning the template. I made them both in the same manner as the first tree – dense shag.
So what do you think of the pillow I made for my wife?
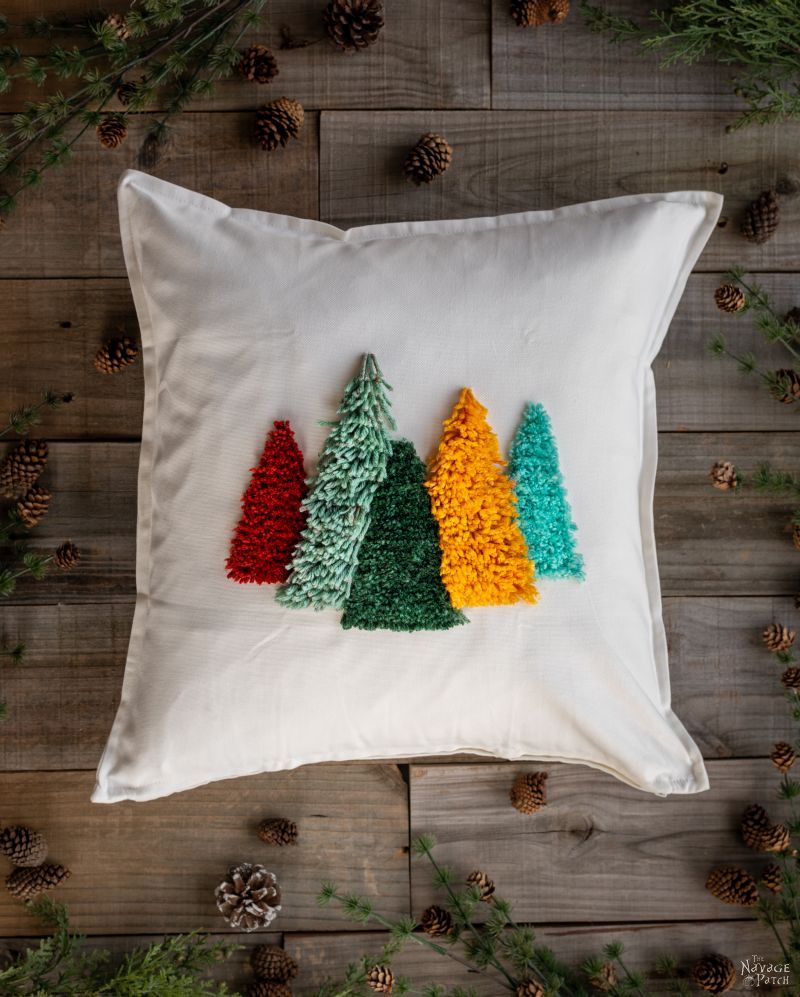
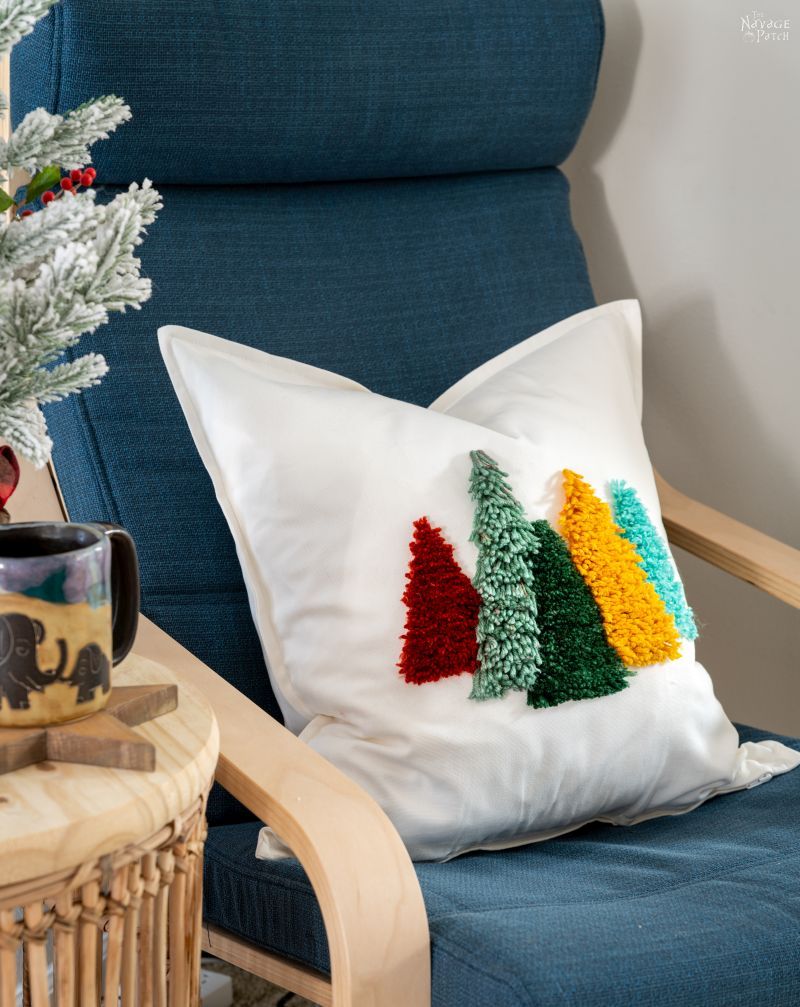

My babes loves it, that’s for sure!
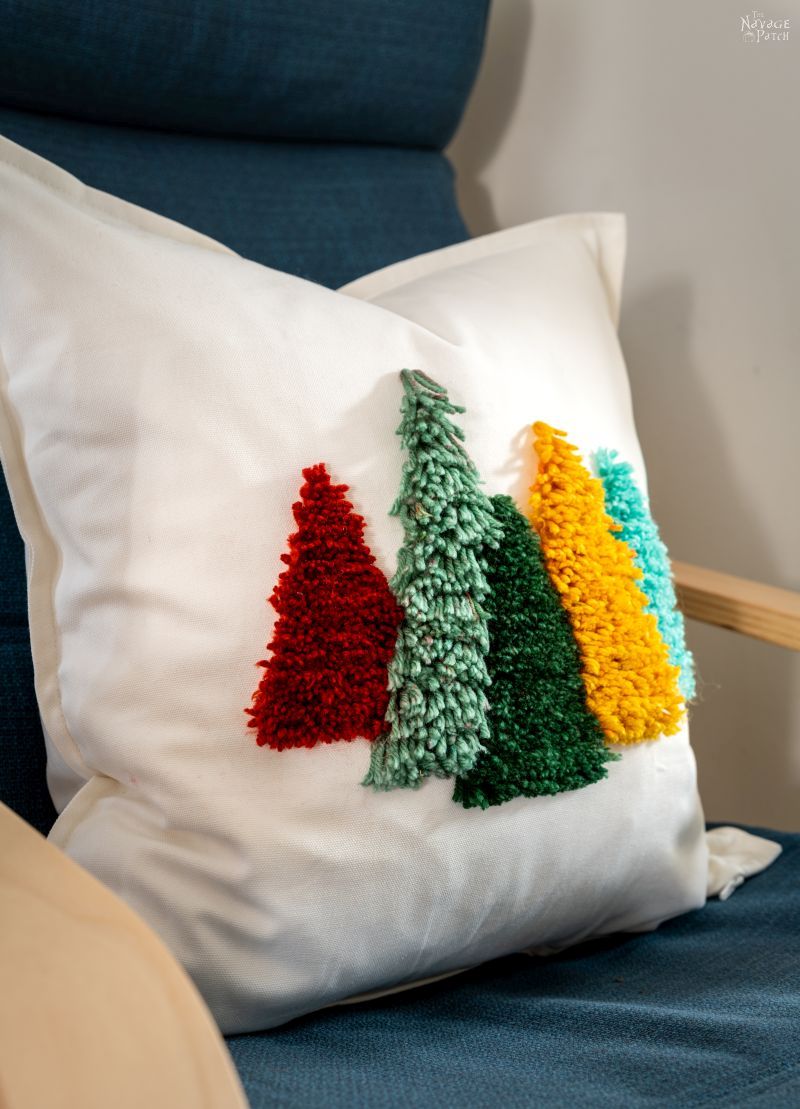
And judging by the reception it got on Instagram over the weekend, it seems she’s not alone in her sentiment!

Tree Templates – click here or on the picture below
To make it easier for you, we made three templates – the Center template is just like the one shown below. We’ve also included a Right template which has the center tree and the two on its right, and we’ve included a Left template which has the center tree and the two on its left.

Happy shagging!
o_0
Shag pillowing, I meant!
Share it on Pinterest & Facebook!


This turned out super cute! We may have to give project a try when the kiddo is out of school.
Thanks, Mo! Send pics if you do!
Cute! Cute! Cute! Love it. Love me some “trees”. Thanks for sharing.
Thank you, Debbie! 🙂
Oh, ho, ho! So well done, Sir! Take a bow! Masterful crafter indeed!
Thank you so much, Barbara! 😀
Love it. It reminds me of latch hook rugs. You did a great job.
Thank you so much, Dorothea. I had to look up what latch hook rugs are, and yes, it looks similar!
You two are the very best!! Love ALL your projects!! I told two of my friends all about your blog & they signed up also. So we may have our own Navage Patch group here in cold, snowy Michigan.
I was so excited about your yarn trees, I have made over 40 of them this special Christmas season. My husband calls them my forest! It has been so much fun making them & sending out to family& friends.
Also the mop wreaths are a big hit too. Now if my fingers would just heal up from all the hot glue!
I just want to wish you& Handan a very
Merry Christmas and Thank you for the greatest craft ideas ever!!!!
Hi Deb! Wow, thank you so much for your kind and wonderful words! I’m so happy you’re enjoying our crafting ideas! Cheers to all of you up there in the snowy wilds from warm and sunny Florida! 😀
How very clever, sir!
It turned out beautiful 🙂
Thank you so much, Cassandra! 🙂
So I’m admittedly jealous that Handan has a husband that spoils her with such cute projects. Even if she is the instigator!!! Adorable pillow, Greg. Thanks Handan for your creativity!
LOL, she is definitely the instigator, Sue, but she does get to enjoy the fruits of what she instigates! 🙂
Wow! Love these pillows. I think this is my favorite Christmas craft this holiday season and I bet it will be one of your highest viewed crafts yet. You guys rock!
Thank you so much, Barb! We really like how it turned out, and it’s already our highest-viewed Instagram Reel. Will the blog follow suit? We’ll see! 🙂
So cute Greg! I’ve already made my Christmas pillows for this year BUT I think I’ll use this idea to make throw pillows for Easter using the loopy technique for grass and the tighter for a bunny!
Absolutely, Julie! You can take the idea and run with it! 🙂
Hi Greg, I make many of your projects and will add this to my list of “to do’s” as I’d been torn about what to put on my blah couch, now I know! I’ll do the trees after Christmas, since I live in the woods (pine forest) I can use it all year around 🙂
Thank you for the tutorial and I hope you and your family have a very Merry Christmas!
Jean
Thank you, Jean! Send us a pic (or tag us on Instagram) when you make it! Merry Christmas to you and your family!
Love these trees, is there any way that you can make your instructions printable. It’s easier for me to follow along.
Hi Jan, check your email!
I think yours is way cuter than World Market! Great job! Loving all the Christmas crafts lately! Your writing is simply the best and cracks me up!
Thank you so much, Sheri, it is my pleasure! 🙂
Mom always says to me that I take things too far. I’m too much like my father, and I tend to overengineer things that just don’t need it. Mom asks to put a shelf up and I’m worried about foundation structure. I see a cute tufted pillow and I’m immediately thinking needle and thread. I had in my mind just how I’d approach this project and then you come along and blow it out of the water with an ingenious idea like popsicle sticks and hot glue.
This is why I could never run a DIY blog. Nothing would ever get finished! I’d still be sewing loops on the first tree! You’re a very clever guy. Things like this is why I follow you!
Also, how clever is that roll of yarn. Instead of having to buy full skeins of each color! I wish I could find something like that here! I might just have to use some embroidery floss instead 😂
As much as I’d love to agree with everything you’ve said and clap myself on the back for being so clever, the reality is I learned this trick from Handan. I’m just the wind-up monkey with two clanging cymbals! 😀
Do you leave the sticks on each row? Newby here!
Hi Debby, no after gluing the wrapped yard onto the pillow case I cut the loops and remove the stick.
So I was also eyeing this exact pillow at World Market all year 2023.. then it went on sale and was immediately out of stock. I’m not sure this pillow exists. I’ll be trying your DIY because I really wanted this pillow!
Awesome! Also check out our DIY sherpa tree pillow for a twist on this design!