DIY Pom Pom Ghosts
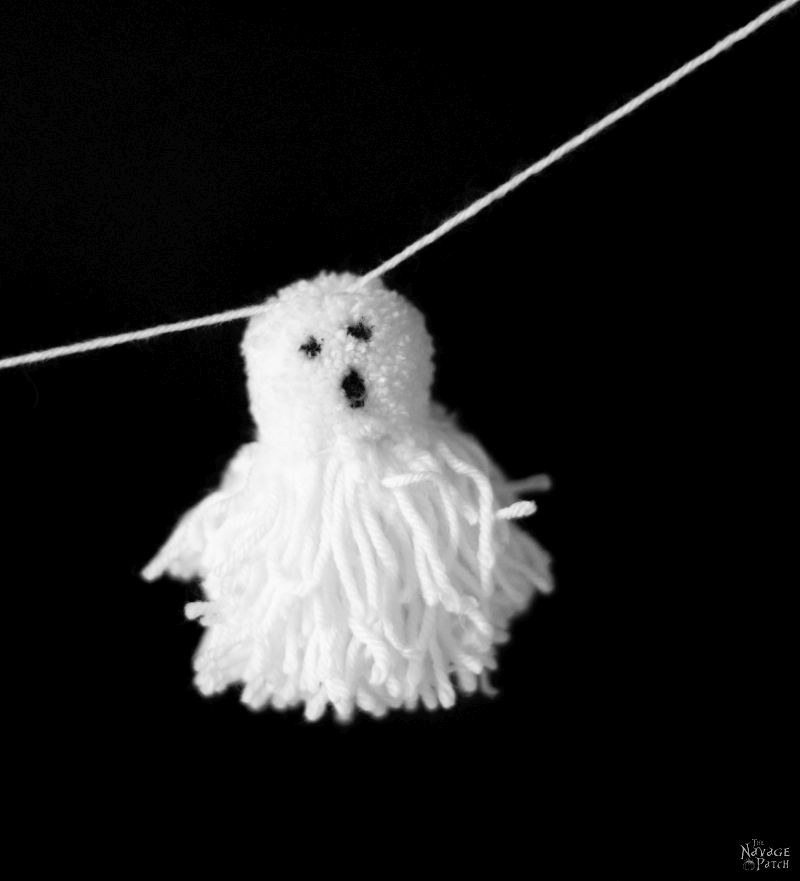
These DIY Pom Pom Ghosts are a simple and fun Halloween project for all ages! Hang them on a garland or let them stand on their own!
I was doddering around my craft room the other day, just editing some photos and minding my own business when I heard the most peculiar thing.
I worried that the acoustics of the room weren’t up to snuff. Perhaps I botched the ceiling paint or hung a curtain askew, causing the sound waves to fracture and distort.
Because the thing I heard…
Well, the thing I heard must have been an artifact or a distortion – an echo, perhaps, that lost its way and became hopelessly garbled.
Or maybe I was having auditory hallucinations.

Hmmmm….I hadn’t licked any toads that day.
I checked my coffee cup, gave it a quick sniff.
Seemed okay.
There it was again!
It sounded remarkably like my wife’s voice, but the words spoken…
The words spoken were all wrong. Like they didn’t belong – not just in my craft room, but in this universe.
They were familiar words but alien sentences.
Strange phrases from another dimension.
I listened closer to try and divine their meaning.
“You’ll be making pom poms, my babes.” The words seemed to suggest.
Pom poms?
You see now how I started to doubt my sanity!
No man should ever hear those words!
I spun around in my chair to see the hideous apparition that would speak of such things!
There!
There it stood, and it looked exactly like my wife!
It spoke again. “My babes, did you hear me? You’ll be making pom poms for our next project.”
And then it hit me.
I wasn’t hallucinating.
The ceiling paint was perfect, and the curtains were hung with military precision.
This was real. This was happening.
My babes was actually suggesting that I—eater of large animals, drinker of strong whisky, slayer of tall weeds, savior of winged beasts, rider of powerful motorcycles and master of his domain—would deign to make pom poms!

“POM POMS!” I roared and rose like Zeus upon a thunderhead, stretching up to all of my five-feet-eight-and-three-quarters-inch height. “Little girls and old ladies make pom poms!” Lightning flashed behind my eyes and thunder boomed from my chest.
“Little girls, old ladies and you.” She said.
“But…” I saw the look on her face and my lightning bolts fled into the closet while my thunder rumbled off in search of more manly pastures.
I shriveled down to five-feet-eight-inches as the remnants of my manhood packed their bags and ran off after the receding thunder.
My face hung down, and my eyes became acquainted with the floor.
“Don’t worry, my babes.” She said. “You’ll then be turning those pom poms into ghosts.”
“Hmmm?” My eyes flicked back up to Handan.
“They’ll be so cute!” She said, and I sighed the sigh I’d sighed a thousand sighs before.
“Ho-kay, my babes. Pom pom ghosts it is. You’re so lucky I love you!”
If my babes wanted pom pom ghosts, my babes was gonna get pom pom ghosts!

- White yarn (2 or 3 weight – I like 2 weight the best)
- Pom pom maker
- Foam packing peanuts (small dowel pieces or your finger would also work)
- Sharp scissors
- Waxed dental floss or waxed thread
- Sharpie Brush marker

DIY Pom Pom Ghosts
Watch the video below or read the full tutorial after that.
When Handan first showed me the pom pom maker I’d be using to make our ghosts, I was totally baffled by the thing. There was no way I’d be able to figure out how to use the infernal contraption if Handan hadn’t shown me how. And even then, I was all elbows and angles. I couldn’t remember on which end to start wrapping because the damn thing made no sense!
How the hell do the old ladies and little girls who make all the pom poms understand and operate this complicated machinery??
Gah!
Apparently I’m an idiot.
Anyway, my babes figured out a little crutch for Old Dunderhead here. She put two little black marks like in the picture below. She used electrical tape, but two dots from a permanent marker would suffice.

I guess if I were making regular old pom poms, I wouldn’t need this crutch, but since I was making ghosts, and one end was different than the other, I needed to know where to start and stop.
Those black marks were my stopping point.
Or starting point. It doesn’t matter.

For the pom pom ghost below, I used the black marks as my stopping point. For the ghost I made in the video, I used them as a starting point.
Step 1 – Wrap
Either way, my first step was to wrap yarn halfway around the semicircle.
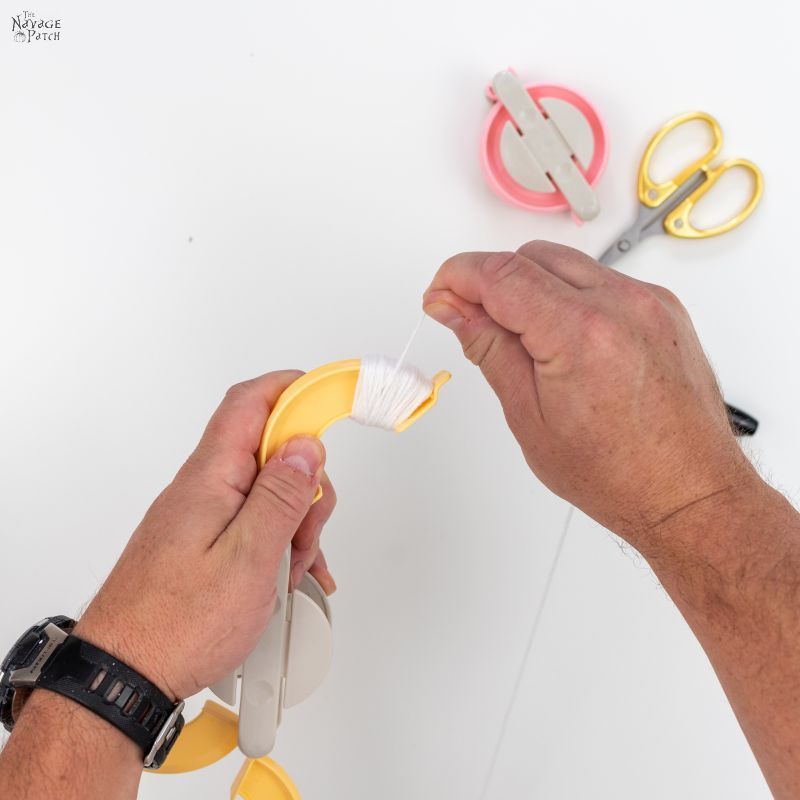
When I got halfway around, I put a packing peanut on the back half of the semicircle and loosely wrapped yarn around it. If you wrap too tight, you’ll crush your peanut.
Nobody likes a crushed peanut.
Oh, by the way, here’s a fun diversion while you’re mindlessly wrapping yarn around your pom pom maker: try saying “packing peanuts” 10 times as fast as you can.
😀

When I got about halfway down the peanut, I stacked another on top of it as shown below. Again, I wrapped it as gently as possible.

Once I had a whole bunch of wraps (a “whole bunch” is more than a “good amount” but far less than a “boatload”), I returned to wrapping the first half of the semicircle. This would eventually be the ghost’s head, so I wanted it to be nice and full.

I closed the first half and cut the yarn.


Moving on to the second half, I repeated all the steps of the first half.


When the two halves looked about equal, I closed it and cut the yarn.


Step 2 – Cut
Using small, sharp scissors, I cut through the yarn around the pom pom maker.


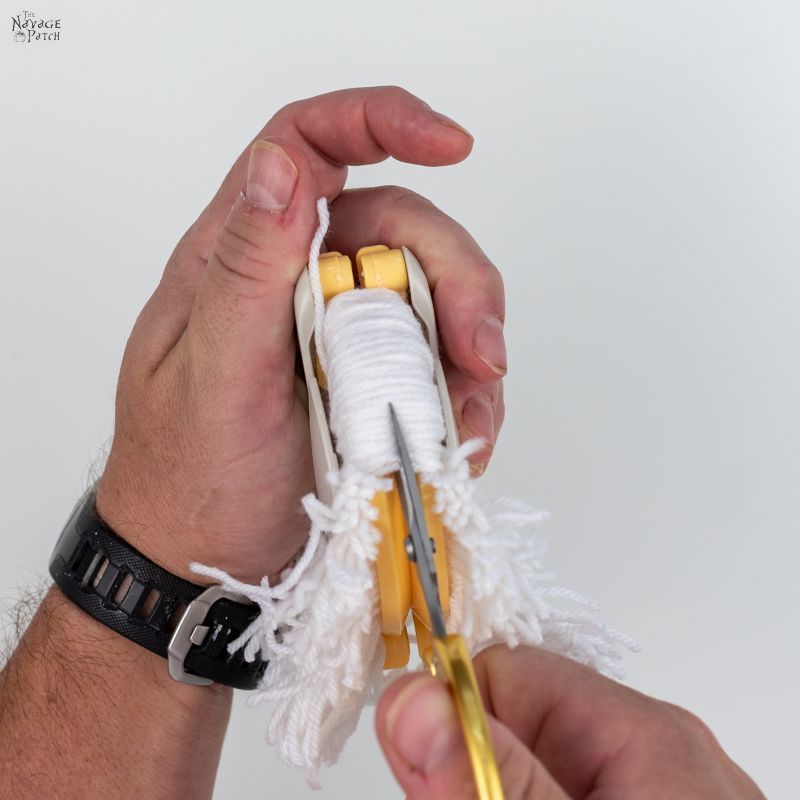
Here’s how it looked after cutting. The head is up top and the body is the longer yarn below.

Step 3 – Tie
I pulled out about 2 feet of waxed dental floss. Waxed floss or thread makes it easier to tie.

I tied it off with a double knot, and left the excess floss so I could hang these pom pom ghosts in a garland. If you just want your ghosts to sit tables and windowsills, you can trim the floss.

Next, I opened the pom pom maker (seriously, who dreams up these things?)


It looked more like a rag mop than a ghost at this point.

Step 4 – Trim
I pulled the floss over to one side so I didn’t accidentally cut it.

Then I grabbed the ghost by his long hair and gave his moppy head a good trimming. The closer you trim, the easier it is to draw his eyes and mouth.

Step 5 – Draw


And that’s all there is to it! You can hang these little guys in a garland, or you can plop them on their little white ghost butts.
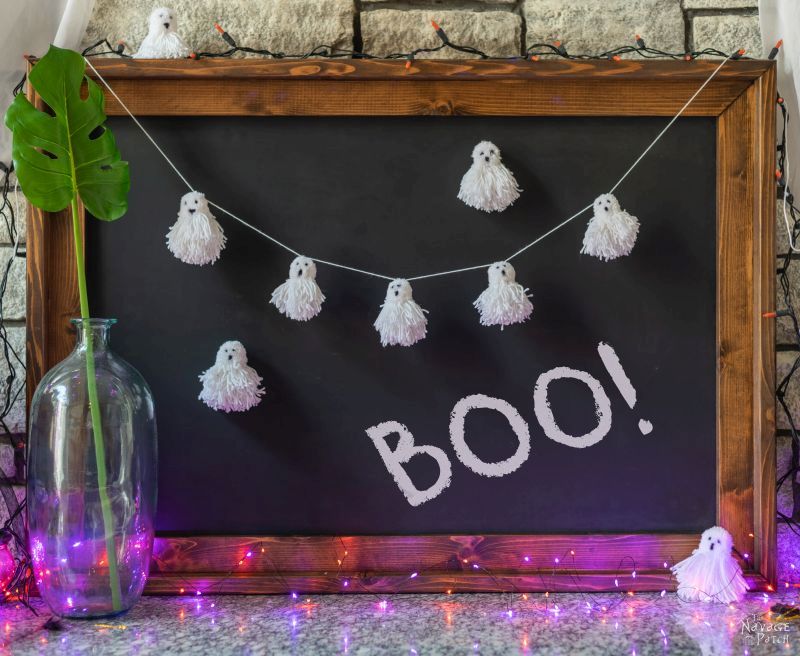
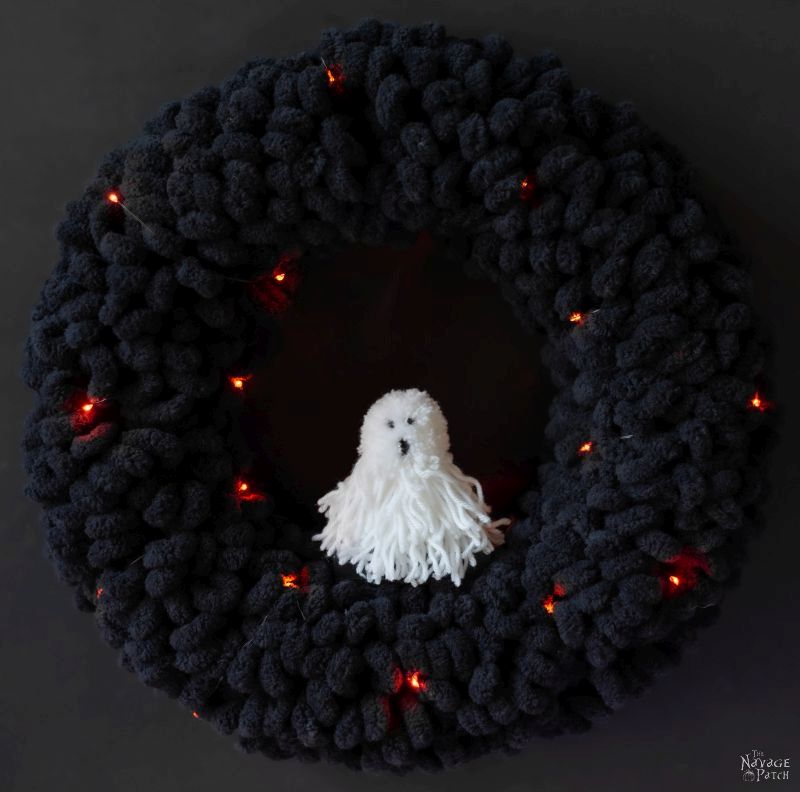
Or if you made our DIY Spider Wreath, you could pull off its legs and repurpose it to use with your pom pom ghosts!

Anywhere you put them, they look great! They even kinda sorta maybe look a little cute. But don’t tell anyone I said so! I’ve got a reputation to protect!

And who’s that in the background?
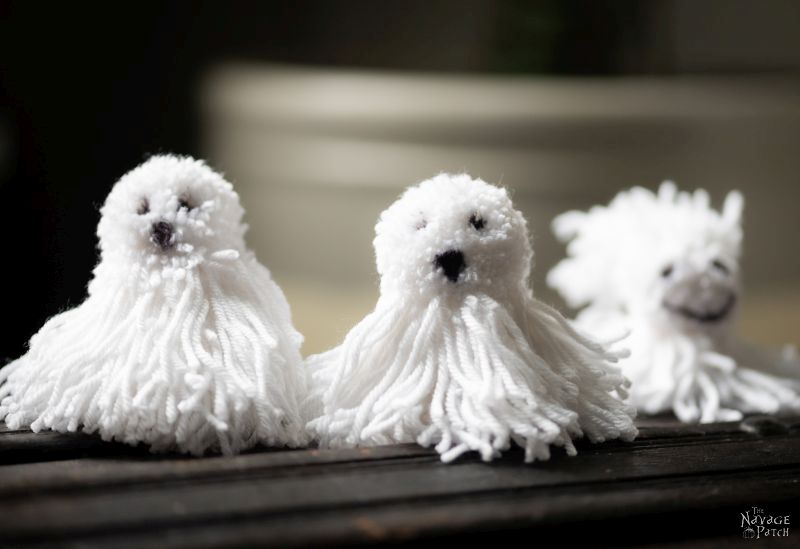
You can play around with your trimming technique and make all sorts of pom pom ghosts!

The other ghosts were totally shocked by this smiling, dreadlocked Ghostafarian!



We love it when you share our posts on Facebook and Pinterest!


Greg, you are a master! These are so cute! You even said it yourself. I especially like the dreadlock guy, though, I have to admit. At first I was a little baffled by how the peanut was going to be used, but when you explained it, of course it made sense. You and Handan are a great team. Thanks for sharing your crafty manly side. 🙂
Thank you, Audrey! LOL, they are pretty cute (yes, I admit it), and I think I like the Rasta ghost best, too!
You guys know I love y’all dearly……BUT, I honestly thought these were owls. I just may give these a try right after I finish your other great ideas?.
btw, know anything about Cricut?
Bye 😉
LOLOL! Well, two birds with one stone, then! Ghosts or owls – your choice! Yes, we know a lot about Cricut – why do you ask?
Too cute, thought the ghostafarian looks sort of like the ghost of Groot. I am Ghrost!
I never saw these types of pom-pom makers. I always used a piece of cardboard. These are game changers.
He does look like Groot, lol! This is the only way I’ve ever made pom poms, but I can see how they’d be easier than any other method!
These are adorable. If I try them, though, I will keep it simple and add a fat tassel to the bottom of a fat pom pom! For some reason the cutie with the full smile reminds me of Charlie Brown’s little bird Woodstock! I’m so glad you are willing to try unfamiliar crafts; it’s a rare willingness; I have had my boyfriend be sorta willing to help with one craft–painting snow and glitter on pine cones for a church project!
Yep, you’re right! LOL, he looks like Groot and Woodstock!
LOVED these! Had a big smile on my face when I saw the little ghosts, but laughed out loud over the dreadlocked sweetie. Thanks for all your projects, big and small.
Thank you, Dyan! I wasn’t sure I should even include the ghostafarian, but he turned out to be the biggest hit! 😀
Ooh Greg you are clever, never seen a pop pom maker, maybe Wales hasn’t discovered them yet, we use two circles of card with a hole cut in the middle (very primitive) ha ha. Their so cute, i can see a few of those dangling from your motorbike handles for Halloween hee hee.
Handan’s the clever one, Catherine! I’m just the dope who follows orders on camera, lol! 🙂
Gostafarian! lol!!! If anyone can be accused of having “too” much fun – It’s you!
Thanks for our morning chuckle!
:D:D:D:D:D
These are crazy cute. They kind of look like a sheepdog to me. If you gave them little ears and a triangle nose, you got a dog! Pom-poms are actually awesome things and very versatile. I saw someone make a 40cm pom-poms reindeer on a show! You could make one big ghost!
Totally cute idea and very manly. They’re ghosts. That’s almost like a skull.
LOLOL! Almost, Jay, almost 😀
Love love these!!
Thank you, Lisa!
Super cute! And as always your commentary has me in stitches. And the same project can be made into baby octopuses. My mom made them for me when I was a little girl and even made a large one in bright pink to lay on my bed. They were cool! So now you need to try sea creatures! ?
Greg
You always have me laughing, & I love the craft ideas! You & Handan are so creative & make a great team! Love the ghostafarian\woodstock too!
Thank you, Michele – I couldn’t do any of it without her! 🙂
Oooooh, that’s a good idea, Naomie! 🙂
Greg,
Love your idea to take the legs off the Spider Wreath and make a wreath home for some little ghosties. What’s your best technique to secure the battery pack to the back of the yarn wreath? I made the white looped wreath with you last Christmas. Now I want to go back and add some pretty white lights to that one as well!
All of your posts are truly the greatest! I love all of the creative ideas and step-by-step tutorials.
BTW, the pom pom ghosts are simply adorable. I’m looking forward to your Thanksgiving and Christmas posts.
Best regards to you and Handan!!!!
P.S. You should be a writer. Your commentary leading into the DIY tutorials is so entertaining. Yours and Handan’s talents really complement each other.
Thank you so much, Linda! We’ll be starting in on Christmas soon – you’re going to love it! And you’re so right – Handan is my perfect complement!
I just stumbled upon this today! Totally missed this post from long ago! I got on a pom pom kick last Christmas. I made pom pom’s galore and used them all in banners to string around my fireplace mantle. I have a pom pom maker that is the devil, I swear. I hate it! I do fine until I cut then the yard wants to draw back inside the pom pom maker and when I tie it off it’s all catty wampus and uneven and some threads even come out of the pom pom entirely. I have been on the search for better pom pom maker and found THE one made of wood sold by pommaker.com. You’ll have to check them out. They how how to make animal heads with their pom maker. So cool! Once I have this thing I have to try making your ghosts!
Cattywampus! Oh, I haven’t heard that in ages! I’m going to have to get that one back in my lexicon. I’m so happy you saw the post. Good luck with your ghosts! 🙂