How to Finish Raw Wood without Changing its Color
Learn how to finish and protect raw wood without changing its color or darkening the wood. This technique works with any sheen!
There are two types of people in the world: those who love the look of raw, unfinished wood and those who can’t wait to slap on some poly to amplify the wood’s natural beauty.
Those in the latter camp must content themselves with the fact that finishes of any type – poly, shellac, lacquer, wax – all change the wood’s appearance. While they accentuate the grain and beauty of the wood, they also darken and deepen its color. This is usually a good thing.
But not always.
Because there are those who prefer the raw look, and they have to accept that their unprotected pieces are at the mercy of Mother Nature, careless spills and grimy hands. If they want to protect that raw wood, they’re going to end up with something a little darker, maybe a little more orange (especially with pine) and often much shinier than actual raw wood.
I work with wood a lot, and I’ve always counted myself among those who can’t wait to drench it in polyurethane to bring out the rich depth and color that’s unattainable in raw wood.
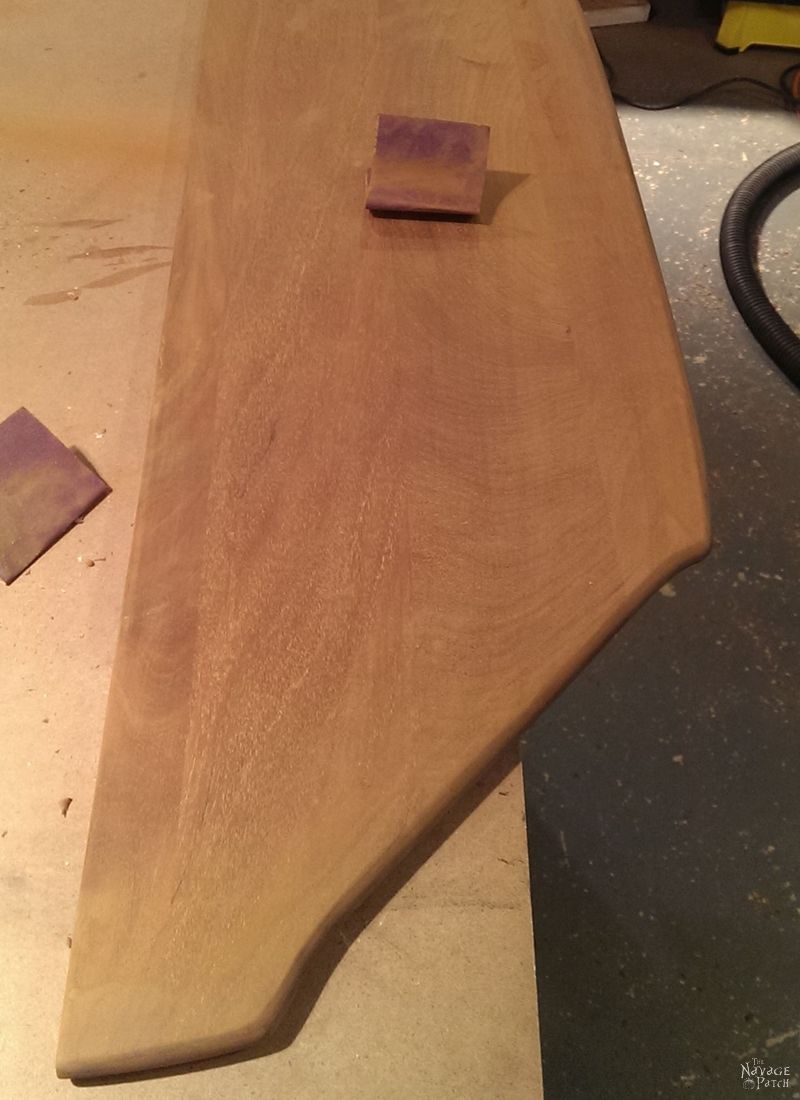
Just look at this mahogany console table I made from a beaten-up old dining table. This was the raw mahogany. Nice enough in its own way, I suppose, if you’re into the whole mousey wallflower thing.
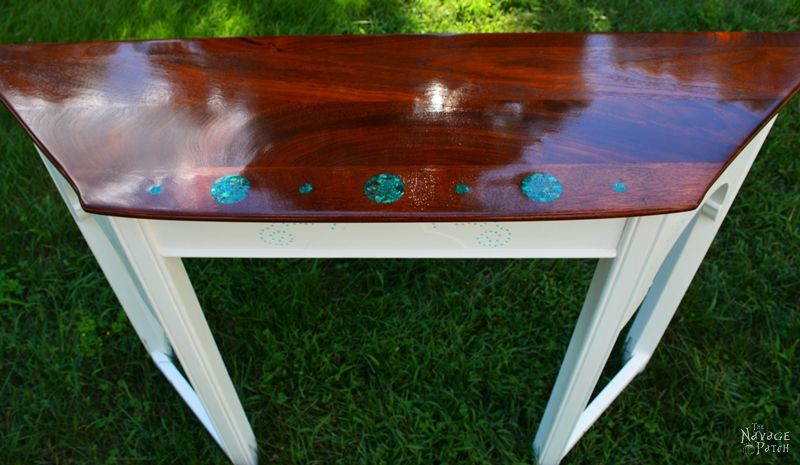
And this is the stunning beauty brought forth by polyurethane. The wood below is not stained! That is just gorgeous mahogany and satin polyurethane!
Okay, so mahogany is a bit of a special case – for me, there are few woods that rival its beauty.
But what about, pine, for instance? Sometimes poly can really highlight the yellows and oranges, and that may not be what you want.
Or maybe you just like the dead flat look of raw wood.
Handan is in the raw wood camp.
She can’t get enough of the lighter tones and flat look of raw wood – especially if it’s distressed.
Her favorite look is old wood furniture that’s been almost entirely stripped of a previous finish and stain.
But the problem has always been – how do you protect the piece while also protecting the look?
Some folks turn to wax and other wood conditioners, though still, some discoloration will result.
But we have a better way.
And our method allows you to achieve the holy grail of raw wood finishing: how to finish raw wood with satin (or glossy) polyurethane without changing the wood’s color or shade.
Yes, it’s possible.
But first, I’ll show you a little project I worked on with Barish.
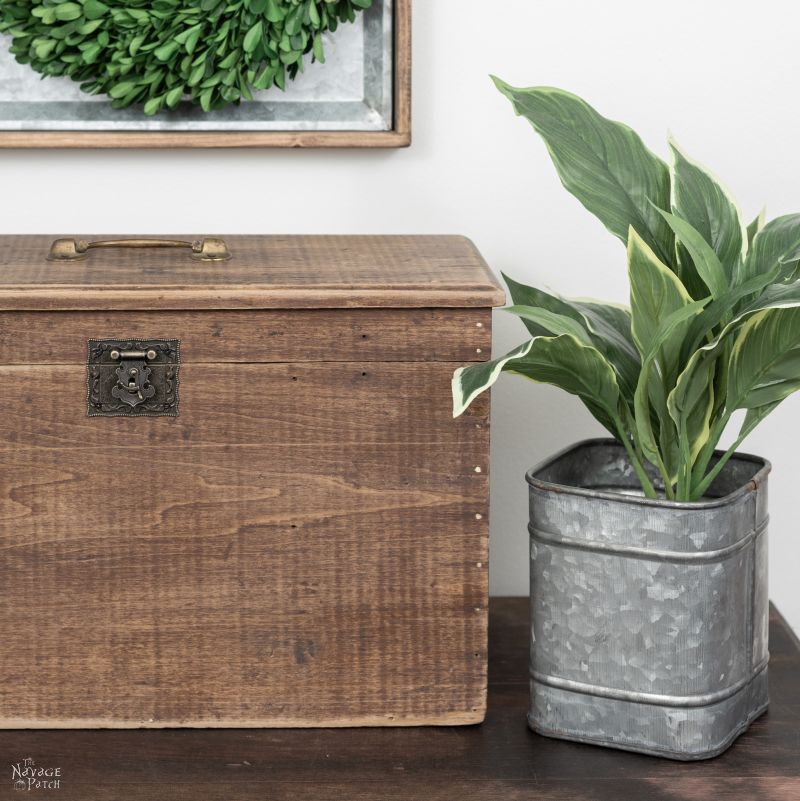
Handan picked up an old wooden file box during one of our tag sale excursions a few years back. It had been stained and finished way back in its day. She wanted that finish stripped off, and she wanted the box to have a raw wood look.
This was a perfect project for The Boy to start playing with power tools.
I set him up with a detail sander and a dust mask, and I set him to work.

Unfortunately, I didn’t follow my own safety precautions. I supervised and took photos while the fine dust flew from that little detail sander.
When I went back upstairs, my nose started burning. Within an hour, I couldn’t feel the tip of my nose.
These symptoms lasted for almost a week.
A week with no feeling in my nose!
Yeesh, I don’t know what the hell this box was stained or finished with, but this was a good lesson.
ALWAYS wear a mask when sanding. You never know what poisonous crap is in the finish you’re stripping off.
Anyway, Barish sanded it down to a point where we thought Handan would like it – a nice combination of raw wood and old finish.

Now here’s the secret to protecting and finishing raw wood while also protecting the raw wood look.
Modern Masters Exterior Dead Flat Varnish.

This is a water-based sealant that brushes on easily and never leaves streaks.

Since it’s water-based, it needs to be applied over raw wood or other water-based products. However, you can put an oil-based product over this dead flat varnish. More on that later.
Here you can see how it looks when wet compared to the unvarnished side. Don’t worry, all that shine (and the slightly darker color) disappears when it dries!

See what I mean? I’m re-attaching the hardware in the pic below, and that wood has been sealed with the dead flat varnish. Compare it to the left side in the pic above. See any difference?

For this old box, I replaced the ancient and non-functioning hasp with something a little more decorative and functional.

This was just a simple little makeover to introduce you to our favorite dead flat varnish. After these few pics, I’m going to show you something really cool!


We’re going to use the box to store our little glue guns and glue sticks.

Remember, for this project we wanted the raw wood color and flat sheen.


But what if you want to keep the raw wood color, and you want to add a little shine?
I know. Sounds like crazy talk.
But here’s how it’s done.
Since mahogany is one of the types of wood that I think changes most dramatically when sealed, I chose to use it for this demonstration.
Here’s a mahogany board, about 2 feet long. I’ve marked it into quarters with pencil lines.

I taped off one end and applied Modern Masters dead flat varnish to the other 3 quarters.

After the first coat of dead flat varnish dried, I taped off the other end and then applied a second coat to the middle two quarters. Here’s how it looked just after I peeled off the tape and before the varnish had turned clear.
In the picture below, the quarter on the right end has no varnish, the quarter on the left end has one coat and the two in the middle have two coats.

When the second coat dried, I taped off the two left quarters and the far right quarter and applied a third coat of varnish to the middle right quarter.
So from left to right in the picture above: 1 coat of dead flat varnish, 2 coats of dead flat varnish, 3 coats of dead flat varnish, raw wood.
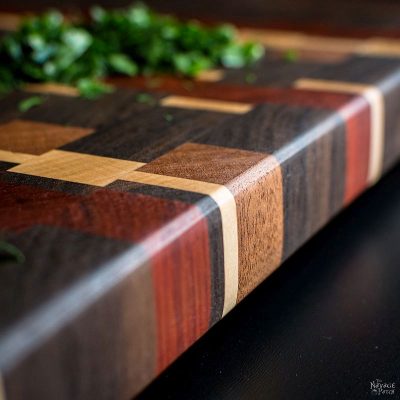
I then gave the whole board one coat of satin polyurethane.

And here is the result. The top quarter is satin poly on raw wood, the one underneath is satin poly over 3 coats of dead flat, then satin poly over 2 coats of dead flat, and finally the bottom quarter is satin poly over 1 coat of dead flat.

As you can see, there is very little difference between 1 and 3 coats of dead flat varnish. Really, you can only see a tiny difference if you look up close and in person. And the best part is that 1 coat of dead flat actually looks better than 3.
But compare those 3 quarters to the one without dead flat varnish!
I isolated the quarters for the pic below to show pure raw wood on the left (picture taken on the back of the board), raw wood + satin poly in the center and raw wood + dead flat varnish + satin poly on the right.

There is no difference between the left and right panels above except for the satin sheen on the right that doesn’t show very well in the photo.
To the eye, the color is identical.
Honest truth – for me this is more of an interesting find than anything else. As I mentioned earlier in the post, I’m a big fan of what polyurethane does to wood.
But for those RawHeads like my babes, this is a game-changer.
Handan has been rooting around the basement looking for something, anything, I can sand down to bare wood and then re-finish with this technique.
“Ooooh, do this one my babes!” She points to a painted chest.
I take a closer look. “Nope. It’s made from crappy composite wood, my babes. Won’t look good.”
“How about this, then?” She points to a nightstand.
“Hmmmmm. Nope. Veneer over crap wood. Sorry, my babes!” I say.
“This box?”
“MDF.”
“That stool?”
“Meh.”
And so the search continues for the perfect piece to strip down to its beautiful bare bones.
But when she finds that piece, you’ll see it here first at The (Naked) Navage Patch.
*******
Hey, while we’re (sort of) on the subject of water-based varnishes, did you know there’s an easy way to paint french doors without taping the panes?
Scout’s honor, it couldn’t be simpler! Click the link above or the picture below to find out how it’s done!

*******
It’s cold outside, and that means major shrinkage!
o_0
Please, madam, I’m talking about your floating floor!
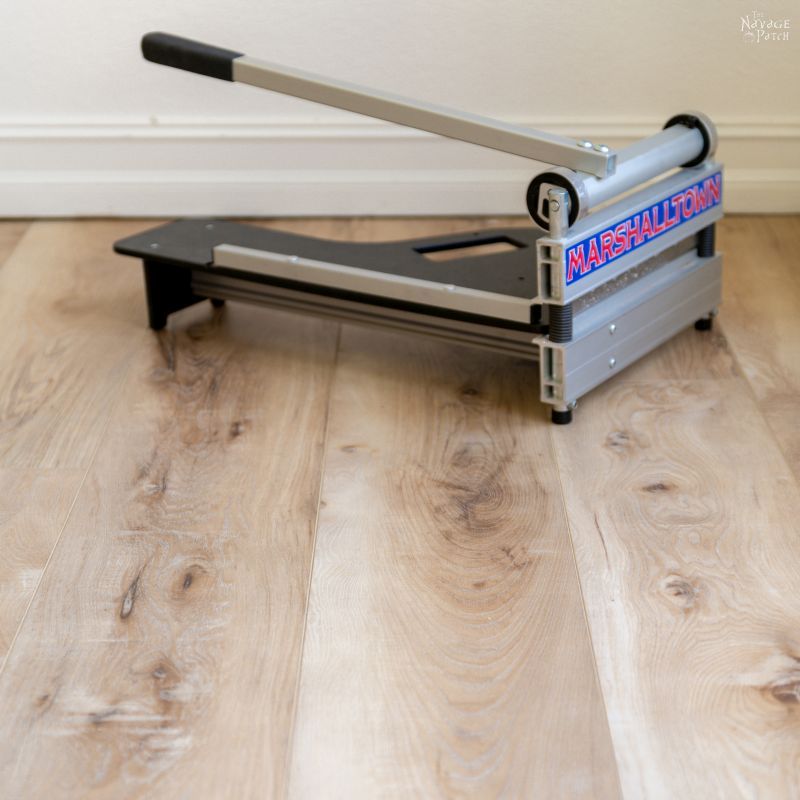
Seasonal fluctuations of humidity and temperature can wreak havoc on floating floors and leave gaps sprinkled all around the room.
Did you know there’s an easy DIY fix for floating floor gaps?


Game changer! I love poly and I love raw wood too (if it is nice wood–I have a thing for fine woods in furniture). I wonder how this would look on raw oak? Would it keep the orange tone from appearing. Hmm, must experiment.
Totally! Whatever colors and tones are in the raw wood will be locked, so when you apply your satin or gloss poly, all you’ll be adding is shine.
Greg,
This article is utter salvation for my Black Walnut wood project!! I don’t like what poly does to the wood’s color. I dreamed of a way to preserve its natural dreamlike color. I took one last stab on the Internet, and your wonderful solution was found!
Thanks again for taking the time to share this. Article is also well-written.
Cheers, brother!
— glen danielsen ??
Awesome! I’m so happy I could help, Glen!
Hi Greg. Apparently the can/container of MM of Exterior Dead Flat Varnish says it shouldn’t be used on raw wood. Any idea why that would be? I’m hoping to apply this over raw wood that gets water splashed on it frequently. Do you think following it up with the Satin Poly would be sufficient water protection? I’m wanting to preserve the raw look as much as possible but also make it functional. Thanks- Joann
I learned that same thing years later from another reader, Joann. I have no idea why they would say that! We’ve used it so many times, and our technique works great! It certainly can’t hurt to follow up with a coat of satin. You’ll keep the raw wood look, but you’ll just have a little sheen. Good luck with it!
I spoke with Modern Masters (Rustoleum). They said The resins in the dead flat varnish will cause raw wood to change color in time. They absolutely recommend it NOT to be used on raw wood. Neither should it be used on top of any polyurethane ( oil or water base). I was greatly disappointed after buying a gallon. My test looks good, but was told to expect it to discolor.
Hi Matt, that is interesting. I’ve got raw pieces going on 3 years that haven’t changed a bit. I don’t know about putting it over poly, but I’ve also got pieces with poly over the MM that are doing just fine, too. Hey, they created it, so they can say what they want, but I’ll keep using it as I have been, because I’ve seen no evidence of color change.
Now this is a real winner! Of all the finish work I do on products, how did I miss this? Thank you! Just ordered some.
Awesome! Glad you found it useful! 🙂
Hi Greg
We can’t get the Modern Masters dead flat varnish here in the UK so would Polyvine Water Base Decorator’s Dead Flat Varnish do the same job? Love the finish on the old box – I agree with Handan – the raw wood finish does look super. I spent days removing almost 100 years of old paint off our staircase and loved the finish when they were done, applied a varnish and it made them a lot darker 🙁 I might strip the varnish off again and apply this if you think it is suitable. We are also applying a ‘brick wall’ wallpaper to the wall behind our cooker and cutting out a few bricks to reveal a mural below of an outdoor scene. It is suggesting you can use dead flat varnish over the wallpaper to protect it from splashes!! Thanks for a very entertaining and informative blog 🙂
Hi Jayne, I imagine any water-based dead flat varnish would work, just be sure to test if first! Once you protect your stairs with the dead flat, you can then get an even better layer of protection with some satin oil-based poly (and you won’t change the color!)
So I am currently working on refinishing my oak bathroom cabinets. They had that nasty “golden oak” finish popular in the 90’s, and it just got gungy. I love the pale color of the bare oak, so I used the Dead Flat. It darkened the grain and made it stand out more, without darkening the rest of the wood, which is not what I wanted, but it was better than straight poly. I applied 3 coats, and then started applying an oil-based clear poly over the top. It turned it golden. It was still a pale gold, but gold nevertheless. So I stopped and resanded it. I got a water based poly instead and so far I’ve got 2 coats of that on, and that seems to be working better than the oil based. I guess the whole point of that is that the oil-based poly added color when I didn’t want it, and as a novice I didn’t realize that.
Hmmm, it’s odd that the oil-based would add color even after the dead flat. In the tests that I ran, oil-based poly over dead flat only added sheen, not color.
I’ll probably never make anything from nice wood but it’s nice to know these products are out there. I wish it was easier to find nice older stuff here. I couldn’t imagine going to the junk yard and finding such great stuff! America has a much longer history with more people, and thus more things for endeavouring DIYers to snuffle up!
Jay, you need to come to America during the summer and go on a tag sale tour!
Loved the post, but you had me confused. About half way through you showed a pic and the sentence that I thought that went with the photo says this “In the picture below, the quarter on the right end has no varnish, the quarter on the left end has one coat and the two in the middle have two coats.”
Then under the photo, two sentences down it says this, “So from left to right in the picture above: 1 coat of dead flat varnish, 2 coats of dead flat varnish, 3 coats of dead flat varnish, raw wood.”
Well I kept scrolling up and down like a yo-yo wondering if I missed a photo somewhere.
So the third quarter from the left in the photo has two or three coats of product. It does not really matter but boy I was confused LOL!
Or maybe I just am misinterpreting something which for me happens all the time.
I like wood any way I can get it. I do not care if it is flat, shiny or soaked in swamp water I just love wood. I even stare at dead branches on the side of the road after a wind storm wondering what I could make with them.
Getting ready to start a large cabinet job. They want the wood sealed but to stay the same color. This could be a lifesaver. Can this product be sprayed with an airless sprayer?
Absolutely, Jeremy. You can thin it with up to 10% water to get the right viscosity for your HVLP sprayer.
Thank you! I am refinishing a mahogany (veneered) DR table and I love the raw driftwoody look of it. My MM DFV is due to arrive tomorrow and I cannot wait to get started. Question, though. Could the MM be the the only product used, even in a few layers? Why would I buy a secons product (poly) to put over it? Does the varnish not offer the same protection as a WB poly? If you truly believe I should add the poly over the 1st coat of MM, can I also use the MM as final coat to achieve the dead flat finish? Again, thanks for your time and advice.
Hi Allisyn, you don’t need to add another poly over the dead flat unless you wanted to get a sheen without changing the color. But if a flat sheen is what you’re after, just stick with a couple of coats of MM dead flat, and you’re good to go!
Hi! This particular product is harder/more expensive to get. Would you recommend the Modern Masters interior dead flat varnish instead (burgundy label)? Most other stores carry that instead. Thank you!
Hi! Excited to try this product! Every other top coat I have tried had yellowed or darkened my weathered oak. Is there a particular reason you chose the exterior? Would the interior have the same effect? It’s much cheaper.
Hi Grace, Interior varnish from Modern Masters should work exactly the same. We use the exterior because that is what Handan happened to buy years ago, and I guess we’ve just stuck with it for no particular reason, lol!
Thanks for this post. Super Helpful.
I had a question, as I am new to wood finishing. We are making some cabinets out of red oak plywood and don’t want color to come through. We also don’t want any shine, but a matte finish. If we use this varnish you recommend in the post from modern masters is it necessary to add something on top of that or is the varnish all that’s needed? Do we also need to use an oil product to protect it or is that the purpose of the varnish?
Thank you,
Doug
Hi Doug, if you’re after a matte finish, the Modern Masters Dead Flat varnish is all you’ll need. You’ll keep the exact look of the raw oak plywood, but it will be protected from spills and stains. Good luck!
Greg, I recently purchased a natural stonewash coffee table from Pier One. Will this product work for me? Do I need to knock down hairs and, if so, after which application?
Hi Laurie, first be sure that the table from Pier One doesn’t already have a protective coat on it. If it doesn’t, you won’t need to knock down hairs, as that is generally done after staining (or sometimes sanding – you wet the wood to let the grain rise and then sand it down again). However, between coats of varnish, you may notice some roughness to the finish. This is caused by tiny air bubbles and any stary lint that was trapped in the finish. I knock the roughness down with 2000 or 3000 grit sandpaper using finger pressure only and going with the grain. For a large table, I would use a random orbit sander with a 2000 or 3000 grit disc. It will leave a white haze all over the table (just polyurethane dust) that is easily wiped away with a rag and some mineral spirits. Good luck!
I am refinishing a pine wood kitchen table. I have sanded it down and LOVE the light whitish look of the raw smooth wood. Will those product work, keep the neutral color , be safe and protect the daily us reach of a kitchen table? Should I use an oil base poly over it?
Hi Kari, yes, it will protect the wood and keep that raw wood color. For an extra layer of protection though (since it’s going on a kitchen table), I would follow up with a few coats of oil-based poly in a satin, semi or gloss sheen (your preference). Finishes with a sheen are easier to clean. Once you seal the wood with the dead flat varnish, the oil-based poly will not darken the wood. In case you’re hesitant, just try a test patch on the underside of the table, and you’ll see! Or, if you love the matte look, you can just leave it as-is. Good luck!
Hi! I have a couple follow-up questions to your answer 🙂
1) is there a reason for using oil-based poly on top of the dead flat varnish instead of using water-based poly?
2) Would there be an issue if I used water-based poly on top instead?
Nope! It’s just that (besides the dead flat), I only use oil-based polys, so that is what I have on hand! 🙂
I was double checking some things with the manufacturer, and when I told them what I was doing, the lady adamantly told me I couldn’t use this varnish on raw wood. She really couldn’t tell me why, and I didn’t have the time at the moment to ask her further questions. Do you know why they would say not to use it on raw wood? It seems to work just fine when you are using it… I am finishing interior tables/ desks. they need to be durable, and have a flat surface, so I will poly when I am done. But wanted to keep the color of the raw wood. Do you have any ideas of why they would say not to use it?
Hi Kasie, I don’t know why they would say that. We’ve been using it on raw wood for years (indoor and out), and it works perfectly. They may have created it for a specific use (a flat varnish for faux finishes), but that doesn’t mean it can’t have other uses. Handan and I are big fans of finding “off label” uses for products. I guess this is another one! Good luck!
Hi..ran into this post and bought the interior version of Modern Masters
https://www.amazon.com/gp/product/B000Z4DYQ8
I did one coat on my stairs handrail (banister) which has white oak. it didn’t change the color. but i do not see any shine. my goal is to preserve the color, seal it good and maybe give it some shine with clear coat so its easy to clean. if i wanted to do second or third coat, do i have to sand in-between with maybe 320 grit? i did sand bare hardrails with 320 before putting first coat.
as you mentioned, can i put polyurethane oil based clear satin to get that sheen after my second/third coat? hopefully that doesn’t change the color. Thanks a bunch for great post with pics and product.
This was a very timely post. My husband and I had a large beautiful walnut corner cupboard (about 100 years old, handmade nails, nothing perfectly uniform) that was massive. We cut it down to be a cupboard about a foot deep to be more manageable. We salvaged 2 Walnut boards and 2 poplar boards from it and decided to make a dining room table. We ordered the table legs from Amazon, built a frame and attach the boards and skirt. I really didn’t want the color of the poplar to change; I like the contrast of the light and the dark. Fortunately, I saw your post and used your link to buy the dead flat varnish. Awesome! Worked perfectly on raw wood. This is one of my favorite projects yet. If I can figure out how to add pics, I will.
Oh, good! I’m so happy we could help! We’d love to see pics – you can send them to greg@thenavagepatch.com. Thanks!
Can you use just one coat on raw wood? I have a project using walnut on a headboard that won’t take a lot of abuse so thought about just one coat as it looks more natural. Just asking as can says two coats for best protection.
Hi! I noticed you used the exterior vs the interior even though you used the furniture indoors. Is there a reason for that? I want to use this to finish a birch butcher tabletop for my work desk in my art studio. Wondering if the exterior will offer more protection?
No real reason – it’s just what we bought the first time we got it, and we’ve continued buying it ever since!
Hello, I am looking to bleach the top of my dinning room table and wanted to seal it. Do you recommend anything I can use to seal it without darkening it? I don’t like wax. Would the exterior dead flat varnish work with this project? Should I use polyurethane?
I wasn’t sure if it would still be a good idea to use the varnish and polyurethane after bleaching. I would clean table off to stop bleaching process.
I really want that light natural wood color look on the table and also want something to protect it from being damaged.
Hi Rosie, since the dining table gets a lot of use and is very prone to spills and stains, I would recommend first applying the dead flat varnish. This will lock in that color you’re after. On top of that, I’d add a few coats of polyurethane for extra stain protection. If you don’t mind a little sheen, a satin poly would be the way to go.
Thank you!!!
For some reason your response disappeared… I should have took a screenshot of the reply. I wrote down what I could remember. Thank you!!! This was super helpful!
Never mind it is showing now. Thank you.
You’re welcome! 🙂
This actually works and is amazing!!!! My table turned out better then perfect and I’m super happy with it. Thank you so much for sharing this awesome technique! 🙂
I wish I could post a picture.
I have a 20 ft cargo trailer that sits outside. I’m about to re-plank it with new doug fir planking.
If left alone, it will turn gray with time. I’d like to keep it looking blonde.
What kind of finish, quickly and easily applied, will keep it looking new. I don’t mind if it has to be reapplied every few years.
Hi Hans, I’d go with a UV-protecting spar urethane. The UV protection will keep the wood from graying and the urethane will keep the water out. Spar urethane’s generally yellow a bit, but it sounds like that is preferable to graying. You’ll definitely need to reapply every other year or so.
This is fascinating! Also, it is just what I was looking to find. My question is this— will it work on a slice cut from a cherry tree stump? I don’t want to sand it? I plan to make a modern light fixture with it.
Thanks much!
Hi Susan, I don’t see any reason it wouldn’t work on a cherry end slice. Good luck! 🙂
Hi – As a raw wood fan I am very excited to try this. We have the builder-grade golden oak cabinets andI would prefer the natural oak color. I have wanted to sand the finish off, but didn’t know what to protect it with. I previously did a dresser for my son and sanded the drawers down to the raw wood which I loved. I added a polyurethane and they turned goldish which I don’t like as much, but I left as is. I noticed my “clear” polyurethane was not clear after doing a couple of the drawers so I wonder if I didn’t get all the finish off here and there because it looked like I did or if this color came out of the wood itself. Any thoughts? Just curious for future projects. I had a brand new brush too. Anyway THIS finish I am going to give a go to on a test door I have. If it works, I will try on the bathroom vanity. The kitchen would be a lot of work, so we’ll see…. Thanks so much for the post.
Please let me know how it goes, Karen! 🙂
Hello! Im excited to find this blog. I love the look of raw wood and have been looking for something like this to possibly use on a 600 year old sinker cypress beam to be used as a mantle and a raw edge parota slab for a dining room table top. What do you think of this product for those wood types??
Hi Kristen, I’m so happy you found us! I think this technique will work just fine on your cypress, but to be safe, just try it on a part of the beam that won’t be seen. Good luck, and I’d love to see pics when it’s done – that beam sounds incredible! greg@thenavagepatch.com
I love this information as I love the look of raw wood but my boyfriend likes the glossy finish. I’ve already put poly on my table but I don’t like how yellow it turned out. Is it possible to just put the dead flat on top of the already polyed table and then poly on that? Or would you suggest I sand it down and do it all over?
I love this! We have old cedar drawers from a cedar closet that we are making into shelves, but don’t want to change the color of the cedar. I think this “dead flat” product is the ticket, but we wonder if we can use water-based satin poly over the dead flat (instead of oil-based). I ask because the off-gassing from oil-based products gives me headaches until it’s fully cured. Thank you!
Sorry! I just found the answer when reading through your prior responses — you replied to Connie’s similar question on 10/15/21: “Nope! It’s just that (besides the dead flat), I only use oil-based polys, so that is what I have on hand! 🙂” Thanks, Greg!
Glad you found the answer, Ann – Good luck! 🙂
Hi looks good
Just wondering if you used a primer on it before the dead flat varnish
Hi Keith, nope. Just the varnish!
I think the finished mahogany piece shows beautiful workmanship, but I’m with Handan: I love the raw-wood look. It’s amazing how subjective art and design is. For example, when I scrolled up to look at the finished mahogany, I actually winced (even though I could see the workmanship was excellent! (No offense….it just goes to show how different we all are.)
It is subjective, and that’s the beauty of DIY – we can always get exactly what we like! Thanks for writing, Michaela! 🙂
Hi just sanded an old staircase for my daughter looks great but after treating one step with danish natural it’s so dark she hates it what can I use that won’t change the colour, other than leave them with out a finish, but not ideal.
Thank you
Hi Neil, use the dead flat varnish I write about in this post. It’ll preserve that raw wood look and protect the stairs. Good luck!
I received a mango wood table in Ceroused White from West Elm. Apparently that finish is more of a raw finish and it will stain. So frustrating.
Do you recommend your dead flat varnish with added polyurethane to protect it?
Will this work on mango wood that has never been sealed?
Hi Diana, yes. The dead flat varnish is polyurethane – just dead flat. so if you want to preserve the existing color, then start with the dead flat. If you like the flat sheen, you’re all set. But if you want something shinier, you can follow up the dead flat with satin or glossy. Since you started with flat, the satin or glossy will not darken the color.
Hi Greg,
I have a mango wood table which did not have a seal on it. I know this because it stained after a piece of fried chicken landed on the table. I was shocked to see a grease stain. This was prior to applying the dead flat. I applied 2 coats of dead flat. It turned my table more of a golden color and brought out more of the wood grain. I don’t hate it but was surprised that it brought out a yellow tone. Do you know why? Is it because it was mango wood? I plan on following up with water based satin poly for extra durability because it is a kitchen table. I am worried it will further change and deepen the color. What do you think? Will it change color or should I go for it?
Hi Diana, I’m really surprised it changed the wood color! I’ve used it on many woods without anything change, BUT I’ve never worked with mango wood. That said, the dead flat should prevent any further darkening when adding satin poly. Still, I’d try a very small test area just to be safe. Good luck!
Incredibly enlightening read! Your article masterfully addresses a common concern. The techniques you’ve shared for finishing raw wood while preserving its color are game-changers. I can’t wait to apply these methods in my projects. Thank you for sharing such valuable expertise!
Thank you!
Hi! Thank you for this post. I bought the Dead Flat Varnish based on your post, but it really lifted the grain. Are you resanding between coats and/or at least resanding between the Dead Flat application and the polyurethane application? -Moira
Hi Moira, I didn’t need to sand, but if it lifts the grain (which would be expected on certain woods with a water-based varnish), I’d lightly sand after the first coat. The grain will be locked from the first coat, and then I’d apply a second coat of dead flat just to be safe.
I have raw maple wood kitchen and was going to paint them inside, but decided against it because the natural look is beautiful. Is there a sealant that can be used on maple wood to protect the wood or am I better off painting them?
Dead flat varnish protects the wood and preserves the natural wood look.
Hi Greg,
I have a raw antique pantry door this product sounds like it would be perfect for. We’d like to protect it from greasy hands and such in the kitchen. Would I need to sand them after applying and if so which grit would you recommend. I’d like to not have to add the poly for the sheen, but what would you recommend.
Thanks
I only sand between coats to remove the little air bubbles that get frozen. 1000 grit with very light finger pressure will take care of those.
Thanks for sharing the info. I have a round wood shelf on my kitchen table, it needs protection from food but love the natural wood. Have you tried the Loba products and is this comparable? We use Loba on floors and you can’t tell there is anything on the wood. However this product is more affordable and available in small amounts so leaning towards using MM.
Thank you!
Nan
Hi Nanette, I have not used Loba. I would also recommend General Finishes dead flat. I used it on an oak staircase, and it works awesome!
Do you know if the little side table is cherry wood?
This might be a weird question, but does this work on sticks? Like, neat looking tree branches or chunks of wood from a tree (the wood not being rotten). Does it work when the piece still has tree bark on it (with it also protecting the bark as well)? If not, what about without the bark?
That’s a good question, Amanda! I haven’t tried it, but I don’t see why not! Give it a shot and let me know1
Could you have any more ads on your page. I was barely able to read the content but if you have more ads you will succeed to make it unreadable. Paragraph – ad – picture – ad – paragraph – ad and so it goes on.
First day on the internet, mate? 😂
Great job on this article!
I have a question for you, i just oiled a dresser that was sanded and bleached with Tung oil, I hate the look. I only did one coat of 70% mineral spirits 30% pure tung oil. Any suggestions on how i can remove it and use the Dead flat?
This was exactly what I needed! I love the natural look of raw wood but often struggle with finishing it without altering the color. Your detailed steps and tips were super helpful. Can’t wait to try this on my next project! Thank you!
This is such a helpful post! I’ve always struggled with finishing raw wood without altering its natural color. Your tips on using the right products and techniques are fantastic. Can’t wait to try this on my latest project!
I love this approach to finishing raw wood! It’s so refreshing to see techniques that preserve the natural look and color of the wood. I’m definitely going to try this on my next project. Thanks for sharing such detailed steps and tips!