
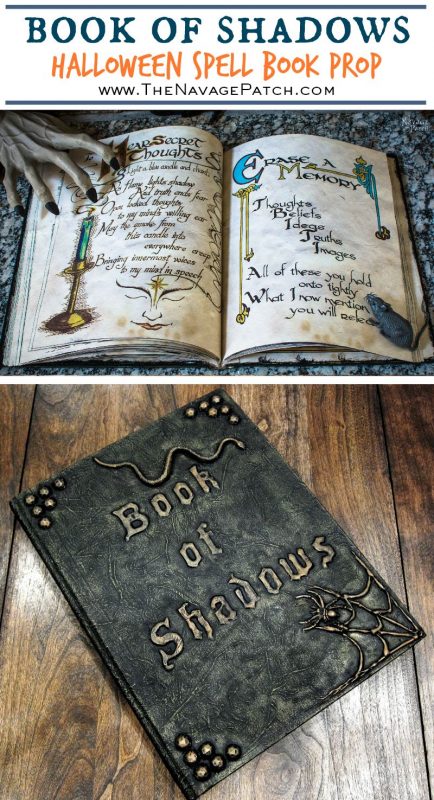
The Book of Shadows
Finally, fall is here. Not that I enjoy watching my poor babes struggling with the leaves, but this is the time when we start the countdown for Halloween. All Hallows Eve is Greg’s show time for home decoration. I know what you’re thinking: I let a man do the house decoration?? Well, what can I say… He is way better with creepy décor than I can ever be. [I’m a connoisseur of creep -Greg] Besides, whenever I decorate the house, I love humming Christmas Carols, regardless what time of the year it is. That weird habit alone is enough to kill the Halloween spirit in our family. This is why the Halloween decoration task will always be on my babes. That being said, I must be doing a somewhat decent job with my hand-crafted Halloween props, because Greg likes them and uses them for our Halloween house decor. So I still get to keep my little action in the show.
Last year, I started my Halloween projects right at the beginning of September. This year, I am yet to start any Halloween projects, as I am still floating in the dreamland trying to decide what kind of props I should go with. Seeing so many good ideas out there is not helping my situation either, because I want to do them all, but I don’t have enough time. So this year, I guess I will end up doing some apothecary jars, since that will look excellent together with The Book of Shadows I prepared last year.

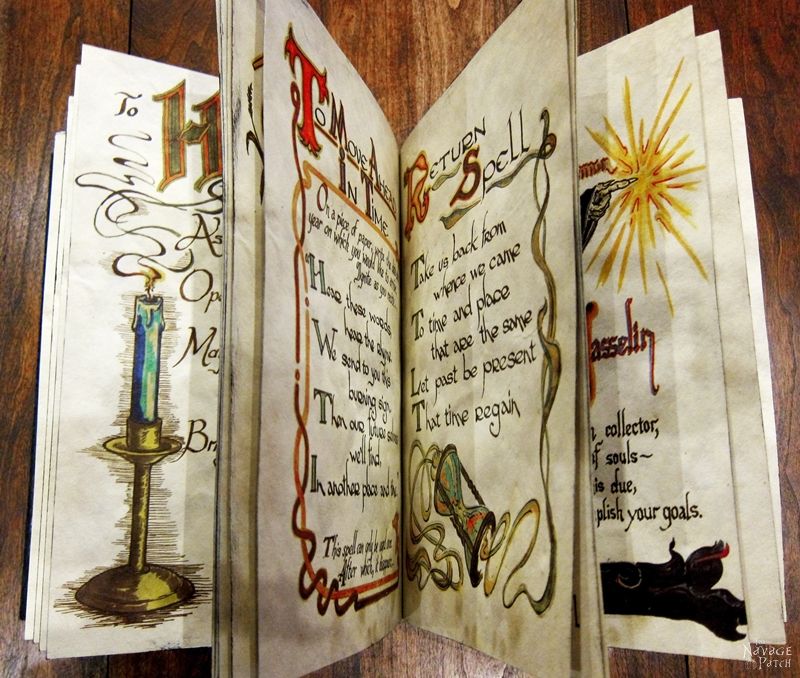
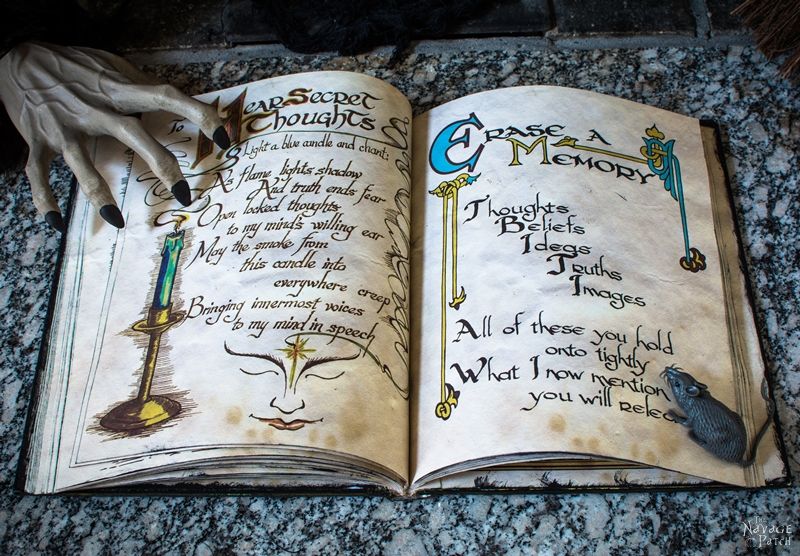
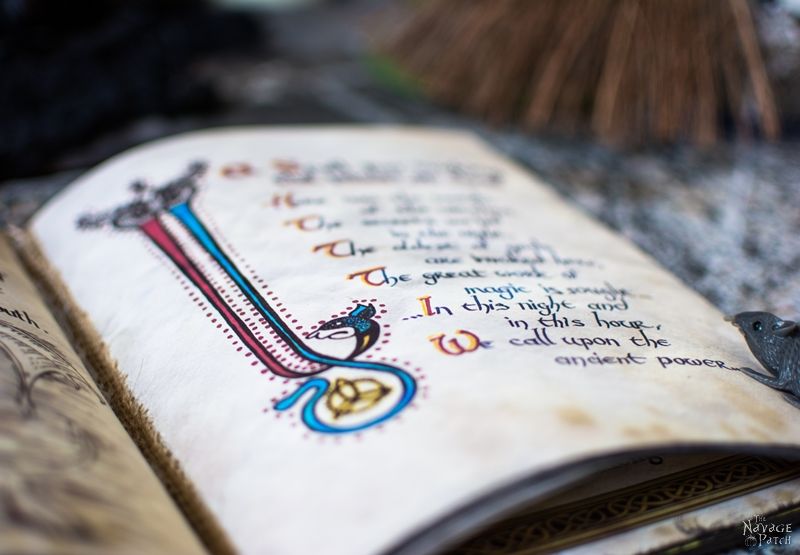
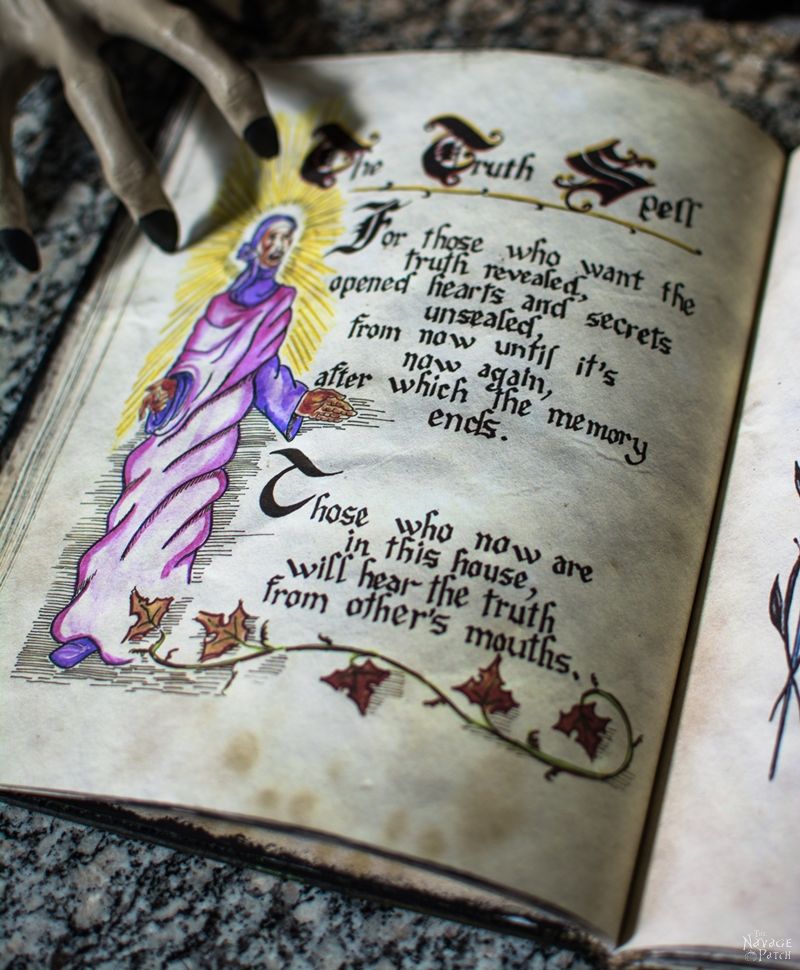
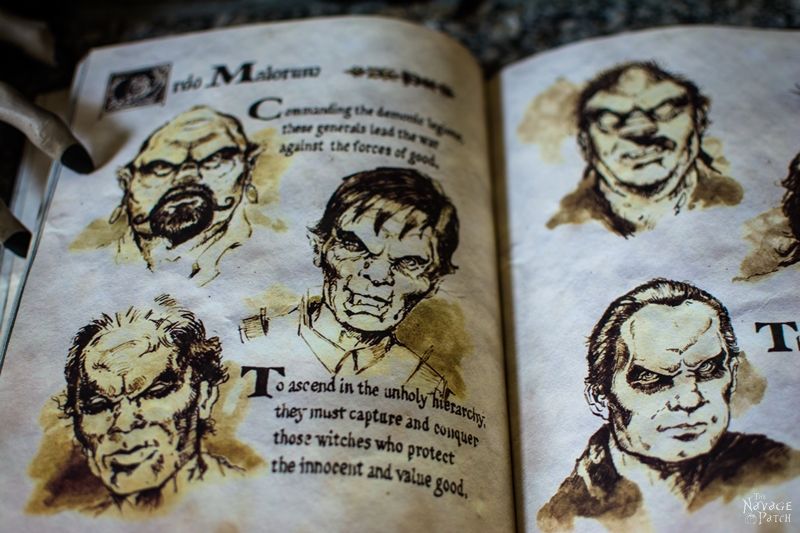
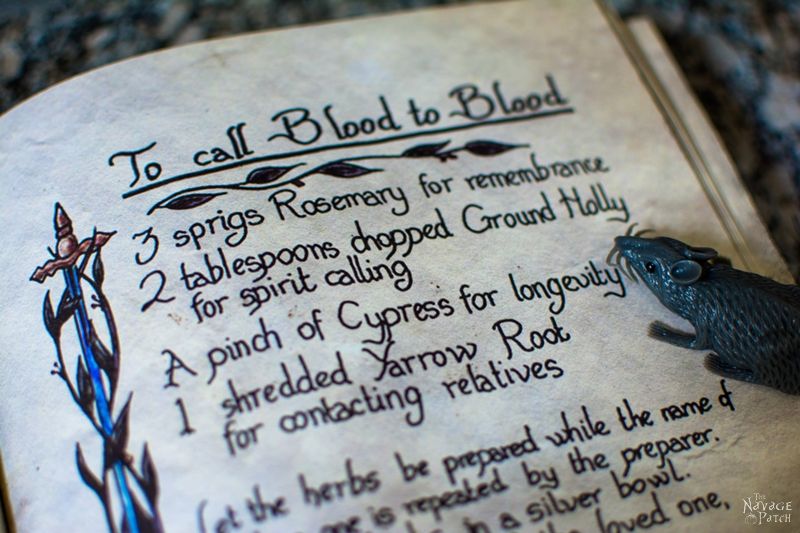
I got the initial idea for the Book of Shadows from Pinterest. But the pins I saw were either about how to transform only the cover of a hardcover book or about 1-2 pages of spells and incantations to stick in a notebook. I couldn’t find any pins on how to prepare a full spell book Halloween prop, inside and out, with the hardcover and all. So I became determined to make one for us. After searching for 3 days online, I happened to land on some excellent illustrations and prop pages that I could use for my project. Preparing the page layouts for book-page printing took me a whole weekend. I used card stock paper for the printing to give the book an authentic old feel.
Once all the pages were printed out, I used this excellent tutorial on Instructables.com for making a hard cover book. As excellent as the tutorial was, trust me this part was the most tedious part of this project. So have some patience if you are attempting to make one, because you will love the end product.
When I got that tedious hardcover part nailed down, the rest was easy and fun. First, I glued some embellishments on the hardcover, choosing from whatever I had on hand. This part is totally up to your imagination: you can use skeletons, snakes, spiders, thumb tacks, lettering, or you can even make a spider web using hot glue. The possibilities are endless. Once I was done with the embellishments, I used Mod Podge to glue some paper towels all around the hardcover. This makes creases on the hard cover. This step is a must if you want that leathery look on your book.

In all the tutorials where the books had raised lettering on the cover, 3D letters from craft stores were used. With my hard cover, I used glass leading paint. Glass leading paint has a softer feel than the 3D letters when touched. So for me it works better than the 3D letters and feels exactly the same as the rest of the plastic toys I used as embellishments.
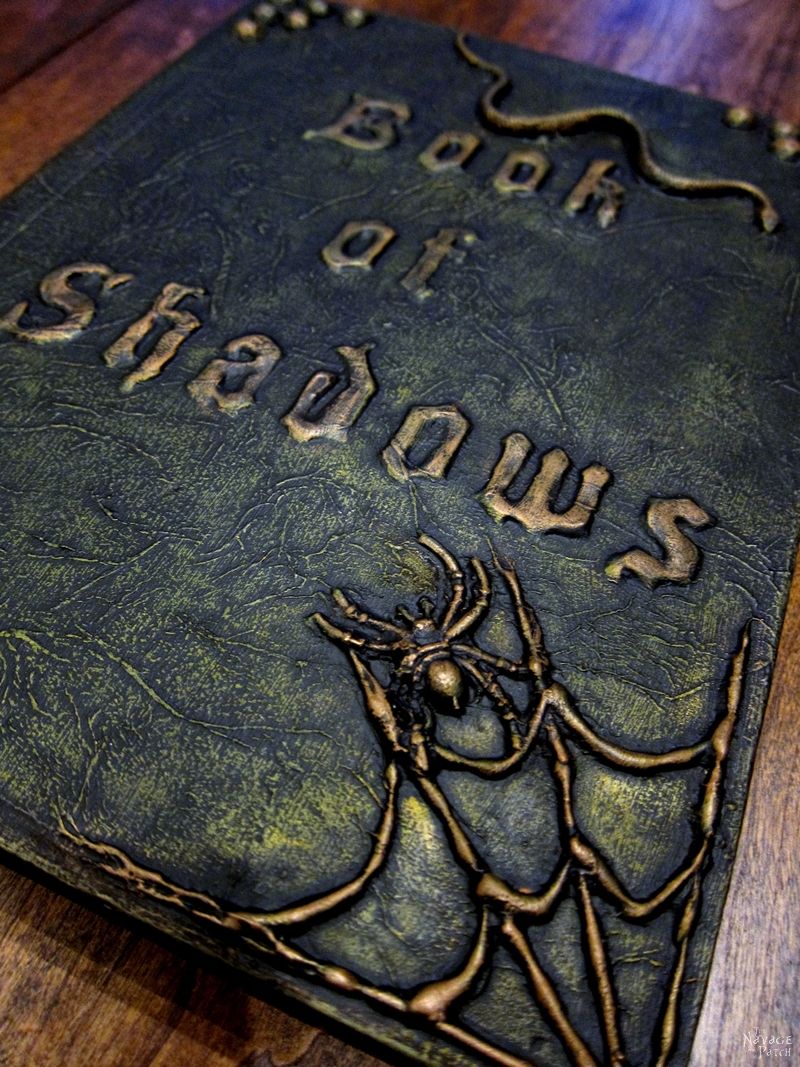
Glass leading paint![]() is very similar to 3D paints but specifically used for glass painting. Since it is used for glass, it basically sticks well to any kind of surface. Amazon sells these glass leading paints, and they come in all colors, but I prefer black, even when I use it for its real purpose, glass painting. So to put the name of our book, I prepared a stencil with my Silhouette Cameo and used that stencil to apply the glass leading paint. About 30 minutes later, the paint dried, and I applied a little more on top of the first application. This allowed me to give a better height to the name.
is very similar to 3D paints but specifically used for glass painting. Since it is used for glass, it basically sticks well to any kind of surface. Amazon sells these glass leading paints, and they come in all colors, but I prefer black, even when I use it for its real purpose, glass painting. So to put the name of our book, I prepared a stencil with my Silhouette Cameo and used that stencil to apply the glass leading paint. About 30 minutes later, the paint dried, and I applied a little more on top of the first application. This allowed me to give a better height to the name.
After I completed dressing up the book cover, the book was ready to paint. You can use any type of paint, including craft paint. I used latex matte black paint, as I already had it on hand. After 2 coats of paint, I let the whole thing dry overnight. The next day, using gilders paste in Celtic Bronze, I gave some highlights to those raised areas and creases on the cover, and voila!
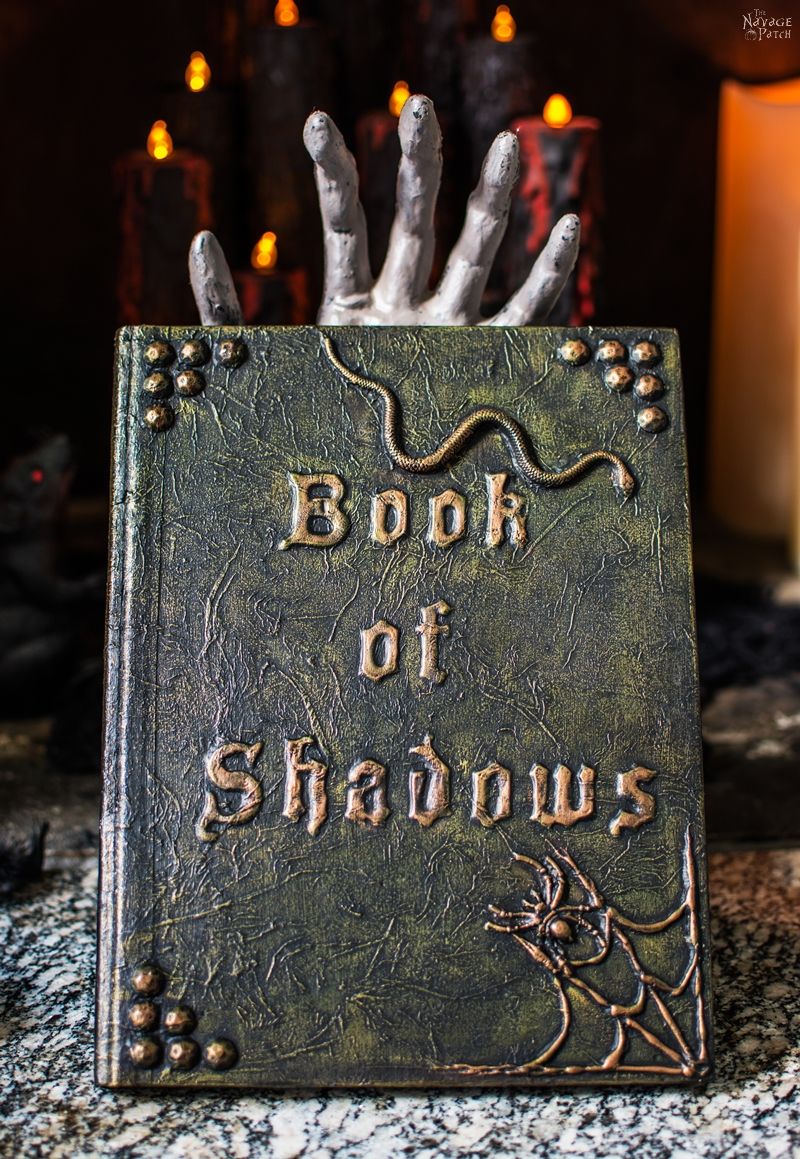
Since I finished our Book of Shadows, I have a great appreciation for the old hardcover books and the workmanship put in them. Though making the hardcover was a bit tedious, certainly our Book of Shadows makes a great Halloween prop, as it looks very realistic!
Handan, xo
We love it when you share our posts on Facebook and Pinterest!


Is there a tutorial on how you did the inside. I love yours. I really would love to be able too do the inside of my book with the art work in yours. And your house looks wonderful. My children are all full grown, but grandchildren would love it all. Please let me know it there’s any tutorials. I tried to print out the skull to put on a plate but it came out 1/8 of it per page, oops. Thanks for sharing. Barb
Thank you, Barbara! I found the content on deviantart.com. I only printed them on both sides of the paper then bound it to turn it into a book. For the content if you search for “book of shadows deviantart” on Google, it will find all the deviantart artists’ works for you and will list it under images tab.
As for printing the skull, I especially put the images big so the quality of the image would be good when printed. Just save those images in your computer, then when printing scale them down to size you like.
THE BOOK LOOKS AMAZING SO WANTED TO START MY OWN AND JUST WANTED TO LET EVERYONE KNOW IF YOUR GOING TO DO ONE YES THE PRINTS ARE ON THE SITE DEVIANTART.COM, BUT HAD A HARD TIME FINDING THEM. SO WANTED TO MAKE SURE I LET EVERYONE KNOW THAT ONCE U ARE ON THE SITE TYPE IN THE SEARCH ENGINE EXACTLY THIS CHARMED BOS AND IT WILL BRING UP THE PERSON WHO HAS ALL THE PAGES FOR YOU TO COPY AND PRINT. WHAT I DID WAS TAKE A SCREEN SHOT OF EACH, CROPED IT THEN PRINTED IT . EASY PEASY! BUT INSTEAD OF DOING FRONT N BACK OF ONE PAGE IM GOING TO LEAVE BACK PAGE EMPTY FOR SPACE FOR MY OWN WRITTING OR ADDING ON THAT SUBJECT MY OWN FINDINGS AND SPELLS. ONLY THING IM SCARED OF NOW IS BIDDING N MAKING IT COME ALL TOGETHER LOL! HOPE THIS HELPS AND HAPPY TO BE A NEW MEMBER OF THE NAVAGE PATCH LOVE ALL THE IDEAS AND CREATIONS! THANKS FOR HAVING ME 🎃
Hi Taylor, thank you so much for the helpful tips! When you finish your book, please post pics on Instagram and tag us! 🙂
I too am interested in the interior of your book of shadows. What did you do? Where did you find that creepy content?
Hello Lisa,
I found the content on deviantart.com. But you can also search on Google for “book of shadows deviantart” and Google will bring up all the images related to that search.
Hope this helps!
the spells are from “CHARMED” ,the TV show. cool to see them put into a book. Although the cover looks nothing like the original .
Hi Evan, thank you so much for your comment! If it wasn’t for it I wouldn’t even know that the spell pages are from a TV show. 😀 I just Googled it and saw the pictures of the book – really cool! Thanks once again!
I love your book, for the pages of the book, what kind of paper did you use? Is it special paper or did you just age it some how? How many pages did you use in your book? What size is your book? Regular paper size or smaller? Again, Love your book and all your Halloween stuff. Thanks for sharing… Deb
Thank you so much, Deb! I used 8.5×11 size white card stock paper. As card stock paper is thicker than the normal copy paper, pages don’t get ripped even if the book is handled a lot throughout the years. I found about 80 prop images / spell pages which were already aged, so I simply printed them all to make my spell book. If you search for “book of shadows deviantart”, Google search will bring all the pages I found and used in my book.
I hope this info helps! 🙂
Love this and I am attempting to make one. When you bound the book did you just glue the pages together with the burlap? i was wondering because the tutorial by Instructables called for folded sheets of 8. I also want a full 8X11 page. I am a subscriber by the way and just love your printables. Have used several on potion bottles. Thanks for the great stories. Loved Greg’s cages and corny jokes….
Hello Marian, sorry I didn’t see your lovely comment before – thank you so much!!
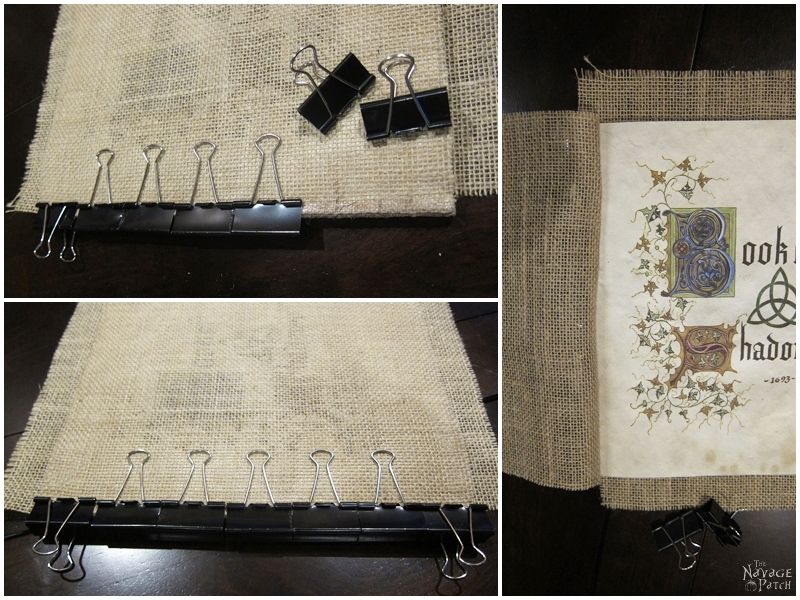
As for your question: the book I wanted to was pretty thick, so I divided the spell pages to have 4 groups. First I stapled each group using 6 staples, then I glued burlap (which also covered the staples) to create a spine for each group. Once each group was looking like a small book (with no cover but with a burlap spine), I glued each group together by gluing the burlap spines together, and finally glued the hard cover to the glued groups.
I hope this makes sense!
Hello, Everything looks great! If you don’t mind sharing, How did you bold the pages? Did you sew them or glue them? Thanks for sharing
Hi Evy, as the book I wanted to was pretty thick I divided the spell pages to have 4 groups. First I stapled each group using 6 staples, then I glued burlap (which also covered the staples) to create a spine for each group. Once each group was looking like a small book (with no cover), I glued each group together by gluing the burlap spines together, and finally glued the hard cover to the glued groups.
I hope this makes sense!
Greg & Handan, Since I have been following your blog; this book is by far the most amazing thing you have ever created! I created a book made of greeting cards that my hubby had given me for our anniversary of 30 years. I used the Japanese method with tying string to hold it together. I found if you print double sided on larger card stock and fold them together you can sew 4 together then glue them together with linen on the outside. Way to go!
Thank you so much, Jeanne – that is such a wonderful compliment! We loved the pics you sent us of your book – you did an amazing job with that!
How did you make the hardcover for the outside. I love the book, you do wonderful diy’s. Thanks Debbie
I love the book. I’m going to try to make one but I’m confused about how you made it. What is the finished size of your book? Is it 8.5 x 11 or half that? I love your site and all the stuff you post. Thank you.
Hi Anna, thank you so much! The book is 8.5 x 11. You need to print the pages on both sides, then staple the pages together before binding.