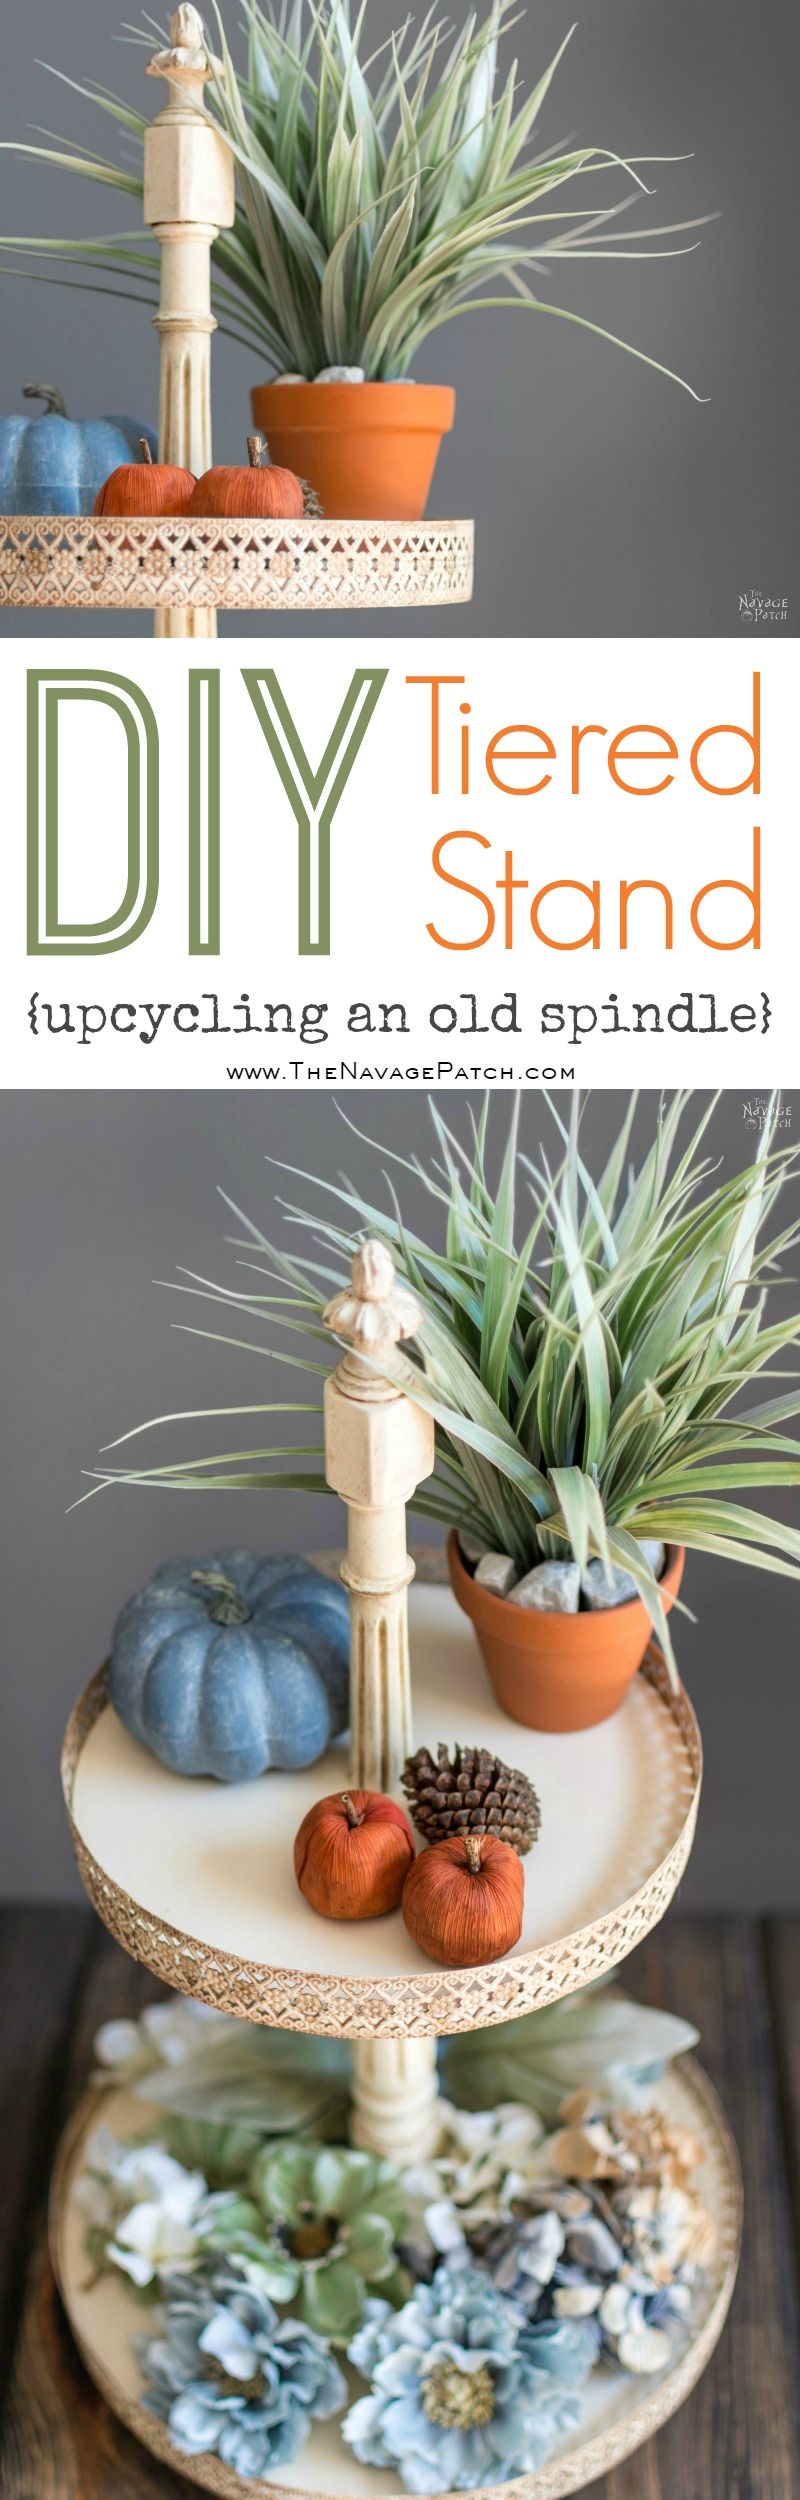
DIY Tiered Stand
I’ve been on the hunt for a tiered stand for quite some time now. I found many different styles online, but the ones I liked were a bit pricey – story of my life! As it wasn’t a “need” but just a “want,” I couldn’t justify spending $80-90 on a tiered stand. Time to make one myself!
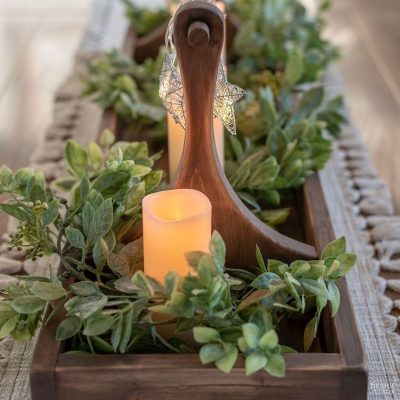
I searched on Google and Pinterest to find a tutorial for the type I wanted, but I had no luck. Generally all tutorials were using round or square cake pans (or bowls) and a spindle cut in two or three depending on how many tiers you wanted. A little glue or a couple of screws, and you are done. They are indeed all beautiful if you are looking for a real farmhouse decor. But our house is nothing close to a farmhouse, so anything like that would stick out like a sore thumb. The ones I like and that would match our house decor are more like the ones below:


A couple days later, convinced that there were no tutorials for the type I wanted, I decided not to waste any more time on searching, but get on with the work and make it as I go. I grabbed 2 plates from the kitchen and went to Greg’s basement lair workshop.
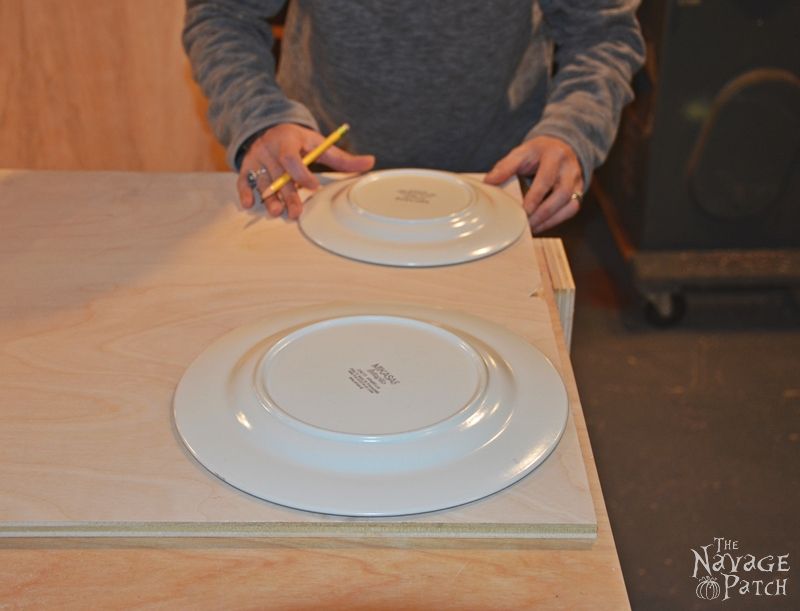
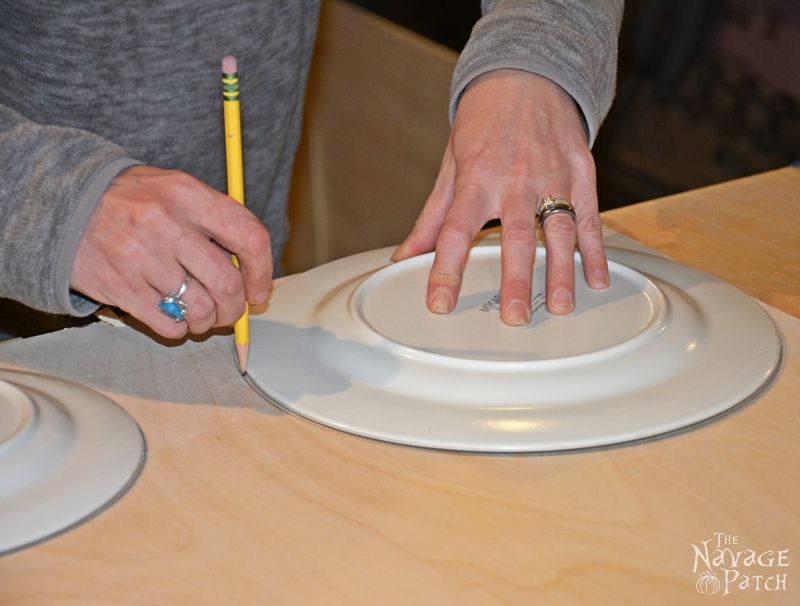
Using the plates as forms, I drew 2 circles on a piece of 1/2 inch plywood. These were going to be the platforms.
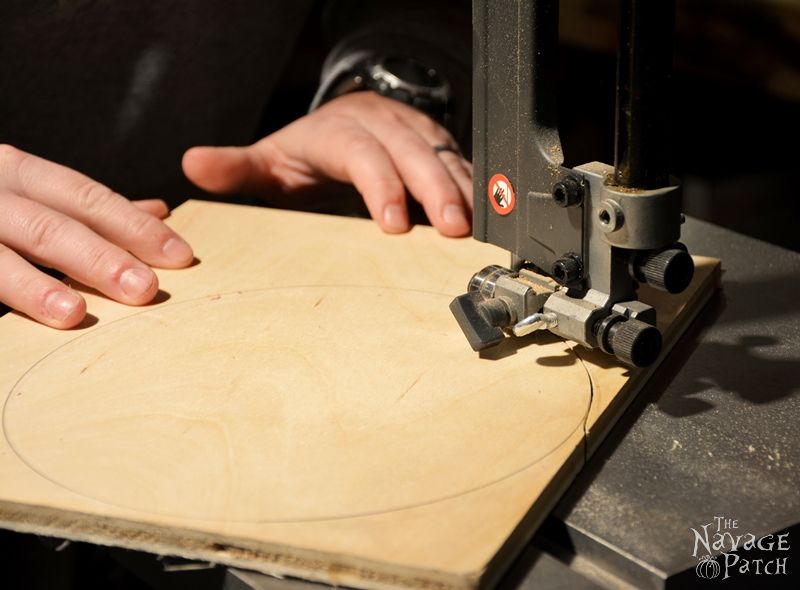
Once I was done drawing, I asked Greg’s help to cut the wooden circles for me. First he cut the plywood in to a manageable size…
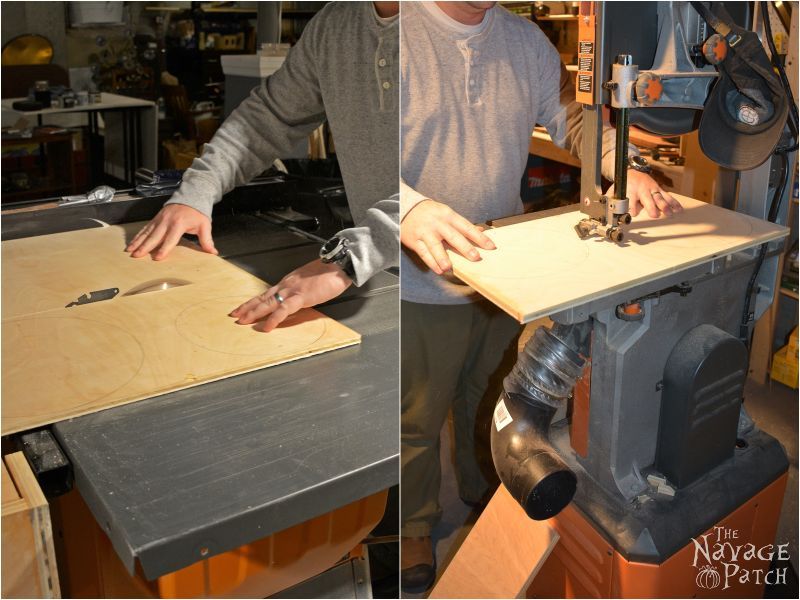
…then he cut the circles out using the band saw. While he was at it, he also cut the spindle I was planning to use into 2 pieces.
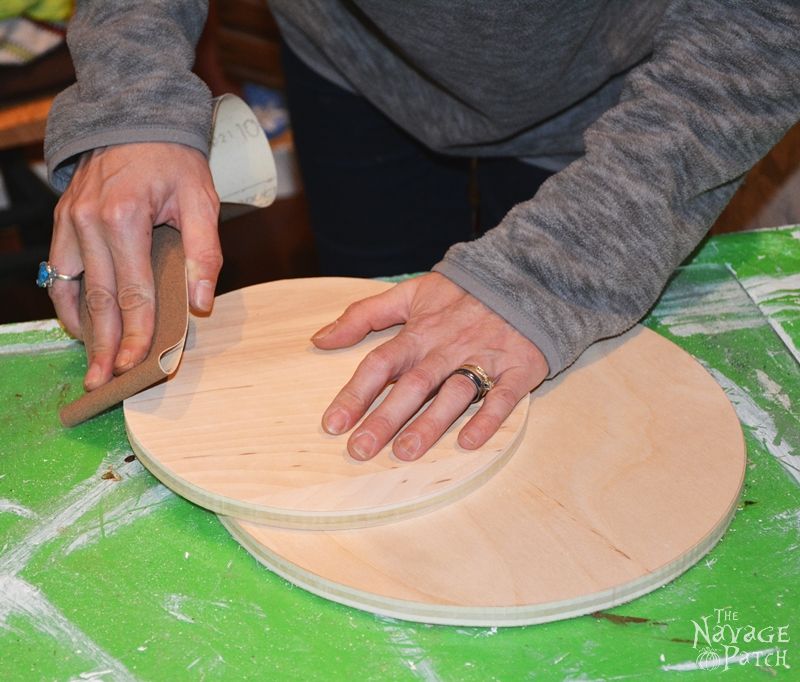
Once both platforms were cut, I sanded the sides to avoid getting splinters in my hands while working on them. A little note here: If you don’t have appropriate tools for cutting the circular platforms you can find pre-cut circular platforms at any crafts store or Amazon.
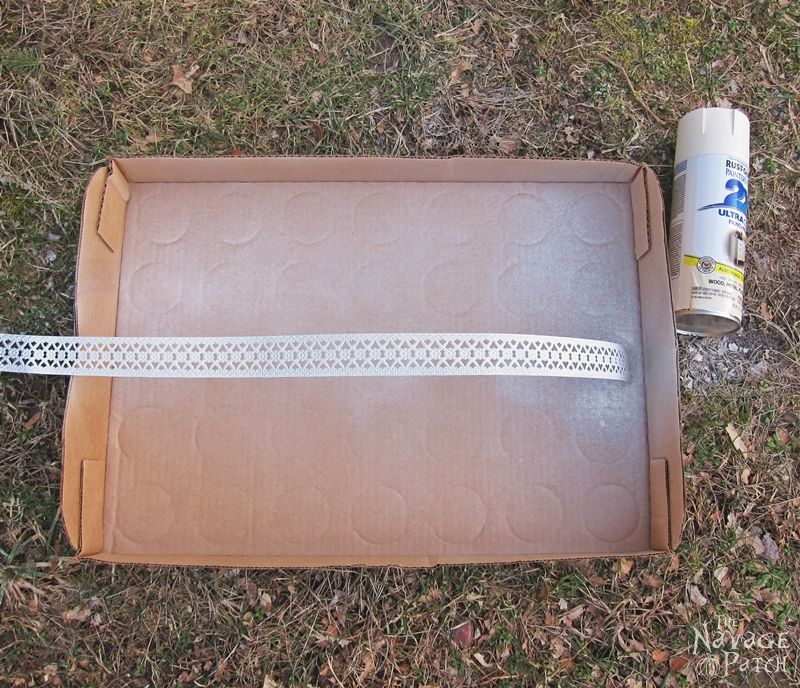
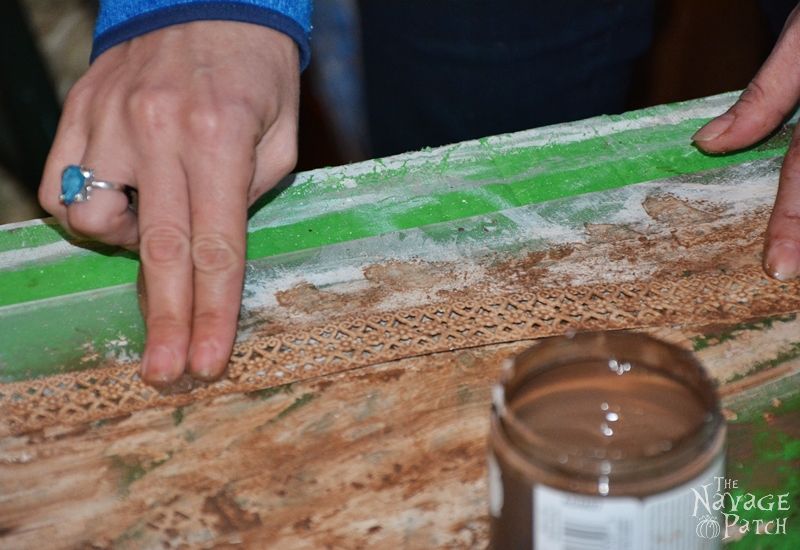
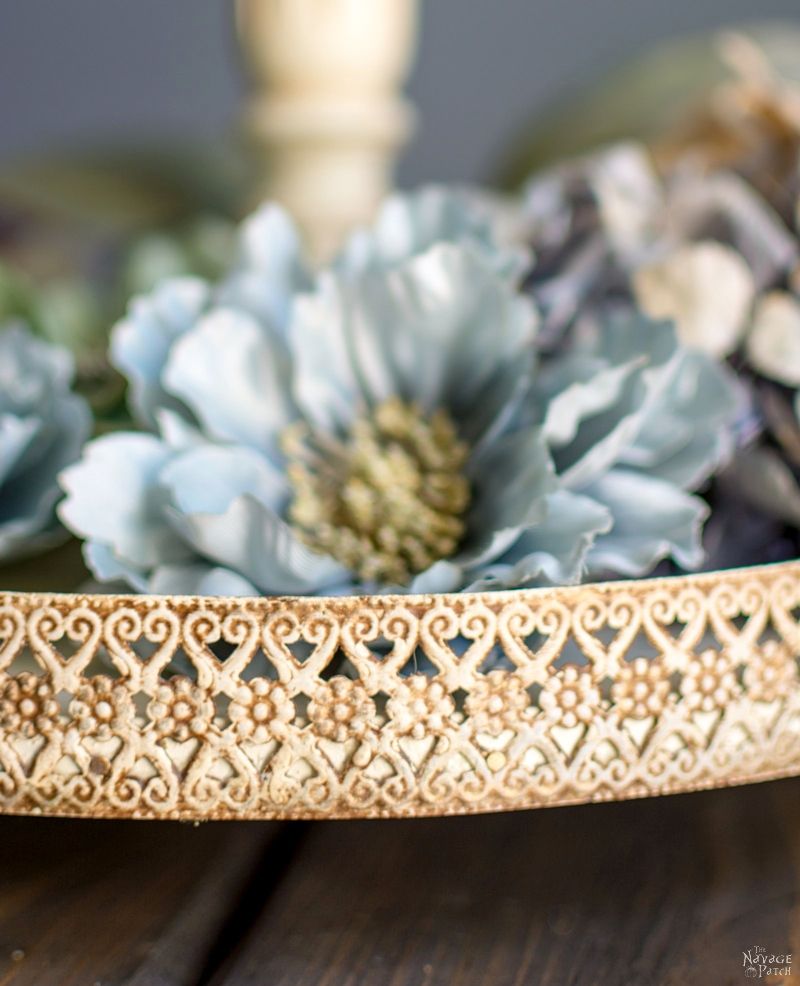
All the tiered stands I liked had ornate metal sides. To create the same look, I bought this decorative metal strip in Hobby Lobby’s floral section for $6. If you don’t have a Hobby Lobby nearby, Amazon also sells decorative nail-on metal strips![]() .
.
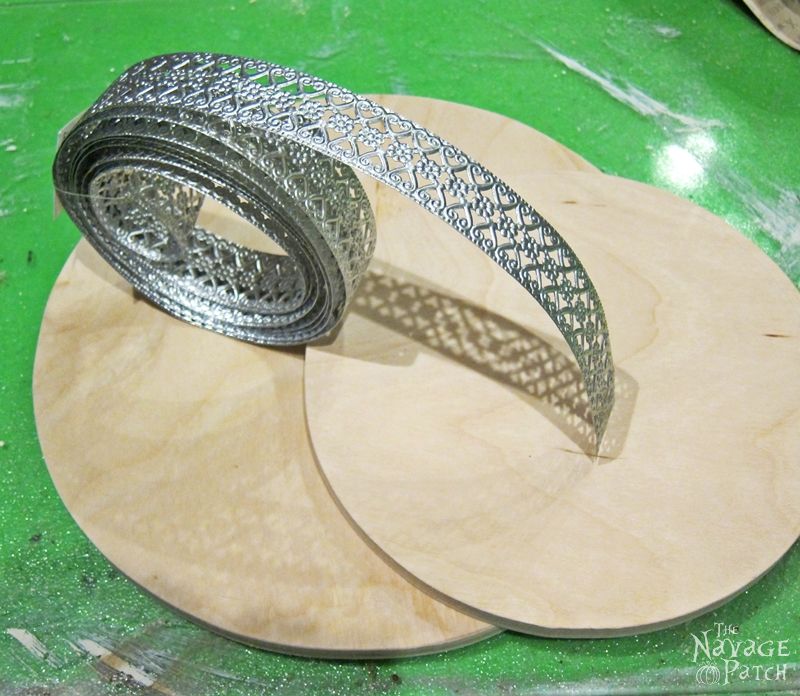
These decorative metal strips![]() turned out to be the perfect material for my intended purpose, and they were so easy to work with – thin enough to cut with scissors or bend into any shape you like but strong enough to form a nice boundary for the platforms.
turned out to be the perfect material for my intended purpose, and they were so easy to work with – thin enough to cut with scissors or bend into any shape you like but strong enough to form a nice boundary for the platforms.
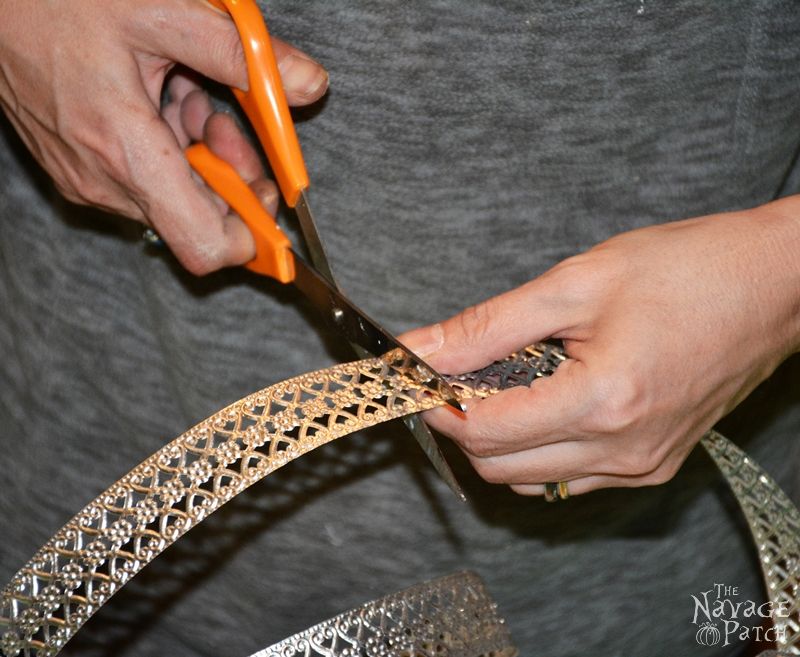
I cut 2 pieces of metal strip, each measuring 1/2 inch longer than the circumference of its platform.

One by one, I primed them with spray paint, then I brush-painted with my homemade chalk paint in white color.
While waiting for the paint to dry, I found and marked the center point of the platforms in preparation for the initial assembly. I prepared that as a separate tutorial (How to Find the Center of a Circle) since that method can be used in any project that involves a circle, such as tiered stands, clock projects, et cetera.

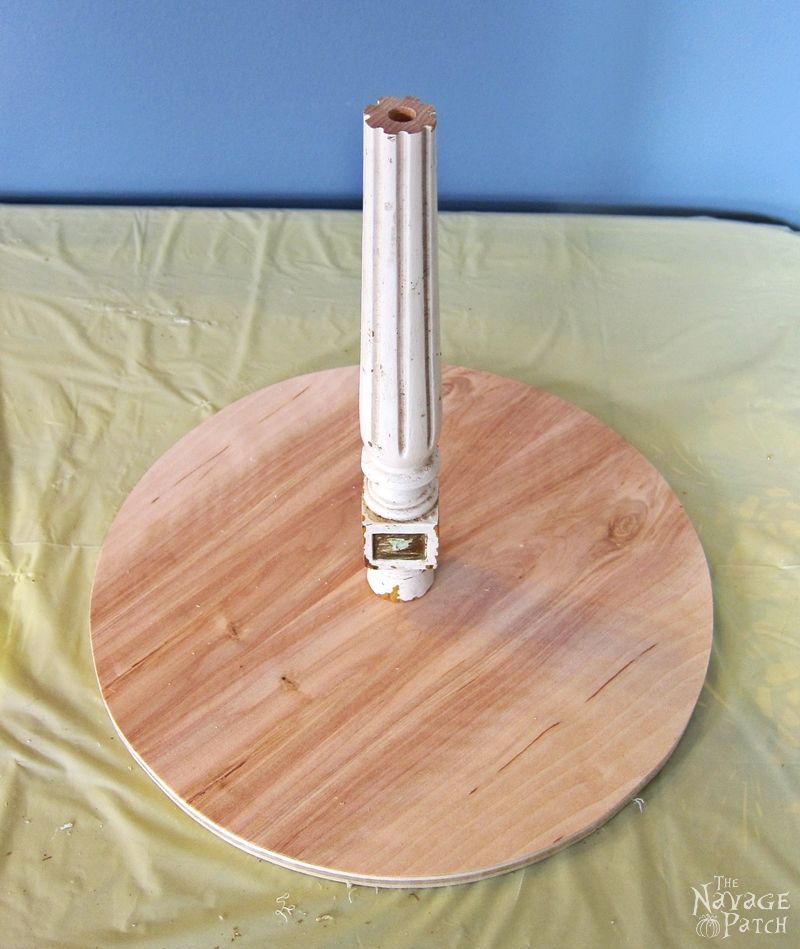
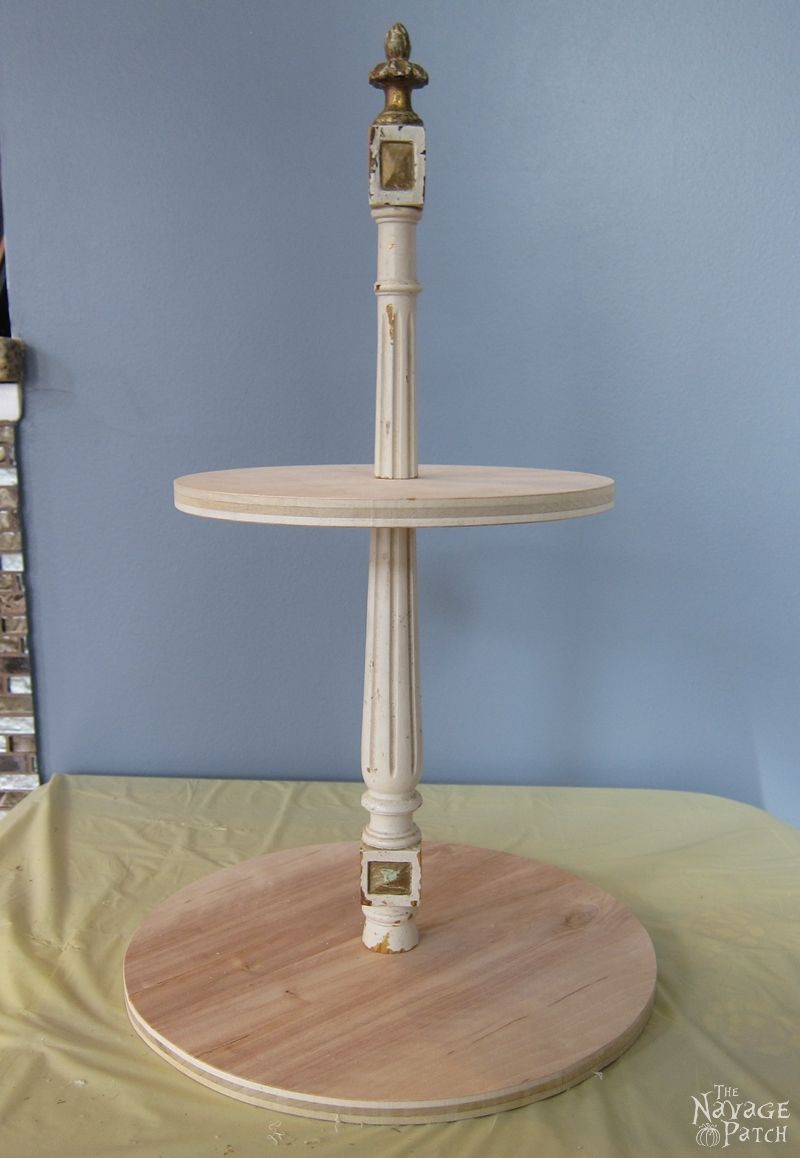
Now everything was ready for creating the main body: The bottom tier was a no brainer – I attached the spindle to the bottom platform with a screw and some wood glue.
For the upper tier connection, my options were either to use a double sided screw or a dowel and wood glue. I didn’t consider using just glue, because my spindle was too thin, so the cut ends didn’t have enough surface to create a strong bond if glued. But if you are using a thicker spindle either wood glue or E6000®![]() would definitely work, because you would have that wider bonding surface.
would definitely work, because you would have that wider bonding surface.
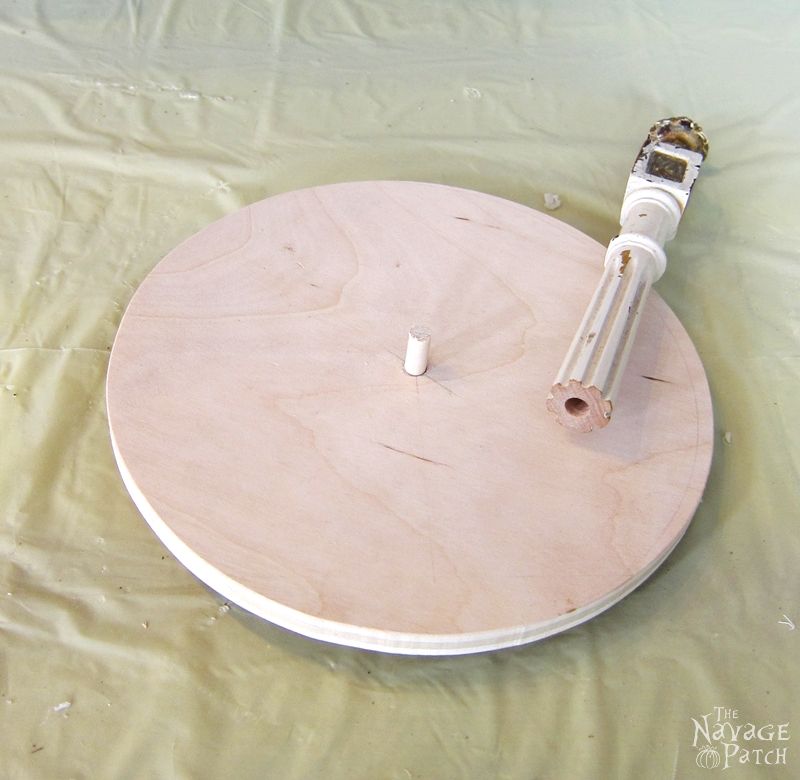
Since we didn’t have any double sided screw in hand I again asked Greg’s help with that connection: first, he cut a dowel long enough for the purpose. Next, he drilled a hole in the center of the upper platform and glued the dowel in making sure both ends of the dowel sticking out. Then he drilled holes in both of the spindles, bottom one and upper one. [drilling straight holes in the exact center of a tapered spindle is a gigantic pain in the @$$! -Greg] Once all the holes and the doweled upper platform were ready, he glued and placed the upper platform on top of the bottom spindle…
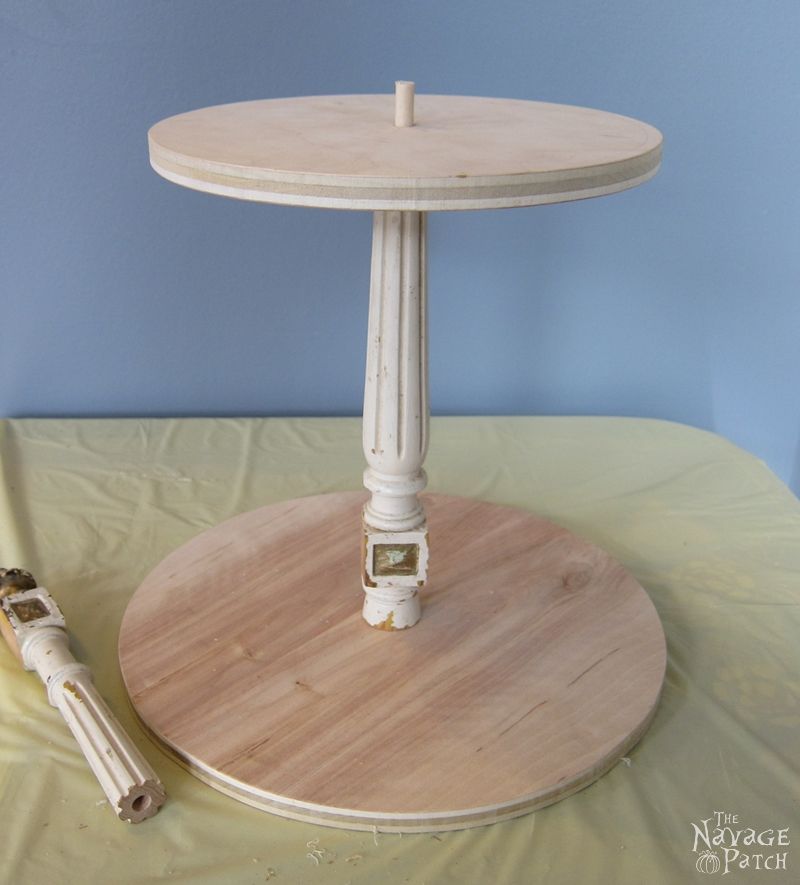
…and again glued and placed the upper spindle on top of the upper platform.
Phew!.. No wonder why I asked Greg’s help with this doweled connection. Even trying to explain the whole process is like a nightmare for me, let alone doing it! I hope the pictures are speaking for themselves. Anyway, once all the tiers were put together, it was time to paint. Using my homemade chalk paint, I gave it 2 coats of paint.

Next, using DecoArt Antiquing Wax and a sponge,![]() I antiqued the spindles and the metal strips.
I antiqued the spindles and the metal strips.
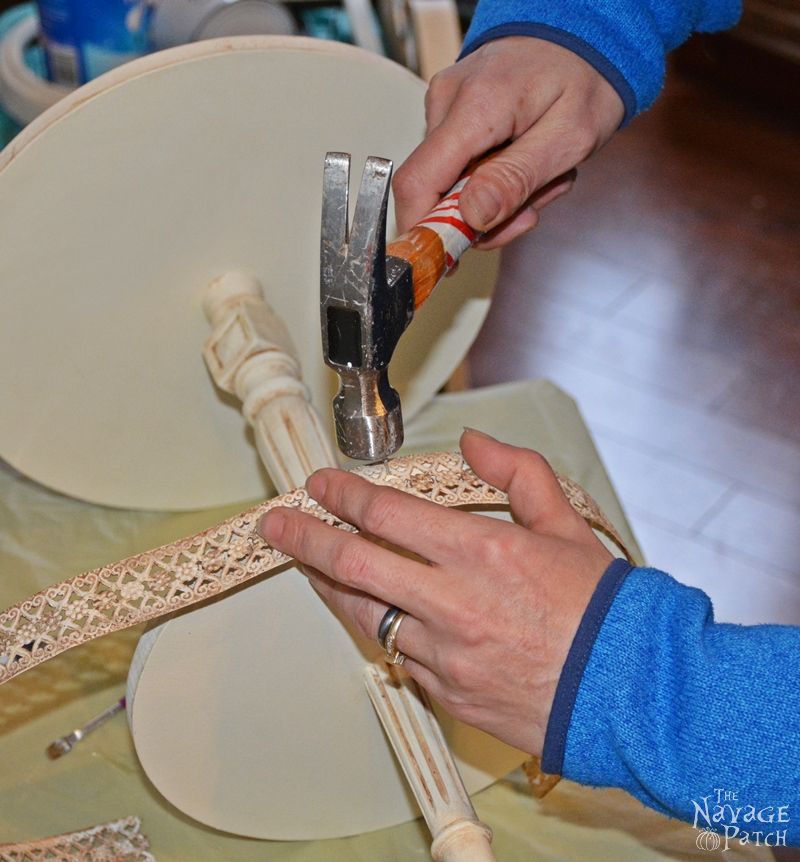
After antiquing, I attached the metal strips to the sides of the platforms using E6000®![]() glue and small nails.
glue and small nails.

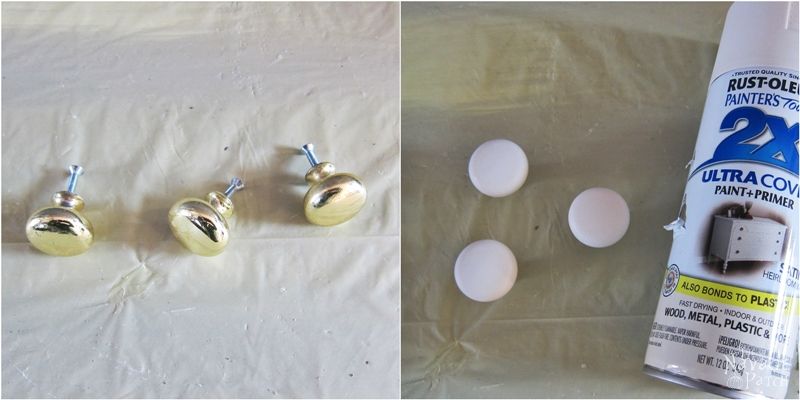
While the E6000®![]() was drying and creating a stronger bond, I started to looking for something to use as the feet. I found these drawer knobs in our basement, and I thought they could make the perfect feet – they were heavy and short which would help with sturdiness, and the shape was great. I spray painted them with Rust-Oleum Heirloom White
was drying and creating a stronger bond, I started to looking for something to use as the feet. I found these drawer knobs in our basement, and I thought they could make the perfect feet – they were heavy and short which would help with sturdiness, and the shape was great. I spray painted them with Rust-Oleum Heirloom White![]() .
.
Once the paint dried and cured for a day, I glued them to the bottom of the tiered stand with E6000 glue.
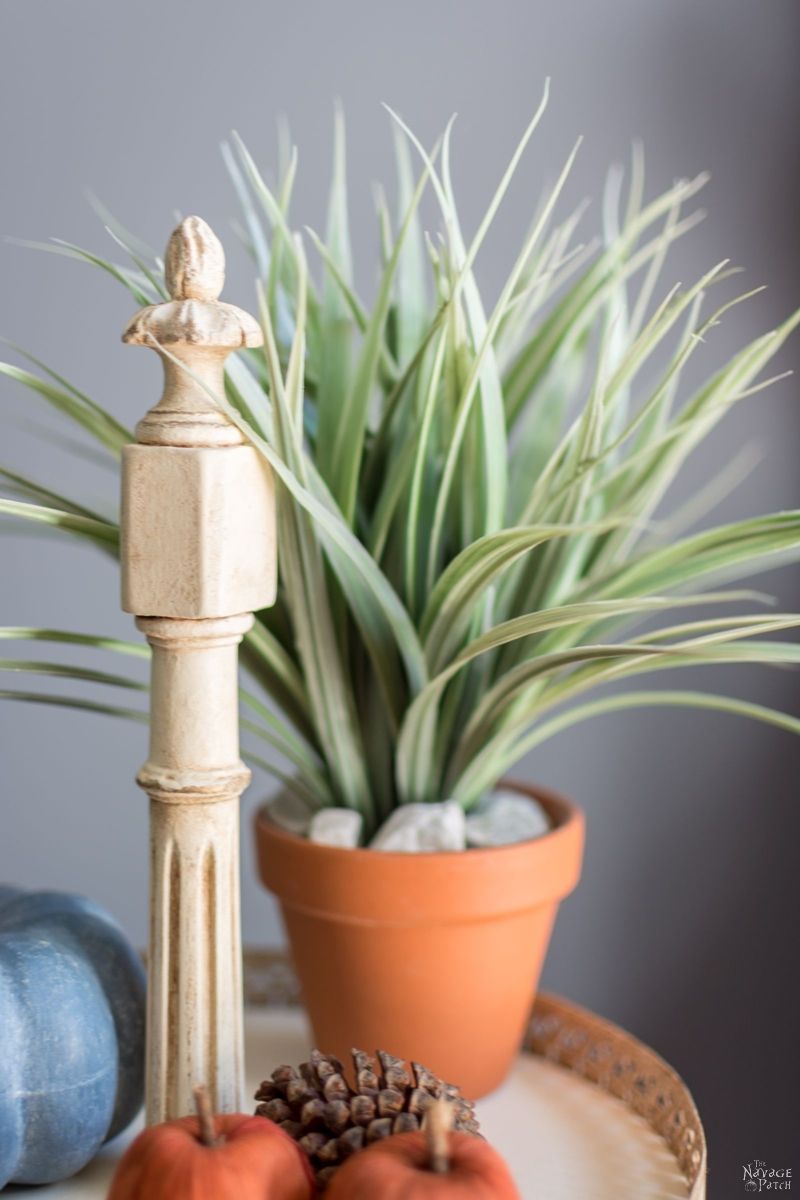
As the finishing touch I applied some Rub ‘n Buff Antique Gold Metallic Wax![]() on the nail heads and on some of flowers of the metal strips.
on the nail heads and on some of flowers of the metal strips.

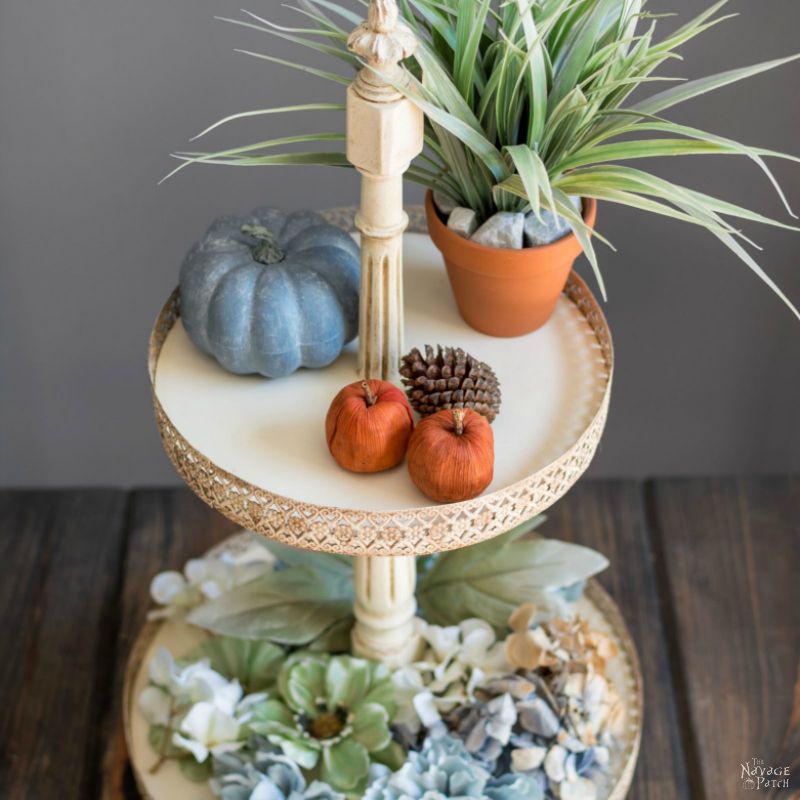
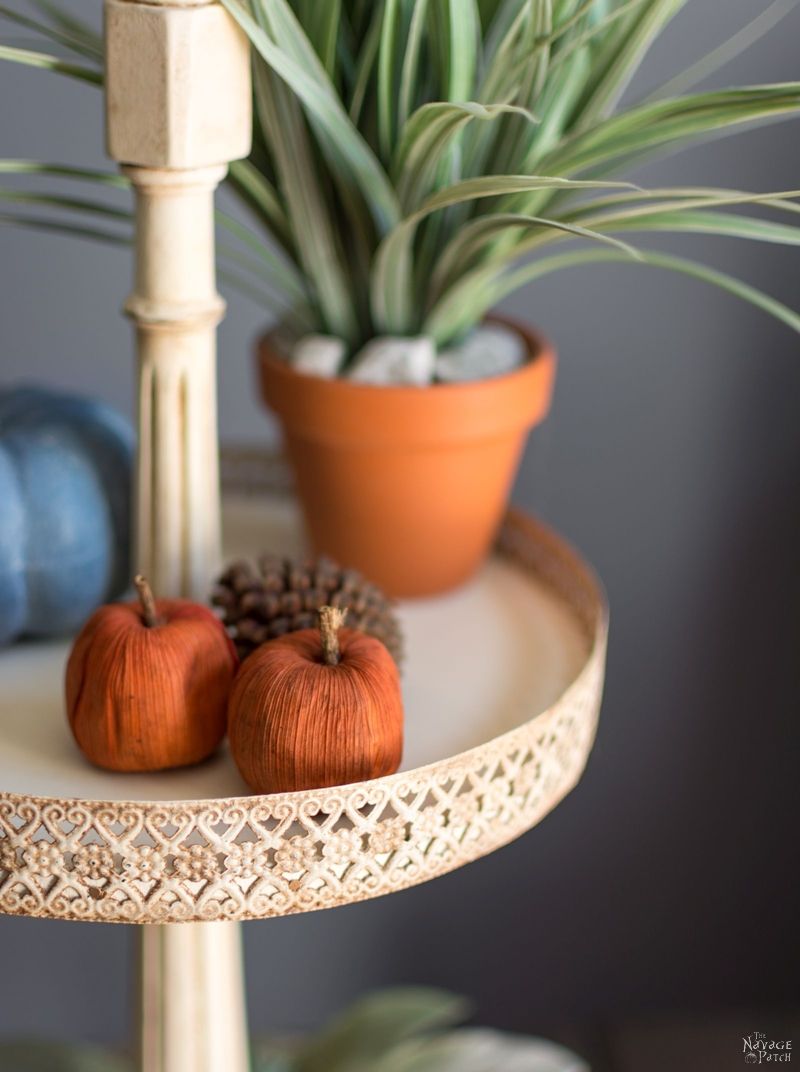
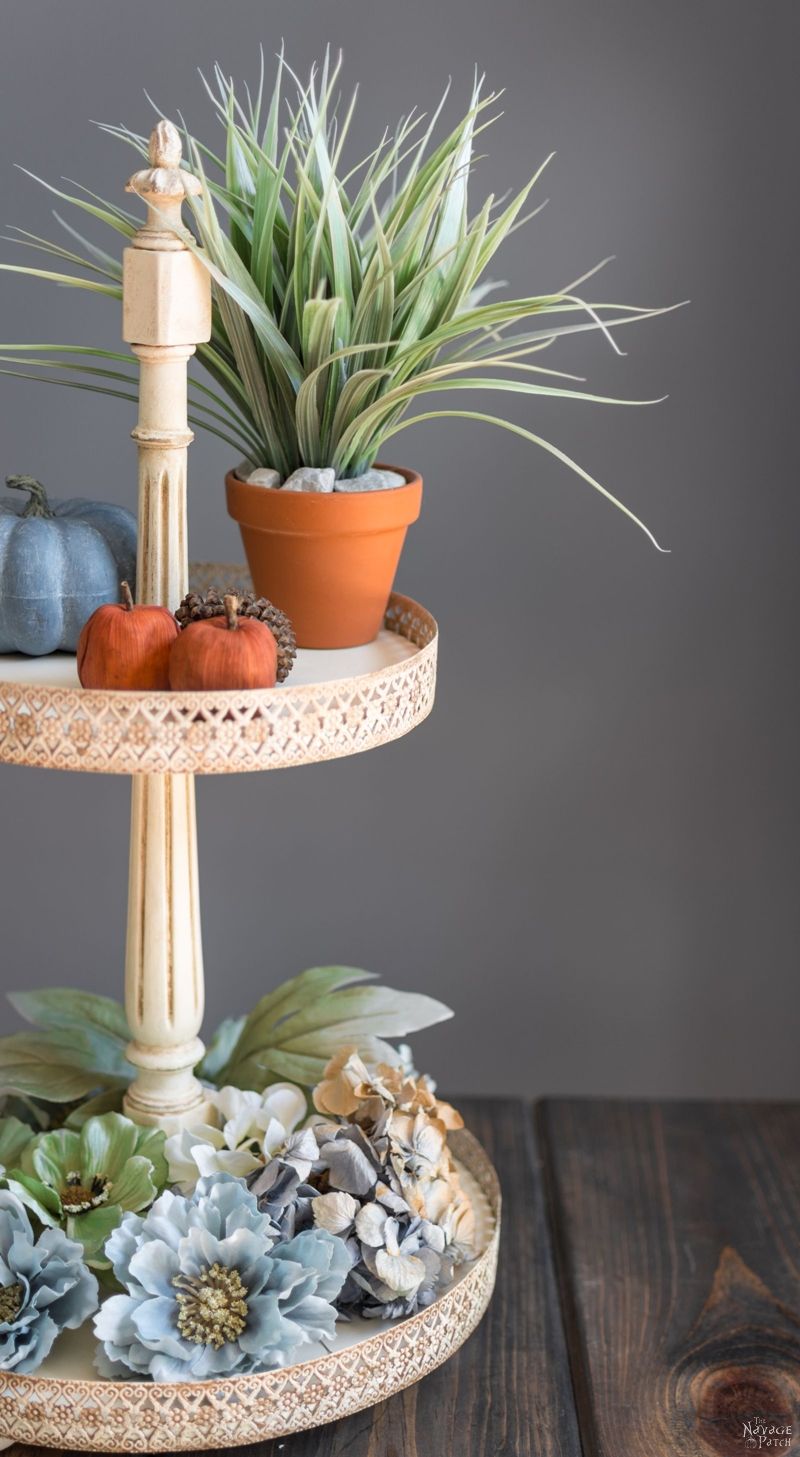
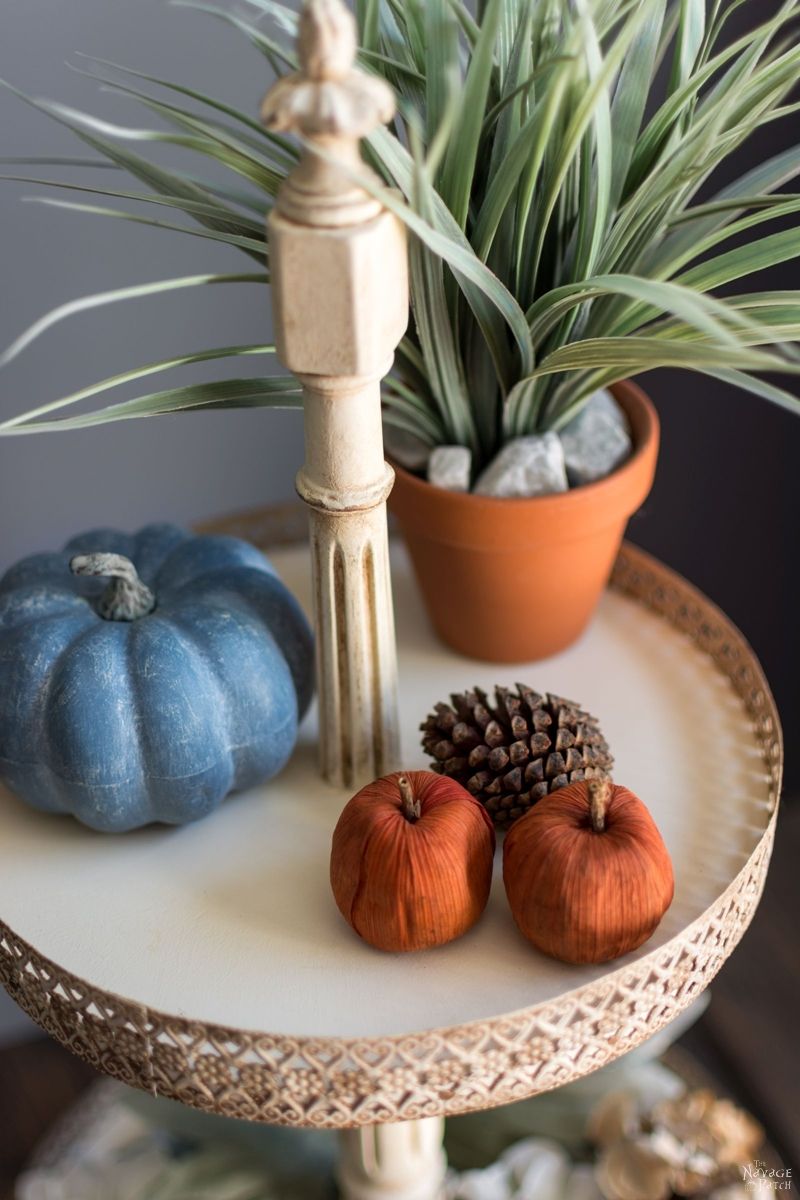
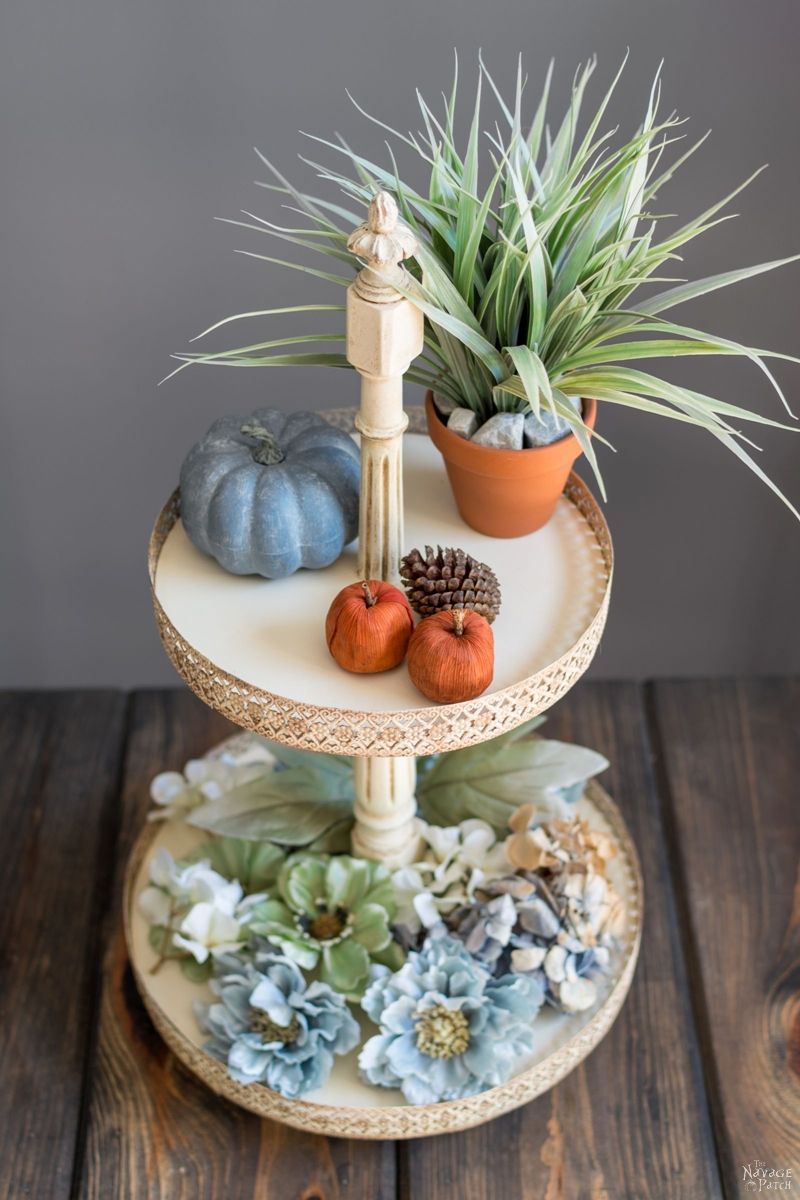
Finally I have a tiered stand to decorate! Not bad at all for a homemade one and a great way put those old spindles and discarded drawer knobs in use.
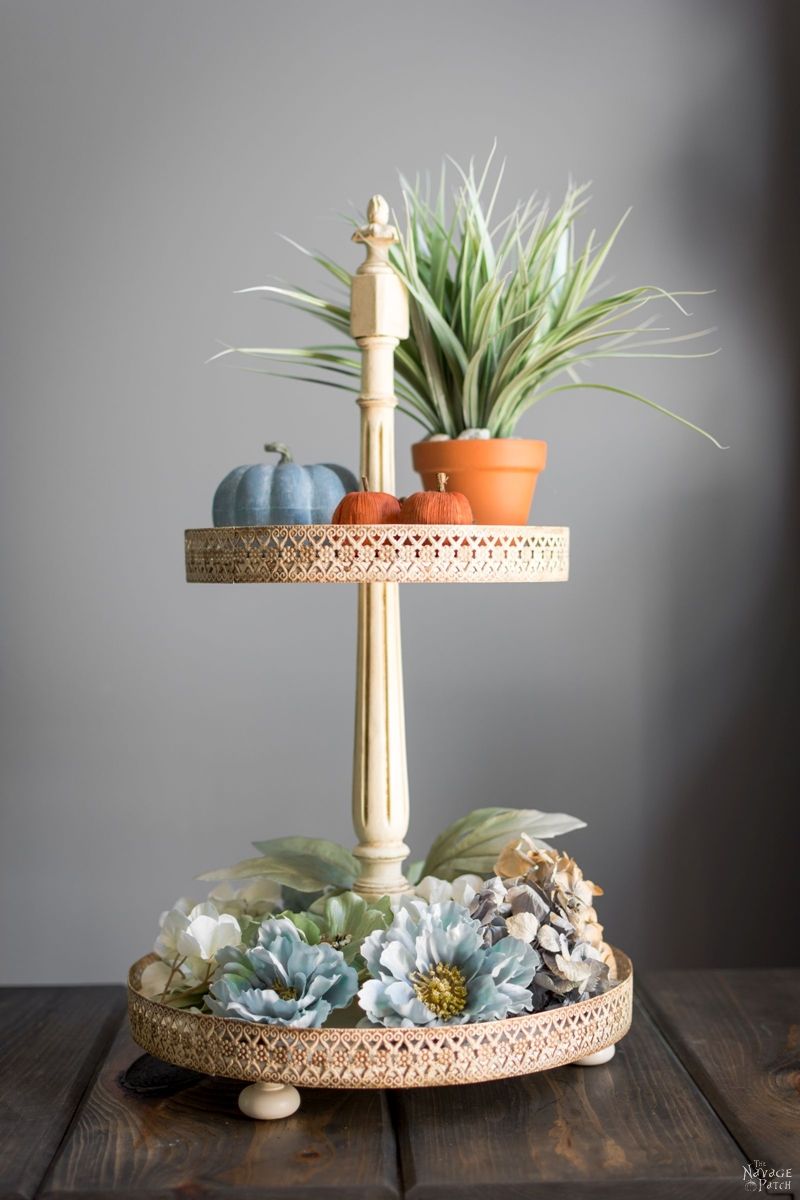
As we had the wood and paint in hand, my expense for this little beauty was only $6.00, which I spent on the metal strip. Considering they are sold for $80-90 (minimum) at several online stores, I think it was well worth my time. I really am pleased with the way it turned out.


Handan, xo
We love it when you share our posts on Facebook and Pinterest!


Lovely project, Handan! I can’t wait until we get a bandsaw…so many possibilities. Love the one-of-a-kind look you achieved with the spindle and metal strips.
Thank you so much, Heather! You can actually make this with the circle wood plaques you can find in crafts stores such as Jo-Ann Fabrics or Michaels. Depending on the diameter they only cost around $2-5, so the power tools are really not necessary to have. But you are so right with the possibilities… I am planning to make a one-of-a-kind candle holder one of these days. It will be exactly the way I did this tiered stand, and as usual I’ll be posting it as a tutorial to give some ideas and inspiration to our readers 🙂
Beautifully done! I never would have guest the stand was “homemade”. You did a great job on the tutorial, thanks! I never knew such a pretty trim was available at craft stores. Gotta get some ‘cuz I can see loads of possibilities with it, eg. decorated picture frame. TFS!
Thank you so much, Michelle! Decorated picture frame is an excellent idea! Please do send some pictures when you finish your project as I would love to see how you used your decorative metal trim 🙂
I just saw your post on HomeTalk. So glad to see it!
I have seen dozens of DIY tiered stands, but never liked any of them enough to make one.
Your’s is a different story. BEAUTIFUL! I really love what you’ve done. I also happen to own a band saw and yards of the metal “ribbon” in lots of different sizes and designs.
Your tutorial is very well done making it easy to follow. That encourages me to give a try.
THANK YOU for sharing your creative project with us.
I can’t wait to make my own.
HAPPY SPRING!
Hello Sylvia,
Thank you so much for your encouraging words!! It really is an easy and very fun project and I am sure you will agree with me when you try it. Please do send the photos of your tiered stand when you finish it as I would love to see it!
Happy Spring to you too!
Hi, Handan.
This is a truly beautiful creation. I love what you and your other half came up with! I pinned your post and went hunting to find some of that beautiful metal trim. Alas, it proved a little too dear for a parent with three kids in university. I’m a stubborn girl, though, and decided to look for an alternative solution. I found a product at Michael’s called md hobbby & craft metal sheet roll in aluminum. Using a deep edge punch (thanks, Martha!), I can punch the pattern right into the sheet aluminum. I chose to place the pattern only on one edge and leave the top edge straight, as I want it to be flush with wood. However, it could be punched both top and bottom, depending on one’s tastes. Just thought I’d share, in case anyone else is looking for an alternative trim idea.
Hello Susan,
That is awesome! I love the idea you came up with! Once you finish your project can you send a picture to Handan@thenavagepatch.com? I’d love to see it. Also if you can send a picture of the deep edge punch I will greatly appreciate it as I’ll be on the look out for it 🙂
Susan etal,
I found my metal “ribbon” at a local unnamed craft store (sounds like …. HobLob???) on clearance for $1/roll. Had no idea what I was going to do with it, but honey, for a buck? yeah… two of each are coming home with me! Watch those clearance aisles especially just before a major holiday or season change… LIKE NOW. See Susan run… RUN Susan Run! 😉
I just love it!! I wanted a tiered stand for so long, but won’t spend the amount they ask for one! Pinning to make one as soon as I get a chair with pretty legs!
I would love to invite you to share it with us at the party I co-host every Tuesday on my blog. Enjoy the weekend!
Thank you so much, Pili! I will definitely join your link-up party on Tuesdays. You too have a great weekend!
Handan, thanks for joining both parties 🙂 You know what? I found curbside a chair with two pretty legs which my husband was kind enough to take for me, so I am on my way to make a tiered stand too… I don’t know when, but someday and I’ll let you know.
Thanks for the inspiration!
Oh that is great…Lucky you!! When we see something at the curbside Greg goes in the auto-response mode: “Do we really need this?” LOL
Yes, please do let me know when you make it. I can’t wait to see it! Thank you for stopping by!! 🙂
What a clever idea love this great job!!
Thank you, Sandra! =)
Stopping by from the DIY party #1! Love your tiered stand. Please stop by and share with us at Merry Monday. Pinned it.
I will definitely link the tiered stand next Monday! Thank you so much for visiting us, Shirley! 🙂
I love this!! And you make it looks so easy! Thanks for joining the DIY party!
Thank you very much, Helen! Thanks for hosting such a great party!!
Very creative and brilliant tutorial! Thank you!
Thank you so much, Claire!
What a great project! Love how it turned out! Have a great weekend 🙂
Thank you so much, Brenda! You too have a great weekend 🙂
Great project, the finished result is beautiful! I love the antiqued look of it!
Thank you so much, Jen! I am so glad you liked it 🙂
Your tiered stand turned out wonderful, what a fun project that you have
shared on the Oh My Heartsie Girls Friday Features this week!
Hope you have a great weekend!
Karren
Thank you so much, Karren! I love your party, so there will be more fun projects I’ll be sharing in upcoming weeks 🙂
You too have a great weekend!!
Talk about awesome, your stand is incredible. Have been wanting metal one, maybe 3 tiers but can do same as yours. Got couple cute round (not too deep) metal trays at Walmart so can put them together or …
Thinking about it want to make one like yours since it’s so wonderful. Yours is just what have been wanting, others have seen are too dear for our budget. Knowing how talented and clever bloggers are someday one of you would make what I wanted, glad it was you, always like to find blogger haven’t “met” before. Think need to subscribe so won’t miss any posts/projects. Great job on your pedestal tower. Looks good styled also.
Hope having wonderful weekend
Oh thank you so much for your wonderful and kind words, JaneEllen!! Your comment was such a day brightener for me and I am thrilled that you liked our projects and subscribed 🙂
You too have a wonderful weekend! x
Love how this project turned out! You did such a great job and the antiquing wax really took this one to the next level. Will have to go out buy my own now. Pinning!
Thank you so much, Jelica! Oh yes antiquing wax is a must for most of my small projects. I almost never use it for furniture makeovers, but with small projects that has some sort of ornate it makes all the difference in the world 🙂
Super pretty and much prettier than the store-bought ones you featured. I’ll have to look into that decorative trim. Like how you aged it. Thank you for linking up with Funtastic Friday!
Thank you so much for your lovely comment, Victoria!… and thank you for hosting such a great party 🙂
Handan you are so lucky to have a basement lair… with lots of cool fancy machines. This is a masterpiece. Beautifully executed and just full of the right amount of patina. Why we could have found it in the old market in Turkey. Thank you for your wonderful tutorial and for sharing with us at Sweet Inspiration.
Thank you so much, Mary! Oh I love our basement, but without Greg’s help I couldn’t do anything as I don’t even like going near those big machines, lol. My small scroll saw and Dremel tool are more than enough for me to handle 🙂
Wow! very cool!
Thank you so much, Jenna!
This turned out really nice! Love the metallic ribbon you used to finish it off. Pinned and tweeted to share 🙂 Thank you for linking up with us for Snickerdoodle Sunday!
Thank you so much, Laurie! I thank you for hosting such a great party!! xx
Love it Handan! It turned out so beautiful. Love that you gave it some aging. It looks like it could be a real vintage piece. Thanks so much for sharing at Vintage Charm.
Thank you so much, Tuula! I am humbled by your wonderful comment. I thank you for hosting a great party! Have a great week 🙂
Beautiful! You did a great job, it turned out better even than the store bough ones! I’m so glad you shared this at The Really Crafty Link Party this week! Pinned!
Thank you so much, Teresa! I love your party and couldn’t thank you enough for hosting it!!
Have a great week 🙂
Great job!! I love that metal strip stuff!
Thanks so much, Lara!
Simply beautiful
Thank you so much, Niki!
I am blown away by your tiered stand!! It turned out gorgeous. I am really impressed!! I am pinning this more people need to see your stand.
Thank you so much, Kim! 🙂
I love how this turned out! Thanks for sharing at Merry Monday!
Thank you so much, Dee!
Wow. That is really pretty. It looks so elegant and like you probably spent a lot of money on it. Love it. Thank you for linking up to Tips and Tricks. Hope to see you again this week.
Thank you so much, Kathleen! Thanks for the amazing party! I will be there every week 🙂
I love this tiered stand, Greg did a great job, Will pin it at one of my boards
Maria
Thank you so much, Maria! Yes I am one lucky lady as Greg is always awesome and so very helpful with my projects 🙂
Positively gorgeous and sometimes we just have to make these things up like what we see in our head when it doesn’t already exist! I love tiered stands but I don’t have anywhere to put one. Dropping in from a Little R & R
Thanks so much, Lizzy!
Just gorgeous- y’all did a fantastic job!! I can’t get over how perfect that metal strip is…and your antiquing was on point! Thanks for linking it up to Talk of the Town!!
Thank you so much, Sarah! 🙂
I love that! I never thought of making my own. I love what you did with the trim stuff from Hob Lob. It looks really expensive. I may just have to try that. Thanks for sharing!
Thank you so much, Brooke!
You are so talented! I would have no idea how to go about making one of these. But you seem like you know exactly what you’re doing. Thank you for sharing with us at The Creative Circle!
Thank you so much, Corinna! 🙂
Absolutely gorgeous! I want to go buy rolls and rolls of that trim now, just think of the possibilities! Thanks so much for sharing at the Wednesday Showcase. Pinned!
Thank you so much, Kati! You can find the trim in Michaels, Hobby Lobby (and even maybe in Joanns) and also on Amazon. Every store carries a different style/pattern though.
This is very cute. Love It!
Thanks so much, Stephannie! 🙂
Just beautiful! It does not look like 2 wooden circles and some trim at all. I will definitely be making this. I love all of the things that you and your hubby make, but this is by far my favorite!? Keep the great ideas comin’!
Thank you so much, Linda! I am humbled by your beautiful comment 🙂
That is a WOW! and not too difficult. Thirdly, it has multiple uses. Thanks for sharing the ‘how-to.’
Thank you so much, Dee! Your lovely comment made my day! 🙂
I do so love your stand…it’s got a whimsical feel to it, as do the other items and they compliment each other perfectly. Did you also create the cage with the balls in it? Very nice. What I’m really curious to know about is the tall, ornate, carved looking tower on the left in the picture…Awesome! I’m really drawn to that sculptured artsy look. It reminds me of a solid copper lamp base/candlestick I’ve owned for almost 40 yrs. that I just can’t bear to make it back into a lamp (even tho’ I have collected all the parts and lampshade during those yrs.)as it’s such a “piece of art” on it’s own. So, did you create that and what is it made of if I may ask? You have an artists eye for sure and beautiful taste in things.
Thank you so much for your lovely comment, Linda!
I bought the bird cage when we first moved into our house (about 3 years ago). The tall ornate thing is a pillar candle holder. I bought it last year from Hobby Lobby for $3 (in their discounted items aisle). It had a very ugly bright blue color with burgundy red distressing. I think that was the reason why it ended up in the discounted items aisle. As it wasn’t wood or anything special (just made from resin) I thought I could paint it to give it a new look. With the same painting method I explained in my “Pillar Candle Holder and Finial Update” post I gave it a new face 🙂
If you have a Hobby Lobby store close by and if you are looking for something similar, just check their discounted items aisle every once in a while. You can find quite good things which have a lot of potential and only for $3-$5. And if you like that painting style then you can see how I did it from my following posts:
https://www.thenavagepatch.com/pillar-candle-holder-and-finial-update/
https://www.thenavagepatch.com/white-horse/
Hi, Just love this! Just came home from shopping for something like this, no such luck… and decided to make my own… then I found yours… I might have missed it, but the spindel… where did you find that? Thnks
Thank you so much, Sophia! I bought the spindle at a tag sale. But you can also find spindles at Lowe’s or Home Depot, and as far as I know the prices are not that bad.
Wow! I love it! I have been looking for one but hate the prices. I will be enlisting my dear man to help me make one now. Thank you for sharing at Link It Up Wednesday!
Thank you so much, Kileen! 🙂
This stand turned out great! I’d love for you to join our link up To Grandmas House We Go.
http://abbottsathome.com/2017/03/14/to-grandmas-house-we-go-link-party-27/
Thank you very much, Stephanie! and thanks for inviting – I shared it this week 🙂
I’m addicted to EVERYTHING you do! The DIY projects are awesome , the selection of free printables are amazing, and the ideas (even ones I’d never be able to tackle), still save them so I can show family & friends. Your talents are awe-inspiring and just had to thank you for everything I’ve learned & the beautiful prints I’ve downloaded! Thanks so much!
Thank you so much, Sue! Both Greg and I appreciate your lovely comment very much! 🙂
i love it! i,too, cannot afford to spend that amount on one of them! I am going to make one,too!!!
Love the tiered stand.I just keep flagging ideas, As I am never home long enough to do any project.As I drive out of state for a living. I start collecting what I need for a project, then get side tracked..Like work calls.I have projects never started.all materials.. needed..in case you wonder 18 wheels are under me.Stay out more than I am at home. Anway BLESS you and your family.Bless your readers also.