
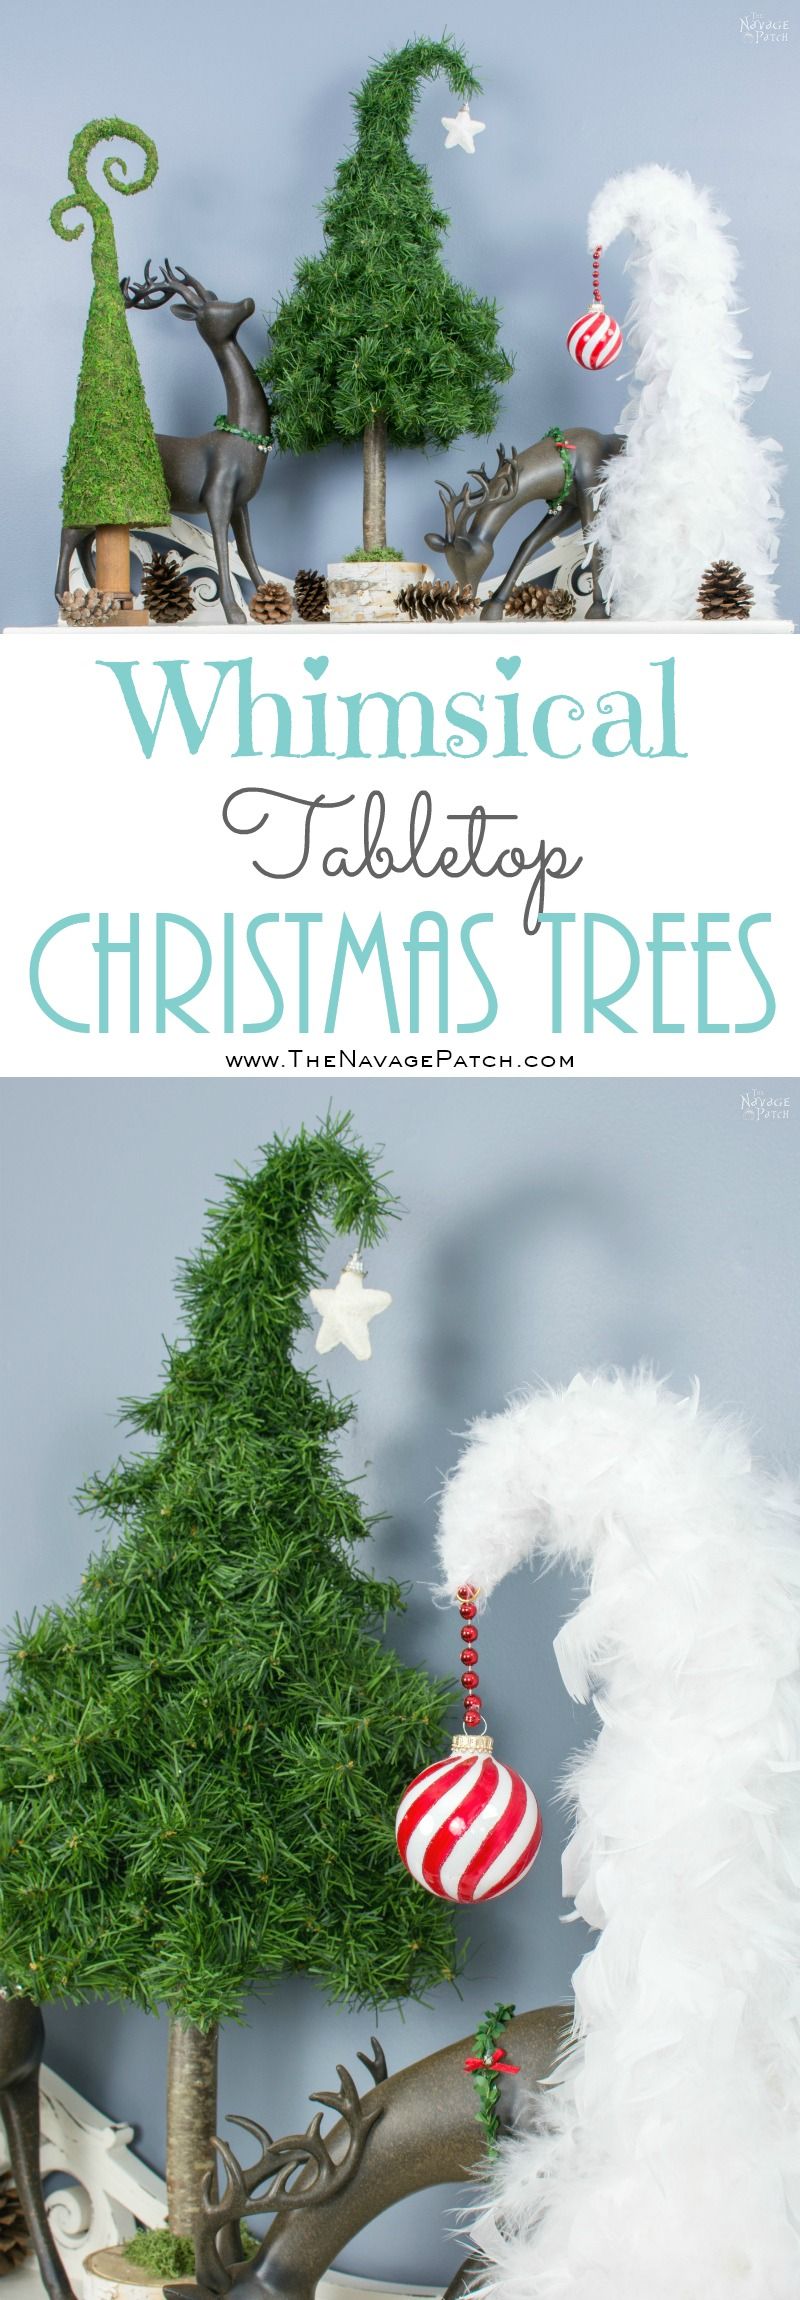
Whimsical Tabletop Christmas Trees
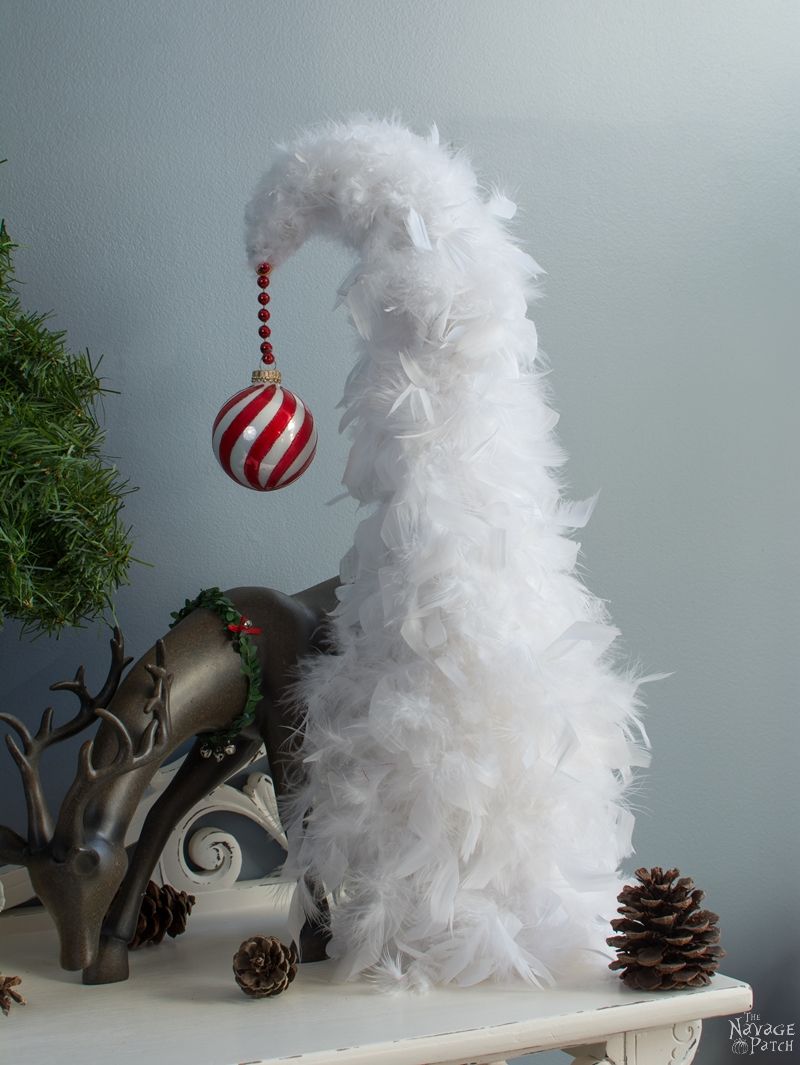
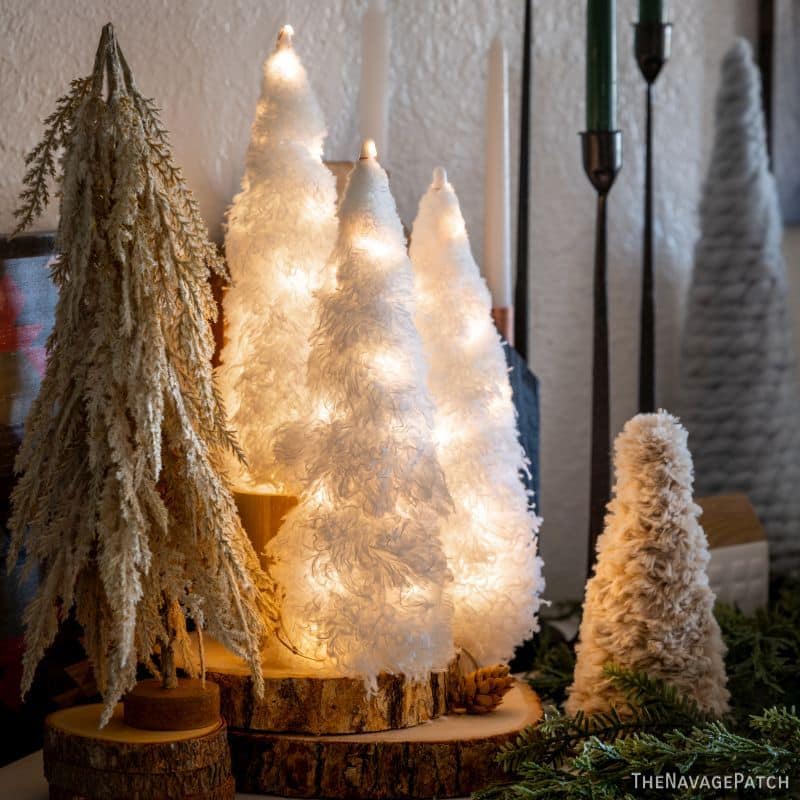
Feathery Whimsical Christmas Tree
I used a 15 inch white Styrofoam cone for the feather one, only because I was using white feathers, and I wanted it a bit tall.

Starting from the bottom of the cone, I hot glued my feather boa around the cone all the way up to top.


Once I reached the top, I cut some craft wire around 8-9 inches long and inserted it in the top-center part of the foam (as seen in the picture below). I made sure at least an inch of the craft wire was in the Styrofoam cone.

Next, I took some aluminum foil and folded it in two. I put some hot glue on the folded edge and…
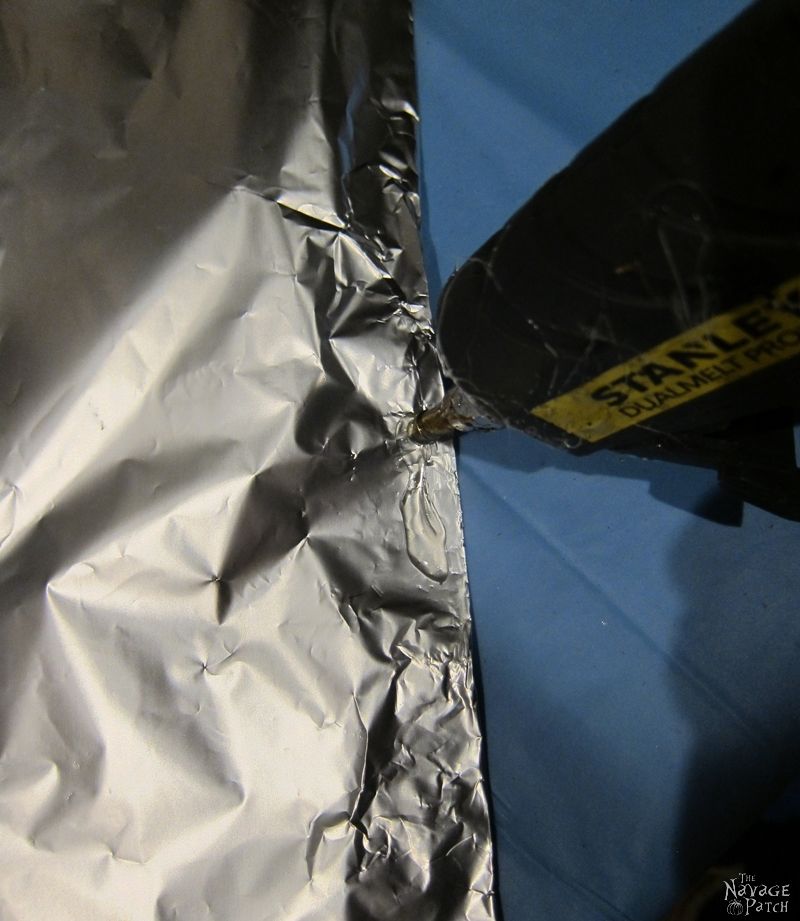
…pressed the aluminum foil to the top part of the Styrofoam cone, so it would be glued in place. Once the aluminum foil was glued to the Styrofoam cone, I started wrapping and crumbling the aluminum foil around the craft wire to give it a kind of gnome hat shape (as shown in the pictures below).

Once I was finished correcting the shape to my liking, I cut the excess floral wire and created a small loop at the end. The loop was so I could hang an ornament or star from it.

And here is the little sneak peak for the feathery whimsical Christmas tree before we move on to the final one.
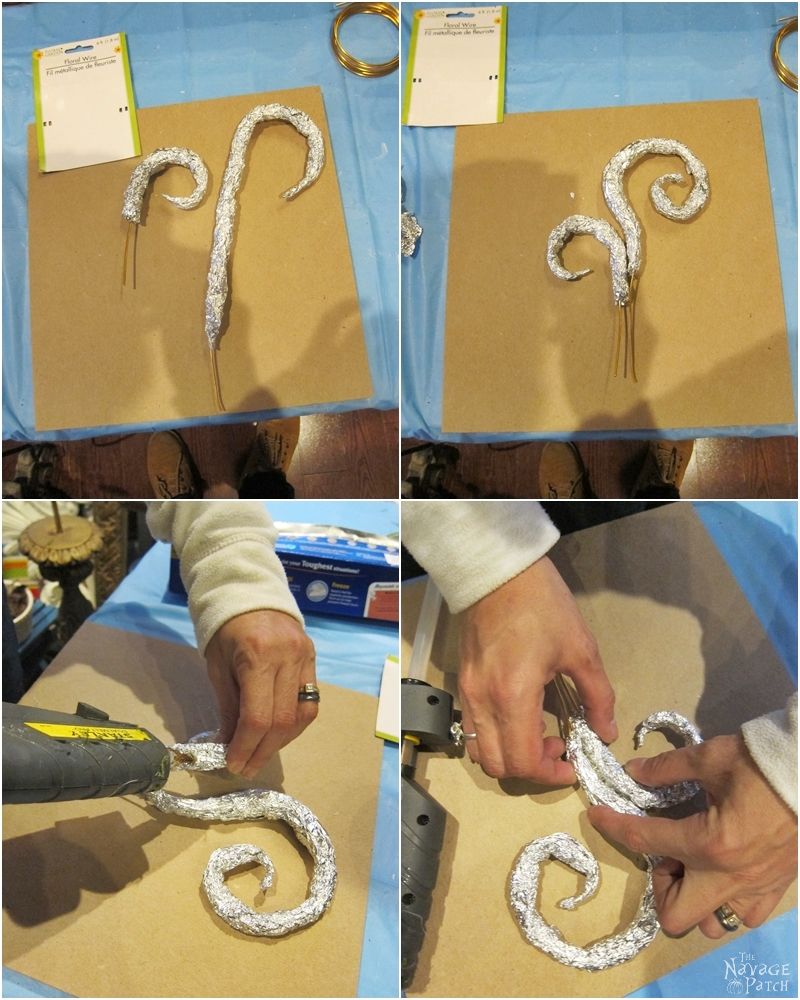
I know, I know…you are wondering how to make the two-way branched-out shape like my curtain rod finial had, right? Have no worries…I promised that you were covered, and so you are! Let’s follow the steps below to get that two-way branched-out shape, then carry on with the third tree, shall we?
First, you’ll need to cut 2 pieces of floral wire: one 18 inches long and one 12 inches long. If you want to make your shape smaller, then you can cut each piece proportionally shorter.

Next, tear some aluminum foil and, starting from one end, wrap the aluminum foil around the wire, making sure you leave 2-3 inches of naked wire at the end (as shown in the pictures below.)

The last picture above looks like some sort of creepy finger, doesn’t it? I think I know what I’ll be doing for next Halloween! hahahaha! Anyway, let’s get back to the tutorial 🙂
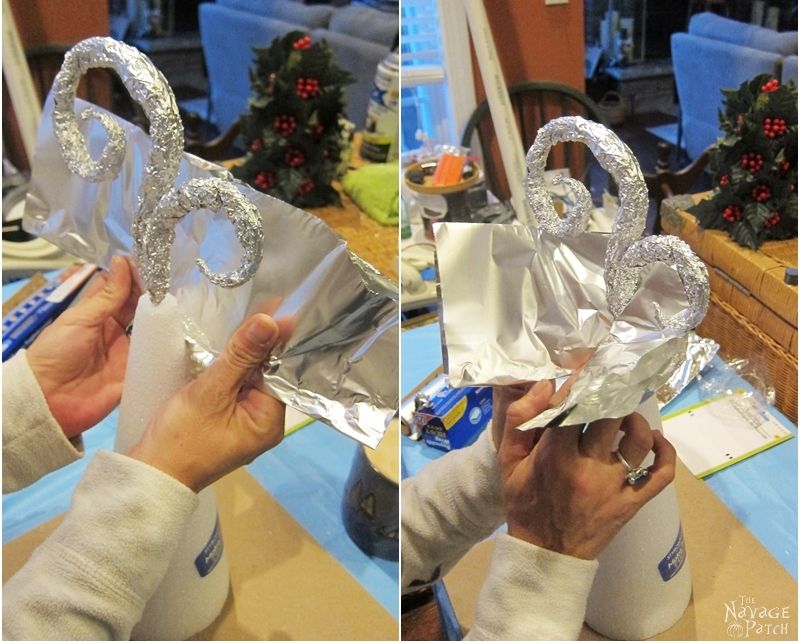
Once you are finished with one, do the same steps with the other wire, so you have the two branches ready. Then, bend each aluminum-foil-wrapped wire to get the shape you want and hot glue them together as shown in the pictures below.
Now that you’ve finished creating the whimsical shape, you will need to insert it in to the Styrofoam cone.

Next, you’ll need to secure the shape into its place. For that, you’ll cut some aluminum foil and fold it in half. Then, put some hot glue on the folded edge.
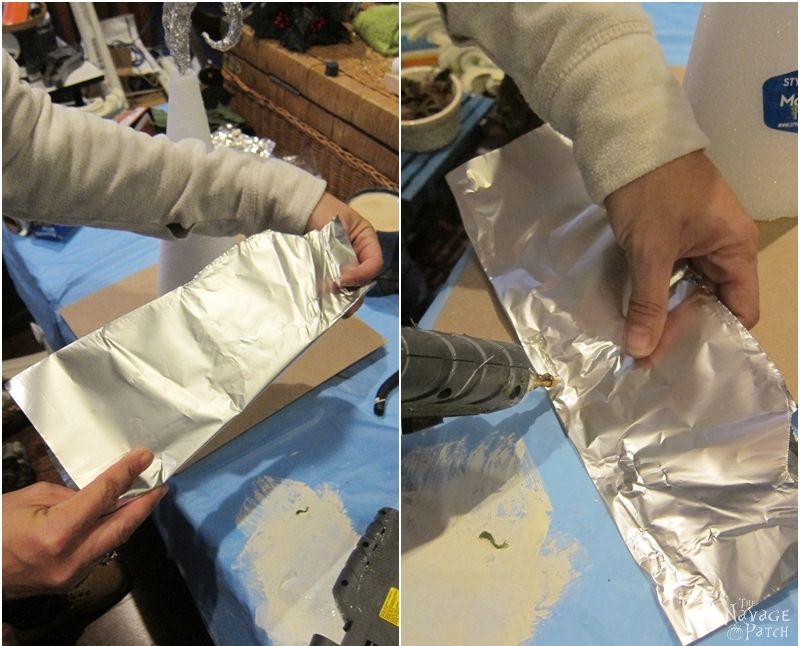
After gluing your aluminum foil on your Styrofoam cone (as shown in the pictures below), start wrapping it around until your cone and the whimsical shape looks as if they were one piece.
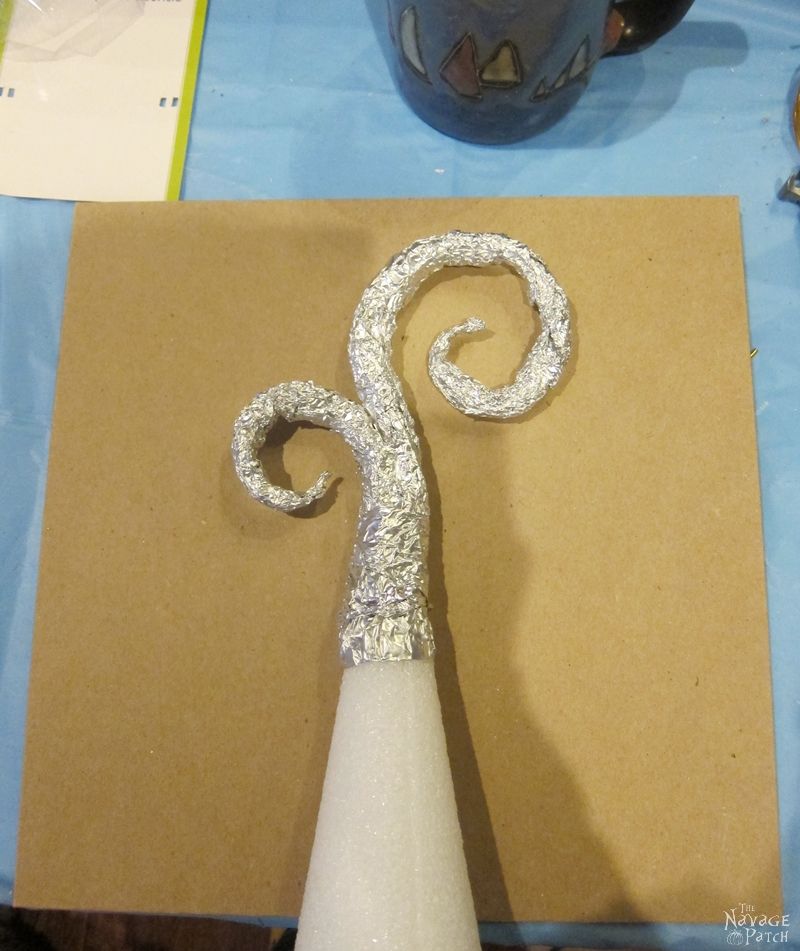
There…you see how easy that was! 🙂 Now, it is all ready for you to start hot gluing sheet moss or whatever material you’d like to make your whimsical tree from.
Last but not least: my favorite whimsical tabletop Christmas tree!
Click on ‘Next’ to continue.
We love it when you share our posts on Facebook and Pinterest!


Hi folks,you always make me smile, sounds just like me and my other half, when i have to look in every nook and cranny of every charity shop,table sale,car boot sale i come across, with comments of “you don’t need that” ,”what do you want that for?” ,” what are you going to do with that?” i’m rather partial to finials,doorknobs etc they have so many uses. As usual you have created something beautiful from someone else s junk , i love it.
Lol…that sounds pretty much like Greg! I knew I wasn’t the only one who was going through it 😀 Thank you so much, Catherine!!
Those are so cute Handan, very creative !!
Thank you so much, Sandra! 😀
Question……in one of the pictures I noticed a tree with birch bark….where can you purchase birch bark to embellish the styrofoam tree base? (The shadeing and texture caught my eye)….love the tutorial for the examples….you explain the process so wonderful. Sorry to bother…
Thank you so much, Nancy! I collected the birch bark from a fallen tree in our woods. But you can purchase them online. Here are some I found on Etsy:
https://rstyle.me/n/dbr8zicb45f
Also, if you’d like to see the birch bark tree tutorial, it is here: https://www.thenavagepatch.com/birch-bark-and-pine-cone-trees/
I hope this info helps! Happy crafting!! 🙂
Soo FRICKING ADORABLE!! Just genius use of random findings??!
Thank you so much, Linda! 😀
awesome just awesome like everything you two do love them xx
Oh thank you so much Chris! 😀 xx
When I saw these trees in your post the other day I was so hoping you were going to do a tutorial! I LOVE these trees. They make me happy. We’re in the process of moving right now, so they may not happen for Christmas this year, but I’m pinning them. Thanks, Handan.
Oh thank you for reading and pinning! I am so glad you liked them. I hope you have an easy and stress-free move! 🙂
You two come up with the best ideas and write excellent and easy to follow tutorials to support those amazing ideas. Love your whimsical trees and pinning to share. 🙂
Thank you so much, Marie! Your comment made it my day! Thanks so much for pinning too! 🙂
Yay, the tree tutorial is here, whoop, whoop double whoop…….. Love what you did Handan. The trees look like something from The Lorax. Whimsical cuteness at it’s best.
Thanks so much, Michelle! Oh these are really fun to make and decorate with! 🙂
You have more creativity in your little pinkie than I do in my entirety. Love this
I am humbled by your comment! Thank you so much, Marilyn! 🙂
Oh, no, Handan, now all thoughts of cleaning the house, getting ready for out-of-state guests and cooking for Thanksgiving have flown out of my head. All I can think of is making my own forest of whimsical trees. I am so charmed by these and can’t wait to make my own (even if I have to wait until after Thursday to get started). Thanks for the inspiratin.
Thank you so much, Susan! I am so glad you liked them!! 😀
These look just like those expensive trees I see in the catalogs! I’m totally going to do this next year.
Thank you so much, Erlene! Happy New Year!! 🙂
You have such a great creative mind on all your projects! I love your trees! They resemble Dr Seuss trees!
Thank you so much, Barb! 🙂
These are adorable Handan! You are so very creative! I wish that we have one of those Put & Take places here where I live. That would be so cool. The hubby would probably band me from going, because I would be coming home with all kinds of things. LOL
Thank you so much, Linda! Put and Take is really the best thing we have in this town 🙂
Now who is so talented??? These are adorable, what a great use for those. Finials. I wish we had a dump like that around here!!
Thank you so much, Susan! Oh yes – a “Put and Take” is a must for every town’s dump! It’s too bad you can’t drop off husbands there though – LOL.
Nope, husbands need to be recycled with the used motor oil and battery acid! 😀
I’m new to your site and love thumbing through all of your creative projects. But as I scroll through your page today, there seems to be an excessive amount of ads. So many that it was hard to actually see what was your blog. I don’t know anyone else has mentioned this or if you have any control over this, but just wanted to put it out there.
Hi Kristi, we try to strike a balance with our ads to keep them as unobtrusive as possible while still bringing in enough money to keep the blog running. Unfortunately for our readers, ads are a necessity. The sad reality is that it’s getting more and more expensive to run a blog with quality content, and without ads, there would be no Navage Patch. I’m sorry you had a bad experience with the ads, and I will be following up with our advertising partner to determine if there is a more optimal way to serve them while still maintaining that elusive balance between user-friendliness and much-needed revenue. Can you tell me, were you on mobile, desktop or tablet when this happened? Thank you for reaching out to us about this, and also thank you for understanding why these ads are necessary.
Greg I also an not patient enough to hold something until hot glue is dry lol. I love these trees. Thank you much for sharing them with us. Coming across your page was one of the most awesome things I have found. Thank you again..
Thank you so much, Susan! Greg and I are so happy that you enjoy The Navage Patch! 🙂
This turned out so cute! Who never know that you created this with those horns.
Thank you so much, Maria! 🙂
These trees are adorable, fun, and whimsical! I want to try all three! Thank you for sharing your creative talent.
Thank you so much, Patricia! 🙂
My favorite tree is the moss covered one! Reminds me of the Grinch movie. What did you use for the tree trunk on that one?
Thanks!
Thank you so much! I used an old wooden spool as a trunk. 🙂
SO creative and adorable, as is everything you do! Pinning for future. Thanks so much for your amazing photo tutorials.
Thank you so much, Dyan! It makes us so happy when our projects are shared on Pinterest! 🙂
These are adorable and utterly charming. Who would have thought an old tree and some broken finials could have so many uses (the Alpine tree you made? Gorgeous.) with just a little bit of love! I love your motto of reuse and recycle. We are so quick to throw away these days, when all most things need is a bit of TLC.
My favorite is definitely the third one but I also have a special place in my heart for the moss tree. I’m a big fan of moss. Thank you for sharing these great projects, Handan!
Thank you so much for your wonderful comment, Jay! It truly made my day! 🙂
Did you make the tree that looks like white feathers? I keep looking for any comments about it but haven’t found anything as of yet. Please share if you did. I made the one with the moss. I had to as soon as I saw it. Had to run Walmart and pick up a curtain rod and sheet moss! Hubby (of course) wanted to know what I was making this time! Lol.
Hi Kathy, yes I made that feather tree too. At the top and bottom of the post (whimsical trees post) you’ll see the page numbers. Click on Page 2 of 3 to see how I made the feather tree. It is very easy to make and looks fantastic with a nice colored ornament! 🙂
I love these they r sooooo cute!!! Bonus my daughter loves Dr. Seuss and they remind me of just that…
Oh good! I’m so happy you found them, Tammy! 🙂