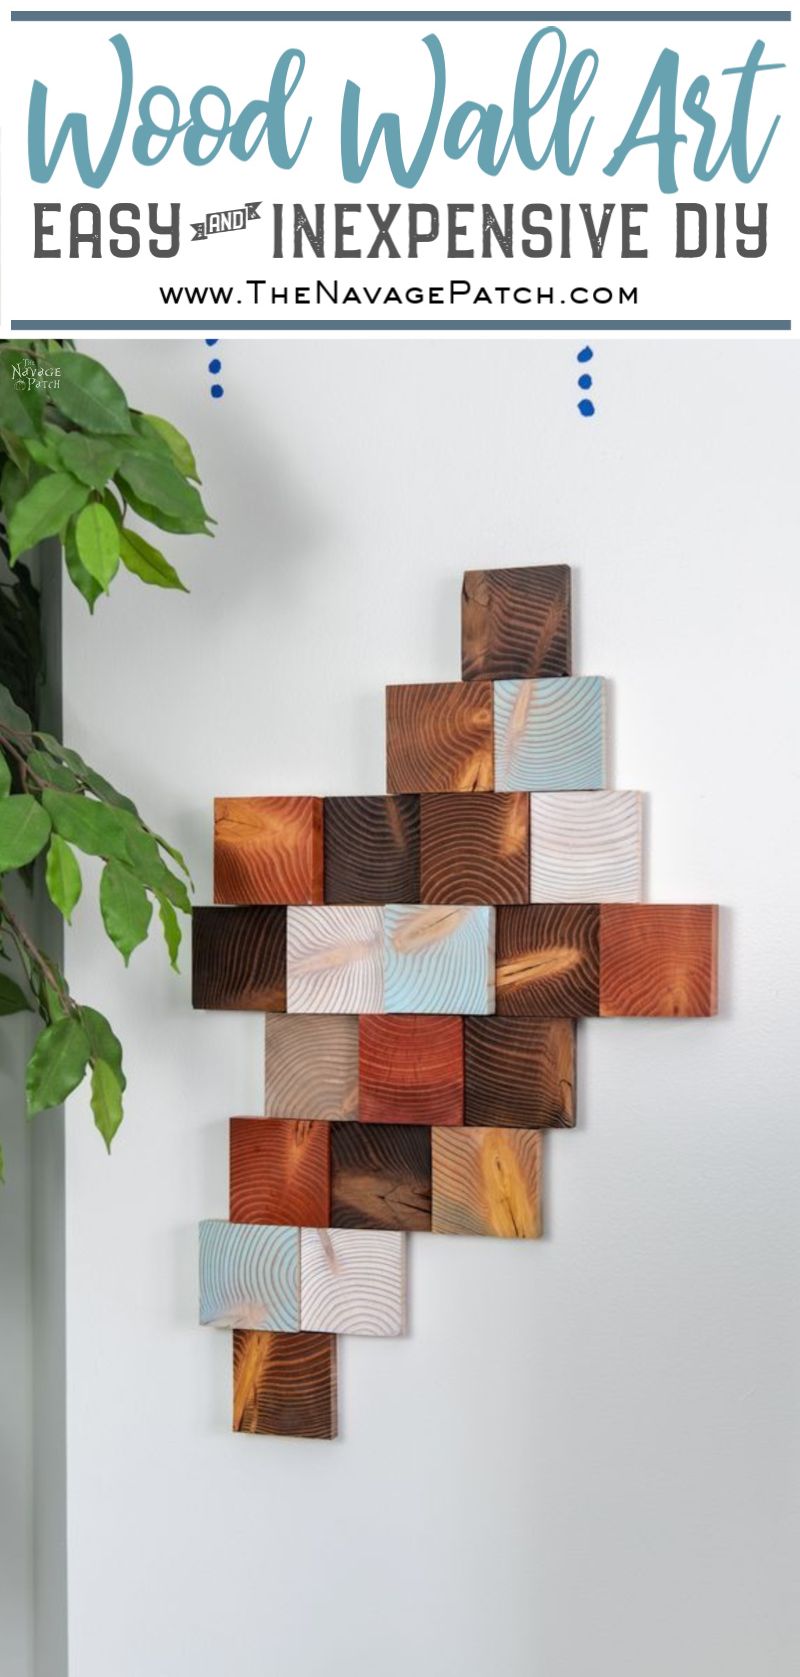
DIY Wood Wall Art
Make your own DIY Wood Wall Art from scrap lumber and get a high-end, art gallery look for just a few dollars! Easily customizable for any space!
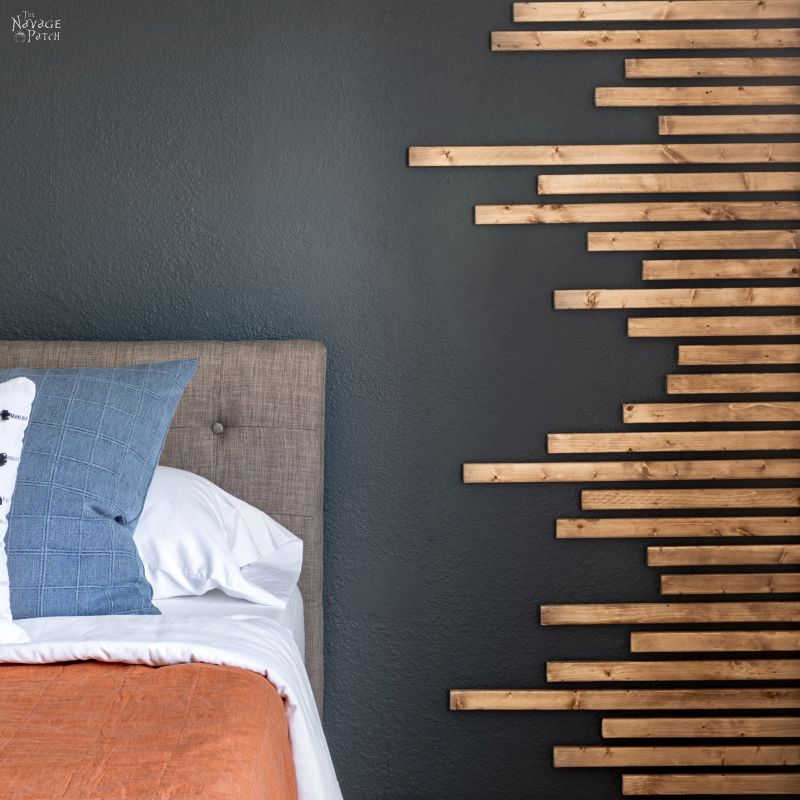
Back in our Teen Bedroom Ideas post, I mentioned we’d be looking to make something for Barish’s accent wall that would be inspired by the following picture.
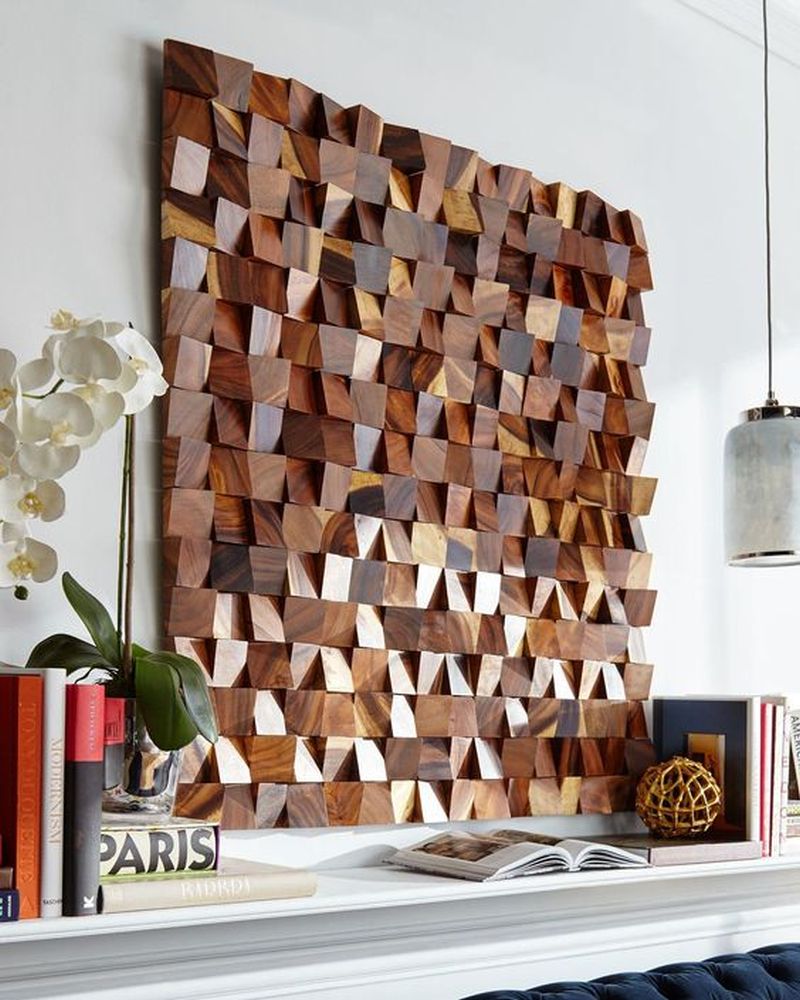
Our original thought was to make something like this to hang over his television.
I think we can all agree that it’s beautiful, but really, we’re not in the position to go tossing thousand dollar bills after art that was created with scrap wood!
Jeezum Crow, people!
Listen, if your money is burning a hole in your purse, and you enjoy transferring chunks of your wealth to the pockets of others, may I suggest looking me up on PayPal and relieving yourself of some of that bothersome cash?
For the rest of you, let’s see if we can DIY our way to some halfway decent wood wall art, eh?
Okay, so the picture above would be pretty easy to duplicate, provided you have a compound miter saw.
Not everyone has a compound miter saw, so we’re going to simplify this project a little bit. Instead of the angled cuts, we’ll make ours with flat-cut pieces.
Okay, here’s what you’ll need.
DIY Wood Wall Art
- 4 x 4 lumber – how much depends on how large an art piece you’d like
- Miter saw or hand saw
- 220 grit sandpaper to be used manually or with a power sander
- 1/8 inch tempered hardboard panel
- Jigsaw or band saw
- Stain colors of your choice
- Wood glue
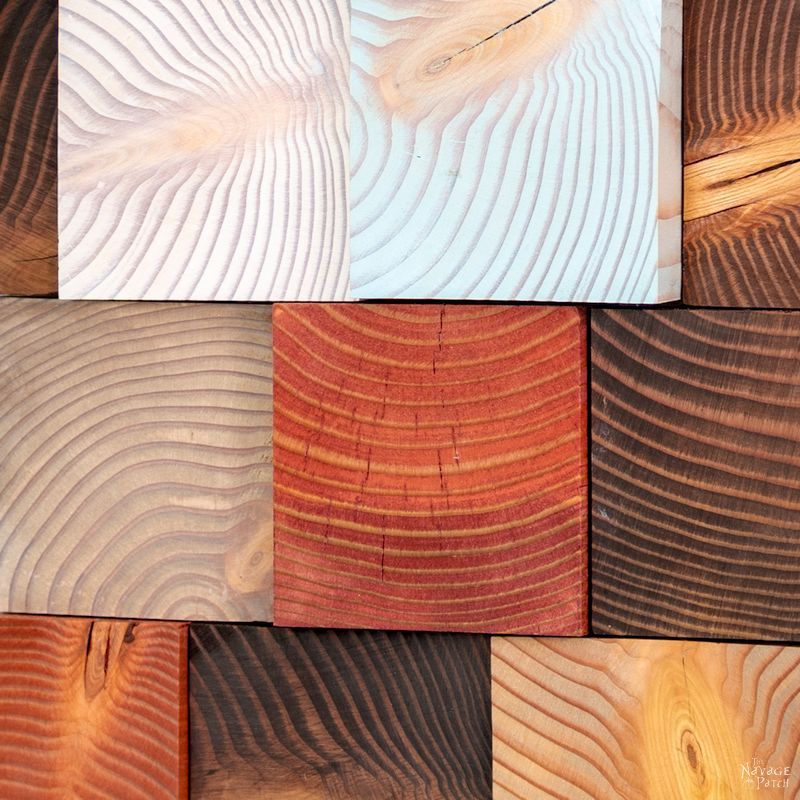
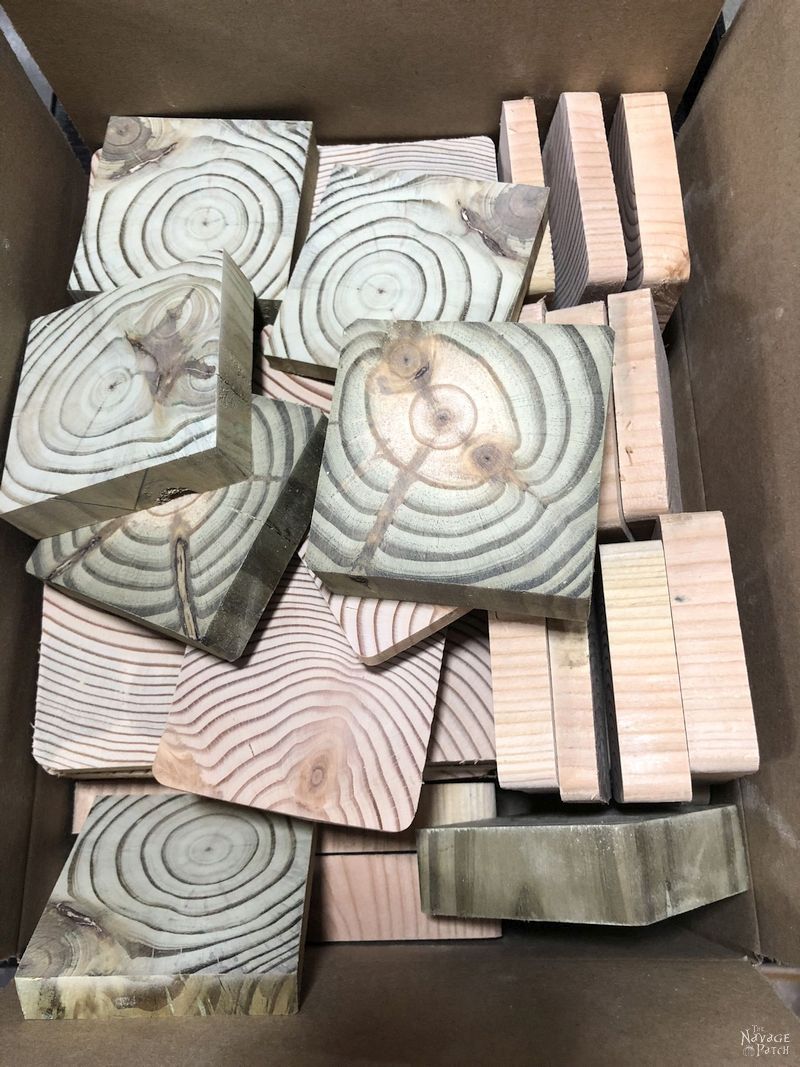
Since I wasn’t sure exactly how big my final art piece would be when I started, I cut a whole lot of slices from some 4 x 4s I had in the basement. I cut a mixture of regular pine and pressure-treated pine, since the P-T pine had a really cool green color going on.
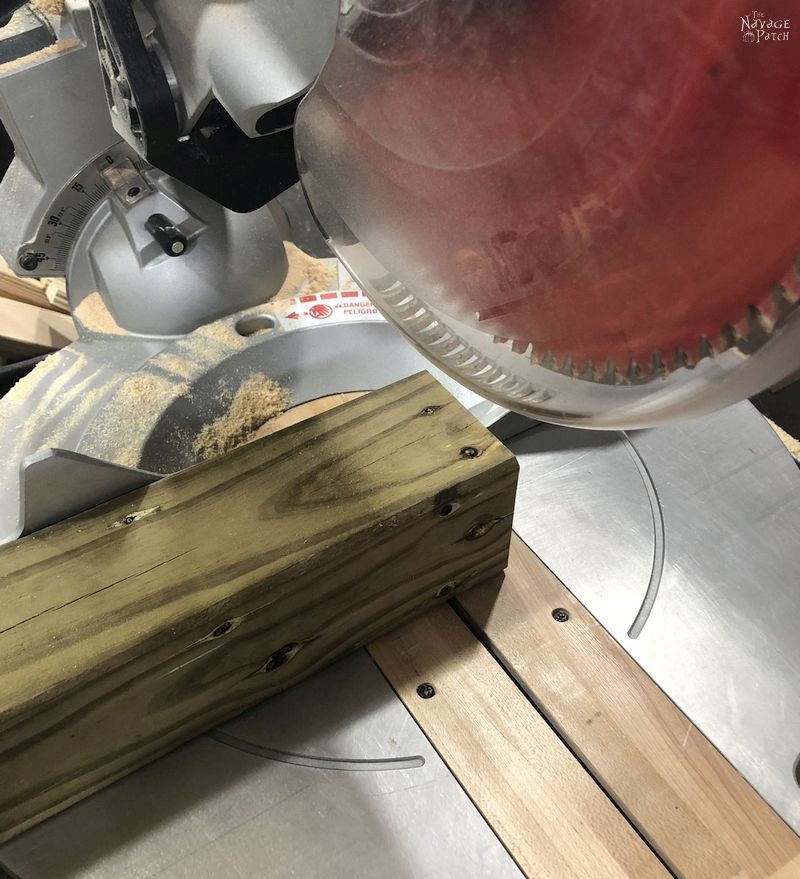
I cut about 100 slices of all different thicknesses from about 1/4 inch to about 2 inches.

As I cut the pine slices, I tossed them into a box on the floor. Pine is all I had on hand, but any wood would work, and the variety would look awesome. I tried to get as many knots as possible, as they add a ton of interest.
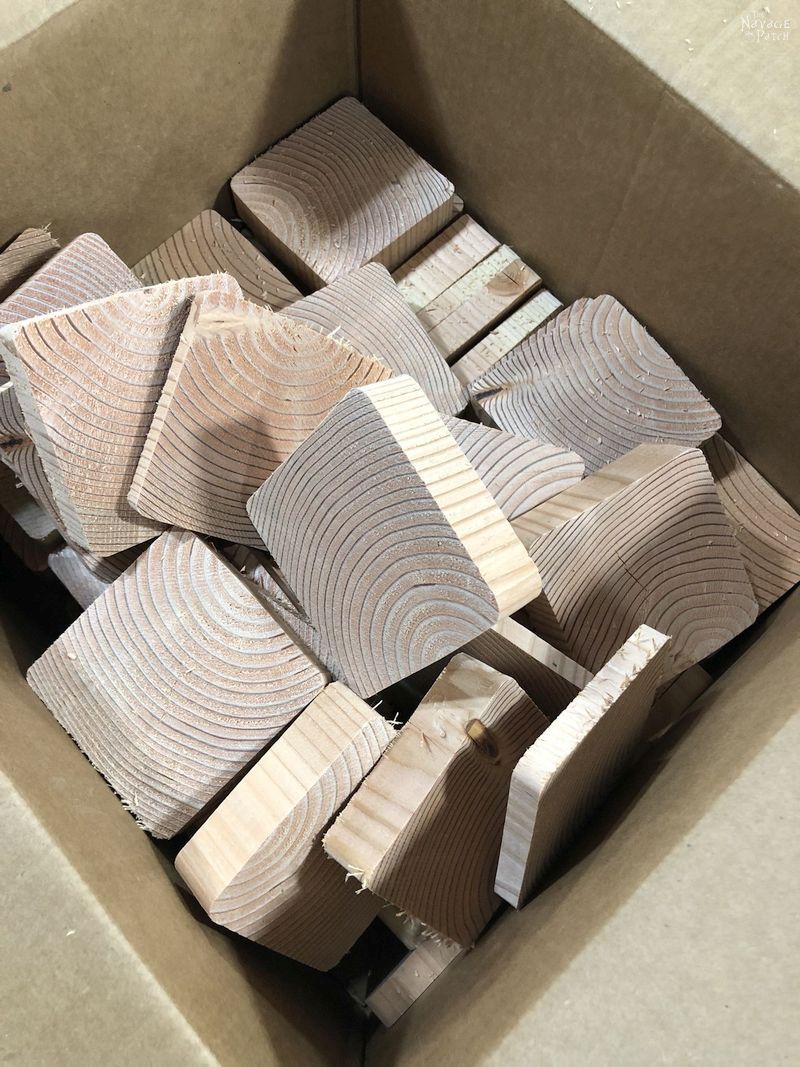
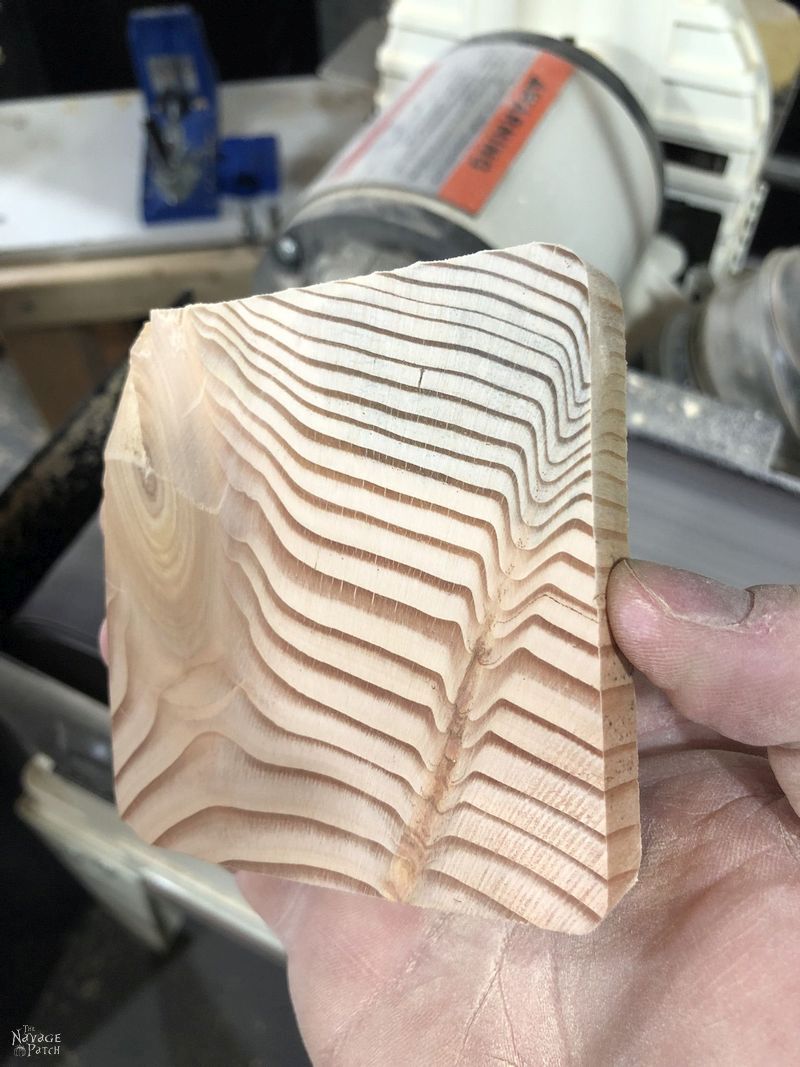
Once I thought I had enough slices, I sanded one face of each with 220 grit sandpaper. I used a belt sander, but a random orbital sander or hand-sanding would also work.
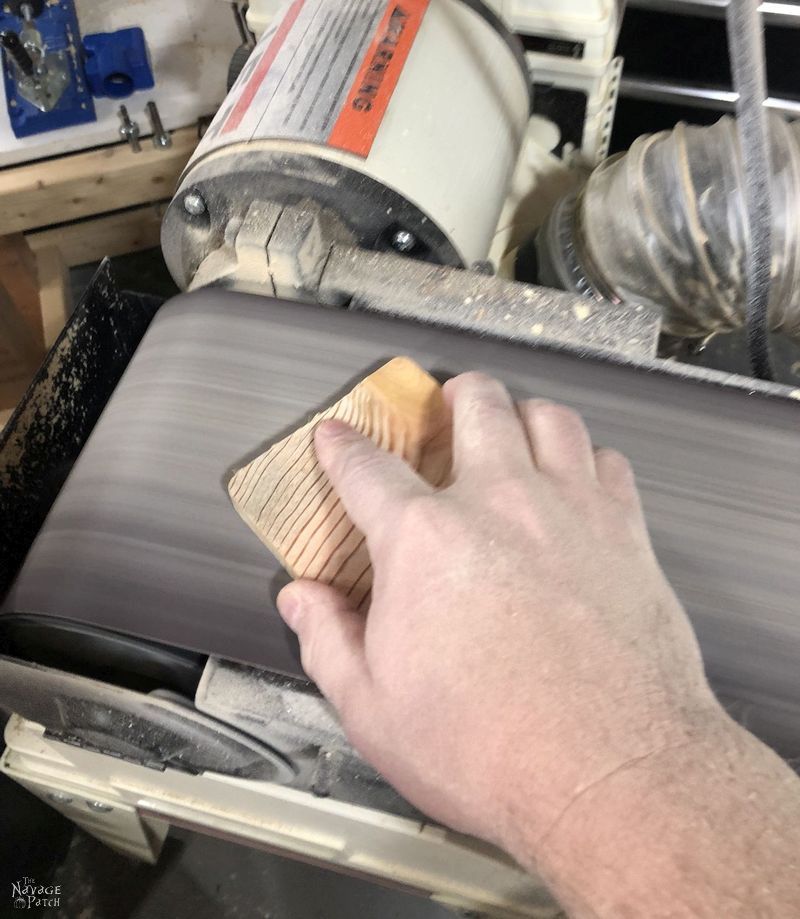
This really shined up the faces!
After a while, I had a box full of sanded slices.
Now, a 4 x 4 is supposed to be 3.5 inches to a side. But age and moisture differences among my scrap wood meant that my pieces ranged from 3.5 inches to a side for the pressure treated to about 3.25 inches for some of the pine. This was compounded by some of the pine pieces not being square but rather more trapezoidal. On top of all these discrepancies and variations, 4 x 4 lumber has rounded corners, so even if all the pieces were the same size, I’d still have gaps in the corners if I tried to line them up.
The only solution was to cut each piece down to 3 inches square. This meant I had to take about 1/8 inch off each side.
I used a table saw for this, but it could also be done with a manual miter saw.
Or you could just leave the pieces as is. This step was not strictly necessary – it just made the final product a little more coherent.
After I trimmed all the pieces (sorry, no pics of that process), Handan and I went to Barish’s room to figure out the exact shape and size for his DIY wood wall art.
Handan’s original thought was a long rectangle that would hang above his TV. We had a look:
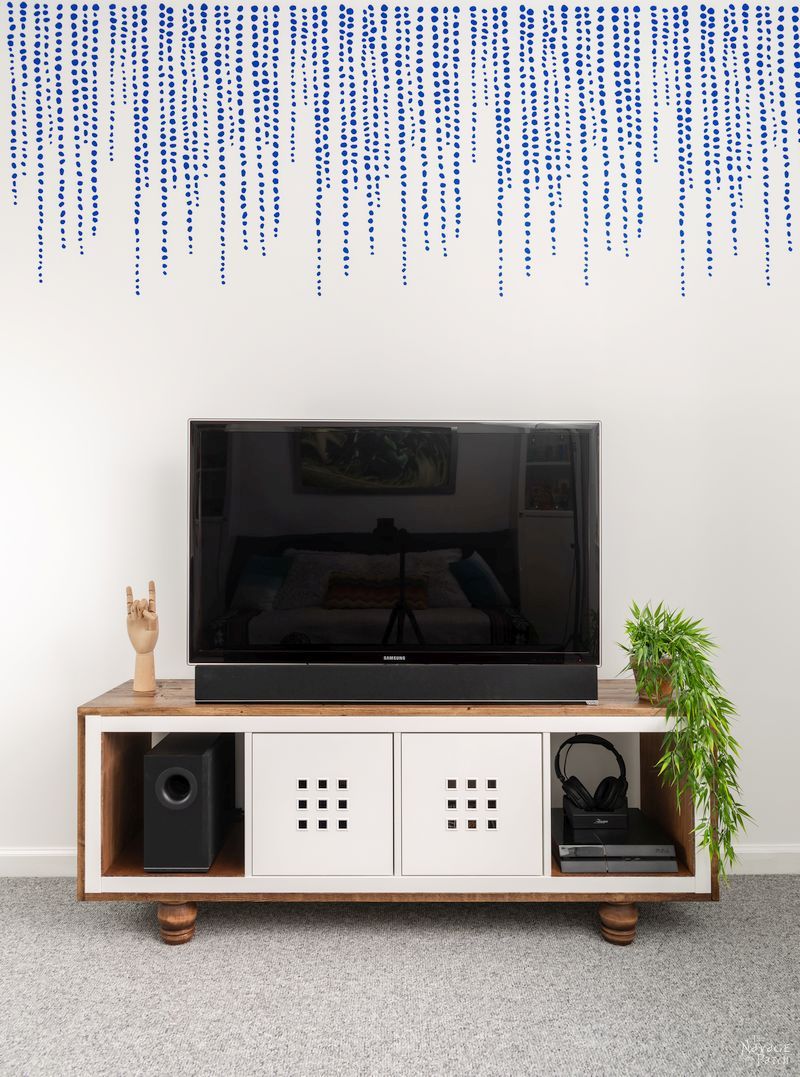
The TV almost met with the accent wall stencil, and we thought that hanging wood wall art there would make the area too busy.
But there was some dead space to either side of the TV and the Kallax TV stand.
Hmmmm….
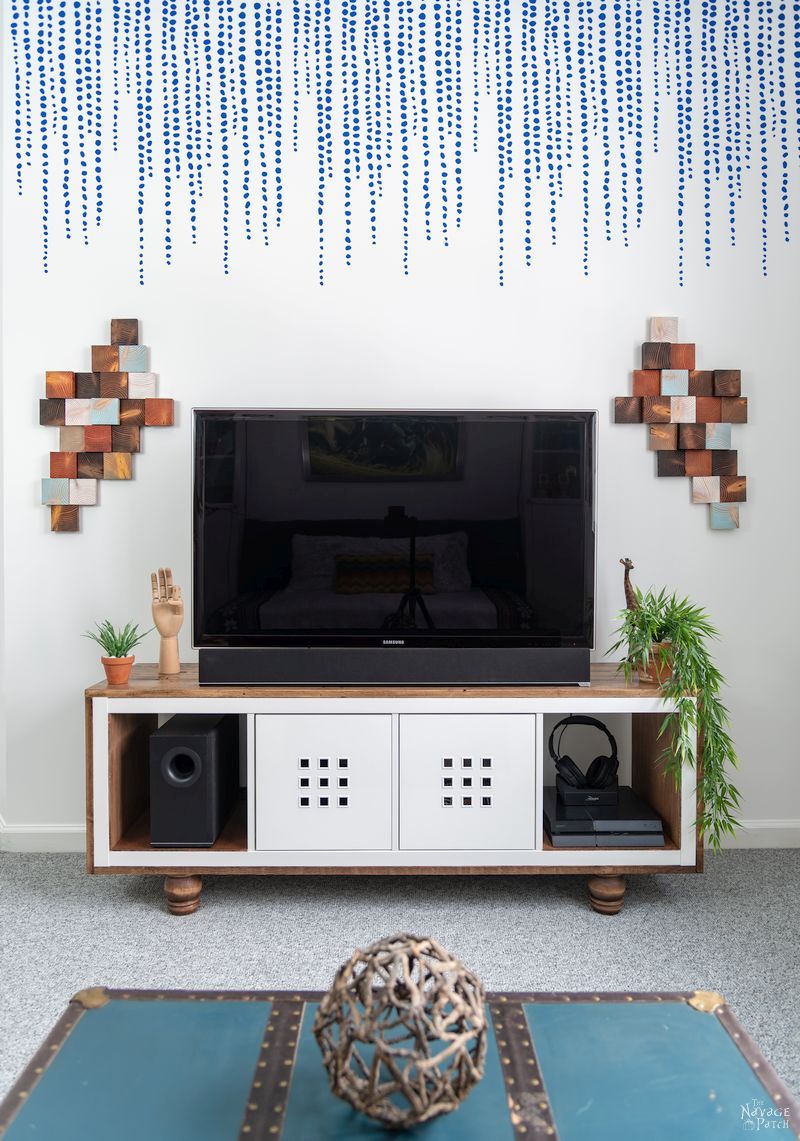
I suggest making two mirror-image shapes to hang below the accent stencil on either side of the TV stand.
I moved my hands around the wall to indicate the rough shape of what I had in mind.
Handan agreed, and off I went to make it a reality.
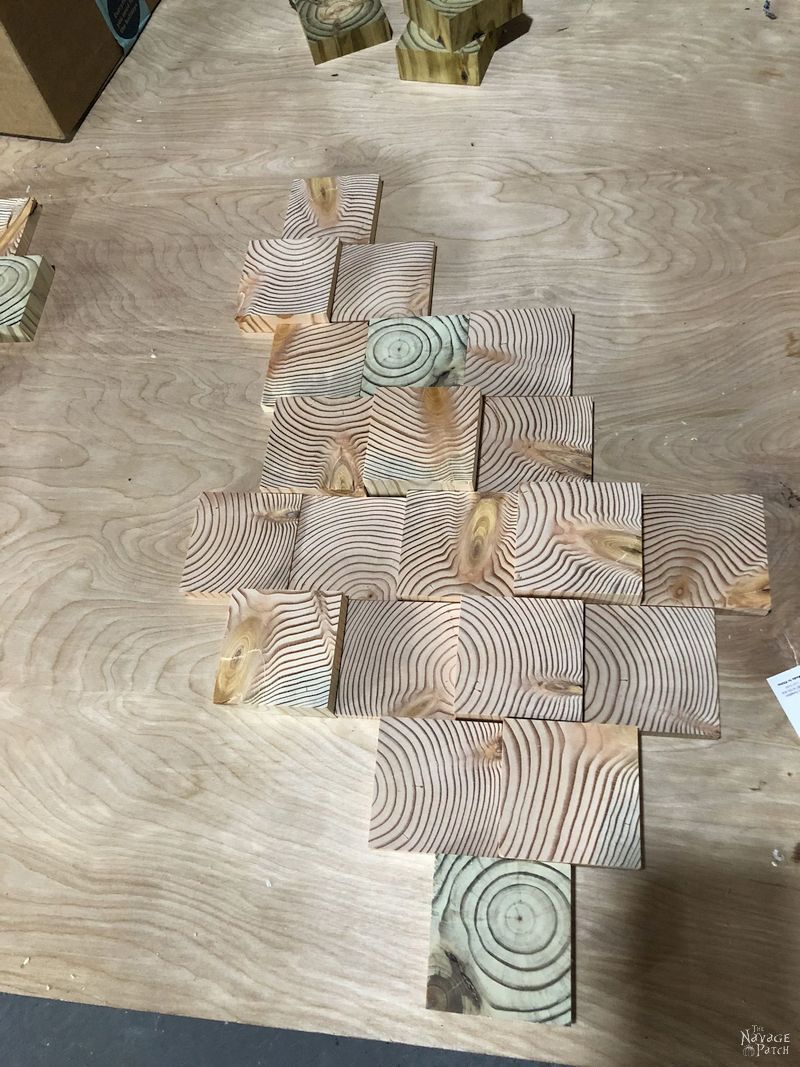
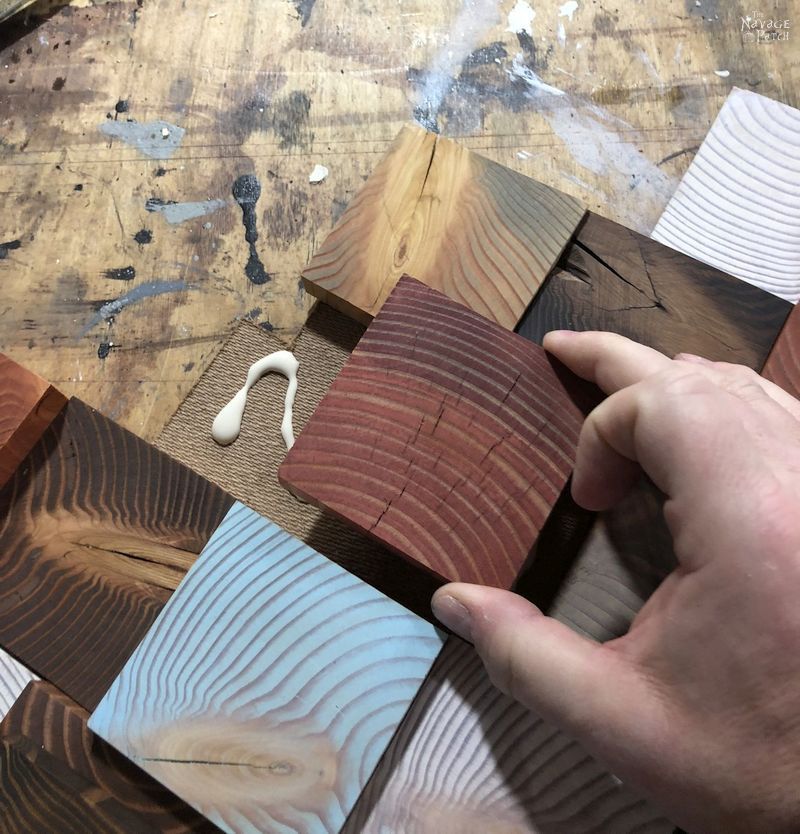
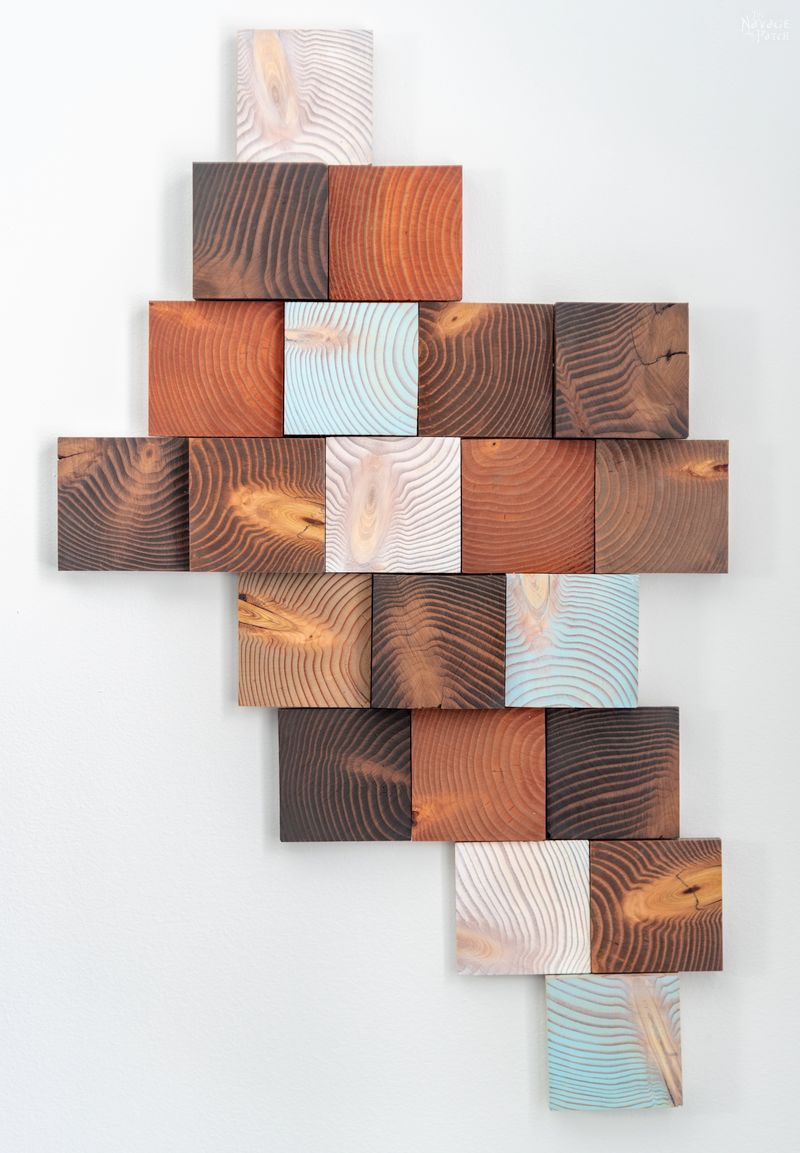
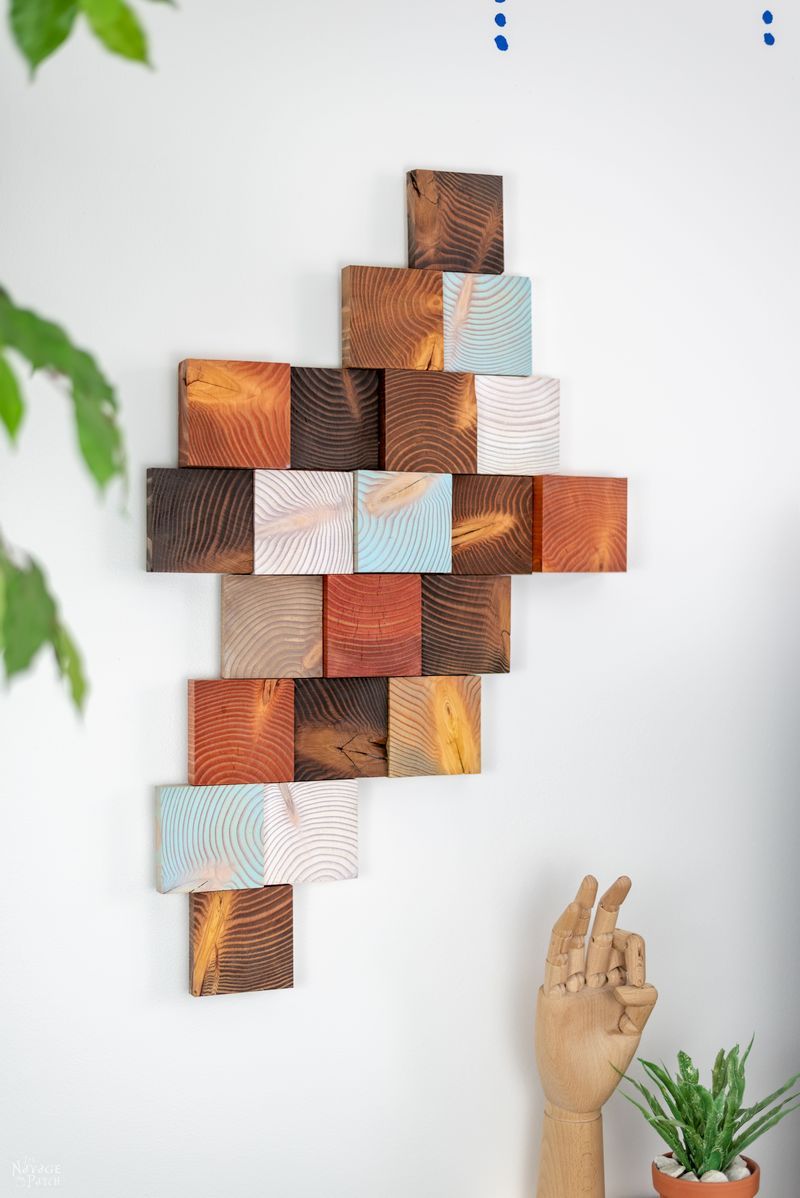
I arranged the wood slices into a shape I liked. I tried to mix up thicknesses, grain patterns and knots to keep things interesting.
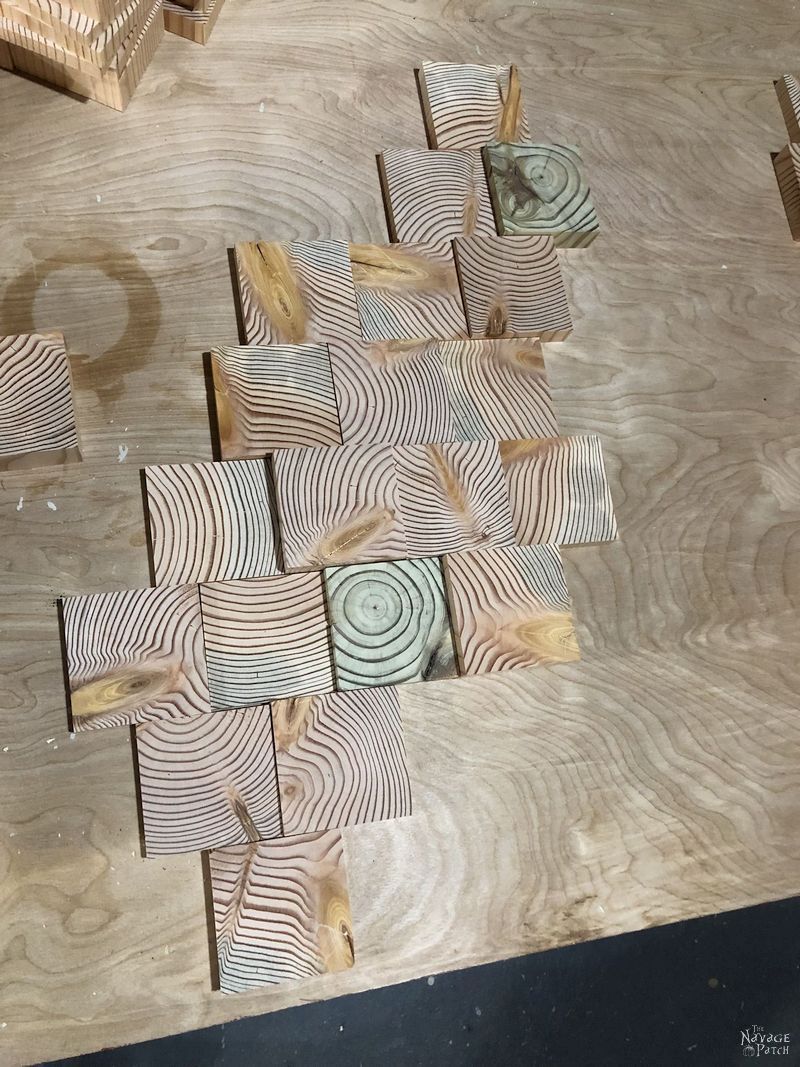
Then I built the mirror image.
I decided to mount the slices on 1/8 inch tempered hardboard, as it is thinner than plywood and not prone to warping. Tempered hardboard has a smooth side and a rough side. I would mount the slices on the rough side, as it would accept wood glue more readily than the smooth side.
After measuring the height and width of my assembled slices, I cut two pieces of tempered hardboard.
I then reassembled my slices on the rough side of the tempered hardboard.

I carefully traced the entire outline with a pencil and then cut out the shape with a jigsaw.
Once I had again assembled the slices on the shaped tempered hardboard, I showed Handan before proceeding.

She brought up a good point – the tempered hardboard was plainly visible when looking from the side. She suggested I recess it all around.
Using my Kreg Multi-Mark (I love that tool!), I marked off a 1/2 inch recess all around the tempered hardboard.

After trimming the tempered hardboard once again, I was ready to stain my slices before final assembly.
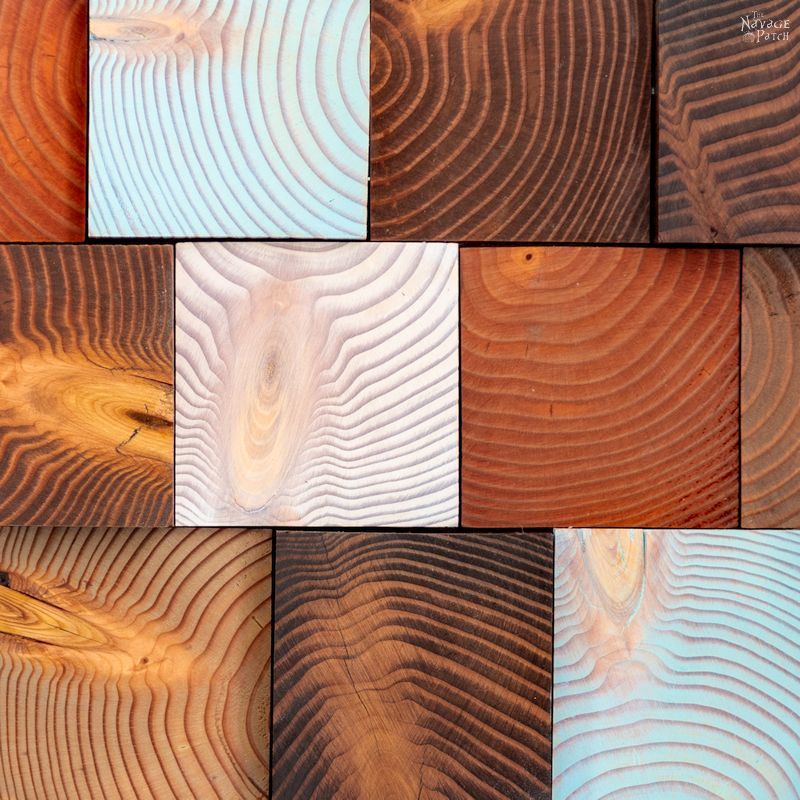
Our initial thought was to keep the stains within the standard browns and reddish browns.
But once I got going, I started to crave color. After all, I keep telling you that I’m bringing color back! How can I claim to be bringing color back if I just stained the slices with boring browns?
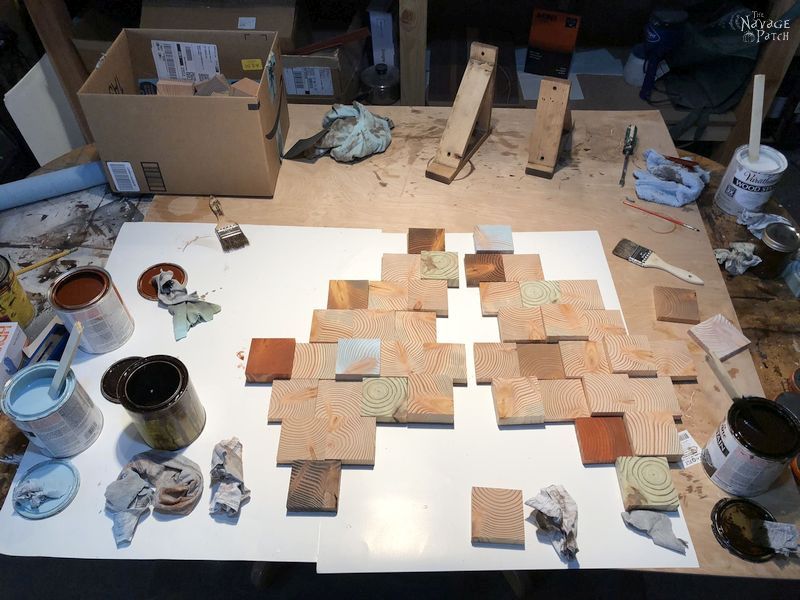
In addition to our Old Faithfuls (Varathane Kona, Minwax Special Walnut, Minwax Weathered Oak), I tossed in some Varathane Light Walnut (that’s the really red one), Varathane Bleached Blue and Varathane Antique White. I also dabbled with some other Minwax flavors, but they were so close to Special Walnut that I just stuck with that instead.
During the staining process, I decided to ditch all the pressure-treated slices. They looked good initially, but once I got those colors on there, they didn’t look as good anymore. I still have them in a box in the basement. I’ll figure out a use for them someday.
When the stain had dried, I again arranged them on their respective tempered hardboards.
Then, by ones and twos, I picked the slices up, put a little wood glue on the hardboard beneath and put the slices back in their places.
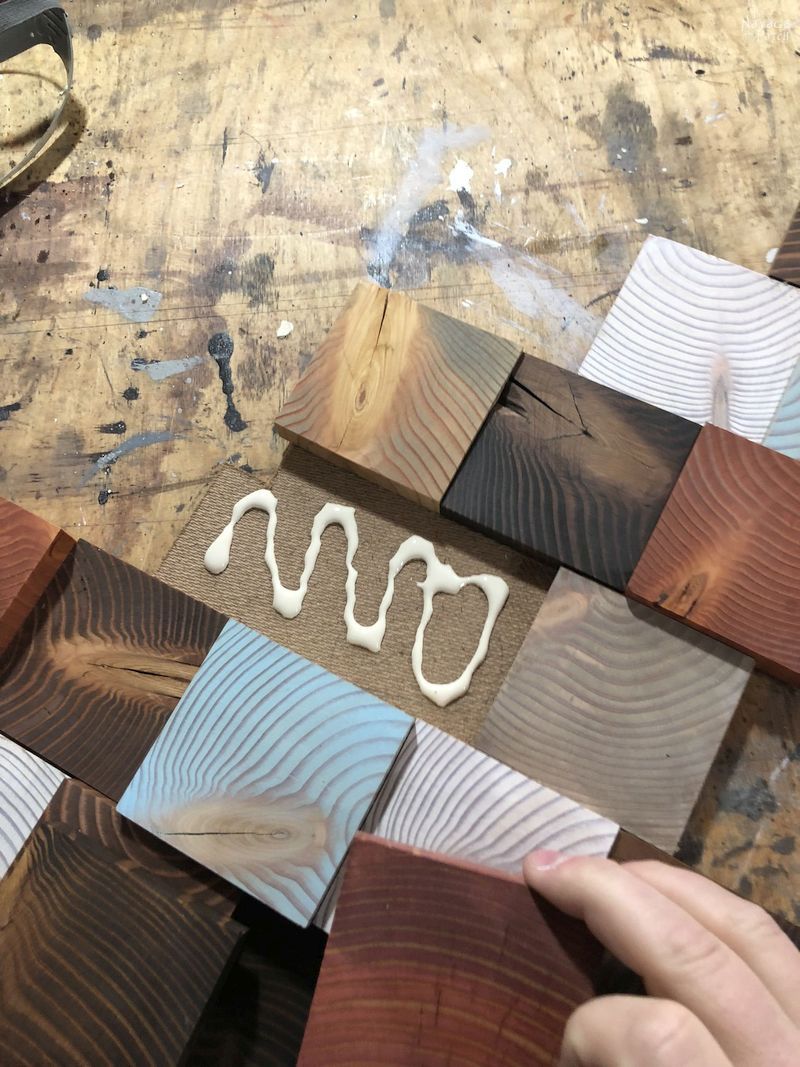
I left my DIY wood wall art to cure overnight.
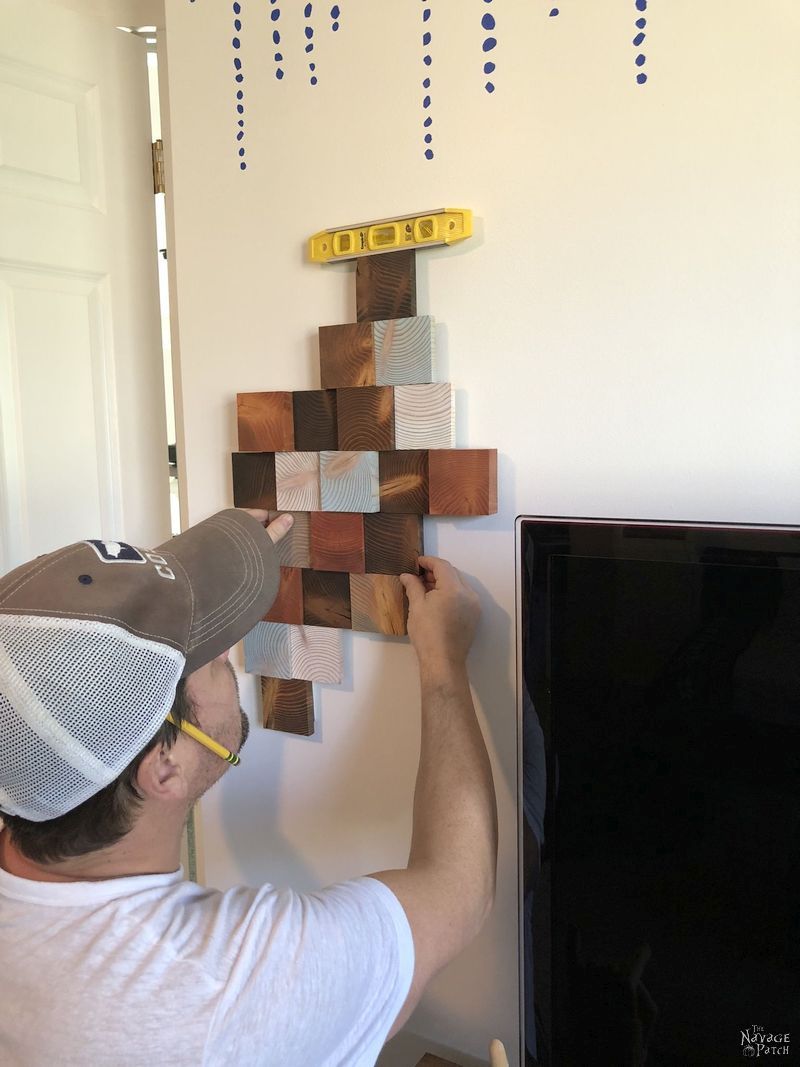
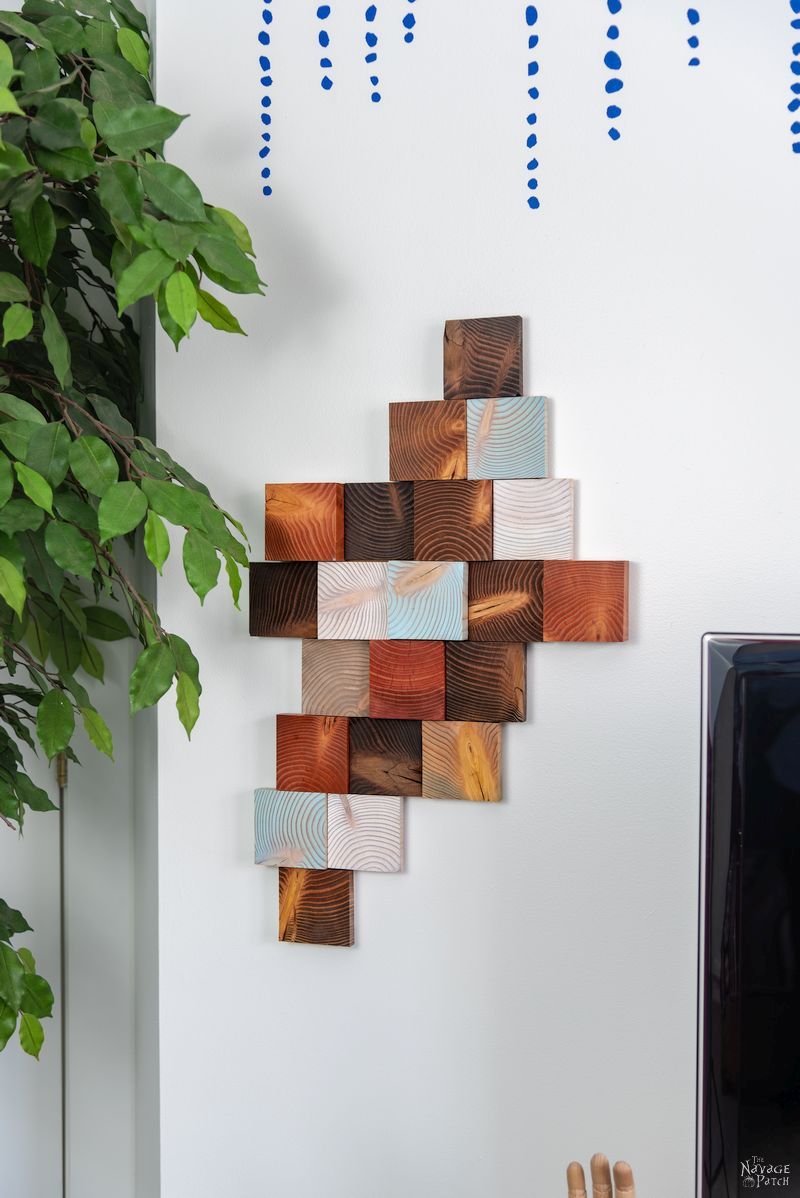
The next day, I brought them to Barish’s room so Handan and I could hang them.
The smooth side of the tempered hardboard was a perfect surface for Command Picture Hanging Strips.

After attaching four Command Picture Hanging Strips (not pictured), I used a torpedo level to hang Barish’s new DIY wood wall art.
Barish loves his new wood wall art, and that makes Handan and me very happy!

If you’re following along with the teen bedroom makeover, here’s how we stand:
Teen Bedroom Makeover Checklist (for The First Room)
Teen bedroom ideas and laying out the game planDIY alcohol ink switch plates- Paint the walls
Build 2 IKEA Billy bookcasesBuild a daybedHack IKEA Kallax into a TV standCreate an accent wallBuy or DIY plugin sconcesMake wooden wall art- Build a small chess table
- Build 2 guitar display frames
- Buy a new desk
- Change the fan
- DIY fired alcohol ink art
- Hack IKEA Laptop Stand
- Buy throw pillows
- Add greenery: faux plants, air plants, DIY air plant holders
- Metal filing cabinet makeover
- DIY Craftsman style trim
- World map wall art
- Small closet makeover
- Barish’s first room reveal
Click here to see more teen bedroom makeover posts as we continue to cross items off our checklist!
We love it when you share our posts on Facebook and Pinterest!


Absolutely LOVE this! So many options. I was wondering if you had tried to angle the face of each piece as in your inspiration picture and how difficult that may be? Not even sure how one would do that?? Love following your posts – you’re so creative! Keep up the amazing work.
Hi Stephannie, thank you so much! So angling the pieces like in the inspiration photo is totally simple…as long as you have a compound miter saw. Those start at about $200 and go up to about $700. Since most of our readers don’t have one, I wanted to show how you can make beautiful wood wall art with just a simple miter box or hand saw. In the future, I will likely do the more advanced version for those who’d like to learn, but for now I just wanted to keep it simple! 🙂
Terrific! I do have a compound miter saw but have never even used it for more than simple straight cuts. My hubby and I are wanting to dip our toes into simple woodworking and have no idea where to start. I figured the angled cuts (from your inspiration photo) could be done on our saw – just need to figure out how to stabilize them during the cut, I guess. Thanks for your response. Have you posted yet on how to paint your faux brick walls?? You’ve inspired me to redo my laundry room! 🙂
Oh yes they could be! Give it a go, and let me know how it turns out! We haven’t yet posted that brick wall tutorial – I’ll check in with Handan and see where we’re at with that! 🙂
i hope the young man knows how lucky he is to have you two as parents, want to adopt me, nah i am too old to have parents going to be the big 70 this month, i really love this we have vaulted ceilings, ( a big freaking waste of space in my opinion) and one bigger one over our tv would look awesome and i love that you added the blue xx chris
We hope he does, too, Chris! 🙂 But we’re always trying to do more for him. He didn’t have an easy upbringing with all the moves, but what’s past is past, and what we can do now is show him each and every day just how special and important he is to us. He’s the best kid, Chris. He’s so good, he probably wouldn’t mind a roomie, if you’re interested, lol! 😀
Wow! I love this! Pinned it.
Thank you, Tonya!
Greg, I am a avid quilter and this reminds me of patchwork square that I use in my blocks after I have finished a quilt.Nothing goes to waste.What a great project.Looking forward to your next posts…
Hi Debbe, I’m not that familiar with quilting, so I’d love to see an example of what you do. Can you send me a pic or two to greg@thenavagepatch.com? Thanks!
A quilter here, too! I’d call it “For the Love of Scrap!”. Love the variety of colors you used for the wood.
Thank you, Jennifer! That’s a great name for it! 🙂
I really like this! With all the different colors, the consistent pine woodgrain is unifying and binds the different heights and colors together. But I imagine you planned it that way!
Thank you, Marte! My original thought was to use pine, pressure-treated pine and cedar, but when I checked my scraps, I had no more cedar and I ended up not using the P-T pine, so it was a happy accident! 🙂
Another quilter who loves your use of scraps!! I also happen to love working with wood and paint…just not enough hours in the day to do everything I enjoy!!
Thank you, Susan! There are never enough hours! 🙂
Love that wooden wall art, Greg. I especially like that you used various colors of stain. Much more interesting than plain brown, I think. I do love that huge piece from Nieman Marcus though!
Thank you, Barbara! Yes, I love that piece, too, and I’ll probably duplicate that one more faithfully in the future. We’ll see! 🙂
Great piece! It came out very well. Two suggestions. There are some really colorful wood stains, such as crimson, pink, burgundy, Hunter green. You can also mix them for custom colors. The end grain(cross section) of the wood will need more stain for deeper colors. Secondly, a word of caution about the pressure treated wood. Working with wood, cutting & sanding, creates fine wood dust. It can barely be seen. Enough of it can create a haze in the room. Fiber is good for you but this stuff in your lungs not so good. A simple dust mask can protect you.
Although you should protect yourself from all fine wood dust, the treatment process makes the wood a little toxic. You should take precautions and work in an open environment (outside with wind preferred). You should also use glives, a dust mask of some sort along with your eye protection. Sorry for the long post but it’s pretty important for new woodworkers. Woodworking is fun and enjoyable! Don’t be afraid to ask questions, it’s the way to learn.
Hi Steve, these are all great points! Yes, there are a ton of great colors out there. For this project, I just used what I had on hand. As for the mask, I always wear one while cutting wood, especially P-T! I also have 3 ceiling mounted air filters that I run anytime I’m cutting. And since the staining took a bit of time, and I was around all those open containers of stain, I used a respirator to filter out those awful fumes. Thanks again for bringing it up! It’s something I should put in the posts when I write about those activities. I will do so going forward!
When you impress the quilters, you’ve created something beautiful! I love the colors! I feel I should warn you, don’t let Handan see the quilt references or you will find yourself the proud owner of a sewing machine, a rotary cutter and more fabric than can be used in one lifetime! And, then, there will be the needed addition to build the sewing room. WAIT! I’m a quilter and I wanna see what Handan would design for that!!!
Derry, you’re killing me here! Don’t give her any more ideas, lol!! 😀
Hi GREG, Such a wonderful creation of wood done by you. You are really a creative person also inspiring. I want to decorate my wall like yours. Thank you so much for sharing such an amazing project with all of us.
Thank you, Holden!
Love the wall art. I had a crazy notion the other day and went for it. I mixed Elmer’s school glue and black paint so that it was gray, and used a rag to put on some raw wood. When dry it looked just like weathered wood. Ahhmazing. Don’t know if I have come up with something new but everyone I have showed it too is blown away. Just thought I would share this with you.
Melita, this sounds like a really cool technique – I’m going to try it! Thank you so much!
Greg, just don’t work it too much. Leave some high spots so it looks natural.
I too, would like to be adopted! I come with a 17 yr. old daughter! (Well, Barish might not mind the daughter! Lol!). I love this project! Definitely in my top 10!
The more, the merrier! 😀
Wow, that’s very impressive! You are so talented, Greg!
Hi Gail, thank you so much! 🙂
That wooden wall art is really cool! I love the finished product. My husband needs to make something like this for our house. I’ll have to make sure he has a good scrap lumber supply.
Love the idea for wall decor. Does any type of wood work for this project?
Oh sure, but woods with an interesting grain look best!
I absolutely love this DIY project! The idea of using scrap 4×4 lumber to create beautiful wall art is so creative and eco-friendly. Your step-by-step instructions are super helpful, and I can’t wait to try this out in my own home. Thank you for the inspiration!
I absolutely love this project! The way you’ve transformed simple scrap lumber into beautiful wall art is so inspiring. I can’t wait to try this at home and add a personal touch to my space. Thanks for sharing the step-by-step process—it makes it feel so achievable!